A Tiered Fruit Basket on the Kitchen Counter: Plan for Produce, Reach, and Space

Product links are for reference. Verify current details on the retailer page before buying.
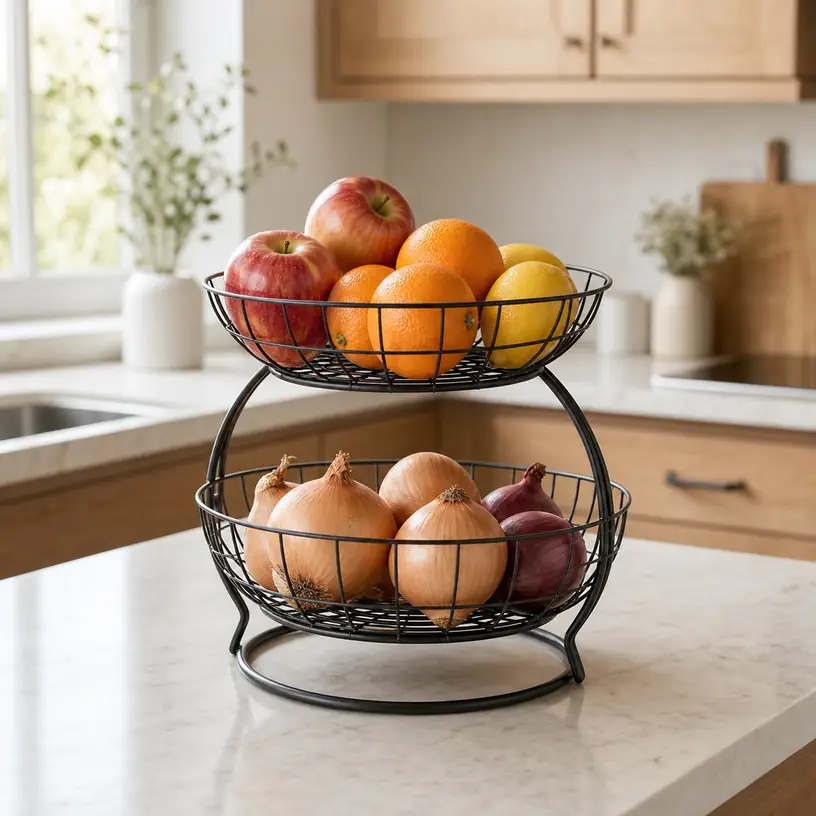
Illustrative image of a generic two-tier fruit basket on a kitchen counter

Illustrative image, not an official product photo.

Short answer

A tiered fruit basket can consolidate countertop produce without using the broad footprint of several bowls, but the upper basket does not create free space—it moves part of the load upward. Measure the full assembled height beneath cabinets, check how far the top tier projects, and make sure both levels remain easy to reach when filled. Then compare basket depth, opening shape, wire or slat spacing, base stability, removable-tier design, and cleaning access with the fruit and vegetables your household actually leaves at room temperature. The useful basket is not the one that holds the most in a listing photo; it is the one that keeps a modest working supply visible without bruising delicate items or taking over the food-prep zone.

Search reference

Tiered fruit baskets for kitchen counters

Compare assembled dimensions, tier access, basket depth, base construction, surface contact, and care instructions with your countertop and usual produce.

View matching options

Start with one week of countertop produce

Before shopping, notice what is already occupying bowls, plates, paper bags, or loose corners of the counter. A home that keeps a few apples and citrus fruits out needs a different organizer from one that regularly stores onions, garlic, bananas, and larger pieces of produce. Count an ordinary week rather than the fullest grocery trip of the year. This keeps an occasional melon or bulk purchase from driving the size of a permanent kitchen fixture.

Separate storage decisions from display decisions. A basket may improve visibility and circulation around some items, but it does not make every fruit or vegetable suitable for room-temperature storage. Ripeness, climate, household practices, and the guidance supplied with the produce still matter. Plan another appropriate place for items that need refrigeration, darkness, separation, or a different container. If you are uncertain about a particular item, check current food-storage guidance instead of treating the basket as a universal produce station.

Now divide the counter group by size and handling needs. Firm apples or citrus may tolerate a different position from soft pears, ripe peaches, tomatoes, or other easily marked produce. Tiny garlic bulbs can slip through large openings. Long bananas do not behave like round fruit, and a bunch may block access to everything below it. This simple inventory reveals whether two open baskets are useful, whether one tier needs a liner, or whether a separate banana hanger is an unnecessary complication.

Who this is for

  • Households that keep a repeatable, moderate amount of produce on the counter and want it visible in one defined zone.
  • Small kitchens where vertical storage could replace two or more separate bowls without blocking an upper cabinet.
  • Grocery routines that benefit from separating firm produce from softer or smaller items.
  • Renters who want freestanding storage with no drilling or permanent cabinet changes.
  • Cooks who prefer to see countertop produce before planning snacks and meals.
  • Shared kitchens where a clear basket boundary can keep loose fruit away from mail, keys, appliances, and the active prep surface.

Who should skip it

  • Skip a tall tiered unit if low cabinets leave too little room to load and unload the upper basket naturally.
  • Keep a simple low bowl if only a few pieces of fruit are normally stored at room temperature.
  • Choose another storage method when most of your produce follows refrigeration or other specific storage guidance.
  • Avoid a deep, narrow basket if shorter household members cannot see or reach the bottom safely.
  • Do not add a permanent organizer when the counter is already short on uninterrupted chopping and appliance space.
  • A wall-mounted or hanging solution is a separate installation decision; do not assume a freestanding frame can be improvised into one.

What to verify before buying

  • Assembled footprint: Measure the widest and deepest points, including feet, handles, outward-curving baskets, and any banana hook.
  • Total working height: Include the frame and anything expected to sit or hang above the upper rim, then allow hand clearance below cabinets and shelves.
  • Tier opening: Check whether the lower basket can be loaded from the front without lifting off the top basket or knocking produce against the frame.
  • Usable basket dimensions: Compare the inside width, depth, and rim height with the produce you buy, not merely the outside dimensions.
  • Gap size: Look at the spacing between wires, slats, or mesh and decide whether small items need a removable, washable liner.
  • Base and feet: Confirm how the frame contacts the counter, whether feet are attached, and what the maker says about use on your surface.
  • Load guidance: Review any stated weight limits and loading instructions for individual tiers and the complete unit.
  • Assembly and joints: Determine whether baskets hook on, screw into place, stack, or separate for independent use.
  • Cleaning access: Check whether the baskets detach, whether joints trap debris, and which cleaning and drying methods are specified.
  • Included pieces: Verify whether hooks, liners, labels, trays, or decorative produce shown in images are actually supplied.
  • Current storage instructions: Confirm that the items you plan to place inside are appropriate for the chosen kitchen location.

Measure the hand path, not only the frame

A dimension diagram can confirm that a basket fits under a cabinet while missing the more important question: can someone use it there? Put a cardboard box or stack of bowls in the proposed position and mimic adding an apple to the upper tier. Your hand needs to pass above the rim, and the fruit needs a short, controlled drop. If the cabinet leaves only an inch or two of clearance, the basket may technically fit but still require pulling the whole unit forward for every item.

The lower basket has a different access path. On many tiered designs, the upper level overlaps it. A low front rim and generous gap between tiers can make the lower section useful for everyday items, while a narrow gap turns it into storage that must be unloaded from the top or reached at an awkward angle. Compare the largest routine item with that front opening. A broad apple, an onion with loose skin, and a bunch of bananas need more maneuvering space than small citrus fruit.

Door and appliance movement also matter. Open the upper cabinet, refrigerator, dishwasher, and nearby drawers while the test object is in position. Leave room to wipe behind the basket and to move groceries through the area. If every counter object has to be shifted before the surface can be cleaned, the organizational gain may disappear during normal kitchen maintenance.

Basket geometry changes how produce rests

A photograph of a filled basket hides much of its internal shape. A rounded bowl draws items toward the center, potentially stacking them several layers deep. A broad, shallow basket spreads the same quantity across more surface area and keeps more pieces visible, but consumes additional counter width. Straight-sided bins use space predictably, though square corners can collect skins and debris.

Rim height affects both containment and reach. A high rim can help keep round fruit from rolling out, yet it asks you to lift each piece farther and may hide what remains at the bottom. An outward-flared rim enlarges the opening but can make the overall footprint greater than the listed base size. Handles are useful when a basket is intended to detach, provided they do not collide with the other tier or steal too much opening space.

Open wire designs leave much of the produce visible and allow air to move around it, but wire spacing should match the contents. Small items can protrude or fall through; delicate skins may rest against a limited number of contact points. Closely spaced mesh contains more shapes but has more intersections to clean. Solid bowls keep loose skins and debris off the counter, though they offer a different ventilation and cleaning arrangement. Material names alone do not settle these tradeoffs—look at the complete shape and follow the current care directions.

Two tiers need a deliberate loading plan

A tiered frame raises the center of gravity as the upper basket fills. Use the unit on a level, stable surface and follow its load guidance. Avoid turning the top into the default location for the heaviest available produce merely because it is easier to see. The best arrangement balances stability, access, ripeness, and the pressure placed on items at the bottom.

Place produce rather than tossing it. A deep pile can hide a softening piece under newer groceries and adds the weight of upper layers to lower ones. A smaller visible quantity is often easier to rotate through meals. When groceries come home, look through what remains before adding more; move items according to appropriate storage guidance and your meal plan rather than automatically burying the older supply.

If the tiers separate, they may offer more flexibility than a fixed tower. Two individual baskets can sit side by side during a large grocery week or move apart when cabinet clearance changes. Confirm whether each basket has feet or a finished bottom before assuming it can be used independently. A detachable upper basket is not necessarily designed to sit directly on a countertop.

Some models add a banana hook above or beside the baskets. Treat the hook as part of the full working envelope. A hanging bunch adds height, swings when touched, and may obscure the upper basket. Check the hook’s stated purpose and load guidance, then make sure the bunch will not contact a cabinet, wall, or fragile items below. If bananas are only an occasional purchase, a simpler two-tier frame may use space more efficiently.

Location matters beyond available space

A fruit basket belongs in a clean, stable place away from obvious contamination and interference with cooking. Do not position it where produce could be exposed to direct splatter, excessive heat, or contact with raw-food preparation. Leave safe clearance from the sink edge and cooking appliances according to the kitchen layout and appliance instructions. Direct sunlight and room conditions can also affect produce, so the brightest open counter is not automatically the most suitable location.

Think about traffic. A basket near the edge of an island may be easy to reach but vulnerable to bags, elbows, and children moving through the room. A deep back corner protects the frame from bumps while making the lower tier difficult to inspect. The practical location is usually visible from the prep area, reachable without leaning over a hot or wet zone, and far enough from the edge that a round item cannot roll directly to the floor.

Countertop material deserves care as well. Grit, trapped moisture, or a rough frame can mark some surfaces. Check the basket maker’s instructions and the counter manufacturer’s care guidance. Keep the contact area clean and dry as appropriate, and do not assume that an added adhesive pad, liner, or coating is compatible with a particular finish.

Cleanup should be part of the weekly routine

Produce baskets collect ordinary debris: onion skins, dried stems, dust, stickers, and residue from an unnoticed soft item. An airy visual design is not necessarily effortless to clean. Closely spaced wire intersections, hollow frame joints, decorative scrollwork, and nonremovable tiers can require more attention than a simple open bowl.

Before buying, imagine removing every item and carrying the empty basket to the cleaning area. Is the complete frame too tall for the sink? Do the baskets release without tools? Can the feet and underside be wiped without turning a heavy assembly awkwardly over the counter? Follow the listed cleaning method, dry the unit as directed, and inspect it before refilling. A removable liner can catch small debris, but it introduces another surface whose material and washing instructions need to be suitable for the intended use.

Cleaning time is also inventory time. Discard items according to household food-safety practices, inspect neighboring produce, and wipe the counter below. Avoid continuously topping up the basket without seeing the bottom. Visibility is one of the main reasons to buy open storage; a periodic empty-and-reset routine preserves that advantage.

Limitations

  • A tiered basket saves horizontal area only by using vertical space and may be awkward under low cabinets.
  • Open storage does not provide the temperature, humidity, darkness, or separation appropriate for every kind of produce.
  • Deep baskets can hide older or delicate items beneath a new grocery load.
  • Tall frames can be less stable if loaded unevenly or placed on an irregular surface.
  • Wire, mesh, slats, and decorative joints all create different contact points and cleanup challenges.
  • A basket full of produce can be heavier and harder to move than its empty product image suggests.
  • Added hooks and handles increase the working envelope and may interfere with cabinets or nearby appliances.
  • Permanent countertop storage reduces the clear surface available for food preparation and cleaning.

Alternatives to compare

A single shallow fruit bowl keeps a small supply easy to see and is simpler to lift for cleaning. Two separate baskets allow different items to occupy different locations without making one tall structure. A ventilated pantry bin may suit items whose storage guidance and pantry conditions are compatible, while keeping the main counter open. A hanging produce basket frees the work surface but introduces ceiling or wall attachment, movement, load, and reach considerations. A rolling kitchen cart creates a larger mobile zone for households with floor space, though it should not become a substitute for appropriate produce storage. For groceries that belong in cooler conditions, use the refrigerator drawers or other recommended storage method instead of choosing a larger countertop organizer.

FAQ

How much room should I leave above a tiered fruit basket?

Leave enough room for your hand and the largest routine item to pass over the upper rim without hitting a cabinet or shelf. Include any handle, hook, and hanging produce in the measurement. Testing the space with a box or stacked bowls is more useful than checking total frame height alone.

Is a two-tier fruit basket better than one large bowl?

It is useful when two levels improve visibility or separation and the kitchen has vertical clearance but limited counter width. One shallow bowl is simpler when the household keeps only a few pieces out, wants easier cleaning, or lacks comfortable access to a lower tier.

What should go in the top and bottom baskets?

There is no universal arrangement. Consider each item’s storage guidance, weight, ripeness, sensitivity to pressure, size, and how often it is used. Keep the frame stable, avoid deep piles, and place delicate produce where it will not be buried or dropped from a height.

Do wire fruit baskets need a liner?

A liner may help contain very small items or loose skins, but it changes airflow, surface contact, and cleanup. Check the basket and liner materials, make sure the liner is intended for the use, and follow its care directions rather than adding an improvised material that stays damp or blocks cleaning.

Can a tiered fruit basket sit under an upper cabinet?

Yes, if the complete unit fits and both levels can be loaded, inspected, and cleaned without repeatedly striking the cabinet or dragging the frame forward. Measure the hand path and the largest produce item as well as the basket itself.

How do I keep countertop produce from being forgotten?

Use a modest quantity, avoid burying older items, look through both tiers before adding groceries, and empty the basket regularly for cleaning and inspection. Plan meals around what is ready to use while following appropriate storage and food-safety guidance.
Choosing a Wall-Mounted Broom and Mop Holder for a Utility Area

Product links are for reference. Verify current details on the retailer page before buying.

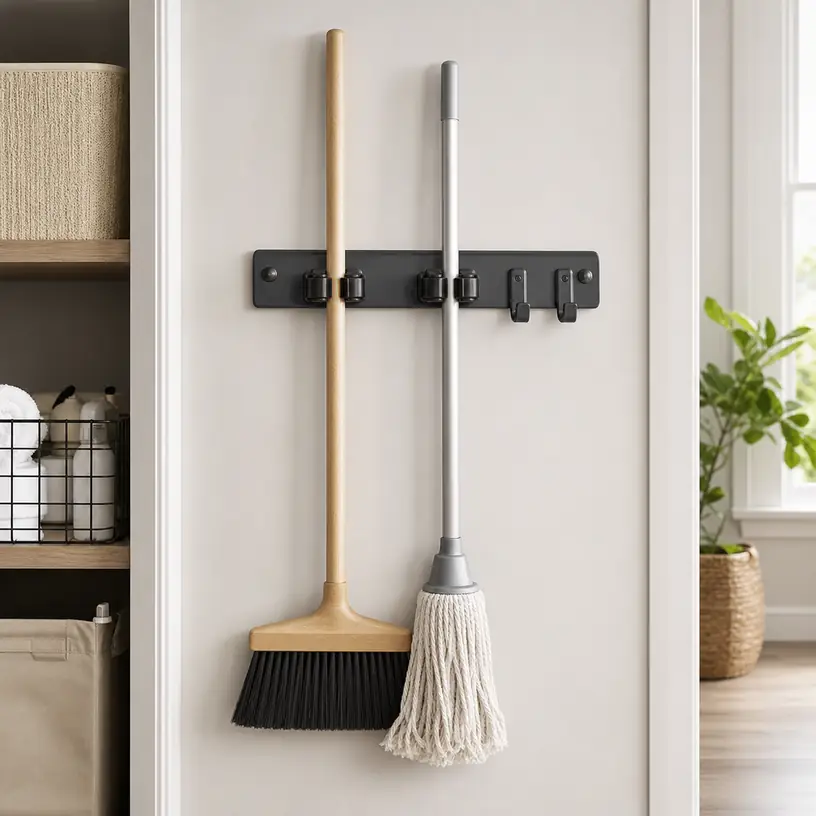
Illustrative image of a generic wall-mounted holder organizing a broom and mop in a utility area

Illustrative image, not an official product photo.

Short answer

A wall-mounted broom and mop holder can reclaim floor space, but the right rail is determined by more than the number of grip positions. Inventory the tools that will actually hang there, measure each handle where the grip will close, and allow room below for mop heads, broom bristles, dustpans, and hanging loops. Then match the mounting method to the wall—not just to the organizer. A rail that fits five handles on paper may feel crowded once wide broom heads and angled tools overlap. For damp mops, choose a location with ventilation and a floor surface that can tolerate drips rather than treating the holder as a drying system.

Search reference

Wall-mounted broom and mop holder options

Compare rail length, grip range, hook layout, mounting hardware, stated load guidance, and installation requirements against your own tools and wall surface.

View matching options

Start with a tool inventory, not a slot count

A storage rail is easiest to plan with the broom, mop, duster, floor squeegee, and dustpan in front of you. Product names often describe several gripping slots plus hooks, but those numbers do not explain whether your particular handles and tool heads can sit together comfortably.

Write down which items need a pressure grip and which can hang from a loop or hole. Measure handle diameter at the intended holding point; tapered handles may be substantially different near the top and middle. Notice where switches, foam grips, adjustment collars, or battery housings interrupt an otherwise smooth handle. A holder may close around a plain round shaft yet be unsuitable at a bulky joint.

Tool heads create a second spacing problem. Two narrow handles can fit adjacent grips while a broad push broom and string mop collide below them. Staggering the hanging heights can help, but only when the wall has enough vertical clearance. If the collection changes seasonally, leave an open position rather than designing a rail with every slot occupied from day one.

Who this is for

  • Households trying to move long-handled cleaning tools off a laundry-room, mudroom, garage, or utility-closet floor.
  • Renters who have permission to make suitable wall penetrations, or who can use a properly supported removable mounting approach within its stated limits.
  • Buyers who want frequently used tools visible and individually accessible instead of leaning in a crowded corner.
  • Small utility spaces where a carefully sized rail can use a narrow strip of wall between shelving, doors, and appliances.
  • Homes that can separate damp tools from dry storage and provide an appropriate place for each.

Who should skip it

  • Anyone who cannot confirm what is behind the proposed mounting area or whether the surface can support the installation.
  • Renters whose lease or building rules prohibit the required fasteners.
  • Households that need children to access cleaning tools containing chemicals, sharp edges, batteries, or other items that require controlled storage.
  • Spaces where a projecting tool would block a walkway, door swing, appliance vent, electrical panel, valve, or emergency access.
  • Buyers expecting one compact rail to safely store very heavy garden or workshop tools without product-specific load guidance and suitable anchoring.

The wall is part of the storage system

Mounting instructions are not interchangeable between drywall, wood studs, masonry, tile, paneled walls, and cabinet sides. Included screws or anchors may be intended for only certain surfaces. Before drilling, identify the wall construction and check for plumbing, wiring, ductwork, or other concealed services. If that cannot be done confidently, ask a qualified installer rather than guessing.

A stud-mounted installation may offer a different level of support from hollow-wall anchors, but rail hole spacing does not always align with the stud locations available. Masonry can require specialized bits and fasteners. Tile introduces crack risk and calls for an installation method appropriate to both the tile and the material behind it. Adhesive-mounted versions avoid holes, yet their performance depends on surface type, preparation, curing time, environment, and the maker’s load limits. Adhesive should not be treated as automatically renter-safe: removal can still damage paint or finishes.

Look at stated capacity carefully. Determine whether a number applies to the entire rail, each grip, each hook, or an installation under particular conditions. The combined weight of the tools is only one factor; tugging a handle out of a spring grip adds force, and long tools can act as levers when pulled sideways.

Allow room to take each tool down

A holder can fit the wall and still be frustrating in daily use. Some grips release when the handle is lifted; others need a controlled outward pull. Either action requires hand room and a clear path for the tool head. Mounting directly under a low shelf may prevent lifting, while placing a rail behind a door can cause repeated impacts.

Use painter’s tape to mark the proposed rail length and grip positions. Lean the actual tools against those marks, spreading wide heads into realistic positions. Open nearby doors and cabinets. Walk past the arrangement while carrying a laundry basket or taking out trash. This simple mock-up reveals conflicts that a dimension drawing may not show.

Height should suit the people who use the tools without placing broom heads so low that they remain on the floor. A grip point that is too high can make release awkward; one that is too low wastes vertical space and allows long handles to tip. In a shared household, test the reach of the shortest regular user before deciding.

Grip mechanisms and utility hooks

Rolling or spring-loaded grips are useful only within their stated handle range. A grip that is too loose can let a tool slide; one that is too tight may demand excessive pulling or mark a softer handle. Confirm the supported diameter range and check whether the mechanism is described for round, oval, or irregular profiles.

Hooks can hold a dustpan, hand brush, cleaning cloth, or lightweight accessory with a proper hanging loop. Fixed hooks make capacity easy to understand, while folding hooks can reduce projections when unused. Sliding modules offer layout flexibility but may move unless their locking method is secure. Whatever the style, check hook dimensions and individual load guidance instead of assuming every pictured accessory is supported or included.

Materials affect upkeep but should not be judged from appearance alone. Metal rails can use different alloys, coatings, fasteners, and plastic grip components. Polymer bodies vary in stiffness and temperature limitations. If the holder will be in a humid laundry area or garage, review the current product’s environmental and care notes and inspect fasteners periodically.

Wet tools need a separate plan

Hanging a damp mop above the floor does not guarantee that it will dry hygienically. Thick mop heads may retain water, touch the wall, or drip onto baseboards and flooring. Follow the mop maker’s washing and drying instructions, remove washable heads when directed, and use a ventilated location that can handle residual moisture.

Do not place wet tools above outlets, power strips, appliances, untreated wood, stored paper goods, or surfaces vulnerable to water. A washable tray may protect the floor from incidental drips, but it also needs cleaning and cannot substitute for wringing and drying the mop correctly. If the utility closet stays closed and humid, a separate drying location may be more practical than putting every tool on the same rail.

What to verify before buying

  • Overall rail length, depth, and mounting-hole spacing, including any modules that slide beyond the main body.
  • The handle-diameter range for each grip and whether tapered, padded, telescoping, or irregular handles are supported.
  • Total and per-position load guidance, along with the mounting conditions under which those figures apply.
  • Whether grips and hooks are fixed, folding, removable, or repositionable, and how movable parts lock in place.
  • The installation surfaces named by the manufacturer and which screws, anchors, templates, or covers are actually included.
  • Required clearance for inserting and releasing a handle, not only the organizer’s packaged dimensions.
  • Material, coating, humidity, temperature, and cleaning guidance for the whole assembly and its fasteners.
  • Whether replacement grip parts or additional modules are available if a mechanism wears or the tool collection changes.
  • Any installation exclusions near utilities, heat, weather exposure, or moisture.
  • The return terms in case the actual grip force or spacing does not suit your tools.

A safer installation and checkup routine

Lay out every component before installation and read the current instructions from start to finish. Use a level and mark holes only after confirming the finished rail will leave retrieval clearance. Choose fasteners for the actual substrate and expected load; do not substitute anchors merely because they fit the hole. Avoid overtightening, which can deform the rail, damage the wall, or crack a mounting surface.

Once mounted, test one light tool at a time. Pull in the direction the release mechanism expects rather than yanking sideways. Check whether the rail moves, fasteners loosen, or grips allow slow sliding. Add other tools gradually and stay within the applicable guidance. Reinspect the installation after the first several uses and periodically thereafter, especially if the wall experiences vibration or large temperature and humidity changes.

Keep the area beneath and around the holder uncluttered. A falling broom is inconvenient; a falling heavy tool can injure someone or damage a nearby appliance. Storage height should also reflect who can reach the tools and whether children or pets need to be kept away.

Limitations

  • Grip compatibility cannot be established from slot count alone; handle shape, diameter, surface texture, and release force all matter.
  • A wall rail does not make damp mops dry faster in an enclosed or poorly ventilated room.
  • Included mounting hardware may not suit your wall, even when it appears in product photos.
  • Capacity statements depend on installation conditions and do not justify storing unlisted heavy tools.
  • Closely packed tools can tangle, hide smaller accessories, and make one-at-a-time retrieval difficult.
  • Wall-mounted storage is less flexible than a freestanding rack when tools or room layouts change often.

Alternatives to compare

Freestanding cleaning-tool rack: Avoids wall penetration and can move with the room layout, though it occupies floor space and needs a stable base.

Utility cabinet with vertical dividers: Conceals supplies and can separate tools, but the cabinet must have enough height and ventilation for the intended contents.

Individual wall hooks: Allow custom spacing around wide tool heads. They may be simpler than a multi-grip rail when every item already has a strong hanging loop.

Pegboard storage: Offers a reconfigurable system for lightweight tools and accessories when the board, hooks, mounting, and loads are all compatible.

Over-door organizer: Uses otherwise idle door space, but added thickness and swinging tools can interfere with closure, trim, hinges, or nearby walls.

FAQ

How many broom and mop grips do I need?

Count the tools that require a pressure grip, then separate items that can use hooks. Leave room for wide heads and consider one spare position for a future or seasonal tool. A rail with more grips is not automatically useful if the tools cannot hang side by side.

Can a broom holder be mounted with adhesive instead of screws?

Only when the specific holder and adhesive system are approved for the surface, environment, tool weight, and pulling forces involved. Surface preparation and curing instructions matter. Adhesive can damage paint during removal and should not be assumed to work on textured, dusty, damp, or incompatible finishes.

How high should a broom and mop holder be installed?

There is no single height for every household. Place it so regular users can operate the release comfortably, tool heads clear the floor when appropriate, and handles avoid shelves and doors. Mock up the arrangement with tape and the actual tools before drilling.

Will a wall holder help a wet mop dry?

It may keep the mop off the floor, but drying still depends on how well the head is wrung out, airflow, humidity, and the mop maker’s care instructions. Do not let a damp head rest against the wall, and protect moisture-sensitive surfaces from drips.

Can the same rail hold garden tools?

Do not assume so. Garden tools can be heavier, longer, or more awkwardly balanced than household brooms. Verify the rail’s stated tool compatibility, handle range, per-position capacity, total capacity, and required mounting method before storing them.

A Folding Shopping Cart for Grocery Runs: Wheels, Frame, and Folded Size

Product links are for reference. Verify current details on the retailer page before buying.

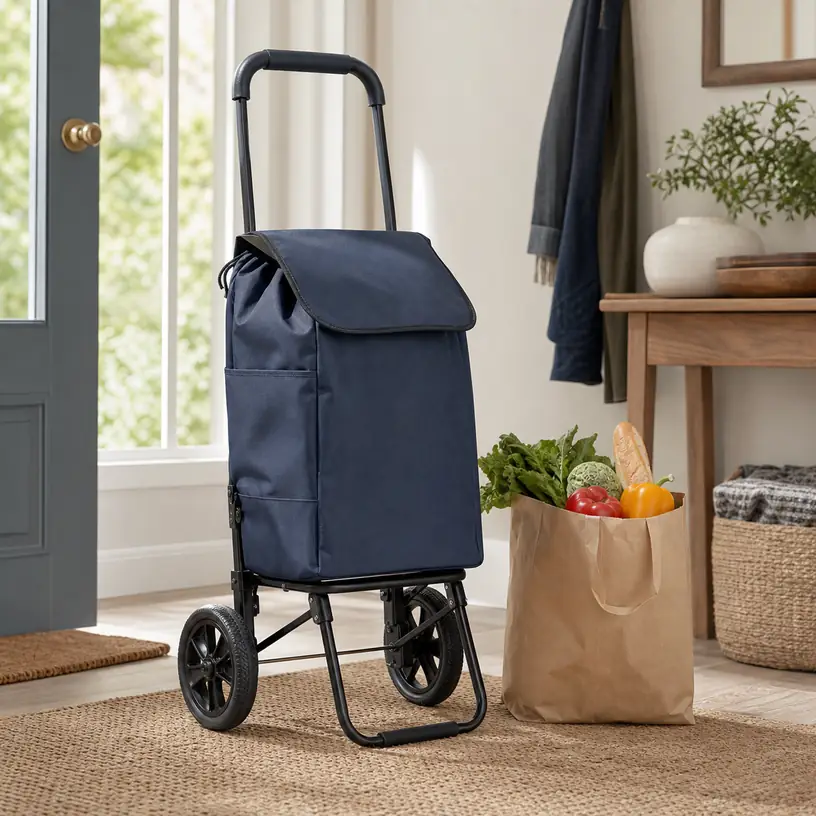
Illustrative image of a generic folding shopping cart with a fabric grocery bag

Illustrative image, not an official product photo.

Short answer

A folding shopping cart should be chosen around the route between the store and home, not around the largest bag in a listing photo. Count the curbs, thresholds, stairs, rough sidewalk sections, and tight turns you normally encounter. Then compare wheel diameter and layout, handle height, frame dimensions, stated load guidance, bag closure, and the cart’s size after folding. A cart that rolls smoothly when loaded and fits beside the door can be more useful than a higher-capacity design that is awkward to steer, lift, or store.

Search reference

Folding shopping carts for grocery trips

Compare wheel layout, handle dimensions, frame and bag construction, stated load guidance, folded size, and stair or curb suitability for your regular route.

View matching options

Walk the route before comparing capacities

Folding grocery carts serve a different job from the small multi-tier utility carts used inside a kitchen, office, or craft room. A grocery cart has to follow a person over outdoor surfaces, hold a changing load, negotiate store entrances, and return to a practical storage spot. Those demands make the route a more useful starting point than color, pocket count, or a broad capacity claim.

Begin at the place where the cart will wait between trips. Measure the available floor or wall space and note whether a folded cart must stand on its own, hang from an appropriate hook, or slide into a closet. Follow the path out of the building. A narrow elevator, heavy entrance door, short flight of steps, uneven paving, or high curb can eliminate designs that would work on a smooth store floor.

Do the same at the destination. Some stores permit a personal trolley to be used while shopping, while others expect it to remain folded until checkout; current local practice should be confirmed directly. Think through where the folded cart will sit before it is loaded and whether its empty frame is manageable alongside a store basket or cart.

Estimate a normal trip rather than an exceptional stock-up run. Bottles, canned goods, produce, boxed food, and household supplies distribute weight differently. A very large bag can invite a load that is difficult to stop, turn, or lift over the final threshold. If grocery trips vary, plan around the heaviest load you can comfortably manage rather than the maximum volume the bag might hold.

Who this is for

  • People who walk to a grocery store, farmers market, laundromat, library, or neighborhood shop and want the load to roll instead of hang from their hands.
  • Apartment residents who have a defined elevator or ground-floor route and a compact place to keep a folded frame.
  • Transit riders who can manage the cart at vehicle entrances and need groceries contained during the walk at either end of the trip.
  • Households making smaller, more frequent grocery runs rather than transporting everything in a car trunk.
  • Shoppers who can keep the cart within its stated use and load guidance and are comfortable slowing down for curbs, slopes, and crowded walkways.

What to verify before buying

  • Complete open dimensions: Check width at the wheels, frame depth, bag height, and handle height rather than relying only on bag measurements.
  • Folded shape: Compare folded thickness, wheel position, latches, and whether the cart is designed to stand, lie flat, or be stored another way.
  • Wheel arrangement: Confirm wheel diameter, number of wheels, axle width, material wording, and any explicit guidance for stairs, curbs, or uneven surfaces.
  • Handle position: Look for the height, grip width, padding or cover, and whether the handle is fixed, adjustable, or shaped for pushing as well as pulling.
  • Stated load guidance: Distinguish the frame limit from any separate bag guidance, and check whether the listing specifies how weight should be distributed.
  • Bag attachment: Determine whether the bag is removable, how it connects to the frame, and whether it can shift toward the wheels when partly loaded.
  • Opening and closure: Check whether the top uses a drawcord, flap, zipper, hook-and-loop section, or remains open, and imagine accessing it at checkout.
  • Base support: Review the platform or lower frame that supports the bag and whether small or soft items could sag into moving parts.
  • Care details: Verify current material wording, cleaning instructions, drying guidance, and any claims involving moisture or weather exposure.
  • Assembly and upkeep: Confirm what must be assembled, how wheel hardware is retained, and whether the listing discusses replacement parts or routine checks.

Wheels decide how the cart meets the street

Two-wheel carts are commonly pulled behind the user. Their simple footprint can be convenient for straight routes and compact storage, but pulling places the loaded cart at an angle. That angle changes how much weight is felt at the handle and how the bag settles against the frame. Check that the handle position and wheel clearance suit your stride so the cart does not repeatedly touch your heels.

Four-wheel formats may be designed to push, pull, or change orientation, depending on the frame. They can keep more of the load supported while standing, but the extra wheels add hardware and may increase the folded footprint. Small swivel wheels can turn neatly on smooth floors yet respond differently to sidewalk cracks and doorway transitions. Do not infer outdoor performance from wheel count alone.

Some carts use clusters of wheels described for stair movement. This layout may change how the cart contacts each step, but it does not remove the weight of the groceries or make every staircase suitable. Step height, landing space, cart width, wheel-cluster dimensions, and the user’s ability to control the load all matter. Verify the maker’s current instructions and consider whether carrying smaller grocery bags separately is safer for your actual stairs.

Larger wheels generally meet small surface changes at a different angle than tiny wheels, but diameter is only part of the system. Axle construction, tire material, alignment, frame stiffness, and the loaded center of gravity also affect how a cart tracks. Inspect wheel and hardware details in current listing images, and check the fasteners periodically according to the supplied instructions.

Fit the handle to the person doing the pulling

A poorly placed handle can make a manageable grocery load tiring. If it is too low, the user may lean or let the cart ride close to the heels. If it is too high or too far behind the frame, steering through a doorway can feel imprecise. Compare a stated handle height with a comfortable hand position while wearing the shoes normally used for errands. Adjustable handles add flexibility only when the adjustment range and locking method suit the user.

Grip shape matters during longer walks. A narrow rigid bar can concentrate pressure, while a wide grip may be difficult for smaller hands. Padding can feel comfortable when dry but may require more care after rain or spills. Check the current product details instead of assuming a fabric or foam-looking section is removable or weather-tolerant.

Also decide whether the cart will be pulled behind, pushed ahead, or used in either direction. Do not push a model merely because its handle looks suitable if the current instructions specify another method. When sharing the cart, make sure the least tall and tallest regular users can both control it without an awkward posture.

The bag should organize the load without hiding problems

A tall single compartment is flexible for cereal boxes, produce, and household packages, but heavy items can settle at the bottom and crush softer groceries. Pack dense, stable items low and keep delicate food in a separate layer or appropriate bag. Side pockets can hold a shopping list or small nonvaluable accessory, but they also add width and may catch on doorframes when full.

An inner liner or insulated-looking surface should not be treated as temperature control unless the current listing clearly describes the construction and intended use. Perishable food still needs an appropriate shopping and transport plan. Likewise, a covered opening can reduce casual exposure but does not automatically make the bag rainproof, spill-proof, or secure.

Removable bags can simplify cleaning and let the frame carry a suitably contained box or other load when the instructions permit. The connection points become important: check straps, hooks, loops, and lower support before each trip. A partly filled bag should remain clear of the wheels and axle. If the cart includes a rigid base insert, verify its orientation and care instructions rather than replacing it with an improvised panel that could interfere with folding.

Bring reusable produce bags or small totes when separation helps. The main cart bag does not need a dedicated pocket for every grocery category. A simple interior is often easier to unload and wipe, while smaller contained bags can be lifted out at the kitchen counter.

Folding is part of every trip

A folding frame earns its storage space only if the routine is manageable. Look at the complete sequence: empty the bag, release the correct latch, move the frame without placing fingers near a hinge, secure the folded shape, and put the cart away. Current instructions should control this process. A cart that collapses to a thin profile may still be tall, unstable when upright, or difficult to lift onto a shelf.

Measure the folded cart with the wheels and handle included. Wheels may prevent it from sliding into a gap that appears wide enough for the frame alone. A loose bag can add thickness or drag on the floor. If storage is behind a door, confirm the door can swing without contacting the cart.

Do not assume every frame can remain upright when folded. If it needs to lie flat, choose a clean, dry storage location where the wheel surfaces do not transfer outdoor debris to clothing or pantry goods. If it is intended to hang, use only a storage method suitable for the cart’s weight and structure; a convenient-looking handle is not necessarily a hanging point.

Who should skip it

  • Skip a large trolley if the route includes stairs or vehicle transfers that make the loaded cart harder to control than two smaller hand-carried bags.
  • Choose a backpack or balanced reusable bags when the grocery load is light and the walking surface is consistently unsuitable for small wheels.
  • A delivery or pickup option may be more practical for occasional heavy orders, severe weather, or routes without accessible crossings.
  • Avoid relying on a grocery cart for children, pets, seating, or any use not explicitly covered by its current instructions.
  • If the main need is movable indoor storage, compare a room-to-room utility cart rather than an outdoor grocery trolley.

Limitations

  • A high stated capacity does not mean that every user can safely steer, stop, or lift the fully loaded cart.
  • Small wheels can catch at cracks, thresholds, gravel, thick mats, and other abrupt surface changes.
  • Large or stair-oriented wheel systems can improve contact in some situations while adding width, weight, and storage bulk.
  • Soft bags do not prevent crushing, leaks, or temperature change without an appropriate packing plan.
  • Folding hinges, latches, axles, wheels, and bag attachments require inspection and care according to the supplied instructions.
  • A cart can free the hands from grocery bags, but it remains an object that must be controlled around traffic, slopes, doors, and other pedestrians.
  • Weather-related wording varies, and ordinary fabric should not be assumed to protect groceries from sustained rain.
  • Store, transit, and building rules differ and may change; confirm the current requirements that apply to the route.

Alternatives to compare

  • A grocery backpack for lighter loads on routes with stairs, while considering fit and comfortable carrying weight.
  • Two balanced reusable bags for short trips where wheels would add more inconvenience than help.
  • A collapsible wagon for suitable ground-level routes and larger loads, if its wider footprint and storage size are practical.
  • A bicycle basket or cargo setup designed for the bicycle and load, with appropriate securement and riding practices.
  • Grocery pickup or delivery for bulky stock-up trips, combined with smaller walking trips for fresh items.
  • A compact hand truck with separately secured containers when the job extends beyond groceries and the equipment is intended for that load.

FAQ

Are two wheels or four wheels better for a folding grocery cart?

Neither layout suits every route. Two-wheel carts are often pulled at an angle and can fold compactly. Four-wheel carts may support more of the load while standing or moving, but wheel size, steering design, surface conditions, and folded dimensions still matter. Follow the current instructions for whether a specific cart should be pushed, pulled, or used in multiple orientations.

What wheel size should I look for on uneven sidewalks?

Start by observing the largest cracks, thresholds, and curb transitions on the normal route, then compare them with the wheel details and intended-surface guidance in current listings. Diameter is useful, but axle construction, tire material, wheel alignment, frame stiffness, and load placement also affect rolling behavior.

Can a folding shopping cart go up apartment stairs?

Only if the specific design, current instructions, staircase, load, and user make that practical. A multi-wheel stair layout does not eliminate the weight or the need to control the cart at every step and landing. For difficult stairs, smaller grocery bags, a lighter load, an elevator, or another transport method may be more manageable.

How should groceries be packed in a rolling cart?

Place compact, stable items low without exceeding the stated guidance, keep leak-prone goods in appropriate closed containers, and protect bread, eggs, produce, and other easily damaged items from heavier packages. Keep the bag clear of wheels and hinges, and make sure the top closes without forcing it.

Where can a folding grocery cart be stored in a small apartment?

Use the cart’s complete folded dimensions, including its wheels and loose bag, to check a closet, entryway recess, or other dry location. Confirm whether the folded cart is intended to stand, lie flat, or use an approved hanging method. Keep outdoor wheel surfaces away from clean textiles and food-storage areas.

A Battery Organizer Case for the Junk Drawer: Capacity, Layout, and Safety Notes

Product links are for reference. Verify current details on the retailer page before buying.

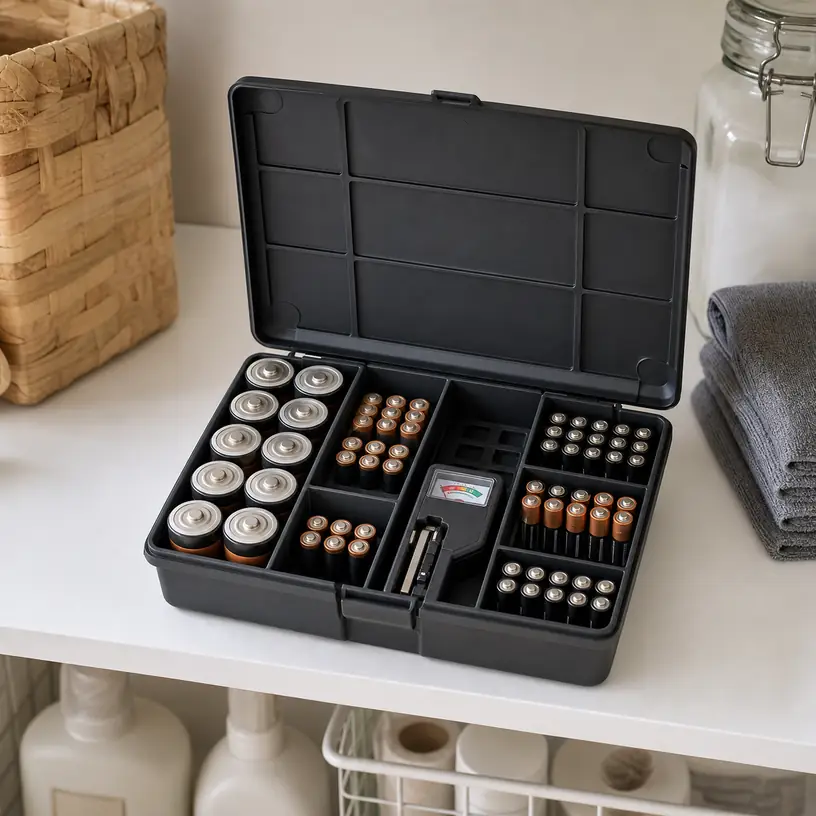
Illustrative image for a household battery organizer case buying guide

Illustrative image, not an official product photo.

Short answer

A battery organizer case is useful when loose household batteries are scattered between a junk drawer, tool box, and utility shelf. Choose around the cell sizes you actually keep—not the largest advertised total capacity. The most practical case will fit its storage location, hold each battery securely enough to prevent a jumble, leave room to separate fresh cells from used ones, and open without spilling its contents. A built-in or removable tester can be convenient, but its supported battery types and required operating steps need to be checked rather than assumed.

Search reference

Household battery organizer case options

Compare current layouts for AA, AAA, 9V, C, D, and coin-size cells, then check closed dimensions, latch design, tester details, and whether the case is intended for a drawer, wall, shelf, or travel kit.

View matching options

Count the batteries you keep, not the empty slots in a photo

Battery organizers often emphasize total capacity, but the shape of that capacity matters more. A household that mainly uses AA and AAA cells for remotes, toys, flashlights, and computer accessories needs a different layout from one that also keeps 9V, C, D, camera, or coin-size batteries. Before shopping, gather the unopened and loose cells you already own and make a quick count by size. That five-minute inventory can prevent buying a large case with many compartments you will never use and too few slots for the batteries you replace most often.

Also consider how quickly your supply turns over. A compact drawer insert may be enough if you replenish batteries in small packs. A deeper hard-sided case can make sense for storm supplies, multiple children’s toys, seasonal decorations, or a workshop, but extra capacity can encourage keeping old cells long after their history is clear. Organization should make rotation easier, not simply hide a bigger stockpile.

The case format changes the routine. Flat organizers are easy to scan in a shallow drawer. Upright cases use less shelf width but may require removing batteries from rows to see what remains. Carrying cases add a handle and closure for moving supplies between rooms. Wall-mountable designs free drawer space, although mounting hardware, loaded weight, and placement need careful review.

Who this is for

  • Households that regularly use several sizes of replaceable batteries and want one known storage location.
  • Parents organizing batteries for toys while keeping the case in an appropriate place that children cannot access.
  • People building a labeled utility shelf, storm-supply cabinet, workshop drawer, or home maintenance kit.
  • Anyone who wants to separate fresh batteries from cells awaiting proper recycling or disposal.
  • Buyers who would use a compatible tester to check an uncertain battery before discarding or installing it.

Who should skip it

  • Skip a large organizer if you only keep one small unopened pack at a time; the original packaging may already be the simpler storage method.
  • Do not treat a basic household organizer as protection for damaged, leaking, swollen, recalled, or unusually hot batteries.
  • Avoid open trays in areas accessible to young children or pets, especially when coin or button cells are present.
  • Choose storage designed for your specific rechargeable battery system if cells need matched sets, charging records, or specialized transport protection.
  • Do not use a general organizer as a shipping container unless its current documentation explicitly supports that use and applicable carrier rules are followed.

What to verify before buying

  • List the exact battery sizes you own and compare that mix with the number of dedicated slots for each size.
  • Measure the organizer’s closed length, width, and height against the drawer, cabinet, shelf, or wall area where it will live.
  • Check whether batteries snap into individual recesses, slide into channels, or sit loosely beneath a lid.
  • Review the closure, hinges, handle, and orientation to judge what could happen if the loaded case is picked up or stored vertically.
  • Confirm which battery types an included tester supports, whether it is removable, and how its readings are described in the instructions.
  • Look for a practical way to distinguish fresh cells from used, uncertain, or rechargeable ones; separate compartments or your own labels can help.
  • Verify whether wall-mount hardware is included and suitable for the wall and loaded weight rather than relying on the empty-case weight.
  • Read the current care and safety guidance for both the organizer and every battery type you plan to store.

Drawer, shelf, wall, or carry case?

For a kitchen or office junk drawer, outside dimensions are the first filter. Measure the drawer at its narrowest usable point and account for screw heads, curved sides, dividers, and items stored above the organizer. A case that technically fits may still jam if its handle or latch catches the drawer frame. Check closed height as well as the footprint.

A shelf case benefits from a clear or easily scanned lid, but visibility should not override placement. Store batteries in a cool, dry location away from direct heat, moisture, metal clutter, and curious children. A strong handle is useful when the organizer must move, yet the latch and hinge become more important when a full case is carried. Look at how the batteries are retained if the case is turned upright rather than judging it only while flat.

Wall storage can keep a crowded workbench clear. It also concentrates the weight on the mounting points, so confirm the intended mounting method and choose hardware appropriate for the wall. Place the organizer where it will not be knocked, heated, splashed, or mistaken for something children may open. If a design can be used either flat or wall-mounted, check whether cells remain secure in both orientations.

Portable organizers work best when every cell has a defined recess and the lid closes without pressing on the battery terminals. If you only need a few spares for a flashlight or camera, a smaller battery holder may be more appropriate than carrying a household-size assortment. Air travel and shipping can involve battery-specific restrictions, so a convenient handle does not automatically make a case suitable for those purposes.

Slot design and sorting habits

Individual recesses make remaining quantities easy to see and reduce the chance that loose batteries roll together. They can also be frustrating when tolerances are tight or when wrapped rechargeable cells differ slightly from common disposable-cell dimensions. Product photos may suggest a fit without documenting it, so check current dimensions and compatibility wording, especially for less common sizes.

Coin and button cells require particular care because their small size presents a serious ingestion hazard. A shallow open pocket is not the same as child-resistant storage. If your household uses these cells, consider keeping them in intact original packaging or another secure, appropriately placed container rather than assuming every mixed battery organizer is suitable.

Sorting by condition is just as important as sorting by size. Avoid mixing fresh and used cells in one unlabeled row. A small removable bin or a separate clearly marked container can hold depleted batteries until they are taken to a collection or disposal location that follows local guidance. Damaged or leaking batteries need handling based on the battery manufacturer’s instructions and local requirements, not routine storage in the organizer.

Rechargeable and single-use cells can look similar at a glance. Dedicated rows or simple labels reduce mix-ups, particularly when several people replace batteries around the home. If devices require matched sets, keep those sets grouped in a way that preserves their identity rather than scattering them across open slots.

Is an included battery tester worth having?

A tester can help when a loose battery has an uncertain history or when a device stops working and you want to narrow down the cause. Convenience depends on access: a removable tester is easier to hold against some cell types, while a fixed tester is harder to misplace. Neither format is useful unless it supports your batteries and its instructions explain how to position them and interpret the display.

Tester results are not a complete assessment of battery condition, remaining runtime, or safety. Different devices place different demands on cells, and a simple reading may not predict performance under load. Never test a battery that appears damaged, leaking, swollen, corroded, or unusually warm. Follow the battery and tester manufacturers’ current instructions, and keep contact points from becoming another place where loose metal items collect.

Limitations

  • Advertised capacity may count many slots for sizes you rarely use and very few for the sizes you buy most often.
  • Plastic latches, hinges, handles, and tight-fitting recesses can wear, so current construction details and return terms are worth checking.
  • An organizer can reduce clutter but cannot make damaged batteries safe or replace battery-specific handling guidance.
  • Mixed-format cases may not fit every rechargeable cell, specialty battery, protected cell, or battery still in retail packaging.
  • A tester provides limited information and should not be treated as a guarantee of remaining runtime or battery condition.
  • A portable-looking case may still be unsuitable for air travel, mailing, or other transport governed by specific battery rules.

Alternatives to compare

  • Original retail packaging for a small supply that turns over regularly.
  • A shallow labeled drawer insert when batteries never need to leave one cabinet.
  • Small rigid battery holders for flashlight, camera, camping, or emergency-kit spares.
  • Separate containers for rechargeable sets when charge cycles and pairing matter.
  • A dedicated, clearly marked collection container for spent cells awaiting recycling or disposal according to local guidance.

FAQ

Should batteries stay in their original packaging?

Original packaging can be a sensible choice for a small supply because it keeps battery types identified and terminals separated. An organizer becomes more useful when you maintain several opened packs or sizes, provided the cells are stored according to their current manufacturer guidance.

Can I mix rechargeable and single-use batteries in one organizer?

They can share a case only if they remain clearly separated and identified. Do not mix rechargeable and single-use cells within a device, and preserve matched rechargeable sets when the device or charger instructions call for them.

Is a battery organizer child-resistant?

Do not assume it is. A latch or zipper intended to stop spills may not be child-resistant, and coin or button cells present a serious ingestion hazard. Store the entire organizer in an appropriate location inaccessible to children and follow product-specific safety guidance.

How should I separate fresh batteries from used ones?

Use different labeled rows, compartments, or containers so uncertain and depleted cells cannot drift back into the fresh supply. Keep batteries awaiting recycling or disposal in a setup consistent with local rules and manufacturer instructions.

Does every battery tester work with rechargeable batteries?

No. Supported chemistries, sizes, voltage ranges, and reading methods vary. Check the tester’s current documentation for the exact cells you own, and do not rely on a simple reading as a full measure of condition or remaining runtime.

Foldable Laundry Drying Racks: Plan the Load Before You Unfold

Product links are for reference. Verify current details on the retailer page before buying.

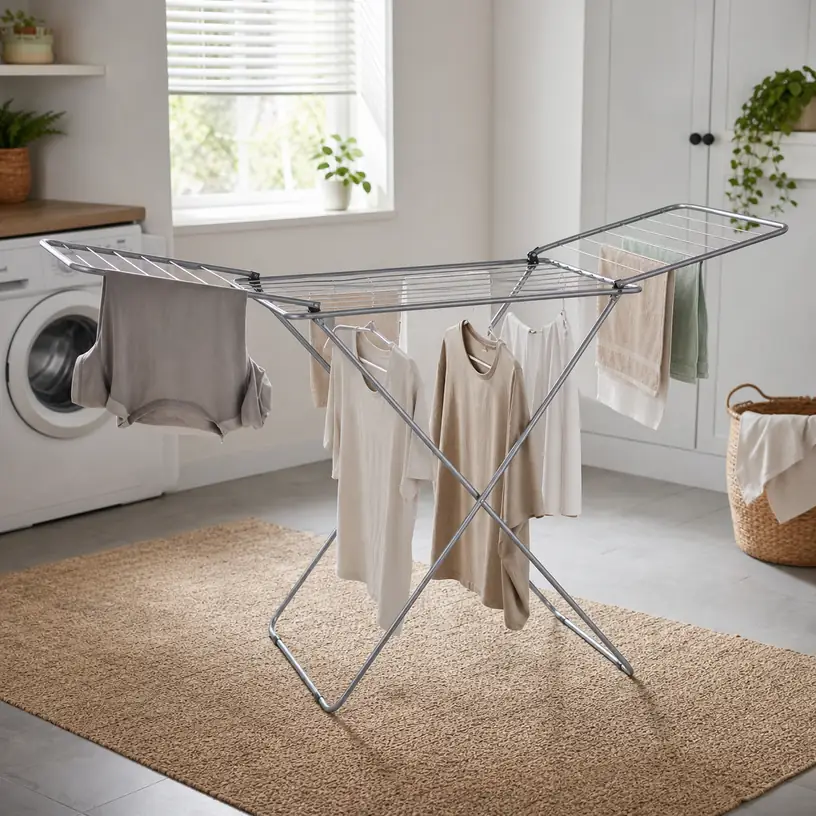
Illustrative image of a generic foldable laundry drying rack in a bright laundry room

Illustrative image, not an official product photo.

Short answer

Choose a foldable drying rack around one realistic wash load and one specific place where it can remain fully open. Count the long garments, small items, and pieces that need to lie flat, then compare that mix with the rail spacing and layout rather than relying on a total drying-space claim alone. The right rack also leaves walking clearance, stands level under damp weight, folds without a complicated routine, and fits its intended storage gap after the laundry is put away.

Search reference

Foldable laundry drying rack options

Compare open dimensions, rail spacing, supported load guidance, flat-drying areas, foot design, and folded size against your usual laundry routine.

View matching options

Sketch the open rack on the floor

A folded product can look compact while opening into a wide structure with wings, side rails, or several tiers. Measure the floor area where wet laundry will actually sit, not just the closet where the rack will be stored. Painter’s tape or a few sheets of paper can mark the listed open length and width so you can check door swings, cabinet access, heating vents, and the route through the room.

Allow extra space beyond the frame. Sleeves and towels can extend past the outer rails, and a loaded wing may be less visible at hip height than the legs below it. In a shared hallway, bedroom, or bathroom, a narrow vertical layout may preserve more floor space, while a low winged rack can offer a better surface for sweaters. Neither shape is automatically more compact once garments are added.

Who this is for

  • Apartment households that air-dry selected garments but cannot install a permanent clothesline.
  • Laundry rooms where a rack can stand open for several hours without blocking appliances or storage.
  • People who want a predictable place for delicates, knitwear, workout clothing, or items that should not go into a dryer.
  • Buyers who need the rack to fold between wash days and fit beside a washer, under a bed, or in a utility closet.
  • Homes that can provide ventilation and protect the floor beneath damp laundry.

Who should skip it

  • A wall-mounted or ceiling-mounted airer may suit a very small room better when installation is allowed and properly planned.
  • Skip a freestanding rack if every available location blocks an exit, walkway, heater, or frequently used door.
  • A single compact rack may be frustrating for households expecting it to hold several large loads at once.
  • Do not assume an indoor rack is suitable for balconies, wind, prolonged outdoor exposure, or uneven ground unless the current instructions say so.
  • Choose another method if the intended garments require a care routine the rack cannot support, such as fully flat drying without sagging.

What to verify before buying

  • Open dimensions: Check length, width, and height with wings, shelves, and extensions in their working positions.
  • Folded dimensions: Include feet, hinges, clips, and locking parts that may protrude into a storage gap.
  • Rail arrangement: Compare usable straight lengths, gaps between rails, tier spacing, and clearance for sleeves or trouser legs.
  • Supported load: Confirm the current total and section-specific guidance, and distribute damp items as directed.
  • Hinges and locks: Review how the rack reaches a stable open position and whether wings have defined working angles or supports.
  • Feet and floor contact: Check the intended flooring, foot material, leveling guidance, and recommendations for moisture beneath the rack.
  • Materials and care: Verify coating, corrosion-care instructions, cleaning method, and whether hardware or caps are replaceable.
  • Indoor or outdoor use: Do not infer weather resistance from a product photo; read the current placement and storage instructions.

Rail layout matters more than a single capacity number

Drying-space measurements often add every rail together, but a total does not show how comfortably a real load fits. Closely spaced rails may work for socks and light tops yet cause bulky items to overlap. A tall center tier can accommodate shirts on hangers, while a low horizontal shelf can support knitwear that should dry flat. Make a rough garment list and assign each piece to a part of the rack before comparing models.

Look at the distance between tiers as well as the rail count. A lower item should not bunch on the floor or press against the clothing above it. If you plan to use hangers, confirm that the relevant bar is intended for them and that the hooks have enough clearance without concentrating too much weight in one area.

Small-item clips or mesh shelves can be useful, but they also add pieces to open, clean, and store. A simpler frame may be faster for a few shirts and towels. For mixed loads, a rack with genuinely different zones can reduce the need to drape one garment across several rails.

Stability changes as damp clothes are added

An empty display image says little about balance under an uneven load. Damp jeans, towels, or a sweater can be substantially heavier than dry lightweight clothing. Follow the stated load guidance and spread heavier pieces across the frame rather than placing everything on one raised wing. Alternate items from side to side when practical, and make sure every foot remains fully supported on a firm, level surface.

Open all supports as directed before loading the rack. A hinge that looks straight may still need a brace, latch, or wing support to reach its working position. Keep children and pets away from folding joints and hanging garments, and avoid moving a loaded rack unless the instructions explicitly describe how to do so. Lifting by a rail or wing can stress a joint not designed as a handle.

Water can drip from hand-washed items, so consider what is under the rack. Protect moisture-sensitive flooring in a way that does not create an unstable or slippery base. Wring or spin garments according to their care labels, provide ventilation, and do not crowd wet fabrics against a wall.

Folding should be a routine, not a puzzle

A rack is easier to live with when opening and closing follow an obvious sequence. Product diagrams can reveal whether several wings must be aligned before the legs fold, whether a latch holds the closed frame, and where hands should be placed away from pinch points. If the rack will be folded after every load, those details may matter more than an occasional extra rail.

Measure the complete folded package and its retrieval path. A rack that technically fits behind a door may prevent the door from opening fully; one stored beside an appliance may be difficult to pull out without scraping a wall. Consider its weight and whether there is a clearly intended carrying point. Before storage, let the frame dry and follow the care instructions for removing lint, detergent residue, or moisture around joints.

Limitations

  • Published capacity may not reflect the size and spacing needs of your particular garments.
  • Closely packed laundry generally dries less evenly than items with air moving between them.
  • Wide wings increase hanging options but also increase the open footprint and the leverage placed on supports.
  • Tall racks save floor area only when tiers provide enough vertical clearance for the intended clothes.
  • Folding joints and removable accessories add potential pinch, loss, and wear points.
  • Coated metal, plastic, wood, and fabric components have different cleaning, moisture, and storage requirements.

Alternatives to compare

  • A wall-mounted retractable rack for a dedicated laundry area where secure installation is possible.
  • An over-the-door airer for a few lightweight items when door clearance and weight guidance permit it.
  • A flat mesh drying surface for sweaters and other garments that should be supported rather than hung.
  • A tension or fixed clothesline for a suitable space, installed and loaded according to its instructions.
  • A larger nonfolding rack when it can stay in one place and daily setup is the main inconvenience.

FAQ

How large should a drying rack be for one laundry load?

There is no universal load size. List the garments you normally air-dry, estimate which need long rails, hangers, clips, or flat support, and map them to the rack’s usable layout. Leave gaps for airflow instead of treating every inch of rail as continuously fillable.

Is a tiered rack better for a small apartment?

A tiered design can use less floor area, but only if its vertical gaps suit your clothing and the loaded rack still fits safely in the room. Long garments may overlap lower tiers, while a winged rack may work better for towels or flat-drying needs.

Can I put a foldable drying rack on a balcony?

Only when the product’s current instructions allow the setting. Wind, rain, sunlight, uneven surfaces, and the risk of items falling can change both stability and material wear. An indoor-only rack should not be assumed to be weather resistant.

How can I keep a drying rack stable?

Place it fully open on a firm, level surface, engage every support or lock as directed, stay within the stated load guidance, and distribute damp garments across the structure. Do not use a wing, tier, or accessory outside its intended position.

What should I measure for folded storage?

Measure folded height, width, and thickness, including feet and latches, plus the path used to put the rack away. Check that nearby doors and appliances still open and that you can retrieve the rack using its intended carrying point.

Countertop Spice Racks: Fit, Visibility, and Everyday Reach

Product links are for reference. Verify current details on the retailer page before buying.

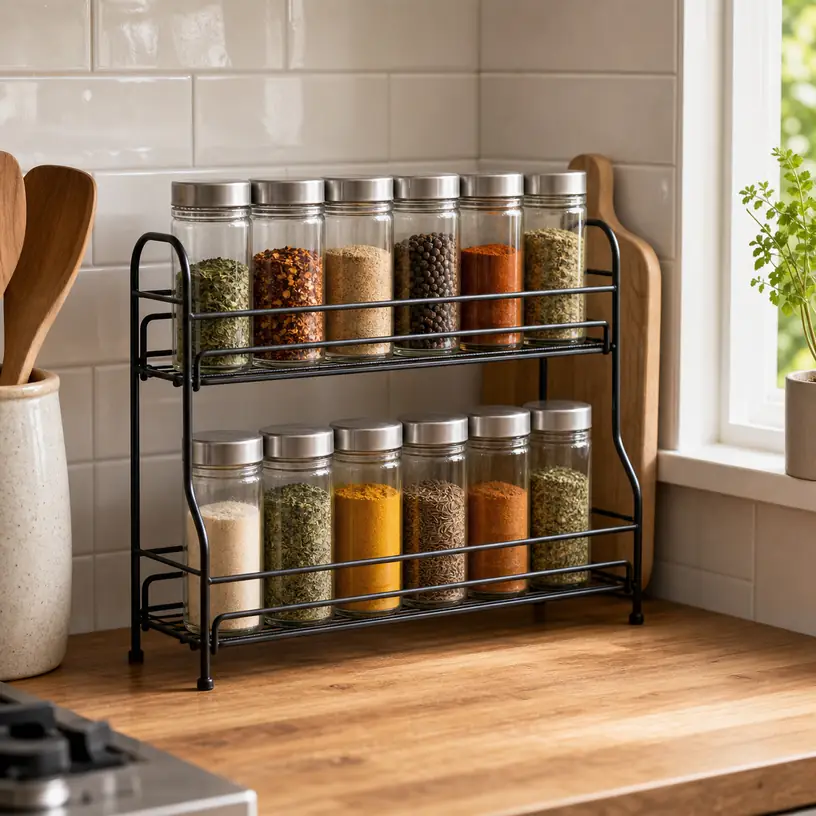
Illustrative image of a generic countertop spice rack in a kitchen

Illustrative image, not an official product photo.

Short answer

A countertop spice rack earns its space when it keeps frequently used seasonings visible without crowding the food-prep zone. Start with the available footprint and the height below any upper cabinet, then consider how easily you can read and remove jars from the back row. Stable feet, an open layout, enough clearance for your existing containers, and a finish that tolerates routine kitchen cleaning matter more than decorative capacity claims.

Search reference

Countertop spice rack options

Compare footprints, tier spacing, jar access, base stability, and cleaning instructions with the containers and counter space already in your kitchen.

View matching options

Decide what deserves counter space

The best candidate for a countertop rack is not necessarily every spice you own. It is the smaller working set you reach for during an ordinary week: perhaps cooking oil seasonings near a prep area, baking spices in another zone, or salt-free blends kept together for a particular household routine. A rack that holds only this active group can be more useful than a larger unit packed with jars that rarely move.

Location changes the decision. A narrow section beside a refrigerator may suit a compact vertical rack, while an open island may call for a lower organizer that does not interrupt sightlines. Measure the proposed location with the nearby drawers and cabinet doors open. Remember that the counter still needs room for wiping, food preparation, and temporarily setting down utensils or groceries.

Heat, steam, direct sun, and cooking splatter also affect placement. Avoid assuming that the small gap beside a range is automatically the ideal spice zone. Check storage guidance on the seasonings themselves, and choose a location away from obvious heat and moisture exposure. Easy reach should not come at the cost of poor storage conditions.

Who this is for

  • Cooks who use a consistent group of seasonings and want them visible at a glance.
  • Renters who need removable organization rather than a wall-mounted or cabinet-mounted system.
  • Households with mixed jar shapes that do not fit a dedicated drawer insert.
  • Small kitchens where a carefully measured vertical organizer can free part of the working surface.
  • Anyone who finds a rotating organizer awkward because labels or containers are difficult to see.

Who should skip it

  • Skip a counter rack if your prep surface is already too limited for comfortable cooking.
  • Choose enclosed cabinet storage if the available counter location receives heavy splatter, steam, or direct sunlight.
  • Avoid a fixed-tier design when your jars vary widely in height and diameter unless the listed clearances work for the full set.
  • Consider a drawer solution if you prefer to see every label from above and have a suitable shallow drawer.
  • Do not buy a rack merely to display a large matching jar set if you only use a few of those seasonings regularly.

What to verify before buying

  • Measure width and depth at the base, plus the total height beneath upper cabinets, shelves, rails, and appliance doors.
  • Compare the usable shelf width and vertical clearance with the tallest, widest, and least stable jars you plan to store.
  • Check whether rear jars can be lifted out without removing the front row or striking the cabinet above.
  • Look at the feet and base construction, especially if the rack will sit on smooth stone, laminate, tile, or a textured counter.
  • Confirm whether assembly is required and whether the product can be moved safely while loaded.
  • Review care instructions for the rack material and finish; kitchen residue can collect around joints, corners, and feet.
  • Determine whether jars, labels, liners, or mounting hardware shown in styled photos are actually included.
  • Verify current dimensions and package contents on the retailer page rather than estimating from photos.

Choose a layout around the way you reach

Tiered racks

A stepped rack raises the back rows so labels are easier to scan. It works best when jars are similar enough in height that each step remains visible. Check the depth of every tier, not only the overall dimensions. Very shallow steps may suit standard spice jars but feel insecure with squat tins, grinders, or wider seasoning containers.

Access is the practical test. Imagine lifting the tallest rear jar upward under your cabinet. If there is little clearance, a rack that looks compact may force you to pull the whole unit forward every time. That repeated movement can become more irritating than opening a cabinet.

Shelves and narrow towers

A small shelf unit uses vertical space without creating a staircase footprint. It can accommodate different container heights if the shelves are adjustable or generously spaced. On the other hand, jars on a flat upper shelf may hide those behind them, and deep shelves can turn the back row into forgotten storage.

Pay attention to side rails and lips. A low barrier may help prevent a jar from sliding, but it can also obscure labels or make short tins harder to grasp. Tall side panels create a more enclosed appearance yet collect dust and cooking residue in corners.

Rotating designs

A rotating organizer can bring rear containers forward without reaching over another row. It needs turning clearance, however, and the useful surface may be smaller than its total diameter suggests. Test the idea by marking a circle on the counter and leaving space for fingers around it. If nearby appliances or a wall block rotation, the format loses much of its advantage.

A rotating rack also benefits from balanced loading. Widely different container sizes may make the surface feel cluttered or cause smaller jars to shift when it turns. Review the edge height and current dimensions before treating a rotating option as a universal solution.

Fit your existing spice containers first

Capacity numbers are difficult to compare because jar shapes differ. A rack advertised for a certain number of containers may have been counted with one narrow jar style. Your collection may include square glass jars, round plastic containers, refill pouches, tins, grinders, or tall seasoning bottles. Measure the actual group rather than relying on a headline capacity.

Arrange the jars on a table in the order you use them. This reveals how much linear shelf space they occupy and whether some items belong elsewhere. It is also a good time to check labels and dates according to your normal household practices. The organizer should support that routine, not encourage decanting into unfamiliar containers simply to make the rack look uniform.

If labels sit on the jar lids, a lower viewing angle may be unhelpful. Front labels benefit from a stepped layout, while top labels are often easier to scan in a drawer. Choose the organizer around how information appears on your containers.

Stability, materials, and cleanup

A narrow rack can become top-heavy when loaded with tall grinders or glass jars. A broad base, level construction, and feet suited to the counter surface are useful features. If a rack includes non-slip pads, confirm their placement and care guidance. Do not assume that every pad material is appropriate for every delicate countertop finish.

Material wording can indicate how a rack should be cleaned, but it does not guarantee long-term performance in a damp or greasy area. Look for clear instructions about wiping, drying, and avoiding abrasive products. Open wire forms usually expose more of the counter for cleaning, while solid shelves can catch small spills before they reach the surface. Both still need to be moved periodically so the area underneath can be cleaned.

Color and finish have practical effects too. Dark finishes may show flour or salt dust; bright metal may reveal fingerprints and water spots; wood-look surfaces may have specific moisture precautions. Choose based on your kitchen habits rather than staged photography alone.

Limitations

  • Keeping spices on the counter exposes the rack and containers to more visible dust and cooking residue than enclosed storage.
  • A compact footprint does not guarantee easy access, especially beneath low cabinets.
  • Published capacity may not match mixed jar sizes or tall grinders.
  • Countertop racks use space that may be more valuable for food preparation or small appliances.
  • An organizer cannot correct storage conditions that are too hot, humid, or sunny for the contents.
  • A matching jar system adds labeling and refilling work that some households may not want.

Alternatives to compare

  • A shallow drawer insert when top labels are easy to read and drawer height is sufficient.
  • A cabinet shelf riser for seasonings that are better kept away from the working surface.
  • A wall-mounted rack where installation is permitted and the wall location remains away from heat and moisture.
  • A rotating cabinet organizer if depth, rather than countertop visibility, is the main problem.
  • Small labeled bins that group baking, grilling, or everyday seasonings and can be removed as a set.

FAQ

How much clearance should I leave above a countertop spice rack?

Allow enough room to lift out the tallest container without tilting it into the upper cabinet. Measure with the actual jar in hand, and remember that a rear tier may raise it several inches above the counter. Current rack dimensions and usable tier heights should be checked before ordering.

Is a tiered rack better than a rotating spice organizer?

A tiered rack makes several front-facing labels visible at once, while a rotating organizer brings hidden containers around to you. The better choice depends on available depth, overhead clearance, turning space, label placement, and whether your jars are similar in size.

Can I put a spice rack next to the stove?

A nearby location may be convenient, but heat, steam, and splatter make it a poor choice in many layouts. Follow storage guidance for the seasonings and keep the rack away from obvious heat and moisture sources. Convenience should be balanced with suitable storage conditions and safe cooking space.

Should a spice rack include matching jars?

Not necessarily. A rack-only option lets you keep familiar containers and their original information. A set with jars can create uniform dimensions, but it also requires labeling, filling, and maintaining a separate system. Verify exactly what is included before buying.

How do I keep a countertop spice rack from becoming cluttered?

Reserve it for the seasonings used most often, group them by your real cooking routine, and return less-used items to a cabinet or pantry. Reassess the selection periodically instead of filling every available slot just because the rack has room.

Pot Lid Organizers for Cabinets: Match the Rack to Your Cookware

Product links are for reference. Verify current details on the retailer page before buying.

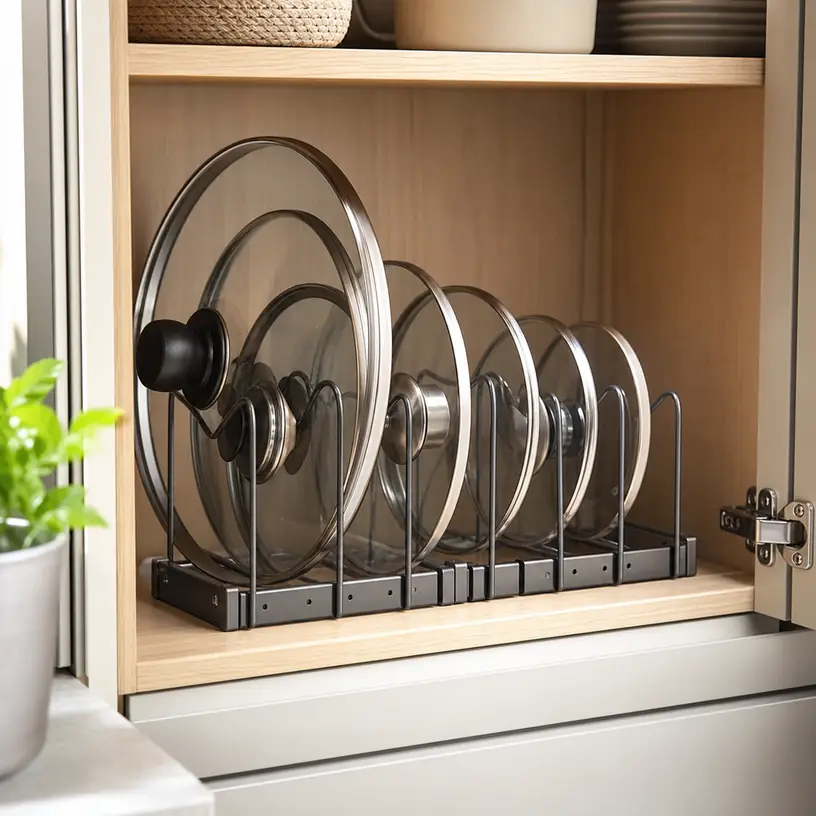
Illustrative image of a pot lid organizer inside a kitchen cabinet

Illustrative image, not an official product photo.

Short answer

A pot lid organizer works when its dividers fit the actual handles, rims, and diameters in your cookware collection. Before choosing one, place every lid you expect to store on the counter and measure the tallest handle, the widest lid, and the depth of the intended cabinet. A freestanding rack is easy to move and requires no installation; an adjustable rack handles mixed lid thicknesses; and a door-mounted holder can preserve shelf space only if the door, hinges, and nearby cookware leave enough clearance. The goal is not to create the most slots—it is to let you remove one lid without lifting or scraping three others.

Search reference

Pot lid organizer options for cabinets

Compare divider spacing, usable rack dimensions, installation method, and handle clearance against your own lids and cabinet layout.

View matching options

Begin with the lids, not the organizer

Cookware lids are awkward because they are thin in one direction and bulky in another. A glass lid may have a wide loop handle, a saucepan lid may have a tall knob, and a flat metal lid may slip through a divider designed for thicker rims. Counting lids tells only part of the story. The combination of handle shape, rim thickness, and diameter determines whether a rack will hold them securely.

Make a quick inventory before browsing. Set aside lids that stay on their pans, lids that belong to rarely used cookware, and any universal lid that replaces several separate pieces. Then arrange the lids you genuinely need to reach during an ordinary week. This often reveals that a household with ten lids only needs six stored in the main cooking zone.

Try the proposed storage shelf with a temporary setup. Stand the lids in a file holder or between small boxes, then open and close the cabinet and remove the largest lid. This simple test exposes problems that dimensions alone may miss, such as a shelf above the rack blocking a tall handle or a cabinet frame narrowing the opening.

Who this is for

  • Cooks who currently stack loose lids under pans and have to unpile cookware to find the right one.
  • Kitchens with a lower cabinet, deep drawer, pantry shelf, or island shelf that can hold lids vertically.
  • Households with several lid sizes that are used often enough to justify a dedicated storage zone.
  • Renters who want a freestanding or adhesive-free solution that can move to another cabinet.
  • Anyone reorganizing cookware around a smaller set of frequently used pots and pans.

Who should skip it

  • Skip a separate rack if each lid can rest upside down on its matching pot without wasting useful cabinet space.
  • Avoid a door-mounted style when the cabinet has shallow hinges, an inset panel, or crowded shelves that leave no room behind the closed door.
  • A narrow fixed-slot rack may be a poor match for lids with thick rims, oversized knobs, or long handles.
  • If the main problem is too many unused pieces rather than disorganized storage, edit the cookware collection before adding another organizer.

What to verify before buying

  • Measure cabinet width, depth, opening height, and any space lost to a face frame, center stile, hinge, pipe, or shelf support.
  • Compare slot spacing with the thickest rim and widest handle base among the lids you plan to store.
  • Check whether dividers are fixed, removable, or adjustable and whether unused sections can be shortened.
  • Confirm the largest supported lid size and remember that a large lid may lean beyond the rack footprint.
  • For vertical storage, make sure knob and loop handles will clear the shelf above and the cabinet opening during removal.
  • For door installation, verify the mounting method, required hardware, panel thickness, screw length, and closed-door clearance.
  • Review base design, feet, coating, care guidance, and current material details on the retailer page.
  • Check what is included; cookware, extra dividers, mounting hardware, and accessories shown in styled images may not all be part of the package.

Fixed slots or adjustable dividers?

Fixed-slot racks are straightforward: place the rack on a shelf and slide one lid into each divider. They work best when the collection is fairly consistent and the spacing comfortably accepts every rim. The tradeoff is that a tight slot may reject a thick lid while a wide slot can let a slim lid tilt. Look at the usable gap rather than relying on the total number of advertised positions.

Adjustable organizers let you assign more room to thick glass lids and less to flat metal ones. That flexibility is useful for mixed cookware or for storing a skillet vertically beside the lids. It also makes the rack easier to revise when a pan is replaced. Check how the dividers attach: a flexible layout is less useful if a divider pulls free every time a heavy lid is removed.

Expandable frames can fit several cabinet widths, but expansion may create a joint or an unsupported section. Compare the dimensions in both the compact and extended configurations. If the cabinet has a face frame, make sure the expanded rack can still pass through the narrower opening even when the shelf behind it is wider.

Shelf, drawer, or cabinet door

A shelf rack is the lowest-commitment arrangement. It can sit beside stacked pans, at the back of a deep cabinet, or in a pantry. The rack needs enough weight and grip to remain in place when a lid is pulled forward. If the base slides, a removable cabinet liner may help, provided it is suitable for the shelf surface.

Deep drawers offer excellent visibility because the lids come out toward you rather than hiding behind cookware. Measure drawer height at the lowest obstruction, not just at the drawer box. Tall knobs can collide with the countertop rail, and large lids may lean into the drawer sides. Also consider whether the rack and lids will shift when the drawer opens quickly.

Door-mounted holders use otherwise empty vertical space, but they demand the most careful fit check. Close the cabinet slowly with the proposed lid position mapped using cardboard. A lid can clear the shelf edge and still hit a pan handle, hinge arm, or center divider. Screws may not suit a thin or framed door, while adhesive mounting depends on the product instructions and the door surface. Renters should not assume that any mount is damage-free.

A layout that makes cooking easier

Put everyday lids where they can be removed with one hand and without moving the heaviest pot. Larger, less frequently used lids can go at the back of a deep rack, while small saucepan lids usually deserve the easiest positions. If two lids look nearly identical, store them next to their pans or label the shelf rather than testing both during dinner preparation.

Orientation affects access. Handles facing upward are easy to grab, but tall handles require more headroom. Handles angled toward the cabinet opening may improve reach in a low shelf, yet they can consume extra depth. For deep drawers, alternating handles can prevent them from crowding one another. There is no universal arrangement; use the one that lets each lid leave the rack independently.

Do not pack every available divider simply because it exists. An empty slot can provide finger room and keep glass or coated edges from rubbing. It also leaves space for a future replacement lid without forcing a complete cabinet reorganization.

Stability, surfaces, and care

Glass lids can be heavy, especially when several lean in the same direction. A broad base, connected frame, or secure mounting method helps keep an organizer steady. Check the maker’s current guidance for capacity and intended use rather than assuming a small rack can support baking sheets, cast-iron pieces, or cutting boards as well as lids.

Coated metal, plastic, wood, and other materials each have different cleaning needs. Kitchen storage collects dust and cooking residue even inside a cabinet, so consider whether the dividers are easy to wipe and whether the rack can be removed without unloading an entire shelf. Deep intersections and closely spaced wires may take more effort to clean than an open frame.

Pay attention to contact points. Rough edges or exposed hardware can mark a shelf or cookware finish. Soft feet may reduce movement, but their suitability depends on the cabinet surface and care instructions. If lids are stored while damp, trapped water can affect the rack, shelf, or cookware rim; let washed pieces dry before returning them to enclosed storage.

Limitations

  • No rack can compensate for a cabinet opening that is smaller than the lids passing through it.
  • Advertised slot counts do not guarantee that the organizer will hold the same number of thick glass lids.
  • Vertical racks may trade shelf width for faster access, so very small cabinets can lose useful pan space.
  • Door-mounted storage can interfere with hinges or interior cookware even when the door itself is large enough.
  • An organizer reduces stacking and searching, but it does not solve duplicate, mismatched, or rarely used cookware.

Alternatives to compare

  • Store each lid upside down on its matching pot when the handle sits safely inside and the pots do not need to nest deeply.
  • Use a wide deep-drawer divider system when lids, pans, and cutting boards all need vertical storage in one place.
  • Consider a wall rail or hanging system only where installation is appropriate and lids can hang without crowding the work area.
  • Use a sturdy file-style rack for lids and sheet pans if its dimensions, stability, and intended load suit both.
  • Reduce the collection with a compatible universal lid if it genuinely fits several commonly used pans and meets your cooking needs.

FAQ

How much space should I leave between pot lids?

Leave enough room for the thickest part of each rim plus finger access. Glass lids and wide loop handles often need more space than flat metal lids, so adjustable dividers can be useful for a mixed collection.

Can a pot lid organizer hold frying pans too?

Some racks are designed for both lids and cookware, but a frying pan adds more weight and leverage than a lid. Verify the organizer’s intended uses, divider strength, base stability, and current capacity guidance before combining them.

Is a door-mounted lid holder safe for cabinet doors?

It can be suitable when the mounting method matches the door construction and the loaded holder clears hinges and interior shelves. Check panel thickness, hardware length, installation instructions, and the weight of your lids before drilling or applying a mount.

Should pot lids be stored vertically or flat?

Vertical storage usually makes individual lids easier to see and remove, while flat storage can work when a lid rests securely on its matching pot. The better method is the one that fits the cabinet and does not require unstable stacking.

How do I measure a cabinet for a lid organizer?

Measure the inside shelf and the narrower cabinet opening, then note the face frame, hinges, shelf above, and nearby cookware. Add the height of your tallest lid handle and test whether the largest lid can enter and leave at a comfortable angle.

Choosing a Rolling Utility Cart for Flexible Room-to-Room Storage

Product links are for reference. Verify current details on the retailer page before buying.

Illustrative image of a generic three-tier rolling utility cart in a home storage area

Illustrative image, not an official product photo.

Short answer

A rolling utility cart is most useful when supplies need a home but not a permanent address. It can follow a craft project to the table, move toiletries out of a shared bathroom, or bring pantry items beside a prep area and roll away afterward. Choose by measuring the cart’s complete footprint—including handles and protruding wheels—then compare usable shelf clearance, caster behavior, load guidance, and whether the frame can pass through the tightest route in your home. A tall cart with tiny wheels is not automatically more useful than a shorter, steadier model with accessible shelves.

Search reference

Rolling utility cart options

Compare the full assembled dimensions, shelf spacing, caster layout, brakes, handles, and stated load guidance for the supplies you plan to move.

View matching options

Plan the route before choosing the cart

A mobile cart should be sized for movement, not just for the empty corner where it will be parked. Measure narrow doorways, gaps beside furniture, counter overhangs, and the turning space near the intended storage spot. Baseboards can make a wall gap narrower near the floor, while an outward-facing handle may add more depth than the shelf dimensions suggest.

Floor transitions matter too. Small hard casters may roll easily across a smooth kitchen floor yet catch at a thick rug edge or raised threshold. If the cart will stay in one room, compact wheels may be sufficient. If it will travel between a pantry, dining area, and home office, wheel size and route clearance deserve as much attention as shelf count.

Who this is for

  • Renters who want extra storage without drilling shelves into a wall.
  • Crafters who need to move current project supplies to and from a worktable.
  • Shared households where bathroom, laundry, or cleaning supplies must be rolled out of the way.
  • Small kitchens that need a movable station for lightweight pantry goods or prep tools.
  • Home offices that need flexible storage for paper, notebooks, cables, and frequently used supplies.

Who should skip it

  • Choose a fixed shelving unit when storage will never move and maximum stability is the priority.
  • Avoid a light utility cart for heavy appliances, large water containers, or other loads outside its stated guidance.
  • Consider a purpose-built tool cart if sharp, oily, or very heavy equipment needs secure transport.
  • A carry basket may be simpler when only a few lightweight items move between rooms.
  • Do not rely on an open cart where children or pets can easily reach unsafe household products.

What to verify before buying

  • Check assembled width, depth, and height rather than relying on shelf dimensions alone.
  • Compare usable clearance between tiers with the tallest bottle, bin, or tool you intend to store.
  • Review the stated total load and per-shelf guidance, including whether weight should be distributed evenly.
  • Confirm the number and type of casters, which wheels lock, and whether replacement casters are discussed.
  • Look for a handle position that works from the side you can reach in the intended parking spot.
  • Verify frame, tray, and fastener material wording along with cleaning and moisture-care instructions.
  • Check whether shelves have solid or ventilated bottoms, raised lips, drainage holes, or removable components.
  • Confirm what assembly is required and which pictured hooks, cups, liners, or bins are actually included.

Shelf layout changes how the cart works

Deep tray lips help contain small bottles and loose supplies while the cart is moving, but they can make a low shelf harder to see and reach. Open wire shelves offer visibility and may let crumbs or water pass through, though narrow items can tip unless a liner or bin is added. Solid shelves are easier to use with small objects, but any spills need to be noticed and cleaned rather than draining away.

Do not count tiers without checking vertical clearance. Three evenly spaced shelves may suit folded cloths and short jars, while a tall spray bottle or roll of paper can require an adjustable shelf or an open top tier. If the cart will change jobs over time, adjustable components can be useful—but only if the adjustment range matches realistic storage setups.

Wheels, brakes, and load placement

A cart feels different once it is filled. Place denser items low and spread weight rather than loading one upper corner. This lowers the center of gravity and can reduce tipping during turns, but it does not override the manufacturer’s load guidance. Side hooks and hanging cups also shift weight beyond the wheelbase, so treat them as storage for light accessories rather than a way to expand capacity indefinitely.

Wheel locks are helpful when the cart becomes a temporary station, but confirm what the lock controls. Some designs stop wheel rotation, some limit swiveling, and product wording may not make the distinction obvious. A brake also cannot compensate for a sloped floor, overloaded frame, or an uneven route.

Match the cart to one primary job

A cart can be repurposed, but choosing one main use prevents a collection of poorly fitting supplies. For a craft cart, check paper dimensions, upright tool storage, and whether small pieces need lidded bins. For bathroom use, think about airflow, splash exposure, and keeping personal items separated. A pantry cart needs clear bottle height and an easy-to-clean shelf surface. An office cart may benefit more from quiet rolling and file-friendly dimensions than deep tray walls.

If the contents should stay hidden, an open utility cart may create more visual clutter than it solves. Matching bins can organize small items, yet bins reduce usable shelf dimensions and add another measurement step. Account for both the outer bin size and the hand space required to lift it out.

Limitations

  • A narrow, tall cart can feel less stable when heavy items are placed on upper tiers.
  • Small casters may struggle on rugs, thresholds, grout lines, or uneven flooring.
  • Open shelves expose contents to dust and do not secure items during abrupt movement.
  • Locks reduce unwanted rolling but do not make a mobile cart equivalent to anchored furniture.
  • Added bins, hooks, and liners can improve organization while reducing clearance or changing weight balance.
  • Moisture resistance, load guidance, replacement parts, and included accessories vary by listing and should be checked before purchase.

Alternatives to compare

  • A fixed bookcase or modular shelf for higher-capacity storage that stays in one place.
  • A lidded storage tote for seasonal items that need dust protection rather than frequent access.
  • A carry caddy for a small group of cleaning, grooming, or craft supplies.
  • A drawer unit when contents should be concealed and separated into shallow categories.
  • A purpose-built kitchen island, tool cart, or laundry sorter when the main job requires a work surface or specialized features.

FAQ

Are three tiers enough for a rolling utility cart?

Three tiers suit many everyday setups, but shelf clearance matters more than the tier count. List the items for each level, measure the tallest one, and make sure your hand can reach it without unloading the shelf above.

Will a rolling utility cart work on carpet?

It may work on low-pile carpet, but small casters generally face more resistance on soft or uneven surfaces. Check the wheel design and intended floor guidance, then consider whether the loaded cart must cross rug edges or thresholds.

Should all the wheels have brakes?

Not necessarily, but you should know how many wheels lock, where they are positioned, and whether you can reach them after parking the cart. The right arrangement depends on how often the cart moves and whether it becomes a stationary work or supply station.

What should go on the bottom shelf?

Place compact, denser supplies low when practical, while staying within the stated shelf and total load guidance. Keep frequently used lightweight items higher, and avoid storing hazardous products where children or pets can reach them.

Can a utility cart be used in a bathroom?

It can hold towels and toiletries, provided its materials and care instructions are suitable for the room’s moisture and splash exposure. Allow wet items to dry, clean spills promptly, and do not assume every metal or composite cart is intended for humid conditions.

A Wall-Mounted Key Holder That Works with Your Entryway Routine

Product links are for reference. Verify current details on the retailer page before buying.

Illustrative image of a generic wall-mounted key holder in an entryway

Illustrative image, not an official product photo.

Short answer

A useful wall-mounted key holder should make keys easier to drop off than to leave on a counter. Start by choosing a spot along the route through your main door, then count the everyday key rings that need separate hooks. Check hook spacing for bulky fobs, the mounting method for your wall, and whether a shelf or mail slot would solve a real entryway problem. A compact rack is often better than a feature-heavy organizer if the larger design crowds a light switch, door frame, or narrow hallway.

Search reference

Wall-mounted key holder options

Compare current hook layouts, mounting hardware, shelf dimensions, and organizer formats with the wall space beside your usual entrance.

View matching options

Plan around the doorway, not the empty wall

The most important measurement is not the width of the key holder. It is the usable area where someone can reach it while arriving with a bag, closing the door, or turning on a nearby light. A rack that fits an open patch of wall may still be inconvenient if it sits behind the door, above shoulder height, or across the hall from the natural walking path.

Use removable tape to mark the proposed outline before ordering. Open the door fully, operate nearby switches, and make sure coats or tote bags will not snag on the hooks. In a shared entrance, place the rack where shorter household members can use it comfortably without creating a head-level obstacle for anyone else.

Placement also affects what belongs on the organizer. Keys used every day should have the easiest hooks. A shallow shelf can hold sunglasses or a small wallet, but it can also become a clutter ledge. Mail compartments are helpful only if paper really enters through that door and has another place to go after sorting.

Who this is for

  • Households that repeatedly misplace keys on counters, desks, or in different bags.
  • Renters or homeowners who want a small entryway landing zone without adding floor furniture.
  • Families that need separate, visible spots for house, car, mailbox, or utility key rings.
  • People combining keys with one or two lightweight departure items such as sunglasses or a dog leash.
  • Small hallways where a narrow wall organizer is more practical than a console table.

Who should skip it

  • Anyone who routinely keeps every key inside the same handbag, backpack, or closed drawer.
  • Renters who cannot make wall holes and do not have a suitable surface for the listed adhesive method.
  • Households needing secure or concealed key storage rather than an open rack near an entrance.
  • Entryways where exposed hooks would project into a tight walking path.
  • Buyers mainly trying to manage coats, heavy bags, or umbrellas, which usually need a different wall system.

What to verify before buying

  • Measure the full width, height, shelf depth, and hook projection against the intended wall area.
  • Count everyday key rings and allow extra side-to-side space for large car fobs and wrist straps.
  • Confirm whether mounting hardware is included and which wall materials it is intended to fit.
  • Check the stated installation process before assuming the rack can be mounted without drilling.
  • Review any shelf lip, mail slot, tray, or cubby dimensions rather than judging capacity from photos.
  • Look for care guidance appropriate to the listed wood, metal, plastic, or mixed-material finish.
  • Consider whether keys will be visible from a window or open doorway and choose placement accordingly.

Hooks, spacing, and usable capacity

Hook count is only a rough capacity guide. Closely packed hooks may look efficient, yet wide key fobs can overlap and hide the rings behind them. If several drivers use the organizer, compare center-to-center hook spacing and hook depth. Open hooks are quick to use; more enclosed hook shapes may hold a ring more securely but can take an extra moment to load.

Think about weight item by item. A normal key ring and a lightweight leash are different from a loaded handbag or winter coat. Do not treat every hook as general-purpose storage unless the current instructions explicitly support that use and the rack is installed into an appropriate wall structure.

Labels can help a shared household, but permanent printed categories are less flexible when routines change. A simple row of visually distinct hooks or small removable labels may be easier to adapt after a move, a new vehicle, or a change in who uses the entry.

Shelf, mail slot, or hooks only?

A hooks-only rack has a clear job and a shallow profile. It suits narrow hallways and households that already have a tray or drawer for pocket items. It is also less likely to collect receipts, loose change, and unopened mail.

A top shelf makes sense when one or two small departure items need to stay with the keys. Check whether the shelf has enough depth and a raised edge; a narrow, flat ledge may not hold rounded sunglasses cases or a wallet securely. Avoid placing fragile objects on a rack beside a door that vibrates when it closes.

Mail pockets can support a deliberate sorting routine, especially in a small apartment without a console table. They are less useful when envelopes accumulate for weeks or when thick catalogs prevent easy access to the hooks below. If paper management is the main goal, compare a dedicated wall file with a separate compact key rail.

Mounting choices deserve a closer look

Screw-mounted key holders can provide a stable installation when the supplied or separately chosen hardware matches the wall. Drywall, wood, masonry, tile, and other surfaces do not all use the same fasteners. Product instructions should guide the installation, and heavier intended loads may require anchoring into suitable structure.

Adhesive mounting avoids holes but is not automatically compatible with every painted, textured, damp, or porous surface. Check surface preparation, curing time, removal guidance, and load limits in the current listing. An adhesive rack that releases can damage items below even when the keys themselves are light.

Some organizers use hidden keyhole slots or a separate mounting plate. These can create a tidy appearance, though screw spacing must be accurate. Before drilling, use the actual product or its verified template rather than relying only on approximate dimensions from a search image.

Materials and entryway upkeep

Metal racks can keep hook profiles relatively slim, while wood or wood-look organizers may blend with entryway furniture. Mixed-material versions often add a shelf, basket, or mail compartment. Material names alone do not establish finish quality or load capacity, so compare the current construction description and installation instructions.

Keys swing against the wall and the organizer during daily use. A back panel can reduce direct contact with paint, while a rack made only from a rail and hooks may leave the wall exposed. If scuffs are a concern, look at the distance between the hooks and mounting surface.

Entryways collect dust, damp outerwear, and residue from frequently handled objects. Choose a finish with care instructions that fit your routine. Deep decorative cutouts and wire baskets may take longer to dust than a plain rail and shallow shelf.

Limitations

  • An open key rack makes keys visible, so placement should account for windows, visitors, and the view through the doorway.
  • Extra shelves and mail slots can attract clutter rather than improve the departure routine.
  • Included fasteners may not be suitable for every wall type or intended load.
  • Adhesive performance depends on the surface, preparation, curing, environment, and stated limits.
  • A key holder organizes items only when household members consistently return them to the assigned hooks.
  • Search listings can change; verify dimensions, materials, included hardware, and installation guidance on the current page.

Alternatives to compare

  • A small entryway tray when keys, earbuds, and wallets are usually emptied from pockets together.
  • A closed drawer or cabinet when keys should stay out of sight.
  • A magnetic key strip for compatible metal key rings and a very minimal setup.
  • A wall-mounted mail organizer when incoming paper is the larger problem and keys are secondary.
  • A freestanding console or narrow shoe cabinet when the entrance also needs substantial storage.

FAQ

How many hooks should a wall-mounted key holder have?

Count the key rings used regularly and give each one its own hook, then consider one or two spare positions. Hook spacing matters as much as the total because bulky car fobs can overlap when hooks are close together.

Where should I install a key holder near the front door?

Choose a reachable spot along the normal path into and out of the home. Check the door swing, light switches, coat movement, walking clearance, and visibility from outside before fixing the position.

Can an adhesive key holder work without drilling?

It can be an option only when the listed adhesive method suits the wall surface and intended load. Follow the current preparation and curing instructions, and do not assume textured or delicate paint is compatible.

Is a shelf useful on a key rack?

A shelf is useful when it has verified dimensions for a small wallet, sunglasses case, or another item that leaves with the keys. If it has no specific purpose, a shelf can simply become a place for clutter.

Should keys be stored beside the door?

Door-side storage is convenient, but an open rack should not expose keys to easy reach or a clear outside view. A less visible wall, closed cabinet, or drawer may be more appropriate for some entrances.

Rotating Pantry Turntables for Spices, Condiments, and Deep Shelves

Product links are for reference. Verify current details on the retailer page before buying.

Illustrative image for a rotating pantry turntable buying guide

Illustrative image, not an official product photo.

Short answer

A rotating pantry turntable is most useful when small jars, oils, sauces, snacks, or cleaning bottles disappear at the back of a shelf. The right one is less about buying the biggest circle and more about matching diameter, rim height, surface grip, clearance, and load expectations to the exact cabinet or pantry zone. Measure the shelf depth and opening first, then decide whether a single-tier turntable, divided tray, high-rim spinner, or tiered rotating organizer fits the way you actually reach for items.

Search reference

Rotating pantry turntable options

Compare diameter, rim height, tier layout, base stability, cleaning guidance, and whether the organizer clears cabinet doors, hinges, and shelf edges.

View matching options

Why a turntable solves a different storage problem

Bins and rectangular trays are good when you want to pull a whole category forward. A turntable solves a different problem: it lets you bring the back row to the front without removing everything around it. That matters in upper cabinets, narrow pantry shelves, corner spaces, under-sink areas, craft cabinets, and refrigerator-adjacent condiment shelves where items are easy to lose behind taller bottles.

The tradeoff is shape. A round organizer leaves unused corners on a rectangular shelf, so it works best when access matters more than maximum square-inch storage. If a cabinet is already tight, a turntable can either make the space feel easier or waste useful room. The decision should start with the shelf, not with the product photo.

Who this is for

  • Home cooks who keep spices, oils, vinegars, extracts, or seasoning jars in a deep cabinet.
  • Pantry shelves where small jars, snack containers, vitamins, drink mixes, or condiments get hidden behind larger items.
  • Renters who want a non-permanent organizer for upper cabinets, bathroom storage, craft supplies, or under-sink bottles.
  • Households setting up a first apartment, shared kitchen, or guest kitchen where categories need to stay visible.
  • Anyone who prefers rotating access over pulling out a full bin or rearranging a shelf every time.

Who should skip it

  • Skip a round turntable if the shelf is very shallow, blocked by a center stile, or too narrow for the diameter you need.
  • Use rectangular bins if you want to maximize every corner of a pantry shelf or store many square packages together.
  • Avoid tiered rotating designs when cabinet clearance is low or tall bottles need to stand upright.
  • Do not rely on a lightweight spinner for heavy glass bottles, oversized jars, tools, or anything that could tip when rotated quickly.

What to verify before buying

  • Measure shelf depth, shelf width, door opening, hinge position, and the height available above the items you plan to store.
  • Check the listed diameter and remember that a circular organizer may need extra room to turn without rubbing the cabinet side.
  • Compare rim height: a low rim is easier for short jars, while a higher rim may help keep bottles from sliding during rotation.
  • Review whether the base has non-slip feet, a smooth bearing, a divided layout, handles, or removable sections.
  • Verify material wording, cleaning instructions, and whether the organizer is intended for pantry, refrigerator, bathroom, or under-sink use.
  • Confirm the number of pieces included if photos show multiple turntables, tiers, or staged accessories.
  • Check whether the listing mentions load guidance, especially if you plan to store oils, sauces, glass jars, or cleaning products.

Diameter, rim, and shelf clearance

Diameter is the first number to check, but it is not the only one. A turntable that technically fits inside a cabinet can still be frustrating if it hits the door frame, rubs against a side wall, or blocks nearby items. Leave enough clearance for your hand to rotate the tray and for taller items to move past the shelf edge.

Rim height changes how the organizer behaves. A low rim keeps labels easy to see and makes it simpler to lift out short spice jars. A high rim can feel more secure for bottles, packets, and small snack containers, but it may hide labels or make short items harder to grab. Divided turntables add separation, though fixed dividers can limit how larger bottles fit.

Tiered rotating organizers are tempting because they improve visibility, but they need careful height planning. Measure the tallest item on each tier and the cabinet opening, not just the open shelf interior. If a tiered unit only works when bottles are perfectly arranged, it may become annoying in a busy kitchen.

Where it works best around the home

In a spice cabinet, a turntable can keep frequently used seasonings from migrating behind rarely used jars. For cooking oils and sauces, a wider tray with a stable rim may make more sense than a small spice spinner. In a pantry, rotating organizers work well for small categories such as extracts, tea tins, drink drops, sprinkles, nut butters, or single-serve snacks.

Outside the kitchen, the same idea can help with bathroom bottles, craft paints, laundry additives, pet-care supplies, or small cleaning items. Under a sink, pay close attention to plumbing, door hinges, and bottle height. A turntable can make round bottles easier to reach, but it is not a substitute for leak-safe storage or child-safety planning.

Cleaning and everyday use

A turntable only stays useful if it is easy to reset. Smooth surfaces wipe faster than textured bottoms, while clear plastic can make small spills easier to notice. Open rims are simple, but sticky bottles and spice dust can collect around the edge. If the organizer has a bearing or rotating base, check whether the listing gives any cleaning restrictions before rinsing or soaking it.

Think about label visibility, too. If you store identical spice jars, a turntable may work better when labels face outward or when the jars are grouped by cooking routine. For mixed pantry items, keep the category small. A spinner filled with unrelated bottles, packets, and jars can become just as messy as the shelf it replaced.

Limitations

  • A round organizer improves access but may waste corner space on rectangular shelves.
  • Large bottles can tip or crowd the rim if the tray is too small or rotated too quickly.
  • Tiered designs can reduce vertical clearance and may not fit tall items inside closed cabinets.
  • Very light turntables may shift if the base lacks grip or if the shelf surface is slick.
  • Materials, cleaning instructions, load guidance, and included pieces vary by listing, so verify current details before buying.

Alternatives to compare

  • Pull-out cabinet bins when you want to remove a full category and see everything at once.
  • Stackable pantry bins for boxed snacks, packets, and rectangular packages.
  • Spice drawer inserts if you have a wide drawer and prefer labels facing up.
  • Door-mounted racks when cabinet shelves are full but the door has safe clearance.
  • Two-tier under-sink organizers for taller bottles that need vertical separation rather than rotation.

FAQ

What size rotating turntable should I choose for a pantry shelf?

Measure the usable shelf depth and width, then choose a diameter that leaves room for the tray to spin and for your hand to reach inside. Do not use the outside cabinet measurement alone, because door frames, hinges, and shelf lips can reduce the space.

Is a Lazy Susan turntable better than a rectangular bin?

A turntable is better when you want to rotate small items into view without pulling out a whole container. A rectangular bin is usually better when you need to use shelf corners efficiently or store boxed and square packages together.

Do high-rim turntables work for spice jars?

They can, but a very high rim may hide short labels or make small jars harder to lift out. For spice storage, compare jar height, label position, rim height, and whether the tray has dividers that match your jar sizes.

Can I use a rotating organizer under the sink?

Yes, if it fits around plumbing and leaves enough door clearance. Check bottle height, base stability, and cleaning guidance, and avoid storing anything that should be kept out of reach or protected from leaks without additional safety planning.

Are clear plastic turntables easier to maintain?

Clear plastic can make spills, crumbs, and misplaced items easier to see, but maintenance depends on the exact material and construction. Verify cleaning instructions and avoid assuming that every organizer can be soaked, dishwashed, or used in damp areas.