Bottle Cleaning Brush Sets: Match the Head to the Opening

Product links are for reference. Verify current details on the retailer page before buying.
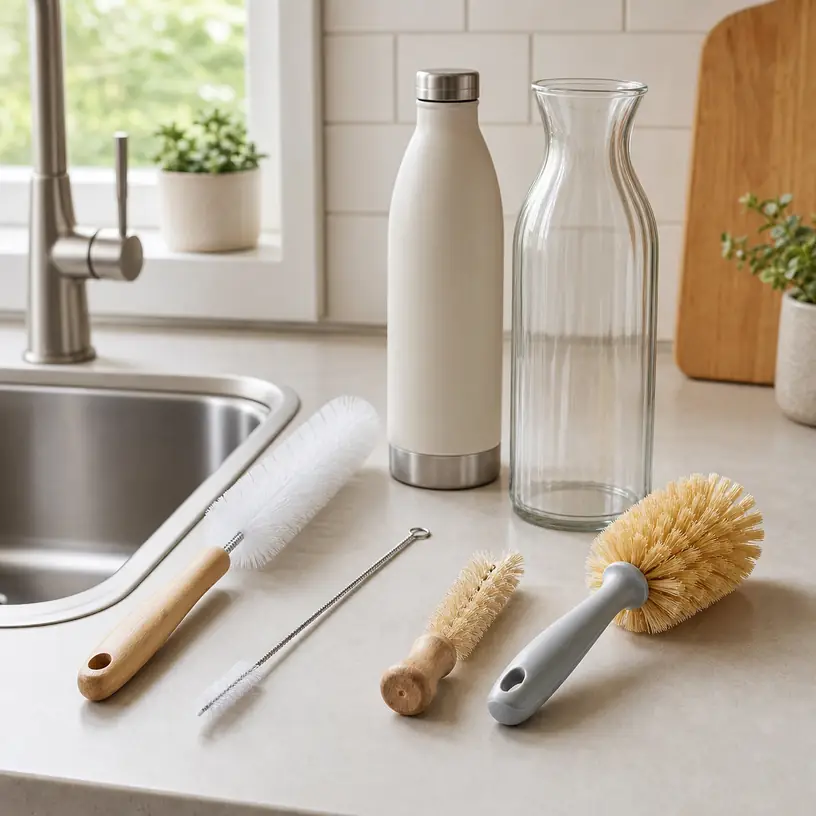
Illustrative image of generic bottle and straw cleaning brushes beside narrow drinkware

Illustrative image, not an official product photo.

Short answer

The useful brush is the one that can pass through the opening, reach the bottom, and make controlled contact with the surfaces that need cleaning. Before comparing sets, measure the narrowest opening and interior depth of the bottle, carafe, travel mug lid, or straw you intend to clean. A long brush with a large fluffy head may look capable but stop at a narrow neck; a slim brush may reach the base yet barely touch a wide sidewall. Compare head diameter, bristled length, tip coverage, shaft flexibility, handle grip, and whether the brush can be rinsed and dried without hidden residue. A mixed set makes sense only when its pieces correspond to distinct jobs rather than repeating several near-identical sizes.

Search reference

Bottle cleaning brush sets

Compare brush-head dimensions, usable reach, tip construction, shaft stiffness, intended surfaces, care directions, and the storage method for every piece in the set.

View matching options

Start with the object, not the brush count

A household may use the words “bottle brush” for several different tools. One has a broad cylindrical head for reusable water bottles. Another is a thin twisted-wire brush for straws. A short detail brush works around threads, valves, gaskets, and lid channels. Some sets also include an angled head for corners or a narrow brush long enough for a carafe. The number printed on a package says little unless each shape has an assignment in your kitchen.

Make an inventory of the objects that are genuinely awkward to clean. Separate the main vessel from removable parts. A bottle body, cap, drinking spout, silicone gasket, straw, and narrow channel can require different access even though they belong to one item. Check the drinkware maker’s care instructions first: a removable part should be taken out only as directed, and some surfaces or components may restrict the type of brush or cleaning method that can be used.

Then identify the point where access becomes tightest. The mouth may be narrower than the interior, a shoulder may prevent a straight brush from reaching an upper corner, or a fixed straw may bend before the tool reaches its full depth. Product photos often show the entire brush, not the diameter of the bristled head or the working length below the handle. Look for stated measurements and a shape that corresponds to your actual cleaning path.

Who this is for

  • Households that regularly clean reusable bottles, tumblers, carafes, or jars whose interiors are difficult to reach with a dishcloth.
  • People who need separate tools for a vessel body, removable straw, cap threads, and small lid recesses.
  • Shared kitchens where clearly assigned brush shapes can keep drinkware tools distinct from general dish or sink cleaning tools.
  • Anyone replacing a brush with crushed bristles, exposed wire, a loose head, trapped residue, or a handle that no longer provides secure control.
  • Buyers willing to rinse, inspect, and fully dry several small tools after use rather than leaving a damp bundle beside the sink.

What to verify before buying

  • Maximum head diameter: Compare the widest bristled point with the narrowest opening it must enter. Check whether the head compresses by design without forcing it.
  • Bristled length and tip coverage: A rounded or bristled tip can contact the base differently from a brush whose shaft or wire extends beyond the working material.
  • Usable reach: Measure from the leading tip to the point where the handle or guard stops entry, not simply the product’s overall length.
  • Shaft behavior: Determine whether the shaft is rigid, gently flexible, or intended to bend. Too much flex can reduce scrubbing control; too little can miss an offset corner.
  • Bristle or cleaning-head material: Read the current material description and surface guidance. Do not assume a soft appearance makes a brush suitable for every coating or finish.
  • Handle and guard: Look for a grip that remains controllable when wet and a shape that reduces the chance of the hand striking a narrow rim.
  • Small-part construction: For straw and detail brushes, inspect the tip, twisted-wire ends, loops, caps, and any protective covering for exposed or sharp areas.
  • Care directions: Confirm the approved washing method, water or temperature guidance, disassembly instructions, and replacement advice for each piece.
  • Drying arrangement: Check whether the set hangs, stands, or uses a holder that lets water drain while keeping brush heads from touching the counter.
  • Set composition: Verify the quantity and dimensions of individual pieces. Similar-looking brushes in one listing may have different working diameters and lengths.

Use three measurements to narrow the field

The first measurement is the opening diameter. Measure the narrowest rigid section the brush must pass through, while following the item’s care guidance and keeping any measuring tool from damaging the rim. A brush head that is slightly compressible may enter a smaller mouth than its relaxed diameter, but heavy force can bend bristles backward, stress the neck, or make removal difficult. If a seller does not state the head width, a styled photo is not a dependable substitute.

The second is the interior depth from the opening to the farthest surface. Compare it with usable reach rather than total handle length. A hanging loop, hand guard, thick grip, or angled neck can stop at the rim. For a deep bottle, the hand should retain a secure part of the handle while the bristles reach the base; a tool that disappears almost entirely into the vessel is awkward to control and retrieve.

The third is the interior width and contour. A slender brush can travel through a narrow neck but may need enough bristled length or controlled flex to contact broader walls. Bottles with shoulders, square corners, recessed bases, or internal features can leave areas outside a straight cleaning path. Do not compensate by bending a brush unless the product instructions permit it. A purpose-shaped head or a maker-approved cleaning method may be more appropriate.

Straws need their own measurements. Compare the internal diameter and full path length, including any intended bend. The brush should pass without scraping exposed metal against the interior, and its working section should extend through the complete channel. If the straw has a valve, fixed bend, unusual lining, or nonremovable component, follow its specific instructions instead of pushing a generic wire brush through resistance.

Head geometry changes where the pressure lands

A full cylindrical head makes contact around much of a straight bottle wall and can cover a broad area with fewer rotations. Dense bristles may hold more cleaning solution and loose material, which makes prompt rinsing important. When the cylinder ends in an unbristled cap, wire loop, or shaft extension, the base may receive less contact than the sidewall. Inspect the tip design rather than assuming every part of a rounded silhouette is a working surface.

A rounded tuft or fan-shaped end directs more of the cleaning material toward the base and curved lower edge. It can be useful when the bottom is the difficult area, but a bulky tip still needs to pass through the neck. An angled side head may reach under a shoulder more readily, provided its shaft and handle permit controlled positioning. None of these shapes confirms compatibility with a particular finish; current instructions for both brush and vessel take priority.

Molded fins, foam-like heads, fibers, and conventional bristles do not behave identically. Widely spaced molded elements can be easy to inspect but may contact textured surfaces differently from fine bristles. A porous-looking head may hold liquid yet require a more deliberate rinsing and drying routine. Product names such as “scratch-free,” “soft,” or “heavy duty” are not precise measurements of pressure or surface suitability. Use light pressure first and stop if the maker’s instructions or the surface condition raise concerns.

A detail brush has a different role. Threads, cap recesses, and removable gasket channels often need short bristles and fingertip control rather than maximum reach. The tool should fit the feature without jamming, and the user should be able to see or feel where the working head is going. Never probe a powered lid, concealed mechanism, sharp component, or nonremovable assembly beyond its cleaning directions.

Shaft and handle determine control

A rigid shaft transfers hand movement directly to the head, which can help with straight, deep vessels. It may also keep the brush from following a curved straw or reaching behind a shoulder. A flexible shaft follows some contours, but excessive flex can cause the head to whip, fold, or lose pressure. Check whether flexibility is an intended feature and whether repeated bending is permitted; a twisted wire that happens to bend is not necessarily designed for reshaping.

Handle length is only useful when the grip remains outside the opening at full reach. A broad stop or hand guard can protect fingers from striking the rim, although it may prevent entry into a recessed or unusually shaped mouth. With glass or ceramic vessels, controlled contact is especially important: do not drive a rigid metal core into the base or use the handle as a lever against the rim.

Wet handling deserves attention. Smooth decorative handles can rotate when coated with dish solution, and a very thin grip may be tiring during repeated cleaning. Look for a shape that can be held without squeezing excessively. If a set hangs from a ring or clips into a handle, confirm that the connection is intended for storage and does not interfere with the grip or trap water after washing.

Small brushes need a visible, organized home

Straw and crevice brushes are easy to lose in a utensil drawer. A loop, stand, or labeled compartment can keep them together, but storage should not press dirty heads against clean tools. Avoid dropping a narrow wire brush loose into a drawer where its tip can catch a hand. Any protective cap should be used only as directed and only after the brush is clean and dry.

A countertop holder is helpful when it has enough clearance for every head and can be emptied and cleaned. If bristles rest in pooled water, the holder is undermining the drying process. Hanging creates airflow when the head remains separated from the wall, faucet, and neighboring tools. Whatever arrangement you choose, brush heads should not touch the sink basin or become confused with brushes assigned to unrelated cleaning tasks.

Color coding can help in a shared kitchen, but shape and location are stronger cues. For example, keep the slim straw brush with reusable drinkware parts, the detail brush in its own slot, and a general bottle brush away from tools used for pet bowls, household cleaning, or other separate assignments. Replace a missing label or unclear routine before several similar brushes become interchangeable by accident.

Cleaning the cleaning tool

Rinse the brush promptly according to its care instructions, directing water through the center and around the base of the head rather than only over the outer bristles. Remove visible debris with an approved method; do not reach into a dense head where wire or hard internal parts may be hidden. If cleaning solution remains trapped, repeat the rinse instead of storing the brush because the exterior looks clear.

If machine washing is permitted, confirm placement and whether all components share the same guidance. A dishwasher-safe statement does not guarantee that a deep handle socket, crowded bristle core, or storage ring will drain during the cycle. Inspect the brush when it comes out and allow additional air-drying as needed. Do not enclose or stack the set while damp.

Check the head-to-shaft connection and the end of every wire brush before each use. Retire a tool with rust-like changes, exposed or projecting wire, loose bristles, a detached cap, torn fins, permanent residue, strong persistent odor, cracks, or a handle that slips around the shaft. Replacement timing depends on condition, frequency, construction, and maker guidance rather than a universal calendar.

Who should skip it

  • A wide-mouth vessel that is fully accessible with a suitable dishcloth or maker-approved cleaning tool may not need a dedicated bottle brush.
  • Buyers who need only one known diameter and depth may get better control from a single well-matched brush than from a large assortment.
  • A generic brush set is not a substitute for the specified cleaning system for a valve, pump, powered lid, filter assembly, or other specialized component.
  • Anyone without a ventilated place to dry several pieces should solve the storage problem before adding a multi-brush set.
  • Replace rather than improvise with a damaged brush; exposed wire or a loose head should not be pushed into drinkware.

Limitations

  • Search-listing photos may not provide reliable head diameter, usable reach, wire-tip construction, or scale.
  • A brush that fits through an opening may still miss shoulders, corners, recessed bases, valves, or lid channels.
  • Compressible bristles do not make every oversized head safe to force through a narrow neck.
  • Soft-looking cleaning material is not proof of compatibility with a coated, printed, polished, or otherwise sensitive surface.
  • Flexible shafts can improve access but reduce pressure control and may not be intended for repeated reshaping.
  • More pieces create more drying, inspection, identification, and storage work.
  • A brush removes reachable residue; it does not replace the drinkware maker’s complete washing, sanitizing, disassembly, or replacement directions.
  • Hidden cracks, fixed internal components, and inaccessible channels may require a different product or cleaning approach.

Alternatives to compare

For a wide-mouth jar or bottle, a suitable dishcloth with a handled utensil designed to hold it may offer visible contact without storing another bristled tool. A dedicated straw brush is a simpler purchase when narrow tubes are the only difficult item. Cleaning tablets or soaking methods may be mentioned in a vessel’s instructions, but ingredient, concentration, contact time, rinsing, and material compatibility must follow the applicable directions; soaking does not guarantee that all residue has been removed. A maker-specific lid or valve tool is preferable when a specialized component requires a particular shape. In some cases, choosing drinkware with a wider opening and fewer inaccessible parts reduces the cleaning burden more effectively than adding brushes.

FAQ

How do I know whether a bottle brush will fit through the opening?

Measure the narrowest rigid opening and compare it with the brush’s stated maximum head diameter. Also inspect the tip and the transition from head to shaft. Do not rely on overall product length or force a large compressible head through the neck; fit must allow controlled entry and removal.

What length bottle brush do I need?

Measure the interior depth, then compare it with usable reach from the brush tip to the point where the handle or guard stops at the rim. The bristles should reach the base while enough handle remains outside for a secure grip. Overall brush length can overstate practical reach.

Do I need both a bottle brush and a straw brush?

You need both only when you regularly clean a wider vessel and a narrow tube that one head cannot serve safely. A bottle brush supplies sidewall and base contact; a straw brush has a much smaller working diameter. Match each tool to stated dimensions and the item’s cleaning directions.

Are silicone-style bottle brushes better than bristles?

Neither construction is universally better. Molded fins may be easy to inspect and rinse, while fine bristles can contact textures and contours differently. Compare fit, tip coverage, shaft control, approved surfaces, cleaning access, and drying requirements instead of choosing by material label alone.

How should bottle brushes dry between uses?

Follow the care directions, shake or drain excess water as appropriate, and place each clean brush where air can circulate around the head without contact with the sink or counter. Empty any holder that collects water. Do not cover, bundle, or return the brushes to a closed drawer until they are fully dry.
Pastry Brushes for Baking: Bristles, Control, and Cleanup

Product links are for reference. Verify current details on the retailer page before buying.

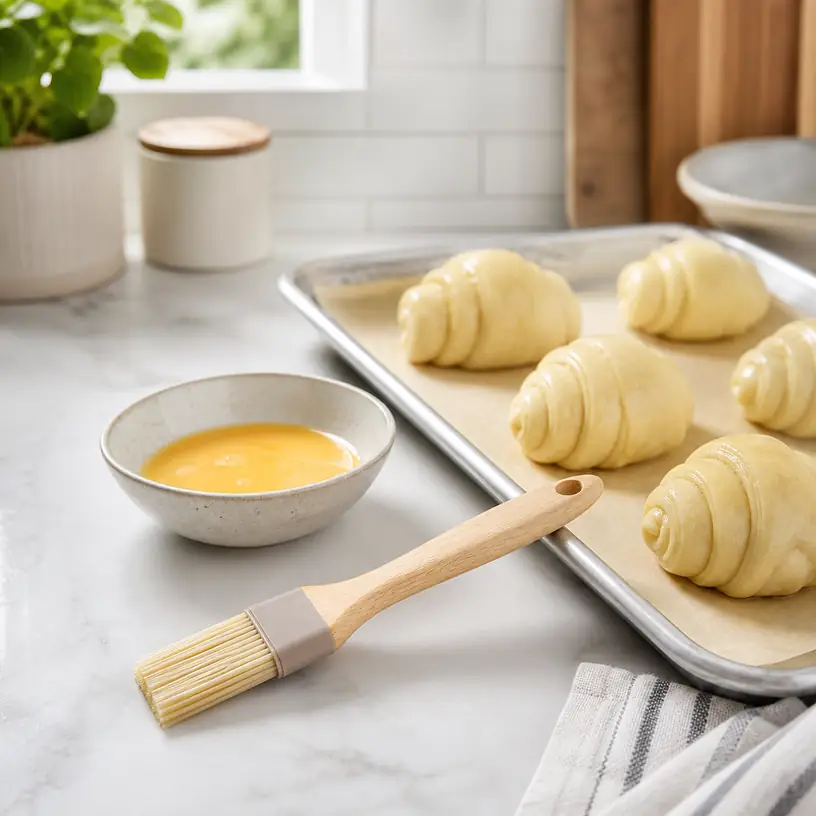
Illustrative image of a generic pastry brush beside egg wash and unbaked pastries

Illustrative image, not an official product photo.

Short answer

Choose a pastry brush around the jobs you repeat, not around the largest set. A soft, relatively narrow head can help place egg wash along delicate dough without flooding seams; a broader head may cover bread or sheet-pan work faster; and a firmer silicone-style brush can be convenient for melted butter or other liquids when the stated temperature and care instructions suit the task. Compare the working width, bristle or tine density, liquid retention, handle balance, head attachment, cleaning access, drying routine, and protected storage. If the same kitchen also uses a brush for strongly flavored marinades, keeping a clearly separate baking brush can simplify flavor control and food-handling routines.

Search reference

Pastry brushes for baking

Compare head width, bristle construction, shedding precautions, heat guidance, handle length, cleaning access, and storage before choosing a brush.

View matching options

Begin with the layer you are trying to apply

A pastry brush does not have one universal assignment. It might spread a thin egg wash over shaped rolls, carry melted butter onto dough, remove loose flour, dampen an edge before sealing, grease a pan, or coat the exposed surface of a loaf. Each job places different demands on the head. A brush that holds a generous amount of liquid can make quick work of a broad surface but may release too much near a crimped edge. A small brush offers more placement control, though repeated refilling can make a large batch slow.

Think about the texture under the brush as well. Chilled laminated dough, soft proofed dough, a crumbly pie edge, and the solid surface of a baking dish should not all be handled with the same pressure. A flexible head that follows a curve may be useful on rolls, while defined bristle tips can reach uneven details. The practical goal is an even film with as little dragging, pooling, and deformation as possible—not simply moving the greatest volume per stroke.

Make a short list of the actual liquids you use. Egg wash can have a different body from melted butter, milk, glaze, oil, or water. Thick mixtures may remain between densely arranged elements, while very thin liquids can run down a handle if the brush is overloaded. Product descriptions rarely capture every recipe, so head geometry and cleaning access are more dependable comparison points than sweeping claims about “all basting.”

Who this is for

  • Home bakers applying egg wash to breads, rolls, hand pies, or other shaped dough.
  • Cooks who want more control than pouring or spooning when spreading melted butter or a light coating over a broad surface.
  • Households replacing an old brush that has loose bristles, a cracked handle, trapped residue, or an insecure head.
  • Batch bakers who can match a wider head to sheet-pan work while keeping a smaller brush for detailed edges.
  • Kitchens willing to clean and dry the spaces at the base of the head immediately after use.

Who should skip it

  • Someone who bakes only occasionally may be able to use the back of a spoon, a clean piece of folded parchment, or another recipe-appropriate tool already in the kitchen.
  • A refillable oil mister serves a different purpose when the goal is a very light spray rather than direct brushing, provided the ingredients and equipment instructions are compatible.
  • A dedicated barbecue or grill brush is a better category to compare for outdoor cooking; a delicate pastry tool should not be assumed to tolerate those surfaces or temperatures.
  • Avoid a multi-piece set if the extra sizes will be difficult to identify, store, or keep separate by use.
  • Do not continue using any brush with loose fibers, torn tines, exposed hardware, cracks, persistent residue, or a head that moves unexpectedly.

What to verify before buying

  • Working width: Compare the actual contact area with small pastries, loaf tops, pan corners, and the batch sizes you prepare.
  • Head style: Identify whether the working elements are individual bristles, grouped synthetic fibers, molded tines, or another construction; do not infer this from a distant image.
  • Softness and recovery: Look for guidance on intended baking uses and whether the head returns to shape rather than remaining splayed after cleaning.
  • Head attachment: Check whether the head is fixed, removable by design, or molded around the handle, and inspect the transition for narrow residue traps.
  • Shedding guidance: Read inspection and replacement advice, especially for a fiber-bristle design, and examine the brush before every use.
  • Handle control: Compare length, thickness, grip shape, balance, hanging openings, and clearance above bowls and hot cookware.
  • Temperature limits: Verify the maker’s current maximum-use guidance for the complete brush, including the head, handle, adhesive, finish, and any joint.
  • Cleaning method: Confirm whether hand washing or a dishwasher is specified and whether a removable part needs a particular orientation or reassembly check.
  • Drying and storage: Look for a way to dry the base of the head fully and store the brush without crushing or contaminating its working surface.
  • Set composition: If buying several brushes, check whether the widths are meaningfully different and decide how each will be labeled or assigned.

Natural-style bristles and molded heads behave differently

Traditional-looking pastry brushes often use many fine fibers held at the end of a flat handle. The individual tips can form a soft, feathered contact area and carry liquid into small contours. That makes this format worth comparing for fragile pastry and detailed egg-wash work. The same dense bundle creates a cleaning obligation: liquid and dough can move toward the ferrule or base, where close-packed fibers take longer to rinse and dry.

The source of the bristles, the way they are secured, and the suitability of the complete brush for food contact should be stated by the seller or maker. A natural appearance does not establish the material, and a material name does not guarantee that no fiber will loosen. Inspect the head before loading it and look over the food after brushing. A brush that repeatedly sheds should be taken out of service rather than treated as a normal inconvenience.

Molded silicone-style heads usually replace fine fibers with rows of thicker flexible tines or flaps. They can provide visible gaps for rinsing and may be less likely to leave a hairlike strand behind. However, thicker elements may carry and release a thin wash differently, leaving lines or moving a larger droplet at once. Closely spaced molded tines, seams around a removable head, and hollow handles can still retain material if the design is difficult to reach.

Neither format is automatically more precise, more hygienic, or more durable. Construction quality, head geometry, the recipe, cleaning habits, drying time, and replacement condition all matter. If possible, compare a close head-on image and the full care instructions instead of choosing from the words “professional,” “premium,” or “easy clean.”

Width should match both the pastry and the bowl

A narrow brush can trace borders and work around scoring without painting the cut faces. It can also fit inside a small prep bowl, allowing only the tips to touch the wash. That reduces the urge to submerge the ferrule or handle joint. The tradeoff is more strokes across a loaf and more opportunities to revisit an area that is already coated.

A broad brush may make fewer passes over sandwich loaves, focaccia, or a pan being prepared, but only if its full width can make contact. On a rounded roll, a stiff wide head might touch at the center while leaving the sides uneven. In a narrow bowl, the outer bristles can scrape the rim or push liquid over the side. Compare the head width with both the food and the container used for the coating.

Sets can help when the included sizes represent distinct jobs. One compact brush might stay with pastry work, while a wider one handles baking dishes or large loaves. Extra pieces are less useful when they are nearly identical or become mixed with brushes used for pungent sauces. Color differences can help, but a label, drawer divider, or separate container is more reliable than remembering a subtle shade.

The handle changes pressure and mess

A pastry brush is controlled from several inches behind its working edge. A thick, highly contoured handle may feel secure during broad strokes yet make fingertip rotation awkward. A slender flat handle offers another kind of control but can turn in a wet hand. Consider how you hold a pen and how you approach a sheet pan from the side; the best geometry keeps the wrist comfortable while letting the tips land lightly.

Length affects reach and balance. A short handle positions the hand close to detailed work but also closer to sticky dough and the rim of the bowl. A longer handle creates clearance around deep pans and warm cookware, though a head-heavy or handle-heavy brush can tip out of a small bowl. If the product has a raised rest or angled neck, confirm that it actually keeps the coated head off your usual counter or plate.

Wood, plastic, metal, and composite-looking handles come with different care questions, but appearance alone is not enough to identify the material or washing method. Check for seams, exposed fasteners, decorative grooves, painted areas, and hanging holes where moisture may remain. If a wooden handle is specified, follow its washing and drying directions rather than assuming it can soak or go through a dishwasher cycle.

Heat guidance applies to more than the bristles

Many baking applications happen before a pan enters the oven, which reduces the need for extreme temperature claims. Other jobs involve melted butter, a warm loaf, or a heated baking dish. The temperature limit should cover the complete tool and the way it is used, not merely the apparent head material. A molded head may tolerate conditions that its handle, connection, or decorative coating does not.

Do not leave a pastry brush resting on the edge of a hot pan, near a burner, or inside an oven. Brief contact and prolonged exposure are different conditions. Steam, splattering fat, and a hot handle can also create risks before a nominal material limit is reached. Use a heat-safe rest away from the cooking zone and follow the recipe and equipment guidance.

A brush used only for cool dough still benefits from a clear assignment. Keeping baking tools away from raw-meat preparation reduces the chance of confusing which brush handled which ingredient. If a brush does contact a raw animal ingredient such as egg, treat the remaining mixture, brush, bowl, counter drips, and hands according to appropriate food-safety guidance; appearance is not a reliable indicator that contamination has been removed.

Cleaning starts before the coating dries

Rinse or wash the brush promptly according to its instructions. Egg wash, butter, syrup, and glaze become harder to remove when left between bristles or around a head joint. Direct water through the working elements rather than only across the outside, and use a suitable cleaning tool if the maker recommends one. Keep fingers away from sharp pan residue or any exposed wire at the ferrule.

For a removable head, disassembly is helpful only when it is intended and the parts can be cleaned, dried, and reattached correctly. Inspect both the socket and the stem. A head that seems secure while dry may move when loaded with a sticky coating, so confirm the connection before bringing it over food. Never pry apart a fixed joint merely because a seam is visible.

Dishwasher-safe wording does not answer every care question. Check rack placement, temperature or cycle restrictions, whether all components are included in the claim, and whether the design can drain. Dense fibers and enclosed cavities can remain damp after the rest of the load looks dry. Allow the brush to air-dry fully in the orientation directed before placing it in a drawer or covered container.

Odor, staining, and discoloration should be interpreted through the maker’s guidance rather than used as the only cleanliness test. A brush can look clean while holding residue at its base, and a stain does not by itself establish unsafe condition. Persistent odor, tackiness, cracking, looseness, or material changes are reasons to stop and inspect the care or replacement instructions.

Store the head without bending it

The working edge should not be crushed beneath spatulas or pressed against a dirty drawer wall. Fine bristles can dry into an uneven fan, while flexible tines can take on an awkward position if held under weight. A dedicated utensil compartment, breathable upright holder, or supported hanging position can protect the shape, provided the brush is fully dry and the head does not contact other items.

Hanging is useful only when the opening is designed for it and the brush cannot swing against a backsplash, range, or frequently handled utensil. A closed case can guard against drawer contact, but trapping residual moisture creates another problem. Check whether any supplied cover is intended for long-term storage or merely for shipping.

Inspect the brush as you take it out, not after the wash is already on the pastry. Gently check for looseness at the head and ferrule, look for separated bristles or torn molded elements, and make sure the handle is not cracked. A thirty-second inspection protects both the recipe and the rest of the batch from a tool that has reached the end of its useful life.

Limitations

  • Product photos do not reveal how softly a head moves across proofed dough or how evenly it releases a particular egg-wash mixture.
  • Fine bristles can be difficult to inspect and dry near a dense base, while molded tines may leave visible tracks in a thin coating.
  • Temperature wording may apply to only part of a brush unless the complete-tool instructions say otherwise.
  • A removable head adds cleaning access but also adds a connection that must be checked and reassembled correctly.
  • Dishwasher permission does not guarantee that residue will leave every seam or that every cavity will dry during the cycle.
  • One width may feel clumsy on small pastry yet slow on a full sheet of rolls or a large loaf.
  • A baking brush should not automatically be treated as interchangeable with a grill, barbecue, cleaning, or craft brush.

Alternatives to compare

The back of a spoon can spread a small amount of melted butter or a thick glaze over a sturdy flat surface, though it offers less control around detailed dough. A small food-safe spatula handles thicker mixtures and can scrape a bowl efficiently, but its broad edge is not ideal for tracing pastry seams. A refillable mister creates a different, lighter distribution and requires ingredient compatibility plus its own cleaning routine. For greasing a pan, a folded paper towel or piece of parchment may be appropriate in some recipes when used carefully and kept away from hot surfaces and flame. None of these alternatives duplicates the light, multi-tip contact of a pastry brush, so match the substitute to the coating and recipe rather than to the tool name.

FAQ

Is silicone or a bristle pastry brush better for egg wash?

Neither is universally better. Fine bristles may conform closely to detailed dough, while a molded silicone-style head can be easier to visually inspect between its elements. Compare how much liquid the head releases, whether it drags the dough, the risk of shedding, and the cleaning routine that you will actually follow.

What width pastry brush should I choose?

Choose a width that fits both the food and your wash bowl. A narrow head offers control around edges and small pastries; a wider head reduces passes over loaves and large batches. Check the stated working width rather than estimating it from a close-up image.

Can a pastry brush go in the dishwasher?

Only when the current instructions for the complete brush permit it. Confirm rack placement, cycle restrictions, whether the head must be removed, and how every part should be dried. Dishwasher-safe wording does not guarantee that a dense base or enclosed joint will drain completely.

How do I keep pastry-brush bristles out of food?

Inspect the dry brush before every use, gently check the head and ferrule for looseness, and look over the coated food before baking. Follow the cleaning and replacement guidance. Stop using a brush that sheds repeatedly rather than trying to pick out fibers and continue.

Should I use the same brush for baking and barbecue sauce?

Separate brushes can make flavor control, temperature selection, and food-handling routines easier. If a brush is shared, its instructions must suit every use, and it needs complete cleaning and drying between tasks. Do not assume a delicate pastry brush is designed for a grill or direct high heat.

A Cleaner Slice: Choosing a Pizza Cutter Wheel for Home Kitchens

Product links are for reference. Verify current details on the retailer page before buying.

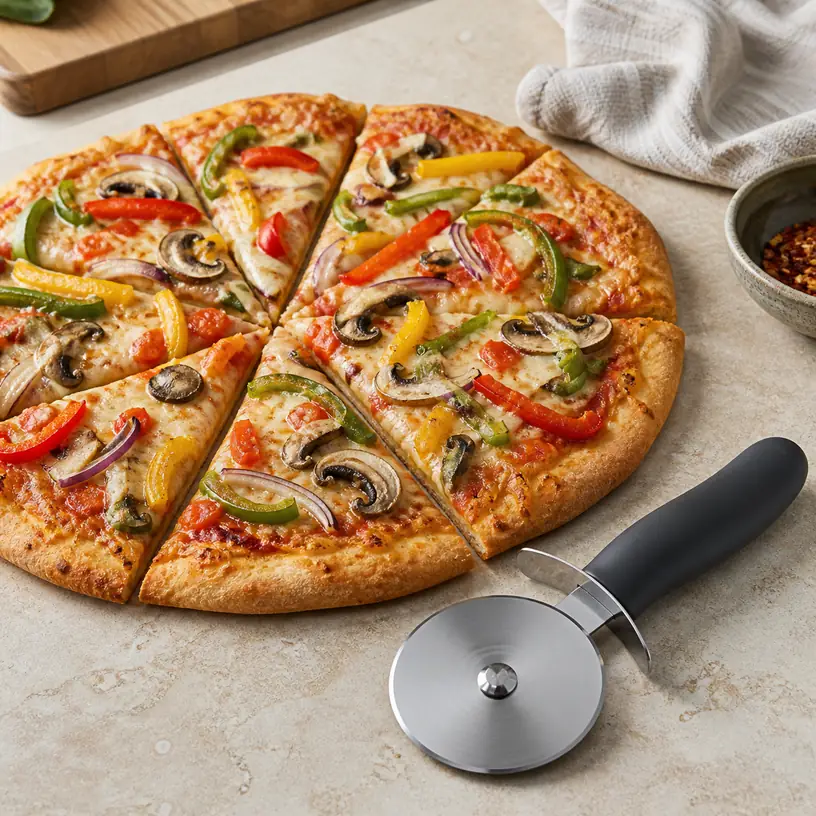
Illustrative image of a generic pizza cutter wheel beside a sliced pizza

Illustrative image, not an official product photo.

Short answer

A pizza wheel earns its drawer space when it can cross your usual crust without pushing toppings ahead of the blade or bringing your knuckles into the food. Match wheel diameter and handle clearance to the thickest pizza you routinely serve, then inspect the guard, axle area, grip shape, cleaning instructions, and storage method. A large wheel can reduce the number of passes across a thick pie, but it also occupies more space and may hide more surface near the hub. For occasional thin pizzas, a compact wheel or a sharp kitchen knife may be the simpler choice.

Search reference

Pizza cutter wheel options

Compare wheel size, hand clearance, guard coverage, cleaning access, and protected storage against your pans, boards, and usual crust style.

View matching options

Begin with the pizza and the cutting surface

The most useful specification is not the longest feature list; it is whether the wheel fits the food and workspace already in your kitchen. A thin flatbread on a roomy wooden board presents a different cutting path from a thick, heavily topped pizza still sitting in a rimmed pan. Note the diameter and thickness of the pizzas you make or order, the type of surface beneath them, and where the finished slices need to go.

A wheel cuts by rolling, so it needs a continuous path. Raised pan edges can stop the axle or handle before the blade reaches the crust. A board that is barely larger than the pizza leaves little room to begin and end each stroke. Deep-dish and very thick crusts can exceed the useful reach of a small wheel even if the edge looks sharp. Measure these constraints before comparing decorative finishes.

Also decide whether the cutter will serve only pizza. Some listings suggest use with flatbreads, quesadillas, dough, herbs, or pastries, but suitability depends on the blade, food, and cutting surface. Treat every additional use as something to verify rather than a guarantee that one wheel can replace a knife, bench scraper, or pastry tool.

Who this is for

  • Home cooks who make or serve round pizzas often enough to want a dedicated slicing tool.
  • Households cutting on a flat board or low-rim surface that gives a wheel an unobstructed path.
  • Buyers replacing a cutter with poor knuckle clearance, a loose-feeling axle, or a hub that is difficult to clean.
  • People who prefer a rolling cut to repeated downward cuts with a chef’s knife.
  • Small-kitchen owners willing to measure drawer, rack, or sheath space before choosing a larger wheel.

Who should skip it

  • An occasional pizza eater may find that a suitably sharp knife already covers the job without adding another sharp utensil.
  • A rocking pizza knife can be easier to compare for very wide pies when there is enough safe storage for the long blade.
  • Kitchen shears may suit some portioning routines, provided they are intended for food and cleaned appropriately.
  • Do not choose an exposed wheel if the kitchen has no secure storage away from children and blind drawer reaches.
  • A wheel is a poor match when raised pan walls prevent the blade from completing a cut across the base.

What to verify before buying

  • Wheel diameter: Compare the stated diameter with crust thickness, topping depth, and the clearance needed around a rimmed pan.
  • Blade exposure: Check how much of the wheel remains usable below the guard and axle rather than relying on overall diameter alone.
  • Handle position: Look at knuckle clearance, wrist angle, grip length, and whether the handle encourages controlled forward pressure.
  • Guard coverage: Confirm that the guard helps separate fingers from the edge without blocking the view or trapping residue in inaccessible seams.
  • Axle construction: Identify whether the fastener is enclosed, removable, adjustable, or meant to remain untouched, and read the care guidance.
  • Cleaning method: Verify dishwasher claims for the exact model and look for instructions on cleaning and drying around both sides of the hub.
  • Blade material wording: Use the current listing and manufacturer instructions rather than assuming composition from a metallic appearance.
  • Storage: Check for a sheath, blade cover, hanging provision, locking case, or enough space in a protected utensil compartment.
  • Overall dimensions: Include the handle and guard when checking drawer depth or countertop storage, not just the wheel.
  • Replacement or service guidance: Find out what the maker recommends if the axle loosens, the wheel bends, or cutting performance declines.

Wheel diameter changes more than cutting depth

A wider wheel can reach farther into a thick crust before the hub or guard approaches the toppings. It also covers more distance per rotation, which may help a cook make one deliberate pass rather than sawing repeatedly. The tradeoff is a larger tool with more exposed circumference, greater storage needs, and potentially less maneuverability around small flatbreads.

A compact wheel can feel precise on a small board and takes less drawer space. Its useful cutting depth may be limited by the axle assembly, however. The nominal diameter tells only part of the story: compare the distance from the lowest point of the edge to the lowest fixed part of the guard or hub. Product photos can help reveal the geometry, but verify measurements in the current listing when they are available.

Do not assume that greater diameter means less effort in every case. Crust texture, wheel sharpness, axle movement, grip, cutting angle, and the stability of the board all matter. If the cutter repeatedly compresses the pie or requires forceful back-and-forth motion, stop and reassess the tool, surface, and technique rather than pressing harder near an exposed edge.

Handle shape and clearance affect the whole pass

Traditional pizza cutters place a straight or angled handle behind the wheel. Others wrap the grip above part of the blade. Neither arrangement is universally better. A rear handle can provide reach and a clear view, while a palm-style body may feel compact; each creates a different wrist position, pressure direction, and distance between fingers and the cutting surface.

Imagine the complete movement from the far edge of the board to the near edge. The grip should remain controlled without requiring the wrist to dip into hot toppings or the knuckles to strike a pan rim. Check the manufacturer’s intended grip and safety instructions. Do not improvise by holding a guard or axle housing that was not designed as a hand surface.

Texture is useful only when it can be cleaned and remains comfortable under pressure. Deep grooves may improve traction for one user but collect flour, cheese, or oil around seams. A smooth handle can be easier to wipe yet slippery when damp. Compare contour, width, material wording, and cleaning access together rather than treating a rubberized-looking surface as proof of secure grip.

The hub is the cleaning test

Food can reach both sides of the wheel and gather where it passes through the axle or guard. A polished outer face may look clean while residue remains behind a fixed housing. Before buying, study how much of that area is visible and accessible with ordinary washing tools. If a model is designed to come apart, confirm the exact disassembly and reassembly steps; never remove a fastener just because it appears removable.

Wash the cutter according to its instructions soon after use, before cheese or sauce dries around the hub. Keep fingers away from the edge while cleaning, and use a method that does not require gripping the sharp circumference. Dishwasher-safe wording should be checked for the entire assembled tool, along with placement and drying guidance. Dishwasher permission does not guarantee that trapped debris will be flushed from every seam.

Drying matters around the axle as well as the blade. Water retained behind a guard can be hard to notice. Let all accessible areas dry as directed before covering or storing the cutter. If the wheel develops side-to-side play, rough rotation, visible damage, corrosion, or an uneven edge, stop using it and follow the stated service or replacement guidance.

Cutting surface and technique belong in the decision

Use a stable, food-safe cutting surface that the surface maker identifies as suitable for sharp tools. A wheel can mark soft boards and may be dulled or damaged by very hard materials. Do not cut directly on a countertop merely because it looks durable; both the tool and the surface can be harmed. A board with nonslip support and enough margin around the pizza gives a clearer start and finish to the stroke.

Let hot pizza settle as appropriate for the recipe and serving situation, then plan the slice lines before moving the wheel. Keep the free hand out of the blade path and avoid reaching across the cutter to steady a shifting pan. A controlled pass is preferable to a fast one. If toppings gather in front of the wheel, repeated rolling may make the arrangement worse; another suitable cutting tool or a change in technique may work better.

Count how many directions you normally cut. Dividing a pizza into many narrow slices increases repeated passes through the center, where toppings and crust can be thickest. A wheel that is comfortable for two cuts may still create fatigue or poor control after several. Handle fit and axle smoothness therefore matter even for a tool used only a few minutes at a time.

Storage should cover the circular edge

A pizza wheel can turn when other utensils shift against it. Tossing one loose into a crowded drawer leaves a curved blade where a hand may not expect it, and protecting only a small section of the wheel is not enough if the guard can slide off. Look for a fitted cover, secure case, or dedicated compartment that prevents contact with the edge and limits movement.

Hanging storage can work when the cutter has a purpose-built opening, the hook supports its weight, and the blade cannot swing into a walkway or another utensil. Magnetic storage should be used only if the cutter and rack are compatible and the complete tool remains stable during removal. Keep sharp tools away from children and from anyone who may mistake the wheel for a harmless serving utensil.

Measure the stored tool in its protected state. A case can add width, and a wide wheel may be too tall for a shallow drawer even though the handle fits diagonally. Storage is not an afterthought here: if there is no safe destination for the cutter, choose a different format or continue using a tool that already has protected space.

Limitations

  • A product photo cannot show axle smoothness, blade alignment, grip comfort, or how much pressure a particular crust requires.
  • Overall wheel diameter may overstate useful cutting depth when a large hub or low guard approaches the food.
  • A dishwasher-safe claim does not by itself confirm that every seam around the axle will clean and dry easily.
  • Wheels can shift toppings forward, especially when the edge is dull, the pizza is thick, or the pass is hesitant.
  • An exposed circular blade requires protected storage even if part of it sits behind a finger guard.
  • One cutter may not handle thin flatbreads, thick pan pizza, pastry, and other foods equally well.
  • Home sharpening or axle adjustment may be inappropriate for a given model; follow its service instructions.

Alternatives to compare

A chef’s knife can divide pizza and handle many other kitchen jobs, provided the blade is long enough for the pie and used on a stable suitable board. A rocking pizza knife spans more of the diameter at once but requires substantial protected storage and a clear two-handed technique. Food-prep kitchen shears can portion some pizzas without rolling toppings, though the blades contact more of the food and need an appropriate cleaning routine. For unbaked dough, a bench scraper or pastry wheel may offer geometry better suited to the task. Choose each alternative according to its stated use rather than assuming every cutting tool is interchangeable.

FAQ

What pizza wheel size works for a thick crust?

There is no single diameter that fits every thick pizza. Compare the wheel’s usable depth below the guard and axle with the combined crust and topping height, then account for any raised pan rim. A larger nominal wheel helps only when its hub geometry and handle clearance allow the edge to reach the base.

Is a removable pizza cutter wheel easier to clean?

It can expose surfaces around the axle, but only when the model is specifically designed for disassembly and gives clear reassembly instructions. A removable part also creates more handling of a sharp edge and another security check before use, so compare the complete care routine rather than the feature alone.

Can a pizza cutter go in the dishwasher?

Only if the current instructions for that exact model permit it. Check whether the statement covers the complete tool, where it should be placed, and how it should be dried. Inspect the hub afterward because narrow spaces may still retain debris or moisture.

Why does a pizza wheel push the toppings instead of slicing cleanly?

Possible factors include a dull or damaged edge, insufficient usable wheel depth, a rough axle, a hesitant cutting motion, a crowded topping layer, or a surface that lets the pizza move. Stop if the tool requires excessive force, then inspect it and consider a more suitable cutter or technique.

How should a pizza cutter wheel be stored?

Store it clean and dry with the full cutting edge protected by a secure cover, case, or dedicated compartment. Prevent the wheel from rotating against other utensils, and keep it out of reach of children and anyone likely to reach into the space without seeing the blade.

A Better Read on the Cold: Refrigerator and Freezer Thermometers for Home Kitchens

Product links are for reference. Verify current details on the retailer page before buying.

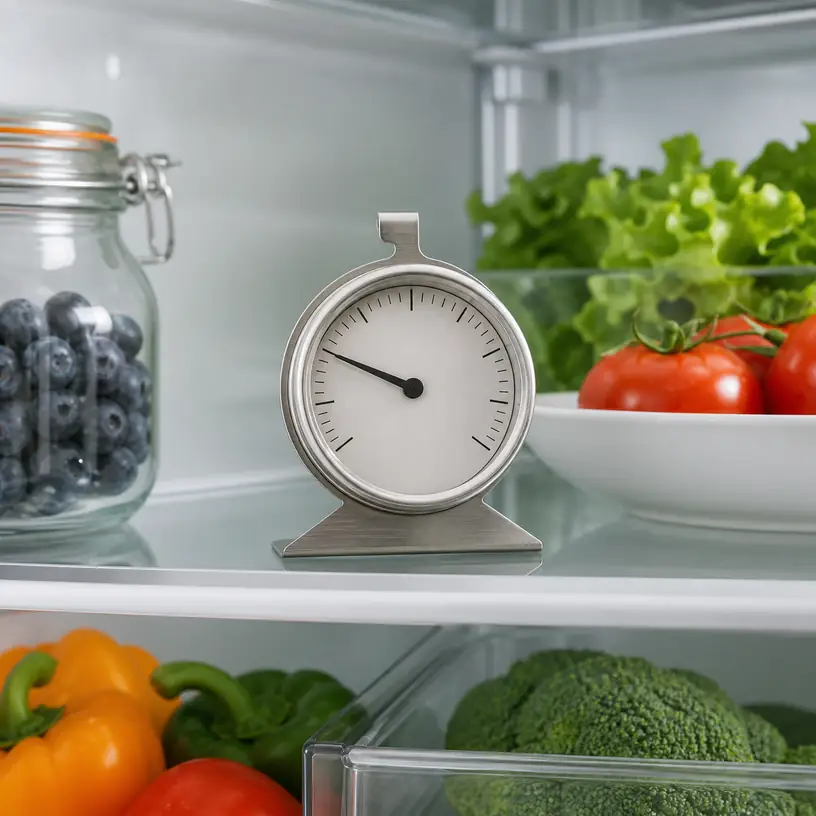
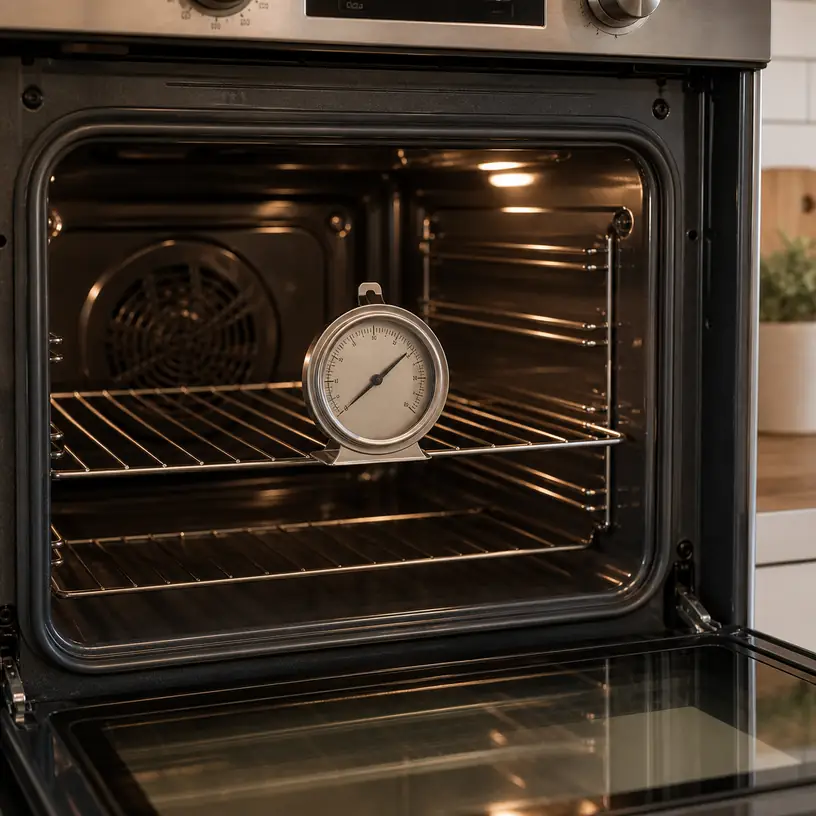
Illustrative image of a generic dial thermometer on a refrigerator shelf

Illustrative image, not an official product photo.

Short answer

A refrigerator or freezer thermometer gives you an independent reading inside an appliance, which is more useful than judging coldness by the control dial or by touching a container. Choose one that covers the temperatures you need to monitor, remains readable in its planned location, and can stand, hang, or attach without blocking vents or interfering with food. An analog dial avoids batteries and can be easy to check at a glance; a digital model may provide larger numbers, minimum-and-maximum memory, or an alarm. Those extras only help if the controls make sense and the device is rated for the compartment. Buy for a specific placement, allow the reading to stabilize, and compare it with the appliance manual and current food-storage guidance rather than treating one quick glance as a complete diagnosis.

Search reference

Refrigerator and freezer thermometer options

Compare rated temperature range, display visibility, placement hardware, stated accuracy, alert behavior, power needs, and cleaning instructions for the compartment you plan to monitor.

View matching options

Start with one shelf, not a feature list

Open the appliance and decide where a thermometer could remain visible without being knocked over, buried by groceries, or pressed against a wall. A crowded refrigerator may need a compact hanging model at the front of a middle shelf. A chest freezer can call for a display that is readable from above. A small dorm-style refrigerator may have no sensible place for a wide dial, while an upright freezer basket can make a loose digital unit disappear under packages.

That location shapes the buying decision. A broad dial is useful only when the markings can be seen through the shelf arrangement. A magnetic back requires a suitable metal surface and permission from the appliance instructions. A hook must fit the shelf wire or edge without hanging into a drawer. A stand needs a flat surface and enough depth to resist sliding when the door closes.

Also decide what question you want the thermometer to answer. Routine monitoring, checking a newly installed appliance, observing a garage freezer during seasonal weather, and investigating uneven refrigerator zones are different jobs. A simple dial can cover a stable visual check. Minimum-and-maximum memory may be more helpful when you want to know what happened between checks, while an audible alert may matter only if it can be heard where the appliance sits.

Who this is for

  • Households that want a reading independent of an appliance’s numbered or unlabeled control setting.
  • Renters checking an unfamiliar refrigerator without altering the appliance.
  • People organizing a refrigerator and trying to identify a practical, consistently cold shelf for particular foods.
  • Owners of an upright or chest freezer who want an easy visual check during normal use.
  • Households setting up a replacement appliance and following the maker’s stabilization instructions.
  • Buyers who can place the device safely, keep the display visible, and respond appropriately when readings change.

Who should skip it

  • Skip a loose display if the compartment is so crowded that the device will be buried, broken, or routinely moved; improve access or choose a securely compatible mounting style first.
  • Do not use an ordinary refrigerator thermometer as a substitute for a calibrated instrument where a business, laboratory, medication, or regulated process has specific monitoring requirements.
  • A wireless sensor system may be more suitable when the essential job is receiving alerts outside a detached garage, basement, or other remote location.
  • Do not assume a general indoor thermometer can tolerate freezer conditions, condensation, or food-area cleaning; use a model rated for the intended environment.
  • If the appliance has persistent temperature problems, damaged seals, unusual cycling, water leakage, or a fault warning, a consumer thermometer does not replace the appliance manual or qualified service.
  • Skip alarm features when no one in the household can reliably hear, interpret, test, and reset them.

What to verify before buying

  • Rated range: Confirm that the full stated operating and measuring ranges include the refrigerator or freezer conditions you need to observe.
  • Stated accuracy: Look for a clear accuracy specification and note whether it applies across the whole range or only within a narrower band.
  • Display resolution: Determine whether the scale or digital step is fine enough for useful decisions without implying greater accuracy than the specification supports.
  • Viewing angle: Check digit height, dial diameter, color contrast, glare, and whether the display remains legible from the direction the door opens.
  • Mounting choices: Verify the dimensions and operation of the stand, hook, clip, suction cup, or magnet instead of assuming it will fit your shelf.
  • Compartment compatibility: Look for explicit refrigerator and freezer suitability as needed, including any limits for moisture or condensation.
  • Response and stabilization: Review the maker’s guidance for placement and how long the unit should remain undisturbed before interpreting a reading.
  • Min/max memory: Check whether values persist until manually cleared, reset after a battery change, or include a time reference.
  • Alarm controls: For digital models, verify thresholds, sound level, delay behavior, mute function, and the indication for an active or silenced alert.
  • Power source: Confirm battery type, expected replacement procedure, low-battery indication, and whether settings survive a battery change.
  • Cleaning guidance: Read what can be wiped, what must stay dry, and whether the device may be immersed; do not infer washability from a sealed-looking face.
  • Calibration or checking instructions: Determine whether the maker provides a user check, an adjustment method, or a service recommendation.

Analog and digital displays solve different annoyances

An analog appliance thermometer is mechanically simple to read: open the door, locate the pointer, and compare it with the scale. It does not need a battery, and color bands can make a routine glance quick. The tradeoffs are physical size, small printed increments, parallax when viewed from an angle, and a pointer that may take time to settle after a large change. Inspect product dimensions, not only close-up images, because a dial that fills a listing photo can be modest inside a deep refrigerator.

Digital displays can offer larger numerals and avoid interpreting the space between scale marks. Some record minimum and maximum readings, which can reveal variation that is absent during a brief door opening. Others add alarms. These functions introduce menus, batteries, icons, reset behavior, and sometimes separate operating and display-temperature limits. A screen that becomes faint or slow in deep cold can be frustrating even when the sensor still works, so freezer suitability should be explicit.

Neither display type is inherently the correct one for every kitchen. A simple analog model may be the better tool for an appliance checked during daily cooking. A digital unit with memory can be more informative when you are comparing locations over a day. An alert is useful only when its threshold can be set appropriately, false alarms are understood, and someone is close enough to act.

Placement changes what the number means

Temperatures inside a refrigerator are not perfectly uniform. Door shelves experience warm air during opening, vents can create colder local zones, drawers alter circulation, and tightly packed containers can restrict airflow. A reading beside a vent should not automatically be treated as the temperature of every shelf. The appliance manual may identify airflow paths and recommended loading practices, so consult it before deciding that one location represents the whole cabinet.

For a first check, place the thermometer where it reflects the food-storage area you care about and where it will not touch the cooling surface, wall, or a cold package unless the instructions call for that method. Keep it away from a direct blast from a vent. Leave enough space for air to move around it, then allow the reading to settle for the period specified by the thermometer and appliance makers.

If you suspect an uneven cabinet, move the same thermometer between planned locations one at a time and give each position a comparable stabilization period. Changing location, shelf load, control setting, and door-opening pattern all at once makes the readings difficult to interpret. Write down the position, time, and relevant changes rather than relying on memory.

Freezers pose a visibility problem as well as a temperature problem. A thermometer hidden at the bottom of a chest freezer will rarely be checked. Secure placement near the top can improve access, but it must not obstruct the lid, hinge, baskets, or safe loading. In an upright freezer, avoid a loose unit that can fall when a drawer is pulled forward.

Opening a door lets warmer room air enter, and loading unfrozen groceries changes conditions. Defrost cycles and compressor operation can also create variation. A number observed immediately after one of these events may not describe the appliance’s established condition. Follow the appliance instructions after installation, loading, a control adjustment, cleaning, or a power interruption before drawing conclusions.

Trend information is where minimum-and-maximum memory can earn its place, but memory needs context. A recorded high may reflect a long grocery-loading session, a door left ajar, a power event, or normal operation within the product’s stated behavior. Clear the memory deliberately at the start of a known observation period and note when you did it. A value with no time stamp cannot tell you exactly when or for how long the condition occurred.

Current U.S. federal food-safety guidance commonly calls for keeping a refrigerator at 40°F (4°C) or below and a freezer at 0°F (-18°C). Consult current guidance and your appliance manual for your circumstances, especially after a power interruption or when deciding whether food remains suitable. A consumer thermometer supplies evidence; it does not determine food safety by itself.

When two thermometers disagree, do not average them and assume the result is correct. First give both units enough time in the same location, compare their specifications, check battery condition where applicable, and follow their stated checking or calibration procedures. A large or persistent disagreement is a reason to investigate the instruments and appliance, not to select the more reassuring number.

Alarms need a response plan

An alarm can draw attention to a change while the door is closed, but only if the threshold, delay, and reset behavior are understood. A model may sound immediately, wait through a delay, or continue showing an alert icon after the temperature returns. Read the current instructions before choosing a threshold, and test the sound and controls as directed.

Consider the room. An alarm inside a closed basement freezer may be inaudible upstairs. A loud signal in a compact apartment may trigger frequently during ordinary loading if the delay is too short. A remote sensor can address distance, but then wireless range, receiver location, pairing, battery status, and notification delivery become part of the system.

Make a short response checklist before relying on an alarm: confirm the door is closed, check for an obvious power issue, avoid unnecessary opening, consult the appliance manual, and follow current food-safety guidance. Repeated alerts without an obvious cause call for troubleshooting or service rather than continually widening the alarm range.

Cleaning and battery access matter over time

Spills and condensation can make a display hard to read. Place the thermometer away from leaking packages and follow the maker’s cleaning directions. “Water resistant” and “washable” are not interchangeable; many electronic displays should be wiped but never submerged. An analog housing can also trap moisture or residue around a seam even though it has no battery compartment.

For a battery-powered model, check whether the compartment can be opened without a tiny loose screw falling near food. Replace batteries according to the instructions and keep spare cells stored appropriately outside the appliance. A low-battery symbol is valuable only if it is visible during routine checks. If the screen fades, segments disappear, or readings behave erratically, treat the device as unreliable until the power and operation are checked.

Inspect hooks, stands, clips, and magnets while cleaning. A bent hook can let the unit drop onto glass; a weakened suction cup can release without warning; a folding stand can collect residue. Reposition the thermometer after restocking so its display and airflow remain unobstructed.

Limitations

  • A single thermometer reports conditions near its sensor, not every shelf, drawer, package, or corner of the appliance.
  • Consumer accuracy and resolution vary, and a detailed display does not guarantee a highly accurate measurement.
  • Door opening, loading, defrost cycles, airflow, and placement can cause readings to change.
  • Minimum-and-maximum memory may not show when a value occurred or how long it lasted.
  • An audible alarm cannot help if it is out of hearing range, muted, poorly configured, or powered by a depleted battery.
  • A magnet, hook, clip, or stand may not fit every appliance interior even when it appears versatile in photos.
  • Condensation and spills can affect readability and may damage models not designed for that exposure.
  • A refrigerator or freezer thermometer does not replace current food-safety guidance, appliance troubleshooting, or qualified repair.

Alternatives to compare

An appliance’s built-in display is convenient and may integrate with its own controls, but check the manual to understand what it measures and whether it shows a set point or a sensed temperature. A wireless refrigerator or freezer monitor can place a receiver or notification outside the compartment, making it more suitable for a remote garage or basement appliance. A data logger records readings over time and can provide more context, though setup, export, sensor placement, and calibration require additional work. An infrared thermometer measures surface temperature rather than the air or internal temperature of food, so it answers a different question. A food probe thermometer is intended for appropriate food-temperature checks and should not be treated as a permanent compartment display unless its instructions explicitly support that use.

FAQ

Where should I put a refrigerator thermometer?

Choose a visible location in the food-storage area you want to monitor, away from direct contact with a wall, cooling surface, vent blast, or recently chilled package unless the instructions specify otherwise. Do not block airflow. Follow the appliance and thermometer placement guidance, then allow the reading to stabilize before interpreting it.

Can the same thermometer be used in a refrigerator and a freezer?

Only if its stated measuring and operating ranges cover both environments. Check freezer suitability, display performance, condensation limits, mounting method, and battery guidance. A model can display low numbers without necessarily being designed to operate reliably at freezer temperatures.

Is an analog or digital refrigerator thermometer easier to use?

Analog models avoid batteries and can support a quick visual check, while digital models may offer larger numerals, memory, and alarms. Ease depends on display angle, lighting, controls, placement, and how often you need trend information. Choose the simplest format that answers your monitoring question.

Why does the temperature change after I open the door?

Room air enters when the door opens, while the sensor’s response and location affect how quickly the display changes. Loading groceries and moving the thermometer can add more variation. Close the door, avoid repeated checking, and wait for the stabilization period recommended by the relevant instructions.

Do I need a thermometer with minimum-and-maximum memory?

It is useful when you want to observe variation between checks or compare appliance locations over a defined period. Reset the memory at a known time and keep notes, because many models record the extreme values without showing exactly when or how long they occurred.

What should I do if two appliance thermometers disagree?

Place them together, allow adequate stabilization time, compare their accuracy specifications, check batteries, and use any manufacturer-provided check or calibration procedure. Do not simply average a large disagreement. Persistent differences call for further instrument checks and, if appliance performance is in doubt, appropriate troubleshooting or service.

Y-Shaped or Straight? Choosing a Vegetable Peeler for Everyday Prep

Product links are for reference. Verify current details on the retailer page before buying.

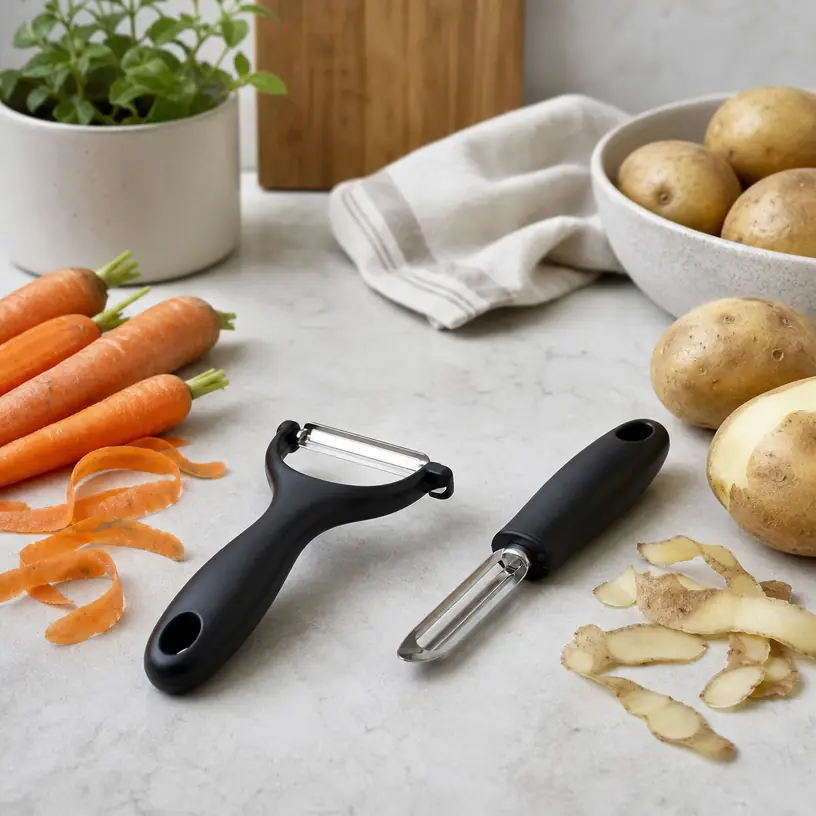
Illustrative image of generic Y-shaped and straight vegetable peelers beside carrots and potatoes

Illustrative image, not an official product photo.

Short answer

Start with the motion that feels natural in your hand. A Y-shaped peeler places the blade across the top of the handle and often suits broad, repeated strokes on potatoes, carrots, and similar produce. A straight swivel peeler holds the blade in line with the handle, which some cooks find easier to guide around curves or use with a paring-knife-like grip. Neither shape is universally more precise. Compare the usable blade width, degree of blade movement, handle thickness, cutting direction, cleaning access, and storage method. If possible, mimic the peeling motion with a similarly sized utensil before choosing. A comfortable, controllable tool used on a stable cutting surface is more useful than an elaborate set with extra blades you will not reach for.

Search reference

Vegetable peelers for everyday kitchen prep

Compare Y-shaped and straight designs, then verify blade type, handedness, handle dimensions, care instructions, and the pieces included in the current listing.

View matching options

Begin with your usual peeling motion

A peeler is a small purchase with a surprisingly personal fit. Two people can use the same blade and disagree about control because they hold the produce differently, pull in different directions, or rely on different parts of the hand. Before comparing sets and accessories, picture an ordinary prep session: three potatoes for dinner, a few carrots for soup, or an apple whose curved surface requires shorter strokes. That routine reveals more than a long feature list.

Pay attention to whether you normally draw a tool toward yourself, push it away, or alternate directions. Also note where the work happens. Peeling over a deep sink, above a bowl, or on a board changes the wrist angle and the room available for each stroke. Safer handling instructions for a particular tool take priority, but understanding your habitual setup helps you reject a handle shape that would feel cramped from the start.

Produce shape matters too. Long carrots offer a relatively open path, while small potatoes require frequent repositioning. Wide squash, thin-skinned fruit, and irregular roots create different demands, and not every item should be handled with the same tool. The goal is not to find a peeler for every possible ingredient. It is to choose one that matches the foods you actually prepare and to use another suitable method when the shape, skin, or firmness calls for it.

Who this is for

  • Home cooks replacing a dull, uncomfortable, or hard-to-clean everyday peeler.
  • First-apartment and shared-kitchen shoppers who want one compact prep tool rather than a large gadget set.
  • People deciding between a crosswise Y-shaped blade and an in-line straight swivel design.
  • Cooks who prepare potatoes, carrots, apples, or similar produce often enough for handle comfort and cleaning access to matter.
  • Households comparing a single general-purpose peeler with a set that includes specialized blade styles.

What to verify before buying

  • Blade orientation: Confirm whether the tool is Y-shaped, straight, fixed, or swivel. Listing photos can make the orientation hard to judge without a side view.
  • Cutting direction and handedness: Check whether the blade cuts in both travel directions and whether the design is described for right-handed, left-handed, or ambidextrous use. Do not infer this from symmetry alone.
  • Handle dimensions: Look for length, width, thickness, and contour details rather than relying on words such as ergonomic or comfortable.
  • Blade description: Review the current blade material and edge wording, but do not assume that a material name alone predicts sharpness, control, or service life.
  • Gap and shaving thickness: If the listing provides a clear blade-gap or intended-use description, compare it with the produce you prepare. A wide opening is not automatically more efficient.
  • Care instructions: Verify whether hand washing or machine washing is recommended and whether food can collect around pivots, guards, seams, or decorative inserts.
  • Storage details: Check for a blade cover, hanging hole, locking feature, or case if the tool will share a drawer with other utensils.
  • Set contents: For multipacks, identify the purpose and edge type of every piece. Similar-looking peelers may be intended for different cuts.

Y-shaped peelers favor a broad, crosswise approach

The crossbar on a Y peeler puts the working edge ahead of the hand. That layout can feel direct when the produce rests on a board and the user makes long strokes along its surface. The handle is often held with the fingers wrapped around it while the thumb and wrist guide the tool, although the correct grip depends on the particular design and its instructions.

Look beyond the overall silhouette. A very wide crossbar may give the hand clearance over a broad vegetable but feel awkward around a small curve. A narrow head can be easier to position yet cover less surface with each pass. The distance between the handle and blade also affects whether knuckles, fingers, or produce crowd one another. Dimensioned drawings are more helpful here than isolated product photos.

Some Y peelers have a modestly moving blade, while others may be described differently. The blade should follow the intended surface without feeling uncontrolled, but the appropriate amount of movement is difficult to assess from an image. Check the mechanism and return policy described by the seller, and inspect the tool when it arrives before using it on food. Loose, damaged, or misaligned parts are a reason to stop rather than compensate with more pressure.

A Y design can occupy more drawer width than a narrow straight peeler. If utensils are tightly packed, consider whether the exposed crosswise blade could be bumped during retrieval. A suitable cover or a dedicated organizer section may be more valuable than an additional specialty edge.

Straight swivel peelers use an in-line grip

A straight peeler resembles a narrow-handled utensil with the blade positioned along its axis. Some cooks prefer this shape because it can be rotated and guided around curved produce without changing to a broad crosswise grip. Others find that the in-line arrangement asks more of the fingers or places the wrist at an uncomfortable angle. The distinction is about fit and technique, not a universal ranking.

Examine the blade end from several views. Head width, tip shape, side guards, and the transition into the handle determine how close the working edge can approach an indentation or narrow section. A pointed feature sometimes included near the blade may be intended for removing blemishes, but its purpose and safe use should be confirmed in the current instructions. It does not replace inspecting produce and removing unsuitable portions according to food-safety guidance.

Handle profile is particularly important on a straight tool. A slim round handle may rotate easily in storage and in the hand; a wider oval or faceted shape may resist rolling and provide a more defined orientation. Surface texture can assist grip, but deep grooves and mixed-material seams may take more attention to clean. Choose based on the entire construction rather than treating softness or texture as proof of comfort.

Handle comfort is more than a padded surface

A handle works when the hand can maintain control without squeezing harder than necessary. Thickness, taper, balance, surface condition, and the distance from grip to blade all contribute. A heavily padded handle can be bulky for a smaller hand, while a thin metal or rigid handle may feel tiring to another user. Marketing labels cannot settle that difference.

Use listed dimensions to make a simple comparison with a utensil already in your kitchen. Hold that utensil in the position you would use for peeling, without making contact with food or a sharp edge, and notice where the fingers overlap and where the thumb rests. This is not a substitute for trying the actual peeler, but it can expose an obviously short, thick, or narrow option before purchase.

If grip strength, hand motion, sensation, or joint comfort is a concern, avoid assuming that a general ergonomic claim meets an individual need. Seek appropriate professional guidance when relevant and consider adaptive kitchen tools designed for the specific situation. A standard peeler should not be presented as a treatment or guaranteed accessibility solution.

Wet hands, smooth handles, and loose produce can combine into poor control. Dry the handle and work area as needed, stabilize the food on a suitable surface, and keep fingers outside the blade path. Follow the manufacturer’s directions and use a different prep method if the item cannot be held securely.

Swivel movement, edge style, and specialty sets

A swivel blade is meant to adjust its angle as it travels across changing contours. Too little movement may require frequent wrist correction; too much perceived play can make placement uncertain. Because listings rarely communicate this feel well, inspect the pivot and blade alignment before first use. Never test sharpness with a fingertip. If the mechanism appears damaged or the edge is exposed in an unintended way, do not use it.

Standard smooth edges are the straightforward starting point for many routine peeling jobs. Serrated or julienne-style edges may be offered separately or in coordinated sets, but they perform different tasks and can require different techniques. Confirm which piece is which, how each should be handled, and whether blade covers are included. Color coding is useful only if household members remember the system.

A three-piece set can appear versatile while creating two unused sharp tools in a drawer. Buy the set when its distinct functions match recurring recipes, not merely because the pieces are bundled. For occasional strips or decorative cuts, another tool already in the kitchen may be adequate. Fewer well-stored utensils can make prep safer and faster than a crowded collection.

Replaceable blades and integrated sharpeners sometimes appear in product descriptions. Verify compatibility, replacement availability, maintenance steps, and safe installation rather than assuming these features extend service indefinitely. Many simple peelers are not designed for user sharpening. Follow the specific care guidance and replace a damaged tool appropriately.

Cleaning and storage deserve a close look

Peel fragments and moisture can settle near a swivel pivot, under a crossbar, or along a handle seam. Look for clear access around these areas and read the stated washing method. A machine-washable claim does not necessarily mean every rack position, detergent, or drying cycle is appropriate, so follow the current instructions for the complete tool.

Rinse or wash the peeler promptly as directed, using a method that keeps hands away from the edge. A brush intended for utensil cleaning may help reach narrow spaces if the manufacturer permits it. Let the tool dry fully before placing it in enclosed storage. Corrosion resistance, when claimed, does not make good cleaning and drying practice unnecessary.

An uncovered peeler should not disappear beneath ladles, whisks, and other drawer contents. Use the supplied blade guard when it is designed for storage, or keep the tool in a suitable compartment that limits accidental contact. Confirm that a cover fits securely without requiring fingers to pass along the cutting edge. Hanging storage can keep the tool visible, but only if the attachment point and location are stable and out of unsafe reach.

Who should skip it

  • Someone who rarely peels produce may be better served by a suitable tool already on hand rather than another single-purpose utensil.
  • A standard manual peeler may not meet an individual accessibility need; consider purpose-designed alternatives and appropriate advice.
  • Households unable to provide protected storage should address that issue before adding another exposed blade to a crowded drawer.
  • Cooks expecting one peeler to handle hard rinds, large squash, delicate garnishes, and every irregular ingredient may need several task-appropriate methods instead.
  • A multipiece specialty set is poor value when only the standard smooth edge matches the household’s recipes.

Limitations

  • Handle comfort is subjective and cannot be confirmed from measurements or product photos alone.
  • A wider blade does not guarantee faster preparation; produce shape, technique, and control affect each stroke.
  • Material labels do not establish edge quality, durability, corrosion performance, or cleaning ease by themselves.
  • A swivel mechanism includes spaces that may need careful cleaning and inspection.
  • Blade guards, hanging holes, blemish-removal features, and specialty edges vary by model and set.
  • Manual peelers still require stable food positioning, a clear cutting path, and attention to the manufacturer’s safety directions.
  • Product listings and set configurations can change, so check the current dimensions, blade descriptions, care guidance, and included pieces before ordering.

Alternatives to compare

  • A suitable paring knife for users with the skill and a task that calls for knife work, following proper handling guidance.
  • An adaptive peeler with a different handle angle or stabilizing feature for a clearly identified accessibility need.
  • A tabletop or crank-style preparation tool when its setup, cleaning, and supported produce types match the household routine.
  • Leaving edible skins on when appropriate for the ingredient, recipe, personal preference, and relevant food guidance.
  • Buying pre-prepared produce for occasions when time or physical effort matters more than adding another kitchen tool.
  • Keeping one familiar general-purpose peeler instead of purchasing a set of specialized edges that will see little use.

FAQ

Is a Y peeler better than a straight peeler?

Neither layout is better for every cook. A Y peeler offers a crosswise head that can feel natural for broad strokes, while a straight peeler uses an in-line grip that some people prefer around curves. Compare both shapes with your normal hand position, produce, and work surface, then prioritize controlled movement over speed.

Can left-handed cooks use the same vegetable peeler?

Only if the current design and blade are suitable for the intended direction of use. Some peelers are described as ambidextrous or able to cut in both directions, while others are not. Verify the listing and instructions instead of assuming that a symmetrical handle settles handedness.

Should I buy a swivel or fixed-blade peeler?

A swivel blade can adjust to changing contours, while a fixed design may feel more predictable to a user who prefers less blade movement. The useful choice depends on technique and produce shape. Confirm the actual mechanism, inspect its alignment, and follow its directions before use.

Are vegetable peelers dishwasher safe?

Care methods vary with the blade, handle, pivot, coating, and other components. Use a dishwasher only when the current manufacturer instructions permit it, including any rack-placement guidance. Otherwise follow the recommended hand-cleaning method while keeping fingers away from the edge.

When should a vegetable peeler be replaced?

Stop using a peeler if the blade, pivot, handle, guard, or attachment is damaged, loose, cracked, or misaligned. Declining control or a tool that no longer performs as intended also deserves attention. Follow the manufacturer’s maintenance and replacement guidance rather than trying an unapproved sharpening or repair method.

Loose-Leaf Tea Infuser Baskets: Fit, Mesh, and Cleanup

Product links are for reference. Verify current details on the retailer page before buying.

Illustrative image of a generic basket-style loose-leaf tea infuser resting across a ceramic mug

Illustrative image, not an official product photo.

Short answer

For most mug-by-mug brewing, a broad basket infuser is easier to fill and empty than a small tea ball because it gives leaves more room while keeping them contained. The useful dimensions are the ones that connect the basket to your own drinkware: its rim must span the cup opening, its body should sit below the waterline without touching the bottom, and its handles must remain easy to lift. Fine mesh helps with small particles, but a basket also needs open area for water flow and seams that do not trap wet leaves. A lid can reduce heat loss during steeping and may double as a drip rest afterward, provided its shape works both ways.

Search reference

Compare loose-leaf tea infuser baskets

Check rim span, basket depth, mesh construction, lid design, handle clearance, and cleaning guidance against the cups or teapot you already use.

View matching options

A basket has to fit two spaces at once

An infuser can look compact on a product page and still be a poor match for a favorite mug. It needs to bridge the opening securely while leaving enough of the basket inside the vessel for water to surround the leaves. If the support arms barely catch the rim, an accidental bump can tip the basket. If the basket is too shallow for a tall mug, part of the tea may sit above the water. If it is too deep, its base may press against the cup and reduce circulation around the lowest leaves.

Measure the inside opening of the smallest and largest vessels you expect to use. Then note their usable depth from rim to bottom and whether the lip is unusually thick, flared, or uneven. A handle that works on a straight ceramic mug may interfere with a travel-cup rim or teapot lid. Manufacturer dimensions should be checked carefully because listings may report the full handle-to-handle width rather than the basket diameter that enters the cup.

Capacity is not simply a question of how much dry tea fits inside. Leaves expand as they steep, and different cuts occupy space differently. Leaving room around them generally makes the basket easier to rinse and less likely to overflow when lifted. Choose for your usual serving size and brewing method rather than trying to maximize the stated capacity.

Who this is for

  • People who brew one mug or a small pot from loose tea and want a reusable alternative to disposable filters.
  • Households with several straight-sided mugs that can share one removable basket.
  • Tea drinkers who want to lift the leaves out at the end of a timed steep instead of leaving them in the vessel.
  • Anyone who finds a narrow tea ball awkward to load, empty, or scrub around its hinge.
  • Small kitchens where a basket, lid, and resting dish can take the place of a dedicated brewing pot.

Who should skip it

  • Choose disposable paper filters if containing very fine sediment and minimizing cleanup matter more than reusability.
  • Use a teapot with a compatible built-in filter if you routinely brew several servings at once.
  • Skip a rigid basket if your everyday vessel has an opening or lid system that does not provide a safe support point.
  • Consider a handled strainer used during pouring if you prefer leaves to move freely in the entire pot.
  • Avoid buying from photos alone when the listing does not provide enough dimensions to establish cup compatibility.

What to verify before buying

  • Basket diameter and depth: Compare the part that enters the vessel—not only the overall dimensions—with your mug or teapot opening and water level.
  • Support span: Confirm how far the arms or rim extend and whether they rest securely on both sides without blocking a drinking handle or teapot feature.
  • Mesh scale: Look for clear photos and wording about the perforations, especially if you brew small-cut leaves or blends with fine particles.
  • Seams and edge construction: Check where mesh joins the frame and whether folded edges, joints, or corners appear accessible for rinsing.
  • Lid purpose: Determine whether a lid is included, how it sits during steeping, and whether it is shaped to hold the wet basket afterward.
  • Handle temperature and grip: Review the design and current use instructions; do not assume every protruding handle stays cool or is intended for bare-hand lifting.
  • Material description: Verify the exact material wording for the basket, frame, lid, and any silicone or plastic parts instead of inferring composition from color.
  • Cleaning directions: Confirm whether hand washing or dishwasher cleaning is recommended and whether all pieces separate for care.

Mesh fineness is a tradeoff, not a finish line

A finer screen can retain more small fragments, yet no reusable infuser guarantees a completely sediment-free cup. Very small openings may drain slowly or hold particles against the surface, particularly when tea is densely packed. Larger perforations usually rinse more readily, but tiny leaf pieces and powdered ingredients can escape. Match the filter to what you brew most often rather than assuming the finest-looking mesh is universally superior.

Construction deserves equal attention. An apparently smooth basket may still have a rolled rim or lower seam where damp fragments collect. A reinforced frame can help the basket keep its shape, while excessive interior ledges make it harder to tap leaves into a compost or waste container. Inspect listing images for the transition from the base to the sidewall and for any brackets entering the brewing area.

Water flow also depends on how much of the basket is perforated. A deep basket with mesh only near the upper walls behaves differently from one with an open base and sides. Once the correct fit is established, compare the distribution of openings and leave expansion room during use. Follow the tea seller’s preparation guidance for quantity, water, and time rather than treating the infuser itself as a brewing recipe.

The lid can earn its storage space

A fitted lid may help retain warmth and keep the top of the basket covered while tea steeps. After lifting the infuser, turning that lid over can provide a convenient place for drips—if it is wide and stable enough for the basket. This two-stage use is worth checking in product photos because a domed cover, shallow saucer, and locking lid do not serve the same purpose.

Consider the removal sequence before choosing a design. You should be able to uncover the mug, lift the basket, and set it down without reaching across steam or carrying a dripping insert across the counter. A lid with a tiny knob may be harder to handle with wet fingers, while a broad flat cover may need more storage room. If no resting piece is included, an ordinary small plate can be a simpler alternative than paying for a feature that does not fit your routine.

Cups that already have their own lids require extra scrutiny. The infuser handles may prevent the vessel lid from closing, and the included infuser lid may not seal the mug. Treat claims about heat retention conservatively and verify how the exact pieces are intended to be arranged.

Cleanup begins before the leaves dry

A basket is easiest to maintain when it is emptied soon after use. Let excess liquid drain, move the spent leaves to the waste or compost stream accepted in your area, and rinse the mesh from both sides before fragments dry in place. Follow the stated care instructions for deeper cleaning and for any stains or buildup; abrasive tools and cleaning products can affect materials and finishes differently.

Wide openings simplify this routine because a spoon or gentle stream of water can reach the base. Hinges, latches, and narrow necks introduce places that are harder to inspect, which is one reason basket formats often suit daily brewing. Still, double-wall mesh, folded rims, or attached decorative parts can add their own hidden areas.

Storage should allow the infuser to dry fully. Nesting it inside the wet mug saves counter space but can hold moisture around both items. Keep the lid nearby so it does not become a mismatched saucer, and avoid stacking heavy utensils on fine mesh that could be bent out of shape.

Limitations

  • Even fine mesh may allow some tea dust or tiny particles into the drink.
  • Search results mix cup baskets, teapot inserts, tea balls, novelty strainers, and pouring strainers with different jobs.
  • A wide support rim does not guarantee compatibility with every mug, insulated tumbler, or teapot lid.
  • The infuser does not determine suitable water temperature, tea quantity, or steep time; those choices depend on the tea and preparation guidance.
  • Wet leaves and mesh still require prompt emptying, rinsing, and complete drying.
  • A single-mug basket may be inefficient when several servings need to be prepared together.

Alternatives to compare

  • Disposable paper tea filters for easier disposal and stronger containment of fine particles.
  • A tea ball or tong infuser for occasional brewing when compact storage matters more than leaf expansion room.
  • A teapot with a removable infuser when several cups are usually served at once.
  • A brewing mug supplied with a specifically fitted basket and lid when compatibility is the main concern.
  • A pour-through tea strainer for brewing leaves loose in a pot and filtering only when serving.
  • A French press reserved for tea if its capacity, filter style, and cleaning routine suit the household.

FAQ

How do I know whether an infuser basket will fit my mug?

Measure the mug’s inside opening and usable depth, then compare those numbers with the basket body and the support span. Check how a thick or flared rim affects the handles, and make sure the basket can reach the normal water level without resting awkwardly on the bottom.

Is fine mesh always better for loose-leaf tea?

Fine mesh is helpful for small-cut leaves, but it can drain more slowly and take more effort to rinse. Larger openings may suit broad whole leaves. Choose the balance that fits your usual tea, and expect some fine sediment with any reusable screen.

Does the basket need a lid?

No, but a lid can help cover the vessel during steeping and may serve as a drip rest after the basket is removed. Verify both functions from the current design, since not every included cover is stable when turned over.

How much tea should go into a basket infuser?

Use the preparation guidance for the specific tea and serving size, and leave space for the leaves to expand. Do not fill the basket simply because extra dry tea fits; crowding can make water circulation and cleanup more difficult.

Can I put a metal tea infuser in the dishwasher?

Only if the current care instructions say that all of its materials and parts are dishwasher compatible. Check the basket, frame, lid, grips, and any coating separately rather than assuming the metallic appearance answers the question.

Give Hot Cookware a Landing Zone: A Guide to Silicone Trivets

Product links are for reference. Verify current details on the retailer page before buying.

Illustrative image of generic silicone trivets beside plain cookware on a kitchen counter

Illustrative image, not an official product photo.

Short answer

Start with the bottoms of the pots, skillets, and baking dishes that most often need a place to land. A silicone trivet should support that footprint without letting a heavy edge hang far beyond the pad, while leaving enough visible border to position the cookware without reaching underneath it. Compare the maker’s stated temperature and contact guidance with how the cookware will actually arrive—off a burner, from an oven, or from a serving table—and follow the countertop or tabletop maker’s care rules as well. Thickness alone does not establish protection: surface pattern, open holes, raised feet, flatness, and the stability of the entire cookware-and-trivet stack all matter. A pair of medium pads can be more adaptable than one small decorative shape, especially for roasting pans and long casseroles.

Search reference

Silicone trivets for pots and baking dishes

Compare usable dimensions, thickness, pattern, current temperature guidance, cleaning instructions, and set count for the cookware and surfaces in your kitchen.

View matching options

Map the cookware that needs a landing place

A trivet is easy to buy by color and surprisingly easy to undersize. Before comparing shapes, turn over the cookware you use most and measure the portion that will actually touch the pad. The base of a saucepan may be much narrower than its rim, while a rectangular casserole or roasting pan may need support near both ends. Note whether the base is flat, footed, rounded, ridged, or fitted with a ring that concentrates weight on a narrow line.

Then identify where each hot item moves. A stockpot may go from cooktop to counter for draining. A Dutch oven may sit in the middle of the dining table. A sheet pan might only need a brief stop beside the oven. These routes create different requirements for space, grip, appearance, and duration of contact. Measuring the intended counter or table area also prevents a large pad from blocking a sink edge, drawer, place setting, or another active prep zone.

Draw the listed trivet dimensions on paper and place the relevant pot over the outline while everything is cool. This quick mock-up shows how much of the base would be supported and whether handles remain clear of walls and nearby objects. For long cookware, test two outlines placed apart. Two separate trivets can support both ends, but only when they sit level, cannot spread unexpectedly, and are positioned before the hot pan is lifted.

Who this is for

  • Cooks who regularly move pots, kettles, skillets, or oven-safe dishes onto a counter or dining surface.
  • Small kitchens that need a flexible pad that can hang, roll, or store in a shallow drawer when it is not in use.
  • Households looking for several landing points for family-style serving dishes rather than one permanent countertop stand.
  • People who want a washable barrier for cookware bases that may carry condensation, sauce drips, or light kitchen residue.
  • Renters who can follow the surface owner’s guidance but do not want to install a fixed or built-in landing area.

Who should skip it

  • Skip a small flexible trivet when large roasting pans need a rigid, continuous platform or support at widely separated points.
  • Choose a purpose-designed insulated surface when the countertop, table finish, cookware maker, or appliance instructions require a specific protective system.
  • Do not use an ordinary trivet as a burner cover, cooktop mat, oven liner, potholder, or direct-flame accessory unless the current product instructions explicitly permit that exact use.
  • A stable metal, wood, cork, ceramic, or composite stand may suit someone who prefers a rigid piece that stays in one location.
  • If a household member cannot reliably see or position a low-profile pad, a larger high-contrast landing zone may be easier to use safely.

Pattern is functional, not merely decorative

Silicone trivets appear as solid sheets, open honeycombs, woven-looking grids, concentric rings, flowers, and many other shapes. Those cutouts and ridges change how the cookware meets the pad. A mostly solid design provides broad coverage and can catch small drips, but its underside may trap moisture against the counter. An open grid allows visibility and some air movement, yet exposed gaps mean parts of the cookware footprint are not directly supported by silicone.

Raised ribs can reduce the contact area and create channels beneath a pan. They can also make a narrow cookware ring sit unevenly if the pattern does not meet it at enough points. Deep texture catches crumbs and oily residue more readily than a simple surface. Product photos taken straight on may hide these differences, so inspect side views and look for the actual height of ridges, feet, and edge borders.

Decorative extensions should not be counted as full support unless they share the load. A trivet listed as eight inches across may provide a smaller central area once holes and thin outer details are excluded. Compare the usable supporting zone, not just the maximum tip-to-tip measurement.

Thickness, flexibility, and a level stack

A thicker pad may create more separation between cookware and furniture, but thickness does not reveal the formulation, stated operating limit, or behavior under a heavy pot. It also raises the cookware farther from the surface. On a soft or uneven pad, a narrow pot can feel less settled than it does on a broad rigid stand.

Flexibility helps with drawer storage and cleanup. It may also let a pad conform to crumbs, grout lines, table seams, or an uneven surface rather than bridging them. Always clear and dry the landing area first. Place the trivet flat before moving the hot item, and never try to straighten a folded edge by reaching beneath loaded cookware.

Check whether the pattern lies flat after shipping and storage. A hanging loop or rolled form is useful only if the trivet returns to its intended shape. If several pads will be used together, their thickness should suit the planned arrangement. Supporting opposite ends of a long dish on pads of different heights can introduce a tilt that was not present on the counter.

What to verify before buying

  • Usable support area: Compare the solid or load-bearing region with the actual base of each pot, pan, or serving dish.
  • Overall thickness and profile: Look for side-view measurements, raised feet, borders, ribs, and any center that sits higher than the edge.
  • Temperature and contact guidance: Confirm the current stated limits, allowed contact conditions, and prohibited uses; do not infer them from appearance or generic material wording.
  • Intended placement: Check whether the item is described for counters and tables and whether there are separate restrictions for cooktops, ovens, grills, microwave appliances, or open flame.
  • Surface compatibility: Follow the care instructions for stone, laminate, wood, veneer, glass, painted finishes, and other surfaces in the home.
  • Cookware stability: Consider the base shape, filled weight, handle direction, and how the trivet pattern contacts the cookware.
  • Food-contact status: If the pad will touch food directly or double as a jar opener or prep accessory, verify that the maker explicitly allows that use.
  • Cleaning method: Check dishwasher placement or hand-washing instructions, drying requirements, and whether oils can collect inside deep openings.
  • Set count and sizes: Confirm whether all pads share one size and thickness or whether the package mixes shapes intended for different jobs.
  • Storage: Measure the drawer, hook, or cabinet location and determine whether folding, rolling, hanging, or stacking is permitted.

Props can make a listing look more complete than the package is. Pots, utensils, tableware, and storage hooks shown around the trivets should be treated as context unless the current included-pieces list says otherwise.

Treat temperature numbers as conditions, not a promise

A maximum temperature shown in a listing is not the temperature of the cookware in your kitchen, nor does it automatically describe every duration, pressure, surface, or mode of use. A pan base can have hot spots, and cookware coming from a burner is not identical to a serving bowl filled with warm food. Verify both sides of the situation: the trivet’s instructions and the cookware or appliance guidance.

The protected surface matters just as much. Some finishes can react to prolonged heat, trapped moisture, pressure, or residue even when a pad remains intact. Stone is not one uniform category; wood finishes differ; laminate and veneer instructions vary. The safest comparison uses explicit guidance for the actual counter or table rather than a broad claim that a trivet “protects all surfaces.”

Use the trivet only in the location and manner its instructions allow. A flexible silicone pad should not be assumed suitable inside an oven, across a hot cooktop, directly on a burner, under a countertop appliance, or around flame. Those environments introduce different heat sources and ventilation needs. A product that works as a serving trivet may still be inappropriate as an appliance mat.

Stability comes before multitasking

Some silicone trivets are also promoted as jar grippers, spoon rests, drying mats, or potholders. A second use can be convenient, but each job has different geometry and risks. A pad that grips a jar lid well in the hand may be too small under a wide Dutch oven. Deep openings that drain water can let sauce reach the table. A thin, flexible piece that bends around a handle may not provide the coverage or control expected from a purpose-made oven mitt.

Evaluate each claimed function separately and follow the relevant instructions. If handling hot cookware is the task, a mitt or potholder must fit the hand, provide the required coverage, and remain secure during lifting. Never assume that success as a stationary trivet establishes safe performance as hand protection.

Color can support a household routine. For example, one visible pad can stay near the oven while another remains on the dining table. This reduces last-second searching with a hot pan in hand. High contrast between pad and surface also makes the landing zone easier to see. Keep the route clear and position the pad before the cookware leaves its heat source.

Cleaning away oil, crumbs, and trapped moisture

Let cookware and the trivet cool according to their instructions before cleanup. Wash the pad using the specified method, paying attention to grid intersections, hanging holes, deep grooves, and textured undersides. Cooking oil can remain in recesses even when the top looks clean, and crumbs beneath the pad can affect stability or mark a delicate finish.

Dry both sides before stacking the trivet or returning it to a drawer. A solid pad left over a damp tabletop can hold moisture against the finish. If trivets nest or cling together, separate them so hidden surfaces can dry. Follow the maker’s guidance before using abrasive scrubbers, strong cleaners, or high-temperature dishwasher cycles.

Inspect the pad periodically in good light. A piece that remains curled, has torn around an open grid, has a damaged edge, or no longer lies as intended should not continue in service without checking the replacement guidance. Discoloration alone does not prove failure, and a normal-looking surface does not prove that it was used within its limits; history and condition both matter.

Limitations

  • A trivet reduces direct contact but cannot guarantee that every countertop or table finish will tolerate a given pan, temperature, weight, and contact time.
  • Search listings may emphasize overall diameter while the usable support area is reduced by holes, thin decorative edges, or raised patterns.
  • Flexible pads can fold, curl, shift, or conform to debris and uneven joints beneath heavy cookware.
  • Open patterns allow spills, condensation, and crumbs to reach the surface below.
  • Silicone can retain oily residue or odors when intricate textures are not cleaned and dried thoroughly.
  • One compact trivet may not support a roasting pan, sheet pan, or long casserole evenly.
  • A stationary cookware rest is not automatically suitable as a potholder, oven liner, burner cover, appliance mat, or direct-food surface.
  • Product temperature wording does not replace the care requirements of the cookware, appliance, countertop, or furniture manufacturer.

Alternatives to compare

A cork trivet is lightweight and naturally rigid compared with a thin silicone sheet, though it has its own cleaning, moisture, and heat guidance. A wooden trivet can create a stable serving platform and complement a dining table, but joints, finish, and washing requirements deserve attention. A metal stand offers a raised rigid structure; check its feet, spacing, stability, and potential to mark a surface. Ceramic or stone trivets provide weight and a solid top but can chip and may need a protective backing. A large purpose-made counter protector creates a broader landing zone for sheet pans and several dishes. For a particular appliance or delicate worktop, the maker’s specified protective accessory may be a better choice than a general household trivet.

FAQ

How large should a silicone trivet be for a pot?

Measure the part of the pot that will bear weight, then choose a usable supporting area that keeps the base stable and leaves a visible margin for placement. Do not rely only on the pot’s rim diameter or the trivet’s widest decorative points. Wide or rectangular cookware may need a larger pad or two equal-height supports positioned according to the cookware guidance.

Can two silicone trivets support one large casserole dish?

They can only be considered when both trivets lie flat, have compatible thickness, support stable parts of the dish, and are used within all current instructions. Position them before lifting the hot dish and make sure they cannot spread or create a tilt. A single broad, rigid landing surface may be simpler for a heavy or awkward casserole.

Can a silicone trivet go directly on a glass cooktop?

Do not assume it can. A trivet intended for a counter or table may not be approved for a cooktop, especially while the surface is warm or in operation. Follow the cooktop manufacturer’s rules and the trivet’s current placement restrictions; use a different landing area if either set of instructions is unclear.

Is a silicone trivet the same as a silicone potholder?

Not necessarily. A trivet is primarily a stationary rest, while hand protection requires suitable coverage, grip, flexibility, and handling instructions. Use a pad as a potholder only when the maker explicitly permits that use and its size and design suit the cookware being lifted.

Why do some silicone trivets have holes or raised ridges?

Openings and ridges change contact area, flexibility, airflow, drainage, and cleaning access. They may help a pad bend or keep part of a pan above the base, but they can also expose the surface to drips or contact a narrow cookware ring unevenly. Compare the actual pattern with the base of your cookware rather than choosing by appearance alone.

Taking Cake on the Road: Choosing a Carrier with Enough Room

Product links are for reference. Verify current details on the retailer page before buying.

Illustrative image of a generic cake carrier with a handled dome lid on a kitchen counter

Illustrative image, not an official product photo.

Short answer

Measure the cake after frosting and decorating, not just the pan that baked it. A useful carrier needs spare room around the widest decoration and above the tallest swirl, topper, or stacked layer. Compare the carrier’s usable interior diameter and height with those finished measurements, then inspect how the base supports the cake board, where the latches sit, and whether the top handle transfers the load through a secure structure. A reversible base can add serving flexibility, while a flat interior is usually easier to clean and less likely to catch a thin board. For occasional trips, fit and dependable closure matter more than extra compartments. For frequent baking, also plan where the bulky dome will live between events.

Search reference

Cake carriers with lids

Compare usable interior dimensions, base profile, latch placement, handle support, care instructions, and storage footprint for the cakes you actually make.

View matching options

Draw a box around the finished cake

A cake carrier is really a clearance decision. Start with a cake you make regularly and note four measurements: the diameter of the cake board, the widest frosting or decoration, the height from the bottom of the board to the top of the cake, and the tallest removable or permanent topper. If the cake is rectangular, measure both sides as well as the diagonal clearance needed to set it down without scraping an edge.

External product dimensions do not answer this question. The lid wall may taper inward, the handle may intrude into the dome, or a ridge around the base may reduce the flat area available to a cake board. Look for interior measurements and a diagram showing where those measurements were taken. If only overall dimensions are listed, there is not enough information to promise that a close-fitting cake will clear the lid.

Leave working room rather than matching the numbers exactly. Fingers or a cake lifter need space to lower and retrieve the board. Piped borders can extend beyond the sponge, and tall frosting can shift slightly during a warm trip. Extra clearance should not be confused with stability, though: a much larger base lets the board slide unless the carrier or your transport setup provides an appropriate restraint.

Who this is for

  • Home bakers carrying layer cakes, cheesecakes, coffee cakes, or other round desserts to family gatherings, school events, and shared meals.
  • Hosts who want one covered container that can move from kitchen counter to vehicle to serving table.
  • People replacing improvised cardboard boxes that do not close over tall frosting or offer a reusable handle.
  • Bakers who already use cake boards and can select a carrier around a repeatable board size.
  • Households that have cabinet, pantry, or shelf space for a wide dome when it is not in use.

Who should skip it

  • Skip a round carrier when sheet cakes, loaf cakes, or long rectangular bakes make up most of your transport needs.
  • Choose a cupcake carrier when individual wells and vertical clearance for many frosted cupcakes are the main requirement.
  • Do not rely on a basic plastic dome for multi-tier cakes, elaborate sugar work, or deliveries that require professional boxing and support.
  • A low-profile keeper may be sufficient if the container will stay on the counter and never be lifted by its handle.
  • Anyone short on storage should measure the empty cabinet first; a rigid dome can occupy more space than the bakeware it serves.

What to verify before buying

  • Usable diameter: Confirm the flat area available to the cake board, excluding raised rims, latch housings, and decorative grooves.
  • Usable height: Check clearance at both the center and the outer edge because some domes curve or taper.
  • Base orientation: Determine whether the base is flat, recessed, footed, or reversible, and which side is intended to hold food.
  • Board compatibility: Compare the flat surface with your usual cake-board diameter, thickness, and edge treatment.
  • Latch arrangement: Count the latches, inspect how they engage, and check whether closure can be seen or felt from each side.
  • Handle structure: Look at how the handle joins the lid and how the closed lid joins the base; the entire load depends on that path when carried from the top.
  • Stated load guidance: If a load limit or carrying restriction is provided, compare it with the filled carrier rather than the empty container.
  • Food-contact materials: Verify the current material description and intended contact surfaces instead of inferring suitability from appearance.
  • Care instructions: Check dishwasher placement, hand-washing guidance, temperature limits, and whether latches or seals are removable.
  • Storage dimensions: Measure the full diameter and height, including the handle when folded and when standing upright.
  • Included pieces: Confirm whether cake boards, serving tools, trays, cupcake inserts, or cold packs shown in photos are actually included.

The base does more work than the dome

The base has to keep a cake level while providing room to lift or serve it. A shallow raised rim may help locate the dome, but it can conflict with a board that nearly fills the platform. Deep grooves and molded decoration can collect crumbs or press into an unboarded cake. A simple flat center is versatile, especially when the carrier will also hold pies, tarts, or unfrosted cakes.

Some carriers advertise a reversible base: one side may be flatter for cake while the other has divided sections or molded supports for another food. Inspect both configurations. Reversing the tray can alter the available height, change how the lid engages, or place feet and ridges near the cake board. Versatility only helps when the cake side still provides the dimensions and closure you need.

A cake board is worth planning into the system. It gives you a surface for decorating, moving, and serving without sliding a spatula directly under soft cake at the event. The board should be stiff enough for the finished cake and should sit fully on the carrier base. A board that bridges a raised center or hangs over the flat area can rock even if it technically fits under the dome.

Read the closure before trusting the handle

A top handle is convenient because it leaves the other hand free for a door or bag, but it also encourages the user to suspend the whole cake from the lid. The handle, lid, latches, and base all become part of one load path. A comfortable handle cannot compensate for latches that are only partly engaged.

Look for product photos that show each latch both open and closed. The closure should be accessible without pushing against frosting through the dome, and its engaged position should be easy to confirm. Several distributed latches can help draw the lid down evenly, provided each one is closed. A single missed latch can let the base hang unevenly when the carrier is lifted.

Before the first real trip, practice with the empty carrier and then with a nonfragile, evenly distributed load that stays within the maker’s guidance. Close every latch on a level counter, lift only a short distance, and observe whether the base remains seated. This is a setup check, not a reason to exceed a stated limit or imitate the weight of an unsupported tall cake.

Carry the container level and support it from below whenever conditions are uncertain. A handle does not turn the carrier into a swing-proof case. Keep the other hand ready under the base on stairs, over thresholds, and during transfers into or out of a vehicle.

A carrier cannot correct a warm, unstable cake

The cake itself needs to be ready to travel. Cool and set it according to the recipe before enclosing it. Warm cake can soften frosting and create condensation inside a closed dome. Decorations that lean before departure are unlikely to improve on the road, no matter how strong the carrier looks.

Check whether the dessert requires refrigeration and follow the recipe’s food-storage guidance. A cake dome is an enclosure, not automatically an insulated cooler. If the carrier supports a cold pack, verify where it sits and whether it changes interior height or creates direct contact the recipe does not permit. Do not assume that an optional insert can maintain a safe temperature for a particular duration.

Odors and residual moisture also matter. Wash and dry the carrier before the event, especially if it previously held savory food. Clear plastic makes it easy to see presentation damage, but it may also show condensation. Venting the carrier should only be done when consistent with the recipe, environment, and transport needs.

Plan the vehicle space before departure

The safest available vehicle location is usually a clean, level, stable surface where the carrier cannot slide, tilt, or be struck by other cargo. A soft seat slopes and compresses; a lap moves with the passenger; a trunk may become hot; and the floor may be uneven or dirty. Conditions vary, so inspect the actual vehicle rather than assuming a familiar spot will work.

Measure the carrier’s full footprint and lid height against the intended space. Make sure a door, seatback, parcel shelf, or hatch will not strike the handle. Keep groceries, drink bottles, and loose serving pieces separate so they cannot roll into the dome. Drive smoothly and avoid abrupt turns or stops where possible, but treat physical placement—not careful driving alone—as the primary defense against movement.

At arrival, open the vehicle and clear a path before lifting the cake. Ask another person to handle doors and carry accessories. Place the carrier on a level serving surface before releasing any latch. Open closures gradually and lift the dome straight up so its rim does not drag across decorations.

Tall domes, low domes, and adjustable designs

A low dome stores more easily and may be adequate for unfrosted cakes, pies, or a single modest layer. It is less forgiving of piped tops and center decorations. A tall dome provides options but raises the center of gravity, needs more vehicle clearance, and occupies more cabinet space.

Some products use collapsible, telescoping, or multi-position lids. These can reduce storage height or adapt to several bakes, but seams and moving sections add areas to inspect and clean. Verify whether the lid is meant to travel in every position and how the selected height locks. A collapsible wall that stays stable on a shelf may behave differently when the filled container is lifted.

Opaque carriers protect the cake from view and may hide scuffs, while transparent domes let you monitor clearance and presentation. Visibility does not reveal whether a latch is structurally engaged unless the closure itself is visible. Choose the material and shape around care, fit, and closure rather than appearance alone.

Cleanup and the awkward question of storage

Frosting tends to reach the lid rim, latch recesses, handle joints, and grooves in the base. Review cleaning directions for every piece. “Dishwasher safe” may apply only to a certain rack or component, and a tall dome may not fit without blocking a spray arm. Hand washing is often easier in a large sink, but the dome can be slippery when wet; support it rather than holding it only by the handle.

Dry latch cavities and nested surfaces before reassembly. Closing a damp dome for long storage can trap odors and moisture. If pieces nest, place a soft barrier only if the maker permits it and make sure the lid is not distorted by a heavy object stacked on top.

Measure storage with the handle in its normal resting position. A folding handle can reduce height, but wide latch tabs still add to the footprint. The top of a refrigerator may seem convenient, yet heat, dust, and difficult lifting can make it a poor everyday location. A low shelf where the carrier can be moved with two hands is easier to manage.

Limitations

  • Seller dimensions may describe the exterior rather than the usable cake space, and curved walls reduce clearance near the top.
  • A secure-looking dome does not establish a load capacity or guarantee that every latch is fully engaged.
  • Rigid round carriers are bulky and do not efficiently fit rectangular cakes or mixed dessert assortments.
  • A cake can still slide inside an oversized carrier if the board and base do not provide an appropriate, stable fit.
  • Plastic surfaces may scratch, cloud, stain, retain odors, or deform when cleaned or stored outside their stated limits.
  • A covered carrier does not automatically provide refrigeration, insulation, leak resistance, or protection from severe impact.
  • Tall decorations and tiered structures may need a specialized box, internal supports, or professional transport methods.
  • Product photos cannot show how comfortably a handle feels at the actual filled weight.

Alternatives to compare

A bakery-style cake box and matching board is lightweight, available in many sizes, and easier to store flat, though it may not offer a reusable top handle or moisture-resistant surface. A pie keeper suits lower desserts and may take less cabinet space. A rectangular food carrier accommodates sheet cakes and mixed trays but can leave unused space around a round cake. A cupcake carrier uses individual supports to separate small cakes. A cake stand with a dome works well for serving and counter storage when portability is secondary. Complex stacked cakes may call for tier-specific boxes, supports, and delivery equipment rather than a general household carrier.

FAQ

How much larger should a cake carrier be than the cake?

There is no single allowance that works for every decoration. Measure the cake board and the widest frosting detail, then choose a usable interior diameter that leaves room for fingers or a lifter without letting the board move freely. For height, include all layers, frosting, and permanent toppers, and remember that a curved dome may narrow near the top.

Can I carry the container only by its top handle?

Only as allowed by the current product instructions and load guidance, with every latch completely engaged. Test the closure before the event, keep the carrier level, and support the base with your other hand during uncertain transfers. A top handle is not evidence that the container can tolerate swinging, impact, or an unspecified heavy cake.

Will a standard cake board fit inside a cake carrier?

It depends on the carrier’s flat usable base, not its outside diameter. Compare the board’s actual diameter and thickness with the interior platform, raised rim, and latch housings. If the listing does not provide usable dimensions, ask for them rather than assuming a named cake size proves compatibility.

Can a cake carrier keep a frosted cake cold in the car?

A basic carrier should not be treated as a cooler unless the maker describes an insulated system and explains how it is used. Follow the recipe’s refrigeration guidance, limit exposure as appropriate, and verify any cold-pack placement. The lid’s presence alone does not establish temperature control.

What is the easiest way to store a large cake dome?

Measure a low cabinet or pantry shelf before buying and include the handle and latch tabs. A reversible base or folding handle may help, while a collapsible dome can reduce height if its design and cleaning requirements suit you. Store all pieces clean and dry without placing weight that could distort the lid or closure.

Choosing a Dough Whisk for Bread, Batter, and Heavy Mixing

Product links are for reference. Verify current details on the retailer page before buying.

Illustrative image of a generic looped dough whisk beside a bowl of bread dough

Illustrative image, not an official product photo.

Short answer

A dough whisk makes the most sense when ordinary balloon-whisk wires clog in a thick mixture but kneading has not yet begun. Look for a head that can move through your usual bowl without striking the sides, a handle long enough to provide leverage without becoming awkward, and smooth junctions that will not hold flour paste. The characteristic looped head can bring wet and dry ingredients together quickly for bread dough, muffins, pancakes, or other sturdy batters, yet it is not designed to aerate egg whites or finish gluten development. Base the choice on bowl size, batch volume, handle comfort, construction, and cleaning access—not on the number of loops alone.

Search reference

Dough whisk options for home baking

Compare head diameter, loop layout, handle length, attachment points, and care guidance against your mixing bowls and typical batch size.

View matching options

Where a dough whisk fits in the mixing sequence

Bread mixing has several stages, and this utensil is most useful near the beginning. Once liquid meets flour, a spoon may push a dense lump around the bowl while a fine balloon whisk fills with paste. A dough whisk uses a more open metal head to cut through dry pockets and pull ingredients toward the center. The goal is a roughly combined mass ready for resting, folding, or kneading by another method.

That role also explains its limits. Open loops do not create the fine aeration expected from a balloon whisk, and a handheld utensil cannot replace a stand mixer when a formula or baker calls for sustained mechanical kneading. It is better viewed as a bridge between measuring ingredients and working the developed dough.

Consider the mixture rather than the recipe label. A high-hydration bread dough, a stiff biscuit mixture, and pancake batter all resist the tool differently. If you mostly mix thin sauces, eggs, or whipped cream, a conventional whisk is more suitable. If your regular baking involves dense, sticky mixtures that only need to be combined evenly, the dough-whisk shape can be genuinely useful.

Who this is for

  • Home bread bakers who mix dough by hand before folding, kneading, or resting it.
  • Cooks whose balloon whisks repeatedly clog when flour first meets liquid.
  • Small kitchens that need one uncomplicated manual mixing tool rather than another countertop appliance.
  • Bakers preparing sturdy muffin, quick-bread, pancake, or biscuit mixtures where overmixing is a concern.
  • People who prefer a broad handle and a pulling motion to gripping a thin spoon through a resistant batch.

Who should skip it

  • Skip it if your main jobs are whipping cream, emulsifying a smooth sauce, or aerating eggs; a balloon whisk serves those tasks better.
  • It adds little if a stand mixer already handles every bread batch from initial mixing through development.
  • A large head can be frustrating in narrow measuring jugs or small bowls.
  • Anyone who has difficulty with repeated wrist and forearm movement should compare a mixer or another method suited to their comfort.
  • Do not expect the whisk to replace a dough hook, kneading, stretching and folding, or whatever development method the recipe requires.

Head size and loop geometry

The working head must be in proportion to the bowl. A broad head engages more mixture on each pass, which can help in a large batch, but it needs room to turn. In a small bowl it may knock the rim, leave ingredients in the corners, or send flour over the side. Compare the maximum head width and overall length with a utensil that already works well in your bowl.

Listings may show one loop, several concentric loops, coils, or related open-wire forms under the same general product name. More metal is not automatically more effective. What matters is whether flour and dough can pass through the open spaces while the head remains stable under resistance. Tight gaps may trap sticky dough; very open forms may miss small dry patches until the bowl is scraped.

Look at the head from the side as well as from above. A mostly flat profile reaches broad bowl bottoms differently from a deeper, three-dimensional form. Rounded bowls, straight-sided containers, and wide shallow mixing tubs each reward a different reach. Product dimensions and multiple viewing angles are more informative than a generic claim about mixing speed.

Handle leverage and control

Length changes both reach and force. A longer handle can keep fingers away from the dough and offer leverage in a deep bowl, but extra length magnifies wobble if the joint is weak. It also requires a larger drawer. A short handle feels direct in a compact bowl yet may place the hand close to wet ingredients.

Grip diameter deserves attention because thick mixtures ask for more force than a light batter. A broad, gently shaped handle can spread pressure across the palm; a very smooth cylindrical handle may rotate when hands are damp. Check side-view photos for abrupt ends or hardware that could press into the hand. Comfort claims are subjective, so measurements and handle shape should guide the comparison.

Wood, metal, and molded handles have different seams and care needs. A wood handle may need prompt hand washing and drying if the maker specifies it. An all-metal design can simplify the material transition but still needs a comfortable contour. Verify instructions for the complete tool rather than assuming the head material determines how the handle can be washed.

Construction details worth inspecting

Dense dough puts torque on the point where wire enters the handle. Search listings may not reveal long-term performance, but they can show how the parts meet. Look for a clearly described attachment method, smooth finished ends, and minimal recesses where hydrated flour can accumulate. Decorative collars can hide the junction, so confirm whether they create a cleanable seam.

Wire thickness affects stiffness, although exact measurements are not always provided. A head that flexes excessively may feel vague in a heavy batch, while a very rigid form transfers more resistance to the wrist. Material labels alone do not establish stiffness, corrosion behavior, or food-contact suitability. If those details are decisive, find explicit current specifications rather than inferring them from a polished surface.

After arrival, inspect the tool before using it. The loops should be secure and evenly finished, the head should not rotate independently of the handle, and no sharp wire tip or rough joint should be exposed. Those simple checks matter more than cosmetic finish.

What to verify before buying

  • Maximum head width and depth relative to the bottom and sides of your usual bowl.
  • Overall length, usable handle length, and the drawer or crock where the tool will live.
  • Loop spacing and whether both sides of the head appear accessible for cleaning.
  • How the metal head attaches to the handle, including seams, collars, welds, or fasteners.
  • Handle shape, diameter, surface texture, and any hanging hole that affects the grip.
  • Current material descriptions for every component rather than just the wire head.
  • Hand-wash or dishwasher guidance for the fully assembled utensil.
  • Whether the selected listing includes one whisk or a multipiece set.
  • Return terms in case the head is too large for your bowls or the grip does not suit your hand.

Styled photographs often include bowls, proofing baskets, scrapers, or other baking accessories. Treat them as scene props unless the current package list specifically includes them.

A practical way to use it

Start with the mixing order given by the recipe; do not rearrange ingredients simply to suit the utensil. When dry and wet ingredients meet, use controlled strokes that pull through the center and sweep around the bowl. Rotate the bowl if that is safe and comfortable. Pause to scrape flour from corners with a flexible bowl scraper rather than forcing a large wire head into an angle it cannot reach.

As the mixture becomes cohesive, pay attention to resistance. The tool has likely finished its job when it is only dragging the dough as one mass rather than incorporating visible dry areas. Move to the next recipe step instead of continuing to churn a dough that needs resting, folding, or kneading.

For quick breads and muffins, stopping matters because unnecessary agitation can affect the result. A dough whisk may reduce clogged wires, but it does not prevent overmixing by itself. Follow the recipe’s visual cues and accept any appropriate small lumps rather than chasing an artificially smooth batter.

Cleanup before flour paste dries

Hydrated flour becomes stubborn around wire crossings and handle collars. Rinse or wash the utensil promptly according to its care instructions. Use a soft brush where the loops overlap if needed, and inspect both faces of the head. Avoid reaching between wires with fingers when a brush can do the job more safely.

A dishwasher claim should cover the handle as well as the metal loops. If the tool includes wood or bonded components, heat and prolonged moisture may have specific restrictions. Dry the joint thoroughly before putting the whisk in a drawer, particularly when the construction includes a collar or recessed opening.

Storage should not bend the loops under heavier utensils. A hanging hole can keep the head visible, while a roomy crock may suit a long handle. If it lies in a drawer, allow enough width that the head does not catch whenever another tool is removed.

Limitations

  • A dough whisk combines ingredients but does not aerate like a balloon whisk.
  • It cannot perform sustained kneading or guarantee proper gluten development.
  • The open head still traps some sticky mixtures, especially around wire intersections.
  • A head suited to a large bread bowl may be clumsy in a small batter bowl.
  • Manual mixing still requires repeated hand, wrist, and forearm movement.
  • Material names and loop counts do not by themselves establish strength, comfort, corrosion resistance, or cleaning ease.

Alternatives to compare

Sturdy mixing spoon: Familiar, easy to scrape against a bowl, and useful beyond baking, though a dense dough can gather into a heavy lump around it.

Flexible bowl scraper: Excellent for collecting dry pockets and turning sticky dough inside a curved bowl. It offers less reach and leverage for the first vigorous mixing strokes.

Balloon whisk: Better for thin batters, sauces, eggs, and aeration. Its fine wires tend to retain thick flour paste.

Stand mixer with dough hook: Useful for larger or repeated batches and recipes that call for mechanical development. It requires more space, setup, and cleanup.

Hands and stretch-and-fold methods: Direct feedback helps a baker feel hydration and development, but the suitable technique depends on the dough and recipe. A dough whisk can still handle the initial messy stage before hands take over.

FAQ

Is a dough whisk the same as a Danish dough whisk?

The names are often used for the same family of open-loop mixing tools, but actual head shapes and dimensions vary. Compare the pictured geometry, measurements, construction, and intended uses rather than assuming every product carrying either name is identical.

Can a dough whisk knead bread dough?

It can bring ingredients together and work through the early shaggy stage. It does not replace kneading, stretching and folding, a dough hook, or another development method when the recipe calls for one. Stop using the whisk when it is merely pulling a cohesive mass around the bowl.

What bowl size works with a dough whisk?

There is no single correct bowl size. The head needs enough room to turn and sweep without repeatedly striking the rim, while still reaching the bottom. Compare the head width and overall length with the internal dimensions of the bowls used for your normal batch.

Does a dough whisk work for pancake or muffin batter?

It can work well for sturdy batters because the open head combines wet and dry ingredients without filling with paste as readily as fine wires. Use the mixing cues in the recipe, since the utensil does not eliminate the risk of overmixing.

Are wooden-handle dough whisks dishwasher safe?

Do not assume they are. Care guidance varies with the wood, finish, attachment, and other construction details. Follow the instructions for the complete utensil; when hand washing is required, clean promptly and dry the handle and joint thoroughly.

Choosing a Cookie Scoop: Portion Size, Grip, and Batch Workflow

Product links are for reference. Verify current details on the retailer page before buying.

Illustrative image of a generic cookie scoop beside portioned dough on a baking counter

Illustrative image, not an official product photo.

Short answer

Choose a cookie scoop around the portions your recipes call for, not around a vague label such as small or medium. The useful comparison is the bowl’s stated volume and dimensions, followed by how much clearance the release sweeper leaves for dough. A scoop also has to feel manageable through an entire batch: compare squeeze-handle, thumb-lever, and spring-action designs; note which hand operates the trigger; and consider whether stiff, chilled dough will overload a light mechanism. A single scoop is enough if one portion size dominates your baking. A measured two- or three-size set makes more sense when you regularly switch among bite-size cookies, everyday cookies, and larger bakery-style portions.

Search reference

Cookie scoops for home baking

Compare stated bowl capacity, release style, hand fit, dough guidance, cleaning instructions, and set contents for the portions you make most often.

View matching options

Start with one recipe you know

Before comparing polished handles and multi-piece sets, open a cookie recipe you actually repeat. Does it specify tablespoons, a measured volume, a finished dough-ball weight, or a scoop number? Those descriptions are not always interchangeable. A scoop number traditionally relates to how many level portions make up a larger reference volume, but seller labels and product dimensions may be inconsistent. Treat the current capacity stated in tablespoons, teaspoons, milliliters, or fluid ounces as the more useful starting point, then check the bowl diameter and depth.

Make one portion with your existing measuring spoon and set it on a plate. This gives you a physical reference for the amount of dough, but remember that a rounded or heaped scoop contains more than a level measure. If a recipe relies on weight, weighing a few portions can be more repeatable than assuming that every pass through the dough fills the bowl identically.

Portion size affects more than the finished cookie’s width. Larger mounds may need different spacing and baking time than smaller ones, and a pan that holds twelve small portions may hold far fewer large ones. Follow the recipe when changing size rather than using a new scoop as the only adjustment.

Who this is for

  • Home bakers who want more consistent spacing and portion size across a tray of drop cookies.
  • People who portion soft dough, muffin batter, meatballs, or similar mixtures and want one dedicated tool for repeatable amounts.
  • Bakers replacing a scoop whose sweeper no longer clears the bowl or whose handle is uncomfortable during long batches.
  • Households selecting a first scoop based on a frequently used recipe rather than buying an assortment blindly.
  • Gift buyers who know the recipient’s preferred cookie style, hand needs, and cleaning routine.

Who should skip it

  • Skip a release scoop if your recipe uses rolled, sliced, piped, pressed, or cut dough instead of dropped portions.
  • Do not expect a small household scoop to force its way through frozen or very hard dough unless the maker explicitly supports that use.
  • Avoid a large set when the capacities are not clearly stated or when most sizes would remain unused.
  • Choose a simple spoon-and-scale workflow if exact portion weight matters more than speed or rounded shape.
  • A trigger located for one hand may be awkward for the other; left-handed users should not assume every mechanism is ambidextrous.

What to verify before buying

  • Bowl capacity: Look for an actual volume and, when available, bowl diameter and depth rather than relying only on small, medium, or large.
  • Release path: Check whether the sweeper travels close enough to the bowl to clear the mixtures you plan to portion.
  • Mechanism style: Compare a thumb trigger with squeeze handles and note the movement, spring placement, and hand required.
  • Intended mixtures: Read the maker’s guidance about soft batter, chilled dough, frozen desserts, or other uses; a similar shape does not guarantee equal strength.
  • Handle fit: Check handle length, width, padding, texture, and the space between moving parts for your grip.
  • Construction: Verify the stated food-contact materials, joints, plating or coatings, and how the bowl connects to the handle.
  • Care directions: Confirm whether hand washing or dishwasher cleaning is specified and how the mechanism should be dried.
  • Set contents: Match every listed capacity to the pieces shown, and check whether measurements are marked permanently or only printed on packaging.
  • Storage: Make sure a wide squeeze handle or nested set will fit the drawer without being compressed under heavier utensils.

How release mechanisms change the rhythm

A thumb-lever scoop holds the main handle in the palm while the thumb presses a side lever. It can be quick when the lever sits naturally under the thumb, but lever reach and spring resistance matter over dozens of portions. Check product images from both sides because a lever that favors the right hand may be inconvenient for a left-handed baker.

Squeeze-handle designs close two handles together to move the sweeper. They distribute the action across more of the hand, which some users may prefer, yet handle span can be too broad for smaller hands. Look at the handle position both open and closed. A soft grip can change the feel, but it does not by itself establish mechanism strength or long-term durability.

Some scoops use a gear, rack, spring, or linkage hidden near the bowl. More parts can create more places for dough and wash water to collect. Close-up photos should show whether the moving pieces are easy to inspect. If the release bar appears bent, sticks in the bowl, or no longer returns as intended, stop using it and follow the product’s support or replacement guidance rather than forcing it.

Match the scoop to dough consistency

Soft drop-cookie dough usually fills by drawing the scoop through the mixture, then leveling against the bowl or container. Sticky dough can cling to both the bowl and sweeper, so the release may not create a perfectly clean mound. Recipe temperature, ingredient balance, and technique all affect release; a nonstick claim should not be treated as a promise that no residue will remain.

Chilled dough presents a different load. If it has become too firm to enter the bowl without heavy force, allow it to reach the recipe’s workable stage rather than prying with the scoop. Twisting a light scoop through hard dough can strain its bowl-to-handle joint or release linkage. The same caution applies to dense mixtures with large chips, nuts, or other inclusions that can jam between the sweeper and bowl.

Wet batters may flow around the sweeper and drip before reaching the pan. A deeper bowl and short travel from mixing bowl to pan can help the workflow, but a spring scoop is not a sealed measuring vessel. For thin batter, a ladle, cup, dispenser, or piping method may give better control.

One scoop or a coordinated set?

One well-chosen scoop is practical when most recipes use approximately the same portion. It takes less drawer space, costs less to replace, and makes it easy to learn how a familiar bowl relates to pan spacing. Select it from the recipe you bake most, then use a scale or measuring spoon to understand the portion it produces with that particular dough.

A set earns its space when each size has a regular job. A small bowl might portion bite-size cookies or fillings, a middle size may cover routine drop cookies, and a larger one may help with muffins or deliberately oversized cookies. Those are possible roles, not universal size definitions. Write the actual capacities on a kitchen note until you recognize them, especially when handles are nearly identical.

Check whether a nested set really nests without squeezing the mechanisms together. Scoops with different handle structures may occupy more drawer width than expected. If the capacities overlap closely, the extra piece may add complexity without a meaningful difference on the baking sheet.

Consistency requires a repeatable fill

A scoop can only improve consistency if it is filled in a similar way each time. Level portions, rounded portions, compressed dough, and loosely gathered dough have different amounts even when they come from the same bowl. Decide which method the recipe intends and use it throughout the tray. If you scrape against the mixing bowl, avoid striking or bending the release bar.

For a new scoop, portion several pieces onto parchment and weigh them individually if consistency is important. The results show whether your hand motion is repeatable and whether inclusions are causing variation. You can then adjust how you fill and level the bowl without assuming the tool itself guarantees identical weights.

Keep pan workflow in mind. Portioning the full tray before placing it in the oven makes uneven gaps easier to spot. Leave the spacing directed by the recipe, and do not infer baking time from scoop size alone. If you intentionally change the portion, monitor according to the recipe’s doneness cues and food-safety guidance.

Cleaning and storage

Dough tends to collect beside the sweeper, under a gear cover, and where the bowl meets the handle. Follow the current washing directions and operate the mechanism carefully during cleaning so all accessible food residue can be removed. Do not put a scoop in a dishwasher simply because it is described as metal; springs, grips, plated parts, and joints may have separate restrictions.

Dry the moving areas before closing the tool in a drawer. Storing it under a heavy pan or utensil can press on the trigger and bend exposed parts. A divider or shallow tray keeps the bowl edge and linkage from catching on whisks and peelers. If the tool is part of a set, avoid forcing pieces together when their release bars touch.

Inspect the scoop before use. A loose handle, sharp edge, flaking surface, rust, misaligned sweeper, or mechanism that will not return deserves attention under the maker’s guidance. A scoop is a portioning aid, not a tool for chipping hard frozen food or levering ingredients from a container.

Limitations

  • Capacity labels can vary across listings, and a generic size name does not establish the portion produced.
  • A scoop measures bowl volume, while the actual dough amount changes with leveling, compression, stickiness, and inclusions.
  • Release sweepers may leave residue and can jam when hard pieces sit between the bar and bowl.
  • Changing cookie portion size can change tray spacing, yield, and baking time; follow recipe guidance.
  • Trigger reach, spring resistance, and handle span are personal fit questions that photos cannot fully answer.
  • Moving joints take more cleaning and inspection than an ordinary spoon, and not every scoop is dishwasher-safe.

Alternatives to compare

  • Measuring spoons plus a small spatula for occasional batches and recipes written in spoon measures.
  • A kitchen scale for recipes where repeatable portion weight is the priority.
  • Two ordinary spoons for soft drop dough when rounded uniformity is not essential.
  • A piping bag or batter dispenser for mixtures that flow rather than hold a scooped mound.
  • A plain ice cream spade or serving scoop for soft desserts when a mechanical sweeper is unnecessary.

FAQ

There is no universal everyday size. Start with the portion named in your recipe, then compare that amount with the scoop’s stated capacity and bowl dimensions. Labels such as medium can differ, and a heaped bowl contains more than a level one.

Do not assume they are presented consistently. When a number is shown, verify how the seller defines it and compare the accompanying volume and dimensions. Keeping those measurements in your recipe notes is more reliable than remembering a marketing size name.

Only when the dough is at a workable stage and the scoop’s instructions support that use. If filling the bowl requires prying or heavy twisting, let the dough soften as the recipe permits. Forcing a scoop through very hard dough can strain the release assembly and joint.

Is a squeeze-handle scoop better than a thumb trigger?

Neither mechanism is automatically better. Squeeze handles use a broader hand motion, while a thumb lever may feel faster to users who can reach it comfortably. Compare open handle span, trigger position, spring resistance, hand orientation, and the number of portions in a typical batch.

Use the same filling method for every portion—level, rounded, or otherwise specified—and avoid compressing some portions more than others. Weighing the first several mounds can reveal variation in your technique before you fill the entire tray.

Choosing a Spoon Rest That Actually Catches the Drips

Product links are for reference. Verify current details on the retailer page before buying.

Illustrative image of generic spoon rests holding wooden cooking utensils beside a saucepan

Illustrative image, not an official product photo.

Short answer

A useful spoon rest needs to catch what falls from the working end of a utensil while supporting enough of the handle to keep the setup steady. Measure the widest ladle, turner, or serving spoon you pause with during cooking, then compare that head with the rest’s usable bowl or tray. A shallow dish is easy to wipe but may let thin liquid run onto the counter; a deeper cradle contains more drips but can be awkward for broad utensils. Also check the overall footprint, rim height, cleaning access, and the material’s stated care and temperature guidance. If several tools are usually active at once, a divided utensil rest or small washable tray may work better than one decorative spoon-shaped dish.

Search reference

Kitchen spoon rest options

Compare the usable cradle with your widest cooking utensil, then check handle support, drip capacity, cleaning instructions, and the space available beside the stove.

View matching options

The utensil determines the useful shape

The phrase “spoon rest” suggests a single shape, yet cooking utensils vary widely. A teaspoon, wooden spoon, silicone turner, pasta server, and deep ladle do not meet a surface in the same way. Lay the utensils used in a typical meal on the counter and note the width and curve of each food-contact end. The widest head is a more useful reference than the longest handle.

A small oval dish can suit a narrow spoon while leaving the edge of a turner hanging over the counter. A deep ladle may roll sideways if only its rounded bowl touches the rest. A spatula with a broad, flat head needs enough horizontal area to settle without teetering. Product photos often show one carefully positioned utensil, so compare listed dimensions with your own tools rather than judging scale from the scene.

Handle support changes the balance. Some rests have a notch or raised tail that lifts the handle while the head sits in a basin. Others are nearly flat. A raised support can keep more of the utensil off the counter, but it also creates a lever: a heavy handle may tip a lightweight rest or lift the spoon head out of a shallow bowl. The combination should remain stable when the utensil is placed down casually, not only when it is centered with care.

Who this is for

  • Cooks who pause with a sauced spoon, ladle, turner, or serving utensil and want a defined washable landing spot.
  • Small kitchens where a compact rest is easier to clean than repeatedly wiping a larger counter area.
  • Households that want to keep an active cooking utensil separate from clean tools in a countertop holder.
  • People who use one or two predictable utensil shapes and can match the rest to those dimensions.
  • Shared kitchens where an obvious utensil landing place helps keep drips away from handles, appliance controls, and prep space.

Who should skip it

  • A single spoon rest may be too restrictive when several utensils, tongs, or pot lids are active at the same time.
  • Cooks with very limited space beside the range may prefer a washable plate already in the kitchen or a rest integrated into another suitable tool.
  • A lightweight decorative dish is a poor choice for a long, heavy ladle if the handle can pull it sideways.
  • Skip intricate grooves or fixed dividers if quick, complete washing is more important than separating tools.
  • Do not place any rest on a hot cooking surface or expose it to direct flame unless the exact product instructions explicitly permit that use.

What to verify before buying

  • Usable cradle dimensions: Compare the interior width and length with the working ends of your ladle, turner, spoon, and other frequent tools.
  • Handle position: Check notch width, support height, and the likely angle of the utensil so the handle does not roll or point into a walkway.
  • Drip containment: Look at bowl depth, raised edges, and where liquid will collect when the utensil rests at an angle.
  • Loaded stability: Consider base width, feet, weight distribution, and whether a long handle could tip or rotate the rest.
  • Counter footprint: Measure the actual landing zone beside the stove, including clearance from burners, appliance controls, prep boards, and the counter edge.
  • Material wording: Verify the stated construction and finish rather than inferring ceramic, metal, silicone, or stone from appearance alone.
  • Care instructions: Confirm whether the complete item can go in the dishwasher and whether corners, slots, or removable parts need extra cleaning.
  • Temperature guidance: Check stated limits and placement instructions; a utensil fresh from a pan can transfer heat even when the rest is not on the cooktop.
  • Surface contact: Review the underside, non-slip features, and any care guidance relevant to a finished counter or stovetop surround.
  • Set contents: Search results may show utensils or multiple rests for context, so confirm the quantity and components in the selected option.

A basin should contain drips without trapping the tool

Containment is a question of both volume and direction. A deep center does little if the utensil head hangs past the rim and sauce runs down the outside. Look at the path from the lowest part of the tool to the collecting area. Ideally, drips fall inside the perimeter even when the handle is not positioned perfectly straight.

Raised edges are useful for thin broth, oil, or condensation, but a high front rim can catch a wide turner as it is lifted. A very narrow handle notch may not accept a thick wooden spoon, while an oversized notch can let slim metal handles slide sideways. If the design has several slots, compare each opening with the handles it is meant to separate.

Capacity claims are rarely necessary for this small accessory. The practical question is whether the rest can hold residue from one cooking session without liquid reaching the edge. A cook who stirs a thick sauce may need a broad wipeable surface; someone serving soup may benefit from more depth. Empty the rest if liquid accumulates rather than allowing a utensil handle to dip into it or relying on an unstated capacity.

One tool, several tools, or a pot lid?

A classic single cradle keeps one active utensil easy to identify. It also discourages stacking a clean spoon on a used one. This arrangement works for a simple stovetop task but can become crowded when a second pan requires a turner and a ladle at the same time.

Multi-slot rests spread several handles apart and may offer a larger drip tray below. Check the spacing between positions, because wide heads can overlap even when handles occupy separate notches. More slots also mean more corners and ridges to wash. A flat tray offers flexible placement, although utensils can touch or roll unless its surface and edge are shaped to control them.

Some listings suggest using a large utensil rest for a pot lid. Treat that as a separate fit check. A lid introduces much more width, weight, hot condensation, and leverage than a spoon. Confirm that the exact rest is intended for the lid’s diameter and weight, and think about where the wet lid will drain. A purpose-designed lid holder or heat-safe plate may be the clearer choice. Do not assume a small spoon rest can safely support cookware because one staged image appears to show it.

Place it where a dripping utensil can reach safely

The shortest route from pan to rest usually creates the fewest drips, but proximity to cooking heat has limits. Choose a stable counter section where the rest does not crowd a burner, block controls, sit on a warm vent, or require reaching across a hot pan. Handles should point away from the counter edge and busy walkways. They should not extend over another burner or snag a towel.

Left- and right-handed cooks may prefer different positions. In a shared kitchen, test both sides of the range before committing to a large or fixed arrangement. If one side holds oil bottles or prep ingredients, a compact rest on the other may reduce congestion. A paper outline cut to the product dimensions can reveal whether a listed footprint leaves enough working room.

The rest should be easy to remove for cleaning without brushing against a hot pot. Grease and food can collect underneath even if the top catches every visible drip, so include the surrounding counter in the cleanup routine. Follow the counter maker’s guidance as well as the rest’s instructions, especially if the base is rough, unglazed, or fitted with removable feet.

Material affects weight, handling, and care

Ceramic-style rests can provide useful weight and a smooth basin, but they may chip or break if dropped. Confirm the actual material, care method, and whether the underside is appropriate for the intended surface. A glossy appearance alone does not establish construction or durability.

Metal options can be thin and easy to rinse, or heavier depending on their build. Look for finished edges, stable feet, and clear cleaning guidance. Do not infer corrosion resistance, alloy type, or compatibility with a dishwasher unless those details are stated for the current item.

Flexible polymer or silicone-style designs may grip the counter and resist breakage, but stiffness, stain behavior, temperature limits, and washing instructions vary. A soft rest that bends during lifting may spill collected liquid unless it is supported underneath. Stone, wood, and composite products bring their own sealing and care requirements. No material category is automatically the easiest; the best fit is the one whose weight, surface, and washing routine suit the way it will be used.

Limitations

  • A spoon rest catches residue from the utensil head, but drips can still travel along a handle or fall while the utensil moves from the pan.
  • One small cradle rarely fits a narrow spoon, broad turner, deep ladle, and tongs equally well.
  • A long or heavy handle can rotate, slide, or tip a rest that appears stable when empty.
  • Grooves, dividers, and handle notches add control while creating more surfaces to inspect and wash.
  • Placing a rest near a stove does not make it suitable for a hot burner, open flame, oven, or other exposure outside its instructions.
  • Light colors may show sauce residue quickly, while dark colors can make some residue harder to notice; either still requires routine cleaning.
  • A utensil rest is not automatically engineered to support a pot lid or other cookware.

Alternatives to compare

A small washable plate or saucer offers a broad landing area and may already fit the kitchen routine, though a round utensil can roll without a notch. A divided utensil tray can serve several tools during a larger cooking session but occupies more counter space. A clip-on utensil holder keeps the spoon near a pot; it must be explicitly compatible with the vessel, utensil, heat, and handling method. A lid-and-utensil stand may suit meals involving both items, provided its loaded stability and cleanup needs work in the available area. Finally, a heat-safe washable mat creates a flexible landing zone for irregular tools, but it may not contain liquid as well as a raised basin.

FAQ

How large should a kitchen spoon rest be?

It should be wide enough for the largest working end you routinely set down and long enough to support a useful portion of the utensil without letting drips fall beyond the edge. Compare interior dimensions with your actual ladle, turner, or spoon rather than using a universal size.

Is a deep or shallow spoon rest easier to use?

A shallow rest is easy to wipe and gives a broad utensil more clearance, while a deeper basin can contain more thin liquid. The right depth depends on the utensil curve and the type of residue. Check that the head sits inside the rim without becoming wedged or unstable.

Can one spoon rest hold several cooking utensils?

Only if its usable area or divided slots fit the handles and heads without unstable stacking. A purpose-made multi-slot rest or washable tray is usually easier to assess for several tools than a small single-spoon cradle.

Can a spoon rest also hold a pot lid?

Do not assume so. A lid is wider, heavier, and may release hot condensation. Use the rest for a lid only when the current product instructions and dimensions support that use; otherwise compare a dedicated lid holder or another suitable heat-safe surface.

Where should a spoon rest sit beside the stove?

Place it on a stable surface within easy reach but away from direct flame, hot burners, vents, controls, and the counter edge. Orient the utensil handle so it does not cross a cooking zone or project into a walkway, and follow all material and placement instructions.

Finding a Potato Masher That Works with Your Pots and Grip

Product links are for reference. Verify current details on the retailer page before buying.

Illustrative image of a generic manual potato masher beside a bowl of roughly mashed potatoes

Illustrative image, not an official product photo.

Short answer

Start with the cookware, batch size, and finished texture rather than the masher’s appearance. A broad perforated plate can cover the bottom of a roomy pot quickly, while a compact zigzag or wavy head may reach more easily inside a small saucepan. The handle should keep your knuckles clear of the rim and let you press downward without bending the wrist sharply. Look closely at the junction between head and handle, because cooked potato can collect in narrow seams. If you want an exceptionally smooth result, compare a ricer or food mill as well; a manual masher is better suited to direct, controllable crushing than perfectly uniform purée.

Search reference

Manual potato masher options

Compare head width, perforation or wire pattern, usable handle length, cleaning access, and the dimensions of the pot you normally use.

View matching options

Begin with the pot, not the utensil drawer

A masher has to move freely inside a real cooking vessel. Measure the flat area at the bottom of the saucepan or Dutch oven you use for potatoes. Then account for rounded sides, rivets, and any insert that narrows the working space. A large head may look efficient in isolation yet leave an untouched ring around a small pot. A small head reaches corners more easily but requires more presses across a family-size batch.

Depth matters too. A short tool can put your hand close to steam and the hot rim of a deep pot. An extra-long handle creates distance, but it can be harder to control and may not fit the intended drawer. The useful measurement is the working length from the top of the mashing head to the comfortable grip area, not simply the overall product length.

Think about the vessel’s interior finish before pressing a metal utensil against it. If cookware guidance discourages metal tools, compare a masher whose current material description is compatible with that surface. Do not infer scratch resistance from a colored coating or product photo. The cookware maker’s instructions and the masher’s stated use are the relevant checks.

Choose a head for the texture you like

Manual mashers commonly use one of several head layouts. The distinction affects how much food passes around or through the tool with each stroke.

A perforated plate provides many small openings across a broad area. It can break cooked pieces down consistently, although soft potato may pack into the holes and require rinsing from both sides. Check whether the plate is flat, slightly curved, or angled relative to the handle, since that changes how it meets the bottom of the pot.

A wavy wire or zigzag head has larger open spaces and fewer enclosed holes. It may be easier to clear under running water and can leave a deliberately rustic texture. Wire spacing, head width, and stiffness vary, so the shape alone does not establish how quickly it will work.

Some designs use a grid or mixed pattern between those two approaches. Compare the actual openings and reachable surfaces rather than relying on a broad style name. None of these heads removes lumps automatically; potato variety, cooking, draining, additions, and the number of passes all influence the result.

Who this is for

  • Home cooks who want to mash cooked potatoes directly in a suitable saucepan or mixing bowl.
  • Households that prefer some control over a smooth, chunky, or rustic texture.
  • Cooks who also prepare soft root vegetables or other foods explicitly covered by the utensil’s instructions.
  • Buyers who want a simple hand tool without a separate hopper, disc, or crank to assemble.
  • Kitchens with a pot and storage location that match the selected head width and handle length.

Who should skip it

  • Skip a basic masher if your priority is an exceptionally fine, uniform potato texture; a ricer or food mill may be a closer fit.
  • Choose another method if repeated downward pressing is uncomfortable for your hand, wrist, elbow, or shoulder.
  • Do not use a metal head in cookware whose care instructions prohibit metal utensils.
  • A broad plate is a poor match for a narrow pot even if it suits the batch volume.
  • Skip intricate head-and-handle joints if you need every food-contact surface to be visible and easy to reach during washing.

Handle shape changes the motion

Most mashers invite one of two hand positions. A vertical handle is held much like a large utensil, with pressure traveling down the shaft. A horizontal or loop-style top can place the palm over the tool. Either arrangement can work, but the wrist angle, force distribution, and storage footprint differ.

For a vertical grip, check circumference, contour, surface texture, and where the handle ends relative to the palm. A very thin handle can concentrate pressure; a thick one may be difficult for a smaller hand to wrap securely. Decorative ridges do not necessarily improve control once the grip is damp. Dimensions and clear side views are more informative than generic ergonomic wording.

For a horizontal grip, compare the width of the contact area and the clearance between the hand and shaft. This shape may distribute pressure across the palm, but it also creates a wider profile in a drawer. Anyone with limited grip strength should consider the complete movement with an empty utensil before applying force to hot food. A masher is a levered hand tool, not a medical or adaptive device unless the exact product is documented for that purpose.

Shaft stiffness and attachment are important under load. Look for a clear description of how the head connects to the handle and inspect the tool when it arrives. It should not show a loose joint, obvious distortion, rough edges, or a grip that rotates unexpectedly. These arrival checks cannot be confirmed from a search result alone.

What to verify before buying

  • Head dimensions: Compare width and shape with the usable bottom area and curves of your usual pot.
  • Working length: Confirm that the grip stays comfortably above the rim without making the tool unwieldy.
  • Head pattern: Look at hole or wire spacing in relation to the texture and cleanup routine you prefer.
  • Cookware compatibility: Check both the utensil material wording and your cookware care instructions.
  • Handle geometry: Review grip diameter or palm width, surface texture, orientation, and knuckle clearance.
  • Construction: Inspect seams, welds, molded joints, coatings, and any spaces where food or water could remain.
  • Care instructions: Verify whether the complete assembled tool is approved for the dishwasher or requires hand washing.
  • Temperature guidance: Do not leave the masher resting in hot cookware unless its instructions permit that use.
  • Storage: Measure drawer length and height, or confirm that any hanging opening fits a secure kitchen hook.
  • Package contents: Make sure the selected option includes the expected number and style of tools rather than accessories shown only for context.

Make the working motion predictable

A stable pot and a manageable amount of cooked food make mashing easier. Place the vessel on a level, heat-safe surface as directed for the cookware. Press in a deliberate pattern across the bottom instead of repeatedly striking one spot. Turning the pot or folding the contents between passes may expose larger pieces, but use a suitable second utensil and keep hands away from steam.

The head should contact food rather than be forced hard against the pot. Excess pressure does not compensate for potatoes that are insufficiently cooked, an overfilled vessel, or a head that cannot reach the corners. If the tool flexes significantly or the handle feels unstable, stop and inspect it rather than applying more force.

A masher also does not automate recipe timing. Potatoes can become gluey when handled aggressively, depending on the variety and method, while additions such as butter or milk change the mixture’s resistance. Follow a trusted recipe for preparation and use the masher to approach the desired texture gradually. The buying decision should support that workflow, not promise one guaranteed consistency.

Cleaning access can outweigh an extra feature

Starchy food dries into a stubborn film, especially inside perforations and around joints. Rinsing promptly, when allowed by the care instructions, can be easier than leaving the utensil until after dinner. A head that is reachable from both sides gives a brush and water a clearer path. Closely spaced wires or deep edge folds deserve extra inspection.

“Dishwasher safe” should apply to the entire masher, including the handle, finish, bonding, and any soft grip. Even then, a dishwasher may not remove material packed in small holes. Check the head before drying and storage. If water can enter a hollow handle or cap, follow the maker’s drying guidance rather than assuming the interior will drain.

One-piece construction can reduce the number of joints, but it does not guarantee that every contour is easy to clean. A separate grip may feel more comfortable while adding seams. Choose the compromise you are willing to wash carefully after a dense, starchy recipe.

Limitations

  • A hand masher can leave more texture variation than a ricer or food mill.
  • Broad heads may miss food around the curved sides of small cookware.
  • Perforations and tight wire patterns can retain potato until rinsed or brushed from both sides.
  • Repeated downward pressure may not suit every user’s hand or wrist comfort.
  • Metal, coated, and polymer heads have different cookware and temperature restrictions that must be checked for the exact model.
  • A potato masher should not be treated as a blender, chopper, or tool for hard raw foods.

Alternatives to compare

Potato ricer: Pushes cooked potato through many small holes for a finer, more uniform texture. It introduces a hopper, handles, and multiple surfaces to load and clean.

Food mill: Processes cooked food through a perforated disc using a crank or sweeping blade. It can suit larger preparation tasks, but requires more setup and storage space.

Sturdy fork: Useful for a small portion in a bowl and already present in most kitchens. The narrow working area makes a large batch slower and may provide less leverage.

Hand mixer: Can combine and smooth some recipes quickly, but speed makes overworking easier and beaters require their own safe handling and cleaning routine. Follow the recipe and appliance instructions.

Silicone or polymer masher: Worth comparing for cookware that should not contact metal. Heat limits, stiffness, head dimensions, and care requirements still vary by product.

FAQ

Is a perforated plate better than a wire potato masher?

Neither head is universally better. A perforated plate applies pressure through many small openings and may produce a more consistent crush, while an open wire pattern can be easier to clear and may suit a rustic texture. Compare both with your pot size and cleaning preferences.

How wide should a potato masher be?

The head should fit the flat and curved working area inside your usual pot with enough room to move across the batch. Measure that space rather than choosing the largest head. A smaller masher takes more passes but can reach vessels that a broad plate cannot.

Can I use a metal masher in a nonstick pot?

Only if the cookware maker’s care guidance allows that type of metal utensil. Many coated surfaces restrict metal contact. When metal is discouraged, compare a compatible nonmetal head and verify its current material and temperature guidance.

Why do potatoes get stuck in the masher holes?

Soft potato is pressed through enclosed openings and can remain there, especially after it begins to dry. A head reachable from both sides is easier to rinse or brush. Follow the care instructions and clean the utensil promptly rather than using a sharp object that could damage it or cause injury.

Does a potato masher make completely smooth mashed potatoes?

A masher can reduce lumps gradually, but its manual pattern often leaves more variation than a ricer or food mill. Ingredients, cooking method, batch depth, and the number of passes also affect texture. Compare another tool if uniform smoothness is the main goal.

One Loaf at a Time: Choosing a Pan for Banana Bread and Sandwich Loaves

Product links are for reference. Verify current details on the retailer page before buying.

Illustrative image of a generic loaf pan and a plain baked loaf on a kitchen counter

Illustrative image, not an official product photo.

Short answer

Choose a loaf pan from the recipe inward. First match the recipe’s stated inside length, width, and depth; pans sold under the same familiar size label may still hold different amounts of batter or dough. Then decide whether the pan is mainly for quick breads, yeast loaves, small cakes, or a mixture of tasks. Compare the stated material and surface, wall shape, corner radius, usable capacity, full exterior footprint, grip area, temperature guidance, and cleaning instructions. A pan that fits the oven but changes the loaf’s depth can change how the center and crust finish, so shape and capacity matter more than a broad label such as “standard.”

Search reference

Loaf pans for home baking

Compare inside measurements, stated capacity, construction, corner shape, rim design, release and care instructions against the recipes you bake most often.

View matching options

Start with a recipe, not a pan label

A loaf pan turns one batch into a deep, compact bake. That depth is useful for a sliceable shape, but it also makes the relationship between the recipe and the vessel unusually important. Batter near the wall begins setting while the center still has farther to go. Dough also rises within the boundaries of the pan rather than spreading freely. If the pan is substantially narrower, shallower, or more flared than the recipe expects, the same mixture occupies a different depth and surface area.

Before shopping, open two or three recipes you actually intend to repeat. Record the requested pan dimensions and whether those dimensions refer to the top opening, the base, or simply a conventional name. Also note the stated preparation method: greasing, flouring, parchment, an uncoated surface, or another approach. The recipe and pan maker should both support the intended oven temperature and preparation.

This short recipe audit prevents a common mismatch: choosing the largest-looking pan for flexibility. Extra room is not neutral. A small batch in an oversized pan can become shallow, while too much batter in a smaller vessel can rise beyond the intended boundary. If a recipe does not explain substitutions, use the specified format or consult a reliable conversion rather than estimating by eye.

Who this is for

  • Home bakers who regularly make banana bread, pound-style cakes, sandwich loaves, meatless savory loaves, or other recipes written for a rectangular pan.
  • First-apartment kitchens that need one versatile piece of bakeware and have already identified the most common recipe size.
  • Bakers replacing a dented, peeling, rusted, warped, or difficult-to-clean pan.
  • Households adding a second matching pan for recipes that yield two loaves or for side-by-side batch preparation.
  • Small-oven users willing to compare the complete exterior footprint with the rack and required appliance clearances.
  • Gift buyers who know the recipient’s preferred recipes, care routine, and available storage space.

Who should skip it

  • Skip a rigid rectangular pan when the recipe is designed around a free-form loaf, Dutch oven, tube pan, bundt pan, or another vessel with different heat exposure.
  • Do not choose solely by an approximate size name when the listing omits usable inside measurements or capacity.
  • A very flexible mold may be a poor fit for anyone who cannot support and move it safely when filled.
  • Avoid a surface or construction whose temperature, utensil, washing, and preparation guidance does not fit your routine.
  • Do not buy a multipack simply for the count if the pans will not sit level in the oven or fit the cabinet without scraping one another.

What to verify before buying

  • Inside dimensions: Look for length, width, and depth measured inside the baking cavity, not only the package or outside rim.
  • Wall profile: Determine whether the sides are straight or flared and whether the published dimensions refer to the top or bottom.
  • Usable capacity: If volume is stated, compare it with the recipe and leave the headroom that recipe calls for rather than filling to the rim.
  • Exterior footprint: Include rolled rims, handles, lids, and decorative extensions when checking oven, dishwasher, and cabinet fit.
  • Material and construction: Read the complete description instead of assuming that every steel, aluminum, glass, ceramic, silicone, or cast pan behaves alike.
  • Surface instructions: Confirm whether the pan is coated, uncoated, seasoned, or requires a particular release method, along with approved utensils.
  • Temperature guidance: Check the current maximum-use instructions against every planned recipe and appliance mode.
  • Grip area: Make sure there is a stable place to hold the hot pan with your own oven mitts without touching the loaf.
  • Corner and seam design: Tight corners, folds, and exposed joints can affect release and how easily residue is removed.
  • Care and storage: Verify hand-wash or dishwasher directions, drying needs, stacking guidance, and any restrictions on abrasives or sprays.
  • Included pieces: Check whether a pictured lid, insert, liner, rack, or second pan is actually included and whether every piece is intended for oven use.

Dimensions tell more than “large” or “small”

A rectangular pan can be described by its top opening even when the base is noticeably smaller. That taper helps some loaves release, but it also changes the actual volume and the width of the finished slices. Two pans with similar top measurements may therefore create different loaf profiles. Seek a dimension diagram or clear specifications for the interior rather than measuring a marketing image.

Depth deserves its own check. A deeper pan gives rising dough or batter more vertical boundary, but the recipe still determines a suitable fill level. It is not safe to assume the unused height will solve an oversized batch. Likewise, a shallow pan exposes more surface relative to the center. When changing dimensions, use tested recipe guidance for fill level and timing instead of transferring the original timer unchanged.

For sandwich bread, consider the slice shape you want and the amount of side support the dough recipe expects. For quick breads, think about how easy it will be to monitor the center without over-darkening the outer surface. These are recipe-matching questions, not promises that one pan geometry will always make a particular crust or crumb.

If capacity is missing, do not rely on a home water test until after purchase—and only if the maker’s care instructions allow the pan to be handled that way. Before ordering, a listing that provides both internal dimensions and capacity is easier to compare than one offering only a nominal size.

Material changes the baking routine

Metal loaf pans are widely available, but “metal” can describe different alloys, gauges, layers, colors, and coatings. A light uncoated pan and a dark coated pan should not be assumed to produce identical results under the same conditions. Follow the recipe and maker guidance, observe an unfamiliar pan during early bakes, and record what works in your oven rather than making a universal timing rule.

Glass and ceramic let a pan move from oven to table in some recipes, but they bring their own handling, preheating, thermal-change, and inspection requirements. Verify that the exact vessel is approved for the temperature and appliance you intend to use. Avoid sudden temperature changes unless the current instructions explicitly permit them, and stop using a vessel with damage that its maker identifies as unsafe.

Silicone can offer flexible release and compact storage, yet a filled mold may need rigid support. If a sheet pan is required underneath, include that sheet in the oven-fit calculation and confirm that the combined setup follows both products’ instructions. Flexibility also changes how the pan is lifted, so a soft mold should not be carried by one corner.

Heavy cast constructions can retain heat and may require seasoning or a specific maintenance routine. Their weight increases further when filled. Check whether the user can move the loaded pan with controlled, two-handed support and whether the oven rack is appropriate for it.

Straight sides, rounded corners, and handles

Wall shape influences both the loaf silhouette and the release path. Straight walls can make squared slices appealing, while a slight flare can provide more clearance as the loaf is lifted. Neither is automatically easier if the batter sticks or the recipe’s preparation was not followed. Look at the transition between the base and sidewalls: sharply defined corners form a different edge than broad rounded ones and may take more attention during cleaning.

Some metal pans are folded at the corners; others appear formed from a continuous piece. Seams and rolled rims can trap crumbs or moisture if they are difficult to reach. Close-up photographs and care instructions are more informative here than a distant lifestyle view. If the listing does not show the inside corners, treat easy-release claims cautiously.

Handles or extended rims can provide valuable space for oven mitts. They also make a pan longer and can interfere with adjacent bakeware. Measure the full span, then check how you will rotate, lift, and set down the hot vessel. A lid can help with transport or storage when designed for those uses, but verify whether it is heat-safe; a lid pictured with bakeware should not be assumed suitable for the oven.

Release begins before the batter goes in

A nonstick description does not eliminate recipe preparation or careful handling. Different surfaces may restrict metal utensils, abrasive scrubbers, aerosol sprays, prolonged soaking, or dishwasher use. Read the current instructions before the first batch and keep them available. If a coating becomes scratched, blistered, peeling, or otherwise damaged, follow the maker’s inspection and replacement guidance.

Uncoated pans may call for greasing, flouring, parchment, seasoning, or another recipe-specific method. Parchment can create a useful sling in suitable recipes, but it must be placed away from heating elements and used within its own temperature guidance. Excess paper should not be allowed to obstruct safe handling.

Cooling time is part of release. Some recipes direct the loaf to rest briefly in the pan; others specify a different sequence. Leaving a loaf too long or turning it out too early can create problems unrelated to the pan’s quality. Follow the recipe, use a suitable rack if called for, and avoid cutting against the pan surface.

Plan for cleanup and storage

Picture the cleanup after a sticky fruit loaf rather than after an empty product photo. Can a soft sponge reach each interior corner? Does the rim have an opening that can retain water? Can the pan dry fully before it is stacked? “Dishwasher-safe” and “easy to clean” are not interchangeable statements, so verify the stated method for the exact construction and finish.

Stacking saves space but can scratch some interiors. Pan protectors or a non-abrasive separator may help when permitted, although the simplest solution can be storing pans upright without pressure on the baking surfaces. Measure the cabinet slot and check whether broad handles prevent a stable stack.

Inspect bakeware periodically under good light. Dents, warping, corrosion, chips, cracks, damaged coatings, or loose attached parts can change fit and handling. Use the maker’s criteria for continued use. Replacing a questionable vessel is more sensible than trying to hide damage beneath parchment.

Limitations

  • One loaf pan will not reproduce recipes developed for every other pan size or material without possible adjustments.
  • Nominal dimensions can obscure differences in taper, depth, corner radius, and usable capacity.
  • Oven calibration, rack position, recipe composition, pan color, construction, and starting temperature can all affect a bake.
  • A coated surface still needs suitable preparation, utensils, cleaning, inspection, and storage.
  • Glass, ceramic, silicone, and heavy cast pans introduce handling requirements that differ from a typical light metal pan.
  • A lid or insert may not be oven-safe even when sold with the pan.
  • Deep rectangular pans are efficient for one loaf shape but less versatile than a flat sheet for free-form baking.
  • Bundled pans take more cabinet space and may be unnecessary for a household that usually makes single-loaf recipes.

Alternatives to compare

A Pullman-style pan with a fitted lid is intended for recipes that call for its enclosed shape; verify pan and lid use rather than adding a loose lid to an ordinary loaf pan. A Dutch oven suits bread methods developed for a covered, preheated vessel and brings different lifting and heat precautions. A baking sheet or stone works for free-form loaves whose dough can hold the intended shape. A muffin pan divides a compatible batter into portions but changes depth and timing. A small cake pan may suit a recipe that provides that alternate format. For occasional no-bake shaping or refrigerator storage, a food-storage container may be more appropriate than buying oven bakeware.

FAQ

Are 8.5-by-4.5-inch and 9-by-5-inch loaf pans interchangeable?

Not automatically. Their length, width, depth, taper, and capacity can produce a different batter depth and loaf shape. Use the size named by the recipe or follow a reliable conversion that addresses fill level and baking progress rather than changing only the timer.

Is one loaf pan suitable for both banana bread and yeast bread?

It can be when both recipes call for that pan’s usable dimensions, capacity, material, and temperature range. The two recipes may still require different preparation, proofing, fill levels, and release steps, so versatility comes from compatibility with the recipes—not merely from the rectangular shape.

Does a darker loaf pan require a different oven temperature?

Color can be one factor in browning, but construction, coating, recipe, oven behavior, and rack position matter too. Follow guidance provided with the recipe and pan. Watch an unfamiliar setup during early bakes instead of applying one temperature change to every dark pan.

Should I choose a loaf pan with a lid?

Choose one when you have recipes or storage needs designed for that exact lid and pan. Confirm whether the lid is intended for baking, cooling, transport, or storage; do not place it in the oven unless the instructions explicitly approve that use.

How much empty space should remain above the batter or dough?

Use the fill level specified by the recipe and the pan instructions. Batter types and yeast doughs rise differently, so there is no single safe fraction for every loaf. If the batch exceeds the recipe’s intended pan, divide it into suitable vessels rather than filling to the rim.

Choosing a Garlic Press That Is Easy to Load, Squeeze, and Clean

Product links are for reference. Verify current details on the retailer page before buying.

Illustrative image of a generic manual garlic press with garlic cloves on a kitchen counter

Illustrative image, not an official product photo.

Short answer

A useful garlic press should fit the cloves you normally prepare without turning one small job into several loads. Compare the inside of the chamber, the handle opening span, the amount of leverage available near the end of the squeeze, and how easily residue can be removed from the holes and hinge. A removable basket or cleaning grid may help, but only if the loose piece is simple to handle and store. Also decide whether you want to press peeled cloves only or are considering a model that is explicitly designed for another workflow. For most kitchens, predictable cleanup and a comfortable grip matter more than extra crushing, peeling, or slicing claims.

Search reference

Manual garlic press options

Compare chamber dimensions, handle reach, pressing plate alignment, cleaning access, stated clove preparation, and care instructions for your usual cooking routine.

View matching options

Notice what happens between the cutting board and the pan

A garlic press solves a narrow but common kitchen problem: reducing a clove to small pieces with a squeezing motion rather than repeated knife work. Whether that is convenient depends on the rest of the meal. One clove going into a skillet calls for a tool that opens, loads, and rinses quickly. A sauce made with a full head of garlic makes chamber capacity and repeated squeezing more important. Someone who enjoys the control of hand-mincing may not need a press at all.

Before comparing products, think through three recent recipes. Note how many cloves you used at once, whether you peeled them first, and whether the garlic went directly into hot cookware or into a mixing bowl. This reveals practical details that a generic feature list cannot: the press may need to fit over a narrow pan, rest without dripping on the counter, or reopen easily for a second load.

The texture produced by a press is also part of the decision. Pressed garlic is generally finer and releases moisture differently from slices or a rough knife mince. That can be welcome in dressings, sauces, and dishes where large pieces would be distracting. It does not replace every knife cut, however. If a recipe depends on intact slices, evenly sized pieces, or slowly cooked whole cloves, a press is the wrong preparation method regardless of its construction.

Chamber size is more useful than overall size

A substantial-looking tool may still have a shallow or narrow loading chamber. Look for internal length, width, and depth when those measurements are available. If listings provide only overall dimensions, inspect multiple images and verify capacity wording rather than assuming that several cloves will fit. Overfilling can keep the pressing plate from entering squarely, force garlic around the rim, and make the handles harder to close.

A broad chamber can reduce reloads, but it also creates a wider pressing surface. The handles and hinge must translate hand pressure across that area, and the remaining garlic skin or fibers still have to be removed. Buyers who usually prepare one medium clove at a time may prefer a smaller basket that is quick to clear. Batch cooks may accept a larger tool if the chamber opens widely and can be emptied without digging into sharp edges.

Notice the shape of the chamber opening. A long basket may accept an elongated clove but be awkward to wipe at the far end. Rounded corners are generally easier to reach than tight seams, though photos cannot confirm how smoothly parts meet. Check whether the basket is permanently attached, swings out, or lifts away, and consider where a removable part will sit during loading and washing.

Leverage and hand fit

Handle length influences leverage, but total length is not the same as comfortable operation. The first part of a squeeze may begin with the handles spread farther apart than expected. Measure the open span if it is listed and compare it with a pair of kitchen tongs or another tool you use comfortably. A long lever can reduce the force required later in the stroke while still demanding a wide initial reach.

Grip shape changes how that force reaches the hand. Thin metal edges, abrupt handle ends, or raised decorative details may create pressure points during repeated loads. Wider or contoured surfaces can distribute pressure, but added covers and inserts introduce joints that need cleaning and care. Product images can show the outline; only the current specifications can confirm dimensions and material wording.

Consider where your hand will be when the handles close. Pinch points can exist near the hinge or where one handle nests into the other. A stop or deliberate gap may help, but its presence and location should be verified. People with limited grip strength, hand pain, or restricted finger movement should not assume that a longer handle makes every press suitable; an alternative mincing method with a different motion may be more appropriate.

The pressing face and hole pattern

Most presses use a plate or plunger to force garlic through a perforated basket. The alignment between those surfaces matters. A plate that enters at an angle can leave more material around one side, while a close-fitting design may push more of the clove through but require careful cleaning along its edges. Marketing phrases about yield do not replace a clear view of how the mechanism meets.

Hole size affects the resulting texture and the effort of clearing residue. Very small holes can create a fine output, yet they provide more openings where fibers can remain. Larger perforations may release coarser pieces and can still clog if the clove is dry or the basket is overloaded. Neither pattern guarantees effortless pressing. Match the texture to the recipes you make and the cleanup to the time you are willing to spend after cooking.

Some designs include pins or a hinged cleaning grid that push backward through the perforations. Others provide a separate brush or rely on running water and a utensil. A built-in cleaner stays with the press but adds a moving surface; a separate tool can reach from different angles but is easier to misplace. Verify that any pin grid actually corresponds to the hole pattern and that it can be moved without putting fingers against rough or sharp areas.

Who this is for

  • Cooks who often want finely pressed garlic for sauces, dressings, marinades, soups, or quick skillet meals.
  • Households looking for an alternative to repeated rocking cuts with a knife for one or two cloves.
  • Batch cooks who can match chamber capacity and handle comfort to several consecutive loads.
  • Buyers willing to rinse or clean the chamber promptly before garlic residue dries in the perforations.
  • Shared kitchens where a dedicated prep tool can provide a repeatable texture across different cooks.

Who should skip it

  • Skip a press if you prefer distinct slices, coarse pieces, or the visual control of hand-mincing.
  • Avoid adding one if a knife, microplane-style grater, or other tool already covers the task comfortably and is easier for you to clean.
  • A small fixed basket may frustrate cooks who regularly prepare many cloves at once.
  • Do not choose a model that requires an opening span or squeezing force that is uncomfortable for the intended user.
  • Skip designs with inaccessible seams or loose cleaning parts if you know they will remain unrinsed or get lost in your kitchen.

What to verify before buying

  • Usable chamber dimensions: Compare the inside capacity with typical clove size and the number of cloves you expect to load.
  • Clove preparation: Confirm whether the instructions call for peeled garlic and do not infer peel handling from an image or broad claim.
  • Handle geometry: Check total length, open span, grip width, closed gap, and any likely pinch points.
  • Pressing mechanism: Inspect how the plunger aligns with the basket and how far the chamber opens for loading and emptying.
  • Hole pattern: Consider the expected texture, number of perforations, and access from both sides for cleaning.
  • Cleaning features: Verify whether the basket removes or swings out, whether a pin grid or brush is included, and how each part is used.
  • Care guidance: Read current hand-wash or dishwasher instructions and note any drying, hinge, or finish precautions.
  • Food-contact materials: Use the exact current listing and manufacturer wording rather than guessing from color, weight, or appearance.
  • Storage footprint: Measure the closed press and decide whether it will lie safely in a drawer or hang from a suitable loop.

Cleanup begins before the garlic dries

Fresh residue is usually easier to remove than the thin layer left after a press sits beside the stove through dinner. Plan a landing place before cooking: a small plate near the sink can keep garlic from smearing across a drawer or counter. When the press is no longer needed, open it fully and follow its care directions rather than leaving the chamber closed.

Access from both sides of the basket is valuable. Water may loosen the soft material, while an appropriate brush or the included cleaner can address individual holes. Keep fingers away from burrs, narrow seams, or edges that cannot be seen clearly. If the basket lifts out, wash and dry it without letting the small component disappear under larger cookware. Reinstall it only in the orientation specified for the tool.

Dishwasher suitability must be confirmed for the exact model and all of its components. A dishwasher statement does not ensure that every perforation will emerge clear, nor does it eliminate the need to dry a hinge or nested surface. If hand washing is required, check whether an ordinary dish brush can reach the chamber. A complicated cleaning routine can outweigh seconds saved during mincing.

Odor can linger when residue remains around the pivot, under an insert, or inside a handle joint. That is another reason to favor visible, accessible construction. It is better to choose a simple mechanism you will clean promptly than an intricate tool whose extra functions create hidden surfaces.

Pressing peeled and unpeeled cloves

Some garlic presses are marketed for loading cloves with their papery covering still attached. Treat that as a model-specific workflow, not a universal property of the product type. Read the instructions to confirm what kind of peel, quantity, and chamber loading are intended. Even where unpeeled use is supported, the remaining skin must be removed between loads and may reduce usable capacity.

Peeling first gives you a chance to trim the root end, inspect the clove, and remove damaged areas before it enters the chamber. It also changes the residue left behind. Whether that preparation feels like unnecessary work or a sensible inspection step depends on how you cook. Choose based on the complete workflow—peeling, loading, pressing, clearing, and washing—not just the moment when the handles close.

Do not use the press for ginger, nuts, spices, or other foods unless the product instructions explicitly include them. Hardness, fibers, and moisture vary, and a chamber designed around garlic may not handle another ingredient safely or effectively. A broad list of possible uses should be checked against current manufacturer guidance.

Storage and durability clues

A garlic press is often too bulky for a flatware tray but small enough to vanish beneath larger utensils. Measure it closed and assign a location where the handles cannot spring open or snag nearby tools. If it has a hanging loop, make sure the hook supports the tool without placing the basket at eye or hand level. A removable insert should remain paired with the body, perhaps in a fitted compartment rather than loose in the drawer.

Durability cannot be established from a shiny finish or heavy feel alone. Look at the hinge type, attachment points, handle flex described in the specifications, and whether the pressing plate appears supported throughout its travel. Verify current material and care claims rather than equating one material label with a guaranteed service life. Proper loading matters too: forcing an overfilled chamber or pressing an unintended hard ingredient can strain even a sturdy-looking mechanism.

A press with several joints may offer excellent access, but each hinge or removable section adds an interface to inspect. A one-piece basket may have fewer loose parts while being harder to reach. The practical choice is the design whose moving surfaces you can understand, clean, dry, and store consistently.

Limitations

  • A garlic press produces a particular fine texture and cannot replace slices, rough chopping, or whole-clove preparation.
  • Chamber capacity shown in photos can be misleading without internal measurements and clear loading guidance.
  • Longer handles may improve leverage but can require a wide opening span and more drawer space.
  • Fine perforations and close-fitting plungers can retain garlic fibers even when a cleaning feature is included.
  • Comfort, hinge resistance, and pinch risk are difficult to judge from specifications alone.
  • Claims about pressing unpeeled cloves or handling other ingredients apply only when confirmed for the exact model.

Alternatives to compare

  • Use a chef’s knife for full control over slices, a coarse chop, or a fine mince on a stable cutting board.
  • Compare a rocker-style garlic crusher if a two-handed downward motion feels more natural than squeezing handles.
  • A fine grater can produce a paste-like texture, though it requires careful finger clearance and has its own cleaning needs.
  • Consider a small manual chopper for larger batches when its blade handling, container, and cleanup fit the task.
  • Use a mortar and pestle when crushing garlic with salt or spices is part of the recipe and the bowl size suits the quantity.

FAQ

Do garlic cloves need to be peeled before using a press?

That depends on the exact press. Some models provide instructions for cloves with papery skin, while others are intended for peeled garlic. Check the current guidance and remember that any retained peel still has to be cleared from the chamber between loads.

How large should a garlic press chamber be?

Choose around the cloves and batch size you actually prepare. Internal dimensions are more informative than the overall tool length. A chamber should accept the intended load without crowding the rim or preventing the pressing plate from entering squarely.

Are removable-basket garlic presses easier to clean?

A removable basket can expose more surfaces, but it also creates a small part that must be handled, dried, reinstalled correctly, and stored. Compare that full routine with a fixed basket that opens widely and can be reached from both sides.

Why does garlic stay inside the press?

Some residue is expected because skin, fibers, and flattened material may not pass through the perforations. Overloading, poor plate alignment, or a hole pattern mismatched to the clove can leave more behind. Follow the loading instructions and clear the chamber before residue dries.

Can a garlic press be used for ginger or nuts?

Only if the instructions for that specific model identify the ingredient and method. Ginger fibers and hard foods place different demands on the chamber and hinge, so appearance alone is not evidence that the press is suitable.

A Kitchen Utensil Holder That Fits the Counter—and the Tools

Product links are for reference. Verify current details on the retailer page before buying.

Illustrative image of a generic kitchen utensil holder with wooden spoons, a spatula, and a whisk on a countertop

Illustrative image, not an official product photo.

Short answer

A countertop utensil holder works well when it keeps the tools used at the stove within one-handed reach without becoming an overcrowded catchall. Gather the utensils you actually want beside the range, then compare their bundle width and handle lengths with the holder’s usable opening and depth. A broad, weighted base helps with long or unevenly loaded tools; an open, removable, or uncomplicated interior is easier to clean after cooking. Before choosing a tall crock, also measure the space below upper cabinets and confirm that whisks and spatulas can be lifted out without striking a shelf or hood.

Search reference

Countertop kitchen utensil holder options

Compare crocks, divided containers, and rotating holders after measuring your everyday tool bundle, the available counter footprint, and the clearance needed to pull out the longest utensil.

View matching options

Start with a working set, not the whole drawer

The purpose of a countertop holder is quick access during cooking. It does not need to absorb every ladle, peeler, skewer, and specialty gadget in the kitchen. Pull out the tools used in an ordinary week and divide them into two groups: tools that are comfortable to grab by the handle, and tools better protected or stored flat. Long spoons, solid spatulas, turners, and a whisk often suit upright storage. Sharp blades, heavy tools, and items with delicate edges may require a block, drawer, rail, or other storage method intended for them.

Stand the countertop group together in a jar or measuring jug and observe how much room the handles need. If the bundle is already tightly packed, selecting a holder with nearly the same internal width will not make retrieval easier. Handles should spread enough to be identifiable, yet not so far that a utensil leans into a burner, walkway, or cabinet door.

Tool shape matters as much as count. A balloon whisk occupies more space at the top than a wooden spoon. A wide turner can bridge a narrow opening, while a heavy ladle may pull the bundle to one side. Measuring the widest heads and longest handles reveals more than a generic capacity claim.

Who this is for

  • Home cooks who repeatedly reach for the same group of spoons, spatulas, turners, whisks, or ladles.
  • Kitchens with usable counter space close to food preparation but safely away from direct heat and splatter.
  • Households that want to move frequently used long tools out of a crowded drawer.
  • Shared kitchens where a visible, limited working set is easier to return after washing.
  • Renters who prefer movable storage rather than a wall-mounted rail or permanent installation.

Who should skip it

  • Keep utensils in a drawer when the counter is already scarce or when upper cabinets leave poor lifting clearance.
  • A wall rail or cabinet-mounted system may be more useful when tools have hanging holes and there is a suitable installation area.
  • Do not use a general-purpose crock as a substitute for storage designed to protect sharp knives or other hazardous edges.
  • People who rarely cook may find that one or two tools fit more neatly in a drawer divider.
  • A single large holder is not ideal if allergy management or another household practice requires certain cooking tools to remain distinctly separated.

What to verify before buying

  • Usable interior dimensions: Look for inner width and depth, not only the outer measurements or a styled capacity image.
  • Opening shape: Compare round, oval, and divided openings with wide turners, bulky whisks, and utensils that have hooked or textured handles.
  • Overall height: A holder should support long tools without swallowing shorter handles or letting the bundle become excessively top-heavy.
  • Base and stability: Review footprint, weight distribution, feet, and anti-slip details, especially for long or heavy utensils.
  • Counter clearance: Measure under cabinets, shelves, and the range hood, including the vertical path needed to remove the longest tool.
  • Interior access: Check whether a hand, brush, or cloth can reach the bottom and whether liners, dividers, or drainage pieces are removable.
  • Material and care instructions: Confirm the current construction wording, washing method, heat limitations, and finish care rather than inferring them from appearance.
  • Included components: Determine whether the pictured divider, insert, drip pad, turntable, or utensil set comes with the current option.
  • Placement guidance: Follow current safety and care directions, and choose a stable location away from open flame, hot cookware, and traffic at the counter edge.

Height should support without hiding

A low container makes short handles easy to see, but long tools can fan outward and create leverage at the rim. A very deep vessel may support those tools better while hiding a pastry brush or small spatula below the surrounding handles. There is no universal ideal height because utensil collections vary, so compare the shortest handle you need to retrieve with the holder depth and the tallest tool with the cabinet clearance.

An uneven bundle can tilt even when the holder itself is stable. Broad utensil heads collect on one side, and a heavy tool added last can shift the center of gravity. Test the intended mix in a temporary container: remove a tool from the front and then from the side. If the container moves, the final holder may need a wider or heavier base, fewer tools, or a non-slip contact surface.

Upper cabinets create a second height constraint. The holder may fit neatly against the backsplash yet leave no room to lift out a whisk. Measure from the counter to the obstruction, subtract the holder height, and compare the remaining space with the portion of the longest tool inside the vessel. A paper mock-up or temporary jar can expose this problem before the counter is rearranged.

One compartment or several?

A single open crock is forgiving when the collection changes. Wide items can rotate, and cleaning usually involves fewer corners. The tradeoff is that tools lean together, so a small spatula can disappear behind ladles. An oversized opening also allows handles to spread until they consume more visual and working space than the base suggests.

Dividers create categories such as wooden tools, silicone-tipped tools, and serving utensils. They can make a broad holder feel orderly, but each section must fit the widest intended head. Fixed dividers reduce flexibility and add seams where flour, oil mist, or crumbs can settle. A removable insert offers another arrangement but should be easy to lift without snagging handles.

Rotating holders can bring a rear compartment forward when the vessel sits in a corner. Rotation needs free space around the widest point, and the mechanism should remain stable under an uneven load. Check whether the base is meant to rotate while full, how it should be cleaned, and whether nearby bottles or appliances would block the turn. A turntable is not automatically useful when every tool is already reachable from an open side.

Choose the counter position deliberately

Convenient does not have to mean immediately beside a burner. Cooking grease and steam can coat both the holder and exposed handles, while a crowded range area increases the chance of a tool leaning toward hot cookware. Look for a stable section of counter that can be reached during preparation without crossing over heat. Keep the vessel away from the counter edge and from paths used for hot pans.

A backsplash corner saves central workspace but can make the rear tools difficult to see. Near a dishwasher, the holder is easy to reload but may be too far from the stove. If the work zones are separated, two small groups can be more functional than one overloaded crock: cooking tools near the preparation area and serving tools nearer the table or dish storage.

Check the surface underneath during routine cleaning. A narrow foot, rough base, or trapped debris can affect a finished counter, and a broad base can conceal splatter. Follow the holder’s current care guidance and any applicable instructions for the countertop. Being able to lift the loaded vessel safely matters if the area must be wiped often.

Cleaning is part of the storage plan

Even a holder that never touches food sits where airborne grease, dust, and crumbs can collect. Simple walls and a reachable bottom make routine washing easier. Interior ridges, permanently fixed dividers, and narrow drainage openings require more attention. If the option includes a mat or liner, confirm that it can be removed and dried before being returned.

Utensils should be clean and dry before storage according to their own care instructions. A general countertop holder is not a drying rack unless its design and current directions specifically support that use. Water trapped at the bottom can be difficult to notice in an opaque vessel, particularly when it is always full.

Set a realistic reset routine: empty the crock, inspect the tools that have migrated into it, clean the interior and exterior, wipe the counter below, and reload only the active set. This prevents gradual crowding and gives damaged or seldom-used utensils a chance to return to more suitable storage.

Limitations

  • Capacity claims do not account for the width and shape of a particular combination of whisks, turners, ladles, and spoons.
  • A stable empty holder may behave differently when several long or heavy utensils lean to one side.
  • Upright storage exposes handles to kitchen splatter and requires enough overhead room for removal.
  • Dividers improve separation but reduce flexibility and can add corners that take longer to clean.
  • A utensil crock organizes appropriate blunt cooking tools; it does not provide edge protection for knives.
  • Search results may include holders bundled with utensils, so the pictured tool set should not be assumed to be included.
  • Material appearance alone does not establish washing instructions, heat tolerance, surface protection, or durability.

Alternatives to compare

A drawer organizer keeps tools out of sight and away from airborne kitchen residue, provided the drawer is long and deep enough for the largest heads. A wall rail with hooks frees counter space and separates tools, but it needs compatible utensils, a suitable mounting surface, and careful positioning. A cabinet-door organizer can use hidden vertical space if door clearance and hardware allow it. A narrow bin inside a deep drawer groups long tools without placing every handle in an individual slot. For a small set, a single drawer compartment near the preparation area may be simpler than adding another countertop object.

FAQ

How many utensils should go in a countertop holder?

Use the number that can stand with enough room to identify, grip, and replace each handle without forcing the bundle. Tool shape matters more than a universal count; one large whisk or turner can use the space of several narrow spoons.

How tall should a kitchen utensil holder be?

It should support the longest tools while leaving shorter handles visible and reachable. Compare interior depth with your shortest handle, then check the full holder-and-tool height against the lifting space below cabinets or shelves.

Are divided utensil holders easier to use?

Dividers can keep categories visible and prevent small handles from disappearing, but each section must accept the widest tool assigned to it. Removable dividers usually provide more flexibility and easier cleaning than narrow fixed compartments.

Can wet utensils go directly into the holder?

A general utensil holder should not be assumed to function as a drying rack. Follow the utensil and holder care instructions, and make sure tools are clean and appropriately dried so unnoticed water does not collect at the bottom.

Where should a utensil crock sit on the counter?

Choose a stable, reachable place near food preparation but away from open flame, hot cookware, the counter edge, and busy walkways. Also leave enough overhead space to remove the longest utensil without striking a cabinet or hood.

A Bench Scraper for Bread Dough, Portioning, and Counter Cleanup

Product links are for reference. Verify current details on the retailer page before buying.

Illustrative image of a generic metal bench scraper beside bread dough on a kitchen counter

Illustrative image, not an official product photo.

Short answer

Choose a bench scraper around the jobs that happen on your counter. For bread and pastry, a broad, straight edge helps divide soft dough and lift portions without requiring a knife. For cleanup, the same tool can gather flour and loose scraps into a manageable pile. Working width, blade height, handle clearance, edge shape, and construction matter more than extra decoration. If you want ruler markings, confirm where zero begins and whether the scale remains readable in the orientation you use. A bench scraper is useful for portioning and moving food, but it is not a substitute for a sharp knife, a flexible bowl scraper, or a tool approved for every work surface.

Search reference

Stainless steel bench scraper options

Compare working dimensions, edge shape, handle construction, markings, and care instructions with your baking surface and cleanup routine.

View matching options

Think in countertop jobs

“Bench scraper” describes a shape, not one narrowly defined task. Before comparing materials or handle styles, list what you expect to do with it:

  • divide a mass of bread or pizza dough;
  • lift cut dough pieces from the worktop;
  • portion rolls, scones, or pastry;
  • transfer chopped vegetables or herbs a short distance;
  • gather flour, crumbs, and soft residue during cleanup; or
  • use printed markings as a quick reference while shaping dough.

That list reveals which dimensions matter. A wider working edge gathers more material in one pass, but it also needs more clear drawer space and can feel awkward on a small board. A taller plate holds a larger pile during transfer, while a low-profile scraper may offer more fingertip control. The most useful choice is usually the one that fits both the work area and the repeated task, rather than the option with the longest feature list.

Who this is for

A bench scraper can earn its drawer space for:

  • home bread bakers who regularly divide sticky or enriched dough;
  • pizza makers portioning dough balls on a smooth prep surface;
  • pastry and biscuit bakers who want to lift cut pieces without warming them excessively by hand;
  • cooks who need a broad surface for moving modest amounts of chopped ingredients; and
  • households that prefer gathering loose counter debris before the final wipe-down.

It is especially practical when several of those jobs occur in the same kitchen. One simple tool can move between baking prep and cleanup, provided it is washed appropriately between tasks.

Who should skip it

A bench scraper may add little value if you rarely work directly on a counter or large cutting board. It is also a poor match when the intended task is cutting hard squash, bones, frozen food, or other items that call for a suitable knife or cleaver. If the main problem is scraping batter from curved bowls, a flexible bowl scraper follows the sides more effectively. Anyone with a delicate or specially coated worktop should check the surface maker’s care guidance before using a metal edge.

Width, height, and edge geometry

Product dimensions can be confusing because listings may include the handle in the overall height. Look for the usable plate dimensions when available.

Working width determines how much dough or debris the edge contacts at once. A broad scraper can divide a large batch cleanly and gather flour quickly. A narrower one is easier to steer around small pieces and takes less storage space.

Plate height affects both knuckle clearance and carrying capacity. More height creates a larger wall for scooping chopped food, but the tool can feel less precise if the handle sits far above the counter.

Edge shape deserves a close look. A straight edge makes consistent contact with a flat worktop. Rounded corners may feel less likely to catch as the tool changes direction. Some scrapers have a beveled edge for easier dough division, but “sharp” is not a benefit for every user or task. Confirm how the edge is described and handle it as a food-prep tool rather than assuming it is harmless.

A small curve or rolled plate can prevent full contact with the counter. Product photos are not always sufficient to reveal this, so inspect the scraper on a flat surface after arrival and follow the return policy if it rocks or leaves a visible gap.

Handle comfort is more than grip material

Handles range from a rolled extension of the metal plate to separate wood, polymer, or rubberized components. No single style is automatically preferable.

An integrated metal design has fewer junctions to inspect, although its contour and temperature can feel different from a thicker handle. A separate handle may fill the palm more comfortably, but seams, fasteners, and care requirements become part of the buying decision. Wood can need gentler washing and thorough drying; other materials have their own temperature and dishwasher limitations.

Check how much room remains between your fingers and the counter in a normal grip. Also consider whether the handle ends press into the palm when pushing through dough. People with limited grip strength may prefer a larger, rounded hold, while those who guide the scraper with fingertips may favor a slimmer profile. These judgments are personal, so dimensions and side-view photos are more useful than generic comfort claims.

Stainless steel wording and construction details

A search for stainless steel bench scrapers will return products with different grades, finishes, plate thicknesses, and handle combinations. Treat broad material wording as a starting point, not proof of every property. If corrosion resistance, dishwasher use, or food-contact documentation is important to you, verify the exact claims and care instructions on the current listing or packaging.

Plate stiffness is a practical distinction. A rigid plate pushes through dough and carries chopped food without folding easily. A little flex can help with some lifting tasks, but too much may feel unstable under a heavy pile. Listings do not always provide thickness, so look for useful construction details rather than inferring stiffness from appearance alone.

Inspect the join between plate and handle. Deep gaps can trap dough or wash water. Fasteners should sit securely, and exposed edges should feel finished. These are arrival checks, not features that can be established from a search result.

Measurement markings: useful, but not a measuring system

Ruler markings can help space rolls or estimate the width of a dough strip. Their usefulness depends on placement and legibility. Before choosing a marked scraper, check:

  • whether the scale uses inches, centimeters, or both;
  • whether zero aligns with a usable edge;
  • whether numbers face the direction you naturally hold the tool;
  • whether markings are etched, stamped, or applied by another method; and
  • whether the plate is long enough for your usual reference measurement.

For precise pastry work, use a dedicated ruler, scale, or template. Scraper markings are best treated as convenient visual guides. A kitchen scale remains the better tool when equal dough portions matter by weight.

What to verify before buying

Review the current product details for:

  • usable plate width and height, not just overall dimensions;
  • straightness, corner shape, and whether the edge is beveled;
  • handle material, shape, and clearance above the counter;
  • plate thickness or other evidence about stiffness, if provided;
  • measurement units, orientation, and marking method;
  • seams, rivets, welds, or rolled edges that affect cleaning;
  • dishwasher guidance and any restrictions for handle materials;
  • food-contact material information if that is a purchase requirement;
  • storage needs, including a hanging hole or blade cover if offered; and
  • the seller’s current package contents, since similar listings may include extra tools.

Do not assume that accessories shown in styled images are included. Confirm the exact configuration attached to the option you select.

Match the tool to the surface

A scraper works best on a stable, smooth prep area, but metal edges are not suitable for every counter or board. Stone, engineered surfaces, wood, laminates, and coated boards have different care requirements. Grit trapped under the edge may scratch even when the scraper itself feels smooth. Remove coarse debris rather than dragging it across the worktop, and use moderate pressure.

Avoid using a rigid metal scraper in nonstick cookware or on another surface whose manufacturer warns against metal utensils. A plastic dough scraper may be a safer comparison for scratch-sensitive areas. When uncertainty remains, test only as permitted by the surface maker or choose a nonmetal alternative.

Cleaning and storage routine

Flour paste and dough can harden in handle seams if the tool is left unwashed. Rinse or soak only as the manufacturer directs, clean around junctions, and dry the scraper fully before storage. Dishwasher-safe wording should apply to the entire assembled tool, not merely the metal plate.

In a crowded drawer, a bare edge can catch fingers or strike other utensils. Store the scraper where the working edge is visible or protected. A hanging hole can help if it is positioned securely, while a fitted guard can be useful if one is actually included. Do not improvise a cover that traps moisture against the plate.

Limitations

  • A bench scraper does not replace a chef’s knife for detailed or hard-food cutting.
  • A rigid plate cannot follow the curved interior of a mixing bowl as well as a flexible scraper.
  • Printed or etched ruler marks are less useful than a scale when portions need equal weight.
  • Metal edges may mark surfaces that are soft, coated, dirty, or not approved for scraping.
  • A wide plate carries chopped ingredients only a short distance safely; a bowl or tray is better for larger transfers.
  • Material names alone do not establish corrosion performance, dishwasher suitability, or food-contact documentation.

Alternatives to compare

Flexible bowl scraper: Better for sweeping batter and sticky dough from curved bowls, though less rigid for dividing portions on a counter.

Plastic dough scraper: Lightweight and often gentler on sensitive work areas, but stiffness, edge durability, and heat limitations vary.

Offset spatula: Useful for lifting delicate cookies, spreading fillings, and working under thin food; it lacks the broad upright plate used for gathering dough.

Kitchen knife: Appropriate when clean slicing and detailed cutting are the priorities. Use the right knife and cutting board rather than pressing a bench scraper into a job it was not designed to do.

Kitchen scale: The better choice for consistent portion weight. A scraper and scale work well together: divide, weigh, and adjust each piece.

FAQ

Is a bench scraper the same as a dough scraper?

The terms overlap, but “dough scraper” may also describe a flexible plastic tool made for bowls. Check the shape and material rather than relying on the name alone. A rigid rectangular bench scraper is intended primarily for work on a flat prep surface.

Should a bench scraper have a sharp edge?

It needs an effective working edge for dividing soft dough and gathering residue, but it does not need to function like a sharpened kitchen knife. Edge profiles vary. Verify whether a product is beveled, inspect it carefully on arrival, and store it so the edge does not catch a hand in the drawer.

Are ruler markings on a bench scraper accurate enough for pastry?

They can be convenient for quick spacing and size estimates if zero and the units are clearly placed. For precise dimensions, use a dedicated ruler or template; for equal portions, use a kitchen scale.

Can a metal bench scraper be used on any countertop?

No. Surface makers give different guidance, and trapped grit or a rough edge can cause marks. Check the care instructions for the counter or board, keep the contact area clean, and compare a plastic scraper when metal utensils are discouraged.

What size bench scraper is easiest to store?

That depends on the drawer, crock, or hanging area available in your kitchen. Compare the full width and height, including the handle, against the actual storage space. A smaller tool is easier to place, while a wider plate can be more efficient for large dough batches and countertop cleanup.

Kitchen Shears for Everyday Prep: Blade Shape, Grip, and Cleanup

Product links are for reference. Verify current details on the retailer page before buying.

Illustrative image of generic kitchen shears on a food preparation board

Illustrative image, not an official product photo.

Short answer

Start with the jobs that make an ordinary pair of household scissors inconvenient. For snipping herbs and opening food packaging, prioritize comfortable handles, controlled tips, and a blade length that is easy to maneuver. If you expect heavier food preparation, look more closely at the stated intended uses, pivot construction, grip when damp, and whether the blades separate for thorough cleaning. A take-apart design can improve access around the joint, but only if it reconnects securely and its care routine fits your kitchen. Check closed length and blade protection as well: good kitchen shears need a deliberate storage place rather than disappearing loose in a utensil drawer.

Search reference

Kitchen shears for food prep

Compare blade geometry, handle orientation, cleaning access, stated prep uses, and closed dimensions before choosing a pair for your kitchen routine.

View matching options

Think in tasks, not feature counts

Kitchen shears occupy the space between a knife and general-purpose scissors. They can bring the cutting action closer to a bowl, let you make small cuts without setting up a full board, and provide leverage for jobs that thin craft scissors were not designed to handle. That does not mean every pair belongs in every food task. Listings differ in blade length, edge profile, handle symmetry, pivot design, and stated uses, so the useful comparison is what you regularly cut rather than how many extra functions are advertised.

Write down the two or three jobs that would bring the shears out most often. A cook who mainly portions parchment, opens sealed ingredient bags, and trims herb stems needs control and easy cleanup. Someone considering shears for more demanding preparation should pay closer attention to the maker’s usage guidance and the thickness the tool can accept. No pair should be assumed suitable for bones, frozen food, wire, cans, or other hard materials merely because it looks substantial.

Also decide whether one pair will serve both food and nonfood packaging. Keeping a dedicated food-prep pair can make the cleaning routine clearer and reduce confusion about what has contacted tape, cardboard, or household materials. Color, a labeled storage location, or a distinct handle shape can help household members return the right tool to the right job.

Blade details that affect control

Blade length changes reach and maneuverability. A long cutting edge may cover packaging or broad herbs with fewer closures, but it can feel unwieldy inside a bowl or near a small ingredient. Shorter blades place the hand closer to the cut and may offer more deliberate control, though they require more strokes across a wide item. Compare the usable cutting edge rather than the full tool length.

The tips deserve attention, especially when the shears will be used around bags, parchment, or crowded prep surfaces. Fine tips can reach a precise point but need careful storage. More rounded ends may be less likely to catch, yet they will not enter a tight starting point in the same way. Product images can suggest a shape, but verify the actual blade and tip description before buying.

Some kitchen shears use a straight edge, while others add micro-serrations or another textured section intended to help hold slippery material. That texture can change how the blades engage food and how they are sharpened. Do not assume a household sharpener is appropriate. Look for maintenance instructions specific to the edge, including whether professional service or replacement is recommended when cutting performance declines.

Handle fit and handedness

A handle that looks generously sized can still be uncomfortable if its openings, contour, or angle do not match the user’s hand. Check internal loop dimensions when they are provided, and notice whether both loops are similar or shaped for a particular top and bottom orientation. Sculpted handles may distribute pressure well for one grip while feeling awkward when turned over.

Handedness is more than a label. On some scissors, blade overlap and handle shaping affect the sightline to the cut as well as how pressure pushes the edges together. A symmetrical-looking handle does not necessarily confirm equally comfortable left- and right-handed operation. Left-handed buyers should look for explicit orientation information rather than inferring it from a front-facing photo.

Grip matters when hands or handles are damp, but surface texture is only one part of control. Opening span, spring action if present, tool weight, and the resistance at the pivot all influence fatigue. A return spring may reduce repeated opening effort for some users, while another cook may prefer conventional handles with fewer moving parts. If hand strength or joint movement is a concern, compare the required motion carefully instead of assuming a large handle solves it.

Who this is for

  • Cooks who frequently snip herbs, trim small ingredients, or portion parchment during meal preparation.
  • Households that want a dedicated kitchen cutting tool rather than borrowing office or craft scissors.
  • Buyers replacing shears that are difficult to clean around the pivot or uncomfortable during repeated cuts.
  • Small kitchens where one thoughtfully chosen pair can cover several appropriate light-to-moderate prep tasks.
  • Left-handed or shared-household users willing to verify handle orientation and blade visibility before ordering.

Who should skip it

  • Skip kitchen shears if a chef’s knife and cutting board already handle your routine safely and efficiently.
  • Do not choose a general pair for heavy bones, frozen items, metal, or other hard materials unless the maker explicitly identifies that use.
  • Avoid take-apart blades if the reconnection method is unclear or household users may not verify that the halves are seated correctly.
  • A specialized poultry, seafood, or herb tool may be a better fit when one demanding task dominates your preparation.
  • Buyers who cannot provide protected, dry storage should resolve that issue before adding another sharp tool.

What to verify before buying

  • Intended cutting jobs: Read the current usage guidance and make sure it covers the foods or packaging you expect to cut.
  • Usable blade dimensions: Compare cutting-edge length, tip shape, and overall closed length with your workspace and storage.
  • Edge style: Check whether the blades are straight, serrated, micro-serrated, or otherwise textured, and review the matching maintenance advice.
  • Handle orientation: Confirm loop dimensions, left- or right-handed suitability, opening span, and any grip material or texture.
  • Pivot construction: Look for the adjustment, fastener, or take-apart mechanism and any instructions for checking that it is secure.
  • Cleaning method: Verify whether the blades separate, which parts may go in a dishwasher if any, and how the pivot should be dried.
  • Food-contact material wording: Use the current product description and care instructions rather than assuming composition from color or finish.
  • Storage protection: Check whether a sheath, lock, case, hanging opening, or other guard is included and how it works.
  • Extra functions: Treat bottle openers, nut-grip sections, scaling edges, or similar additions as optional only after the shears meet the main cutting need.

Take-apart or fixed-pivot shears?

Take-apart shears allow the blade halves to separate, usually at a particular opening angle. This exposes surfaces near the joint that can be hard to reach on a fixed pair. The design can be useful when food residue reaches the pivot, but separation creates its own routine: both halves need to be cleaned, dried, reassembled in the correct orientation, and checked before the next cut.

A fixed pivot keeps the tool in one piece. There is less risk of a loose blade half being left in a drying rack, but the joint may require closer attention during washing. Inspect whether the design leaves accessible surfaces around the fastener and whether the instructions mention lubrication, adjustment, or service. Do not tighten or modify a pivot without following the maker’s directions, as excess friction and blade misalignment can both affect cutting.

Neither construction guarantees hygiene or longevity. Those outcomes depend on access, care, drying, materials, and how the pair is used. Choose the mechanism whose maintenance steps you will actually follow after a busy meal.

Cleaning after food preparation

Shears used with food should move promptly into the stated cleaning routine rather than sitting closed with residue at the joint. Open the blades carefully so water can reach the cutting surfaces, handle transitions, and pivot area. If the blades are designed to separate, follow the specified opening angle and handling method; never force apart a pair that is not meant to come apart.

Cross-contact is an important practical reason to plan the workflow. A tool used on raw ingredients should not move to ready-to-eat herbs, cooked food, or packaging without appropriate cleaning. Follow established food-safety guidance for the ingredients you prepare, and keep contaminated shears away from other utensils in the sink. A dedicated pair may simplify the routine when one category of task occurs often.

Dishwasher claims must be verified for the exact model. Even when a listing permits dishwasher cleaning, placement and drying instructions may matter, and a high-temperature cycle does not replace removal of trapped debris. Hand washing is not automatically gentler if the shears are left wet. Dry all accessible areas, especially the pivot and separated blade faces, before reassembly and storage.

Storage is part of safe use

Loose shears can hide beneath spatulas and measuring cups, exposing fingers to the tips when someone reaches into a drawer. Measure the closed tool and choose a repeatable storage method. A fitted sheath can cover the edges, a reliable lock can keep spring-loaded handles closed, and a wall or rail location may work if it is secure and away from children. Verify that any included guard remains attached during normal drawer movement.

Magnetic storage requires particular care: the shears must be compatible with the holder, fully supported, and positioned so removal does not sweep an exposed edge toward the hand. A hanging loop is useful only when the hook and surrounding space keep the tool stable. Whatever method you use, the shears should be dry, visible, and distinct from scissors reserved for paper, tape, or garden work.

When extra features become clutter

Multipurpose kitchen shears may incorporate ridged handle sections, openers, scraping surfaces, or other functions. An additional feature is worthwhile when it serves a frequent task without compromising grip, cleaning, or storage. Otherwise, it can add crevices and make the handle less comfortable during the primary cutting motion.

Evaluate each extra separately. Determine which surface performs the function, whether using it brings a blade close to the hand, and how the area is cleaned afterward. A long feature list does not reveal how well the blades align or how the handles fit. If the pair is mainly for herbs and packages, a straightforward design with predictable care may be more useful than a crowded multitool.

Limitations

  • Product photos do not reveal pivot smoothness, handle pressure, blade alignment, or comfort in a particular hand.
  • Kitchen shears are not universal cutters; suitability for dense or hard materials must be explicitly confirmed.
  • Serrated and micro-serrated edges may require a different sharpening approach from plain blades.
  • Take-apart construction improves access only when the halves are handled, dried, and reconnected correctly.
  • Built-in openers and grip sections can add cleaning surfaces without helping the main cutting task.
  • Even well-sized shears require an appropriate cutting technique, cleaning routine, and protected storage location.

Alternatives to compare

  • Use a chef’s knife and stable cutting board for broad chopping, slicing, and tasks where a rocking or downward cut offers better control.
  • Consider compact herb snips when fine leafy work is the main purpose and their cleaning requirements suit your routine.
  • Compare purpose-built poultry shears for appropriate joint and carcass preparation rather than assuming standard kitchen shears are intended for it.
  • Keep a separate utility-scissor pair for cardboard, tape, twine, and nonfood packaging to preserve a clear food-prep workflow.
  • A guarded craft knife or package opener may be more suitable for household deliveries, provided it is used and stored according to its instructions.

FAQ

Are take-apart kitchen shears easier to clean?

They can make the blade faces and pivot area more accessible, but only if the model is designed to separate and you follow its instructions. Both halves still need careful washing, drying, correct reassembly, and a security check before use.

Can the same kitchen shears cut herbs and raw ingredients?

A pair may be suitable for multiple listed food tasks, but it must be cleaned appropriately before moving from raw ingredients to ready-to-eat food. A dedicated pair can simplify separation when a potentially contaminating task occurs frequently.

Do serrated kitchen shears need sharpening?

Cutting edges can lose performance over time, but serrations may require model-specific maintenance. Check the maker’s guidance before using a sharpener, file, or service intended for plain scissors.

What should a left-handed buyer check?

Look for explicit left-handed or ambidextrous guidance, then compare handle contour, blade overlap, sightline, opening span, and any lock or release placement. A visually symmetrical handle alone does not confirm an equal experience in both hands.

How should kitchen shears be stored in a drawer?

Store them clean and dry with the blades closed and protected by a suitable sheath, lock, case, or fitted compartment. Keep them visible enough that no one has to reach blindly past exposed tips, and separate them from nonfood scissors.

Over-the-Cabinet Towel Bars: Fit the Hook Before You Hang the Towel

Product links are for reference. Verify current details on the retailer page before buying.

Illustrative image of a generic metal towel bar hanging over a white kitchen cabinet door

Illustrative image, not an official product photo.

Short answer

An over-the-cabinet towel bar can put a dish towel within reach without drilling, but the hook must fit the actual door before the bar style matters. Measure the door thickness and the gap above it, then inspect the space behind the door for shelves, drawer boxes, plumbing, and stored items. Compare the hook’s usable depth, protective lining, bar length, and distance below the door top. A good match should let the door close normally, keep the towel clear of the floor and nearby heat or food-preparation areas, and avoid concentrating pressure on a delicate cabinet finish.

Search reference

Over-the-cabinet towel bar options

Compare hook dimensions, door-clearance requirements, bar length, padding, inside-cabinet projection, and towel drop against the cabinet you plan to use.

View matching options

Start with one specific cabinet door

The useful installation spot is not simply “under the sink” or “near the stove.” Choose the exact door, open it, and look at all four edges. Some doors sit below a countertop with a visible gap; others close into a narrow reveal or overlap a face frame. An accessory that slips easily over one door may scrape the countertop, prevent an adjacent drawer from opening, or leave another door slightly ajar.

Measure the door itself rather than relying on a general cabinet description. Record its thickness at the top edge, the vertical clearance between that edge and the counter or frame, and the distance from the top edge to the lowest point of the towel bar. If the door has a routed panel or curved upper rail, check whether the hook would rest on a flat, structurally suitable section instead of a bevel or decorative edge.

Next, close the empty door slowly while watching the hook from the side. The part that wraps inside needs room between the door and cabinet structure. A shelf placed close to the top, a drawer box behind a false-looking front, or the rim of a pull-out bin can occupy that space. Under a sink, supply lines and cleaning bottles may not touch the hook when the door is still, yet could catch it as the door swings.

Who this is for

  • Renters and homeowners who want a removable place for a hand towel or dish towel without making holes.
  • Small kitchens where counter space is limited but a compatible base-cabinet door is available.
  • Households that can dedicate one door to towel storage without blocking a walkway, drawer, appliance, or second cabinet door.
  • Buyers willing to measure both the outside and inside of the door instead of choosing by bar length alone.
  • People who prefer a towel to hang from a bar rather than bunching it through a cabinet pull.

Who should skip it

  • Skip this format when the cabinet maker advises against hanging accessories over the door or applying pressure to its top edge.
  • A door with almost no closing gap, a thick decorative top, an angled edge, or an unusually fragile finish may not accept a generic hook.
  • Look elsewhere if the only available door puts the towel beside a burner, oven vent, open flame, trash opening, pet bowl, or heavily splashed work zone.
  • Do not use a bar that interferes with child locks, soft-close hardware, a pull-out shelf, plumbing, or the normal operation of an appliance.
  • A towel that would drag on the floor, become trapped between doors, or brush against stored chemicals needs a different location.
  • If the household routinely pulls hard on towels or hangs heavy wet items, a properly installed fixed solution may be more appropriate.

What to verify before buying

  • Door thickness: Compare the measured top edge with the hook’s stated usable opening, not just its overall outside width.
  • Top clearance: Confirm the metal and any protective liner can pass beneath the counter, rail, or drawer above without scraping.
  • Inside projection: Check how far the hook extends behind the door and whether it conflicts with shelves, bins, hinges, or plumbing throughout the swing.
  • Bar length: Make sure the bar fits on a flat section without crossing a neighboring door, handle, corner, or appliance front.
  • Towel drop: Calculate where the bottom of your usual folded towel will land after it is placed on the bar.
  • Surface protection: Read what contacts the front, top, and back of the door, and whether pads or liners are included and replaceable.
  • Finish and care: Verify cleaning instructions for the bar and compatibility guidance for painted, laminated, veneered, or wood cabinet surfaces.
  • Load wording: Check the current stated use and limit; a dish towel is a different load from a bath towel, damp apron, or filled bag.
  • Installation orientation: Some designs may be intended for a particular door direction or bar position, so follow the exact instructions.

Hook fit has three dimensions

Product photos tend to show the visible bar, while the hidden hook determines whether the accessory works. Its first critical dimension is the opening that receives the door. Too narrow and it will not seat fully; much wider and the bar may tilt, rattle, or shift unless the design includes a suitable spacer. Do not bend a rigid hook to force a new fit unless the maker explicitly describes that adjustment.

The second dimension is the material stacked above the door. Even when the hook opening matches the thickness, the top bridge must fit through the closing gap. Include attached pads in this calculation. Compressing a liner to make the door close can transfer pressure to the finish and may keep the door from sitting in its intended position.

The third dimension is the leg hidden inside the cabinet. A longer inner leg may help locate the hook on a compatible door, but it also reaches farther toward shelf contents. Observe the entire door swing, not only the closed position. The hook should not sweep across a tall bottle, catch the edge of a pull-out container, or press a bag against a hinge.

Cabinet pairs deserve extra attention. A bar mounted near the meeting edge can collide with the second door or cover its finger pull. Corner cabinets and doors beside dishwashers may create similar conflicts. A short piece of removable painter’s tape can mark the proposed bar width during measurement, but do not leave adhesive on a finish longer than its instructions allow.

Put the towel where kitchen work actually happens

Placement determines whether the bar is convenient or perpetually in the way. Near the sink, a hand towel is easy to reach, but repeated splashes may keep it damp. Near a prep area, it may be convenient for drying clean hands, yet it should not brush food, knife handles, cabinet contents, or the floor. Near an oven or cooktop, heat, steam, grease, and open flames make proximity a poor default; follow appliance clearances and choose a safer location.

Open the selected cabinet while someone stands in the normal work position. A long towel can swing into knees or catch on a projecting handle. In a narrow galley kitchen, a bar that adds only a small amount of depth can still snag clothing as people pass. The towel should remain reachable without requiring the user to lean across a hot, wet, or busy surface.

Consider which towel will live there. A small hand towel folded once over the bar has a different drop from a full-size kitchen towel hanging from one end. Measure the towel in its intended fold and add the distance from the cabinet top to the bar. If the calculated bottom is too low, choose a shorter towel, a higher bar geometry, or another door rather than relying on the product image.

Bar shape, stops, and usable width

Overall width and usable hanging width are not always the same. End caps, bends, hook brackets, or raised stops can take up part of the bar. A narrow bar may hold one folded towel neatly, while a longer one can allow more airflow or accommodate two small towels if its stated use permits. Extra length is not automatically useful when it crosses a door seam or invites the towel to slide into a walkway.

An open-ended arm can make it quick to slide a towel on and off, but the towel may also work its way off if the cabinet door moves briskly. A capped or closed bar can retain it more predictably, though threading a thick folded towel may take more room. Look at how the bar meets the hook: a connection that projects outward may change the effective depth more than a straight profile.

A smooth bar is easier to wipe than one with deep decorative joints. If the location is close to the sink, examine current care guidance and whether water can collect around seams, pads, or end caps. Finish names alone do not establish resistance to scratches, moisture, or cleaners, so use the recommended cleaning method and dry the accessory as directed.

Protect the door and check it over time

Pads are helpful only when they remain clean, aligned, and compatible with the surface. Dust, grit, or dried kitchen residue trapped beneath a pad can mark a finish as the bar shifts. Inspect every contact point before installation, wipe the door according to the cabinet care instructions, and make sure no sharp edge or exposed fastener touches it.

Install the accessory without forcing the door. Close it gently the first time and check the reveal around neighboring fronts. The latch or soft-close action should work as it did before. If the door springs open, sits proud, rubs the counter, or needs pressure to latch, remove the bar rather than treating that behavior as normal.

During routine cleaning, lift the bar off and inspect the top edge, front, and back of the door. Check for trapped moisture, pad movement, discoloration, abrasion, rust-like spots, loose joints, or bending. A damp towel adds moisture directly beside the cabinet, so allow both towel and contact area to dry. Follow the maker’s instructions about cleaning the accessory and replacing any protective parts.

Limitations

  • “No drilling” does not mean every cabinet finish or door profile is compatible.
  • A hook can match door thickness while still being too tall for the closing gap or too deep for the cabinet interior.
  • The bar uses part of the door edge and may interfere with paired doors, drawers, pull-outs, or countertop overhangs.
  • Wet towels can transfer moisture to the accessory and nearby cabinet surfaces.
  • A removable bar may shift or rattle when the towel is pulled or the door is opened quickly.
  • Long towels can hang into walkways, touch the floor, or swing into adjacent storage.
  • Generic search photos cannot confirm the fit of a specific cabinet; measurements and current product instructions remain necessary.

Alternatives to compare

  • A self-standing countertop towel holder when counter space is available and a movable location is useful.
  • A wall-mounted or cabinet-mounted bar installed with hardware appropriate for the surface and expected load.
  • A towel ring placed away from heat and splashes when only one small hand towel is needed.
  • A compatible appliance-handle towel clip that helps keep a towel from sliding, provided it does not affect appliance operation.
  • A removable hanging hook approved for the chosen surface, with enough surrounding airflow for the towel.
  • Keeping clean towels in a nearby drawer and placing the in-use towel at a dedicated sink-side drying point.

FAQ

How do I measure a cabinet door for an over-the-door towel bar?

Measure the thickness at the exact top section where the hook will sit, then measure the gap above the closed door and the unobstructed space behind it. Also mark the proposed bar width and calculate the bottom of the folded towel. Compare every measurement with the current product diagram and installation instructions.

Will an over-the-cabinet towel bar stop the door from closing?

It can if the top bridge and padding are thicker than the available gap or if the inner hook contacts cabinet structure. A compatible bar should not require force or change the door’s alignment. Remove it if the door rubs, sits open, or no longer closes normally.

Can I use this type of bar on a painted cabinet?

Only when the product guidance and cabinet care instructions indicate that the contact materials and mounting method are suitable. Inspect pads and edges, keep contact areas clean and dry, and check periodically for marks or finish changes.

Where should a cabinet towel bar go in a kitchen?

Choose a compatible door near the task but away from burners, open flames, oven vents, food-contact areas, trash openings, and crowded walkways. Test the door swing and make sure the towel cannot touch the floor, stored chemicals, or adjacent appliances.

Is a longer towel bar always better?

No. A longer bar offers more hanging width only if it stays within a clear, flat section of the door. It may otherwise cross a cabinet seam, block a neighboring front, or project into traffic. Match usable width to the towel and the available door area.

Can I hang more than a dish towel on the bar?

Use it only for the item types and load described by the current instructions. Do not assume that a design intended for a light hand towel can support a wet bath towel, apron, cleaning tools, or a filled bag.

Choosing a Microwave Splatter Cover That Fits Your Plates and Routine

Product links are for reference. Verify current details on the retailer page before buying.

Illustrative image of a generic vented microwave splatter cover over a dinner plate

Illustrative image, not an official product photo.

Short answer

A microwave splatter cover is useful only if it clears both your usual plate and the tallest food you reheat without hitting the microwave ceiling or stopping the turntable. Measure diameter and usable interior height, then compare vent design, grip position, microwave-use instructions, cleaning method, and storage shape. A tall rigid dome favors clearance and simple setup; a collapsible design can save cabinet space but adds folds and moving sections that need thorough washing and drying.

Search reference

Microwave splatter cover options

Compare outside diameter, interior clearance, steam vents, grip placement, care directions, and storage height around the plates and microwave you already use.

View matching options

Begin with the space above the plate

A cover has to fit two boundaries at once. Its base must extend far enough to contain splashes from the plate or bowl, yet its full height must remain below the microwave ceiling and any internal rack. The turntable also needs to rotate without the cover brushing a wall. Measurements taken from the outside of the appliance will not answer those questions, so measure the usable cooking cavity and the actual dinnerware that goes inside it.

For diameter, note the widest plate or shallow bowl you routinely reheat. Compare that measurement with both the cover’s outside diameter and the supported area described by the seller. A dome that sits partly on food can smear sauce onto its underside, while one balanced on a narrow rim may shift as the turntable starts. Square food containers introduce another fit issue: their corners can reach beyond a round cover even when the listed widths look similar.

Height should be considered from the plate surface upward. A low cover may work for flat leftovers but touch a piled sandwich or a bowl with a raised rim. A very tall dome creates more clearance while taking up more storage space and possibly limiting use in a compact microwave. Product photos rarely provide a reliable sense of scale, so current dimensions matter more than appearance.

Who this is for

  • Households that regularly reheat saucy, oily, or moisture-rich food and want to contain routine splashes.
  • Shared kitchens where wiping a removable cover can be simpler than cleaning the microwave ceiling after every meal.
  • People who mostly use the same range of dinner plates and can match a cover to those known dimensions.
  • Small kitchens considering a collapsible cover because a rigid dome would occupy too much cabinet or drawer space.
  • Buyers replacing improvised coverings with an item whose instructions explicitly address microwave use.

Who should skip it

  • Skip a separate cover if your microwave or reusable container system already includes a suitable vented lid for the food you reheat.
  • Do not choose a cover that prevents the turntable from rotating freely or leaves too little clearance above the food.
  • Avoid any item whose current instructions do not clearly confirm the intended microwave use and care method.
  • A rigid dome may be impractical when no shelf, drawer, or wall-hanging space can hold its full diameter.
  • A cover does not replace the container, standing time, stirring, or venting directions for a particular food.

What to verify before buying

  • Measure the microwave cavity, turntable, largest regular plate, and typical food height; compare them with complete exterior and interior cover dimensions.
  • Confirm the material wording and the exact microwave-use restrictions supplied for the item rather than relying on a generic plastic or silicone appearance.
  • Check whether vents are permanently open, adjustable, or part of a collapsible section, and follow food-specific heating directions.
  • Look at where the grip sits and how it can be lifted without pressing fingers into hot condensation.
  • Verify whether the cover is rigid, collapsible, fold-flat, or designed for hanging, then measure its stored dimensions.
  • Read hand-wash or dishwasher guidance, including placement restrictions and whether hinges, folds, vents, or magnets need special care.
  • Confirm that any photographed plate, mat, utensil, or storage hook is actually included if that accessory matters.
  • Inspect the stated edge shape so the cover can rest securely around your dinnerware instead of rocking on a raised rim.

Vents manage steam, not every heating problem

Food covers generally need a route for steam to escape, but vent styles differ. Some domes use a pattern of always-open holes; others have an adjustable panel or a raised vent at the top. Collapsible models may vent through their folds or through a separate feature. Check the instructions for the exact design, because a visible hole pattern does not explain how much venting a particular food requires.

A splatter cover is not an airtight storage lid, and it should not be treated as one unless the manufacturer explicitly describes a separate use. It also does not make every container microwave compatible. The plate, bowl, or food container underneath still needs to be suitable for the appliance and used according to its own directions.

Condensation can collect on the underside of the dome, especially with moist food. Grip location therefore matters. A central knob is easy to see but may place a hand above the hottest steam path. Side tabs change the lifting motion but need enough room around the plate. Whatever the design, pause as directed, lift cautiously, and angle the cover so escaping steam moves away from your hands and face.

Rigid and collapsible covers solve different storage problems

A rigid cover has no expandable walls to set before use. Its continuous dome may also be straightforward to inspect for residue. The disadvantage is volume: even a lightweight cover can consume the better part of a shallow cabinet shelf. Before buying one, find a place where it will not be crushed beneath cookware or slide out when a door opens.

A collapsible model reduces stored height and may fit in a wide drawer. The tradeoff is additional geometry. Accordion folds, locking rings, and recessed vents create surfaces that must be opened, washed, rinsed, and allowed to dry. Check whether the cover stays fully expanded as it is moved and whether the stated collapsed height actually fits the planned drawer with handles and vents included.

Some covers advertise hanging features or magnets intended for storage. Do not assume either works in your kitchen. A hanging loop needs a suitably placed hook and enough wall clearance for the cover’s diameter. Magnetic storage depends on an appropriate surface and the maker’s instructions; it should not interfere with microwave operation or ventilation. Treat storage features as useful only after mapping them to a real location.

Cleaning is part of the daily workflow

A cover that catches sauce and condensation needs cleaning often enough to prevent residue from drying in its vents and edges. Smooth, open curves are easier to see at a glance, while textured grips, collapsible folds, and adjustable vent pieces may require more attention. If dishwasher use is important, verify permission and rack placement, then measure whether the dome can sit without blocking a spray arm or becoming distorted between tines.

After washing, dry the cover in its expanded shape when the care instructions allow. Closing damp folds can trap moisture where it is difficult to notice. Inspect vent holes before the next use, and retire a cover according to the maker’s guidance if it becomes warped, cracked, permanently loose, or otherwise damaged.

Color and transparency affect convenience rather than basic fit. A clear or lightly tinted dome can make it easier to see whether food is bubbling, though condensation may obscure the view. An opaque cover hides stains more readily but also hides activity beneath it. Neither appearance replaces stopping and stirring when the food’s heating directions call for it.

Limitations

  • A cover can reduce routine splashes but cannot guarantee a spotless microwave or contain an overflowing container.
  • Large outside dimensions do not guarantee useful interior clearance if the walls slope sharply inward.
  • Steam vents do not eliminate condensation or the need to lift the cover carefully.
  • Collapsible walls save space but add folds that may take longer to clean and dry.
  • A dome sized for dinner plates may not cover square meal-prep containers or tall bowls.
  • Material appearance alone does not confirm microwave, dishwasher, freezer, or heat-limit claims.

Alternatives to compare

  • A microwave-compatible container lid with a manufacturer-specified venting position for the matching container.
  • A reusable microwave-safe plate cover supplied for a particular dinnerware or storage system.
  • A sheet of microwave-compatible covering used exactly as its instructions direct when storage space is extremely limited.
  • A rigid plate-size dome for straightforward setup and a collapsible version when drawer height is the main constraint.
  • Smaller dedicated covers for bowls or mugs if a full dinner-plate dome would overwhelm a compact turntable.

FAQ

How wide should a microwave splatter cover be?

It should rest securely around the plate or bowl without sitting on the food, while remaining small enough to rotate freely inside the microwave. Compare your dinnerware diameter and the cavity’s usable width with both the cover’s outside and inside measurements.

Do microwave splatter covers need vents?

Steam needs a safe escape path, but the correct vent design and use depend on the cover and the food. Follow the item’s instructions and the heating directions for the meal rather than assuming that every visible hole provides the same result.

Is a collapsible cover better than a rigid dome?

It is better for shallow storage when its folds are easy to expand, wash, and dry. A rigid dome involves fewer moving sections but occupies its full volume all the time. Choose from your drawer or cabinet measurements and cleaning routine.

Can I put a microwave cover in the dishwasher?

Only if the current care instructions permit it. Check any rack-placement or temperature guidance, and make sure the full dome fits without touching a spray arm or being forced between tines.

Why does water collect under a splatter cover?

Steam from moist food can condense against the cooler cover. Let the food stand as directed, keep hands away from the steam path, and tilt the cover away from you when lifting it.

Will one cover fit plates, bowls, and square containers?

Not necessarily. Diameter, corner clearance, wall slope, and interior height can make a cover suitable for one piece of dinnerware but not another. Measure the largest shapes you actually reheat before choosing.

Choosing a Butter Dish with a Lid for the Counter or Refrigerator

Product links are for reference. Verify current details on the retailer page before buying.

Illustrative image of a generic covered butter dish on a breakfast table

Illustrative image, not an official product photo.

Short answer

The right butter dish is determined less by its outside appearance than by the space beneath its lid. Measure the butter format you normally buy, including any extra height created when a partially used stick becomes uneven, and compare those figures with the dish’s usable interior length, width, and lid clearance. Then decide whether the dish will live mainly on a refrigerator shelf, travel between the refrigerator and table, or stay out only during meals. A stable base, a lid that can be lifted without slippery fingertips, and simple corners that are easy to clean tend to matter every day. Treat a lid as a cover rather than proof of an airtight seal, and always follow the butter package’s storage directions.

Search reference

Covered butter dish options

Compare interior dimensions, lid clearance, material, refrigerator footprint, handle shape, cleaning instructions, and whether the cover seals or simply rests on the base.

View matching options

Start with the butter, not the dish

A package labeled as a stick is not a complete size specification. Butter formats and wrapper proportions vary, while whipped, cultured, spreadable, block, and homemade butter may need a different footprint altogether. Even a dish that accepts a fresh stick can become awkward after the butter has softened, been cut at an angle, or been reshaped by a serving knife.

Measure a typical unopened portion and add reasonable clearance on all sides. Compare that result with interior dimensions rather than the widest exterior measurement. If a listing supplies only overall dimensions, the rim, wall thickness, recessed base, and lid shape may leave much less usable room than expected. Customer photos are not a reliable scale; a dimension diagram or maker specification is more useful.

Height is particularly easy to overlook. A low cover can touch the butter, collect smears, and drag them across the rim each time it is replaced. A very tall cover avoids contact but occupies more refrigerator space and may be easier to knock sideways. Look for enough clearance for the way people in the household actually cut and serve butter, not merely enough room for a perfectly rectangular new piece.

What this product type is

A butter dish with a lid is a small storage-and-serving vessel with a shallow base and removable cover. The base may be flat like a tray, recessed to hold the butter in place, or surrounded by a raised rim. The lid may rest loosely on that rim, overlap the outside edge, latch, or include a gasket. Common material descriptions include ceramic, glass, stainless steel, plastic, wood, bamboo, and mixed-material designs.

These constructions do not all provide the same storage conditions. A heavy ceramic cover may sit securely yet have no seal. A transparent cover makes the remaining amount visible but can show fingerprints and condensation. A gasketed container may reduce casual air exchange, although its actual sealing performance depends on the complete design and proper closure. Check the listing rather than inferring performance from the word “covered.”

Who this is for

  • Households that want to move butter from its wrapper to a tidier serving piece at breakfast or dinner.
  • People replacing a dish whose lid touches the butter, whose narrow handle is hard to grip, or whose base slides during serving.
  • Buyers trying to organize a crowded refrigerator shelf or door compartment around a known footprint.
  • Shared kitchens where a clearly contained portion is easier to identify and return to storage.
  • Home cooks who want a dedicated place for a butter portion while still following the package’s storage instructions.

Who should skip it

  • Skip fixed-size stick dishes if the butter you buy usually comes in tubs, broad blocks, or irregular homemade portions.
  • Anyone who needs a verified leak-resistant or airtight food container should not assume a loose covered dish provides that function.
  • A fragile glass or ceramic design may be a poor fit for households where it will be handled by young children or carried frequently across hard floors.
  • Avoid a counter-oriented design when its size, material, or care directions do not suit refrigerator storage and that is where the package says the butter belongs.
  • If you rarely serve butter separately, keeping it in its original package or a multipurpose food container may use less cabinet space.

What to verify before buying

  • Check the usable interior length, width, and height beneath the closed lid, not only the external footprint.
  • Compare those dimensions with the butter format and portion size normally used in your household.
  • Confirm whether the lid rests loosely, overlaps the base, latches, or uses a removable gasket; do not equate every lid with an airtight seal.
  • Look at how the cover is lifted. A knob, loop, side lip, or textured area should be reachable with the grip you expect to use.
  • Check the base for a rim or recess that contains smears without making the last portion difficult to reach.
  • Measure the intended refrigerator shelf, door bin, counter corner, or covered serving tray, including room to lift the lid vertically.
  • Review food-contact, temperature, refrigerator, microwave, freezer, and dishwasher wording separately. Suitability for one does not establish suitability for the others.
  • For glass or ceramic, check whether the maker describes thermal-shock precautions and inspect the item for chips or cracks before use.
  • For wood or bamboo components, read the washing, drying, oiling, and prolonged-moisture guidance.
  • Confirm what is included. A pictured knife, spreader, board, or replacement gasket may be a styling prop rather than part of the package.

The base should support cutting as well as storage

Serving butter applies sideways force. A broad, level base is less likely to rotate than a narrow foot, and a modest rim can keep a soft portion from sliding off the edge. At the same time, a deep lip can obstruct a knife when the butter is nearly gone. Think about whether users slice downward, scrape across the top, or soften a small amount before spreading; the most convenient base profile changes with that habit.

Surface texture also affects cleanup. Decorative grooves and sharp internal corners can trap butter, crumbs, and wash water. A smooth glazed or molded surface is usually easier to inspect, but only the manufacturer’s care directions can establish the permitted cleaning method. If the base will be used for cutting, verify that the material and finish are intended for that contact rather than assuming any serving tray is a cutting board.

A non-slip foot can be useful, but it adds another material junction to clean and inspect. Determine whether it is permanently bonded, removable, or merely an unattached pad. Check replacement availability for detachable rings or feet that are important to the dish’s stability.

Lid shape changes everyday handling

A cover is handled when fingers may be cool, damp, or lightly greasy. Small round knobs can look neat but offer little leverage. Long handles, raised arches, or opposing side tabs distribute the grip differently. The best choice is one that can be lifted and aligned without touching the butter or tilting the base.

Consider where the removed lid goes. A flat-topped cover may be easy to set down, while a rounded or knobbed lid can wobble if inverted. Setting the butter-contact side on the table can transfer residue, so plan for a clean resting place or choose a lid that remains clean inside during normal use. Some designs attach the cover, but hinges and latches introduce crevices and moving parts that need inspection.

Clear lids make it possible to check the contents without opening the dish. Opaque lids hide smears and visual clutter but also hide how much remains. Neither choice preserves butter by itself; light exposure, temperature, time, closure, and the butter maker’s directions still matter.

Material tradeoffs belong in the routine

Ceramic and stoneware-style dishes often feel stable on the table and come in many finishes. Their weight may be helpful during serving but inconvenient for one-handed handling. Verify dishwasher and temperature guidance, and retire chipped or cracked pieces according to the maker’s instructions.

Glass dishes provide visibility and usually have a nonporous surface when intact. They can be slippery when wet and need protection from impact and abrupt temperature changes. Molded ridges, seams, and lid-to-base contact points deserve a close look because they influence grip and cleaning.

Plastic containers are typically lighter and may offer clips or gaskets. Check food-contact wording, stain and odor care, heat restrictions, and whether replacement seals are available. A scratched, warped, cracked, or poorly closing container should be assessed using the manufacturer’s replacement guidance.

Stainless steel designs hide the contents but can be lightweight and resistant to ordinary table knocks. Thin bases may move during cutting, and polished covers can show fingerprints. Confirm whether other materials are used in handles, feet, or seals and clean each component as directed.

Wood or bamboo lids and bases add a warm serving-board appearance, but their care can differ sharply from the rest of the dish. Many wood components should not soak, and a wooden lid should not be presumed to create a seal. Mixed-material pieces can require hand washing or component-by-component care even when one part is dishwasher compatible.

Refrigerator, counter, and table are different settings

A compact rectangular dish often makes efficient use of a refrigerator shelf. Leave enough room above it to lift the lid without pulling the whole dish forward, and make sure neighboring containers cannot strike a fragile knob. Door storage is convenient but varies in dimensions and movement; measure the bin and verify that the dish remains level when the door opens and closes.

For table service, stability and comfortable lifting become more noticeable than stacking. A dish carried from a cold refrigerator may collect condensation in some room conditions, so place it on a suitable dry surface and handle it carefully. Return or discard the butter according to its package directions and applicable food-safety guidance rather than relying on a general room-temperature rule.

Counter storage deserves the same product-specific approach. Butter type, formulation, package instructions, room temperature, sunlight, contamination risk, and intended holding time can all affect the decision. A covered dish helps protect against casual contact and debris, but it does not make every butter product suitable for indefinite room-temperature storage.

Cleaning details that are easy to miss

Before first use, clean the dish as directed and inspect every food-contact surface. If the lid has a gasket, remove it only when the instructions say it is removable, clean the channel, and reinstall it fully dry and untwisted. Trapped residue can prevent closure even when the container looks clean from above.

“Dishwasher safe” may apply only to a particular component or rack position. Painted decoration, metallic trim, wood, adhesives, seals, and bonded non-slip feet can change the care method. Verify the complete instructions instead of applying the base material’s general reputation to a mixed-material dish.

Butter residue is easier to see on some colors than others. Regardless of finish, inspect corners, the underside of the lid, handle joints, and the base rim. Let components dry completely before closing them for storage so moisture is not trapped inside an empty dish.

Limitations

  • Interior capacity may be substantially smaller than the published outside dimensions.
  • A loose lid protects against contact and debris but does not necessarily form an airtight or leak-resistant seal.
  • Fragile materials can chip, crack, or break, while light dishes can slide during cutting.
  • Tall handles and domed covers consume refrigerator clearance that a simple footprint measurement misses.
  • Mixed materials may require separate cleaning methods and can make dishwasher claims component-specific.
  • No butter dish overrides the storage directions, date guidance, or handling instructions on the food package.
  • Decorative styling cannot compensate for an awkward grip, poor base stability, or a cover that touches the contents.

Alternatives to compare

  • The butter’s original wrapper placed inside a clean secondary container for added containment.
  • A small multipurpose food-storage box with verified interior dimensions and closure characteristics.
  • A lidded butter crock or butter bell, which uses a different holding arrangement and requires its own directions and upkeep.
  • A flat serving board with a separate dome for meal-only presentation and prompt return to appropriate storage.
  • A small ramekin with a compatible cover for irregular butter portions that do not fit stick-shaped dishes.
  • A divided condiment server when several spreads are presented together and removed after the meal.

FAQ

How much clearance should a butter dish lid have?

There should be enough usable height and side clearance for the butter portion, including the uneven top created during normal serving, without letting the lid touch or smear it. Because stick formats and lid interiors vary, measure your usual butter and compare it with published interior dimensions rather than relying on a generic “one stick” claim.

Does a covered butter dish make an airtight seal?

Not necessarily. Many lids simply rest on or overlap the base. A gasket or latch may indicate a more deliberate closure, but actual sealing performance should be confirmed in the current product description and instructions. Do not infer airtight or leak-resistant storage from the presence of a lid alone.

Can a butter dish stay on the kitchen counter?

Follow the storage directions on the specific butter package and applicable food-safety guidance. Butter type, formulation, room conditions, exposure, and time all matter. A lid limits casual contact and debris, but it does not create refrigeration or make every butter product suitable for prolonged counter storage.

Is ceramic, glass, metal, or plastic better for a butter dish?

Each suits a different routine. Ceramic can provide table stability, glass shows the contents, metal hides smears and handles ordinary bumps differently, and plastic can be lightweight or gasketed. Compare grip, fragility, interior space, cleaning instructions, temperature restrictions, and replacement parts instead of choosing by material alone.

Can a butter dish go in the dishwasher?

Only when the maker’s care instructions permit it. The base, lid, gasket, wood insert, decoration, handle, and non-slip foot may have different requirements. Check whether dishwasher guidance specifies a rack position or excludes any component, and allow all parts to dry fully before reassembly.

Ironing Board Covers: Fit, Padding, and Fastening Without the Guesswork

Product links are for reference. Verify current details on the retailer page before buying.

Illustrative image of a generic padded cover fitted to a full-size ironing board

Illustrative image, not an official product photo.

Short answer

An ironing board cover works well only when its shape, padding, and fastening system suit the board underneath it. Measure the deck itself from nose to rear edge, record the width at its broadest point, and note the nose profile, attached iron rest, hinges, and clearance below the frame. Then compare those observations with the current fit diagram rather than relying on labels such as standard or large. A smooth cotton-style surface with a separate or integrated pad is a familiar general-purpose arrangement, while metallic or coated surfaces come with different care and temperature guidance. Whatever the material, the cover should tighten evenly without wrinkles, exposed hardware, hanging cords, or a soft pad that shifts under the garment.

Search reference

Ironing board cover options

Compare deck dimensions, nose shape, pad construction, edge depth, tightening hardware, surface care, and compatibility with the frame already in your laundry space.

View matching options

Measure the board after the old cover comes off

A worn cover can hide the very dimensions needed for its replacement. Its elastic may have relaxed beyond the deck, its pad may overhang the edges, and years of stretching can make the nose look rounder than the metal or composite board beneath it. If the board maker’s instructions allow removal, take measurements from the bare, cool deck rather than tracing the old textile.

Measure length along the center from the tip of the nose to the rear edge. Find the widest part of the board and measure straight across it. It also helps to record the width at one or two points nearer the nose because two boards with the same maximum dimensions may taper differently. Finally, measure deck thickness or edge depth where the cover must wrap underneath.

Look below the board before shopping. Crossbars, leg pivots, wall-mount hardware, cable guides, and an attached iron rest can limit where elastic, clips, buckles, or a drawstring can run. Photographing the underside for personal reference makes it easier to compare product diagrams without repeatedly unfolding the board. Keep hands clear of hinges and lock the frame as directed while measuring.

What this product type is

An ironing board cover is the replaceable top textile fitted over an ironing board deck. Many versions include a sewn-in pad, a separate underlay, or both; others are sold as a cover only. The edge may be held by elastic, a drawstring, a bungee-style cord, straps, clips, or a combination of those systems.

Surface descriptions vary. Plain woven covers are common, while some listings describe metallic, silicone-treated, reflective, stain-resistant, or heat-resistant finishes. Those terms are not interchangeable, and none should be treated as permission to leave a hot iron standing on the board. The iron’s heel rest or a separate rest should be used exactly as the appliance and board instructions specify.

Who this is for

  • Households replacing a stained, scorched, loose, or compressed cover while keeping an otherwise serviceable ironing board.
  • People whose current cover shifts at the nose, forms ridges, or exposes the deck edge during ordinary garment care.
  • Buyers willing to measure an extra-wide, compact, tabletop, wall-mounted, or built-in board instead of assuming a universal fit.
  • Sewers and crafters who want a consistently smooth work surface and can match pad firmness to the pressing tasks they perform.
  • Anyone assembling a first laundry setup who wants the cover, pad, frame, and iron-rest arrangement to work as one system.

Who should skip it

  • Do not cover a bent, unstable, rust-damaged, heat-damaged, or poorly locking board merely to hide the problem; assess repair or replacement first.
  • Skip universal-fit claims when the listed dimension range, taper, and underside layout do not match the board.
  • A conventional full-size cover will rarely suit a sleeve board, tabletop board, over-the-door design, or built-in foldaway deck without explicit compatibility.
  • Avoid coated or metallic surfaces when their instructions conflict with a garment label, iron manual, pressing tool, or the way you use steam.
  • Anyone unable to secure cords, clips, and excess fabric away from hinges, feet, children, and pets should choose a safer fastening arrangement.

What to verify before buying

  • Match the stated minimum and maximum deck length and width to measurements of the bare board, not to the relaxed old cover.
  • Compare the nose outline, rear corners, edge depth, and any cutout needed around an attached iron rest.
  • Confirm whether the package contains a cover only, an integrated pad, a loose underlay, fastening clips, or some combination of these parts.
  • Check the surface material wording, pad material, layer count, and total thickness without assuming a thick-looking photo represents the delivered construction.
  • Identify how tension is adjusted: continuous elastic, drawstring, bungee cord, toggle, underside straps, clips, hook-and-loop tabs, or fixed elastic edging.
  • Review the underside diagram to ensure fasteners will clear the board’s braces, hinges, wall hardware, and leg mechanism.
  • Read care instructions before washing, drying, or spot cleaning; integrated foam, felt, coatings, and printed finishes may require different treatment.
  • Check the maker’s temperature, steam, and iron-rest guidance. Heat-resistant wording does not mean fireproof or suitable as a parking surface for a hot soleplate.
  • Verify return terms before opening or installing the cover if exact fit is uncertain.

Padding changes the feel as much as the surface does

The pad separates fabric from the hard or perforated deck. Too little cushioning can allow the board pattern or hardware to telegraph through thin garments. Too much soft padding can make it difficult to press crisp seams, allow the iron to rock, or hold moisture after heavy steam use. The useful balance depends on the board construction and the work being done.

A sewn-in pad simplifies installation because its alignment is fixed, but the whole cover generally has to be replaced when one layer wears out. A separate pad can be trimmed or replaced independently when the instructions permit, yet it needs to stay flat while the cover is tensioned over it. Confirm whether a loose underlay should reach the deck edge or stop short of the wraparound skirt; bunching material under the edge can prevent an even fit.

Foam and felt are often described by thickness, weight, density, or simply a layer count. Those measurements do not translate neatly into the same firmness. Compare the actual specifications supplied for each option, and be cautious about treating more layers as automatically better. If the existing setup already has a reusable pad, check whether the new cover is intended to go over it. Stacking unapproved layers can alter fit, trap moisture, or reduce stability.

Fastening should distribute tension around the deck

Elastic edging is quick to install when its sewn shape closely follows the board. It becomes less forgiving when the deck sits at the limit of the advertised size range. A drawstring or bungee cord adds adjustment, but the cord path and locking toggle need a safe location underneath. Underside straps can pull opposing edges together and reduce sideways movement, provided they clear braces and do not distort the cover.

Fit the cover only with the iron unplugged, cool, and set aside. Follow the cover and board instructions, lock the board in its working position, and center the nose before tightening the rear. Work around the edge in small increments rather than pulling one point to maximum tension. The surface should become smooth without forcing seams over the deck, curling its edges upward, or loading the frame unevenly.

After installation, fold and unfold the board cautiously while watching the underside. No cord, strap, clip, or loose skirt should enter a hinge, scrape a wall, catch a leg, or touch the floor. Recheck tension after the first few uses because new fabric and elastic can settle. A cover that repeatedly slips despite correct installation may have the wrong dimensions or contour.

Surface choice should follow the fabric-care routine

A conventional cotton or cotton-blend surface offers a familiar feel and makes it easy to see whether the board is smooth. Pattern and color are aesthetic choices, but very bold dyes or prints should still come with clear care guidance. Stop using a cover if its finish transfers, discolors garments, develops an odor, or changes in a way the instructions identify as unsafe.

Metallic-looking and reflective surfaces are often marketed around heat management. The exact coating, permitted settings, steam guidance, and care restrictions matter more than the visual appearance. They may feel different when pressing fusible materials, delicate textiles, transfers, or items that require a pressing cloth. Always start with the garment-care label and the iron manual; a cover cannot make an unsuitable temperature safe for the fabric.

Steam must have somewhere to go. A perforated deck, pad, cover, room ventilation, and ironing technique all affect moisture. If the underside remains damp, let the board cool and dry fully as directed before folding it away. Persistent condensation or odor calls for checking the layers and use instructions rather than adding another cover on top.

When to clean or replace the cover

Loose fibers, embedded residue, wrinkles that no longer tension out, compressed padding, torn edge channels, weakened elastic, and exposed deck areas all signal declining performance. Scorch marks deserve particular attention. Do not assume a darkened area is merely cosmetic; let everything cool, identify the cause, and replace any damaged component as appropriate.

Cleaning is product-specific. Some removable textile covers may permit washing, while coated surfaces, integrated pads, cords, toggles, and elastic can change the allowed method. Follow the current label for water temperature, detergent, drying, and whether the item may be ironed itself. Reinstall only when every layer is completely dry and the board is clean.

If starch, fusible residue, or another pressing product reaches the cover, follow the product and cover directions rather than scraping a warm surface. A removable pressing cloth or project-specific mat may be easier to replace for messy craft work, but it still needs to be compatible with the temperature and technique involved.

Limitations

  • Size ranges do not guarantee a neat fit when the board has an unusual taper, thick edge, square nose, or integrated rest.
  • A replacement cover cannot stabilize a damaged frame, repair a warped deck, or correct a faulty height lock.
  • Very soft or layered padding may reduce precision for seams and small details even when it feels comfortable for larger garments.
  • Coatings and metallic finishes can have care or temperature restrictions that differ from ordinary woven surfaces.
  • Elastic, cords, and straps can loosen with use and require periodic inspection and adjustment.
  • No cover eliminates the need to follow garment labels, appliance instructions, ventilation guidance, and safe hot-iron handling.
  • Colors and patterns shown online can look different under laundry-room lighting and may show lint or scorch marks differently.

Alternatives to compare

  • A board-specific replacement part from the original manufacturer when the model number is still available.
  • A cover-only replacement used with an existing pad that remains flat, clean, dry, and compatible.
  • A separate felt underlay beneath a properly sized cover when both products explicitly allow that arrangement.
  • A tabletop ironing board for occasional small garments in a home with limited floor space.
  • A sleeve board or tailor’s board for narrow garment sections and shaped sewing work.
  • A heat-compatible pressing mat for a limited task on a suitable protected surface, following all mat and surface instructions.
  • A complete replacement ironing board when the frame, deck, lock, feet, or attached rest is no longer sound.

FAQ

How do I measure an ironing board for a replacement cover?

Remove the old cover if the board instructions allow it, then measure the bare deck along its center from the nose to the rear edge. Record the greatest width, one or two widths along the taper, and the edge depth. Note the nose shape, rear corners, iron rest, and underside hardware before comparing a fit diagram.

Should an ironing board cover include a pad?

It depends on the board and the condition of any existing underlay. An integrated pad is convenient, while a separate pad can be replaced independently when permitted. Confirm exactly what is included and whether the new cover is designed for bare-deck installation or use over a compatible pad.

Why does a new ironing board cover keep slipping?

The cover may be too large, shaped for a different taper, unevenly tensioned, or blocked from tightening by braces underneath. Recheck the measured fit range and installation directions. Make sure straps or cords clear moving hardware, and do not add improvised fasteners that could enter the folding mechanism.

Is a metallic ironing board cover safe for every fabric?

No surface is automatically suitable for every textile or technique. Follow the garment label and iron manual, then check the cover’s stated temperature, steam, coating, and care guidance. Use a compatible pressing cloth when required and never treat the board surface as a hot-iron rest.

Can an ironing board cover go in the washing machine?

Only if its care label specifically permits machine washing. Integrated foam, felt, metallic coatings, elastic, cords, and printed finishes may require spot cleaning, hand washing, or another method. Let all layers dry completely before reinstalling the cover.

Stove Gap Covers: Measure the Seam Before You Choose a Strip

Product links are for reference. Verify current details on the retailer page before buying.

Illustrative image of generic gap covers fitted between a kitchen range and adjacent counters

Illustrative image, not an official product photo.

Short answer

A stove gap cover should bridge the seam beside a range without interfering with controls, ventilation, appliance movement, or safe clearances. Measure the gap at the front, middle, and back on both sides; also note whether the counter and range top are level. Flexible T-shaped strips can adapt to modest variations when their center fin fits the seam, while flat strips need enough supported surface on each side. Before choosing either style, compare its full width, length, trim instructions, temperature limits, cleaning directions, and compatibility language with the range manual. A cover can catch crumbs at an awkward seam, but it cannot correct a poorly installed appliance or make an unsafe clearance acceptable.

Search reference

Stove gap cover options

Compare strip profiles, stated dimensions, trimming methods, material guidance, and cleaning instructions against the two seams in your kitchen.

View matching options

Map the seam from front to back

The space beside a range rarely behaves like one tidy measurement. Cabinets may be slightly out of square, the appliance can sit closer to one counter than the other, and a raised edge or control panel may interrupt the back of the seam. Measuring only at the front can lead to a strip that pinches halfway along or leaves an opening where spills are most likely to disappear.

With the appliance cool and in its normal position, measure each seam at several points without moving the range merely to make the numbers look uniform. Record the narrowest and widest sections. Then measure the usable run from the front edge to the first obstruction at the rear. Left and right sides deserve separate notes; there is no guarantee they match.

Height is just as important as width. If the range top sits below the countertop, a very soft flat strip may sag toward the appliance. If it sits higher, a rigid cover may tilt or rock. Look at the cross-section shown in the listing and ask where it will actually rest. Product length alone says little about whether the profile can handle that height difference.

Who this is for

  • Households that regularly find crumbs or light splashes in the narrow seams beside a freestanding or slide-in range.
  • Renters who want a removable solution and are permitted to place one without adhesive or appliance modification.
  • Cooks whose counters and range provide continuous, unobstructed support for the profile specified by the cover maker.
  • People willing to remove the strips for cleaning rather than treating them as a permanent seal.
  • Buyers who can check the range manual and current product instructions before placing an accessory close to a cooking appliance.

Who should skip it

  • Skip a cover if the range manual prohibits accessories in that location or requires the seam to remain open for airflow, movement, or service access.
  • Do not use a decorative strip to conceal an installation problem, unstable appliance, damaged counter edge, gas odor, electrical concern, or inadequate clearance.
  • A poorly fitting cover is not useful when controls, burners, vents, doors, or cookware can contact it.
  • Built-in cooktops and unusual commercial-style ranges may require a different solution specified by the appliance or counter manufacturer.
  • Anyone unable to confirm the material’s permitted temperature and placement should leave the area clear until compatibility is established.

What to verify before buying

  • Measure the gap width at multiple points on both sides and compare the complete range with the cover’s stated fit range.
  • Check the counter-to-range height difference and identify which surfaces will support the strip.
  • Compare usable seam length with the product’s actual length, then read whether and how it may be trimmed.
  • Inspect the profile dimensions: top width, center-fin width and depth, edge thickness, and any end caps or raised lips.
  • Confirm compatibility with the appliance type and follow the range maker’s clearance, ventilation, and accessory instructions.
  • Review the material description, stated temperature limits, and restrictions around burners, hot cookware, flames, and oven vents.
  • Check whether the strip relies on friction, adhesive, magnets, clips, or simple surface contact; verify that the attachment method suits both adjoining surfaces.
  • Read cleaning directions, including whether the cover must cool before removal and whether hand washing or dishwasher cleaning is permitted.
  • Confirm package quantity. A photo showing both sides of a range does not necessarily mean two strips are included.
  • Look for color and finish descriptions under ordinary kitchen lighting rather than assuming a styled photo will match the appliance or counter.

Flat strips and T-shaped profiles solve different fit problems

A flat cover spans the seam from above. Its broad top can create a simple visual line, but it needs adequate contact on the range and counter to remain level. If the surfaces have a large height mismatch, the strip may lean, curl, or leave an edge that catches during wiping. Measure the available landing area as well as the open gap, especially near raised trim and rounded counter edges.

A T-shaped cover adds a center fin that drops into the seam. That fin can help locate the strip and reduce sideways movement, provided it is narrow enough to enter the tightest section and deep enough for the intended design. A fin that is too wide will bunch up; one that is too narrow may not stabilize the cover. Check whether the maker allows the fin to be trimmed, because cutting the wrong part can change how the strip sits.

Rigid metal-style bridges offer another look but tend to demand more consistent geometry. Curves, rolled edges, end pieces, and attachment hardware all affect fit. Magnets only help where the relevant appliance surface and cover design are magnetically compatible; a nearby stainless-looking panel should not be assumed to hold them. Adhesive may reduce movement, but it adds questions about heat exposure, residue, surface finish, removal, and rental rules.

Heat guidance matters more than a color match

A gap cover lives near an appliance, yet exact conditions vary by range design and burner use. Oven vents may direct warm air through the rear or side area, oversized cookware may extend beyond a burner, and a gas flame can behave differently from an electric cooking element. A generic material label does not prove suitability for every location on every range.

Start with the appliance manual. Identify vents, required openings, hot-surface warnings, cleaning-cycle instructions, and accessory restrictions. Then compare those requirements with the current cover instructions and stated temperature limits. Keep the strip away from any area the instructions exclude, and never let it overlap a burner, flame, heating element, control, or moving door.

Fit should be checked again during ordinary use without touching a hot strip. Curling, discoloration, odor, softening, or movement can indicate that the product is unsuitable for the conditions or placement. Turn off the appliance and follow the relevant safety directions if something appears wrong. Do not improvise with tape, caulk, or another material merely to hold a heat-exposed cover in place.

Trimming should preserve the intended profile

Many covers are sold in a standard length because appliance depths differ. A neat cut can keep a strip clear of a rear obstruction or align it with the counter front, but only when trimming is explicitly permitted. Read which end or section may be cut and what tool is recommended. A hollow profile, metal insert, magnet, cap, or adhesive channel can make a seemingly simple cut unsuitable.

Mark each side separately. Place the uncut, cool strip in position as the instructions allow, note the actual endpoint, and account for any required clearance. Removing a small amount at a time is safer than trying to restore material after an aggressive cut. Rounded front corners or manufacturer-supplied end pieces may affect which end should remain visible.

A cut edge should not expose sharp reinforcement, scrape the counter, or interfere with removal. If trimming creates an uneven profile that no longer lies as designed, choose a more suitable size rather than forcing it into the seam.

Cleaning works best when the cover stays removable

Gap covers intercept residue instead of eliminating it. Crumbs can collect along the edges and fine liquid can travel beneath a strip that is not a sealed barrier. Plan to lift and clean both the accessory and adjoining cool surfaces at an interval appropriate for the way the kitchen is used.

Follow the product directions for removal and washing. Flexible-looking material is not automatically dishwasher safe, and decorative coatings or attached magnets may require gentler care. Let the appliance and surrounding surfaces cool before handling the cover. Dry the seam and strip as directed before replacing it so trapped moisture does not remain hidden.

During cleaning, inspect the profile for cuts, hardening, warping, loose pieces, or residue that prevents it from sitting flat. Also confirm that the range has not shifted. If a cover suddenly fits differently, remeasure rather than stretching, wedging, or gluing it into position.

Limitations

  • A cover reduces direct access to a seam but does not create a watertight or food-safe seal unless the exact product documentation explicitly says so.
  • Irregular gaps, uneven counters, raised range edges, and rear obstructions can defeat an otherwise suitable profile.
  • Flexible strips can curl, discolor, collect residue, or move when the fit and support are poor.
  • Rigid strips are less forgiving of changing gap width and differences in surface height.
  • Adhesive or magnetic features depend on compatible surfaces and may complicate cleaning or removal.
  • Heat exposure varies with appliance design, cookware, ventilation, and cooking habits; a broad material claim cannot replace the stated limits.
  • The strips must be removed periodically to clean underneath them.
  • A gap cover cannot repair cabinetry, level a range, correct appliance clearances, or replace qualified service.

Alternatives to compare

  • Leaving the seam uncovered and cleaning it with a narrow crevice tool after the appliance is cool.
  • An appliance-manufacturer accessory specifically listed for the exact range model.
  • A counter-mounted filler installed by a qualified professional when the cabinetry and appliance design permit it.
  • Repositioning or leveling the range according to its installation instructions if the seam is uneven because the appliance has shifted.
  • A removable crumb-catching tray beneath the side area when the appliance design allows access and the maker’s directions permit it.
  • Cabinet or countertop correction during a planned kitchen renovation when the gap comes from a persistent installation mismatch.

FAQ

How wide a gap can a stove gap cover bridge?

There is no universal width because flat and T-shaped profiles use different dimensions. Measure the seam at the front, middle, and back on each side, then compare both its narrowest and widest points with the stated fit range. For a T-profile, also verify the center fin rather than looking only at the width visible on top.

Should a stove gap cover be level with the countertop?

It should sit in the position described by its maker without rocking, sagging, obstructing the range, or creating an awkward raised edge. A counter-to-range height difference changes how the cover is supported, so compare that difference with profile drawings and compatibility guidance before ordering.

Can stove gap covers be cut shorter?

Only trim a cover when the current instructions permit it. Confirm which end or section can be cut, the recommended tool, and whether the design contains magnets, reinforcement, adhesive, or end caps. Measure the left and right sides independently before cutting.

Are silicone stove gap covers safe near heat?

A silicone description by itself is not enough to establish safe placement. Check the exact product’s stated temperature limits and restrictions, then follow the range manual regarding vents, burners, flames, clearances, and accessories. Stop using a strip that changes shape or condition in a way the instructions identify as a problem.

Do gap covers stop every spill from reaching the floor?

No. They can intercept crumbs and some light splashes, but edges and an unsealed underside may still allow liquid or fine debris through. Remove the covers after the area cools and clean beneath them according to the product and appliance directions.

Choosing an Oven Thermometer You Can Read Through the Door

Product links are for reference. Verify current details on the retailer page before buying.

Illustrative image of a generic dial oven thermometer standing on an oven rack

Illustrative image, not an official product photo.

Short answer

An oven thermometer is only useful if its scale is legible in the place where it will sit. Before comparing decorative dial styles, look at the temperature range, spacing between scale marks, pointer contrast, viewing angle, and whether the unit can stand securely or hang from your oven rack. The specified heat limit must cover your cooking routine, and the body should fit without touching an element, fan cover, wall, pan, or food. Treat its reading as a reference for understanding your oven, not as a substitute for following appliance instructions or checking food with the appropriate food thermometer.

Search reference

Oven thermometer options

Compare dial layouts, stated temperature ranges, mounting methods, dimensions, and use-and-care guidance for the oven you own.

View matching options

Begin with the view from outside the oven

Product photos make nearly every dial appear easy to read because they are close, level, and brightly lit. Your real viewing position may be several feet away, above the rack, and behind tinted or reflective glass. A large case does not guarantee a useful display: scale marks can still be crowded, numbers can be small, and a thin pointer can disappear against a busy background.

Think about when you intend to read it. If you want to glance through the closed door, favor a clean scale with strong pointer contrast and numbers visible at the temperatures you use most. Check whether the oven light and window offer a clear line of sight at the intended rack height. If the door must be opened for every reading, temperature can change while you inspect the dial, and the hot rack becomes harder to approach safely.

Scale resolution and range work together. A very broad range can support more cooking modes, but fitting that range onto one dial may place the markings closer together. Compare the actual labeled intervals rather than assuming a larger maximum temperature produces a more useful instrument. Make sure the manufacturer’s stated operating range covers your routine, including any low-temperature or high-heat setting you genuinely plan to monitor.

Who this is for

  • Bakers who want another reference point when cakes, breads, or cookies consistently finish earlier or later than expected.
  • Renters and homeowners learning how an unfamiliar conventional or countertop oven behaves at their usual settings.
  • Cooks who need a persistent oven-air reading rather than the quick internal-food reading provided by an instant-read thermometer.
  • Households comparing heat at practical rack positions while staying within the appliance and thermometer instructions.
  • Anyone replacing a dial that is hard to see, unstable on the rack, or unsuitable for the temperatures they commonly use.

Who should skip it

  • Skip a dial model if your oven window, lighting, or required placement makes the face impossible to read without unsafe reaching.
  • Do not use an oven thermometer as a meat, candy, frying, refrigerator, grill, or surface thermometer unless its instructions explicitly permit that job.
  • Choose an appropriate probe system if you need to monitor food internally or read a display outside the closed oven.
  • Do not place any thermometer in a microwave or under a broiler unless the exact product and appliance instructions specifically allow it.
  • Contact a qualified appliance professional rather than relying on an accessory if the oven shows signs of malfunction or cannot operate as its manual describes.

What to verify before buying

  • Compare the stated operating range and any restrictions for broiling, self-cleaning cycles, grills, toaster ovens, convection ovens, or other cooking modes.
  • Examine the number size, pointer contrast, labeled intervals, and scale units; confirm whether Fahrenheit, Celsius, or both are shown.
  • Check full case dimensions, including the hook, base, and any projection behind the dial.
  • Confirm whether it hangs, stands, clips, or supports multiple positions, then inspect how those positions interact with your rack wires.
  • Read the placement directions and minimum-clearance guidance for walls, elements, fans, pans, and food.
  • Look for instructions about initial setup, settling time, comparison checks, adjustment, and what to do if readings appear inconsistent.
  • Review cleaning directions and whether the face, joints, or base can trap grease; do not assume it can be submerged or washed in a dishwasher.
  • Verify the package quantity and contents rather than inferring that multiple thermometers or accessories shown in a photo are included.

Hooks, bases, and rack geometry

A standing base is convenient when the rack has a flat area that remains clear during cooking. It also consumes usable rack space and may shift when a heavy pan slides past. A hanging hook preserves the surface below, but its viewing angle depends on rack height, wire direction, and the shape of the hook. Some designs offer both positions; that flexibility helps only when each position is stable and clearly described.

Measure more than the round face. The hook may extend well above it, the foot can be wider than the case, and a rear projection may stop the thermometer from sitting where you expected. In a countertop oven, even a modest dial can compete with the pan for limited clearance. Sketching the thermometer’s complete dimensions on paper is an easy way to test the footprint before ordering.

Placement can affect what the dial reports because an oven is not necessarily uniform from front to back or top to bottom. Follow the product and appliance directions, and keep the thermometer from contacting heating components, oven walls, fan covers, cookware, or food. If you compare positions, change one location at a time and allow the oven and instrument to respond according to their instructions. A reading beside an empty rack is not automatically identical to conditions around a large pan during cooking.

Understand what the pointer can and cannot tell you

An oven’s heat source may switch on and off as it regulates temperature, so a dial can move rather than remain fixed at the number selected on the control. The thermometer itself also takes time to respond. A single glance during preheating does not explain the full heating pattern, and different instruments may not move at exactly the same pace.

For a useful comparison, keep the rack position, oven setting, thermometer position, and observation method consistent. Follow stated preheating and settling guidance, note readings over an appropriate period, and avoid repeatedly opening the door. The goal is to notice a repeatable pattern at the settings you use—not to chase every small pointer movement.

Accuracy claims also need context. Check whether the listing provides a tolerance, test point, or adjustment method, and follow the maker’s instructions if it describes a comparison check. Do not improvise a calibration procedure that exposes the thermometer to water, ice, direct flame, or other conditions outside its permitted use. If two thermometers disagree substantially, that difference does not identify the faulty item by itself.

Cleaning and long-term readability

Oven air can carry grease and cooking residue onto the face, pointer cover, hook, and base. A dial that begins with excellent contrast may become difficult to read if the cover clouds or the scale collects film. Review care instructions before purchase, especially if you roast splattering foods. Removable parts, immersion, abrasive cleaners, and dishwasher use should never be assumed.

Let the unit cool as directed before moving or cleaning it. Inspect the viewing cover, seams, hook, and base for damage or buildup, and stop using it if the instructions say its condition is unsafe or could affect operation. Store it where the pointer and mounting hardware will not be bent by heavier utensils. If it normally lives in the oven, remember to check compatibility before starting a high-heat, broil, or cleaning cycle.

Limitations

  • A door window, oven light, rack position, and dial angle can make a readable product photo misleading in everyday use.
  • Analog pointers take time to respond and may move as the oven cycles; one momentary reading has limited meaning.
  • Placement near a wall, element, fan, pan, or open door can differ from conditions at another point in the oven.
  • A wider temperature range may compress the scale and make small differences harder to distinguish.
  • Grease, condensation, scratches, discoloration, or a bent hook can reduce readability or stability over time.
  • An oven-air thermometer does not measure the internal temperature of food and cannot diagnose or repair an appliance.

Alternatives to compare

  • A wired oven probe with an external display when you need to read oven-air temperature without looking through the door.
  • An appliance-compatible smart probe system when remote alerts are important and the permitted temperature range suits the intended use.
  • An instant-read food thermometer for checking internal food temperature at specific moments.
  • A leave-in food thermometer designed for the particular food and cooking method you use.
  • Professional appliance inspection when temperature behavior, controls, seals, elements, or safety features appear faulty.

FAQ

Where should an oven thermometer sit?

Use the location and mounting method specified by the thermometer maker while also following the oven manual. It should be stable, visible, and clear of heating elements, walls, fan covers, pans, and food. For comparisons, keep its position consistent rather than moving it every time you look.

Why does an oven thermometer reading move up and down?

Ovens commonly regulate heat by cycling their heat source, while analog thermometers take time to respond to changing air temperature. Watch for a repeatable pattern using the stated settling guidance instead of judging the oven from one glance during preheating.

Can I leave an oven thermometer inside all the time?

Only within the uses and temperature limits stated for that exact model. Check before broiling, running a self-cleaning cycle, or using another high-heat mode, and remove it whenever either the thermometer instructions or oven manual requires removal.

Is an oven thermometer the same as a meat thermometer?

No. An oven thermometer is intended to report the surrounding oven environment, while a meat or food thermometer is designed to check internal food temperature. Use an instrument whose instructions explicitly match the measurement and cooking method.

Is a Fahrenheit-and-Celsius dial easier to use?

It is convenient when recipes use both scales, but two scales can crowd the face. Compare the actual number size, intervals, pointer contrast, and your viewing distance; a single-scale dial may be clearer if you consistently use one unit.

Handheld Garment Steamers for Home and Travel: Choosing a Practical Fit

Product links are for reference. Verify current details on the retailer page before buying.

Illustrative image for a handheld garment steamer buying guide

Illustrative image, not an official product photo.

Short answer

A handheld garment steamer is most useful for relaxing everyday wrinkles in hanging shirts, dresses, trousers, and some household textiles when setting up an ironing board feels disproportionate to the job. Choose around the routine rather than a headline heat-up claim: check the water-tank capacity, filled weight, cord reach, permitted operating angles, fabric guidance, cool-down instructions, and whether the unit can be emptied and packed without trapped water. A travel-friendly body is not necessarily ready for international outlets, and steam is not suitable for every fabric or every finish.

Search reference

Handheld garment steamer options

Compare tank capacity, filled weight, cord length, approved operating positions, included attachments, voltage requirements, and the maker's care routine for the garments and spaces you have in mind.

View matching options

Think in outfits, not just tank numbers

A large reservoir can mean fewer refills during a weekly wardrobe session, but the same water adds weight to the hand. A smaller unit may be more comfortable for touching up one blouse before work yet frustrating for curtains or several outfits. Estimate what you normally steam in one session, where the garment will hang, and how far the nearest safe outlet is before comparing capacities.

The setup area matters too. You need a stable place for the hot appliance, clearance around the garment, and a surface that will not be harmed by heat or moisture. A compact body does not remove those requirements. If the only available door, wall, or cabinet surface is moisture-sensitive, an iron or a different garment-care routine may fit the room better.

Who this is for

  • People who frequently refresh a few hanging garments between normal wash or dry-cleaning cycles.
  • Apartment dwellers who have limited room for an ironing board but can create a safe vertical steaming area.
  • Travelers who want to address suitcase creases after arrival and can verify voltage, plug, luggage, and hotel-use requirements for the trip.
  • Households that need occasional vertical care for compatible curtains or fabric items, within the steamer and textile instructions.
  • Anyone comfortable following a fill, warm-up, use, cool-down, emptying, and descaling routine.

Who should skip it

  • Choose an iron and stable board when sharp creases, collars, cuffs, or a deliberately pressed finish are the priority.
  • Skip steaming when a garment’s care label warns against it or when its fiber, coating, embellishment, dye stability, or construction is uncertain.
  • Avoid a handheld steamer if holding the appliance plus water would strain your wrist or if you cannot keep the hot head and steam path controlled.
  • Do not plan to use a domestic steamer in another country until its voltage and frequency support are explicitly confirmed; a simple plug adapter does not convert voltage.
  • Consider professional care for valuable, structured, heavily embellished, vintage, or otherwise delicate pieces.

What to verify before buying

  • Tank capacity and access: Compare stated capacity, opening size, fill markings, whether the tank detaches, and how completely it can be drained.
  • Filled weight and grip: Add the water load to the listed appliance weight and check handle shape, control placement, and balance.
  • Operating orientation: Some units are intended only for upright use, while others allow specified angles. Confirm the exact instructions rather than assuming a photo demonstrates safe use.
  • Warm-up and continuous-use wording: Treat timing claims as planning guidance, then check indicator lights, ready signals, and any duty-cycle or rest instructions.
  • Power details: Verify rated voltage, frequency, wattage, plug type, cord length, and whether the model is genuinely dual voltage if travel is intended.
  • Fabric guidance: Read the current manual for compatible textiles, test-area advice, distance from fabric, and attachment use.
  • Water requirements: Check whether tap, distilled, or another water type is recommended for your local conditions and model.
  • Storage procedure: Confirm cool-down time, emptying steps, cord storage, leak precautions, and the cleaning or descaling method.
  • Included parts: Identify whether a fabric brush, delicate-fabric spacer, lint attachment, measuring cup, travel pouch, or heat-resistant rest is actually included.

Four details that change the daily experience

Reservoir design affects more than runtime

A transparent tank with a clear maximum line is easier to monitor, while a wide opening can simplify filling and drying. Detachable tanks may be convenient at the sink, but seals and latches need to be aligned correctly. Fixed reservoirs can make the body simpler yet may be awkward to drain. Whichever design you choose, overfilling is not a way to gain extra runtime; follow the marked limit and filling sequence.

Orientation rules determine where it can work

Garment steamers heat water and direct hot vapor through a head held near fabric. Tilting a model beyond its approved position can cause sputtering or hot-water discharge. This matters when reaching low trouser legs, angled upholstery, or a curtain edge. If those are central uses, look for explicit manufacturer guidance covering the required position rather than relying on terms such as multipurpose.

Keep hands out of the steam path, work from a proper hanger or support, and never steam a garment while someone is wearing it. Attachments are not universal heat shields; install and use them only as directed.

A fast start does not guarantee a smooth session

Warm-up time is only the beginning. Tank capacity, steam control, pauses between garments, refilling rules, and cool-down time all contribute to the real routine. A trigger that can be locked may reduce finger fatigue during a longer session, while momentary control can limit steam when repositioning. Check how the unit signals readiness and whether the instructions require it to cool before adding water.

Travel suitability starts at the electrical label

Small dimensions and a storage pouch describe packability, not electrical compatibility. North American appliances commonly have requirements that do not match every destination. Confirm the input range printed for the exact model and compare it with the destination supply. A plug adapter changes the physical connection; it does not by itself make an incompatible appliance safe. Also check current airline, accommodation, and cruise policies before packing or using a steamer.

A safer setup and care routine

Place the filled unit upright on a stable, moisture-tolerant surface, inspect the cord, and arrange it so nobody must cross the hot working area. Let the appliance reach its indicated ready state. Test an inconspicuous section of the garment, then use controlled passes at the distance and direction described in the manual. Do not concentrate steam over one area in an attempt to force a quick result.

After use, unplug the appliance and place it where the hot head cannot touch fabric, furniture, children, or pets. Allow it to cool for the specified time before emptying or disassembly. Standing water and mineral deposits can affect storage and performance, so follow the maker’s draining and descaling schedule. Do not improvise with vinegar or another cleaner unless the instructions explicitly permit it.

Limitations

  • Steam may relax wrinkles, but it does not create every crisp seam or pressed edge that an iron can produce.
  • Results vary with fiber content, weave, garment construction, wrinkle depth, technique, and the textile’s care requirements.
  • Handheld tanks trade capacity against weight; no single size is ideal for both one-shirt touch-ups and long household sessions.
  • Hot steam, hot surfaces, sputtering water, and tipping can cause burns or material damage if the instructions are ignored.
  • A steamer does not clean stains, replace laundering, sanitize every textile, or make an unsuitable garment safe to treat.
  • Mineral buildup, residual water, and damp storage can create maintenance problems over time.
  • Compact dimensions do not establish dual-voltage support or permission to use the appliance in every hotel, ship, or destination.

Alternatives to compare

A conventional iron and board offer direct pressure for collars, cuffs, pleats, and sharp creases. A compact travel iron may suit people who still want a pressed finish away from home, subject to the same electrical and accommodation checks. Wrinkle-release spray can help with some washable fabrics when label directions allow, though it adds moisture and product residue. Hanging a garment promptly after washing and packing with fewer tight folds can reduce the amount of corrective care needed. For structured tailoring, delicate textiles, or an important outfit, professional pressing may be the safer choice.

FAQ

Can a handheld garment steamer replace an iron?

It can replace some quick wrinkle-relaxing jobs, especially on compatible hanging garments. An iron is generally the more direct tool for sharp creases, firm collars, cuffs, and flat pressing. Many households will find that the two tools solve different problems rather than fully replacing one another.

Is a larger water tank always better?

No. More water can extend a session, but it also increases the weight you hold and may make the body bulkier to store. Choose capacity around the number and size of items normally handled at one time.

Can I put tap water in a clothes steamer?

Follow the exact model’s instructions. Recommendations can depend on the internal design and local water hardness; some manuals permit tap water, while others specify distilled water or a particular mixture. The descaling method also varies.

Is a compact garment steamer automatically safe for international travel?

No. Size does not indicate voltage compatibility. Confirm the model’s stated input voltage and frequency, the destination supply, plug requirements, and local accommodation rules. A plug adapter alone does not convert voltage.

Why does a garment steamer spit water?

Possible causes include insufficient warm-up, overfilling, an unapproved tilt angle, condensation, mineral buildup, or a tank that is not seated correctly. Stop using the unit, keep it pointed away from people and valuables, let it cool as instructed, and consult the troubleshooting guidance for that model.

A Cookbook Stand for a Busy Kitchen Counter: Page Support, Angle, and Cleanup

Product links are for reference. Verify current details on the retailer page before buying.

Illustrative image for a cookbook stand buying guide

Illustrative image, not an official product photo.

Short answer

A useful cookbook stand should keep the recipe readable without occupying the prep space needed for bowls, boards, and hot pans. Begin with the formats you actually cook from: a thick hardcover needs a deeper ledge and steadier base than a slim magazine, while a tablet introduces button access and charging-cable concerns. Check whether the viewing angle works at your eye level, whether page holders can move without covering ingredient quantities, and whether the stand can be wiped after a splash. A folding design is valuable in a small kitchen only if it remains stable when open and has a realistic place to go when cooking ends.

Search reference

Cookbook stand options

Compare stands by usable ledge depth, page-control design, viewing-angle range, counter footprint, cleaning guidance, and folded dimensions.

View matching options

Start with the recipe, not the stand

Cookbooks vary more than styled product photos suggest. A compact spiral-bound collection can lie nearly flat, whereas a new hardcover may push firmly against its pages until the binding relaxes. Loose printouts need broad backing so they do not slump, and a recipe displayed on a phone or tablet needs an unobstructed screen and access to controls. The most useful stand is therefore the one that fits your recurring recipe format, not necessarily the largest model.

Measure a few closed books and then open them to a typical recipe. Note the spine thickness, total spread, and how much force the pages need to remain in place. Compare those observations with the stand’s stated ledge depth, backing width, and page-holder arrangement. If a listing only shows a thin book, do not assume a deeper volume will sit securely.

The location matters too. A stand placed beneath an upper cabinet may have limited vertical clearance, especially when a tall book opens at an upright angle. On an island, the same design may have plenty of room but need better resistance to sliding. Choose the intended counter position before evaluating dimensions.

Who this is for

  • Home cooks who regularly follow recipes from hardcover books, spiral books, magazines, or printed sheets.
  • Bakers who want instructions at eye level while both hands are occupied with measuring and mixing.
  • Small-kitchen users looking to separate a recipe from damp or crowded prep surfaces.
  • Households that alternate between printed recipes and a tablet and can verify that one stand supports both formats.
  • Gift buyers who know the recipient’s counter space and usual cookbook size well enough to choose a practical footprint.

Who should skip it

  • Someone who cooks almost entirely from memory may not gain enough value to justify permanent counter or cabinet space.
  • A wall-mounted rail, shelf, or under-cabinet holder may suit a kitchen with almost no spare work surface.
  • A basic tablet stand may be a better fit when printed books are never used and charging access is the main concern.
  • Loose recipe cards may be easier to manage in a small clip holder rather than on a full-size book stand.
  • If recipes are routinely exposed to heavy splashes, a protected printout or device-safe setup may be more practical than placing a valuable book near the work zone.

What to verify before buying

  • Compare the usable ledge depth with the thickness of an open cookbook, not just its closed spine.
  • Check the backing width and height against large books, binders, magazines, or letter-size printouts used in your kitchen.
  • Confirm how many viewing positions are available and whether the hinge or support locks at each position.
  • Look closely at page holders: note their reach, tension, tip covering, and whether they can move away from important text.
  • Measure the stand both open and folded, including any rear support that extends behind the book.
  • Review the current material and cleaning instructions, particularly for hinges, unfinished edges, pads, and clear panels.
  • If the stand may hold a tablet, verify device thickness, case compatibility, control access, ventilation needs, and charging-cable clearance.
  • Check what assembly is required and whether protective feet or pads are included rather than merely shown.
  • Identify a storage location before choosing a heavy fixed stand or a wide folding model.

The viewing angle changes the working footprint

An upright recipe is easy to scan across the counter and usually consumes less depth at the front. It can also bring a tall book close to an upper cabinet. A lower angle may feel more natural when the stand sits nearby, but it pushes the rear support farther back and may collect more overhead splashes. Adjustable stands offer flexibility, though adjustment hardware adds parts that must stay secure and clean.

Test the angle using an improvised support at the counter where you normally cook. Stand where you mix or chop rather than directly in front of the recipe. You should be able to read a line without bending repeatedly or turning the book toward you each time. Household members of different heights may benefit from multiple positions, while a single cook with a fixed setup may prefer a simpler stand with fewer joints.

Depth measurements can be misleading when they describe only the folded item. Look for the open footprint at the intended angle. Leave room to lift a book on and off without striking a cabinet, utensil crock, or backsplash outlet.

Page control should be gentle and movable

Page arms solve a familiar problem, but their shape determines whether they help or interrupt the recipe. Short arms may not restrain a stiff hardcover. Long arms can reach farther across the page yet cover measurements printed near the lower edge. Flexible or pivoting arms can move around text, although they should not require so much pressure that turning a page becomes a two-handed task.

Consider the contact point. A covered tip may be gentler on paper than a sharp exposed edge, but the actual construction needs to be checked on the current listing. Collectible, fragile, or heavily used books deserve particular care. Avoid forcing a tight binding flat merely to fit the stand; a deeper ledge and a more supportive angle may reduce that strain.

For loose pages, backing coverage matters as much as the holders. A single sheet can curl around a narrow frame or move in airflow from a vent. A broad back offers support but creates more surface area to wipe. If recipes arrive as several printed sheets, decide whether you want to stack them, clip them, or turn them during cooking.

Stability depends on the counter and the load

A broad base is not automatically stable on every surface. Countertop texture, foot material, rear-support geometry, and the book’s center of gravity all play a role. A heavy book positioned too far forward can tip a shallow stand; a light folding stand may slide when a stiff page is turned. Product weight is useful context, but it should be considered alongside the open footprint and support design.

Non-slip feet can help on smooth stone or laminate if they remain attached and clean. Raised feet also create edges where crumbs or moisture can collect. Check pad placement and care instructions, and never assume that a stand is safe beside a hot burner merely because it is sold for kitchen use.

Place the stand outside the path between the sink, cooktop, and refrigerator. It should not block a backsplash outlet, sit beneath a cabinet door that opens downward, or require reaching across heat to turn a page. Good placement often protects the book more effectively than an extra accessory.

Materials and cleanup are part of the daily routine

Wood, metal, molded plastic, and clear panel designs each create different tradeoffs, but a material name alone does not establish durability or washability. Seams, fasteners, hinges, coatings, and edge treatments influence how a stand handles repeated wiping. Follow the maker’s current care directions rather than immersing a stand or using a cleaner that may affect its finish.

A clear front shield can reduce direct splatter on the lower page, but it may add reflections, fingerprints, and corners that need cleaning. It can also complicate page turning. An open stand leaves the recipe more accessible while relying on thoughtful placement and routine wiping. Neither approach makes a cookbook immune to steam, grease, flour, or spills.

If raw ingredients are being handled, avoid touching page arms and then returning to food preparation without following appropriate hand-cleaning practices. The stand is a kitchen accessory, not a food-preparation surface, and intricate hinges can be harder to clean than a simple panel.

Storage can decide whether it gets used

A decorative stand left on display is always ready, but it permanently claims counter space. A folding stand can fit in a drawer or vertical cabinet slot if its closed dimensions and protruding hardware suit that location. Folding also creates a repeated setup step; a design that is awkward to open may remain stored while the cookbook returns to the counter.

Think through the entire motion. Can you retrieve the stand with one hand, open it without pinching fingers, position it securely, and put it away after wiping? Does the folded support stay closed, or can it catch on nearby pans and boards? For a fixed stand, confirm that its base does not interfere with routine counter cleaning.

A stand that also holds a tablet can reduce duplicate accessories, provided it performs both jobs without compromise. A wide book ledge may obstruct a tablet screen, while a tablet-oriented groove may be too narrow for a thick cookbook. Treat dual-use claims as dimensions to verify, not as proof of universal compatibility.

Limitations

  • A cookbook stand uses counter space even when its footprint looks modest in an isolated product photo.
  • Page arms may cover text, leave marks, or struggle with thick, springy books.
  • Adjustable hinges and supports can loosen or become collection points for residue over time.
  • A clear guard may reduce some splashes but can reflect light and does not seal the whole book.
  • Folding designs still require suitable storage and may be less convenient if setup is fiddly.
  • Tablet compatibility varies with device size, protective case thickness, ports, buttons, and charging position.
  • No stand makes paper safe from heat, steam, grease, water, or contamination when placed poorly.
  • Large cookbooks can exceed the backing area or shift the center of gravity beyond what a compact stand supports.

Alternatives to compare

  • A simple tablet or phone stand when every recipe is digital.
  • A clipboard or magnetic clip for one-page printed recipes.
  • An under-cabinet device mount where counter space is scarce and installation is appropriate.
  • A wall shelf or rail-mounted holder in a kitchen already designed for that system.
  • A recipe-card box paired with a small card clip for short, frequently repeated dishes.
  • A washable printed copy kept away from a valuable cookbook during messy preparation.
  • A book weight or separate page clips when the cookbook already sits at a comfortable angle.

FAQ

How deep should the ledge of a cookbook stand be?

It should support the thickest open book you expect to use without forcing the spine forward or leaving the book balanced on an edge. Measure an open cookbook at the point where it meets the ledge, then compare that measurement with the stated usable depth. Account for page arms or a front lip that may reduce the available space.

Are page holders necessary on a cookbook stand?

They are helpful for new hardcovers, tightly bound books, and lightweight pages that will not remain open. A relaxed spiral-bound book may not need them. If holders are included, check whether they reach the page, move around printed measurements, and contact paper gently.

Can the same stand hold a tablet?

Possibly, but compatibility depends on more than screen size. Verify the tablet’s thickness with its case, the ledge or groove dimensions, button and port access, ventilation guidance, and space for a charging connector. Make sure the device remains stable at the intended viewing angle.

Is a splash guard worth having?

A clear guard can intercept some direct splatter near the lower part of a page, which may suit messy prep. It also adds a surface that can reflect light, collect fingerprints, and make page turning less direct. It does not protect the book from every direction, so placement still matters.

Where should a cookbook stand sit on the counter?

Place it where the recipe is readable from your main work position but outside sink splashes, cooking heat, steam, and busy traffic paths. Check clearance beneath cabinets and around outlets. Avoid any position that requires reaching over a hot surface to turn a page.

Wire Cooling Racks for Baking: Match the Grid to Your Sheet Pan

Product links are for reference. Verify current details on the retailer page before buying.

Illustrative image of generic wire cooling racks beside a rimmed baking sheet

Illustrative image, not an official product photo.

Short answer

Start with dimensions, not the rack’s size name. A cooling rack should fit on the counter without wobbling and, if you plan to pair it with a sheet pan, sit inside that pan’s flat interior without riding on the sloped walls. After fit, compare grid spacing, foot height, perimeter construction, cleaning instructions, and the maker’s specific guidance for oven use. A rack sold for cooling is not automatically suitable for roasting or baking, even when it looks similar to an oven-safe model.

Search reference

Wire cooling rack options

Compare complete rack dimensions, grid patterns, foot designs, pan compatibility, temperature guidance, and care instructions for your baking setup.

View matching options

Solve the pan-and-rack puzzle first

A wire rack seems like simple bakeware until it arrives a fraction too wide for the pan you meant to use. Familiar labels such as half sheet, quarter sheet, large, and medium are useful starting points, but they do not guarantee compatibility across different manufacturers. Rim shape, corner radius, wall slope, and handle design can all reduce the flat area available inside a baking sheet.

Measure the interior of your pan where the rack’s perimeter and feet will actually rest. Then compare those numbers with the rack’s complete exterior length, width, and height. Leave enough room to lift the rack without scraping the pan walls. If a listing shows a pan-and-rack set, confirm whether both pieces are included; lifestyle photos do not establish package contents.

Counter-only use is less demanding, but dimensions still matter. The rack needs a heat-safe landing area, and its feet should sit fully on the surface rather than near a sink edge or between stovetop grates. A pair of smaller racks may be easier to move and wash than one broad rack, while a single large rack reduces the gap between batches of cookies or bread rolls.

Who this is for

  • Home bakers who want airflow beneath cookies, pastries, breads, or cakes after they leave the pan.
  • Cooks assembling a rack-and-sheet-pan setup for uses that the selected rack explicitly supports.
  • Small-kitchen households choosing equipment around a countertop oven, compact sink, or narrow cabinet.
  • Batch bakers deciding between one full-width rack and two smaller racks that can be moved separately.
  • Anyone replacing a rack that wobbles, traps food in wide openings, or no longer fits the pans they use.

Who should skip it

  • Skip a separate rack if your occasional recipe can cool safely on existing bakeware and you do not have storage space for another rigid item.
  • Do not use a cooling-only rack in the oven, under a broiler, over direct heat, or on a grill unless its current instructions explicitly allow that use.
  • Choose a sturdier purpose-specific roasting setup if the rack must hold a heavy load; a rack intended for cookies may not suit it.
  • Avoid guessing about coatings or metal composition when the listing does not provide the material and care information you require.
  • Do not buy by sheet-pan label alone when exact interior and exterior dimensions are missing.

What to verify before buying

  • Check the rack’s complete length, width, and height, then measure the usable interior of every pan you want it to fit.
  • Look at the wire pattern and opening size, especially if you cool small cookies or narrow pastries that could tip into a wide grid.
  • Confirm how many feet or cross supports touch the counter and whether the product description addresses stability under its intended load.
  • Read the material and surface-finish wording rather than inferring construction from silver color.
  • Verify whether oven use is permitted, along with any stated temperature, broiler, direct-heat, or dishwasher restrictions.
  • Check the package count and whether photographed sheet pans, mats, or utensils are actually included.
  • Review washing and drying directions, paying attention to joints, rolled edges, and other places that may hold crumbs or moisture.
  • Measure the sink, dishwasher rack, and cabinet slot where the rack will be cleaned and stored.

Grid spacing changes what the rack can hold

Parallel bars create fewer crossing points and can be straightforward to wipe, but narrow food may sag or turn between them. A tighter square grid gives small cookies and delicate pieces more points of support. The tradeoff is a larger number of wire intersections where glaze, crumbs, or melted ingredients can collect. The useful choice depends less on appearance than on what normally comes out of your oven.

Check the perimeter as well. A continuous outer frame helps define the rack’s shape, while crossbars beneath the cooking surface can reduce flex. Product photos taken from above may hide the feet and supports, so side and underside views are valuable. If a listing gives a load limit or intended-food guidance, use that information rather than assuming every wire rack can carry the same weight.

Foot height creates the air gap. Low feet can make a rack easier to store, but they leave less room beneath it for air movement and crumbs. Taller feet increase clearance while also raising the food and requiring more cabinet depth. Stability matters more than maximum height: all feet should land on the pan or worktop, and folding feet should have clear setup instructions if the design uses them.

Cooling on the counter versus cooking in the oven

For countertop cooling, the rack separates hot baked food from a solid pan or plate so air can reach more of the surface. Place it on a stable, heat-safe area with enough room around the edges. Very soft or delicate bakes may still need time to firm in their pan before transfer, so follow the recipe rather than moving everything immediately.

Oven use is a separate buying question. A rack may be described as a cooling rack while another visually similar rack is marketed for roasting, crisping, or baking. Materials, finishes, joints, feet, and temperature guidance can differ. Look for explicit oven-use instructions for the exact item and follow the stated limits. Dishwasher-safe wording, rust-resistant wording, or an all-metal appearance does not by itself establish oven compatibility.

If oven use is approved, pan fit becomes especially important. A rack perched on a rim can shift and leave little room for oven mitts. Confirm that its feet rest on the pan floor and that the assembled height leaves suitable oven clearance. Drippings and residue can collect at wire intersections, so consider how the rack will be handled and cleaned after use before making this its routine job.

Cleaning and storage deserve a trial run

Imagine moving the rack through your real kitchen. A large grid may fit the oven but not lie flat in the sink. Hand washing can require turning it several times, and exposed wire ends or close corners may catch a cloth. If dishwasher cleaning is important, verify both permission and physical fit between the tines. “Easy to clean” is not a substitute for specific care instructions.

Drying is part of care, particularly around welded joints, folded edges, and feet. Follow the maker’s directions and make sure air reaches the entire rack before it goes into a cabinet. Stacking a damp rack against a sheet pan can trap moisture and crumbs. A vertical bakeware divider can provide easy access, but only if the rack cannot slide out when the cabinet opens.

For nested storage, compare the rack’s height with the depth available inside the pan. Taller feet or outward-projecting supports may prevent a second pan from stacking neatly on top. Two smaller racks can be tucked into different pans, though a center seam may be inconvenient when both are used together beneath one large batch.

Limitations

  • Size names are not standardized enough to replace measurements of both the rack and the pan interior.
  • A tight grid supports smaller food but creates more intersections that may require detailed cleaning.
  • Cooling racks do not all share the same oven, broiler, grill, dishwasher, or temperature permissions.
  • Tall feet provide clearance but add to overall height and can complicate pan nesting or cabinet storage.
  • Wire racks can flex, wobble, discolor, or develop surface damage depending on construction, load, use, and care.
  • A broad rack may be awkward to wash even when it fits the oven and sheet pan perfectly.

Alternatives to compare

  • A matched sheet-pan-and-rack set when you want compatibility established within one current product listing.
  • Two compact cooling racks for separate batches, a small sink, or a countertop oven workflow.
  • A solid trivet for supporting a hot pan when airflow beneath individual baked items is not the goal.
  • A purpose-specific roasting rack for heavier foods or a shape designed to hold food above drippings.
  • The pan or board recommended by the recipe when the food should cool gradually without immediate transfer to a wire surface.

FAQ

How do I know whether a cooling rack will fit my sheet pan?

Measure the flat interior of the pan, including the space between sloped walls and rounded corners, then compare it with the rack’s full exterior dimensions and foot positions. Do not rely only on labels such as half sheet or quarter sheet.

Can every wire cooling rack go in the oven?

No. Treat oven use as a product-specific feature. Check the exact rack’s instructions for permitted uses and temperature limits, and do not infer safety from its color, metal appearance, or cooling-rack label.

Is a grid pattern better than parallel wires?

A tight grid gives small cookies and narrow pastries more support, while parallel wires have fewer crossing points to clean. Choose according to the size and softness of the food you usually cool rather than assuming one pattern is universally better.

Should a cooling rack have tall or short feet?

The feet need to provide a stable air gap without making the rack awkward for your pan, oven clearance, or storage. Compare overall height and support placement; maximum clearance is less useful if the rack wobbles or will not nest in the pan.

Is one large rack more useful than two small racks?

One rack provides an uninterrupted surface for a large batch. Two small racks can be easier to lift, wash, and store, and they allow separate batches to move independently. Measure your pan, sink, counter, and cabinet before choosing.

Choosing a Bread Box That Works on a Crowded Kitchen Counter

Product links are for reference. Verify current details on the retailer page before buying.

Illustrative image of a generic bread box on a kitchen counter

Illustrative image, not an official product photo.

Short answer

A useful bread box is not simply the biggest container that fits under a cabinet. It should hold the loaves, rolls, or pastries your household typically has at the same time, open fully in its intended location, and leave enough counter space for daily food preparation. Compare usable interior dimensions rather than exterior width alone. Then look at ventilation, closure design, cleaning access, food-contact guidance, and whether crumbs can be removed without turning the whole box upside down. A bread box can make the counter tidier and shield bread from light and incidental contact, but it does not give every type of bread the same storage life.

Search reference

Bread boxes for kitchen counters

Compare interior capacity, door clearance, ventilation, surface care, crumb cleanup, and the counter area each design occupies while open.

View matching options

Start with the bread, then measure the counter

Bread boxes are often photographed with one neatly centered loaf, while real kitchens may need to store a sandwich loaf, a bag of rolls, and half a bakery boule at once. Make a short inventory before comparing containers. Note the tallest and widest bread you buy regularly, whether it stays in a bag, and how many packages usually overlap between shopping trips. A slim box can be perfectly adequate for one household and become a frustrating stack of crushed bags in another.

Measure the proposed location in three dimensions. Width is only the beginning: wall cabinets limit height, a backsplash can interfere with a rear hinge, and an appliance cord may reduce usable depth. Leave practical room around the box instead of planning a millimeter-perfect fit. If it will sit beside a toaster or coffee maker, account for the space needed to use and clean those appliances and follow their placement instructions.

The door changes the working footprint. A front-hinged panel needs clear counter area in front and may become a temporary surface that collects crumbs or clutter. A roll-top or sliding door avoids that forward swing but can take up interior room. A top-hinged lid needs overhead clearance and may be awkward under a low cabinet. Sketch the door in its open position before deciding that the exterior dimensions fit.

Who this is for

  • Households that keep bread on the counter and want packages gathered in one defined place.
  • Small kitchens where a measured container can replace a loose pile without consuming the main preparation area.
  • Home bakers who need room for one or two familiar loaf shapes after the bread has cooled completely.
  • Shared kitchens where a visible, consistent storage location helps keep counters orderly.
  • Buyers willing to clean crumbs regularly and adjust storage habits for different bread types and room conditions.

Who should skip it

  • Skip a counter bread box if you rarely keep bread at home or already use freezer storage successfully.
  • A decorative box is a poor trade if it occupies the only safe, usable preparation space in a very small kitchen.
  • Do not use a bread box as a substitute for refrigeration when a specific product label or recipe requires refrigerated storage.
  • Anyone expecting a sealed container to make all bread last indefinitely should choose a storage method based on the particular bread instead.
  • A household that buys unusually long baguettes or several bulky loaves may find a pantry shelf, drawer, or dedicated cabinet more practical.

What to verify before buying

  • Usable interior dimensions: Compare the space inside with bread in its normal bag or wrap; exterior measurements do not reveal wall thickness, hinges, or door tracks.
  • Open-door clearance: Check forward, upward, or rear clearance in the exact counter location, including cabinet handles and backsplash edges.
  • Ventilation: Look for clearly described vents or adjustable airflow and consider how the design suits the bread and climate in your home.
  • Closure behavior: Confirm that the door moves smoothly, remains where intended, and does not require holding the box with a second hand.
  • Cleaning access: Check whether corners, tracks, seams, and ventilation holes can be reached and whether any crumb tray is actually removable.
  • Material and care: Review current cleaning instructions, food-contact wording, finish care, and restrictions involving water, detergents, or heat.
  • Base and feet: Make sure the box sits steadily and will not scratch or trap moisture against the counter surface.
  • Assembly details: For flat-packed designs, verify included hardware, tool requirements, panel alignment, and finished dimensions.
  • Placement guidance: Follow the maker’s directions about heat, moisture, sunlight, walls, and nearby appliances.

Door style matters in a working kitchen

A roll-top door is appealing when the counter in front of the box must remain available. The slatted panel usually travels along a curved track, so examine how much interior height and depth that mechanism consumes. Tracks also create places for crumbs to collect. A smooth path and accessible cleaning areas matter more over time than the visual novelty of the door.

Front-hinged doors provide a broad opening and make the back of the box easier to reach. Some are designed to rest horizontally, but that does not automatically make them a cutting board or load-bearing shelf. Use the panel only as described in the current instructions. Check where its handle lands and whether opening it blocks a drawer or pushes into the area where someone is preparing food.

A top lid can be mechanically simple and easy to wipe, yet low wall cabinets may prevent it from opening far enough. Lift-off lids require somewhere clean to set the lid down. Side-opening doors are less common but may suit a narrow counter if the adjacent area remains clear. There is no universally superior style; the best mechanism is the one that can be opened, loaded, and cleaned without rearranging the kitchen each time.

Airflow is not the same as a perfect storage environment

Bread storage involves competing changes. Too much exposure can contribute to drying, while trapped moisture can create an undesirable damp environment. Bread boxes approach that balance in different ways through small holes, seams, adjustable vents, or doors that are not airtight. Product descriptions do not always explain airflow precisely, so avoid treating words such as “fresh” or “ventilated” as a measurable guarantee.

The bread itself matters. A packaged sandwich loaf, a crusty bakery loaf, homemade enriched bread, and pastries with perishable fillings do not have identical storage needs. Keep and follow the product label, bakery guidance, or recipe instructions. Let home-baked bread cool fully before enclosing it; visible condensation or a damp interior is a reason to reassess the storage setup and clean the box.

Room conditions change the result as well. Heat, humidity, direct sun, steam from cooking, and proximity to a dishwasher or sink can affect the environment around the box. Choose a dry location away from obvious heat and splashes. Inspect stored food regularly and discard it when its condition is questionable rather than assuming the container has preserved it.

Materials change care more than appearance

Metal boxes can offer thin walls and a wipeable interior, though painted or coated finishes may have specific restrictions. Look for protected edges, stable hinges, and care instructions that address scratches, rust, and prolonged moisture. A metal shell may also show fingerprints or dents, which is mainly a household preference rather than a storage performance measure.

Wood and bamboo can add a warm counter appearance and may use thicker panels. Their care often differs from a washable plastic bin: soaking, harsh cleaners, or a dishwasher may be inappropriate. Check how joints, grooves, and unfinished surfaces should be cleaned and dried. Marketing names alone do not establish the exact material, coating, or food-contact suitability.

Plastic or mixed-material designs can be light and easy to move. Verify temperature limits, approved cleaning methods, latch construction, and whether removable components can be washed separately. A transparent window helps show what is inside without opening the box, but seals and window edges add more seams to inspect. Regardless of material, smooth reachable interior surfaces make routine crumb removal easier.

Capacity without counter takeover

Single-level boxes keep everything visible but can become wide. Two-level designs use vertical space and may separate loaves from rolls, yet they need sufficient clearance beneath wall cabinets and can hide items at the back. Check whether the shelves are fixed, adjustable, or removable, and whether the stated dimensions include handles and feet.

Avoid treating the top as bonus storage unless the manufacturer describes an appropriate load and use. Even a flat top can become cluttered with fruit, mail, or appliances that must be moved every time the lid opens. Storing heat-producing appliances on or against a bread box can also conflict with appliance clearance instructions. Plan the top as empty space unless both products’ directions support the arrangement.

If capacity needs fluctuate, a slightly larger interior may be useful, but oversized storage can encourage forgotten packages. An easy visual check is valuable: place older bread toward the front, avoid crushing soft items under heavy loaves, and clear empty bags promptly. Organization habits often make more difference than one extra tier.

Cleaning should be a weekly-sized task, not a project

Crumbs accumulate even when bread remains wrapped. Removable trays and wide openings can simplify cleanup, but only if they come out without disassembling hinges or spilling into tracks. Look closely at interior corners and door mechanisms. Decorative perforations and deep seams may be attractive in photos while adding work in actual use.

Follow the supplied care instructions rather than assuming every bread box can be rinsed in a sink. Unplug and move nearby appliances before cleaning the counter area when appropriate. Dry the box completely before putting food back inside, and investigate persistent moisture, odors, stains, or visible growth rather than covering them with another bag of bread.

A liner may seem like an easy solution, but it can block intentional vents or hold crumbs and moisture against a surface. Use one only if compatible with the design and clean it frequently. Strong fragrances can also transfer to food or linger in enclosed spaces, so use cleaning products approved for the material and rinse or wipe as directed.

Limitations

  • A bread box cannot guarantee a fixed storage life because bread formulation, packaging, room conditions, and handling differ.
  • Exterior size may overstate practical capacity once door mechanisms, shelves, hinges, and thick panels are considered.
  • Ventilation descriptions are not always quantified, and a design suited to one household or climate may not suit another.
  • Crumbs can collect in tracks, seams, vents, and corners even when most bread remains packaged.
  • Large boxes can reduce preparation space, interfere with appliances, or fail to open fully beneath wall cabinets.
  • Decorative tops and drop-down doors should not be treated as cutting boards, shelves, or appliance platforms unless specifically designed for that use.
  • Bread with perishable ingredients or storage instructions may require a different method regardless of the container.

Alternatives to compare

  • Freezer storage with portions wrapped and labeled for households that use bread slowly.
  • A dedicated pantry shelf or deep drawer when counter space is more valuable than at-a-glance access.
  • A clean bread bag or appropriate wrap inside a cabinet for one loaf at a time.
  • A tall pantry bin for packaged rolls and flatbreads, provided airflow and food-storage guidance remain suitable.
  • A smaller pastry container used only when its closure, capacity, and care fit the specific baked goods.

FAQ

Should a bread box be airtight?

Not necessarily. Many bread boxes use limited ventilation rather than an airtight seal, but the appropriate storage method depends on the kind of bread, its packaging, and the conditions in your kitchen. Follow label, bakery, or recipe guidance instead of relying on the closure alone.

Can I put warm homemade bread directly into a bread box?

Let it cool fully first. Warm bread can release moisture inside an enclosed space, changing both its texture and the condition of the box. Use the recipe’s storage guidance once cooling is complete.

How large should a bread box be for one loaf?

Measure the loaf in the bag or wrap you normally use and compare it with the listed interior dimensions. Leave enough room to insert and remove it without crushing the bread; do not rely only on the product’s exterior width.

Can the top of a bread box hold a toaster?

Only if the bread-box maker and toaster maker both support that placement, including weight, heat, and ventilation clearances. A flat lid is not automatically an appliance shelf, and the toaster may also prevent the box from opening.

How often should I clean a bread box?

Remove crumbs regularly and clean spills promptly, using the product’s care instructions. The practical interval depends on how often it is used, but do not wait when you notice moisture, odors, residue, or questionable food condition.

Rolling Pins for Home Baking: Match the Shape to the Dough

Product links are for reference. Verify current details on the retailer page before buying.

Illustrative image of a generic wooden rolling pin on a home baking counter

Illustrative image, not an official product photo.

Short answer

A useful rolling pin should suit both the dough you make and the clear counter space you have. A straight dowel gives the hands direct feedback and offers one continuous rolling surface. A handled pin keeps the hands in a familiar position while the barrel turns, but its bearings, handles, and axle add parts to inspect and clean. Tapered pins are easy to steer through curves, while straight sides help when you want an even strip or broad sheet. Compare usable rolling length rather than total length, then consider diameter, weight, surface texture, care instructions, and where the pin will live between baking sessions.

Search reference

Rolling pins for home baking

Compare dowel, tapered, and handled designs against your work surface, usual batch size, preferred grip, cleaning routine, and storage space.

View matching options

Begin with the dough, not the material

A rolling pin is simple enough that material can dominate the shopping page, but shape and working dimensions usually make a better first filter. Think about the task that sends you looking for the pin. Large batches of cookies need enough usable length to cross a broad piece of dough without leaving repeated ridges. A small pastry round benefits from control when turning and thinning the edges. Pizza, flatbread, pasta, decorative dough, and laminated pastry each place different demands on the tool and may also call for recipe-specific technique.

Measure the uninterrupted counter or board area where you actually roll. Include the room required for your hands, not just the dough. A pin that looks compact in isolation can become awkward beside a wall, sink, appliance, or raised board edge. Conversely, a very long tool may add no practical rolling area if its ends constantly hit nearby objects. If you use a rimmed board or a pastry mat, check how the pin’s handles or tapered ends interact with those boundaries.

Then note the largest sheet you make regularly. The relevant product dimension is the barrel or central working section that touches the dough. Overall length may include handles, rods, knobs, or narrow tapers that do not provide the same contact. Listings do not always label these dimensions consistently, so compare diagrams and current specifications carefully.

Who this is for

  • Home bakers replacing a short bottle, glass, or improvised roller with a dedicated tool.
  • Cookie and pastry makers who want a working length suited to their usual batch rather than the largest pin that fits a cabinet.
  • Cooks choosing between the direct feel of a dowel and the separate grips of a rotating handled pin.
  • Bakers who need a second pin for a different task, such as a tapered shape for round dough alongside a straight pin for broad sheets.
  • Anyone reorganizing a small baking station and willing to measure the counter, drawer, or hanging space before buying.

Who should skip it

  • Skip an oversized pin if most of your work is a single small crust or a narrow strip of dough on a compact board.
  • Do not choose a heavy stone or metal option solely for appearance if lifting, stopping, or storing it would be uncomfortable.
  • Avoid an unfinished wooden tool if your routine requires soaking or machine washing; follow the stated care method for the actual pin instead.
  • A pin with thickness rings is a poor match when the ring settings do not correspond to the recipes you follow or when the guides reduce usable width too much.
  • If limited hand movement makes two-handed rolling difficult, consider whether a press, pasta machine, or another task-specific tool would be easier to use.

What to verify before buying

  • Usable rolling length: Distinguish the dough-contact area from the complete end-to-end measurement.
  • Body shape: Confirm whether the working surface is straight, gently tapered, or shaped in another way and decide how that suits your common dough.
  • Maximum diameter: A thick dowel changes hand position; measure a familiar cylindrical item if the listed diameter is hard to visualize.
  • Weight: Check the actual stated weight and consider both downward pressure during rolling and the effort required to lift and reposition the pin.
  • Grip and movement: For handled models, look at handle size, clearance, axle construction, and whether the barrel is intended to rotate freely.
  • Surface and seams: Inspect descriptions for coatings, texture, joints, engraved measurement marks, or crevices where flour and dough could collect.
  • Care instructions: Verify washing, drying, conditioning, rust-prevention, dishwasher, and temperature guidance for the specific construction.
  • Guide rings: Check included thicknesses, measurement units, how firmly the rings attach, and how much rolling width remains between them.
  • Storage: Measure the full tool, including handles, and confirm whether any hanging feature is intended to support its weight.

Straight dowel, tapered pin, or rotating barrel?

A straight dowel is one solid cylinder or a cylinder-like body without separate handles. Your palms move across its surface while rolling, so pressure and dough thickness can be felt directly. Its uninterrupted length is useful across wide sheets, and the lack of an axle means fewer moving joints. The tradeoff is that a thick or slick dowel may feel unfamiliar, especially to someone accustomed to holding handles. Diameter, surface finish, and the user’s hand size all affect comfort.

A tapered pin narrows toward the ends. Moving one hand through a slightly longer stroke can help steer the pin around a circular piece of dough. That makes the form appealing for pie and other round work, though technique still matters. Because the ends narrow, only the center offers the maximum diameter and pressure profile. Look for a clear drawing of the taper and total working length instead of assuming all tapered pins have the same proportions.

A handled rolling pin has a barrel that turns around a central rod or axle while the hands hold separate grips. It can feel intuitive for long back-and-forth passes and keeps flour off the palms. The barrel length, not the distance across the handles, determines the broadest uninterrupted pass. Check that your fingers have clearance from the counter and that the handles suit your grip. Bearings or bushings should move as described, but the care instructions may limit soaking or dishwasher use because water and residue can reach the joints.

None of these designs is automatically the right one for every baker. If possible, mimic the hand position with objects of similar diameter before ordering. A straight cardboard tube can suggest whether a dowel feels too thick, while the handles of an existing kitchen tool can help you judge grip length. This will not reproduce weight or balance, but it can expose an obvious mismatch.

Material changes weight, feel, and upkeep

Wood is common because it offers a warm grip and a surface that is neither identical to polished metal nor stone. Species, grain, finish, and construction vary, so broad material labels do not define care. Confirm whether a particular pin is sealed, unfinished, laminated, or made from one piece, and follow its cleaning and conditioning directions. Wood should not be assumed dishwasher-safe, and prolonged soaking can be unsuitable. Inspect a new pin for rough areas or damage before it touches food.

Metal pins can have a smooth surface and may be designed to cool before use, but construction matters. A hollow pin and a solid pin will not feel alike, and not every product is intended for refrigeration or freezer exposure. Verify the stated material, seams, end caps, filling instructions if any, and cleaning guidance. Condensation can affect flour and dough behavior, so a cold surface is a technique choice rather than a universal advantage.

Stone pins often emphasize mass and a cool-feeling surface. That weight can provide steady pressure, yet it also makes the tool harder to stop, lift, and move to a sink or shelf. Stone can chip or damage another surface if dropped, and handles, axles, or stands may need separate care. Check the complete weight rather than judging from photos, and plan a low, stable storage location.

Silicone-covered or synthetic-surface pins may be marketed around release and cleanup, but coatings are not all the same. Review food-contact wording, temperature limits, seam construction, permitted cleaning methods, and what lies beneath the outer surface. Even a low-stick surface may still need flour according to the recipe, and soft coatings can be vulnerable to cuts or abrasion from nearby utensils.

How weight and diameter affect a rolling session

A heavier pin contributes more downward force before you deliberately press. That may help with firm dough, but it can also thin soft areas faster than expected or make frequent lifting tiring. A light pin is easier to reposition and can offer delicate control, though the user supplies more of the working pressure. Neither description establishes quality. Match mass to the dough, the length of the session, and what is comfortable for the person doing the baking.

Diameter changes leverage and hand posture. A slim pin can be nimble for small pieces but may require more revolutions or shorter strokes. A large-diameter dowel raises the hands farther above the counter and can cover distance smoothly, while also demanding a broader grip. Handled pins need enough clearance beneath the grips so knuckles do not brush the worktop.

Balance is difficult to judge from a single listing image. On a dowel, consistent shape and material distribution matter. On a rotating model, the barrel should remain centered and move without the handles loosening during normal use as defined by its instructions. Check the return terms before buying when weight, grip, or movement cannot be assessed in person.

Thickness rings and measurement marks

Removable guide rings lift the main barrel above the counter to target a nominal dough thickness. They can help with cookies and crackers when uniformity matters, but they only work while both rings stay on a level surface. A small board, mat edge, pile of flour, or counter seam can tilt the pin. Rings also reduce the effective width available for dough, and soft pieces may shift or compress differently under pressure.

Compare the included ring sizes with your recipes and confirm whether dimensions are shown in inches, millimeters, or both. If the listing provides only color coding, consider how you will identify the rings later. Check how they attach, whether replacements are available, and whether the pin can be used comfortably without them.

Printed or engraved ruler marks may help estimate width, but their location can also create texture where dough touches the pin. They do not measure thickness unless the product includes a separate mechanism for that purpose. Treat markings as a convenience to verify, not a substitute for a ruler, dough guides, or the recipe’s visual and tactile cues.

Cleaning and storage deserve a plan

Remove dough according to the maker’s instructions rather than reaching immediately for a sharp scraper that could gouge wood or cut a coating. Pay attention to the ends of a dowel, the edge of a sleeve, and the gaps beside rotating barrels. Flour can hide in joints even when the central surface looks clean. Wash only by the stated method, dry thoroughly, and apply any recommended maintenance at the specified interval.

Storage should protect the rolling surface from knife edges, moisture, falls, and the weight of other cookware. A long pin tossed into a crowded utensil drawer can jam the drawer or damage its surface. A stable shelf, deep drawer, or suitable hanging point can work, but verify that a loop or handle is designed for hanging. Heavy pins are generally better kept low, where a slip has less distance to travel.

If a pin comes with a stand, include the stand’s footprint in your measurement. Counter storage keeps the tool accessible but also exposes it to cooking splatter and sunlight. A cloth bag may reduce dust while trapping moisture if the tool is put away before it is fully dry. The simplest safe storage method is the one you can follow after every baking session.

Limitations

  • One rolling pin may not feel equally controlled on tiny pastry rounds, broad cookie sheets, firm pasta dough, and soft laminated dough.
  • Material names alone do not establish exact weight, surface finish, food-contact construction, or cleaning requirements.
  • Guide rings target a spacing from the counter but cannot correct an uneven surface or guarantee uniform dough after it springs back.
  • A cold pin does not replace recipe temperature control, and condensation may alter how the dough and flour behave.
  • Handles and rotating parts add grip options but also create joints that need inspection and product-specific care.
  • The comfortable weight and diameter for one baker can be tiring or awkward for another, particularly during large batches.

Alternatives to compare

  • Dough guide strips used with an existing straight pin when repeatable thickness is the main concern.
  • A compact pastry roller for small pans, edges, or limited work areas.
  • A tortilla or dough press for recipes designed around pressing rather than rolling.
  • A manual pasta machine for creating repeatable narrow sheets appropriate to the recipe.
  • A clean, suitable cylindrical substitute for occasional use, provided its material, surface, and shape are safe for food preparation.

FAQ

Is a dowel or handled rolling pin easier for beginners?

It depends on the grip that feels natural. A handled pin separates the hands from the moving barrel, while a dowel places the palms directly on the tool for immediate pressure feedback. Compare diameter, weight, usable length, and hand position rather than treating either style as universally easier.

What length rolling pin should I choose for cookies?

Measure the widest sheet of cookie dough you normally roll and the clear width of your work area. Then compare that with the pin’s usable rolling surface, not just its overall length. Leave room for both hands and for repositioning the dough without striking nearby objects.

Does a marble or metal rolling pin need to be chilled?

Only if the specific product instructions and the recipe support chilling. Confirm permitted temperatures and cooling methods first. A cool pin can gain condensation, and temperature-sensitive dough still requires appropriate handling of the ingredients, room, and work surface.

Are rolling pin thickness rings accurate?

Rings can establish a nominal gap when both ends travel on the same flat surface. Their result can be affected by an uneven counter, a mat edge, flour buildup, dough spring-back, or rings that shift. Verify the ring dimensions and check the dough with the method your recipe recommends.

Can a wooden rolling pin go in the dishwasher?

Do not assume so. Wood construction and finishes vary, and heat, prolonged water exposure, and detergent may be unsuitable. Follow the current care instructions for the exact pin; hand cleaning and prompt drying are common requirements but still need product-specific confirmation.

Choosing a Splatter Screen That Works With Your Frying Pans

Product links are for reference. Verify current details on the retailer page before buying.

Illustrative image of a generic mesh splatter screen beside a frying pan

Illustrative image, not an official product photo.

Short answer

Start with the outside rim of the pan you use most, not its advertised cooking-surface size. A splatter screen should span that opening securely without leaving a broad gap, sliding into the food, or forcing its handle against another hot pan. Fine mesh can intercept droplets while letting steam escape, but it also collects residue and needs thorough cleaning. Compare the screen’s actual outside diameter, edge construction, handle length and angle, heat guidance, cleaning instructions, and the place where it will dry and be stored. If one screen is meant to cover several pans, check every rim individually rather than assuming a single nominal size will fit them all.

Search reference

Splatter screens for frying pans

Compare screen diameter, mesh construction, rim profile, handle position, care guidance, and storage features for the pans already in your kitchen.

View matching options

Fit begins at the top edge of the pan

Cookware size labels can be a rough starting point, but the dimension that matters here is the opening the screen must cover. Measure straight across the pan at its upper rim. Include pouring spouts, helper handles, or unusually flared sides in your inspection, because they can create gaps or keep a flat frame from resting evenly. Then compare that measurement with the screen’s stated outside diameter and usable mesh area.

A little overhang is often more practical than a screen that barely reaches the edge, provided the frame still rests stably and the maker describes it as suitable for the pan size. Excessive overhang has tradeoffs: it can crowd a neighboring burner, bump a saucepan, or place more hot metal beyond the pan. A screen that is too small may sit below the rim, contact food, or leave an open crescent where droplets escape.

Pan geometry also changes the fit. A high-sided sauté pan, low skillet, wok, and griddle do not present the same resting surface. Some screens have a flat outer ring; others use stepped rings intended to locate on more than one diameter. Those rings can improve positioning on compatible cookware, but only when the spacing agrees with the actual rim. Product photos are not a substitute for measurements.

Who this is for

  • Cooks who pan-fry, sauté, or brown foods that regularly send small droplets beyond the cookware.
  • Households trying to reduce routine cleanup on the range and nearby backsplash without sealing a pan under a solid lid.
  • People who use one or two frequently reached-for skillets and can choose a screen around known rim dimensions.
  • Small kitchens where a hanging loop or folding handle would give the tool a realistic storage location.
  • Buyers replacing a warped, clogged, unstable, or difficult-to-clean screen.

Who should skip it

  • Skip a separate screen if the cooking method specifically calls for a fitted solid lid and controlled moisture retention.
  • A rigid wide screen is a poor choice when it would overhang the cooktop controls or interfere with cookware on adjacent burners.
  • Do not use a generic screen as a substitute for specialized safety equipment, deep-frying guidance, or the appliance and cookware instructions.
  • Avoid an option whose temperature limits, handle material, food-contact construction, or cleaning directions are unclear for your intended use.
  • If hand strength or reach makes lifting a broad hot screen awkward, compare a stable lid or a different cooking setup instead of relying on a long handle alone.

What to verify before buying

  • Outside diameter: Match the complete screen measurement to the pan opening and available space around the burner.
  • Resting edge: Check whether the screen is flat, stepped, or shaped with feet, and whether it can sit evenly on your cookware rim.
  • Mesh construction: Confirm the stated material, number of mesh layers, and how the mesh joins the outer frame.
  • Handle position: Note its length, angle, grip material, and distance from the pan wall and neighboring burners.
  • Heat guidance: Review current temperature and stovetop-use instructions rather than assuming every grip or trim piece tolerates the same heat.
  • Steam behavior: Make sure the design is intended to vent steam; never assume it performs like a fitted lid.
  • Cleaning method: Check for hand-wash or dishwasher directions and whether the rim, joints, or layered mesh have areas that trap residue.
  • Storage footprint: Measure the full length with the handle extended and verify whether a folding handle or hanging loop locks securely.
  • Included pieces: Determine whether the listing is for one screen, a multi-size set, or a screen bundled with unrelated utensils.

Mesh, perforations, and visibility

Traditional splatter screens often use woven metal mesh. The openings allow vapor to move upward while the strands interrupt many droplets. A finer weave may intercept smaller droplets, yet it presents more surface area for oil and food residue. Multiple mesh layers can add another barrier, but they can also make it harder to see the food and more important to clean and dry the screen carefully. Examine how the listing describes the construction instead of treating every mesh screen as equivalent.

Perforated metal guards use punched openings rather than woven wire. Their smooth sections may feel simpler to wipe, while the size and distribution of holes affect visibility and venting. Silicone elements sometimes appear around the edge or across parts of a guard. These features may change grip and cleanup, but their heat limits and care rules need specific confirmation.

Visibility is useful because a screen is normally lifted when food must be turned, stirred, or checked. No design stays perfectly clear once vapor and droplets reach it. If seeing browning is central to the recipe, plan for brief checks made with appropriate heat protection. Do not lean over the pan or place a face close to the screen to see through it.

The handle has to fit the whole cooktop

A long handle creates distance from the pan, but length by itself does not guarantee comfortable handling. Look at where the handle meets the frame and whether the grip rises above the pan’s own handle. Two handles occupying the same direction can be awkward to grasp separately. Rotating the screen can solve that conflict only if the cooktop leaves a safe, clear direction for its handle.

Grip materials deserve the same attention as the mesh. A dark or soft-looking section should not automatically be assumed cool to the touch. Read the heat and handling guidance, use suitable protection where directed, and keep every handle away from flames and other active heating zones. A loose joint can let the screen tilt as it is lifted, so inspect fasteners and follow the maker’s maintenance instructions.

Folding handles reduce drawer length and can make dishwasher placement easier when permitted. The hinge adds a moving part, however. Verify how it locks in the working position and avoid choosing one that must be held open by constant hand pressure. A short center knob has a smaller footprint but positions the hand over the hot pan; consider that movement before selecting by storage convenience.

Use and cleanup are connected

A splatter screen works best as one part of careful stovetop practice. Use cookware of suitable capacity, control heat according to the recipe, remove excess surface moisture from ingredients where appropriate, and avoid overcrowding. The screen can reduce escaping droplets, but it cannot contain every splash or correct an unsuitable pan-and-heat combination.

Lift the screen away from yourself so condensed moisture does not run toward your hand or back into hot fat unexpectedly. Have a heat-safe landing place ready before cooking. Setting an oily screen across a counter, sink edge, or another pan creates extra cleanup and can make the tool unstable. A dedicated rest or heat-safe plate needs enough area for the entire rim.

After cooking, allow the screen to reach a safe handling temperature and follow its cleaning instructions. Mesh often needs prompt attention because residue can dry between the wires. Clean both faces and inspect the rolled edge and handle joint. If dishwasher use is permitted, position the screen as directed so it does not block the spray or catch on a rack. Drying matters as much as washing, especially around layered mesh and enclosed rims.

Storage can decide whether it gets used

A typical screen is thin but broad, with a handle that makes it longer than the pan it covers. Before buying, try a cardboard circle and strip cut to the listed dimensions in the intended drawer or cabinet. This reveals whether the handle collides with the drawer front or whether the circular frame prevents other tools from lying flat.

Hanging can be efficient when there is a suitable hook away from heat, steam, and food-preparation traffic. Confirm that the loop is part of the load-bearing design and that the screen will not brush a wall while oily or damp. A folding model may fit vertically with baking sheets, but its hinge should not support the screen at an angle where it can roll out.

Sets with several diameters solve fit problems only when each size corresponds to cookware you actually own. Otherwise, the unused pieces consume space and complicate cleanup. One correctly sized, reachable screen can be more practical than a multi-piece set selected for coverage on paper.

Limitations

  • A vented screen reduces many droplets but cannot create a sealed barrier or eliminate stovetop cleanup.
  • Fine or layered mesh can retain grease and may require more detailed washing than a solid lid.
  • A nominal pan size does not guarantee fit because rim diameter, flare, spouts, and handle placement vary.
  • Steam, condensation, the metal frame, and some grip components can become hot during use.
  • Wide screens and long handles may interfere with adjacent cookware, controls, walls, or compact cooktops.
  • A screen does not replace recipe directions, temperature control, suitable cookware, or safe frying practices.

Alternatives to compare

  • A fitted lid when retaining moisture is desirable and the recipe supports covered cooking.
  • A partially vented cookware lid made for the pan, where its instructions allow the required steam release.
  • A deeper sauté pan or skillet to add sidewall height for foods that can be cooked appropriately in it.
  • An oven method when the recipe permits it and reducing open-pan stovetop activity is the main goal.
  • A single-pan cooking schedule that leaves more clearance if crowding, rather than the screen itself, creates the handling problem.

FAQ

Should a splatter screen be larger than the frying pan?

It should cover the complete opening and rest securely on the rim, which may require a modest overhang. Too much overhang can crowd other burners or controls. Compare the screen’s full outside diameter with the measured top opening of the pan and follow the stated fit guidance.

Does a splatter screen work like a pan lid?

No. A mesh or perforated screen is intended to let much of the steam escape while intercepting many droplets. A solid fitted lid retains substantially more moisture. Choose according to the cooking method rather than treating the two tools as interchangeable.

Is a fine-mesh or perforated splatter guard easier to clean?

The answer depends on construction. Fine and layered mesh offers many small spaces where residue can collect, while perforated metal may have smoother open surfaces but still includes edges and joints. Review the care instructions and inspect how the screen, rim, and handle are assembled.

Can one splatter screen fit several pan sizes?

Sometimes, especially when the screen is large enough and has a stable resting profile for each rim. Measure every pan separately and check for spouts, sloped walls, and handle conflicts. A screen that merely spans a smaller pan is not useful if it slides or creates unsafe overhang.

Where should I put a hot splatter screen while stirring food?

Prepare a stable, heat-safe landing area large enough for the complete screen before cooking. Lift it away from yourself, account for condensation, and use the handling protection specified by the maker. Do not balance it on another pot, a narrow sink edge, or a surface that may be damaged by heat or oil.

Muffin Pans for Batch Baking: Cup Shape, Capacity, and Cleanup

Product links are for reference. Verify current details on the retailer page before buying.

Illustrative image of a generic muffin pan in a home kitchen

Illustrative image, not an official product photo.

Short answer

A useful muffin pan matches three things: the portions you actually bake, the paper liners or recipes you commonly use, and the clear space inside your oven. A 12-cup metal pan is a familiar starting point for routine batches, while a 6-cup pan can be easier to handle in a compact oven. Before choosing, compare the stated cavity dimensions rather than trusting labels such as standard, jumbo, or mini. Also look at the pan’s overall footprint, rim or handle area, material and coating description, care instructions, and whether the cup shape leaves easy-to-clean corners.

Search reference

Muffin pan options

Compare cup counts, cavity measurements, pan footprints, material descriptions, liner compatibility, and cleaning instructions for your usual batch size.

View matching options

Think beyond the number of cups

Cup count is easy to compare, but it does not tell the whole story. Two 12-cup pans can have different cavity profiles and different amounts of metal around the outside. That changes how a paper liner sits, how much room the pan needs on an oven rack, and how confidently you can grip it with oven mitts. If you already have a recipe, storage shelf, or countertop oven in mind, those physical details are more useful than a broad size name.

Start with your normal baking rhythm. Someone who makes one breakfast batch for the week may appreciate a single 12-cup layout. A household that divides batter into different flavors might prefer two 6-cup pans that can be filled or removed separately. Mini cavities suit bite-size portions, while larger cavities change both portion size and recipe timing. Recipes may need adjustment when the cavity size differs, so a different pan format is not automatically interchangeable.

The empty spaces matter too. A broad outer rim can provide a more secure place to hold the pan without pressing an oven mitt against a hot muffin. On the other hand, extra-wide handles can prevent the pan from fitting into a toaster oven or a narrow cabinet. Check the full exterior length and width, including handles, rather than adding up cavity diameters.

Who this is for

  • Home bakers replacing a warped, scratched, stained, or awkwardly sized muffin pan.
  • Households that make muffins, cupcakes, egg bites, or other portioned oven recipes and want a dedicated cavity pan.
  • Small-space cooks choosing between a compact 6-cup pan and a full batch layout.
  • Bakers who want a second pan so two batches can be prepared before the first pan cools.
  • Gift buyers who know the recipient’s oven size and preferred style of baking.

Who should skip it

  • Skip a large rigid pan if your oven rack or cabinet cannot accommodate its complete exterior dimensions.
  • Choose individual baking cups or a flexible mold if storage shape matters more than a rigid frame.
  • Do not replace a specialty popover, mini cake, or doughnut pan with a muffin pan unless the recipe allows that change.
  • Avoid an unfamiliar coating or material when the listing does not provide the care, temperature, and food-contact information you require.
  • Do not buy a bundled set merely for a higher piece count if only one cavity size fits your recipes.

What to verify before buying

  • Confirm the number of cavities, each cavity’s top diameter, base diameter, and depth, plus the pan’s full exterior measurements.
  • Compare the cavity dimensions with the paper or reusable liners you plan to use; size labels alone may not establish a good fit.
  • Read the material and surface description carefully, including any coating and the utensils or cleaning methods the maker recommends.
  • Check the stated oven-temperature guidance against the recipes you bake most often.
  • Look for enough exposed rim or handle area to grip while wearing your own oven mitts.
  • Review hand-wash or dishwasher instructions and any guidance about soaking, abrasive pads, cooking spray, or metal tools.
  • Verify whether the pan is sold alone or with liners, lids, racks, or other pictured accessories.
  • Measure oven-rack clearance and the cabinet slot where the pan will be stored.

Metal, silicone, and surface choices

Metal pans are common because a rigid frame is straightforward to move when every cavity contains batter. Listings may describe steel, aluminized steel, aluminum, or other constructions, sometimes with a surface coating. The material name by itself does not establish weight, gauge, heat behavior, or durability. Compare the complete construction description and care guidance instead of assuming every pan made from a named metal will perform alike.

Silicone pans trade rigidity for flexibility. That can make release and compact storage appealing, but a flexible mold may need support from a sheet pan when it is filled or moved. Adding a supporting tray changes the total footprint and can affect how the setup fits in the oven. If you are considering silicone, check whether the maker calls for external support and whether that support is included.

A nonstick description can sound convenient, especially for batters that bake against the cavity wall. It still deserves a closer read. Confirm what utensils, liners, washing tools, and cooking sprays are recommended. If an older coated pan has damage, follow its maker’s replacement and care guidance rather than treating all marks as merely cosmetic. An uncoated pan may suit buyers who prefer to manage release with recipe-specific preparation, but it has its own cleaning and seasoning considerations.

Color should be a secondary filter. Dark and light surfaces can behave differently in an oven, but construction, recipe, rack position, oven calibration, and baking time all contribute to the result. A new pan may require observation during the first few batches instead of a permanent change based on color alone.

Fit, handling, and batch workflow

Before ordering, make a paper rectangle using the listed exterior dimensions and place it where the pan would sit on the oven rack. This simple check reveals conflicts with oven walls, rack handles, and nearby bakeware. It also shows whether the pan will fit flat in a cabinet or must be stored vertically. For a countertop oven, leave the clearances required by the appliance instructions rather than choosing a pan that barely slides inside.

Handling becomes important at the end of the bake. Batter rises near the cavities, so there may be little open surface available for a bulky mitt. A pronounced rim or dedicated grip area can help, provided it does not make the pan too wide. Look at the space between outer cavities and the edge, not only at decorative handle shapes.

For back-to-back batches, consider whether you want one large pan or two smaller ones. A single pan uses fewer pieces but must cool enough for safe handling before it is prepared again. Two pans let the next batch wait in a separate pan, although they require more storage and may not bake identically if their materials or cavity shapes differ. Matching pans simplify recipe notes when consistency between batches matters.

Liners, release, and cleanup

Paper liners are useful for serving and cleanup only when their base and side shape sit properly in the cavity. A liner that is too small can float or fold as batter is added; one that is too large may wrinkle sharply. Compare actual measurements and test a small liner pack before stocking up. Reusable liners add another care routine and can alter how the finished edges look, so verify that the recipe and pan combination suits them.

For unlined baking, follow the recipe’s preparation directions and the pan maker’s care instructions. More grease or spray is not always the answer, especially when a coating has specific restrictions. After baking, let the pan reach the handling stage recommended by the recipe before removing food. Digging around the edge with a sharp tool can damage both the bake and some pan surfaces.

Cleanup is easier when residue does not remain in tight seams or rolled edges. Check close-up images for the transitions between the cavity walls and top deck. If dishwasher use is important, confirm it explicitly; “easy to clean” does not necessarily mean dishwasher-safe. Drying the pan before storage also helps prevent trapped moisture between stacked bakeware.

Limitations

  • Cavity labels such as standard, mini, and jumbo are not a substitute for listed measurements.
  • Changing pan size can change portion count, baking time, browning, and the amount of batter needed per cavity.
  • A rigid 12-cup pan may not fit a countertop oven even when individual cavities appear compact.
  • Surface coatings require suitable utensils and cleaning methods, and no finish should be assumed maintenance-free.
  • Flexible molds can be awkward to carry when full unless the setup includes proper support.
  • Muffin pans occupy more storage space than loose baking cups and are not the ideal shape for every portioned recipe.

Alternatives to compare

  • Individual oven-safe baking cups when you want flexible batch counts and easier cabinet storage.
  • A loaf pan when the recipe supports one larger bake instead of individual portions.
  • A mini muffin pan for bite-size servings, short events, or recipes written for small cavities.
  • A jumbo muffin pan when larger portions are intentional and the recipe provides suitable timing guidance.
  • Specialty popover, doughnut, or mini cake pans when shape and structure are central to the recipe.
  • A supported silicone mold when flexible release and storage matter more than a fully rigid frame.

FAQ

Is a 6-cup or 12-cup muffin pan more practical?

A 12-cup pan suits common full-batch workflows, while a 6-cup pan can be easier to fit, lift, and store in a small kitchen. Check your recipes, oven dimensions, and usual number of servings rather than choosing on cup count alone.

Will standard paper liners fit every standard muffin pan?

Not necessarily. Size terms can vary, and liner shapes differ at the base and sides. Compare the listed liner measurements with the cavity’s top diameter, base diameter, and depth before buying in bulk.

Do I need to place a silicone muffin pan on a sheet pan?

Some flexible molds are easier or safer to move with rigid support, but requirements vary. Follow the specific product instructions and account for the supporting sheet pan when measuring oven clearance.

Can a muffin pan go in the dishwasher?

Only if its current care instructions permit it. Material, coating, seams, and attached grip components can affect the recommended method, so do not infer dishwasher compatibility from appearance.

What should I do before using a new muffin pan for the first time?

Read the maker’s washing, preparation, temperature, and utensil guidance, then compare it with the recipe. During the first batch, monitor progress according to the recipe rather than assuming the new pan will behave exactly like the old one.

Reusable Silicone Stretch Lids: Matching Sizes to Bowls and Produce

Product links are for reference. Verify current details on the retailer page before buying.

Illustrative image for a reusable silicone stretch lid buying guide

Illustrative image, not an official product photo.

Short answer

Reusable silicone stretch lids make the most sense when several lid sizes match containers you already reach for: a mixing bowl, an open can, half a melon, or a small leftover dish. Measure the outside diameter of those items instead of choosing by the number of pieces alone. Then compare the stated size range, compatible rim shapes, tab design, temperature guidance, and cleaning instructions. A lid still needs a clean, dry edge and an appropriate fit to stay in place.

Search reference

Reusable silicone stretch lid sets

Compare current size ranges, lid shapes, pull tabs, care directions, and stated container compatibility with the bowls and produce you plan to cover.

View matching options

Start with six measurements, not a set count

A six-piece set sounds complete, but adjacent lid sizes may cover nearly the same group of containers while missing the large bowl that prompted the purchase. Make a short list of the items that regularly lose their original lids, and measure the widest part of each rim. For cut produce, measure the diameter near the cut face rather than the whole fruit.

Compare those measurements with the maker’s stated unstretched and supported ranges. Stretch is useful for creating tension, but it should not be treated as unlimited extra size. A lid pulled to its maximum may be difficult to position, more likely to slip during handling, and less convenient for everyday reuse. If two frequently used bowls fall between sizes, a mixed set with closer increments may be more practical than a bundle centered on very small containers.

Who this is for

  • Households that often store leftovers in bowls without matching rigid lids.
  • Small kitchens where a nested set of flexible covers takes less drawer space than many container lids.
  • People who want temporary covers for cut onions, citrus, melons, or open cans when the size and shape are suitable.
  • Shared kitchens where quick visual size selection matters more than a perfectly matched container system.
  • Buyers willing to wash and dry flexible lids between uses and keep container rims clean before applying them.

Who should skip it

  • Choose locking food-storage containers when spill resistance during commuting or bag transport is the priority.
  • Keep purpose-made lids for containers that already have reliable fitted covers.
  • Skip stretch lids if most cookware has pronounced handles, pouring spouts, or irregular rims that interrupt contact.
  • Use another storage method when the food, temperature, or cleaning routine falls outside the current product’s stated guidance.

What to verify before buying

  • Measure the outside diameter and note whether each target rim is round, square, rectangular, lipped, or irregular.
  • Confirm the dimensions for every lid rather than relying on labels such as small, medium, or large.
  • Check the stated material, food-contact information, temperature limits, and refrigerator, freezer, microwave, and dishwasher guidance.
  • Look at the number and position of pull tabs, especially if wet or slippery lids are difficult for you to grip.
  • Confirm whether the lids are intended for cans and cut produce as well as bowls and containers.
  • Review care directions for oily foods, staining ingredients, odor removal, and full drying before nesting.
  • Check whether the set includes a storage holder or whether the lids can be stacked without sticking together.

Rim shape decides whether stretch becomes grip

Flexible material cannot compensate for every container shape. A smooth, even rim gives the lid a continuous surface to wrap around, while a spout, side handle, thick rolled lip, or sharp corner can create a gap. Square and rectangular dishes also ask the material to travel farther around corners than around a circle with a similar width.

Container condition matters too. Moisture, oil, crumbs, or condensation on the contact area can reduce grip. Wipe the rim and your hands dry before stretching the lid evenly from opposite sides. If the lid repeatedly rides upward or distorts the container, move to the next size rather than forcing more tension. Very lightweight cups and bowls may flex or tip while a tight lid is being applied.

Tabs, texture, and a repeatable routine

Small tabs can help center a lid, pull it over a rim, and lift an edge later. Their usefulness depends on placement and thickness: a tiny tab may be hard to hold with wet hands, while several prominent tabs take slightly more room when lids are nested. A textured outer surface can also improve handling, but grooves may need extra attention during washing.

For an easier routine, assign the sizes to familiar objects before storing the set. For example, keep the lid that fits the everyday mixing bowl on top of the stack, and avoid tightly nesting damp pieces. Some sets use colors or molded size markings; verify whether those cues are visible enough to be useful once the lids are in a drawer.

Storage expectations and food safety habits

A stretch lid is a cover, not a promise that a bowl can be turned upside down or carried loose in a backpack. Keep covered containers upright unless the maker explicitly describes and demonstrates a different use. For soups, dressings, and other spill-prone foods, a rigid container with a locking lid is generally the more predictable transport option.

Follow ordinary food-storage practices regardless of the cover style. Refrigerate perishable leftovers promptly, use containers appropriate for the food, and discard food according to relevant safety guidance. Check the current instructions before exposing a lid to heat, freezing temperatures, sharp edges, or direct contact with a heating element. Replace a lid if it tears, remains tacky after cleaning, or can no longer hold its intended shape.

Limitations

  • Real-world fit depends on rim geometry and surface condition, not diameter alone.
  • A size range may describe possible stretch rather than the easiest everyday fit.
  • Flexible covers can slip on wet, oily, dusty, or uneven edges.
  • Strong-smelling or deeply colored foods may require more careful cleaning according to the maker’s directions.
  • Stretch lids do not automatically make a container leakproof, stackable, or safe for travel.
  • Pulling a small lid over a large rim can make application and removal unnecessarily difficult.

Alternatives to compare

  • Rigid snap-on or locking containers for lunches and liquid leftovers.
  • Elastic fabric bowl covers for low-tension countertop or refrigerator covering where appropriate.
  • Flat silicone covers that rest on smooth bowl rims without wrapping around the sides.
  • Reusable storage bags for portions that do not need to retain a bowl’s shape.
  • Replacement lids from the container maker when only one frequently used piece is missing.

FAQ

How do I choose the right stretch-lid size?

Measure the outside diameter of the container rim and compare it with the individual lid dimensions and supported fit range. Select a lid that needs modest, even tension rather than the smallest one that can be forced over the edge.

Do silicone stretch lids fit square containers?

Some are described for multiple shapes, but corners, rolled rims, and side features can interrupt the seal. Check the current compatibility guidance and dimensions; a round-lid set should not be assumed to fit every square or rectangular dish.

Why does a stretch lid keep slipping off?

The lid may be too small or too large, or the rim may be damp, oily, uneven, or interrupted by a handle or spout. Clean and dry the contact area, center the lid, and try the next appropriate size without overstretching it.

Can a covered bowl be stored upside down?

Do not assume so. Stretch lids vary in fit and are not automatically leakproof. Keep the container upright unless the maker explicitly states that the specific lid and container combination supports another orientation.

How should reusable stretch lids be stored?

Wash and dry them according to the current care instructions, then stack or hang them without trapping moisture. A loose nested stack or simple holder can make sizes easier to separate than a tightly compressed bundle.

Dish Drying Mats: Counter Space, Airflow, and Cleanup

Product links are for reference. Verify current details on the retailer page before buying.

Illustrative image of a generic dish drying mat with plain dishes beside a kitchen sink

Illustrative image, not an official product photo.

Short answer

A dish drying mat makes the most sense when you hand-wash a modest batch, need the counter back afterward, and do not want a rigid rack occupying the same spot all day. Measure the open area beside the sink, including faucet reach and cabinet clearance, then decide where runoff should go. Absorbent mats hold moisture until they can dry; channeled or raised designs are intended to keep dishes above collected water; roll-up or foldable formats can be put away between uses. Whichever style you consider, leave room between items, check the care instructions, and plan a realistic place for the mat itself to dry.

Search reference

Dish drying mats for kitchen counters

Compare usable dimensions, surface design, care directions, storage method, and the way each mat handles water on your counter.

View matching options

Start with the wettest part of your routine

The useful size of a drying mat is not simply the largest rectangle that fits beside the sink. Watch one ordinary wash-up first. Count the dinner plates, glasses, utensils, lids, and awkward pieces that usually need a landing place. A wide mat can hold more, but crowding dishes together reduces the open space around them. A compact mat may work better if you wash in two short batches and put dry items away promptly.

Also notice how much water reaches the counter. Some people shake or drain each item over the sink before setting it down; others transfer pieces directly from rinse water. Flatware, bottle lids, and containers with deep rims can carry surprising pockets of water. An absorbent surface and a draining surface manage that water differently, so the right choice depends on what you are willing to empty, hang, wipe, or launder after the dishes are put away.

Counter geometry matters just as much as dish count. A mat placed across a cabinet seam may prevent a drawer from opening. One pushed beneath an upper cabinet can leave little vertical room for tall bottles. If it sits close to a wood edge, backsplash joint, appliance cord, or wall outlet, splashes may reach places that are inconvenient to wipe. Sketching the usable rectangle with a tape measure is more reliable than estimating from a listing photo.

Who this is for

  • Apartment and small-kitchen households that want a drying surface they can move after use.
  • People who hand-wash a few glasses, knives, reusable bottles, or cookware pieces between dishwasher loads.
  • Renters who prefer a counter solution that does not require mounting hardware or a permanent sink attachment.
  • Households that already have a small rack but need temporary overflow space during meal preparation.
  • Anyone willing to include the mat in a regular washing and drying routine instead of leaving it damp beneath dishes.

Who should skip it

  • A full rack may be more practical when several place settings are hand-washed at once and plates need individual support.
  • Skip a flat mat as the only solution if you regularly need to hold many plates, boards, or lids upright.
  • An over-sink rack may suit a kitchen with almost no safe counter area, provided its dimensions match the sink.
  • Avoid choosing a mat without first identifying somewhere to hang, stand, or lay it out after use.
  • If standing water must drain directly into the sink, compare racks or mats with a clearly described drainage path rather than assuming every surface will shed water.

What to verify before buying

  • Usable footprint: Compare the stated length and width with the clear counter area, not the counter’s total dimensions.
  • Thickness and edge shape: Check whether a raised rim, stitched border, or sloped edge changes the usable surface or catches nearby drawers.
  • Water strategy: Confirm whether the design absorbs moisture, holds it in channels, drains toward an edge, or uses an elevated surface.
  • Care instructions: Verify whether the mat is intended for machine washing, hand washing, wiping, or another method, and follow any drying guidance.
  • Material description: Read the current listing for the actual surface, core, backing, and any separate parts instead of inferring them from appearance.
  • Heat guidance: Do not place hot cookware on a drying mat unless the maker explicitly describes suitable temperatures and uses.
  • Folding or rolling: Determine how small it becomes and whether the design is meant to be folded, rolled, hung, or stored flat.
  • Backing and counter contact: Check the stated backing design and any instructions for delicate, sealed, or porous counter surfaces.
  • Included pieces: Confirm whether a utensil holder, rack insert, sling, or storage strap shown in photos is actually included.
  • Clearance for dishes: Make sure tall bottles, stemware, cutting boards, and pan handles will not collide with cabinets or fall into a traffic path.

Absorbent, channeled, and raised surfaces solve different problems

Absorbent mats

An absorbent mat accepts drips across its surface and can provide a soft landing for cups and bowls. That simplicity is useful for mixed small items, especially when the mat doubles as temporary overflow beside a rack. Its limitation is equally straightforward: water remains in the mat until it evaporates or the mat is washed and dried. A thick, damp mat folded immediately into a cabinet has little opportunity to air out.

Compare the complete care routine rather than focusing only on an absorbency claim. Check whether the product has multiple layers, whether all layers share the same washing instructions, and whether the mat needs to be reshaped or laid flat after cleaning. The surface should be inspected between uses for trapped crumbs, cooking residue, or water that migrated beneath it.

Channeled or flexible draining mats

A molded mat may use ridges or channels to lift dishes above part of the wet surface. This can separate an upside-down glass rim from pooled droplets, but the water still needs a destination. Some layouts retain runoff for later emptying; others may direct it toward an edge when placed in the intended orientation. Verify the drainage description and measure whether any lip or spout can actually reach the sink from your chosen counter position.

Grooves create more surface detail to clean. Look at the spacing and depth of channels, particularly if you dry small bottle parts or flatware that could settle between ridges. A flexible design may roll for storage, while a firmer one may need to stand vertically. Neither behavior should be assumed from a styled photo.

Rigid or quick-drying slabs

Some drying surfaces are sold as firm slabs rather than fabric or flexible mats. Their weight, fragility, cleaning method, edge construction, and counter-contact instructions can differ substantially from soft formats. Check how the current listing says the surface handles water and stains, whether it requires any conditioning, and how it should be stored. A rigid slab may look tidy left on display, but it will not offer the same fold-away convenience as a textile mat.

The broad lesson is to choose a water-management method, not just a color. If you want to put the mat in a laundry cycle, prioritize clear textile care instructions. If you prefer to wipe a structured surface, inspect the channels and edges. If direct drainage is essential, confirm an uninterrupted route to the sink before ordering.

Give dishes enough room to dry

A mat supplies a boundary; it does not organize every item automatically. Place cups and bowls so air can reach their interiors, and avoid nesting wet pieces tightly together. Bottles with narrow openings may benefit from an appropriate stand or rack because a flat surface alone does not hold them at an angle. Large knives should be placed where their edges and handles do not create a reaching hazard, following suitable knife-care practices.

Plates are another dividing line between mats and racks. A plate laid flat consumes substantial space, while several plates leaning without supports can shift. If plates dominate the daily load, a small rack or removable plate holder on top of a mat may use the counter more effectively. Verify that any separate rack is stable on the chosen surface and that its feet do not damage the mat.

Do not treat visible dryness on the top side as proof that the counter underneath is dry. Lift the mat after use, wipe the worktop as appropriate for its material, and let both surfaces air out. This step is especially important when the mat sits in the same place every day or when water can collect along a raised counter seam.

Build cleanup into the choice

The mat becomes part of the dishwashing load, even though it is easy to overlook. An absorbent style may need laundering; a grooved mat may need scrubbing or rinsing; a rigid surface may have its own care restrictions. Check the instructions before using strong cleaners, high heat, a dishwasher, or a washing machine. A generic material label is not a substitute for the maker’s directions for the assembled product.

Think about timing as well. If the household needs the mat again for the next meal, a design that takes longer to dry may require a second mat or an alternate drying spot. Two smaller mats can sometimes be rotated more easily than one large mat, but they also create extra edges and storage pieces. A hanging loop can be useful only if there is a hook in a ventilated location where drips will not reach the floor or wall.

Storage should happen after the mat and counter are dry. Rolling may suit one design while creasing or compressing may be discouraged for another. Measure the cabinet shelf or drawer where the cleaned mat will live, and account for any rigid insert that cannot bend. If convenient storage is the main reason for choosing a mat over a rack, this measurement is part of the purchase decision rather than an afterthought.

A mat can complement a rack instead of replacing it

The choice does not have to be all mat or all rack. A compact rack can hold plates and bowls upright, while a mat beside it catches overflow or supports large cookware. A removable utensil cup can keep forks and spoons from occupying the mat’s center. For occasional baking sheets or pans, an expanded drying area may be more useful than buying a much larger permanent rack.

This mixed setup works best when each component has a defined role. Keep the rack’s drainage area aligned with the sink or tray, and do not assume a mat underneath can compensate for runoff that extends beyond its edges. Check whether rack feet remain secure on the mat and whether the combined height fits beneath cabinets. Afterward, separate the pieces so hidden contact areas can dry.

For a kitchen that changes roles through the day, modular pieces can restore prep space quickly. The benefit comes only if the rack, mat, and accessories each have a storage location. Otherwise, a supposedly flexible system can become a loose stack that stays on the counter.

Limitations

  • A flat mat does not support plates or lids upright without a separate compatible holder.
  • Absorbed water still has to leave the mat through proper drying and care.
  • Channels and ridges can collect residue and require attention during cleaning.
  • Water may reach the counter beneath or beyond a mat, especially when wet items overhang its edges.
  • A large mat can interfere with drawers, appliances, food-prep space, or the natural route between sink and stove.
  • Soft surfaces may not be appropriate for hot cookware, sharp edges, or every counter finish; follow current product and surface-care guidance.
  • Foldable storage is not universal, particularly among rigid or layered designs.

Alternatives to compare

  • A compact dish rack when plates and lids need supported slots and a defined drainage tray.
  • An over-sink roll-up rack when counter space is limited and the sink dimensions allow a secure fit.
  • A wall-mounted or over-sink drying system where installation and load guidance make it appropriate.
  • A small rack placed over a separate washable mat for mixed loads and occasional overflow.
  • Clean kitchen towels for rare, light-duty drying when they can be changed and laundered promptly.

FAQ

What size dish drying mat should I choose?

Measure the uninterrupted counter space beside the sink, then subtract room needed to open drawers, operate the faucet, and keep dishes away from edges. Match that usable area to an ordinary wash load rather than buying around the largest holiday meal. If plates are common, allow room for a separate holder or compare a rack instead.

Is an absorbent mat or a draining mat easier to maintain?

It depends on the cleanup you prefer. An absorbent mat may fit a laundry-based routine, while a channeled mat may be rinsed or wiped according to its instructions. Both need to dry fully, and both require the counter underneath to be checked and cleaned. Review the exact care guidance before choosing.

Can I put hot pots on a dish drying mat?

Do not assume a drying mat is a heat-resistant pad. Materials, backings, adhesives, and layered construction vary. Use it for hot cookware only when the current maker explicitly states the relevant temperature guidance and intended use; otherwise use an appropriate trivet or pot holder.

How do I keep water from collecting under a drying mat?

Drain items over the sink before placing them, keep wet pieces within the mat’s edges, and lift the mat after the load is put away. Wipe the counter according to its surface-care instructions and let both sides of the mat dry. If runoff is heavy, compare a design with a clearly described tray or sink-directed drain.

Can a dish drying mat replace a rack?

It can replace a rack for small, stable items when flat counter space is more useful than plate slots. It is less effective for holding many plates, lids, boards, or narrow bottles at useful angles. A compact rack on or beside a mat may be a better compromise for mixed loads.

Choosing a Kitchen Sink Drain Strainer That Is Easy to Empty

Product links are for reference. Verify current details on the retailer page before buying.

Illustrative image of generic removable drain strainer baskets beside a kitchen sink

Illustrative image, not an official product photo.

Short answer

A kitchen sink drain strainer should catch ordinary food scraps without making the basin slow to drain or becoming unpleasant to empty. Fit comes first: identify the drain style, measure the opening and surrounding recess, and note whether you need a simple removable screen or a basket that also closes as a stopper. Then compare hole size, basket depth, rim profile, underside clearance, and how easily you can lift the strainer without touching collected debris. A highly polished finish matters less than a stable fit and an open shape that can be scrubbed from both sides.

Search reference

Compare kitchen sink drain strainers

Review removable screens and basket-style designs while checking exact dimensions, drain configuration, perforation pattern, lifting method, care guidance, and included pieces.

View matching options

First decide what the strainer needs to do

The term “sink strainer” covers more than one product. A shallow perforated screen rests over or just inside a drain and catches scraps while water runs through. A deeper removable basket sits in an existing drain assembly. Some basket assemblies can also seal the drain when pushed, twisted, or positioned a certain way. Replacement parts may look interchangeable in a search grid even when their diameter, post, spring mechanism, or sealing surface differs.

If your sink already has a functional drain flange and you only want better debris capture, a drop-in screen may be the simplest option. If you are replacing a basket or stopper component, inspect the existing part before shopping. Photograph its top and underside, record its dimensions, and look for the way it engages with the drain. A basket that fits the opening but cannot sit at the intended height may drain poorly or fail to seal.

This guide focuses on removable household strainers rather than installing a complete drain body. Replacing plumbing hardware can involve seals and connections below the basin; that is a separate job from choosing a lift-out debris basket.

Who this is for

  • Home cooks who want to keep vegetable trimmings, rice grains, and other ordinary scraps from entering the kitchen drain.
  • Renters seeking a removable accessory that does not alter an existing sink assembly.
  • Households replacing a lost, bent, corroded, or difficult-to-clean strainer basket.
  • Shared kitchens where an easy-to-see and easy-to-empty catch basket can simplify the cleanup routine.
  • Buyers comparing a basic always-open screen with a basket that can also retain water in the sink.

Who should skip it

  • A sink with a garbage disposal may need a disposal-specific splash guard, stopper, or compatible strainer rather than a generic basket.
  • A damaged, leaking, loose, or corroded drain flange calls for diagnosis or repair, not merely a new drop-in screen.
  • Anyone expecting a strainer to prevent grease, fine sediment, or liquids from entering the drain needs a broader disposal routine.
  • A bathroom drain, utility sink, or unusually shaped drain may require a product designed for that fixture.

What to verify before buying

  • Drain opening and recess: Measure the usable diameter, depth, and the flat area where the rim will rest; do not choose from sink size alone.
  • Strainer type: Confirm whether the listing describes a shallow screen, replacement basket, stopper basket, complete drain assembly, or a part intended for a disposal.
  • Top and underside dimensions: Check rim diameter, basket diameter and depth, center post or stem details, and clearance beneath the basket.
  • Water flow: Compare the number, size, and placement of holes with the kinds of scraps you want to catch and the flow your sink needs.
  • Lift point: Look for a knob, loop, tab, or rim that can be grasped when the basket contains wet debris.
  • Sealing function: If you want to fill the sink, verify how the stopper engages and whether compatibility depends on a particular drain assembly.
  • Cleaning access: Favor smooth transitions and perforations that can be reached from both sides over hidden channels that trap residue.
  • Package contents: Check whether the offer includes one basket, a multi-pack, a stopper, seals, or installation components rather than relying on the main image.

Measure the drain, not the old product name

Begin with the drain empty and clean. Measure across the inner opening at more than one point, then measure the ledge or recessed area that supports the strainer rim. For a deeper basket, note how far it can extend before contacting hardware below. A ruler can provide a rough check, but calipers are useful when a replacement depends on a close fit.

Measure the old basket too, if it seated correctly. Record its outer rim, body width, overall depth, and any underside post. Do not assume a nominal description represents every relevant dimension. Two listings can use similar wording while differing enough to wobble, sit too high, or fall too deeply into the drain.

A silicone or flexible rim can reduce rattling in some designs, while a rigid metal rim can be thinner and easier to wipe. Neither approach fixes a dimensional mismatch. Also check whether a raised rim will interfere with a flat-bottomed dish placed in the basin.

Balance debris capture with drainage

Very fine perforations can catch small particles, but they offer less open area and may need to be emptied sooner. Large holes keep water moving yet allow smaller scraps through. Think about the actual cleanup load: rinsing a few coffee cups produces a different mix of debris from washing a pot after preparing rice or chopped vegetables.

Basket depth changes both capacity and handling. A deep basket may hold more before water backs up, but collected scraps can compress against the holes and become harder to knock out. A shallow screen is easy to see and remove, though it may shift when hit by a strong stream of water. Shape matters as much as capacity: rounded corners and a gently tapered basket are generally easier to brush clean than a tight seam between a flat base and vertical wall.

Do not treat the strainer as a tiny waste bin. Scrape plates and cookware into the appropriate household waste or compost container first. The strainer is the last catch for remnants left during rinsing, and it works better when emptied before a dense mat forms.

Stopper baskets need a closer compatibility check

A dual-purpose basket can drain in one position and seal in another. That convenience depends on how the basket meets the drain assembly. Some use a center post, ball, pin, spring, twist action, or pressure fit. A listing that says “universal” should still be checked against measured dimensions and the current compatibility notes.

If retaining water is important, look beyond the visible basket. Review the sealing surface, operating method, replacement guidance, and whether a separate gasket is involved. A basket may catch scraps perfectly yet be unsuitable as a stopper. Conversely, a secure stopper may require an extra action each time you want the sink to drain freely.

For disposal-equipped sinks, verify the entire arrangement before placing a metal basket or loose component near the opening. Use only a format described as compatible with the disposal and sink setup, and follow the appliance maker’s current safety guidance.

Make emptying part of the decision

Imagine removing the basket when it is wet and full. A tall center knob can be easy to grasp but may collect residue around its attachment point or interfere with items in the basin. A wire loop folds down neatly, though its hinge can add another cleaning spot. Rim tabs avoid a central obstruction but may be difficult to grip if they sit flush.

The easiest basket to live with can be lifted, tapped out, rinsed, and returned without turning it inside out or picking debris from a narrow groove. Check whether perforations have accessible edges and whether separate trim or silicone pieces can be removed for washing. Follow the current care directions for the stated materials; appearance alone does not establish dishwasher suitability or corrosion resistance.

Empty the basket after food preparation and before debris dries in place. Wash both sides, clear each blocked hole, and clean the drain recess where the rim sits. If the basket becomes sharp, distorted, cracked, or impossible to clean, replace it rather than forcing it to fit.

Limitations

  • A removable strainer reduces the amount of solid debris entering a drain but does not catch every fine particle.
  • It does not make grease, cooking oil, paint, or other unsuitable liquids safe to pour into plumbing.
  • Search results can mix simple screens, stopper baskets, complete drain assemblies, bathroom parts, and disposal accessories.
  • A close visual resemblance does not confirm fit; small differences in diameter, depth, and underside hardware can matter.
  • Fine holes may clog quickly during a heavy cleanup, while coarse holes may pass the smallest scraps.
  • A new basket cannot repair a leaking flange, blocked pipe, damaged seal, or malfunctioning garbage disposal.

Alternatives to compare

  • A flat mesh drain screen when the drain has little recess and only light debris needs catching.
  • A deeper basket strainer for food-preparation sinks that receive a larger volume of scraps.
  • A disposal-specific stopper or splash-guard accessory for a compatible garbage-disposal opening.
  • A sink stopper without perforations when retaining water matters and debris capture is handled separately.
  • A countertop scrap bowl or compost container to keep most preparation waste away from the sink entirely.

FAQ

How do I measure for a kitchen sink drain strainer?

Measure the inner drain opening, the recessed ledge or flat area supporting the rim, and any available depth below it. For a replacement basket, also measure the old rim, body, depth, and underside post or mechanism if the old part fit correctly.

Are kitchen sink drain strainers universal?

No. Many products cover common size ranges, but drain openings, recesses, basket depths, center posts, stopper mechanisms, and disposal configurations vary. Compare the listing’s exact dimensions and compatibility notes with your sink.

Is a mesh screen or perforated basket easier to clean?

A perforated basket with smooth, accessible holes is often quick to rinse, while fine mesh can catch smaller particles but may require more brushing. The better choice depends on the debris you usually encounter and how often you are willing to empty it.

Can I use a regular strainer with a garbage disposal?

Do not assume so. Disposal openings can require a specific stopper, splash guard, or strainer format. Confirm compatibility with the disposal and sink configuration and follow the appliance maker’s current instructions.

Why does water drain slowly through a new strainer?

The holes may offer too little open area for the water flow, the basket may be sitting too low, or debris may already be blocking the perforations. Remove and clean it, check its seating, and compare its dimensions and hole pattern with the drain.

Kitchen Sink Caddies That Keep the Wet Zone Manageable

Product links are for reference. Verify current details on the retailer page before buying.

Illustrative image of a generic kitchen sink caddy holding a sponge and dish brush

Illustrative image, not an official product photo.

Short answer

A useful kitchen sink caddy gives damp sponges and brushes a defined place without turning the counter into a harder-to-clean obstacle course. Start with placement: decide whether the caddy should sit on the counter, attach inside the sink, bridge the faucet area, or hang over a divider. Then compare drainage direction, ventilation, capacity, and how easily every wet component can be removed and washed. The right model should suit the tools already in your kitchen rather than encouraging you to store every cleaning item beside the faucet.

Search reference

Compare kitchen sink caddy layouts

Look across counter, suction-mounted, saddle, and faucet-area designs while checking dimensions, drainage details, removable parts, and the number of tools each option is intended to hold.

View matching options

Begin with the sink, not the organizer

A caddy occupies one of the busiest and wettest spots in a kitchen. Before choosing a shape, watch what happens during a normal cleanup. Notice where the faucet handle travels, where the spray lands, whether a cutting board rests across the basin, and which side of the sink remains accessible when a large pan is soaking. A compact holder can still be annoying if it blocks a soap dispenser or must be moved every time the faucet is cleaned.

Countertop caddies are easy to reposition and do not depend on a perfectly smooth sink wall. Their main drawback is the surface underneath: trapped water and soap residue can collect if the base is broad or difficult to lift. In-sink holders free the counter, but they take up basin space and need a secure attachment point. Saddle designs can work across a double-sink divider, while faucet-area trays use otherwise idle space but must fit around the fixture without interfering with controls.

Measure the proposed location with the faucet, backsplash, sink rim, and everyday supplies in place. Product dimensions alone do not show whether a tall dish brush will lean into a window ledge or whether a tray will drain toward the basin. A paper outline on the counter is a quick way to test the footprint before committing to it.

Who this is for

  • Kitchens where a sponge, dish brush, bottle brush, or scraper tends to stay loose along the sink rim.
  • Small households that need a focused drying spot but do not want a full countertop organizer.
  • Shared kitchens where separating wet tools from soap bottles makes the cleanup routine easier to follow.
  • Renters who want removable storage rather than drilling or making a permanent change around the sink.
  • Anyone replacing an improvised dish or saucer that holds water instead of helping tools dry.

Who should skip it

  • Minimal kitchens that use one washable cloth and already have a ventilated place to hang it.
  • Households with no clear counter, basin, divider, or faucet space that can hold a caddy without disrupting washing.
  • Anyone expecting a small caddy to organize cleaners, gloves, spare sponges, and full-size soap bottles at the same time.
  • Buyers who cannot routinely remove and clean another object from the splash zone.

What to verify before buying

  • Overall and usable dimensions: Check the outer footprint as well as the width of compartments, brush openings, rails, and sponge slots.
  • Drainage destination: Determine whether water runs into the sink, collects in a tray, passes through an open base, or lands on the counter.
  • Attachment method: For suction cups, adhesive parts, hooks, or clamps, confirm the intended surface and current installation guidance.
  • Cleaning access: Look for removable trays, open corners, and parts that separate without requiring a complicated reassembly.
  • Tool fit: Compare the caddy with the thickness of your sponge, the handles of your brushes, and any sink stopper or scraper you plan to store.
  • Faucet clearance: Make sure tall tools will not obstruct a side lever, pull-down hose, sprayer, window, or wall-mounted fixture.
  • Material and care wording: Review the listing’s current instructions rather than assuming a metallic finish, plastic body, or flexible insert has a particular care requirement.
  • Included pieces: Confirm whether a drainage tray, soap rail, brush cup, towel bar, mounting hardware, or spare attachment is actually included.

Drainage matters more than extra compartments

A sink caddy is supposed to manage wet tools, so its water path deserves more attention than its compartment count. An open wire or perforated base can improve airflow, but only if the drips fall somewhere that is easy to rinse or wipe. A sloped tray may direct water into the basin when it sits close enough to the rim. Farther from the sink, that same tray may simply hold a shallow puddle.

Removable drip trays make water easier to carry away, yet they also introduce a hidden surface that needs regular washing. Look for a tray that slides out without lifting a fully loaded caddy and that does not have tight channels where residue can settle. If the entire organizer must be tipped to empty it, consider whether that action will send brushes and sponges onto the counter.

Ventilation and spacing are connected. A deep, solid-walled bin may conceal clutter, but damp tools pressed together can dry slowly. Separate zones for a sponge and upright brushes are often more useful than a single large compartment. Leave enough room for air instead of treating the listed capacity as a target that must be filled.

Match the holder to your actual cleanup kit

Lay out the items that genuinely live beside the sink. Many kitchens need space for only a sponge and one handled brush. Others rotate among a bottle brush, straw brush, pan scraper, dish wand, sink stopper, and cleaning cloth. The most suitable format depends on the tallest handle, widest brush head, and dampest item—not the total number of accessories shown in a styled image.

For upright brushes, check whether the base is broad and stable enough to resist tipping when a tool is pulled out from one side. A divided brush cup can prevent handles from tangling, while an open rail may better accommodate unusually shaped heads. Sponge slots should hold the sponge without squeezing it tightly; a narrow slot can be less useful once a scrubber absorbs water and expands.

Soap storage is optional rather than automatically beneficial. A combined soap-and-tool station can make the area look coordinated, but a heavy pump can shift the organizer or make the base harder to rinse. If you refill soap frequently, verify that the bottle can be lifted without knocking over wet tools. In a cramped corner, keeping the dispenser separate may make both items easier to clean around.

Attachment choices and their tradeoffs

Freestanding designs ask the least of the sink surface. They can move to either side and are simple to remove before deep cleaning. Stability depends on the base, feet, load distribution, and counter conditions, so check whether the design remains practical when brushes lean outward.

Suction-mounted holders can preserve counter space, but installation depends on the material, texture, curve, and cleanliness of the mounting area. Do not assume a suction cup will work equally well on every sink. Adhesive mounts may offer a different hold but can be less convenient to reposition. For either style, follow current preparation and load instructions and keep a fallback storage spot in mind if the attachment loosens.

Saddle caddies drape over a divider or edge and suit certain double-basin sinks. Measure divider width, height, and clearance on both sides. Flexible designs can still interfere with stacked dishes or get splashed from both basins. Faucet-neck or faucet-deck organizers need close attention to fixture diameter, hose movement, control access, and the direction in which water drains.

A simple maintenance routine

Treat the caddy as part of sink cleaning, not as permanent scenery. Empty it, wash or wipe the base and tray, clean the surface underneath, and let components dry before reloading. Rinse trapped food particles from sponge slots and brush cups rather than waiting for visible buildup. Follow the current care directions for the specific materials and removable pieces.

Reducing inventory makes maintenance easier. Store replacement sponges and less-used brushes in a dry cabinet, then reserve the caddy for items in active rotation. Retire worn tools on their own schedule; an organizer can improve airflow and contain drips, but it cannot make a neglected sponge sanitary.

Limitations

  • A caddy organizes wet tools but does not clean, sanitize, or fully dry them on its own.
  • Search results may mix counter, basin, saddle, adhesive, and faucet-mounted formats with very different installation needs.
  • Suction and adhesive performance depends on the surface and preparation, so compatibility cannot be inferred from appearance alone.
  • Open drainage can move water to the counter if the caddy is not positioned carefully.
  • Added soap holders and towel rails increase capacity but can also increase the footprint and cleaning effort.
  • A compact organizer will not solve broader under-sink or countertop storage problems.

Alternatives to compare

  • A simple ventilated sponge dish if only one scrubber needs a landing place.
  • A clip-on sponge holder for a basin with a compatible rim and enough interior clearance.
  • A wall or cabinet-door rail for brushes that benefit from hanging separately.
  • A narrow absorbent sink mat when several irregular tools need temporary drying space.
  • An under-sink bin for dry replacements and occasional-use cleaning accessories.
  • A compact dish rack when cups, lids, and small dishes—not just cleaning tools—also need to air-dry.

FAQ

Should a sink caddy drain into the sink or into a tray?

Direct-to-sink drainage reduces the need to empty a tray, but it works only when the caddy sits close enough and the slope reaches the basin. A removable tray is more flexible on distant counters, provided you are willing to empty and clean it regularly.

Are suction-cup sink caddies reliable?

They can be practical on a compatible, clean, smooth mounting surface. Sink material, texture, curves, moisture, preparation, and load all matter, so check the current attachment guidance and avoid assuming universal compatibility.

What should I keep in a kitchen sink caddy?

Keep the small wet tools used in the daily routine, such as one sponge, a dish brush, or a scraper. Store spare supplies and seldom-used tools elsewhere so air can circulate and the caddy remains easy to clean.

Is stainless steel automatically better for a wet sink area?

No material label removes the need for drainage, cleaning, and care. Review the exact material and finish wording, construction details, and care instructions for the current option instead of choosing on appearance alone.

How often should I clean the caddy?

Clean it often enough that water, soap film, and debris do not accumulate. The practical interval varies with use, but adding the caddy and its underside to the regular sink-cleaning routine is easier than waiting for visible buildup.

Indoor Watering Cans for Houseplants: Spout Control, Capacity, and Storage

Product links are for reference. Verify current details on the retailer page before buying.

Illustrative image for an indoor houseplant watering can buying guide

Illustrative image, not an official product photo.

Short answer

For a few houseplants on shelves and windowsills, a compact watering can with a narrow, extended spout usually offers more control than a large garden can. The spout should reach beneath leaves without forcing you to tip the body into the plant, while the handle should remain comfortable as the water level shifts. Capacity still matters, but bigger is not automatically better indoors: a full can that is awkward to lift, fill under the faucet, or store may create more spills than it prevents. Compare the fill opening, spout attachment, balance, drip behavior, and actual storage footprint before deciding.

Search reference

Indoor watering can options

Compare compact and long-spout designs by usable capacity, reach, filling clearance, handle position, materials, dimensions, and care instructions.

View matching options

Let your plant layout determine the shape

A watering can for one large floor plant does a different job from one used across a shelf of small pots. Floor plants leave room to bring the can close to the soil, so moderate spout reach may be enough. Crowded shelves, hanging planters, and plants with broad foliage reward a slimmer, longer spout that can approach the pot from the side.

Reach is only useful when it remains controllable. A very long spout shifts water away from your hand and may feel front-heavy as the can empties. Check the complete dimensions rather than looking only at capacity; the spout and handle can make a modest can surprisingly wide. If plants sit above shoulder height, consider whether the can can be raised safely without hiding the target pot behind its body.

The rate of flow should suit the potting setup. A narrow outlet can place water close to the soil and reduce splashing around small pots. It may also take longer to empty and can be inconvenient for a collection of large containers. A broader outlet serves bigger pots more quickly but requires a steadier hand near delicate foliage, lightweight soil, or shallow saucers.

Who this is for

  • Apartment dwellers caring for plants on windowsills, bookcases, desks, or compact plant stands.
  • Houseplant owners who need to direct water beneath dense leaves rather than pour over them.
  • People who want a dedicated indoor container instead of carrying a kitchen pitcher between rooms.
  • Plant keepers whose current can dribbles down the spout or bumps into nearby pots.
  • Anyone building a small, accessible watering station near potting supplies.

Who should skip it

  • Use a larger outdoor can or hose for a patio collection if repeated refilling would make a small indoor can inefficient.
  • A squeeze bottle may provide finer control for tiny nursery pots, seedlings, or narrow propagation vessels.
  • Bottom-watering trays may be more practical when many similar pots can soak together.
  • If plants are spread across several floors, a lightweight pitcher already available in each area may be easier than moving one specialized can.
  • An automatic irrigation setup may better suit long absences, though it requires separate compatibility and maintenance checks.

What to verify before buying

  • Check the stated capacity and the can’s total filled weight; one liter of water adds roughly one kilogram, or about 2.2 pounds.
  • Compare spout length with the depth of shelves and the distance from the pot edge to exposed soil.
  • Look at the outlet shape and whether the listing describes a removable rose, diffuser, cap, or other flow attachment.
  • Measure the entire footprint from handle to spout tip, then choose a realistic shelf, cabinet, or utility-area storage spot.
  • Confirm that the fill opening fits beneath your faucet and leaves enough space for easy rinsing.
  • Inspect how the spout joins the body and read the current cleaning guidance for the listed material and finish.
  • Note whether capacity refers to total internal volume or a practical fill level below the rim.
  • Check whether the handle permits a natural wrist position at both the beginning and end of a pour.

Capacity is a route-planning decision

Estimate how much water you normally use on one round rather than choosing the largest number in the search results. A smaller can is easier to maneuver and refill, and it discourages keeping old water sitting around. A larger can reduces faucet trips but becomes heavier and requires more room to turn between furniture and plants.

A simple way to estimate your needs is to fill the container you currently use, complete one normal watering round, and note how many refills it takes. This will not establish how much any individual plant needs, but it gives a useful comparison for carrying capacity. Seasonal conditions, pot size, soil, drainage, and plant type all change watering needs, so capacity should support your routine rather than dictate it.

Do not assume a can should be filled to the brim. Leaving headroom can reduce sloshing while walking and makes the first tilt easier to control. The handle and fill opening should also allow you to carry the can level without your knuckles pressing into the body.

Spout design affects the last few inches

Product photos often emphasize the overall silhouette, but the outlet and spout angle determine what happens at the pot. A tapered spout can help place a stream near the soil line. An upward-angled tip may resist dripping while carried, yet it can require more tilt before water begins to flow. That delayed start matters around small pots because the stream may arrive suddenly once the water reaches the tip.

A detachable spout or sprinkler-style rose can add flexibility, provided the connection remains secure for your intended use. Small removable pieces also need a storage habit. Verify what is included rather than inferring accessories from styled images, and check whether seals or replacement pieces require special care.

After watering, pause with the tip over the pot or sink before moving to the next plant. Even a well-shaped spout can retain a small amount of water. If drips on wood shelves or floors are a concern, a washable tray under the stored can can be more reliable than expecting any design to remain perfectly dry.

Filling, carrying, and cleaning

A generous opening makes it easier to fill the can under a faucet and to inspect the interior. However, a very open top can slosh during a quick walk. A partially covered top contains water better but may restrict access for cleaning. Compare the opening with the height and reach of your faucet; a beautiful tall can is not helpful if it cannot fit in the sink.

Handles positioned above the body can support a balanced carry but may interfere with filling. Rear handles leave the top clearer and can offer good pouring leverage, though the weight may pull forward as the can empties. Two-handle designs can support both carrying and tipping, but they take more space. There is no universally correct arrangement—your grip, faucet, plant height, and usual fill level all matter.

Follow the current care instructions for the specific material. Regardless of finish, emptying leftover water and allowing the interior to dry can help keep the can ready for its next use. If you mix plant food, do so only according to the product directions, avoid leaving a mixture in the can, and rinse as instructed. A watering can used for plants should not double as a food or beverage container.

Limitations

  • A long spout improves reach but increases the can’s storage footprint and may make it front-heavy.
  • Small cans require more refills for large pots or extensive plant collections.
  • Large cans become tiring to lift and harder to place accurately when full.
  • Residual water can drip from the outlet after the main pour ends.
  • Narrow openings and enclosed bodies can be difficult to inspect and clean.
  • Decorative finishes may show water spots, scratches, or wear over time.
  • A precise can does not determine when a plant needs water; plant type, soil, drainage, light, and season still shape the routine.

Alternatives to compare

  • A household pitcher for large, easily reached pots and occasional use.
  • A squeeze bottle for seedlings, propagation containers, or very small pots.
  • A pump sprayer for tasks that specifically call for a mist or spray rather than soil watering.
  • Bottom-watering trays for groups of compatible pots with drainage holes.
  • A larger outdoor watering can for balcony, porch, greenhouse, or garden rounds.
  • A self-watering planter or irrigation system when more consistent unattended delivery is the priority.

FAQ

How large should an indoor watering can be?

Choose enough capacity to cover most of your usual route without making the filled can uncomfortable. Test your current routine with a measured container, account for the weight of the water, and leave some headroom to limit sloshing. A compact can often suits a shelf collection, while several large floor pots may justify more capacity.

Is a long spout better for houseplants?

It is helpful when pots sit behind foliage, beneath shelves, or in crowded arrangements. The tradeoffs are a wider storage footprint and potentially more front-heavy balance. For open, large floor pots, a shorter spout may be easier to carry and control.

Should the top be open or covered?

An open top is generally easier to fill, inspect, and rinse. A covered or partially enclosed top can reduce splashing while carried but may complicate cleaning and faucet access. Check the actual opening dimensions and handle placement before choosing.

Why does a watering can drip after pouring?

Water can remain inside the spout after the main flow stops. The tip angle and internal shape influence how much remains, but technique matters too. Hold the tip over the pot or sink for a moment before carrying the can across a shelf or floor.

Can one watering can be used to mix plant food?

Only use products as their current labels direct. If a plant-care product is mixed in the can, measure it as instructed, avoid storing the mixture there, and clean the can according to both products’ guidance. Keep the can dedicated to plant care rather than household food use.

Choosing a Handheld Milk Frother for Everyday Drinks

Product links are for reference. Verify current details on the retailer page before buying.

Illustrative image of a generic handheld milk frother beside a foamy drink

Illustrative image, not an official product photo.

Short answer

A handheld milk frother is a compact choice for adding a light foam cap to coffee, mixing powdered drinks, or blending a small serving without dedicating counter space to an appliance. Start with the vessel and drink you actually use: a narrow whisk must fit comfortably inside the mug or pitcher, while the shaft needs enough reach to work below the surface without putting the motor housing near the liquid. Then compare one-touch versus press-and-hold operation, available speed settings, battery or rechargeable power, whisk attachment, grip, stand or storage method, and cleaning instructions. It will not automatically create café-style microfoam or heat milk, but a well-matched wand can make everyday drink preparation quicker and tidier.

Search reference

Handheld milk frother options

Compare whisk dimensions, controls, power source, cleaning guidance, and storage details for the mugs and drinks in your routine.

View matching options

Think about the drink before the motor

Frothers with similar silhouettes can serve different routines. Someone topping one morning coffee needs a different setup from a household mixing protein powder in a tall tumbler or preparing several cups after dinner. Write down the vessel, usual liquid volume, and desired result before comparing claims about speed.

For a foam topping, control near the surface matters because pulling in too much air can create large, dry bubbles. For cocoa or another powdered drink, reaching the bottom and circulating the mixture may matter more. A very fast wand can be useful in a deep pitcher but splash in a short, nearly full mug. This is why the relationship among whisk diameter, shaft length, vessel shape, and control style is more informative than motor wording by itself.

A handheld frother generally does not warm milk. If your drink calls for warm liquid, that is a separate preparation step, and the liquid and container should be handled according to their own heating guidance. Likewise, “frothing” can refer to anything from airy bubbles to fine, pourable foam. A small coil whisk is convenient, but buyers seeking consistent latte-art texture should also compare purpose-built steam or automatic frothing methods.

Whisk and shaft details that affect fit

The coil at the end does the visible work, yet listings do not always make its useful dimensions easy to judge. Check the whisk diameter against narrow travel cups and small mugs. A wide head may not move freely in a tight vessel, while a small head can take longer to circulate a broad pitcher. Product photos can provide context, but stated measurements are a better basis when available.

Shaft length determines reach. Enough distance between the grip and whisk helps keep fingers and the housing away from splashes, especially in a tall container. Excess length, however, can make the tool awkward in a shallow cup and harder to store in a drawer. Look for the total length as well as the usable metal shaft length rather than assuming they are the same.

Some wands have a fixed whisk; others use a removable or interchangeable attachment. A fixed assembly avoids a small loose part, while a removable whisk may simplify access during cleaning or allow another mixing head. If the attachment comes off, verify how it locks in place and whether replacements are available for that exact design. Do not infer cross-compatibility from a similar appearance.

Who this is for

  • Coffee and cocoa drinkers who want a quick foam layer without a large countertop appliance.
  • People who mix one serving at a time in a mug, small pitcher, or compatible tumbler.
  • Small kitchens, dorm-style spaces, and office drink stations where drawer or vertical storage matters.
  • Buyers who are comfortable heating liquid separately when a warm drink is desired.
  • Households that want a compact mixer for suitable powdered drinks as well as occasional milk frothing.

Who should skip it

  • Skip a wand if you expect it to heat milk; most handheld frothers only agitate the liquid.
  • Choose another method if your priority is repeatable, fine microfoam for detailed latte art.
  • A handheld design may be a poor fit when you routinely prepare several large servings in sequence.
  • Avoid using a frother for thick mixtures, crushing solids, or other jobs not included in its instructions.
  • Consider a manual jar, pump frother, or whisk if keeping batteries charged or replaced would make the tool inconvenient.

What to verify before buying

  • Whisk diameter: Confirm that the head can move freely inside your narrowest intended mug or pitcher.
  • Shaft reach: Compare the usable shaft length with the depth of your vessel, leaving comfortable clearance above the liquid.
  • Control behavior: Check whether operation is press-and-hold, one-touch, or multi-speed, and how the tool turns off.
  • Power source: Verify the battery type and quantity, whether batteries are included, or the charging connector and supplied cable for rechargeable models.
  • Attachment design: Determine whether the whisk is fixed or removable and whether additional heads shown are actually included.
  • Cleaning guidance: Confirm which part may contact water and whether the motor housing must only be wiped clean.
  • Storage: Look for a stand, wall loop, protective cover, or dimensions that fit the intended drawer or utensil cup.
  • Current contents: Check the listing for the exact frother, attachments, stand, cable, batteries, and instructions included in the package.

Controls: simple is useful when it is predictable

A press-and-hold button stops the whisk when released. That can make short pulses intuitive and reduce the chance of lifting a spinning whisk out of the cup. It also requires continuous finger pressure. A one-touch switch frees the thumb during a longer mix but makes the stop sequence important, particularly if multiple speed presses must be cycled before the motor turns off.

Multi-speed controls can help bridge different tasks. A lower setting may offer more restraint near the surface of a small drink, while a higher setting can circulate a larger volume. More settings do not guarantee more useful control, though. Find out where the button sits, whether the current setting is visible, and what happens after the frother is switched off and restarted.

Grip shape also deserves attention. A smooth cylinder can be easy to wipe, but diameter, balance, button resistance, and surface texture affect comfort more than styling alone. The tool will be used near liquid, so the intended grip should remain secure with clean, dry hands. Keep the housing away from splashes unless the instructions explicitly describe water resistance; a metal-looking exterior does not establish that protection.

Battery-powered or rechargeable

Replaceable-battery frothers can be simple to keep available when spare cells are already part of the household routine. Check the required battery size, orientation, and access to the compartment. A cap that is difficult to align can turn a small maintenance step into a recurring frustration. Store and dispose of batteries according to their instructions, and remove them if the maker recommends doing so for long periods without use.

Rechargeable models reduce the need for disposable replacements but introduce a cable and charging routine. Verify the connector on the device instead of assuming a familiar port from a photo. Also check what charging equipment is included and where the device is supposed to rest while charging. Battery runtime claims depend on speed, load, and usage pattern, so focus on whether charging fits naturally between uses rather than treating a single runtime figure as universal.

Neither power style proves how well the whisk works in a particular drink. Fresh batteries and a charged internal cell may help the motor operate as intended, but vessel geometry, liquid properties, temperature, volume, and technique all affect the result.

A less splash-prone routine

Use a container with room above the liquid. Insert the whisk before switching it on, begin below the surface, and keep the motor housing clear of the drink. For incorporating air, move the whisk closer to the surface carefully rather than starting at the rim. Turn the motor off before removing the head. These habits are simple, but they often matter more to counter cleanup than an extra speed setting.

Milk and milk alternatives differ in protein, fat, stabilizers, temperature response, and foaming behavior. Results can also vary among products within the same category. Treat the first attempt as a way to learn the liquid and vessel: start with a modest volume and restrained movement, then adjust time and whisk position. Avoid making nutritional or dietary assumptions from the type of drink; use the package information relevant to your needs.

Powders add another variable. Some dissolve readily, while others form dry pockets or thicken quickly. Add and mix them according to their own directions, and do not run the frother in a mixture beyond the tool’s intended consistency. A handheld coil is not a substitute for a blender when ingredients require crushing, high capacity, or sealed mixing.

Cleaning and storage

Dried milk can collect around a coil quickly. Clean the whisk promptly using the method specified by the manufacturer. Many handheld designs have a motorized housing that should not be submerged, even when the shaft is rinsed. A removable attachment is not automatically dishwasher-safe, and a fixed shaft is not automatically safe under running water near the body. Current care instructions settle those questions.

After cleaning, let the whisk dry before placing it in a closed drawer or cover. A stand can keep the coil from touching the counter and make the tool easy to notice, but it consumes surface space. Drawer storage hides clutter but should not bend the shaft or snag the coil against other utensils. If attachments are supplied, decide where the small pieces will live before they disappear into a crowded organizer.

Limitations

  • A handheld milk frother agitates liquid but usually does not heat it.
  • Foam volume and texture vary with the liquid, temperature, vessel, whisk position, and technique.
  • A coil whisk may create airy foam without producing the fine texture expected for latte art.
  • Small motors and shafts are not intended for every thick mixture or solid ingredient.
  • Open-cup mixing can splash when the vessel is too full or the whisk starts near the surface.
  • Battery condition or charge level can change performance over time.
  • A compact wand still needs prompt cleaning and a storage spot that protects the whisk.

Alternatives to compare

  • A manual pump frother can create foam without batteries, though it adds a vessel and more parts to wash.
  • A lidded jar may be adequate for occasional shaking if the jar, lid, liquid temperature, and handling method are appropriate.
  • An automatic frother can combine more of the process in one container; compare capacity, heating modes, minimum fill, cleanup, and counter space.
  • An espresso-machine steam wand offers a different path to textured milk but requires compatible equipment, technique, and cleaning.
  • A small blender or shaker bottle may better suit larger powdered-drink servings, provided the appliance or container is intended for those ingredients.

FAQ

Does a handheld milk frother heat the milk?

Usually not. A handheld wand spins a whisk to move and aerate liquid, while heating is a separate step. Confirm the functions of the specific model and use an appropriate method and vessel if you want a warm drink.

Can I use a handheld frother in a regular coffee mug?

You can use one in a suitable mug if the whisk fits freely and there is enough empty space to limit splashing. Insert the whisk before starting, keep the housing out of the liquid, and switch it off before lifting it out.

Is one speed enough for a milk frother?

One predictable speed may be enough for a consistent single-drink routine. Multiple speeds can offer more control across vessel sizes and mixing tasks, but button behavior and technique are just as important as the number of settings.

Can a milk frother mix protein powder or cocoa?

Some handheld frothers are described for suitable powdered drinks, but powders and mixtures vary. Check the tool’s intended uses and the drink instructions, avoid solids or mixtures that are too thick, and use a larger or sealed mixing method when the serving would splash or overload the whisk.

How should I clean a handheld milk frother?

Follow the current instructions for the exact model. Clean the whisk promptly, keep any non-submersible motor housing out of water, and do not assume a removable attachment is dishwasher-safe. Let the cleaned parts dry before storage.

Choosing a Fabric Shaver for Sweaters, Upholstery, and Everyday Knits

Product links are for reference. Verify current details on the retailer page before buying.

Illustrative image for a fabric shaver buying guide

Illustrative image, not an official product photo.

Short answer

A fabric shaver can tidy the raised pills that make a compatible sweater, coat, blanket, or upholstered cushion look worn. The useful choice is not necessarily the model with the largest head or most accessories. Look for a protective guard that can be adjusted for different fabric surfaces, a lint chamber you can empty without scattering fibers, and controls that are easy to hold away from the moving cutter. Before using any shaver, read both the appliance instructions and the item’s care label, then test an inconspicuous area on a flat, unstretched surface.

Search reference

Fabric shaver options

Compare guard settings, shaving-head size, power source, lint-bin access, included cleaning tools, and the fabrics each model is intended to handle.

View matching options

Why fabric and tool compatibility comes first

Fabric pills form when loose fibers rub together and collect into small knots on the surface. A shaver uses a perforated guard to hold the textile away from rotating cutters while allowing raised pills to enter. That sounds straightforward, yet textiles vary widely. A dense sweatshirt, a loosely knitted cardigan, a thin jersey top, and a sofa cushion do not present the same risk or require the same approach.

Start with the care label and the shaver manufacturer’s fabric guidance. Loose loops, embroidery, lace, seams, zippers, buttons, appliques, textured yarn, and intentionally brushed surfaces can catch or sit unevenly beneath a shaving head. If an item is delicate, valuable, structurally loose, or difficult to replace, professional care or a gentler manual method may be the more sensible option.

Who this is for

  • Households that want to refresh compatible sweaters, sweatshirts, blankets, or cushion covers between normal cleaning cycles.
  • People who see widespread fine pilling and would rather cover a broader area than pick at individual pills by hand.
  • Shared homes that need one compact garment-care tool for several kinds of everyday textiles.
  • Anyone willing to work slowly, test first, and stop when the fabric no longer sits flat beneath the guard.
  • Travelers who want a compact tool, provided its power and transport requirements suit the trip.

Who should skip it

  • Skip powered shaving on fabrics whose care labels or manufacturers advise against it.
  • Do not use a fabric shaver over loose threads, open-knit holes, decorative stitching, fasteners, sharp folds, or raised trim.
  • Choose another approach if the problem is loose hair, dust, or surface lint rather than attached pills; a lint roller or garment brush is designed for a different job.
  • Avoid treating an item while wearing it. The textile needs a stable, flat support where you can see the whole working area.
  • Consider professional care for heirloom garments, very delicate knits, specialty upholstery, or anything whose construction you cannot confidently identify.

What to verify before buying

  • Guard design: Check whether the protective surface is fixed or adjustable and whether the instructions explain how its settings relate to fabric thickness or pill height.
  • Head size: A wider head can cover a blanket or sofa cushion more quickly, while a smaller head may be easier to guide around sleeves and narrow garment panels.
  • Power source: Compare replaceable batteries, built-in rechargeable power, and corded operation. Confirm whether batteries, a cable, or a power adapter are actually included.
  • Runtime and charging details: For rechargeable models, verify the stated runtime, charging connection, charging restrictions, and whether use while plugged in is supported.
  • Lint chamber: Look at its capacity, visibility, removal direction, and whether opening it puts your fingers close to the cutter assembly.
  • Grip and controls: The handle and switch should be manageable with your preferred hand without forcing you to press hard against the textile.
  • Maintenance access: Confirm how the guard, cutter, and lint path are cleaned, and whether a brush or replacement components are available.
  • Intended surfaces: If you hope to use the tool on furniture or blankets as well as clothes, check that those applications are explicitly covered by the current instructions.

Three decisions that shape everyday use

Adjustable guard or simple fixed head

An adjustable guard can add control when moving between a substantial blanket and a finer garment, but extra settings help only when they are clearly marked and explained. A simple fixed design may be easier for one predictable use, such as maintaining similar sweatshirts. Neither layout makes every fabric suitable. The guard is a safety barrier, not a guarantee against snags or thinning.

Compact head or broad shaving area

Large heads appeal when a sectional cushion or blanket has a wide field of pills. They also reach seams and curved garment sections less gracefully. A compact head takes longer across broad surfaces but may offer a clearer view near cuffs and side panels. Think about the item you expect to treat most often rather than choosing by head diameter alone.

Disposable batteries or rechargeable power

Replaceable batteries are easy to swap and can make sense for occasional use, though ongoing battery storage and replacement are part of ownership. Rechargeable units reduce that routine but eventually need a cable and a suitable charging location. Product listings sometimes show a cable without a wall adapter, so inspect the included-parts list rather than relying on staged images.

A cautious first-use routine

Lay the clean, dry item on a firm surface and smooth it without stretching. Remove any objects from pockets and identify seams, buttons, zippers, loose yarn, and damaged spots before switching the tool on. Test a hidden patch with the least aggressive appropriate setting, using light passes rather than pressure. Check the surface after each pass.

Work in small sections and keep the guard flat. Pushing harder is not a shortcut; it can compress the textile toward the cutter or create uneven results. Empty the lint chamber before it becomes packed, following the shutdown and opening directions in the manual. If the sound changes, the tool pulls at the surface, or the fabric begins to ripple, stop and inspect instead of continuing.

A shaver removes fiber from an item, even when it is removing only pills as intended. Repeated passes therefore deserve restraint. The goal is a tidier surface, not to chase every tiny irregularity until the fabric looks artificially uniform.

Cleaning and storage considerations

Turn the unit off and isolate it from its power source before opening any section near the blades. Use only the cleaning method described by the manufacturer; an included brush is generally meant to clear dry fibers from specific areas, not to scrub the motor housing. Verify whether any removable component may be rinsed, because the answer varies by design.

Store the shaver with its cover fitted if one is supplied, away from children and from a crowded drawer where the guard or switch could be damaged. Rechargeable models should be stored and charged according to their battery instructions. If the cutter dulls or the guard becomes dented, look for the correct replacement part rather than operating the tool with a compromised protective surface.

Limitations

  • A fabric shaver removes attached pills; it does not wash stains, collect all pet hair, repair pulled yarn, or restore stretched fibers.
  • Results depend on fabric construction, existing wear, technique, and the condition of the guard and cutter.
  • Any cutting tool can damage an unsuitable, folded, loose, or overstretched textile.
  • Large lint chambers reduce emptying frequency but can make a unit bulkier in the hand.
  • Rechargeable runtime and battery longevity vary, while battery-powered models create an ongoing need for compatible cells.
  • Even a successful treatment removes some fiber, so frequent aggressive shaving can shorten the useful life of a textile.

Alternatives to compare

A garment brush can lift surface debris and neaten some sturdy fabrics without a motorized cutter. A lint roller is better for loose lint, hair, and dust. A sweater comb or sweater stone offers slow manual control on materials for which the tool is intended, but it still requires a test patch and a light touch. Small scissors may be useful for one isolated pill in experienced hands, though they are not an efficient or forgiving choice for a broad area. For delicate or high-value items, ask a qualified cleaner or textile-care professional before attempting removal.

FAQ

Can a fabric shaver be used on cashmere or other delicate knits?

Only if the garment care guidance and the shaver instructions both support that use. Delicate, fine, or loosely constructed knits can be easy to snag or thin. Test a hidden area with minimal pressure, and choose professional care when the material or construction is uncertain.

Is a fabric shaver the same as a lint remover?

The names overlap in shopping results, but the functions may differ. A fabric shaver cuts attached pills through a protective guard, while a sticky roller or brush picks up loose lint, dust, and hair. Identify the surface problem before choosing a tool.

Should I press down to remove stubborn pills?

No. Keep the item flat and use light, controlled passes according to the instructions. Extra pressure can push fabric toward the cutter and make results uneven. Stop if the head drags, catches, or changes sound.

Can I use one fabric shaver on both clothes and a sofa?

Possibly, but only when the current product guidance covers both surfaces and the upholstery care instructions permit shaving. Furniture seams, piping, textured weaves, and fixed cushions can make it harder to keep the guard flat.

How often should the lint chamber be emptied?

Empty it before packed fibers obstruct airflow, movement, or proper reassembly, following the model’s manual. A transparent chamber can make the fill level easier to monitor, but capacity and removal methods vary.

Ice Cube Trays with Lids for an Easier Freezer Routine

Product links are for reference. Verify current details on the retailer page before buying.

Illustrative image for an ice cube tray with lid buying guide

Illustrative image, not an official product photo.

Short answer

An ice cube tray with a lid can make a crowded freezer easier to manage, but the lid is only one part of the decision. Start with the drinks you usually prepare, then compare cube dimensions, tray rigidity, release method, lid attachment, and the amount of level shelf space available. A low-profile tray may suit daily water bottles, while larger molds are better reserved for glasses that have enough room for slow-melting cubes.

Search reference

Ice cube trays with lids

Compare cube dimensions, covered stacking, fill method, release design, cleaning instructions, and freezer footprint across current options.

View matching options

Let the drinkware choose the cube

Cube shape matters more than an impressive cavity count. Small cubes fit narrow reusable bottles and chill drinks quickly, but a tray full of tiny cavities can take longer to refill. Standard cubes are flexible for everyday glasses. Oversized cubes occupy more freezer space and may not pass through a bottle opening, yet they can be useful for drinks served in wide tumblers.

Measure any narrow bottle mouth before choosing a specialty shape. Product photos can make cubes look smaller than they are, so look for stated cavity dimensions rather than relying on the serving glass shown in the listing. If the goal is batch preparation for a family, compare total usable ice volume as well as the number of cavities.

Who this is for

  • Households that want covered trays for tidier stacking in a shared freezer.
  • Apartment kitchens where several shallow trays are easier to place than a countertop ice maker.
  • People who prepare ice for water bottles, iced coffee, pitchers, or occasional guests.
  • Buyers replacing old open trays that spill when moved from the sink to the freezer.
  • Anyone comparing twist-style rigid trays, flexible-bottom trays, or push-release systems.

Who should skip it

  • Choose a countertop or refrigerator ice maker if the household needs large amounts of ice throughout the day.
  • Skip oversized molds when most drinks use narrow bottles or small glasses.
  • An open tray may be adequate if freezer stacking and covered storage are not concerns.
  • Avoid complicated release mechanisms if simple cleaning and few loose parts are the priority.

What to verify before buying

  • Check cavity length, width, and depth against the drinkware you actually use.
  • Confirm whether the lid snaps on, rests on top, slides into place, or is intended only as a loose cover.
  • Compare filled-tray dimensions with the clear, level area inside your freezer.
  • Review the stated materials, care instructions, temperature guidance, and dishwasher claims on the current listing.
  • Look for an explanation of the release method and whether the tray must sit briefly at room temperature before twisting or pressing.
  • Confirm how water is added and whether a fill line, removable lid, or drain opening affects the routine.

Lid fit and stacking are different questions

A covered tray is not automatically leakproof. Many lids are designed to keep the top covered and help trays stack; they may not prevent water from escaping if a freshly filled tray tilts. A rigid rim can make the trip from sink to freezer steadier, while a very flexible body may need support underneath until the water freezes.

For stacking, check whether the lid bears the weight of another filled tray without pressing into the cavities. Raised edges or alignment features can help, but usable stack height still depends on the freezer shelf. Leave enough clearance to lift the lid instead of sliding a full tray against the shelf above it.

Choosing a release style

Traditional rigid trays release ice by twisting the entire body. They are familiar and often quick, although the force required depends on the material and cavity shape. Flexible trays let you press individual cubes from below, which can be convenient when only a few cubes are needed. Some covered systems use a separate plate, lever, or bin to release a batch at once.

More parts can improve convenience but also add seams, hinges, and corners to wash. Think about whether you usually empty a complete tray or take two cubes at a time. For individual access, a flexible bottom can be useful; for party preparation, a batch-release design may save repeated handling if it works as described.

Filling without creating a freezer puddle

A tray with interconnected channels can distribute water across cavities, while isolated cavities give more control over the fill level. Neither approach is universally easier. Channels may reduce repetitive filling but can leave thin sheets of ice between cubes when overfilled. Isolated cavities take more attention but make it easier to prepare only part of a tray.

Set the tray on a level surface before filling and leave the amount of expansion space recommended by the maker. If the tray includes a lid with a fill port, check how excess water drains and whether the opening is accessible under your faucet. Do not assume the lid makes it safe to carry the tray vertically or at an angle.

Cleaning and repeat use

Ice trays contact both water and the freezer environment, so regular washing and thorough drying matter. Inspect removable lids and release components for narrow grooves that could retain water. If the listing describes the set as dishwasher-safe, verify which pieces that statement covers and whether a specific rack position is recommended.

Odors can also be a practical concern in a shared freezer. A lid may reduce direct exposure, but it is not a substitute for cleaning spills or storing strongly scented food properly. Replace a tray if the material cracks, the lid no longer fits as intended, or damaged surfaces become difficult to clean.

Limitations

  • A fitted lid may help with coverage and stacking without making the tray spillproof.
  • Cube dimensions, not just cavity count, determine whether the ice suits a particular bottle or glass.
  • Flexible trays can be awkward to carry when full unless the rim or base provides enough support.
  • Release performance can vary with fill level, freezer temperature, cavity shape, and how long the ice has been frozen.
  • Lids and multi-part release systems create additional pieces that need washing, drying, and storage.

Alternatives to compare

  • Standard open ice trays for a simple, low-part-count option.
  • Narrow stick molds for bottles with small openings.
  • Large-cube molds for wide glasses and smaller serving counts.
  • Reusable ice packs when the goal is cooling a lunch bag rather than chilling a drink.
  • Countertop ice makers for households that need frequent, higher-volume production.

FAQ

Are ice cube trays with lids leakproof?

Not necessarily. Many lids are intended for coverage and stacking rather than carrying a filled tray at an angle. Look for an explicit claim and handling instructions if spill resistance is essential.

Is a rigid or flexible ice tray easier to use?

A rigid tray is often steadier to carry, while a flexible tray can make individual cubes easier to press out. The better choice depends on whether transport stability or selective release matters more in your routine.

What cube size works for water bottles?

The cube must be narrower than the bottle opening. Measure the opening and compare it with the listed cavity dimensions; consider a narrow ice-stick mold when regular cubes will not fit.

Can covered ice trays be stacked before the water freezes?

Some are designed for filled stacking, but lid strength and alignment vary. Check the maker’s directions, keep trays level, and avoid placing weight on a lid unless the design specifically supports it.

How many ice trays does a household need?

Estimate how many cubes the household uses between refills, then account for freezing time and available shelf space. Two modest trays may be easier to rotate and store than one bulky mold.

Salad Spinners: Choose a Bowl That Fits Your Washing Routine

Product links are for reference. Verify current details on the retailer page before buying.

Illustrative image of a generic salad spinner with leafy greens on a kitchen counter

Illustrative image, not an official product photo.

Short answer

A useful salad spinner should hold the amount of greens you normally wash without crowding them, stay steady while the basket turns, and come apart without turning cleanup into another project. Capacity is only one part of the choice: compare the inner basket dimensions, crank or pump mechanism, lid controls, drainage method, and the cabinet space the assembled bowl consumes. A compact spinner can be enough for herbs and one-person salads, while a larger bowl better suits whole heads of lettuce or meal prep. The goal is not maximum speed. It is removing enough surface water for dressing to cling and for washed greens to be easier to store, without bruising delicate leaves or filling the sink with awkward parts.

Search reference

Salad spinner options

Compare basket capacity, spinning control, brake design, base stability, drainage, and cleaning instructions against the greens you prepare each week.

View matching options

Picture the full wash-to-table routine

A spinner sits between several steps: separating leaves, rinsing away grit, draining the first rush of water, spinning, and then moving the greens to a bowl or storage container. Think through that sequence before choosing a design. If you rinse produce directly in the removable basket, its holes and handles should make it comfortable to lift from the sink. If you fill the outer bowl with water to loosen soil, you will need a controlled way to pour out a heavy bowl without losing leaves.

The amount you prepare also changes what “large enough” means. Loose herbs occupy little space but can be delicate. A head of romaine produces long pieces that may not settle into a shallow basket. Several servings of mixed greens need room to tumble; tightly packed leaves cannot move freely, even when the advertised bowl volume sounds generous. Compare usable basket dimensions rather than relying on the outside diameter alone, because the drive assembly and taper can reduce working space.

Finally, decide what happens after spinning. Some outer bowls are shaped to serve at the table, while others are primarily utility containers. That second use may save a dish, but only if the bowl is comfortable to hold, pours cleanly, and suits your table. It should be treated as a bonus rather than a reason to overlook an inconvenient mechanism.

Spin mechanisms feel different in a busy kitchen

Crank and side-handle designs

A crank turns the basket through repeated circular motion. It gives the user direct control over acceleration and can be easy to slow by simply stopping the handle, though the basket may continue coasting. Look at the crank’s folded and operating positions. A prominent handle can improve grip but make the lid difficult to stack or store.

Side-handle mechanisms use a back-and-forth or rotational action near the edge of the lid. They may keep the top lower than a tall center crank, but require enough clearance beside the bowl. Consider whether the supporting hand has a secure, dry place to hold the spinner while the other hand operates it.

Pump and pull-cord controls

A pump is usually pressed downward several times to build basket speed. This action can suit a spinner placed on a stable counter, and some pumps lock down for storage. Check whether the control remains tall when locked and whether the lock can be operated without forcing it. The pumping motion also transfers force into the base, making nonslip contact especially relevant.

Pull-cord models translate a straight pull into rotation. They can feel quick and keep one hand away from the lid center, but the cord path, retracting action, and handle storage deserve attention. Confirm the current cleaning instructions for the enclosed mechanism; a lid with an internal cord assembly may not be intended for soaking or dishwasher cleaning.

No mechanism guarantees better drying by itself. Basket load, how thoroughly water was drained first, leaf shape, and the length of the spin all affect the result. A separate brake button can stop the basket more predictably, but inspect where that control sits and whether it is easy to press without destabilizing the bowl.

Who this is for

  • Households that regularly wash whole or loose leafy greens rather than relying only on ready-to-serve packages.
  • Home cooks who want dressing to coat leaves instead of being diluted by rinse water.
  • Gardeners and market shoppers dealing with herbs or greens that need a thorough rinse and drain.
  • Meal preppers who wash several servings at once and want more control over surface moisture before storage.
  • Cooks who would use the removable basket as a colander for produce beyond salad leaves, within the maker’s stated guidance.

Who should skip it

  • Skip a dedicated spinner if greens are rare in your routine and a colander plus clean kitchen towels already handles the occasional batch.
  • A full-size model is a poor fit for a kitchen without a realistic cabinet, shelf, or counter location for the assembled bowl and lid.
  • Avoid assuming vigorous spinning is suitable for every delicate herb, berry, or prepared food; follow appropriate washing guidance and the product’s stated uses.
  • A spinner does not replace proper produce handling, clean hands, a clean sink, or food-storage practices.
  • If pumping, cranking, or pulling is uncomfortable, compare the operating movement carefully rather than choosing only by capacity.

What to verify before buying

  • Usable basket size: Check inner diameter, depth, and any central spindle or raised base that takes space away from the greens.
  • Typical batch fit: Match the basket to long lettuce leaves, loose greens, herbs, or smaller portions rather than aiming for the largest bowl available.
  • Control style: Compare crank, pump, side-handle, or pull-cord motion and the hand position each requires.
  • Braking: Determine whether there is a separate brake, how it is activated, and whether the basket stays contained as it slows.
  • Base stability: Look for a broad base and the maker’s description of any nonslip ring or feet; these features still require a clean, suitable surface.
  • Water removal: Check whether water is poured through the lid, drained after removing the basket, or released through another opening.
  • Lid construction: Inspect seams around the drive mechanism and confirm whether the lid separates for cleaning.
  • Care guidance: Verify which individual parts are currently described as dishwasher suitable and whether rack placement or hand washing is specified.
  • Storage dimensions: Measure diameter and full height with the lid fitted, including handles or controls that do not fold down.
  • Current contents and materials: Confirm every included part and the food-contact material wording on the current listing instead of judging from photos.

Capacity without wasted cabinet space

Bigger bowls give leaves room to move, but oversized equipment creates its own friction. A spinner that lives behind several appliances may not be used often enough to justify its footprint. Measure a likely storage spot before ordering, including door frames, shelf supports, and the clearance needed to lift the lid. Round bowls also leave unused corners in rectangular cabinets, so their diameter can matter more than volume.

Compact spinners are easier to store and may suit herbs, baby greens, or one or two portions. The tradeoff is batching: overfilling reduces movement, while splitting a head of lettuce into repeated loads adds time. If your routine alternates between small herb bundles and large salads, a medium basket may offer a more practical compromise than buying around the largest meal of the year.

Nesting can soften the storage cost. Some users keep the clean basket inside the outer bowl, but the lid still needs a home and all pieces should be dry before assembly. A flat or locking control may allow other lightweight items to sit nearby; do not assume the top is designed to support weight. Check the stated dimensions in both operating and storage positions.

Drainage, balance, and leaf handling

A spinner works by moving water away from the greens and through the basket openings. Drain free water before accelerating the basket; leaving the outer bowl full defeats the purpose and adds unnecessary mass. If a lid has a pour opening, consider how you will hold the bowl during draining and whether leaves remain securely contained. A transparent outer bowl can help you see collected water, but visibility does not confirm that the greens are fully dry.
An uneven load may make the spinner wobble. Distribute leaves around the basket and start at a controlled pace. Very long leaves can bunch on one side, while a few small herbs may lift or cling. Pausing to rearrange a load can be more effective than forcing the mechanism faster. Product instructions should take priority for maximum fill and operating technique.

Surface moisture is not the only consideration when greens are headed for storage. Damaged leaves, trapped soil, container choice, temperature, and time all matter. A spinner is a preparation tool, not a promise of a particular storage life. After use, empty collected water and clean food-contact surfaces so residue from one batch does not remain for the next.

Cleaning the mechanism matters

The basket and outer bowl are usually visually straightforward; the lid is where designs diverge. Gears, cords, springs, brake parts, and seams can retain water if the lid is submerged contrary to its care instructions. Read the current cleaning guidance for each component separately. A listing that describes the bowl as dishwasher suitable does not necessarily make the assembled lid suitable as well.

Removable lid plates may improve access, but only if they release and reinstall without excessive force. Look for instructions rather than prying at seams that merely appear detachable. After washing, allow enclosed areas and nested parts to dry as directed. A lid stored while damp can undermine the convenience of a tool intended to make produce preparation cleaner.

Basket holes also deserve a quick inspection after herbs or torn leaves. Fine stems can catch around the base, and residue may remain where the basket meets its hub. An uncomplicated basket with accessible surfaces may be more useful than an elaborate one if salad prep happens several times a week.

Limitations

  • A salad spinner removes surface water but does not wash produce automatically or make food safe regardless of handling.
  • Advertised bowl capacity may not represent the comfortable working load for bulky or long leaves.
  • Fast rotation can bruise delicate ingredients, especially when the basket is crowded or unbalanced.
  • Nonslip features reduce movement only under appropriate conditions; wet or uneven counters still require care.
  • Enclosed lid mechanisms may demand different cleaning methods from the bowl and basket.
  • Even a compact spinner occupies more storage space than a basic colander or towel method.

Alternatives to compare

  • Drain greens in a colander, then spread or gently roll them in clean kitchen towels when storage space matters more than speed.
  • Use a clean mesh produce bag with an appropriate manual drying method only where you can control splashing and follow safe handling practices.
  • Choose a collapsible colander for rinsing and draining if removing every visible droplet is not central to the recipe.
  • Wash smaller portions as needed rather than processing a full batch if refrigerator storage, not drying speed, is the main concern.
  • Compare a compact herb spinner when most loads are small and a family-size bowl would stay largely empty.

FAQ

What size salad spinner should I get?

Choose around your common load, not the largest salad you might make once a year. Compare the inner basket diameter and depth with a typical head of lettuce or portion of loose greens, then confirm the assembled spinner fits your storage space. Leaves need room to move, so the useful load is smaller than the bowl’s full volume.

Does a salad spinner make lettuce completely dry?

It can remove a substantial amount of surface water, but results vary with the load, leaf shape, initial draining, and spin time. Water may remain in folds or near thick ribs. Inspect the greens and use a clean towel for any remaining moisture when the recipe requires it.

Is a pump salad spinner better than a crank model?

Neither mechanism is universally better. A pump uses repeated downward pressure and works best on a stable surface; a crank uses a circular hand motion and may provide more direct speed control. Compare hand comfort, lid height, braking, storage, and cleaning rather than choosing by mechanism name alone.

Can the outer bowl be used to serve salad?

Some outer bowls may be suitable for serving, but verify the product’s stated use and material guidance. Also consider grip, appearance, pour shape, and whether you need the bowl again for another batch. Wash and dry it as directed before bringing it to the table.

How should I clean a salad spinner lid?

Follow the instructions for that specific lid. The bowl and basket may have different care guidance from a lid containing gears, a pump, or a retracting cord. Do not assume an enclosed mechanism can be submerged or placed in a dishwasher, and let all parts dry before nesting them for storage.

Countertop Paper Towel Holders: Stability, Tear Control, and Counter Space

Product links are for reference. Verify current details on the retailer page before buying.

Illustrative image of a generic countertop paper towel holder in a kitchen

Illustrative image, not an official product photo.

Short answer

A countertop paper towel holder works well when the roll needs to stay visible, movable, and easy to replace without drilling into a wall or cabinet. Start by measuring the roll diameter and the patch of counter you can spare. Then compare base width and weight, spindle height, loading method, bottom grip, and any feature meant to keep the loose sheet from unwinding. A narrow stand saves surface area, but it still needs enough stability for the way you tear sheets. If you often reach with one wet hand, give more attention to controlled dispensing and a base that resists sliding than to decorative finish alone.

Search reference

Countertop paper towel holder options

Compare roll capacity, footprint, base stability, loading access, sheet control, and care instructions for your available counter space.

View matching options

Map the reach before choosing the stand

Paper towels tend to be used in a hurry: drying hands, catching a spill, wiping the edge of a sink, or covering food for a short task. The right location is therefore part of the product decision. Watch where you naturally reach during meal preparation and cleanup, then identify a spot that is accessible without leaning over a hot burner or carrying drips across the room.

That spot also needs a realistic footprint. Measure the base area rather than judging the holder only by its slim upright post. Leave room for the roll itself, which may extend beyond the base, and enough hand clearance to pull a sheet from the side. A holder squeezed between an appliance and a backsplash may technically fit but still be awkward to reload or clean around.

Placement near the sink is convenient, yet repeated splashes can reach the bottom sheets and the base. Near a cooktop, grease and heat become concerns. A portable holder can move between work zones, but it must be comfortable to lift and should not depend on a permanently attached surface. Decide whether the stand will have one home or travel from counter to table before comparing handles, top knobs, and overall weight.

How common countertop designs behave

Open spindle stands

The simplest form has a vertical post rising from a base. The roll drops over the top, so reloading is quick and there are few moving parts. This design makes it easy to see how much paper remains, but an exposed roll can unwind when pulled quickly or brushed while the stand is moved. The top of the spindle must also remain accessible under upper cabinets.

For an open stand, compare the post height with the paper products you normally buy and check whether the top cap, if present, must be removed during loading. A short post may leave a taller roll poorly guided. An oversized decorative knob can make carrying convenient, yet it may add a step when changing rolls.

Stands with a side arm

Some holders add a vertical or angled arm that rests against the outside of the roll. Depending on the design, it may provide light tension, keep the loose sheet closer to the roll, or create an edge against which to pull. The useful question is not simply whether an arm exists, but how it meets a full roll and follows the roll as it becomes smaller.

Check whether the arm is fixed, spring-loaded, flexible, or manually repositioned, and review how the maker describes its operation. An arm that presses too firmly for your preferred paper can make dispensing frustrating; one that barely touches may offer little control. Also account for the arm in the total footprint because it may project beyond the circular base.

Enclosed or guarded formats

A partial guard can shield part of the roll and reduce loose-sheet movement. It can also increase the holder’s width, limit the roll size, and create another surface to wipe. These designs may suit a busy counter where the roll is often bumped, provided there is enough opening to load and pull the paper comfortably.

Look closely at the route the sheet takes. If paper must be threaded through a slot or under a bar, consider whether replacing a roll will still feel simple during daily use. Confirm that the opening works with the sheet width and thickness you expect rather than assuming every roll format will feed the same way.

Who this is for

  • Renters and homeowners who want a paper towel station without drilling or attaching hardware.
  • Kitchens where the useful work zone changes and the roll needs to move between counter, island, and dining table.
  • Households with enough counter space to keep a roll visible and within reach.
  • People replacing a lightweight stand that tips, skids, or allows the paper to unravel.
  • Buyers who want easier roll changes than an enclosed wall-mounted dispenser may provide.

Who should skip it

  • Skip a countertop stand if every open section of work surface is needed for food preparation or small appliances.
  • Choose an under-cabinet or wall-mounted format when freeing the counter matters more than portability.
  • Avoid placing paper products close to an open flame, exposed heating element, or another location prohibited by the appliance or holder guidance.
  • A basic open spindle may disappoint if you require consistent one-handed dispensing and the design provides no practical sheet control.
  • Consider reusable cloths and a nearby drying or laundry routine if reducing disposable paper use is the main goal.

What to verify before buying

  • Roll dimensions: Compare the usable spindle height, clearance around any guard or arm, and stated roll capacity with the paper towels you purchase.
  • Base footprint: Measure the full base and any projecting arm, then allow additional space for the outer edge of a full roll.
  • Stability: Check base weight, width, weight distribution, and the surface types for which any nonslip pads are intended.
  • Dispensing method: Review whether the holder is designed for one-handed tearing, controlled resistance, or simply roll storage.
  • Loading access: Confirm whether a top knob, cap, arm, or cover must be removed and whether there is enough cabinet clearance to do so.
  • Carry point: If the holder will move often, look for a secure area to grip without lifting by the paper roll or a loosely fitted part.
  • Bottom contact: Inspect the stated pad material and care guidance so the base does not trap moisture or mark a sensitive counter finish.
  • Cleaning: Check how crumbs, splashes, and grease are removed from the post, base seam, tension arm, and any enclosed surfaces.
  • Current contents: Verify which parts are included and whether assembly is required; photos alone may not show separate pads, caps, or hardware clearly.

Stability is more than a heavy base

Weight can help a paper towel stand remain planted, but it does not explain the whole experience. A wide base generally creates a larger support area, while a tall roll raises the point where sideways force is applied. The direction of your pull matters too. A sharp outward tug can slide a stand that feels solid when pressed straight down.

Bottom pads add friction only when they suit the counter and remain clean. Dust, grease, water, or a warped pad can reduce contact. A ring-shaped pad may behave differently from several small feet on tile grout or a textured surface. Product descriptions may use broad phrases for grip, so inspect the base layout and confirm surface compatibility rather than treating “nonslip” as a guarantee.

If one-handed use is important, think of the holder, roll, perforations, and pulling motion as a system. A base can stay still while too much paper unspools, or a tension arm can control the roll while a narrow base rocks. User technique still matters: pulling close to the roll and changing direction at the perforation can place less leverage on the stand than yanking from several feet away.

Roll fit changes from the first sheet to the last

Paper towel rolls vary in height, outer diameter, core opening, sheet thickness, and winding firmness. A holder may accept the roll over its spindle yet leave too little room for a side arm or guard when the roll is full. Compare stated capacity with your usual product, especially if you buy oversized rolls.

The experience also changes as the roll shrinks. A full roll has more mass and may contact a tension arm near its outer edge. A nearly empty roll is lighter and brings the paper closer to the spindle. On some formats, that changes resistance and the angle needed to tear a sheet. Look for a design whose control feature follows the changing diameter if consistent dispensing matters to you.

Check the center opening as well. The post needs to fit without so much friction that the roll cannot turn, but an extremely thin post can allow the roll to lean and wobble. Do not assume outside dimensions alone settle the fit; review the maker’s current compatibility details.

Counter material and cleanup deserve attention

The area under a paper towel holder can collect crumbs and moisture because the base is lifted less often than smaller utensils. A smooth base with accessible edges is easier to wipe around than one with deep decorative grooves. Seams between a weighted insert and an outer shell may also need attention after a spill.

Before using cleaners, follow the holder’s care directions and the maintenance advice for your countertop. Abrasive products can affect some finishes, while leaving water trapped under a base can affect others. Lift the stand periodically, dry both surfaces, and check that pads remain attached and free of grit that could scratch when the holder is moved.

The paper itself should stay out of splash zones where practical. A raised base can help keep the lowest sheet away from a small amount of surface moisture, but it is not a sealed barrier. If the roll becomes wet or contacts a cleaning product, follow appropriate household handling guidance rather than relying on the stand to protect it.

Make portability intentional

A countertop format is often chosen because it can move, but not every stand is pleasant to carry. Grabbing the roll can lift it off the spindle while leaving the heavy base behind. Lifting by a removable top cap can do the same. If the stand will travel to an outdoor table or another room, identify a fixed grip point and check the overall weight before buying.

A recessed handle or secure top loop can simplify movement, although it may increase total height. Measure the path as well as the destination: a tall holder carried under cabinets or past hanging utensils can snag. For occasional transport, it may be safer to support the base with one hand instead of expecting the spindle to function as a handle.

Portability also means the holder encounters different surfaces. A bottom designed for a smooth stone counter may not feel as stable on a slatted patio table or soft tablecloth. Test placement before pulling a sheet, and keep the stand away from table edges where a heavy base could fall.

Limitations

  • A freestanding holder occupies counter space even when the roll is nearly empty.
  • One-handed tearing depends on base stability, roll resistance, paper perforations, pulling angle, and technique; the holder alone cannot guarantee it.
  • A weighted stand can still slide on a wet, dusty, uneven, or incompatible surface.
  • Side arms and guards may restrict oversized rolls or add areas that need cleaning.
  • An exposed roll remains vulnerable to splashes, grease, dust, and accidental unwinding.
  • Product photos do not reliably establish roll capacity, material, base weight, surface compatibility, or included parts.

Alternatives to compare

  • An under-cabinet holder preserves work surface while keeping the roll near a preparation zone, but it requires suitable mounting space and installation.
  • A wall-mounted holder can establish a fixed station away from wet counters, provided the wall and mounting method are appropriate.
  • An over-cabinet-door holder avoids drilling and saves the counter, though door clearance, cabinet finish, and movement need consideration.
  • A drawer-based roll holder hides the paper when not in use but requires a drawer layout intended for dispensing.
  • A basket of washable kitchen cloths can cover many routine wiping tasks when paired with a practical collection, washing, and drying system.

FAQ

How wide should the base of a countertop paper towel holder be?

There is no single ideal width. The base needs to fit your available counter while supporting the height and weight of a full roll during your normal pulling motion. Compare the complete footprint, base weight, bottom grip, and any projecting arm rather than choosing by diameter alone.

Will an oversized paper towel roll fit a freestanding holder?

It depends on spindle height, the roll’s outer diameter and core opening, and clearance around side arms or guards. Measure a new roll from the package you usually buy and compare those dimensions with the holder’s current capacity information.

Do weighted paper towel holders work with one hand?

Some are designed to improve one-handed dispensing, but weight by itself does not guarantee it. Roll resistance, tension features, bottom grip, paper perforations, and pulling direction all affect whether one sheet tears cleanly without moving the stand.

Can I put a paper towel holder next to the sink?

It can be convenient if the location stays away from direct splashes and leaves room to wipe beneath the base. Keep the paper dry, follow care guidance for the holder and counter, and choose another location if water regularly reaches the roll.

Is a countertop holder better than an under-cabinet holder?

A countertop holder is portable and usually avoids installation, while an under-cabinet holder preserves counter space and creates a fixed location. The better fit depends on available surface area, mounting permission, reach, cabinet clearance, and whether you want to move the roll.

Manual Citrus Juicers: Match the Press to Your Fruit and Routine

Product links are for reference. Verify current details on the retailer page before buying.

Illustrative image of a generic manual citrus juicer with lemons and limes

Illustrative image, not an official product photo.

Short answer

Choose a manual citrus juicer around two things: the fruit you squeeze and the amount of juice you make at one time. A compact hinged press can be convenient for a lemon or lime used while cooking. A bowl-and-reamer design gives you somewhere to collect juice and may be easier to use across several fruit sizes. A larger countertop lever press occupies more room but can make sense for repeated batches. Whichever form you prefer, check the usable fruit opening, handle leverage, drainage holes or strainer, stability, cleaning instructions, and storage footprint. The most elaborate option is not automatically the most useful; the right tool should be easy enough to rinse and put away that you reach for it on an ordinary weeknight.

Search reference

Manual citrus juicer options

Compare the press style, usable fruit size, juice collection, seed control, grip, and care guidance for the way you prepare lemons, limes, or oranges.

View matching options

Start with one week of citrus use

A cocktail garnish, a spoonful of lemon juice for a dressing, and a pitcher of orange juice place very different demands on a juicer. Before looking at handle colors or countertop styling, notice what passes through your kitchen in a typical week. Count the limes squeezed over tacos, the lemons used in marinades, and any larger fruit prepared for drinks. Also note whether you normally need juice straight over a pan or collected in a measured container.

That small inventory points toward a format. A handheld press offers a direct path from fruit to bowl, but its cup must fit the cut fruit. A reamer requires a twisting motion and usually collects the liquid below. A tabletop press keeps the fruit and mechanism on the counter, which changes both storage needs and cleanup. None is universally superior; each moves the effort to a different part of the task.

If possible, measure the widest citrus you buy regularly instead of judging by labels such as “lemon” or “orange.” Produce varies, and a fruit half that sits above a small pressing cup may tilt or spill. Capacity matters more than an advertised fruit list.

Three common pressing styles

Hinged handheld presses

A hinged citrus squeezer places half a fruit between a perforated cup and a pressing surface. Closing the handles forces juice through the openings. This shape is compact and can be fast for finishing a recipe directly over a bowl, pan, or glass. It is worth checking the depth and width of the cup, because the useful capacity may be less obvious than the overall tool dimensions.

Handle length affects leverage as well as drawer fit. Longer handles can provide more mechanical advantage, but they need room to open and may feel awkward over a narrow glass. Look at the hinge area, the edges that meet your hand, and the orientation shown in the instructions. Some presses are loaded with the cut face in a direction that may not seem intuitive at first glance.

Reamers with collection bowls

A reamer uses a ridged cone to break the citrus pulp as the fruit is twisted. Simple handheld reamers release juice into a separate container, while bowl-style versions collect it underneath and may add a strainer or pour spout. This design can be useful when you want to see how much juice has accumulated before adding it to a recipe.

Compare the cone size with the fruit you use. A narrow cone may suit smaller citrus but feel inefficient with a broad orange half; a large cone can be awkward inside a small lime. Also inspect how the strainer, cone, and bowl separate. Removable parts may help with cleaning, but extra seams and tabs add places where pulp can collect.

Countertop lever presses

Countertop presses hold the fruit under a descending cone or cup while a long lever supplies force. They can suit a routine involving several fruit halves, provided there is a stable work surface and enough vertical clearance to raise the handle. They are more of a dedicated station than a drawer tool.

For this style, base dimensions deserve as much attention as height. Check where the juice container sits, whether your usual glass or measuring cup will fit, and how the machine is stabilized. A tall lever may also conflict with an upper cabinet. Review which food-contact pieces detach and how the maker says to clean them before assigning permanent counter space.

Who this is for

  • Home cooks who frequently add fresh lemon or lime juice to sauces, marinades, dressings, and finished dishes.
  • People who want a seed-control step between a citrus half and a drink or recipe.
  • Households replacing a general-purpose hand squeeze with a more repeatable kitchen tool.
  • Drink makers who prepare enough citrus to value a dedicated press but do not want an electric appliance.
  • Cooks comparing a compact handheld squeezer with a collecting reamer or countertop lever press.

Who should skip it

  • Skip a dedicated juicer if citrus appears only occasionally and a fork, spoon, or simple hand squeeze already meets your needs.
  • A small hinged press is a poor match when most of your fruit is too broad to sit fully inside its cup.
  • Avoid a heavy countertop model if it will be stored in a difficult cabinet and lifted out for only one lemon at a time.
  • Choose an electric citrus juicer or another suitable appliance if repeated twisting or handle pressure does not fit your comfort or mobility needs.
  • Do not assume a generic citrus tool is intended for unusually large fruit or non-citrus produce without checking its stated use.

What to verify before buying

  • Usable opening: Compare the inside cup or cone dimensions, not just the total width of the juicer, with the citrus you normally buy.
  • Batch size: Decide whether juice should flow directly into a recipe or collect in a bowl with enough capacity for several fruit halves.
  • Seed and pulp control: Check the size and arrangement of drainage holes, the strainer design, and whether the level of pulp can be adjusted.
  • Leverage and grip: Review handle length, opening span, edge shape, hinge movement, and any grip surface that contacts your hand.
  • Counter stability: For reamers and lever presses, look at base width, feet, and the type of flat surface the instructions call for.
  • Container clearance: Make sure the spout or outlet will align with the glasses, measuring cups, or bowls you expect to use.
  • Cleaning steps: Confirm whether parts separate, whether narrow openings are accessible, and what the current hand-wash or dishwasher guidance says.
  • Storage: Measure the closed handle length, bowl diameter, or full countertop height, including clearance needed to operate a lever.
  • Current materials and contents: Verify food-contact material wording, included strainers or cups, and care notes on the retailer page rather than inferring them from images.

The small details that change daily use

Seed control is often a balance rather than an all-or-nothing feature. Small holes may catch more seeds but can slow the flow when pulp accumulates. Wider openings drain quickly yet may allow small seeds or more pulp through. If a very clear drink matters, you may still prefer to pour through a separate fine strainer. For cooking, a little pulp may be irrelevant, making faster drainage more valuable.

A pour spout helps only when it reaches beyond the rim cleanly. Look at the shape of the collecting bowl and imagine tipping it with wet hands. A broad rim can improve grip, while a marked container may help with recipes only if the markings use units you read and remain visible with the juice inside. Treat any stated measurement marks as a convenience to verify, not as a substitute for a kitchen measuring tool when accuracy matters.

Fruit preparation also affects the experience. Cutting across the middle usually exposes sections to the pressing surface, but the product instructions should guide loading and orientation. A very thick peel or an overfilled cup can make a hinged press harder to close. For a reamer, a stable bowl prevents the twisting motion from turning into a chase across the counter.

Cleaning should be part of the decision

Citrus pulp dries quickly in perforations, around reamer ridges, and beside hinges. A tool that looks efficient during pressing can become inconvenient if it needs a brush after every use. Examine product images for blind corners, narrow slots, overlapping metal, or nonremovable strainers. If the parts separate, consider whether they are intuitive to reassemble and small enough to get lost in a crowded drawer.

Rinsing promptly can keep pulp from drying, but always follow the current care directions. Dishwasher suitability should not be guessed from appearance, and even a listed dishwasher-safe component may have placement guidance. Hinges and joined handles may need more attention than a simple one-piece reamer. Let pieces dry before nesting them so trapped moisture and odors do not undermine the convenience you bought the tool for.

Citrus is also messy around the tool. A collecting bowl can contain splashes, while squeezing directly over cookware reduces extra dishes but may send juice sideways if the fruit shifts. Think about whether you would rather wash one more container or wipe the surrounding counter. Your answer can matter more than a marginal difference in theoretical juice extraction.

Comfort, leverage, and workspace

A manual juicer still requires hand or arm force. With a hinged press, the distance between open handles determines how far the hand must stretch before pressure begins. Handle length changes leverage, but a long, narrow edge can still feel uncomfortable. If dimensions are available, compare them with a utensil you already use comfortably.

Reamers trade squeezing for gripping and twisting. A larger bowl can give the supporting hand more area, while a nonslip base may help on an appropriate clean counter. Countertop lever presses shift more of the action to the arm and shoulder and need a base that stays put. No format removes effort completely, so match the movement to the person who will actually make the juice.

Workspace includes what sits above and beside the juicer. A lever needs an operating arc. A reamer needs elbow room. A handheld press needs space over the receiving vessel and a safe place to rest between fruit halves. Simulate the motion at the intended counter before committing to a larger design.

Limitations

  • Fruit sizes vary, so a press labeled for a type of citrus may not fit every piece you bring home.
  • Manual tools reduce some effort but still require squeezing, twisting, or lever movement.
  • Built-in strainers may not remove every small seed or deliver pulp-free juice.
  • A deeper cup or stronger-looking handle does not by itself confirm durability, capacity, or material quality.
  • Countertop presses consume storage and operating space that may be hard to justify for occasional use.
  • Juice can remain in the pulp or peel with any method; a manual juicer does not guarantee a particular yield.

Alternatives to compare

  • Use a fork or spoon to loosen a lemon half when citrus is an occasional ingredient and perfect seed control is not essential.
  • Pair a basic reamer with a separate fine-mesh strainer when you want flexible pulp control.
  • Consider an electric citrus juicer for frequent, larger batches, while accounting for its cord, noise, parts, and storage.
  • Keep a small hinged lime press near a drink station and a larger bowl reamer in the kitchen if one tool cannot sensibly cover both routines.
  • Use bottled juice only where its flavor, ingredients, storage guidance, and recipe role meet your needs; it is not identical to freshly pressed citrus.

FAQ

Which manual juicer works well for both lemons and limes?

Look for a pressing cup or reamer cone that physically accommodates the range of fruit sizes you buy. A medium hinged press may handle many lemons and limes, while a bowl reamer can offer more flexibility when the sizes vary. Compare usable dimensions rather than relying only on the fruit names in a listing.

Do I put the cut side up or down in a citrus press?

Follow the orientation shown in the instructions for the specific press. Many hinged designs are intended to turn the peel as they close, so the loading direction may feel counterintuitive. Correct orientation helps juice pass through the intended openings instead of escaping around the sides.

Will a manual citrus juicer keep seeds out of the juice?

A perforated cup or strainer can catch many seeds, but the result depends on hole size, seed size, fruit placement, and pulp buildup. If seed-free juice is important, inspect the liquid and use a separate fine strainer when needed.

Is a metal citrus press better than a plastic one?

Material alone does not determine fit or usefulness. Compare the specific tool’s construction, hinge design, food-contact material wording, weight, grip, care guidance, and dimensions. A well-matched design that is easy to clean may serve your routine better than choosing by material category alone.

How do I keep pulp from drying in a manual juicer?

Empty the peel and rinse or clean the tool soon after use, following its care instructions. Pay attention to drainage holes, reamer ridges, strainers, and hinge gaps, then let all parts dry before storage.

Stainless Steel Mixing Bowls for Prep, Baking, and Easy Storage

Product links are for reference. Verify current details on the retailer page before buying.

Illustrative image for a stainless steel mixing bowls buying guide

Illustrative image, not an official product photo.

Short answer

Stainless steel mixing bowls are a good fit when you want durable prep bowls that can handle daily cooking, baking, tossed salads, marinating, and compact cabinet storage. The most useful set is not always the one with the most pieces. Look for a size range you will actually use, a shape that works with whisks and spatulas, rims that are comfortable to hold, and nesting that does not turn the cabinet into a noisy stack. If lids, non-slip bases, measurement marks, or dishwasher care matter to your routine, verify those details before choosing a set.

Search reference

Stainless steel mixing bowl options

Compare current bowl sizes, nesting sets, lid options, base styles, rim shapes, and care instructions before matching a set to your prep space.

View matching options

Start with the way bowls move through your kitchen

A mixing bowl set spends more time moving than sitting still. It may start in a cabinet, move to the counter for chopped vegetables, hold dough while you measure flour, chill a salad in the refrigerator, and then land near the sink. Stainless steel is popular because it is light for its size, difficult to break, and usually easy to rinse quickly. Those strengths matter most when the bowls fit the tasks you repeat every week.

Think about your most common bowl jobs before comparing extras. A small bowl may be enough for whisking a dressing or holding minced garlic. A medium bowl is often the workhorse for pancake batter, chopped produce, or seasoning potatoes. A large bowl helps with salad, popcorn, bread dough, or mixing ingredients without spilling over the edge. If a set skips the sizes you use most, extra pieces can become clutter instead of convenience.

Shape affects daily comfort. A deep, narrow bowl contains splatter and can work well for vigorous whisking, while a wider bowl gives more room for folding, tossing, or coating ingredients. A rounded interior helps a spatula reach the sides. A rolled rim can make a bowl easier to grip, but it also changes how lids fit and how water drains after washing. These small details decide whether a set becomes the one you reach for first.

Who this is for

  • Home cooks who want light, durable bowls for chopping prep, baking, marinating, and side dishes.
  • Small kitchens where nesting storage matters more than decorative serving presentation.
  • Meal-prep routines that need several bowls out at once for washed produce, sauces, dry ingredients, and cooked components.
  • Households that want bowls less fragile than glass or ceramic for busy counters, kids helping in the kitchen, or outdoor serving.
  • Bakers who need a range of bowl sizes for measuring, mixing, proofing, and staging ingredients.

Who should skip it

  • Skip stainless steel if you need microwave-safe bowls; metal should not be used in a microwave.
  • Choose glass if seeing the mixture from the side is important for your baking or prep routine.
  • Consider ceramic or serving bowls if table presentation matters more than lightweight handling.
  • Avoid very large bundled sets if you already own several prep bowls and only need one missing size.
  • Compare plastic or silicone options if low noise, bright colors, or kid-friendly grip matters more than metal durability.

What to verify before buying

  • Check the exact included sizes and capacities instead of relying only on the number of pieces in the set.
  • Confirm whether lids are included, and whether each lid matches a specific bowl size.
  • Review whether bases are plain metal, silicone, rubber-like, or otherwise designed to reduce slipping.
  • Look at rim shape, pour spouts, measurement marks, and interior curve if you bake or whisk often.
  • Verify care instructions, dishwasher guidance, and any warnings about acidic foods, salt, or long soaking.
  • Check nesting height and cabinet clearance, especially if you store bowls under a low shelf.
  • Read what is actually included; accessories in photos may be props rather than part of the set.

Size range, nesting, and counter space

The headline piece count can be misleading because lids, graters, or accessories may be counted alongside bowls. Start by listing the bowl sizes you would use in one normal cooking session. If dinner often involves a salad, a sauce, chopped vegetables, and marinated protein, a set with several mid-size bowls can be more useful than one huge bowl and several tiny ones.

Nesting is helpful only when the stack is stable and easy to separate. Thin bowls can save space, but they may feel more flexible in the hand. Heavier bowls may feel steadier, yet take more effort to move when full. If cabinet space is tight, look for the total nested height and the diameter of the largest bowl. A set that nests neatly but is too wide for the shelf still creates a storage problem.

Counter behavior matters during active prep. A rounded metal bottom can slide on a smooth countertop when whisking quickly. A flat base or non-slip base may feel more planted, but it can add cleaning edges or change dishwasher guidance. If you use a stand mixer, food processor, or kitchen scale nearby, make sure the bowl sizes will fit the workflow instead of crowding every appliance on the counter.

Lids, measurement marks, and cleaning details

Lids can turn mixing bowls into short-term storage containers, which is useful for chopped produce, rising dough, leftovers, picnic sides, or make-ahead ingredients. The tradeoff is storage: lids can warp, disappear, or become the part of the set that takes the most cabinet space. If lids are important, check whether they are described for storage, transport, or leak resistance rather than assuming every lid performs the same job.

Measurement marks sound convenient, but they should not replace careful measuring for recipes that need precision. They are more useful for quick prep decisions, such as estimating salad volume or portioning batter between bowls. If printed or etched marks matter to you, verify how they are shown and whether the markings are likely to remain readable after repeated washing.

Stainless steel usually cleans easily, but it is not maintenance-free. Sticky dough, oil, salt, tomato mixtures, and acidic marinades can leave residue if bowls sit too long. Smooth interiors are easier to wipe than decorative ridges or complicated bases. After washing, nested bowls should dry fully before storage so water does not sit trapped between pieces.

Limitations

  • Stainless steel bowls are not microwave-safe.
  • Metal bowls can be noisier than glass, ceramic, plastic, or silicone when stacked or whisked.
  • Very light bowls may slide on smooth counters unless the base design helps them stay put.
  • Lids, bases, and measurement marks vary widely, so do not assume every set includes the same features.
  • A bowl set will not solve storage problems if the largest bowl is wider than your cabinet or refrigerator space.

Alternatives to compare

  • Glass mixing bowls if you want microwave use, visibility through the sides, or a heavier feel.
  • Plastic prep bowls for lightweight, low-noise handling and color-coded food staging.
  • Ceramic bowls when serving appearance matters more than impact resistance or nested storage.
  • Collapsible bowls for camping, RV kitchens, or extremely tight storage spaces.
  • A single large salad bowl if you already own small prep bowls and only need more tossing capacity.

FAQ

What sizes should a stainless steel mixing bowl set include?

A practical set usually covers small prep, medium mixing, and larger tossing or baking tasks. Instead of chasing the highest piece count, compare whether the included capacities match how you cook, how much counter space you have, and what will fit in your cabinet.

Are stainless steel mixing bowls safe for the microwave?

No. Stainless steel is metal and should not be used in a microwave. If reheating is part of your bowl routine, compare glass, ceramic, or microwave-safe plastic options instead.

Do I need lids with mixing bowls?

Lids are useful if the bowls will also hold leftovers, prepped ingredients, rising dough, or picnic sides. They are less important if the bowls are mainly for active mixing and you already use separate food storage containers.

Why do some mixing bowls have non-slip bases?

A non-slip base can help a bowl stay steadier while whisking, tossing, or stirring on a smooth counter. The tradeoff is that the base may add weight, cleaning edges, or specific dishwasher guidance, so check the current care details.

Is stainless steel better than glass for mixing bowls?

Neither material is better for every kitchen. Stainless steel is light, durable, and easy to nest, while glass is heavier, transparent, and may be useful for microwave reheating if the specific bowl is labeled for that use.

Stovetop Popcorn Makers for Movie Nights and Small Kitchens

Product links are for reference. Verify current details on the retailer page before buying.

Illustrative image for a stovetop popcorn maker buying guide

Illustrative image, not an official product photo.

Short answer

A stovetop popcorn maker is worth considering if you want a dedicated pan or kettle for fresh popcorn without adding a full countertop appliance. The most useful choice is not simply the biggest pot; it is the one that matches your cooktop, batch size, stirring preference, storage space, and cleanup routine. Pay close attention to base compatibility, lid design, handle heat protection, stated capacity, and whether the stirring mechanism looks easy to use while the pan is hot.

Search reference

Stovetop popcorn maker options

Compare cooktop compatibility, batch capacity, stirring handle layout, lid design, cleaning guidance, and storage footprint before choosing a dedicated popcorn pan.

View matching options

Start with your stove and snack routine

Stovetop popcorn makers sit in a practical middle ground. They are more specialized than a regular saucepan, but usually simpler to store than a theater-style machine. Some households use them for weekend movie nights, while others want a quick snack pan that lives near the oils, kernels, and seasoning jars. The right design depends on how often you pop corn, how many people share the bowl, and how much attention you want to give the pan while it heats.

Cooktop fit should come before appearance. A pan that works on a gas flame may not automatically be suitable for an induction surface, and a wide bottom may behave differently on a small electric burner. If you cook on glass, ceramic, induction, or a compact apartment stove, check the current listing for base material, bottom shape, and any cooktop restrictions instead of assuming every stovetop popper works everywhere.

Who this is for

  • Households that make popcorn often enough to justify a dedicated pan instead of improvising with a saucepan each time.
  • Movie-night hosts who want a larger batch than a small microwave bowl can provide.
  • Renters or small-kitchen cooks who prefer stovetop cookware over another plug-in appliance.
  • Snack makers who want more control over oil, kernels, and seasoning than ready-to-eat bags provide.
  • Buyers comparing a hand-crank popper with an air popper, microwave popper, or ordinary lidded pot.

Who should skip it

  • Skip this type if you want a completely hands-off snack appliance; stovetop popcorn still needs heat control and attention.
  • Choose an air popper if avoiding added oil is the main reason you are shopping.
  • Use a simple pot you already own if you make popcorn only a few times a year and have storage concerns.
  • Avoid buying a specialty popper until you confirm that its base is appropriate for your cooktop.

What to verify before buying

  • Confirm cooktop compatibility, especially for induction, glass, ceramic, small electric coils, or portable burners.
  • Check stated capacity and whether it refers to kernels, finished popcorn volume, or an approximate serving size.
  • Look at the stirring system: crank placement, handle shape, lid fit, and whether parts appear removable for cleaning.
  • Review handle materials and heat warnings, because cookware handles can still become hot during extended use.
  • Compare pot depth, lid vents, pouring angle, and whether the lid can be opened safely after popping.
  • Verify cleaning instructions, dishwasher guidance if claimed, replacement part availability, and storage dimensions on the retailer page.

Buying notes for popcorn nights

Capacity is easy to misread because popcorn expands dramatically. A maker advertised for a large finished volume may still require a modest amount of kernels per batch. If your usual serving is one bowl for two people, a smaller pan may heat more evenly and store more easily. If you regularly feed a family room, a wider kettle can be more convenient, but only if the burner supports it and the pan is not awkward to shake, turn, or pour.

Stirring style matters because popcorn can scorch when kernels sit too long on a hot surface. Hand-crank designs are popular because they move kernels and popped pieces while the lid stays closed, but the crank should be comfortable to reach from your normal stove position. A thin knob, a lid that wobbles, or a handle that sits too close to steam may make the routine feel less convenient than expected.

Materials and base construction should be evaluated carefully rather than assumed from the photos. Some buyers prefer lighter pans that are easy to lift and pour; others may prefer a heavier base that feels stable on the burner. If you use induction, the listing needs to say so clearly. If you use a delicate cooktop surface, read the care guidance for sliding, shaking, or lifting the pan.

Cleaning is part of the purchase decision. Popcorn oil, salt, sugar, and seasoning dust can collect around lid hinges, stirring rods, and vents. A smooth interior is easier to wipe than a complicated lid assembly, but you should still follow the current care instructions. If you plan to make sweet or sticky popcorn, check whether the product is designed for that use before assuming it can handle the same cleanup as plain salted popcorn.

Limitations

  • A stovetop popcorn maker does not remove the need to monitor heat; unattended kernels can burn.
  • Batch size depends on the pan design and cooking method, not just the headline capacity.
  • Some models may not work on induction or may have restrictions for glass or ceramic cooktops.
  • Handles, lids, steam vents, and stirring parts can become hot during use.
  • Specialty lids and crank mechanisms can be more awkward to clean than a simple saucepan.

Alternatives to compare

  • A regular lidded saucepan or Dutch oven if you want fewer dedicated tools.
  • An electric air popper if you prefer a plug-in appliance and a lower-oil routine.
  • A microwave popcorn bowl if convenience and compact storage matter most.
  • A larger countertop popcorn machine for parties, game rooms, or frequent group servings.
  • Ready-to-eat popcorn if storage, cleanup, and cooking attention are bigger concerns than customization.

FAQ

Do stovetop popcorn makers work on induction cooktops?

Only some do. Induction compatibility depends on the base material and construction, so check the current product details for explicit induction support before buying.

What size stovetop popcorn maker should I choose?

Choose size by your normal serving routine and burner size. A large pan can be useful for group snacks, but it may be harder to store, heat evenly, or manage on a small stove.

Is a hand-crank lid necessary for popcorn?

It is not strictly necessary, because popcorn can be made in a regular lidded pot. A hand-crank lid can make stirring easier while the lid stays closed, but the handle and mechanism should feel practical for your stove layout.

Can I use a stovetop popcorn maker for sweet popcorn?

Do not assume every model is suited to sugar, caramel, or sticky coatings. Check the current instructions for approved ingredients and cleaning guidance before using anything beyond plain kernels, oil, and seasoning.

How should I clean a stovetop popcorn maker?

Follow the maker’s care instructions. In general, pay attention to oil residue around the lid, crank, vents, and corners, and avoid soaking or dishwashing parts unless the listing or manual clearly allows it.

Digital Kitchen Scales for Baking, Meal Prep, and Everyday Portions

Product links are for reference. Verify current details on the retailer page before buying.

Illustrative image for a digital kitchen scale buying guide

Illustrative image, not an official product photo.

Short answer

A digital kitchen scale is most useful when volume measurements feel too vague: flour for baking, coffee beans, meal-prep portions, pet food scoops, or small pantry ingredients that are easier to weigh than pack into cups. Start with capacity and readability, then compare platform size, tare controls, unit options, display placement, power source, cleaning guidance, and whether the scale stays readable when a bowl or plate sits on top.

Search reference

Digital kitchen scale options

Compare capacity, gram readability, platform size, tare controls, unit choices, and display layout against the bowls, plates, and recipes you use most often.

View matching options

Think about what you actually weigh

Kitchen scales are often sold with similar product photos, but the right one depends on the tasks that repeat in your kitchen. A baker may care about gram precision, quick tare resets, and a display that remains visible under a mixing bowl. Someone portioning leftovers may care more about a flat platform that fits plates and containers. A coffee routine may point toward smaller increments, a compact footprint, and controls that respond quickly.

Before comparing finishes or extra modes, list the containers you already use. A wide dinner plate, a tall mixing bowl, a meal-prep box, and a narrow coffee dripper can all block the display in different ways. If you expect to weigh ingredients directly into a large bowl, display placement and button access can matter as much as the maximum capacity.

Who this is for

  • Home bakers who want more consistent flour, sugar, butter, and dough measurements than measuring cups can provide.
  • Meal-prep cooks who portion grains, proteins, snacks, or leftovers into repeatable servings.
  • Coffee and tea drinkers who weigh beans, loose tea, or water for a steadier routine.
  • Households that split bulk pantry items into containers and want a quick tare function.
  • Anyone comparing a general kitchen scale with measuring cups, measuring spoons, or a more specialized coffee scale.

Who should skip it

  • Skip a kitchen scale if your cooking style is mostly loose, visual, and not affected by small measurement changes.
  • Choose a purpose-built coffee or laboratory-style scale if you need very small increments, timing features, or specialized accuracy claims that a general kitchen scale does not state.
  • Avoid relying on a scale for medical, commercial, shipping, or regulated measurements unless the listing clearly supports that use.
  • Do not buy only by the stated capacity if the display, platform, and controls will be awkward with your usual bowls.

What to verify before buying

  • Check maximum capacity and smallest displayed increment, especially if you switch between heavy bowls and small ingredient amounts.
  • Confirm that the scale supports the units you use, such as grams, ounces, pounds and ounces, or milliliters when appropriate.
  • Look at display placement and whether a wide plate or mixing bowl may hide the numbers.
  • Review tare behavior, button layout, auto-off timing, and whether the scale keeps the reading long enough for your workflow.
  • Compare platform size, surface material, and cleaning instructions for spills, flour dust, sticky syrups, or raw ingredient prep.
  • Verify battery type, charging method, included accessories, and any calibration or care notes on the retailer page.

Buying notes for everyday kitchens

Capacity and readability work together. A high capacity is useful only if the scale still displays small changes in a way that matches your recipes. If you regularly weigh flour into a heavy bowl, remember that the bowl counts against the maximum capacity before you press tare. If you mostly weigh spices, coffee, or small snack portions, look carefully at the smallest increment rather than the headline weight limit.

Platform shape is easy to overlook. A slim rectangular platform stores neatly in a drawer, but a large plate can cover the screen. A broader top may feel steadier for bowls and containers, yet take up more counter space. If the scale will live beside a mixer, coffee setup, or pantry jars, measure that area before choosing an oversized model.

Controls should be simple enough to use with messy hands. Tare is the feature many people use constantly: place a bowl, reset to zero, add an ingredient, reset again, then continue. Separate unit and tare buttons can reduce mistakes, while very small touch controls may be harder to use when the counter is dusty with flour or slightly damp.

Also consider storage and cleaning. A kitchen scale that slides into a drawer gets used more often than one stored in a box. Flat surfaces are easier to wipe, but no scale should be treated like a cutting board or washed as if it were a bowl. Read the current care notes so spills, crumbs, and sticky ingredients do not become the reason the scale stops being convenient.

Limitations

  • A digital kitchen scale does not automatically make every recipe more precise if the recipe itself is written loosely or uses approximate serving sizes.
  • General kitchen scales may not be suitable for extremely small amounts, regulated uses, or commercial measurement needs.
  • Large bowls, plates, and containers can hide the display or make buttons harder to reach.
  • Auto-off timing can interrupt slow prep if the scale powers down before you finish adding ingredients.
  • Spills, heat, soaking, or rough cleaning can damage electronics if the care instructions are ignored.

Alternatives to compare

  • Measuring cups and spoons for quick recipes where exact weight is not important.
  • A coffee scale if you need very small increments, a timer, or a platform sized for brewing gear.
  • A hanging luggage or produce scale for bulky items that do not sit well on a kitchen platform.
  • Portion containers if the goal is repeatable lunch packing without weighing every time.
  • A larger postal-style scale if you routinely weigh heavy containers that exceed kitchen-scale capacity.

FAQ

What capacity should a digital kitchen scale have?

Choose capacity by adding the container and the food together. A heavy mixing bowl plus dough can use more capacity than expected, while small ingredient work depends more on the displayed increment than the maximum number.

Is one-gram readability enough for baking?

One-gram readability is practical for many home baking tasks, but very small amounts such as yeast, salt, spices, or coffee doses may need closer attention. Check the recipe style and the scale’s stated increment before assuming it fits every task.

Why does display placement matter on a kitchen scale?

A bowl, dinner plate, or meal-prep container can cover the display if the screen sits too far under the platform. If you use wide containers, look for product photos or dimensions that show whether the reading remains visible.

What does the tare button do?

Tare resets the displayed weight to zero after you place a bowl or container on the scale. It lets you weigh ingredients inside that container and reset between additions without doing mental subtraction.

Can I wash a digital kitchen scale under running water?

Do not assume that is safe. Most kitchen scales contain electronics, so cleaning depends on the exact design and care instructions. Wipe spills promptly and follow the current guidance on the retailer page.

Electric Can Openers for Safer, Easier Kitchen Prep

Product links are for reference. Verify current details on the retailer page before buying.

Illustrative image for an electric can opener buying guide

Illustrative image, not an official product photo.

Short answer

An electric can opener is worth comparing when manual openers feel awkward, shared kitchens need a simpler setup, or canned goods are part of regular meal prep. Start with the person who will use it most: hand strength, counter reach, cleanup habits, and storage space matter as much as motor style. Then compare whether the opener is countertop or handheld, how it holds the lid, how easy it is to wipe down, and whether the cutting mechanism suits the can sizes you buy most often.

Search reference

Electric can opener options

Compare countertop and handheld designs, lid magnets, cutting style, cleaning access, cord or battery setup, and the can sizes your kitchen uses most.

View matching options

Choose around the kitchen routine

Electric can openers look like small convenience appliances, but the better choice depends on the rhythm of your kitchen. A countertop model can stay ready near the prep area and may be easier for repeated use. A compact handheld model can be easier to store, but it may require more attention to battery status, grip position, and how the opener travels around the lid.

For weeknight cooking, think about the cans you actually open: soup, beans, tomatoes, pet food, broth, or larger pantry-size containers. Taller cans need enough clearance on a countertop unit. Small cans need a cutter and guide that do not feel fussy. If several people share the appliance, visible controls and a stable base can matter more than a sleek shape.

Lid handling deserves a close look. Some openers hold the lid with a magnet after cutting, while others may leave the lid resting on the can. A clean lift can reduce mess, but only if the magnet is placed well and the can is supported securely. Check the current retailer page for the exact lid-removal wording rather than assuming every electric opener works the same way.

Who this is for

  • Home cooks who open canned ingredients often enough that a manual opener feels like a chore.
  • Shared kitchens where guests, relatives, or roommates may prefer a simple, visible can-opening station.
  • Users who want to reduce wrist twisting, hand squeezing, or awkward gripping during meal prep.
  • Pantry-heavy households that open beans, tomatoes, broth, soup, fruit, or pet food on a regular schedule.
  • Small apartment kitchens that need one reliable opener instead of several drawer tools that disappear.

Who should skip it

  • Skip a countertop electric opener if counter space is scarce and you only open cans occasionally.
  • Choose a manual safety opener if you prefer no cord, batteries, motor noise, or removable appliance parts.
  • Avoid buying solely for accessibility needs without checking whether the controls, height, and can support match the intended user.
  • Do not assume one design handles unusually tall, wide, dented, or specialty cans unless the current listing says so clearly.

What to verify before buying

  • Check whether the opener is countertop, handheld, corded, rechargeable, or battery powered.
  • Compare can-size wording, including tall cans, small cans, pop-top cans, and any stated size limits.
  • Review how the lid is lifted or held after cutting, especially if reducing mess or sharp-edge contact is a priority.
  • Look for cleaning instructions around the blade, wheel, magnet, removable lever, and drip-prone areas.
  • Check control placement, button force, base stability, cord length, and storage footprint.
  • Verify material, included accessories, warranty wording, and replacement-part information on the retailer page.
  • Confirm whether photos show styling props or included parts before relying on them for your setup.

Practical buying notes

Countertop models usually make the most sense when the opener has a dedicated spot. Measure the space under cabinets and near outlets, not just the footprint listed online. A tall body can be convenient for standard cans but frustrating if it blocks a low shelf or sits too far from the prep area.

Handheld electric openers trade counter space for storage flexibility. They can be useful in small kitchens, RVs, dorm-style setups, or for occasional use, but they may require more careful positioning. If the listing mentions batteries or charging, check what is included and how the opener signals low power.

Cleaning access is one of the easiest details to overlook. Canned tomato, tuna, pet food, and syrupy fruit can leave residue near the cutting area. A removable cutting assembly or easy-to-wipe surface can be more useful than extra features you will rarely use. If sanitation is a concern, read the care instructions before choosing a model.

For users with limited hand strength or dexterity, the best option is not always the largest machine. Look closely at the start button, lever movement, can alignment, and how the finished can is removed. If possible, compare product photos or videos for the exact motion required, then verify the details on the retailer page.

Limitations

  • Electric can openers still require correct can placement and may struggle with damaged or nonstandard cans.
  • Countertop units add another appliance to clean, store, and keep near an outlet.
  • Handheld units can be less convenient if batteries are weak or the opener is hard to position.
  • A magnetic lid holder does not eliminate the need to handle lids carefully after opening.
  • Accessibility needs vary widely, so a design that helps one person may not suit another user’s reach, grip, or counter height.

Alternatives to compare

  • A manual smooth-edge opener for buyers who want no motor and a different lid edge style.
  • A classic handheld manual opener for occasional use and minimal storage space.
  • A wall-mounted opener if a fixed pantry or utility-room station makes more sense than a countertop appliance.
  • Precut or pull-tab pantry items when the goal is easier opening rather than a new appliance.
  • A compact multitool for camping or emergency kits where electricity is not dependable.

FAQ

Is a countertop or handheld electric can opener better?

A countertop model is usually easier to keep ready for frequent cooking, while a handheld model saves space and can move between rooms or storage areas. Compare the can sizes, storage location, power source, and the user’s ability to align the opener comfortably.

What should I check if I am buying one for someone with hand strain?

Look beyond the word electric. Check button force, lever movement, can alignment, height, grip position, and how the lid is removed. The best choice should reduce twisting and squeezing without creating a new reach or cleanup problem.

Do electric can openers work with all cans?

No single opener should be assumed to handle every can. Tall cans, very small cans, dented cans, pull-tab cans, or specialty shapes may need specific support, so verify the current can-size wording before buying.

How important is the lid magnet?

A lid magnet can make removal cleaner, especially for wet ingredients, but placement and strength vary by design. Check whether the listing explains how the lid is held after cutting and whether the magnet area is easy to clean.

Are electric can openers hard to clean?

They can be simple or annoying depending on the cutter design and food residue. Review whether the blade or lever is removable, how the wheel area is wiped, and whether the care instructions match the foods you open most often.

Countertop Compost Bins for Daily Kitchen Scraps and Odor Control

Product links are for reference. Verify current details on the retailer page before buying.

Illustrative image for a countertop compost bin buying guide

Illustrative image, not an official product photo.

Short answer

A countertop compost bin is useful when you want food scraps to leave the cutting board quickly without walking to an outdoor pile, shared collection bucket, or under-sink container after every meal. Start with the amount of prep waste your kitchen actually creates, then compare lid design, whether the bin uses replaceable filters, how easy the inner surfaces are to wash, and whether the shape fits the counter space where you chop vegetables most often.

Search reference

Countertop compost bin options

Compare compact kitchen scrap bins by capacity, lid style, filter approach, liner compatibility, and cleaning instructions before choosing one for your prep routine.

View matching options

Place the bin where scraps happen

The best countertop bin is not always the largest one. It is the one you can keep near the cutting board without crowding the coffee maker, dish rack, or stove. A small kitchen may need a narrow shape that tucks against a backsplash, while a household that cooks from fresh produce every night may prefer a wider opening that accepts peelings without constant aiming.

Before comparing finishes, picture the route from prep area to final disposal. Some people empty a countertop bin into a municipal food-scrap cart every evening. Others use it as a temporary holder before moving scraps to a backyard compost setup or freezer bag. That routine affects capacity, liner needs, handle comfort, and how much odor control matters between emptying cycles.

Who this is for

  • Home cooks who want a nearby place for vegetable peels, coffee grounds, eggshells, or other accepted food scraps during daily prep.
  • Apartment or townhouse kitchens where the main collection container is outside, in a shared area, or under the sink.
  • Households trying to separate food scraps without adding a full-size trash can to the counter.
  • People who cook in short sessions and want a bin that can be emptied and rinsed without a complicated cleaning routine.
  • Small-space kitchens that need a tidy container instead of an open bowl near the cutting board.

Who should skip it

  • Skip a countertop bin if your local compost or food-scrap program does not accept the scraps you plan to collect.
  • Choose an under-sink or freezer-based setup if visible counter storage bothers you more than an extra trip during prep.
  • Avoid filter-dependent designs if you do not want to buy replacement filters or track their fit over time.
  • Do not assume any bin will control odor indefinitely if it is overfilled, left warm, or cleaned infrequently.

What to verify before buying

  • Check the listed capacity and compare it with how often you realistically plan to empty the bin.
  • Review the lid type, opening width, and whether one-handed use is comfortable for your cooking routine.
  • Confirm whether the bin requires charcoal filters, replacement discs, bags, or brand-specific liners.
  • Look at cleaning instructions, especially whether the parts separate and whether dishwasher use is allowed.
  • Verify the footprint, height, and handle clearance against the counter space where the bin will sit.
  • Check which food scraps are accepted by your local composting option before relying on the bin for everything.

Main buying notes

Capacity is a balancing act. A very compact bin is easier to park beside a cutting board and empty nightly, but it can fill quickly during meal prep. A larger bin reduces trips, yet it also occupies more counter space and may encourage scraps to sit longer. If your kitchen is warm or you cook with strong-smelling ingredients, a smaller bin that gets emptied often may be more practical than a big one with a tight lid.

Lid design matters more than it first appears. A flip lid can be convenient when your hands are messy, while a lift-off lid may be simpler to clean. Some bins rely on airflow and replaceable filters; others focus on a close-fitting lid and frequent emptying. Neither approach removes the need for regular washing, so read how the lid, rim, and filter area are meant to be maintained.

Material and shape should match your habits. Smooth interiors are easier to rinse than seams and sharp corners. A removable inner bucket can make emptying less awkward, but it adds another part to clean. If you plan to use compostable liners, confirm the intended bag size and remember that liner rules vary by local collection program.

Limitations

  • A countertop bin is a temporary scrap holder, not a complete composting system by itself.
  • Odor control depends on what you put inside, how long scraps sit, room temperature, and cleaning habits.
  • Filters, liners, and replacement parts may add ongoing cost or become harder to match later.
  • Some bins are too tall for low cabinets or too wide for crowded prep zones.
  • Local rules for meat, dairy, bones, compostable bags, and paper products can differ widely.

Alternatives to compare

  • Under-sink food scrap bins if you want the counter fully clear.
  • Freezer scrap containers for households that empty less often or want to slow odors between pickups.
  • A small lidded bowl or reused container for occasional vegetable prep.
  • Outdoor compost pails for kitchens with direct access to a garden or backyard bin.
  • Pull-out trash and recycling systems when you want waste sorting hidden inside a cabinet.

FAQ

What size countertop compost bin works for a small kitchen?

For a small kitchen, look for a footprint that fits beside your main prep area first, then choose capacity based on how often you will empty it. A compact bin emptied daily can be more convenient than a larger bin that blocks counter space.

Do countertop compost bins stop odors completely?

No countertop bin should be expected to stop odors completely. Lid fit, filters, airflow, food type, room temperature, and emptying frequency all matter. Plan on regular rinsing and do not overfill the container.

Are charcoal filters necessary for a kitchen scrap bin?

They are not always necessary, but some designs are built around them. If a bin uses filters, verify the filter size, replacement schedule, and replacement source before buying so the ongoing maintenance is clear.

Can I use compostable bags in a countertop compost bin?

Only if the bin size fits the bags and your local composting program accepts that liner type. Some programs restrict compostable bags, so check local guidance before making liners part of your routine.

Should a compost bin go on the counter or under the sink?

Choose the counter if quick access during chopping is the priority. Choose under-sink storage if you dislike visible containers or have very limited counter space. The better choice is the one you will actually empty and clean consistently.

Collapsible Colanders for Small Kitchens and Quick Rinsing Jobs

Product links are for reference. Verify current details on the retailer page before buying.

Illustrative image for a collapsible colander buying guide

Illustrative image, not an official product photo.

Short answer

A collapsible colander makes the most sense when you need a real draining tool but do not want a bulky bowl-shaped strainer taking over a small cabinet. Compare options by expanded capacity, collapsed height, sink or pot fit, handle stability, heat guidance, hole pattern, base design, and how easily food residue can be cleaned from the folds.

Search reference

Collapsible colander options

Compare capacity, collapsed height, handle layout, heat guidance, and cleaning instructions before choosing a design for your kitchen.

View matching options

Match the colander to the jobs that repeat

Collapsible colanders look simple, but they are not all built for the same routine. A single-person apartment kitchen may need a small tool for berries, canned beans, and a serving of pasta. A family kitchen may need a wider design that can drain vegetables or a larger pot without flexing awkwardly. The better choice starts with the task that happens several times a week, not the largest capacity shown in a product photo.

Storage is the main reason to consider this style. A rigid colander can be easier to grab and rinse quickly, while a collapsible one earns its space by folding flatter, sliding into a drawer, or hanging near the sink. That folding design also introduces details worth checking: hinge feel, rim stiffness, how the base sits when expanded, and whether the folds trap grains, sauce, or vegetable scraps during washing.

Who this is for

  • Apartment cooks who need a draining tool that can share space with pans, lids, and mixing bowls.
  • Households that rinse produce often but do not want a large rigid colander on the counter.
  • People who cook pasta, grains, canned beans, or frozen vegetables in modest portions.
  • RV, dorm, or vacation-rental kitchens where compact storage matters as much as capacity.
  • Anyone replacing a cluttered set of strainers with one easy-to-store everyday option.

Who should skip it

  • Choose a rigid colander if you frequently drain very heavy batches or want the sturdiest possible shape.
  • Skip compact designs if you regularly cook for a crowd and need a large, stable bowl.
  • Avoid over-the-sink styles if your sink width, faucet position, or counter layout is not a good match.
  • Do not assume a collapsible model is suitable for boiling water, dishwasher heat, or direct contact with hot cookware unless the listing says so clearly.

What to verify before buying

  • Check expanded dimensions and usable capacity against your typical pasta pot, produce bowl, or meal-prep portions.
  • Compare collapsed height with the drawer, shelf, or cabinet space where you plan to store it.
  • Review the material wording and heat guidance, especially if you will drain hot pasta or blanched vegetables.
  • Look at handle placement, rim stiffness, and whether the base or feet keep food above the sink surface.
  • Confirm the hole size and pattern for small grains, berries, beans, leafy greens, and pasta shapes you commonly prepare.
  • Read the cleaning instructions for folds, seams, gaskets, and dishwasher placement.

Main buying notes

Capacity can be misleading if the colander flexes when full. A deep bowl may hold more food, but it also needs a stable base and handles that are comfortable when the contents are hot or wet. If you drain pasta directly from a pot, look for clear information about heat limits and grip surfaces. If you mostly rinse berries or herbs, a smaller bowl with fine enough holes may be more useful than a larger pasta-focused design.

The collapsed shape deserves as much attention as the expanded shape. Some colanders fold nearly flat, while others still keep a raised rim or bulky handles. Measure the drawer or cabinet slot where the tool will live. A design that stores vertically beside cutting boards may work better in one kitchen, while a flat drawer-friendly shape may work better in another.

Cleaning is the tradeoff. Collapsible sides can save space, but folds and seams can hold starch, seeds, or vegetable bits if the tool is rinsed quickly and put away wet. If you use the colander for oily foods, noodles, or sauced leftovers, check whether the manufacturer gives specific hand-washing or dishwasher guidance. A simple shape with fewer creases may be easier to maintain than a highly compact design with many folds.

Limitations

  • Collapsible colanders may feel less rigid than traditional metal or plastic colanders when loaded heavily.
  • Fold lines and seams can trap food residue if they are not washed and dried carefully.
  • Heat tolerance varies by material and should not be guessed from appearance.
  • Over-the-sink models depend on sink width, counter layout, and handle extension range.
  • Very compact colanders may be too small for family-size pasta, large leafy greens, or batch cooking.

Alternatives to compare

  • A stainless steel colander for maximum rigidity and frequent hot-food draining.
  • A fine mesh strainer for quinoa, rice, herbs, tea, or small ingredients that slip through larger holes.
  • A salad spinner if washing and drying greens is the main task.
  • A clip-on pot strainer when storage space is extremely tight and the pot shape is compatible.
  • A nesting mixing bowl and strainer set if you want prep, rinsing, and serving pieces that store together.

FAQ

What size collapsible colander is best for a small kitchen?

Choose the smallest size that still handles your repeated jobs. For many small kitchens, that means enough capacity for everyday produce or a modest pasta portion, with a collapsed shape that fits a drawer, narrow cabinet slot, or hanging rail.

Can a collapsible colander be used for hot pasta?

Only if the current listing clearly supports that use. Check material wording, heat guidance, handle design, and cleaning instructions before draining boiling water or hot food through a collapsible tool.

Are over-the-sink collapsible colanders worth it?

They can be convenient when the handles fit your sink securely and leave enough room around the faucet. Measure your sink width and consider where water will drain before choosing this style.

What hole pattern should I look for?

Larger holes drain pasta and vegetables quickly, while smaller holes are better for berries, beans, and some grains. If you cook tiny grains often, compare a fine mesh strainer instead of relying on a standard colander.

How do I keep a collapsible colander clean?

Rinse the folds and seams right after use, then wash according to the maker’s instructions and let the tool dry fully before collapsing it for storage. This matters most after starchy foods, seeds, herbs, or oily leftovers.

Compact Dish Drying Racks for Small Counters and Everyday Cleanup

Product links are for reference. Verify current details on the retailer page before buying.

Illustrative image for a compact dish drying rack buying guide

Illustrative image, not an official product photo.

Short answer

A compact dish drying rack is most useful when you wash a few items by hand, live with limited counter space, or need a daily landing spot for cups, utensils, baby bottles, coffee parts, or lunch containers. The rack should fit the real counter area beside your sink, drain in a way that works with your sink edge, hold the dish types you use most, and leave enough room to wipe the counter instead of creating a permanent wet corner.

Search reference

Compare compact dish drying rack options

Use the search page to compare current footprints, drainage trays, utensil holders, plate slots, foldable parts, and material notes before choosing a rack for your sink area.

View matching options

The counter space test comes first

Small drying racks look simple, but the deciding measurement is not only the product width. The useful question is how the rack will sit beside your sink after a normal meal cleanup. A rack that technically fits can still block a coffee maker, crowd a cutting board, or leave no room for a sponge and hand soap.

Before comparing designs, measure the counter area where water can safely drain and where dishes will not interfere with meal prep. Include the distance from the sink rim, backsplash, faucet handle, wall outlet, and any appliance that normally stays on the counter. If the rack has a spout or angled tray, check whether that drain path can reach the sink without hanging awkwardly over a raised rim.

Capacity should match the household habit. A narrow rack can be enough for one or two people who mostly use a dishwasher and hand-wash fragile items. A taller two-tier rack may hold more, but it can feel bulky in a tiny kitchen and may block window light, cabinets, or faucet movement. Compact should mean easier daily cleanup, not just a smaller version of a rack that still dominates the counter.

Who this is for

  • Apartment kitchens, studio spaces, dorm-style setups, and small counters where a full-size rack feels too permanent.
  • Households that use a dishwasher but still hand-wash knives, pans, mugs, water bottles, or delicate items.
  • Coffee and tea stations that need a place for mugs, lids, filters, reusable straws, or brewer parts to dry.
  • One- or two-person kitchens where a modest rack is easier to empty than a large dish drainer.
  • Buyers who want a removable drying station rather than an installed over-sink system.

Who should skip it

  • Large households that regularly air-dry a full meal of plates, bowls, cookware, and utensils at once.
  • Kitchens with almost no safe drainage path beside the sink, unless a separate absorbent mat is part of the plan.
  • Anyone who needs a rack for heavy cookware without confirming weight guidance and slot spacing on the current listing.
  • Counters with delicate surfaces where standing water, tray edges, or metal feet could become a problem without protection.

What to verify before buying

  • Measure the rack footprint and the larger operating area, including space for the tray, spout, utensil cup, and items leaning outward.
  • Check whether drainage runs directly into the sink, collects in a removable tray, or depends on a separate mat.
  • Compare plate slot spacing, cup rails, utensil compartments, and flat zones for lids or small containers.
  • Review material wording, coating notes, feet design, and care instructions instead of assuming every rack handles water the same way.
  • Confirm whether the utensil holder, drainboard, cutting board holder, bottle posts, or cup hooks are included in the current option.
  • Look at height if the rack will sit under cabinets, near a window ledge, or beside a faucet handle that swings sideways.
  • Check whether the rack folds, disassembles, or has removable parts if storage between uses matters.

Buying notes for small-kitchen cleanup

Drainage style changes the whole experience. A rack with an angled spout can be convenient when the counter is level with the sink and the spout reaches cleanly over the edge. If the sink has a raised lip or the rack must sit farther away, a removable tray may be more practical because you can empty it manually. A drying mat is simpler still, but it may need more frequent laundering and does not separate items as neatly.

Think about the dishes you actually wash by hand. Plate slots are helpful only if they fit your dinner plates, small plates, or cutting boards without tipping. A household that washes many mugs may prefer rails or open space over closely packed plate dividers. If reusable bottles are common, check whether tall pieces can stand securely or whether they will make the rack top-heavy.

Utensil storage deserves a closer look. A narrow utensil cup saves room, but forks and spoons can bunch together and dry slowly if the compartment is too tight. Divided compartments can help, while removable cups are easier to rinse. If sharp knives are usually hand-washed, consider whether the rack encourages safe placement rather than leaving blades loose in a crowded cup.

Materials and coatings should be judged by care habits, not by appearance alone. Stainless-look metal, coated wire, plastic trays, silicone edges, and bamboo accents can all appear in this category. The most practical rack is one you can clean around, lift easily, and dry before buildup appears. Check current care guidance if dishwasher-safe parts, rust resistance wording, or hand-wash recommendations matter to you.

Limitations

  • Search results can change, so the linked page may show different sizes, accessories, and drainage layouts over time.
  • Compact racks trade capacity for counter space; they may require more frequent unloading after larger meals.
  • Product photos may not show how the drain spout lines up with your exact sink rim or countertop slope.
  • A rack can help dishes dry, but it does not prevent water spots, mineral buildup, or mildew if the tray is not cleaned.
  • Tall plates, heavy pans, oversized cutting boards, and water bottles may not fit securely in every compact design.

Alternatives to compare

  • A dish drying mat if you need a flat, storable surface for occasional hand-washing.
  • An over-sink roll-up rack when you want drying space that can disappear after use.
  • A two-tier dish rack if vertical capacity matters more than a low profile.
  • A sink caddy plus towel setup for kitchens that only hand-wash a few small items.
  • A larger standard dish drainer if your household regularly air-dries full place settings.

FAQ

How small should a compact dish drying rack be?

It should be small enough to leave usable counter space after the rack, tray, and drying dishes are in place. Measure the full working area, not just the base width listed in a product title.

Is a drain spout better than a removable tray?

A drain spout is convenient when it reaches the sink cleanly. A removable tray may work better when the sink has a raised rim, the rack sits away from the edge, or you want to empty collected water by hand.

Can a compact rack hold pots and pans?

Some compact racks can handle a small pan or lid, but not every design is meant for heavy cookware. Check slot spacing, base stability, and current weight or use guidance before relying on it for pans.

What is better for a tiny apartment kitchen, a rack or a mat?

A rack keeps items separated and can improve airflow, while a mat stores flat and takes less visual space. If you wash only a few cups or utensils, a mat may be enough; if plates and bottles need to stand upright, a rack is usually easier.

How do I keep a dish drying rack from becoming a wet corner?

Empty it regularly, wipe the counter underneath, clean the tray or spout, and leave enough clearance for airflow. A smaller rack only helps if it is easy to lift and clean around during normal kitchen routines.

Insulated Lunch Bags for Workdays, Commutes, and Simple Packed Meals

Product links are for reference. Verify current details on the retailer page before buying.

Illustrative image for an insulated lunch bag buying guide

Illustrative image, not an official product photo.

Short answer

An insulated lunch bag is useful when you carry food often enough that a plain tote, backpack pocket, or disposable bag feels messy. The best choice is not simply the biggest bag with the thickest-looking walls. Match the interior size to your usual containers, leave room for an ice pack when needed, check how the liner cleans, and make sure the handle or strap suits the walk from home to car, transit, classroom, or office refrigerator.

Search reference

Insulated lunch bag options

Compare interior dimensions, liner materials, closure styles, strap layouts, and cleaning notes before choosing a bag for your packed-meal routine.

View matching options

Start with the lunch you actually pack

A lunch bag can look compact on a counter and still be frustrating if your containers must be tilted sideways. Before comparing styles, line up a typical meal: the main container, a drink if you carry one, utensils, napkins, a snack, and any ice pack you normally use. Measure the tallest container and note whether it needs to stay upright.

Soft-sided lunch bags are forgiving, but they are not magic. A narrow bag may fit a sandwich and fruit well, while a wider rectangular bag may be better for meal-prep containers. Tall tote-style bags can work for bottles and stacked boxes, but small items may disappear at the bottom. If you carry lunch inside another bag, the outside dimensions matter as much as the interior capacity.

Insulation also depends on the whole routine. A bag may help separate food from the rest of your belongings, but perishable food still needs appropriate handling, cooling, and timing. Treat any cooling-duration wording as something to verify in the current listing and with your actual commute conditions.

Who this is for

  • Office workers who carry a packed lunch, snacks, or drinks several days a week.
  • Commuters who want food containers separated from laptops, notebooks, or gym clothes.
  • Students, teachers, and caregivers who need a reusable lunch carrier without choosing a bulky cooler.
  • Meal-prep routines built around one or two containers plus a small ice pack.
  • Households replacing disposable bags with something easier to wipe, zip, and reuse.

Who should skip it

  • Skip a lunch bag if you need a hard cooler for long outdoor trips, hot weather, or several meals for a group.
  • Choose a backpack or tote with a dedicated food compartment if you already carry too many separate bags.
  • Avoid very small designs if your containers are rigid, tall, or likely to leak when tipped.
  • Do not rely on insulation alone when food safety depends on specific temperature control.

What to verify before buying

  • Compare the stated interior dimensions with your regular containers, bottle, utensils, and ice pack.
  • Check whether the bag is meant to stand upright, fold flat, or stretch around wider containers.
  • Review the liner wording, seam construction, and cleaning instructions before assuming spills will wipe away easily.
  • Look at the closure style, such as zipper, roll-top, flap, drawstring, or hook-and-loop fastening.
  • Confirm the carrying setup: top handles, shoulder strap, crossbody strap, backpack attachment, or luggage sleeve.
  • Check pockets only if you will actually use them for utensils, napkins, keys, or small snacks.
  • Verify any claims about leak resistance, cooling time, included ice packs, and care limits on the retailer page.

Buying notes for everyday use

Interior shape is often more important than listed capacity. A boxy lunch bag may hold rectangular meal containers neatly, while a rounded or tapered design can waste space around square boxes. If your lunch includes soup, dressing, or cut fruit, choose the container first and then find a bag that lets it sit flat.

Liner care deserves attention because lunch bags collect crumbs, condensation, and occasional spills. Smooth liners are generally easier to wipe than textured corners, but seams, folds, and zipper tracks can still trap moisture. If the bag will be used by kids or carried daily on public transit, simple cleaning may matter more than decorative fabric.

The handle arrangement changes how a lunch bag feels after the first week. A short top handle is fine from kitchen counter to car, but a shoulder strap or crossbody option can be easier for walking commutes. If the bag will ride inside a backpack, a bulky handle may be less useful than a slim rectangular profile.

Extra pockets can be helpful, but they also add places to forget utensils, packets, or receipts. A small front pocket is practical for napkins and flatware. Large outside pockets are less useful if they make the bag harder to fit in an office fridge or a crowded shelf.

Limitations

  • Insulated lunch bags vary widely, and photos alone cannot confirm how long food will stay at a desired temperature.
  • Soft bags may compress, tip, or lose shape when packed with heavy containers.
  • Liners can stain, hold odors, or wear at seams if spills are not cleaned promptly.
  • Zippers, handles, and straps may matter more for daily comfort than insulation thickness.
  • Large bags can be inconvenient in shared refrigerators, lockers, small cars, or crowded backpacks.

Alternatives to compare

  • Hard-sided personal coolers for longer outdoor use or heavier ice packs.
  • Bento boxes with built-in compartments when portion control and compact packing matter most.
  • Backpack coolers if you need hands-free carrying for parks, sports sidelines, or longer walks.
  • Reusable food storage containers placed in an existing tote for short trips where insulation is not needed.
  • Stainless steel food jars for soups or hot meals when the meal type suits that design.

FAQ

What size insulated lunch bag should I choose?

Start with the containers you already use. The bag should hold them upright with enough space for an ice pack, utensils, and a small snack, but it should not be so large that food slides around or the bag becomes awkward in a refrigerator.

Is a zipper lunch bag better than a flap closure?

A zipper usually gives a more enclosed shape, while flap or roll-top designs can be quick to open and may adjust around taller items. The better choice depends on whether you prioritize tidy packing, easy access, or flexibility for different container sizes.

Can I put an insulated lunch bag in a backpack?

Sometimes. Check the outside dimensions and the shape of the handle before assuming it will fit. A slim rectangular lunch bag is usually easier to pack than a wide boxy cooler, but rigid containers still need enough room to stay level.

How should I think about ice pack space?

Leave space for the ice pack as part of the normal load, not as an afterthought. If the bag is full before the ice pack goes in, you may end up squeezing containers, bending the liner, or leaving out the cooling piece you intended to use.

What cleaning details matter most?

Look for clear care instructions, a liner that can be wiped without soaking, and corners that are not overly hard to reach. If the bag will carry sauces, fruit, or condensation-prone items, cleaning access is more important than decorative exterior details.

Choosing Glass Food Storage Containers for Leftovers and Meal Prep

Product links are for reference. Verify current details on the retailer page before buying.

Illustrative image for a glass food storage containers buying guide

Illustrative image, not an official product photo.

Short answer

Glass food storage containers are worth comparing when you want a reusable way to store leftovers, prep lunches, or move food from refrigerator to microwave without switching bowls. Start with the shapes and capacities you actually use, then compare lid design, nesting space, weight, oven or microwave guidance, dishwasher notes, and how easy replacement lids may be to find later.

Search reference

Glass food storage container options

Compare set sizes, lid styles, shape mixes, and care instructions, then verify current details on the retailer page before choosing.

View matching options

Think in meals, not just pieces

A large container set can look generous in a listing, but the useful count depends on how your household stores food. A person packing lunches may need a few shallow rectangular containers that fit a bag neatly. A family saving dinner leftovers may prefer deeper bowls, larger rectangles, or several medium sizes that stack in the refrigerator without hiding the food inside.

The lids matter as much as the glass. Some sets use snap-lock tabs, some use softer press-on lids, and some are designed mainly for storage rather than carrying. If you plan to take soup, sauce, or dressed salads outside the home, read the lid wording carefully and avoid assuming every container is leakproof, freezer safe, or suitable for reheating with the lid attached.

Who this is for

  • Households that regularly store leftovers and want containers that show contents clearly in the refrigerator.
  • Meal-prep routines built around lunches, cut fruit, cooked grains, or ready-to-reheat portions.
  • Kitchens where stain resistance and odor control matter more than the lightest possible container.
  • People replacing mismatched plastic tubs with a smaller set of predictable shapes.
  • Anyone who wants containers that can double as serving bowls when the design and care instructions allow.

Who should skip it

  • Skip glass if you need the lightest option for commuting, school bags, hiking, or frequent travel.
  • Choose another material if containers will often be handled by young children or used on hard outdoor surfaces.
  • Avoid large sets if your cabinets cannot spare room for heavier bowls and loose lids.
  • Do not buy for oven use unless the listing clearly states the glass type, temperature guidance, and lid restrictions.

What to verify before buying

  • Confirm the listed capacities and compare them with your usual portions, not just the number of pieces in the set.
  • Check whether the piece count includes lids, because a 24-piece set may mean 12 containers and 12 lids.
  • Review lid claims for leak resistance, freezer use, microwave use, dishwasher placement, and replacement availability.
  • Compare container shapes with your refrigerator shelves, lunch bag, dishwasher rack, and cabinet space.
  • Look for clear care instructions about thermal shock, hot ovens, sudden temperature changes, and chipped glass.
  • Verify whether containers nest with lids off and whether lids stack together without becoming difficult to match.

Main buying notes

Shape is the first practical choice. Rectangular containers make efficient use of refrigerator shelves and lunch bags, while round bowls can be easier for soups, grains, and stirring. Shallow containers cool food quickly and keep single portions visible, but deeper containers may work better for stews, salad greens, or batch-cooked ingredients.

Lid construction affects daily satisfaction. Snap-lock lids can feel secure, yet the tabs and gaskets may need more careful washing. Flexible press-on lids are simple, but they may not be the best choice for carrying liquids. If the listing mentions removable seals, check how they are cleaned and whether replacements are sold separately.

Glass is also heavier than many alternatives. That weight can make a container feel sturdy on the table, but it can be awkward in a crowded lunch bag or high cabinet. A smaller coordinated set may be more useful than a large bundle with sizes you rarely reach for. If you cook in batches, count the containers needed for your typical week rather than choosing the largest set by default.

Limitations

  • Glass containers can chip, crack, or break if dropped, stacked carelessly, or exposed to temperature changes outside the maker’s guidance.
  • Lids may stain, warp, trap odors, or wear out before the glass bases do.
  • Leak resistance varies by design and should not be assumed for soups, sauces, or commuting.
  • Heavier containers may be inconvenient for kids, office bags, picnics, or upper cabinets.
  • Some sets include awkward sizes that increase the piece count without matching everyday portions.

Alternatives to compare

  • Plastic food storage containers for lighter bags, lower weight, and casual travel.
  • Stainless steel containers for durable dry storage or packed lunches where microwave reheating is not needed.
  • Silicone bags for flexible freezer storage and compact empty storage.
  • Mason jars for soups, overnight oats, sauces, or pantry ingredients when the shape fits the task.
  • Disposable containers for sending food home with guests or taking meals where returns are unlikely.

FAQ

Are glass food storage containers better than plastic?

They solve different problems. Glass is useful when you care about visibility, stain resistance, and reheating guidance, while plastic is usually lighter and less fragile. The better choice depends on where the container will be used and who will carry it.

What size containers are most useful for meal prep?

Many meal-prep routines work best with several medium rectangular containers for single portions, plus a few larger containers for batch-cooked ingredients. Check the listed capacities against your usual lunches instead of relying on photos alone.

Can glass containers go from freezer to microwave?

Do not assume that all glass containers can handle sudden temperature changes. Read the current care instructions for freezer use, thawing, microwave use, lid position, and thermal shock warnings before buying or reheating.

Should I choose round or rectangular containers?

Rectangular containers usually store more efficiently in refrigerators and bags. Round containers can be comfortable for soups, stirring, or serving. A mixed set can help if you store both portioned meals and loose leftovers.

Do replacement lids matter?

Yes. Lids often wear out before the glass bases, especially if they have tabs or removable seals. If you expect to keep the set for years, check whether replacement lids are available for the exact shapes and sizes.

Choosing Silicone Baking Mats for Everyday Sheet Pan Cooking

Product links are for reference. Verify current details on the retailer page before buying.

Illustrative image for a silicone baking mats buying guide

Illustrative image, not an official product photo.

Short answer

Silicone baking mats are worth comparing if you want a reusable liner for cookies, roasted vegetables, sticky dough work, or routine sheet pan cleanup. The best fit depends on pan size first, then temperature guidance, mat thickness, edge reinforcement, surface texture, cleaning instructions, and whether you need a single liner, a matched set, or different sizes for different pans.

Search reference

Silicone baking mat options

Compare mat sizes, set configurations, temperature guidance, and care notes, then confirm the details on the retailer page.

View matching options

Start with the pan you already use

A baking mat only helps when it fits the pan that comes out of your cabinet most often. A mat that is slightly too large can buckle at the corners, while a much smaller one may leave exposed areas that still need parchment or extra cleanup. Before comparing colors or printed measurement guides, measure the usable flat surface inside your sheet pan and compare it with the listed mat dimensions.

Silicone mats are commonly marketed for baking, but many households also use them for sheet pan dinners, freezing small items, rolling dough, or protecting a work surface during sticky prep. Those use cases point to different buying details: a cookie baker may care about even spacing and cleanup, while a meal-prep cook may care more about fit, edges, and whether strongly seasoned foods are easy to wash away.

Who this is for

  • Home bakers who regularly line sheet pans for cookies, pastries, or sticky dough.
  • Meal-prep cooks who want a reusable surface for roasted vegetables or small freezer projects.
  • Households trying to reduce routine parchment use without changing every baking habit.
  • People who own a few standard sheet pans and want liners that can stay paired with those pans.
  • Apartment kitchens where compact storage and quick cleanup matter more than specialty bakeware.

Who should skip it

  • Skip silicone mats if you mainly need disposable liners for travel, potlucks, or messy shared kitchens.
  • Use parchment or a pan-specific liner when a recipe clearly calls for it or warns against silicone.
  • Avoid buying by color alone if the listing does not clearly state dimensions, temperature guidance, and care instructions.
  • Do not assume every mat is suitable for broilers, grills, direct flame, cutting, or sharp tools.

What to verify before buying

  • Measure the inner flat area of your sheet pan and compare it with the mat dimensions, not just the pan’s outer label.
  • Check the stated temperature range and whether it matches your usual baking or roasting temperatures.
  • Review cleaning instructions, including dishwasher guidance and any notes about oils, staining, or odors.
  • Confirm whether the set includes half-sheet, quarter-sheet, round, or toaster-oven sizes.
  • Look for clear wording around food-contact materials and any certifications you personally require.
  • Verify storage recommendations if you plan to roll the mat, stack it, or keep it inside a pan.

Main buying notes

Fit is the most practical filter. Many pans are described with familiar names such as half sheet or quarter sheet, but rim shape and interior space can vary. If the mat has printed borders or measurement marks, make sure those markings will still sit flat inside your pan rather than curling up the sides.

Thickness and construction also affect everyday use. A very thin mat may feel easier to roll, while a heavier one may feel more stable when you lift dough or slide cookies off the pan. Some mats have reinforced edges or fiberglass-style internal structure; if a listing mentions those details, read the care instructions carefully so you know whether the mat can be folded, cut, or used with metal utensils.

Think about cleanup before choosing a large set. Silicone can reduce stuck-on residue, but it still needs proper washing and drying. If you often cook with garlic, spice blends, cheese, or oily marinades, check whether the seller provides specific cleaning guidance. A two-mat set may be enough for baking batches, while a mixed-size set can be more useful for small pans, toaster ovens, or freezer trays.

Limitations

  • Silicone mats are not universal replacements for parchment paper, foil, greased pans, or recipe-specific liners.
  • They can retain odors, show stains, or feel greasy if washed or stored poorly.
  • Most should not be cut, placed over direct flame, used under a broiler, or treated as a cutting board.
  • Printed measurement marks and borders may fade or become less useful over time depending on care.
  • A mat that does not match your pan size can wrinkle, slide, or leave exposed hot spots.

Alternatives to compare

  • Parchment paper for recipes that need disposable release or easy transfer.
  • Aluminum foil when the goal is pan protection rather than a nonstick baking surface.
  • Unlined sheet pans when browning, airflow, or direct pan contact is important.
  • Pastry mats for countertop rolling and measuring rather than oven use.
  • Pan-specific reusable liners if you need a precise fit for toaster ovens or specialty pans.

FAQ

Are silicone baking mats the same as parchment paper?

No. Both can help with release and cleanup, but they behave differently with heat, moisture, browning, and recipe instructions. If a recipe specifically calls for parchment, foil, or an unlined pan, follow the recipe unless the mat maker says the use is appropriate.

What size silicone baking mat should I buy for a half-sheet pan?

Measure the usable flat area inside your pan and compare it with the listed mat dimensions. Pan names can be helpful, but the rim shape and interior surface matter more than the label.

Can silicone baking mats go in the dishwasher?

Some listings allow dishwasher cleaning and others recommend hand washing. Check the current care instructions before buying, especially if you use oily marinades, cheese, or strongly seasoned foods.

Do I need one mat or a set?

One mat can work if you bake occasionally on a single pan. A two-pack helps with batch baking, while mixed sizes are better if you use quarter sheets, toaster-oven pans, or freezer trays.

Can I cut a silicone baking mat to fit a smaller pan?

Do not assume that cutting is safe. Many mats are designed to stay intact, and cutting can expose internal layers or damage the edge. Look for a smaller size instead unless the manufacturer clearly says trimming is allowed.

Magnetic Measuring Spoons for Small Kitchens and Busy Drawers

Product links are for reference. Verify current details on the retailer page before buying.

Illustrative image for a magnetic measuring spoons buying guide

Illustrative image, not an official product photo.

Short answer

Magnetic measuring spoons make the most sense when a kitchen drawer is crowded, loose measuring spoons keep separating, or you want a set that stays nested between baking sessions. Look beyond the magnetic feature itself: the useful details are measurement readability, spoon shape, whether the set reaches into spice jars, how the pieces separate during use, and whether the material and care instructions match daily cooking habits.

Search reference

Compare magnetic measuring spoon sets

Use the search page to compare current spoon counts, nested designs, measurement labels, material wording, and care instructions before choosing a set for your kitchen drawer.

View matching options

Why the magnetic part matters

A standard measuring spoon set can work perfectly well, but many sets rely on a ring or clip that becomes annoying when you need only one spoon. Magnetic sets try to solve that drawer problem by letting the pieces stack together while still coming apart individually.

That convenience is most helpful in kitchens where measuring tools are used often but storage space is limited. A nested set can sit in a narrow drawer compartment, near a baking station, or beside spice jars without spreading into a loose pile. The magnet should be treated as a storage feature, not as proof that the set is better for every cook.

The real decision is whether the set makes common tasks easier. For baking, clear teaspoon and tablespoon markings matter. For spices, a narrow spoon may reach into jars more easily than a wide round bowl. For meal prep, durable labels and simple cleaning may matter more than a decorative finish.

Who this is for

  • Home cooks who keep losing individual measuring spoons in a crowded drawer.
  • Bakers who want commonly used teaspoon and tablespoon sizes easy to find.
  • Small-kitchen shoppers looking for utensils that nest compactly without a bulky ring.
  • People who measure spices, extracts, baking powder, or seasoning blends often.
  • Shared households that need tools to return to the same place after washing.

Who should skip it

  • Anyone who already likes a ring-bound set and does not want loose individual pieces during cooking.
  • Buyers who need laboratory-level precision rather than everyday kitchen measuring tools.
  • Kitchens where the spoons will be stored on a magnetic rail, unless the current listing clearly supports that use.
  • Shoppers who cannot verify size markings, included measurements, or care instructions from the current product page.

What to verify before buying

  • Check the included measurements, especially whether the set covers the spoon sizes you use most.
  • Look for clear markings that are etched, stamped, engraved, or otherwise described in the listing.
  • Compare spoon shape: narrow oval spoons can be useful for spice jars, while rounder bowls may feel easier for liquids.
  • Confirm whether the spoons are single-ended, double-ended, or shaped for both dry and liquid ingredients.
  • Read the material wording and care guidance instead of assuming every set has the same stainless steel grade or finish.
  • Review how the magnets are positioned so the spoons nest securely but separate without a fight.
  • Check whether the current option includes a leveler, storage case, ring, or other accessory you may or may not want.

Buying notes for real kitchen use

Measurement labels deserve more attention than the product photo. A spoon that looks tidy in a stack can still be frustrating if the size marking is tiny, printed in a place that wears down, or hard to read when your hands are damp. If the listing shows both US and metric markings, confirm that the sizes are easy to distinguish.

Spoon shape affects more than appearance. Long, narrow spoons can dip into small spice jars without spilling as much around the rim. Wider spoons may be nicer for scooping flour, sugar, or liquids from larger containers. Some double-ended designs put a narrow bowl on one side and a rounder bowl on the other, which can be useful if the handle length still feels comfortable.

Think about cleaning before choosing a finish. A smooth stainless-look set may be easy to rinse, while colored or coated finishes can have specific care notes. If the set has magnets built into the handles, check whether the listing mentions dishwasher guidance or recommends hand washing. Do not assume that all magnetic sets should be cared for the same way.

Storage is the main reason to consider this category, so picture the exact drawer or utensil cup where the set will live. A stack that is too tall may not fit a shallow drawer. A set with strong magnets may stay together nicely but take an extra tug to separate. A weakly nested set may scatter after a few busy cooking sessions. None of these details is visible from the main search result, so the current retailer page matters.

Limitations

  • Search results can change, so the linked page may show different set sizes, materials, and accessories over time.
  • Magnetic nesting helps with storage, but it does not make a set more accurate by itself.
  • Product photos may not show how readable the markings are under normal kitchen lighting.
  • Magnets, coatings, and dishwasher guidance can vary by design, so care instructions should be checked before buying.
  • Very narrow or unusual spoon shapes may not suit every ingredient container or measuring habit.

Alternatives to compare

  • Ring-bound measuring spoons if you want the pieces permanently grouped together.
  • Plastic measuring spoon sets for lightweight use, color coding, or lower-cost drawer backups.
  • Adjustable measuring spoons when you want one sliding tool instead of several fixed sizes.
  • Measuring cups and a kitchen scale for ingredients where volume spoons are not the best fit.
  • A dedicated spice measuring set if reaching into narrow jars is the main problem.

FAQ

Are magnetic measuring spoons more accurate than regular measuring spoons?

Not automatically. The magnetic feature is mainly about storage and nesting. For everyday cooking, compare the listed measurement sizes and markings; for precision baking, a kitchen scale may still be the better tool for some ingredients.

What spoon shape works best for spice jars?

Narrow oval spoons are often easier to fit into small spice jars, while wider spoons can be more comfortable for scooping from larger containers. If you mostly measure spices, look closely at bowl width and handle length.

Should I choose single-ended or double-ended spoons?

Single-ended spoons are simple and familiar. Double-ended spoons can be useful when one side is narrow for jars and the other is rounder for liquids or larger containers, but they may take up more length in a drawer.

Do the magnets make the spoons hard to separate?

They can, depending on the design. A good set should stay nested in storage but still let you pull out one size without disturbing the whole stack. Check current product photos and description details for how the handles connect.

What markings should I look for?

Look for clear size labels for the measurements you use most, and check whether the listing describes etched, stamped, engraved, or printed markings. Labels that are easy to read can matter more than a decorative finish.

Reusable Produce Bags for Grocery Runs and Kitchen Storage

Product links are for reference. Verify current details on the retailer page before buying.

Illustrative image for a reusable produce bags buying guide

Illustrative image, not an official product photo.

Short answer

Reusable produce bags are useful when grocery trips leave you with a drawer full of thin plastic bags or when loose apples, onions, herbs, and greens need a tidier way to move from cart to fridge. The most practical set is not simply the one with the most bags. Look at bag sizes, tare weight visibility, fabric style, closure design, wash instructions, and whether the bags will actually fit the way you shop.

Search reference

Compare reusable produce bag options

Use the search page to compare current mesh, cotton, and mixed-size sets, then confirm bag counts, dimensions, closure details, and care instructions before choosing a set.

View matching options

Think about your grocery routine first

Produce bags work best when they match a repeated habit. A weekly shopper who buys leafy greens, citrus, potatoes, and bulk onions may need several larger bags and a few small ones. Someone who mostly buys bananas and a head of lettuce may only need a compact set that stays in a tote or car console.

Before comparing sets, picture the parts of the shopping trip where the bag will matter. Will cashiers need to see the contents quickly? Do you buy items by weight? Will damp herbs or washed greens go straight into the fridge? Do you want the bags to double as pantry organization for onions, garlic, or snacks? Those answers shape the fabric and closure choice more than a product photo does.

Who this is for

  • Shoppers who want a reusable option for loose fruits and vegetables.
  • Households that already use grocery totes but still rely on disposable produce bags inside the store.
  • People organizing fridge drawers, pantry shelves, farmers market purchases, or bulk-bin items.
  • Buyers who prefer a washable, packable set that can live with other shopping bags.
  • Shared households that need different sizes for quick weekday trips and larger restock runs.

Who should skip it

  • Anyone who rarely buys loose produce or usually buys pre-packed items.
  • Shoppers who cannot use reusable bags at a particular store, market, or local checkout system.
  • Buyers who need sealed, leakproof food containers rather than breathable bags.
  • Households that will not wash and dry the bags when they become damp or dirty.

What to verify before buying

  • Confirm the number of bags, each listed size, and whether the set includes small, medium, and large options.
  • Check the fabric description, such as mesh, cotton, polyester, or a blended set, and match it to visibility and storage needs.
  • Look for tare weight information if the bags will be used for items sold by weight.
  • Review the closure style, including drawstrings, toggles, color tabs, or zipper-like openings.
  • Read the care instructions so you know whether the bags can be machine washed and how they should be dried.
  • Check whether the current option is meant for produce only or also for bulk dry goods, pantry items, or travel organization.
  • Make sure the bags fold small enough to keep with your main grocery tote.

Fabric, visibility, and weighing details

Mesh bags are popular because they let cashiers and household members see what is inside. They also tend to feel light and packable. The tradeoff is that very fine items, small grains, or powdery bulk goods may need a tighter weave or a different container.

Cotton and muslin-style bags can feel more substantial and may be useful for pantry organization, but they can hide the contents and may weigh more at checkout. If your store weighs produce in the bag, the tare weight matters. Some reusable bags display it on a tag or label, while others require you to remember or write it down. Verify the current listing rather than assuming every set handles tare weight the same way.

Closures also deserve attention. A simple drawstring is easy to use, but loose cords can tangle in a drawer or washing machine. Toggles may keep heavier produce from spilling out, while color-coded tabs can help separate bag sizes. None of these details is universal, so compare the current set configuration carefully.

Cleaning and storage habits

Reusable bags only stay practical if they are easy to reset after shopping. If you put damp greens, soil-dusted potatoes, or farmers market produce inside them, plan for washing and full drying before the next trip. A bag that remains damp in a tote can develop odors or mildew, regardless of how convenient it seemed at checkout.

For fridge use, breathable mesh may help you see contents quickly, but it is not the same as a sealed storage container. Delicate herbs, cut produce, berries, or washed greens may need a different storage method depending on how quickly you plan to use them. Treat reusable produce bags as a transport and organization tool, not a universal freshness solution.

Limitations

  • Store policies, checkout equipment, and local rules can affect whether reusable produce bags are convenient to use.
  • Bags are not leakproof and should not replace sealed containers for wet, cut, or spill-prone food.
  • Dark or opaque fabric can make it harder for cashiers to identify produce quickly.
  • Heavier fabric may affect weighed purchases if tare weight is not handled correctly.
  • Drawstrings, toggles, and seams can wear over time, especially with heavy produce or rough washing.

Alternatives to compare

  • Standard reusable grocery totes for boxed, canned, and packaged items.
  • Collapsible crates or market baskets for farmers market trips and heavier produce.
  • Glass or plastic food containers for cut fruit, washed greens, and leftovers.
  • Silicone storage bags for sealed snacks or damp items that should not sit in mesh.
  • Open fridge bins when the main goal is drawer organization rather than shopping.

FAQ

How many reusable produce bags do I need?

For occasional grocery trips, a small mixed-size set may be enough. Larger households or weekly shoppers may want several medium and large bags so onions, apples, citrus, greens, and potatoes do not all share one overfilled bag.

Are mesh or cotton produce bags better?

Mesh is usually easier for visibility and quick checkout, while cotton or muslin-style bags can feel sturdier and may work well for pantry storage. The better choice depends on whether you value see-through convenience, fabric feel, or storage appearance.

What does tare weight mean for produce bags?

Tare weight is the weight of the empty bag. If produce is sold by weight, the bag weight may need to be accounted for at checkout. Check whether the current bag set lists tare weights and whether your store can use them.

Can reusable produce bags go in the refrigerator?

Many people use them in fridge drawers, but they are not sealed containers. For damp greens, cut produce, berries, or foods that need moisture control, compare the bag instructions with a dedicated food storage option.

How should I clean reusable produce bags?

Follow the care instructions for the specific fabric and closure hardware. In general, bags that touch damp or dirty produce should be washed when needed and dried fully before being stored in a tote or drawer.

How to Choose Forks and Spoons for a Practical Flatware Set

Product links are for reference. Verify current details on the retailer page before buying.

Illustrative image for a forks and spoons buying guide

Illustrative image, not an official product photo.

Short answer

A good forks-and-spoons purchase starts with the way the utensils will actually be used: daily family meals, a first apartment, guest hosting, office drawers, or replacing pieces that disappeared over time. Before choosing a set, check the piece count, utensil mix, material wording, finish, handle shape, care instructions, and whether the listing includes only forks and spoons or a broader flatware set.

Search reference

Compare forks and spoons sets

Use the retailer page to compare current set sizes, finishes, included pieces, and seller details.

View matching options

Start with the drawer you are trying to fix

Forks and spoons are easy to buy casually, but the right choice depends on the gap in your kitchen. A household that is short on teaspoons has a different need from someone furnishing a new dining setup. A break room may need simple, repeatable pieces, while a dinner table may need a more coordinated finish.

Most listings fall into one of three broad groups: replacement packs, forks-and-spoons-only bundles, and full flatware sets that may also include knives or serving pieces. Read the selected variation carefully so you know which group you are actually buying.

Who this is for

  • Households replacing everyday utensils that have gone missing or become mismatched.
  • First-apartment shoppers who want a practical starter set without overthinking formal place settings.
  • Hosts who need extra forks and spoons for casual dinners, holidays, or shared meals.
  • Offices, dorm kitchens, rental units, and break rooms that need simple utensils for repeated use.
  • Buyers who want a coordinated drawer but still care more about function than decorative details.

When to compare something else

A generic forks-and-spoons set may not be the right choice if you need an exact match for an existing pattern, a specific brand line, toddler utensils, travel cutlery, adaptive handles, or formal service pieces. If weight and balance matter to you, avoid listings that do not show dimensions, handle shape, or enough product detail to judge how the utensils may feel in hand.

What to verify before buying

  • Count the pieces and translate that into real place settings for your household.
  • Check whether the selected option includes forks and spoons only, or also knives and serving utensils.
  • Read the material and finish wording instead of assuming every set uses the same stainless steel grade or coating.
  • Look for handle length, edge shape, and proportions if comfort matters for daily use.
  • Review care instructions, including dishwasher guidance and any finish-specific cautions.
  • Confirm seller details, shipping expectations, and return policy before placing an order.
  • If you are matching an existing drawer, compare pattern, finish, and dimensions as closely as possible.

Buying notes that matter in daily use

Piece count is the easiest mistake to make. A 20-piece set and a 40-piece set can look similar in search results, but they solve different problems. For a busy kitchen, extra teaspoons may matter more than a visually complete place setting.

The utensil mix also matters. Some sets include dinner forks and teaspoons only. Others include salad forks, tablespoons, soup spoons, knives, or serving pieces. Do not rely on the main search result alone; check the selected listing and variation.

Finish is partly visual and partly practical. A mirror finish, satin finish, black finish, or gold-tone finish can change how the set looks with existing dishes. Care instructions may also differ, especially for coated or colored finishes.

Comfort is harder to judge online, so use any available dimensions and photos carefully. Thin handles can feel efficient and lightweight; wider handles may feel steadier. Neither is automatically better, but the difference matters when the set is used every day.

Limitations

  • Search results can change, so the linked page may show different sellers, bundles, or set configurations over time.
  • Product titles may omit important details such as exact utensil mix, dimensions, or finish care.
  • Photos can make weight, edge comfort, and finish tone difficult to judge.
  • Dishwasher guidance and long-term appearance can vary by material, coating, water conditions, and care habits.
  • Matching an older flatware pattern is difficult without exact brand, model, and measurement details.

Alternatives to compare

  • Full flatware sets if you also need knives and a coordinated table setting.
  • Open-stock replacement pieces if only one utensil type is missing.
  • Serving utensil sets if the real gap is larger spoons, ladles, or serving forks.
  • Travel cutlery for lunch bags, camping kits, or office drawers.
  • Adaptive utensils if grip size, wrist position, or accessibility is the priority.

FAQ

How many forks and spoons should I buy?

Start with daily users, then add extras for guests, packed lunches, and dishwasher cycles. A small household may still benefit from extra teaspoons or dinner forks if those pieces disappear quickly.

Is a forks-and-spoons-only set better than a full flatware set?

It is better when you are filling a specific drawer shortage. A full flatware set makes more sense when you also need knives, matching place settings, or a more coordinated table setup.

What material details are worth checking?

Check the material wording, finish, care instructions, and dishwasher guidance on the current listing. Do not assume every set has the same grade, coating, or maintenance needs.

Does heavier flatware mean better flatware?

Not necessarily. Some people prefer heavier utensils, while others want lightweight pieces for everyday meals, shared kitchens, or children setting the table. Balance, handle shape, and edge comfort matter too.

What is the easiest detail to miss?

The included piece mix. A listing may look like a complete flatware set at first glance, but the selected option may include only certain fork and spoon types.

Cutting Board Sets: Who They Fit and What to Check Before Buying

Product links are for reference. Verify current details on the retailer page before buying.

Illustrative image for a cutting board sets buying guide

Illustrative image, not an official product photo.

Short answer

Cutting board sets fit buyers who want separate prep surfaces for daily chopping, serving, or kitchen organization. Compare board size, material wording, surface texture, juice grooves, storage stand details, cleaning instructions, and whether the set matches your food-prep habits before buying.

Search reference

Cutting board set options

Compare current options and verify details on the retailer page before buying.

View matching options

What this product type is

Cutting board sets group multiple boards or mats for kitchen prep, serving, and separating tasks. Current listings vary by board count, shape, material wording, thickness, groove design, handles, storage stand, and cleaning guidance. A good comparison starts with how much counter space you have and what foods you prepare most often.
This guide treats the seed listing as a category signal only. Compare current matching options and verify details on the retailer page before buying.

Who this is for

  • Home cooks replacing worn or warped prep boards.
  • Buyers who want separate boards for produce, bread, or raw ingredients.
  • Small kitchens that benefit from a compact storage stand.
  • Gift buyers looking for a practical kitchen item with daily use.

Who should skip it

  • Skip a multi-board set if one durable board already covers your prep routine.
  • Choose flexible mats if drawer storage matters more than a standing board display.
  • Avoid unclear listings when material wording, care instructions, or board dimensions are not visible.

What to verify before buying

  • Check board dimensions, thickness, and whether each board has the same size.
  • Verify material wording and cleaning instructions on the current page.
  • Review whether juice grooves, handles, feet, or a storage stand are included.
  • Check if the board surface suits knives, serving, or heavy chopping.
  • Confirm counter clearance, cabinet storage, and drying space.
  • Review current seller information, warranty terms, and return policy.

Main buying notes

Material wording matters because wood, bamboo, plastic, and composite boards have different care expectations. Verify the current listing instead of assuming the care routine.
Size should match your cutting habits. A compact board can feel easy to wash, while larger boards can handle bread, vegetables, or meal prep with less crowding.
Storage stands look tidy only if they fit your counter. Check height, width, and whether boards can dry with airflow.
Grooves can help contain liquid, but they may also make cleaning more detailed. Choose based on the foods you cut most.

Limitations

  • Some sets include boards you may rarely use.
  • Wood and bamboo styles often need more careful drying than simple plastic boards.
  • Very small boards can crowd larger prep tasks.
  • Knife feel, weight, and surface texture are hard to judge from images alone.

Alternatives to compare

  • Single large cutting boards for larger prep tasks.
  • Flexible cutting mats for lightweight storage.
  • Carving boards when meat or roast prep is the main task.
  • Serving boards if presentation matters more than chopping.

FAQ

What should I verify before buying a cutting board set?

Verify board dimensions, material wording, cleaning instructions, groove design, storage stand details, warranty terms, and return policy.

Are cutting board sets better than one large board?

Not always. Sets help separate prep tasks, while one large board can be simpler if you mostly cook the same way each day.

Do juice grooves matter on cutting boards?

They can help with wet foods, but they may add cleaning detail. Choose based on what you prepare most often.

How should I compare cutting board storage stands?

Check the stand footprint, airflow, board spacing, and whether it fits your counter or cabinet space.

What alternatives should I compare with cutting board sets?

Compare single large boards, flexible mats, carving boards, and serving boards depending on your kitchen routine.

Rice Cookers: Who They Fit and What to Check Before Buying

Product links are for reference. Verify current details on the retailer page before buying.

Illustrative image for a rice cookers buying guide

Illustrative image, not an official product photo.

Short answer

Rice cookers fit buyers who want a simple small appliance for repeat rice or grain cooking without watching a pot on the stove. Compare capacity wording, menu controls, inner pot care, keep-warm behavior, cleaning steps, included accessories, and counter space before buying.

Search reference

Rice cooker options

Compare current options and verify details on the retailer page before buying.

View matching options

What this product type is

Rice cookers are small countertop appliances designed to cook rice and related grains with less stove monitoring. Current listings vary by cooked capacity, uncooked capacity wording, menu modes, inner pot coating, keep-warm behavior, steamer tray inclusion, cleaning instructions, and counter footprint. Compare the appliance around your real household size first, then verify the current retailer page for exact specifications.
This guide treats the seed listing as a category signal only. Compare current matching options and verify details on the retailer page before buying.

Who this is for

  • Households that cook rice or simple grains several times a week.
  • Small kitchens that need a compact, repeatable cooking appliance.
  • Meal-prep routines where hands-off cooking matters.
  • Buyers replacing a worn cooker or moving beyond stovetop rice.

Who should skip it

  • Skip this type if you rarely cook rice or grains.
  • Choose a multi-cooker if pressure cooking, sauteing, or slow cooking matters more than rice-specific convenience.
  • Avoid unclear listings when capacity, inner pot care, or cleaning instructions are not visible.

What to verify before buying

  • Check whether capacity is listed as cooked or uncooked rice.
  • Verify menu modes, keep-warm behavior, and any timer wording.
  • Review inner pot material wording and care instructions.
  • Check included accessories such as a measuring cup, spoon, or steamer tray.
  • Confirm counter footprint, cord setup, and storage needs.
  • Review current seller information, warranty terms, and return policy.

Main buying notes

Capacity wording is the first filter. Cooked and uncooked measurements are not the same, so compare them carefully before choosing a size.
Controls should match your routine. A simple one-touch cooker can be easier for basic rice, while menu modes may help if you cook different grains.
Inner pot care affects daily ownership. Verify coating wording, washing steps, utensil guidance, and replacement part details where visible.
Accessories are useful only if you will use them. A steamer tray or measuring cup can help, but they should not distract from capacity and cleaning needs.

Limitations

  • Small cookers may not serve larger households well.
  • Some models take counter or cabinet space that small kitchens may not have.
  • Inner pot care can limit which utensils and cleaning methods make sense.
  • Rice-specific appliances may be less flexible than broader multi-cookers.

Alternatives to compare

  • Multi-cookers for broader cooking functions.
  • Stovetop pots for buyers who prefer manual control.
  • Microwave rice cookers for very small spaces.
  • Instant grain pouches when convenience matters more than appliance ownership.

FAQ

What should I verify before buying a rice cooker?

Verify cooked and uncooked capacity wording, menu modes, inner pot care, included accessories, counter footprint, warranty terms, and return policy.

How should I compare rice cooker capacity?

Check whether the listing uses cooked or uncooked rice measurements, then compare that number with your usual serving needs.

Is a rice cooker better than a multi-cooker?

Not always. A rice cooker is focused on repeat rice or grain cooking, while a multi-cooker may suit buyers who want more cooking functions.

Do rice cooker accessories matter?

They can help if you use them. Verify whether a measuring cup, rice paddle, steamer tray, or recipe guide is included before buying.

What alternatives should I compare with rice cookers?

Compare multi-cookers, stovetop pots, microwave rice cookers, and instant grain options depending on your space and cooking routine.

Portable Blenders: Who They Fit and What to Check Before Buying

Product links are for reference. Verify current details on the retailer page before buying.

Illustrative image for a portable blenders buying guide

Illustrative image, not an official product photo.

Short answer

Portable blenders fit buyers who want a compact way to make simple smoothies or shakes without using a full-size countertop blender. Compare jar capacity, charging method, blade safety design, leak resistance wording, cleaning steps, and whether the cup shape fits your routine before buying.

Search reference

Portable blender options

Compare current options and verify details on the retailer page before buying.

View matching options

What this product type is

Portable blenders are compact personal blending devices used for smoothies, shakes, and simple mixed drinks at home, at work, or while traveling. Common listings vary by jar size, charging method, lid design, cleaning instructions, blade cover, and whether the cup is intended for direct drinking. The safest comparison starts with how and where you plan to use it, then checks the current retailer page for exact specifications.
This guide treats the seed listing as a category signal only. Compare current matching options and verify details on the retailer page before buying.

Who this is for

  • People who make one serving at a time.
  • Small kitchens, dorm rooms, offices, or travel setups.
  • Buyers who want a compact appliance for smoothies or protein shakes.
  • Anyone replacing a bulky blender for lighter daily use.

Who should skip it

  • Skip this type if you regularly blend hard frozen ingredients or large batches.
  • Choose a full-size blender if motor power and capacity matter more than portability.
  • Avoid unclear listings if blade safety, charging details, or cleaning guidance are not visible.

What to verify before buying

  • Check jar capacity and whether the cup is meant for drinking or only blending.
  • Verify charging method, cable type, and battery-related instructions.
  • Review blade safety wording, lid lock details, and operating limits.
  • Check whether parts are dishwasher safe or require hand washing.
  • Confirm what ingredients the current listing says it can handle.
  • Review current seller information, warranty terms, and return policy.

Main buying notes

Capacity should match your real serving size. A compact jar is easy to carry, but it can be frustrating if you routinely make larger drinks.
Charging details matter. Verify whether the device uses USB-C, a proprietary cable, or another charging setup before buying.
Cleaning design is a daily-use issue, not a small detail. Look for clear guidance about detachable parts, blade area access, and drying.
Do not assume a portable blender can replace a high-power countertop model. Treat it as a convenience appliance for lighter tasks unless the current listing says otherwise.

Limitations

  • Portable designs may have limited capacity compared with countertop blenders.
  • Battery runtime and charging behavior can vary by model.
  • Some ingredients may require added liquid or smaller pieces.
  • Cleaning around blades may take more care than the product photos suggest.

Alternatives to compare

  • Full-size countertop blenders for larger batches.
  • Immersion blenders for soups and sauces.
  • Manual shaker bottles for protein drinks.
  • Mini food processors for chopping rather than blending.

FAQ

What should I verify before buying a portable blender?

Verify jar capacity, charging method, blade safety design, cleaning instructions, supported ingredients, warranty terms, and return policy.

Can a portable blender replace a full-size blender?

Usually no. Portable blenders are better for small servings and lighter blending tasks. Compare countertop blenders if power and capacity matter most.

Are portable blenders good for travel?

They can be useful for travel if the size, charging setup, lid design, and cleaning process fit your trip. Verify current transport and battery guidance before buying.

How should I compare portable blender cleaning designs?

Check whether parts detach, whether any parts are dishwasher safe, and how the blade area should be cleaned and dried.

What alternatives should I compare with portable blenders?

Compare full-size blenders, immersion blenders, shaker bottles, and mini food processors depending on the job you need done.

Silicone Cooking Utensils: Who They Fit and What to Check Before Buying

Product links are for reference. Verify current details on the retailer page before buying.

Illustrative image for a silicone cooking utensils buying guide

Illustrative image, not an official product photo.

Short answer

Silicone cooking utensils fit buyers who want everyday kitchen tools for stirring, turning, scraping, and serving without switching tools for every pan. Compare the included tool shapes, handle material, heat wording, flexibility, cleaning instructions, storage needs, and whether the utensils match your cookware before choosing a set.

Search reference

Silicone Cooking Utensils options

Compare current options and verify details on the retailer page before buying.

View matching options

What this product type is

Silicone cooking utensils are kitchen tools made for stirring, turning, scraping, serving, and mixing around cookware. Common options include spatulas, spoons, tongs, whisks, ladles, and bundled utensil sets. Buyers usually compare tool mix, handle comfort, cleaning access, storage, heat wording, and whether the tools are suitable for the cookware they already use.
This guide treats the seed listing as a category signal only. Compare current matching options and verify details on the retailer page before buying.

Who this is for

  • Home cooks replacing worn spatulas, spoons, or turners.
  • Buyers who use nonstick cookware and want gentler everyday tools.
  • Small kitchens that need one compact set instead of many mismatched pieces.
  • Gift buyers looking for practical kitchen basics.

Who should skip it

  • Skip them if you prefer rigid stainless steel tools for heavy scraping.
  • Compare wood or steel utensils if open-flame cooking is common in your routine.
  • Avoid large bundled sets if you only need one or two specific tools.

What to verify before buying

  • Check the exact tools included in the set.
  • Verify handle material, care instructions, and dishwasher wording.
  • Review heat wording on the current retailer page before buying.
  • Check flexibility, edge thickness, hanging holes, and storage holder details.
  • Confirm whether the utensils are suitable for your cookware and cooking style.
  • Review current seller information, warranty terms, and return policy.

Main buying notes

A utensil set is only useful if the shapes match your cooking routine. A large set can still miss the one turner, spoon, or scraper you use most.
Handle design matters during longer cooking sessions. Verify grip shape, hanging holes, and whether the handle material fits your care routine.
Cleaning access is easy to overlook. Check seams, one-piece construction wording, and whether food can collect where the head meets the handle.
Do not rely on a headline alone for heat wording. Verify the current retailer page before using any utensil near high heat.

Limitations

  • Some silicone heads may feel too flexible for heavy foods.
  • Wood-handled options may need different care than one-piece designs.
  • Large sets can take more drawer or counter space.
  • Heat wording and care instructions can vary by model, so verify current details before buying.

Alternatives to compare

  • Stainless steel utensils for firm scraping and grilling.
  • Wooden spoons and turners for simple low-tech cooking.
  • Nylon utensils for lightweight budget kitchen tools.
  • Single replacement spatulas if a full set is unnecessary.

FAQ

What should I verify before buying silicone cooking utensils?

Verify the included tools, handle material, heat wording, cleaning instructions, storage style, and whether the utensils fit your cookware.

Are silicone cooking utensils only for nonstick pans?

No. They are often compared for nonstick cookware, but buyers should verify the current listing and match the tool shapes to their own cookware.

Is a large utensil set better than a small set?

Not always. A smaller set can be better if it includes the exact spatula, spoon, turner, or tongs you will actually use.

Can silicone utensils go in the dishwasher?

Some listings say they can, while others have care limits. Verify cleaning instructions on the retailer page before buying.

What alternatives should I compare with silicone cooking utensils?

Compare stainless steel, wood, nylon, and single replacement tools based on your cookware and cooking routine.

Coffee Grinders: Who They Fit and What to Check Before Buying

Product links are for reference. Verify current details on the retailer page before buying.

Illustrative image for a coffee grinder buying guide

Illustrative image, not an official product photo.

Short answer

Coffee grinders are useful for buyers who want fresher coffee flavor, more control over grind size, or a compact tool for beans and similar dry ingredients. Compare blade versus burr style, grind settings, capacity, cleaning access, noise, counter space, and whether the grinder fits your brewing method before choosing one.

Search reference

Coffee grinder options

Compare current options and verify details on the retailer page before buying.

View matching options

What this product type is

A coffee grinder breaks whole beans into grounds for brewing. Common options include simple blade grinders, electric burr grinders, manual grinders, and compact models for small kitchens or travel. Buyers usually compare grind consistency, control, capacity, cleanup, noise, and whether the grinder is suited to drip coffee, French press, pour-over, or espresso-style preparation.
This guide treats the seed listing as a category signal only. Compare current matching options and verify details on the retailer page before buying.

Who this is for

  • Coffee drinkers who want to grind beans closer to brewing time.
  • Small-kitchen buyers who need a compact counter or cabinet tool.
  • People comparing basic coffee gear before moving to larger machines.
  • Gift buyers looking for a practical kitchen accessory.

Who should skip it

  • Skip it if pre-ground coffee already fits your routine and storage habits.
  • Compare a dedicated burr grinder if grind consistency is the main priority.
  • Avoid oversized models if your counter space or cabinet height is limited.

What to verify before buying

  • Check whether the grinder uses blade, burr, manual, or electric operation.
  • Verify grind settings, capacity, cleaning instructions, and removable parts.
  • Review noise wording, cord storage, lid design, and safety interlock details.
  • Confirm whether the grinder suits your brewing method before buying.
  • Check dimensions, power requirements, warranty terms, and return policy.
  • Review current seller information and included accessories on the retailer page.

Main buying notes

Grind style matters. Blade grinders are usually simple, while burr grinders usually focus on more controlled particle size. Verify the current listing instead of assuming from the product name.
Capacity should match your brewing habit. A compact grinder may be enough for one or two cups, while larger households may want more room.
Cleaning access is easy to underestimate. Grounds can collect around lids, cups, blades, burrs, and seams.
Storage also matters. Check cord management, lid fit, and whether the grinder can sit safely in a cabinet between uses.

Limitations

  • Entry-level grinders may offer limited grind control.
  • Some models can be loud during short grinding sessions.
  • Fine grinding for espresso-style brewing may require more specialized equipment.
  • Oils and fine grounds can make cleaning more important over time.

Alternatives to compare

  • Manual coffee grinders for quiet use and travel-friendly packing.
  • Electric burr grinders for more controlled grind adjustment.
  • Pre-ground coffee for the simplest routine.
  • All-in-one coffee makers with built-in grinders if counter space allows.

FAQ

What should I verify before buying a coffee grinder?

Verify grinder type, grind settings, capacity, cleaning access, dimensions, noise wording, and whether it fits your brewing method.

Is a blade grinder enough for everyday coffee?

A blade grinder can work for simple routines, but buyers who need more control should compare burr grinder options.

Can one coffee grinder work for every brew method?

Not always. Verify the supported grind range on the current retailer page before buying.

Are coffee grinders hard to clean?

Cleaning depends on the design. Check removable parts, brush access, and care instructions before buying.

Should I choose manual or electric grinding?

Choose manual grinding for portability and quiet use, or electric grinding for speed and easier daily use.

Nonstick Grill Pans: Who They Fit and What to Check Before Buying

Product links are for reference. Verify current details on the retailer page before buying.

Illustrative image for a nonstick grill pan buying guide

Illustrative image, not an official product photo.

Short answer

Nonstick grill pans are useful when you want grill-style sear marks and quick stovetop cooking without setting up an outdoor grill. Compare cooktop compatibility, pan size, handle comfort, coating care, cleaning access, and whether the shape fits your burner before choosing one.

Search reference

Nonstick grill pan options

Compare current options and verify details on the retailer page before buying.

View matching options

What this product type is

A nonstick grill pan is a ridged pan designed to cook meat, vegetables, sandwiches, and other everyday foods on a stovetop or similar cooking surface. The raised ridges can separate food from some cooking liquid and create a grilled presentation, while the nonstick surface is meant to reduce sticking when used correctly.
This guide treats the seed listing as a category signal only. Compare current matching options and verify details on the retailer page before buying.

Who this is for

  • Home cooks who want indoor grill-style cooking without using an outdoor grill.
  • Small kitchens where a separate electric grill would take too much space.
  • Buyers comparing everyday cookware for quick weeknight meals.
  • People who want a pan that can handle vegetables, sandwiches, and simple proteins.

Who should skip it

  • Skip it if you mainly need a flat pan for eggs, pancakes, or delicate foods.
  • Skip nonstick versions if you prefer metal utensils or high-heat cookware routines.
  • Compare cast iron grill pans if heat retention matters more than lighter handling.

What to verify before buying

  • Check cooktop compatibility and confirm it matches your stove type.
  • Verify the usable cooking surface and whether the pan shape fits your burner.
  • Review coating care instructions, utensil limits, and cleaning guidance on the current retailer page.
  • Check handle material, handle angle, and whether the handle stays comfortable during normal use.
  • Confirm weight, rim height, pour spouts, and storage space before buying.
  • Review seller information and return policy before buying.

Main buying notes

Size matters more than a product title suggests. A larger square pan gives more cooking room, but it may heat unevenly on a smaller burner.
Ridges change the cooking feel. They can help with grill-style marks, but they can also make cleaning more detailed than a flat skillet.
Coating care deserves attention. Use the current retailer page to check utensil guidance, heat guidance, and whether the pan needs special cleaning steps.
Handle design affects daily use. A comfortable grip and balanced weight can matter as much as the cooking surface.

Limitations

  • A grill pan does not fully replace an outdoor grill.
  • Ridges can make sauce-heavy or delicate foods harder to manage.
  • Nonstick care rules can limit utensil choice and heat routines.
  • Actual cooktop fit and cleaning behavior can vary by listing.

Alternatives to compare

  • Flat nonstick skillets for eggs, pancakes, and delicate foods.
  • Cast iron grill pans for buyers who prioritize heat retention.
  • Electric indoor grills for larger batches and dedicated grill surfaces.
  • Stainless steel pans for buyers who prefer metal utensil flexibility.

FAQ

Can a nonstick grill pan replace an outdoor grill?

No. It can support indoor grill-style cooking, but it will not match the smoke, heat pattern, or open-air setup of an outdoor grill.

What size nonstick grill pan should I compare first?

Compare the usable cooking surface with your burner size, storage space, and the amount of food you usually cook.

What should I verify before buying a nonstick grill pan?

Verify cooktop compatibility, coating care, handle design, weight, cooking surface, cleaning guidance, and return policy.

Are ridged grill pans easy to clean?

They can be easy enough for routine meals, but ridges may need more careful cleaning than a flat skillet.

Should I choose nonstick or cast iron?

Choose based on handling, heat routine, cleaning preference, utensil choice, and how much maintenance you accept.

Electric Kettles: Who They Fit and What to Check Before Buying

Product links are for reference. Verify current details on the retailer page before buying.

Illustrative image for a electric kettle buying guide

Illustrative image, not an official product photo.

Short answer

Electric kettles are useful for tea, coffee, instant meals, and quick hot-water tasks when you want a dedicated countertop appliance. Compare capacity, heating controls, shutoff behavior, handle design, cleaning access, and cord storage before choosing one.

Search reference

Electric kettle options

Compare current options and verify details on the retailer page before buying.

View matching options

What this product type is

An electric kettle is a small countertop appliance that heats water separately from a stove or microwave. Buyers usually compare capacity, body material, lid opening, water-level visibility, handle comfort, automatic shutoff wording, and whether the base fits their counter layout.

This guide treats the seed listing as a category signal only. Compare current matching options and verify details on the retailer page before buying.

Who this is for

  • Tea and coffee drinkers who heat water often.
  • Small kitchens, dorm rooms, and office break areas with limited stove access.
  • Buyers who want a dedicated appliance for hot water rather than a saucepan.
  • Households comparing simple kitchen appliances for daily routines.

Who should skip it

  • Skip it if you rarely heat water and do not want another countertop appliance.
  • Skip basic models if you need precise temperature presets for specific drinks.
  • Compare stovetop kettles if you prefer no electric base or cord.

What to verify before buying

  • Check capacity and confirm it matches your usual serving size.
  • Verify automatic shutoff, boil-dry protection, and any safety wording on the current retailer page.
  • Compare glass, stainless steel, and plastic-contact notes if material matters to you.
  • Check lid opening size, spout shape, handle clearance, and cleaning access.
  • Confirm base style, cord length, and whether the kettle lifts cleanly from the base.
  • Review seller information and return policy before buying.

Main buying notes

Capacity affects daily convenience. A larger kettle can serve more people, but it may take more counter space and feel heavier when full.

Controls should match the way you use hot water. A simple switch is enough for many kitchens, while drink-specific routines may benefit from more control.

Cleaning access matters because mineral buildup can appear over time. Check whether the opening, filter, and interior are easy to reach.

Safety wording should be verified on the current page. Do not assume every kettle handles shutoff, dry heating, or exterior heat the same way.

Limitations

  • Electric kettles still need regular cleaning, especially in hard-water areas.
  • Exterior surfaces can become warm depending on design and materials.
  • Temperature wording, safety features, and included accessories can vary by listing.
  • A kettle does not replace a full coffee maker or multi-function cooker.

Alternatives to compare

  • Stovetop kettles for users who prefer non-electric heating.
  • Gooseneck kettles for controlled pouring.
  • Hot water dispensers for frequent multi-serving use.
  • Small saucepans if you only heat water occasionally.

FAQ

What capacity should I compare first?

Compare capacity against your usual number of cups, counter space, and how heavy the kettle feels when filled.

Do all electric kettles have automatic shutoff?

No. Verify automatic shutoff and boil-dry protection wording on the current retailer page before buying.

Is glass or stainless steel better for an electric kettle?

It depends on your priorities. Compare visibility, cleaning access, exterior heat, weight, and material-contact notes.

Can an electric kettle make coffee?

It heats water for coffee preparation, but it does not replace a brewer unless your method only needs hot water.

What should I verify before buying?

Verify capacity, controls, safety wording, material notes, cleaning access, cord setup, and return policy.

Grilling Gloves: Who They Fit and What to Check Before Buying

Product links are for reference. Verify current details on the retailer page before buying.

Illustrative image for a grilling gloves buying guide

Illustrative image, not an official product photo.

Short answer

Grilling gloves are worth comparing if you handle hot grates, pans, skewers, smoker racks, or cast iron outdoors. Focus on fit, cuff coverage, grip, cleaning instructions, and the current heat-resistance wording rather than treating one listing as the only option.

Search reference

Grilling glove options

Compare current options and verify details on the retailer page before buying.

View matching options

What this product type is

Grilling gloves are protective hand coverings used around grills, smokers, ovens, and hot cookware. They are usually compared by listed heat rating, cuff length, grip texture, lining, cleaning method, and fit.

This guide treats the seed listing as a category signal only. Compare current matching options and verify details on the retailer page before buying.

Who this is for

  • Outdoor cooks who move hot grill tools, trays, or smoker accessories.
  • Home cooks who want more wrist coverage than a basic potholder may provide.
  • Buyers comparing gloves for barbecue, baking, and general kitchen tasks.
  • People who need better grip when handling tools near heat.

Who should skip it

  • Skip this category if you need certified professional protective equipment for workplace hazards.
  • Skip it if loose gloves would be unsafe for your cooking setup.
  • Compare other options if you need waterproof handling, knife protection, or chemical protection.

What to verify before buying

  • Confirm the current heat-resistance wording and the conditions attached to that claim.
  • Check cuff length, palm texture, and whether the glove shape fits both hands comfortably.
  • Verify listed materials, lining, and cleaning instructions on the retailer page.
  • Review size guidance before buying, especially if you have smaller or larger hands.
  • Check whether the gloves are meant for dry heat only or can handle damp tasks.
  • Review seller information and return policy before buying.

Main buying notes

The most useful grilling gloves balance protection and control. Thick gloves may feel safer, but bulky fingers can make tongs, skewers, or lid handles harder to manage.

Cuff length matters when reaching near hot racks or deep grills. Short cuffs may be easier to store, while longer cuffs can add forearm coverage.

Grip texture is important because outdoor cooking often involves metal tools, slick trays, and uneven surfaces. Verify the current product page instead of relying on old listing details.

Cleaning instructions can decide whether the gloves fit daily use. Some buyers may prefer wipe-clean surfaces, while others may want washable fabric construction.

Limitations

  • Heat-resistance wording can depend on contact time, surface type, and whether the glove is dry.
  • Bulky gloves may reduce finger control for small tools or delicate food handling.
  • They are not a substitute for workplace-grade protective equipment unless the current listing clearly supports that use.
  • Fit and cuff comfort can vary by hand size.

Alternatives to compare

  • Silicone potholders for quick pan handling.
  • Long oven mitts for indoor baking and roasting.
  • Heat-resistant grill tool sets if hand coverage is not the main issue.
  • Disposable food-prep gloves for cold prep tasks, not heat handling.

FAQ

Are grilling gloves only for outdoor cooking?

No. Many buyers compare them for grills, smokers, ovens, and cast iron, but the current listing should confirm the intended use before buying.

What matters most when comparing grilling gloves?

Start with heat-resistance wording, cuff length, grip, fit, materials, cleaning instructions, and seller information.

Can grilling gloves replace oven mitts?

They may work for some oven tasks, but compare coverage, thickness, and the current use guidance before treating them as a direct replacement.

Should I choose longer cuffs?

Longer cuffs can help when reaching near hot racks or grill lids, while shorter cuffs may feel less bulky. Choose based on your cooking setup.

What should I verify on the retailer page?

Verify the selected size, material notes, heat wording, cleaning method, return policy, and current product details before buying.

MINDEPOT Desktop Paper Organizer and File Holder: Who It Fits and What to Check Before Buying

Product links are for reference. Verify current details on the retailer page before buying.

Illustrative desktop paper organizer image for a buying guide

Illustrative image, not an official product photo.

Short answer

The MINDEPOT desktop paper organizer and file holder is worth considering if you want one desk accessory for papers, folders, small office items, and vertical file storage. It is mainly for people who need a tidier work surface and are willing to confirm the selected configuration before buying.

Search reference

Desktop paper organizer options

Compare current options and verify details on the retailer page before buying.

View matching options

What this product is

This is a desktop organization item for office papers, folders, notebooks, and small desk supplies.

Visible listing information describes a multi-tier paper tray, vertical file holder sections, and selected configurations that may include drawer or pen-holder features.

The product page wording positions it for desks, classrooms, workspaces, and home offices. This draft does not independently confirm material quality, exact dimensions, load capacity, or which accessory configuration is selected at checkout. Verify those details on the retailer page before buying.

Who this is for

This desktop paper organizer and file holder may fit:

  • people who keep loose papers, folders, notebooks, and small desk items within arm’s reach
  • home-office users who want horizontal trays and vertical file slots in one desk area
  • teachers, students, or office workers comparing compact organization options
  • buyers who can check the current selected color and drawer or pen-holder configuration before ordering

Who should skip it

Skip or compare more options if:

  • your desk space is very narrow and you have not confirmed the organizer footprint
  • you need a lockable storage box for private documents
  • you want a fully enclosed cabinet rather than open trays
  • you need a verified heavy-duty load rating for large binders or stacked books

What to verify before buying

  • Confirm the exact selected version, including color and whether drawer or pen-holder parts are included.
  • Check the current dimensions against your desk depth, shelf height, and monitor placement.
  • Verify assembly requirements and whether tools or small hardware are included.
  • Check material wording, finish, edge design, and cleaning guidance.
  • Confirm return policy, delivery timing, and seller information before buying.

Main buying notes

The main appeal is combining paper trays and file slots so daily paperwork has a visible place instead of spreading across the desk.

Open trays are convenient, but they also show clutter. If your goal is a very minimal desktop, compare this with closed drawers, document boxes, or wall-mounted file storage.

The most important buying detail is the selected configuration. Similar listings can show several variants, and the image or title may not be enough to confirm what will ship. Check the current option selector carefully.

Limitations

  • Exact dimensions and selected accessory configuration should be verified on the retailer page.
  • Long-term finish wear and load capacity cannot be judged from the visible listing alone.
  • Open storage may not protect papers from dust, spills, or private viewing.
  • It may not fit under low shelves, monitor risers, or compact desk corners.

Alternatives to compare

  • a simple letter tray if you only need horizontal paper sorting
  • a vertical file sorter if folders are the main problem
  • a drawer unit if you want private or enclosed storage
  • a wall file holder if your desk surface is already crowded
  • a cable tray or desk caddy if small accessories are the bigger issue

FAQ

Is this mainly for paper storage?

Yes. The visible listing describes a desktop organizer for papers, files, and office supplies. Verify the current selected version before buying.

Does it include drawer or pen-holder features?

Some visible wording references drawer and pen-holder features, but selected configurations may vary. Check the current option on the retailer page.
Will it fit a small desk?

It may fit some small desks, but you should compare the current listed dimensions with your available desk space before buying.

Is it suitable for a classroom or home office?

The visible product wording mentions classroom, office, and home-office use. Confirm size, stability, and setup details for your own space.

What should buyers check first?

Start with the selected configuration, dimensions, material wording, assembly requirements, and seller information.