Choosing a Headphone Stand for a Busy Desk

Product links are for reference. Verify current details on the retailer page before buying.
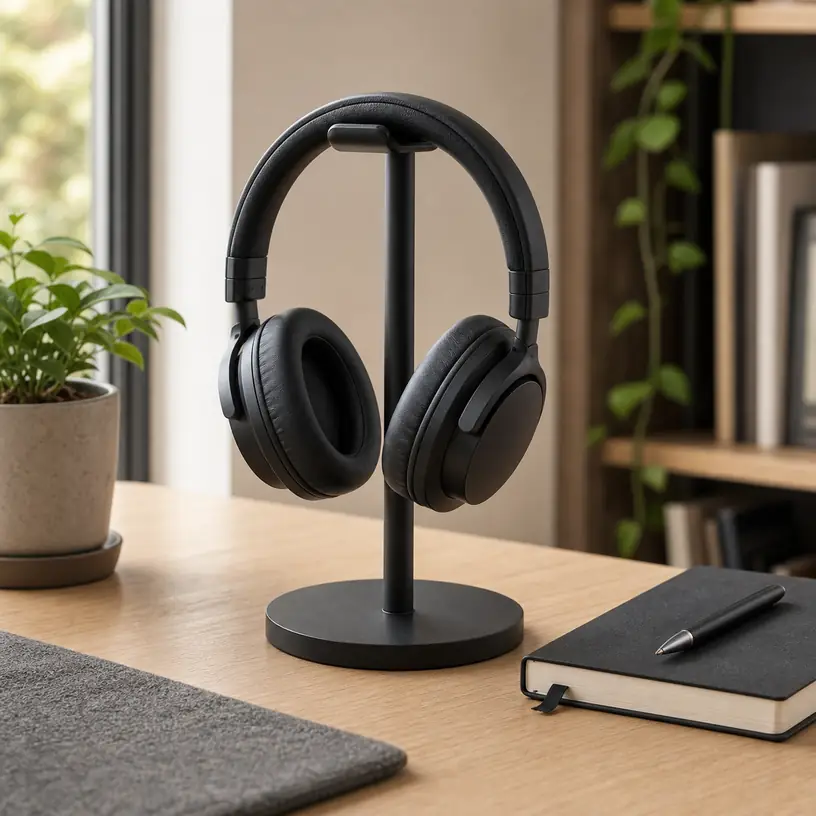
Illustrative image of generic over-ear headphones resting on a freestanding desk stand

Illustrative image, not an official product photo.

Short answer

A headphone stand earns its place on a desk when it provides a broad, suitable resting point for the headband without taking over the work surface. Before choosing one, measure the headphones from the top of the band to the bottom of the earcups, then map a footprint that will not crowd the keyboard, mouse, monitor base, or charging area. Compare the support shape, usable clearance, base construction, cable route, and assembly details. A tall stand is not necessarily a stable one, and extra USB ports or lighting can add cables to a setup that only needed a simple storage spot.

Search reference

Headphone stand options for a desk

Compare support width, usable hanging height, base dimensions, underside protection, cable features, assembly, and current compatibility notes.

View matching options

Start with the place where the headphones will land

A stand seems like a small accessory until it competes with everything already on the desk. Monitor feet, speakers, a laptop dock, notebooks, drinkware, and charging devices tend to claim the same corners. Rather than buying around the stand’s appearance, choose its location first. Mark the proposed base with paper or painter’s tape, place the keyboard and mouse where they normally sit, and make sure your arm will not bump the headphones during routine work.

The stand needs clear space above the base as well. Over-ear headphones often hang lower than expected because the headband remains extended after use. The earcups may also rotate, angle inward, or hold a microphone boom. Measure the headphones in the condition in which you actually remove them. Product dimensions can describe the overall stand yet omit the usable distance between its support and base, so look for a diagram that makes this clearance explicit.

Consider the removal path. A stand tucked under a shelf might physically fit while leaving too little room to lift the headband over the top. A position behind a monitor may require reaching around a warm display or pulling the cable across other equipment. If the headphones go on and off several times a day, an unobstructed side or front corner is usually more practical than a visually hidden but awkward location.

Who this is for

  • People who use over-ear or on-ear headphones regularly and want a consistent place to put them between calls, listening sessions, or games.
  • Home-office users who have enough open desk area for a stable base and want to keep earcups away from drink spills, papers, and abrasive surfaces.
  • Shared-desk users who benefit from moving one recognizable accessory, rather than leaving headphones across the keyboard or monitor.
  • Owners of wired headphones who can plan a short, low-tension route from the stand to an audio interface, computer, or cable anchor.
  • Anyone comparing a freestanding holder with an under-desk hanger and willing to measure both the headphones and the available workspace.

Who should skip it

  • A clamp-on or adhesive hanger may preserve more work surface when the desk is narrow and has a suitable, low-risk mounting location.
  • A wall hook or shelf may make more sense when headphones are used occasionally and the desktop needs to remain completely clear.
  • Travelers and hot-desk workers may get more value from a protective case than from a stand that stays in one room.
  • Skip powered stands if you do not need their connections and do not want another cable, power source, or device on the desk.
  • Do not rely on a decorative stand as protective storage where children, pets, chair backs, or passing traffic can easily knock it over.

What to verify before buying

  • Usable height: Compare the support-to-base clearance with the headphones at their normal headband adjustment, not only with the stand’s overall height.
  • Support shape: Look for the width, curve, edge profile, and covering of the contact area; a narrow or sharply edged perch can concentrate pressure on the headband padding.
  • Base footprint: Check both dimensions and include any projecting feet, cable posts, phone rests, controls, or decorative parts.
  • Stability details: Review the base material, assembly method, and underside design rather than assuming that a wide-looking product is weighted.
  • Surface contact: Confirm what touches the desk and whether the maker provides guidance for wood finishes, glass, desk mats, or other surfaces.
  • Headphone orientation: Make sure large earcups, a suspended inner strap, swivel hinges, or a microphone boom will not collide with the post or base.
  • Cable handling: For wired headphones, inspect the route and bend radius instead of treating a small cable notch or wrap as universally compatible.
  • Assembly and hardware: Check whether tools are included, whether the post attaches with screws or threads, and whether parts can be retightened.
  • Powered features: For models with ports or lighting, verify connector types, input requirements, included cables, output specifications, controls, and device compatibility on the current listing.
  • Included configuration: Confirm whether the pictured stand is a single holder, a dual holder, or part of a bundle with accessories that are sold separately.

The headband contact point matters

The stand supports the headphones at a part that was designed primarily to sit on a head. A broad, gently curved top can distribute contact across more of the headband than a peg-like support. This is especially relevant for a band with soft padding or a separate suspension strap. The goal is not to stretch the headphones into shape; it is to give them a neutral resting place without a hard edge pressing into one small area.

Check which layer actually bears the weight. Some headphones have a rigid outer frame and a flexible inner strap. Depending on the stand and the headset geometry, the holder may touch the strap, the frame, or both. A very wide support might not fit between structural parts, while a very narrow one may leave a temporary indentation in soft padding. Because constructions vary, compare clear dimensions and photographs of the support rather than trusting a broad compatibility claim.

Earcup position matters too. If the cups rest against the stand’s post, the pads may stay compressed or the headphones may sit at an angle. If the cups land on the base, the stand is too short for that adjustment. Leave clearance for swiveling cups and any control buttons, charging connectors, detachable cable sockets, or microphone hardware. Nothing should have to bend sharply just to put the headphones away.

A stand should not be used to force a tight headband open wider than its normal resting geometry. If the product displays headphones stretched around the outside of a broad form, check whether that arrangement suits your particular pair and follow the headphone maker’s care instructions. Long-term material behavior differs across foams, coatings, fabrics, and headband designs, so avoid universal claims that one support style preserves every headset.

Stability is a whole-desk question

Base weight and width are only part of stability. The center post, attachment hardware, headphone weight distribution, desk surface, and direction of removal all affect how the stand feels. Pulling headphones sideways by one earcup creates more leverage than lifting from the center of the band. A stand that remains upright in a staged photo may still slide across a smooth desk or rock if its base is uneven.

Think about the surface under it. Rubberized or silicone-like feet may reduce movement on some desks, but product wording does not guarantee behavior on every finish. Dust can reduce grip, and some soft materials can leave marks or interact with sensitive coatings over time. A desk mat changes the situation again: a small base may sink or wobble on a soft mat, while a broad base may occupy mouse space. Check care guidance for both the stand and the furniture, and periodically inspect the contact area.

Assembly can influence stability long after unboxing. A threaded post may loosen as headphones are repeatedly lifted at an angle. Multi-part supports may require the base and top to be aligned before tightening. Read the assembly instructions, use only the recommended hardware, and recheck connections if the stand begins to rotate or lean. Do not overtighten parts made from materials that may crack or strip.

Placement can solve risks that specifications cannot. Keep the stand away from the desk edge, a swinging door, and the path of a chair. Avoid balancing it on top of a computer, speaker, narrow shelf, or cable management box. If the headphones are expensive or the room is active, a lower storage position or protective case may be more sensible than a tall display.

Decide whether cable management is actually included

For wireless headphones, the stand may be only a resting point, with charging handled elsewhere. If charging while hanging is important, locate the headphone port and picture the cable path. A connector on the bottom of an earcup can be blocked by the base or forced into a tight bend. A connector on the side may leave a loop that catches on the microphone, stand, or nearby objects.

Wired headphones create a different problem: extra cable length. Some stands provide a post, notch, tray, or hook that appears to store a coil. Verify its dimensions and keep loops broad enough for the cable. Winding a cable tightly around a narrow post can add repeated bends, while leaving the plug hanging can place strain on the connector or scratch the desk. Detach the cable for storage only when the headphone design and instructions support routine removal.

A powered stand can combine a holder with USB connections, audio connections, lighting, or wireless charging, but each function needs independent scrutiny. Verify which ports provide data or power, which cable feeds the stand, and whether a separate power adapter is needed. Confirm compatibility and current electrical specifications rather than assuming that a connector shape guarantees a particular charging rate or feature.

Extra features also affect longevity and desk layout. If an integrated port fails, the physical stand may remain usable, but the added electronics and cable may no longer justify its footprint. A separate charging cable, hub, and simple stand are easier to replace independently. Choose integration because it solves a real routing problem, not simply because the product card lists more functions.

Match the stand style to the room

A single-post stand gives the headphones a visible, designated place and is easy to move while cleaning. A dual stand can group two pairs, but it needs enough width that earcups and cables do not collide. Designs with a phone tray or accessory dish may collect adapters and small items; that can be convenient, or it can turn the base into another clutter zone.

Materials affect appearance, contact points, maintenance, and assembly, but names alone do not tell the whole story. A listing may combine metal, wood-like finishes, plastic, foam, or flexible pads in one product. Check which part each material describes and follow current cleaning instructions. Avoid soaking electronic models, and do not use a cleaner on the stand if overspray could reach the headphones or desk finish.

Visual fit is reasonable to consider because the stand remains on display. A plain neutral holder often blends with changing equipment better than a feature-heavy design. Still, scale is more important than matching color. A compact stand that crowds the earcups or a sculptural model that blocks a monitor is not improved by matching the keyboard.

Limitations

  • A freestanding stand permanently uses desk area even when the headphones are in use.
  • Overall product height may not reveal the usable hanging clearance beneath the support.
  • A one-size compatibility statement cannot account for every headband, suspension strap, earcup, hinge, cable port, or microphone layout.
  • Soft headband materials may respond differently to long periods on a particular support shape.
  • Desk-gripping materials can slide, gather dust, or interact with some furniture finishes and mats.
  • Integrated lighting, ports, or charging features add power and compatibility questions to an otherwise simple holder.
  • A stand organizes headphones but does not protect them from dust, spills, sunlight, falling objects, pets, or being knocked from the desk.

Alternatives to compare

  • An under-desk clamp-on hanger when edge thickness, clearance, and the clamp surfaces suit the furniture.
  • An adhesive holder for lightweight use on a compatible surface, with the understanding that removal can mark some finishes.
  • A wall-mounted hook where installation is permitted and the route does not leave headphones or cables in a walkway.
  • A padded shelf compartment for keeping headphones off the work surface without suspending the headband.
  • A protective case for infrequent use, travel, dusty rooms, or desks where spills and impacts are a concern.
  • A monitor-mounted accessory only when the monitor maker and accessory instructions explicitly support the intended placement and load.

FAQ

How tall should a desk headphone stand be?

It should provide enough usable clearance for your headphones at their normal adjustment so the earcups and cable connectors do not rest on the base. Measure from the top of the headband to the lowest part of the earcups, then compare that number with the support-to-base clearance—not just the stand’s total height.

Can a headphone stand dent the headband cushion?

A narrow or hard contact point can concentrate pressure on soft padding, while a broader, gently curved support may spread the load. Headband materials and constructions differ, so inspect the support dimensions, note whether it touches padding or a suspension strap, and follow the headphone maker’s storage guidance.

Is a weighted base necessary?

Not in every setup, but the stand should remain stable during normal placement and removal. Base dimensions, construction, underside grip, post attachment, headphone balance, and desk surface all contribute. Check current product details and place the stand away from edges even if the base is described as weighted.

Is a stand with USB ports better than a simple one?

Only if the ports solve a connection or charging need in your setup. Verify input power, connector types, data support, output specifications, included cables, and device compatibility. A simple stand avoids another powered device and lets you replace the holder and charging equipment separately.

Should I choose a stand or an under-desk hanger?

Choose a stand when you have a safe footprint and want the headphones visible and easy to move. A hanger saves desktop space but depends on a suitable desk edge or mounting surface and enough knee, drawer, and cable clearance below. Measure both positions before deciding.
Desk Cable Management Boxes: Sizing a Safer, Tidier Charging Setup

Product links are for reference. Verify current details on the retailer page before buying.

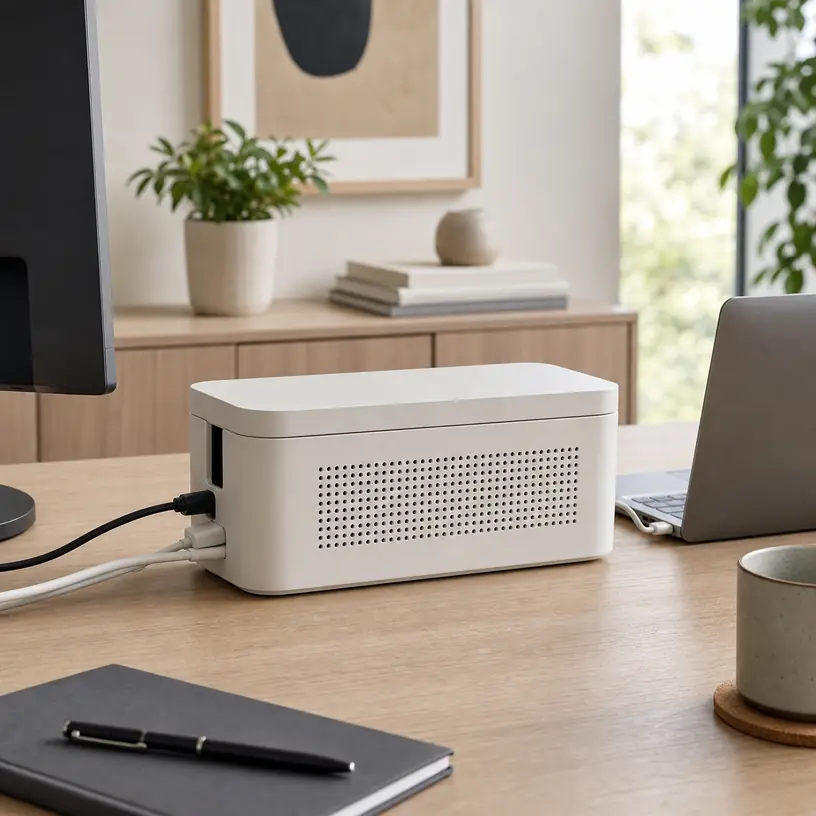
Illustrative image for a desk cable management box buying guide

Illustrative image, not an official product photo.

Short answer

A desk cable management box can hide a power strip, bulky adapters, and spare cord length in one movable enclosure. The most important decision is not color or lid style: it is whether the interior fits the power strip with every plug attached while leaving room around warm adapters and allowing cables to exit without sharp bends. Measure the entire powered setup, review the box’s openings and ventilation, and choose a location where the enclosure will stay dry, uncovered, and easy to inspect.

Search reference

Desk cable management box options

Compare usable interior dimensions, cord-entry positions, ventilation, lid access, base stability, and the space needed by side-facing plugs or oversized charging adapters.

View matching options

Start with the plugged-in power strip, not the empty one

A bare power strip may look easy to fit, but adapters change its footprint. A laptop charger can rise above the sockets, a sideways plug can extend past an end, and stiff cords need room to turn toward an exit. Before shopping, connect the devices normally used at the desk and measure the setup’s length, width, and height at its widest points. Add practical clearance so the lid does not press on plugs and cords are not forced against an edge.

This distinction separates a cable box from smaller cable-routing accessories. Adhesive clips keep individual charging leads within reach; sleeves gather a bundle traveling in one direction; an under-desk tray lifts several cords and a strip away from the floor. A box is most useful when the main visual problem is the power strip and the cluster of adapters around it.

Who this is for

  • Home-office users with a power strip and several adapters sitting beside or behind a desk.
  • Renters who want a movable enclosure without attaching a large tray to furniture.
  • Shared workspaces where charging equipment needs a clear, repeatable place.
  • Living-room or bedside setups where a strip is visible but still needs regular access.
  • Sit-stand desk owners who have planned enough cable slack for the full travel range.

Who should skip it

  • Skip an enclosed box if the power strip or adapter instructions require a different placement or more open airflow.
  • Use an under-desk tray when floor space is limited or many cables must travel across the full width of a workstation.
  • Choose clips or a weighted cable holder if the real problem is only one charging cable falling behind the desk.
  • Avoid placing electrical connections in damp areas, beneath leak-prone containers, or where the box will be covered by fabric or paper.
  • Do not use a decorative enclosure to hide damaged cords, loose plugs, heat, odor, discoloration, or an overloaded strip.

What to verify before buying

  • Measure the connected power strip, including its switch, breaker button, wall plug, adapters, and cables at their natural bend radius.
  • Compare those measurements with the usable interior dimensions rather than relying only on outside dimensions.
  • Check the number, width, and position of cord exits, especially if cables need to leave from opposite sides.
  • Review ventilation openings and any placement or load restrictions stated by the box, power-strip, and charger manufacturers.
  • Confirm that the lid can open where you plan to put the box and that switches or reset buttons remain reachable.
  • Look for a stable base and edges that will not pinch or abrade cables passing through the openings.
  • Verify the listed material, cleaning instructions, included pieces, and whether the design is intended for a floor, shelf, or desktop.
  • Account for future changes: replacing a compact adapter with a larger one can make a tightly sized box unusable.

Cord exits can determine whether the layout works

A long opening along the side gives several cords flexibility, while small end slots can create a cleaner appearance but limit where thick plugs and braided cables pass. Map the cable directions before choosing. A monitor cable may head upward, a lamp cord may run sideways, and the strip’s own cord may need the opposite end. If every cable must cross inside the box to reach one opening, the interior can become crowded even when the strip technically fits.

Avoid pulling cords taut at the exits. Standing desks need enough slack for both the lowest and highest positions, and rolling desks need a route that does not snag a wheel. Keep cable bends gradual and make sure the lid does not turn an exit into a pinch point.

Ventilation and access are everyday requirements

A cable box should organize connections without making them disappear from routine checks. Adapters and power supplies can become warm in normal use, so air openings should remain unobstructed and the enclosure should not be packed with papers, fabric, or unrelated storage. Product materials and vent layouts vary; compare current specifications and follow the instructions supplied with the electrical equipment.

Easy access matters too. A hinged or lift-off lid should have enough clearance under the desk, and frequently used switches should not require dismantling the entire setup. After arranging everything, check that plugs are seated normally, cords are not crushed, and no component shows unusual heat or damage. If something seems wrong, unplug it and address the electrical issue rather than treating the box as a cover.

Placement around a desk

On the floor, a box is simple to move but can collect dust or sit in the path of feet, chair casters, and vacuum cleaners. On a shelf, it stays protected from kicks but needs enough depth and lid clearance. A desktop location improves access, though a large box may consume useful work area. Pick the location first, then measure that space as carefully as the power strip.

For a sit-stand workstation, decide whether the power strip moves with the desktop or stays near the wall outlet. That choice changes the amount of slack, the path of every device cable, and whether a floor box is practical. A cable box alone cannot solve a route that becomes taut as the desk rises.

Limitations

  • An enclosure reduces visual clutter but does not add outlets, correct overloading, or repair damaged electrical equipment.
  • Large adapters and side-facing plugs can consume much more interior space than the strip itself.
  • A box on the floor may attract dust and interfere with feet, chair wheels, or cleaning tools.
  • Limited cord exits can create awkward routing when devices sit on different sides of the desk.
  • Material, ventilation, heat guidance, dimensions, and included accessories vary, so current listing details and equipment instructions need to be checked.

Alternatives to compare

  • An under-desk cable tray when the strip and cords should move with the workstation or stay off the floor.
  • Adhesive or screw-mounted clips for guiding a few lightweight cords along an edge.
  • Reusable hook-and-loop ties for shortening loose cable loops without enclosing a power strip.
  • Cable sleeves for a bundle that follows one shared path toward a monitor or computer.
  • Weighted desktop cable holders when charging ends need to remain accessible.

FAQ

How do I measure a power strip for a cable management box?

Plug in the adapters you normally use, then measure the complete setup at its longest, widest, and tallest points. Include the strip’s switch, plug, side-facing adapters, and the space cords need to bend toward the exits. Compare that footprint with the listed usable interior dimensions and leave practical clearance.

Can a cable management box sit on carpet?

Placement rules vary by the enclosure and the electrical equipment inside it. Check all current instructions, keep ventilation openings clear, and avoid any location where fabric, dust, foot traffic, or chair wheels could obstruct or damage the setup. If the guidance is unclear, choose a firm, open surface instead.

Does a cable box make a power strip safer?

It can reduce casual contact and visual clutter, but it is not a substitute for correct electrical use. It does not increase a strip’s capacity, repair damaged cords, or eliminate heat. Follow the power strip and adapter instructions, keep the setup inspectable, and unplug equipment that shows damage or unusual heat.

Is an under-desk tray better than a cable management box?

A tray is often better for lifting several cords and a power strip off the floor or keeping them with a sit-stand desktop. A box is easier to move and can visually contain adapters and spare cord length. The right choice depends on mounting permission, desk movement, cable direction, and available floor or shelf space.

How much extra room should I leave around adapters?

There is no universal allowance because adapter shapes, cord stiffness, ventilation guidance, and box layouts differ. Size the enclosure around the fully connected setup, make sure nothing presses against the lid, preserve natural cable bends, and follow the clearance instructions for the electrical equipment.

Adhesive Cable Clips for Desks, Nightstands, and Charging Corners

Product links are for reference. Verify current details on the retailer page before buying.

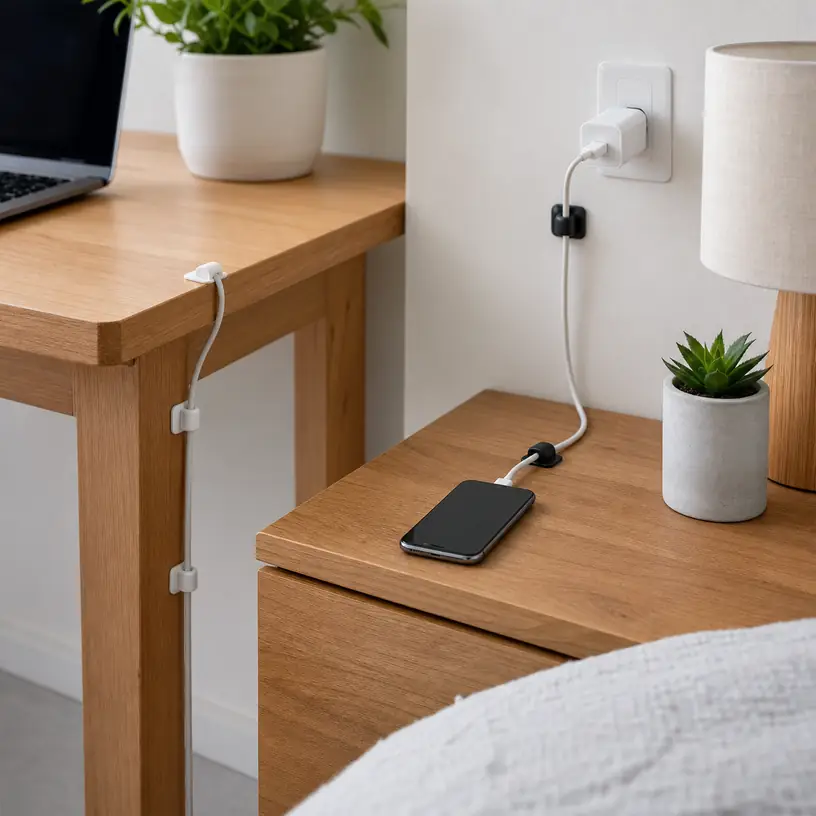
Illustrative image for an adhesive cable clips buying guide

Illustrative image, not an official product photo.

Short answer

Adhesive cable clips are most useful when a few lightweight cords keep slipping behind a desk, nightstand, TV stand, or charging shelf. They are not a full wiring system, and they should not be treated as a fix for overloaded power strips or heavy extension cords. Start with the cable size, the surface you want to stick them to, and how often the cable needs to move. A good match should hold the cord without pinching it, stay out of the way of drawers and knees, and remove cleanly enough for the surface you are willing to risk.

Search reference

Adhesive cable clip options

Compare current clip sizes, adhesive backing notes, surface guidance, quantity, color, and whether the design is meant for single charging cords, thicker desk cables, or temporary routing.

View matching options

Small clips solve a small but specific cord problem

The best use case for adhesive cable clips is usually not a dramatic before-and-after makeover. It is the phone charger that falls behind the nightstand, the lamp cord that drifts across a work surface, the USB cable that disappears under a monitor, or the thin power lead that needs to follow the back edge of a table. In those spots, a few low-profile clips can make a daily routine feel less messy without adding a tray, box, sleeve, or permanent hardware.

Because the clips depend on adhesive, the mounting surface matters as much as the clip shape. Smooth finished wood, laminate, metal, glass, tile, painted drywall, textured walls, and unfinished surfaces do not behave the same way. Some adhesives grip strongly but may damage paint or veneer when removed. Others are easier to remove but may not hold well around heat, dust, humidity, or repeated cable tugging.

Think about the cable’s movement before choosing a style. A cable that stays in place behind a monitor can use a closed or semi-closed clip. A phone charger that is picked up daily may need an open channel that lets the cord lift out easily. If you plan to route several cords together, a larger organizer, under-desk tray, or cable sleeve may be neater than forcing too many cords through small clips.

Who this is for

  • People who want charging cables to remain reachable on a desk, bedside table, kitchen counter, or shelf.
  • Home-office users cleaning up one or two monitor, lamp, keyboard, speaker, or USB cords without installing an under-desk tray.
  • Renters who prefer a light, removable-looking option and can accept that adhesive may still mark some surfaces.
  • Parents or shared-household users trying to keep low-voltage charging cords from falling behind furniture.
  • Anyone who needs a simple routing point for a few thin cables rather than a complete cable-management project.

Who should skip it

  • Skip adhesive clips for heavy cords, power bricks, overloaded cable bundles, or anything that feels warm during use.
  • Avoid mounting them on delicate paint, papered walls, raw wood, fabric, crumbling surfaces, or furniture finishes you cannot risk marking.
  • Choose screw-mounted hardware or an under-desk tray if cords are pulled hard, moved frequently, or routed across a long span.
  • Do not use small clips where they could create a tripping hazard, pinch a cable at a sharp bend, or interfere with ventilation.
  • Consider a cable management box if the main problem is a visible power strip rather than loose cable ends.

What to verify before buying

  • Check the inner channel size or supported cable diameter, especially for thicker power cords, braided cables, or multiple cords.
  • Confirm the intended surface types and whether the current listing mentions painted walls, glass, metal, wood, tile, or textured surfaces.
  • Review removal guidance, adhesive pad style, and any warning about residue, finish damage, or single-use mounting.
  • Count how many clips are included and compare that with the number of turns, anchor points, and spare pieces your layout may need.
  • Look at the opening direction: some clips hold a cable permanently, while others let a charging cord pop in and out.
  • Measure nearby drawers, chair arms, knees, vents, wall outlets, and furniture edges before deciding where clips will sit.
  • Verify color and visibility if the clips will be on the front edge of a desk or on a wall rather than hidden behind furniture.

Placement matters more than using every clip in the pack

It is tempting to stick clips wherever a cord looks messy, but fewer anchor points often work better. One clip near the back of a desk can keep a charger from dropping. Two or three clips along the rear edge can guide a lamp cord without making the setup hard to change. Too many clips can make cable removal annoying, and each adhesive pad adds another surface contact point that may leave residue later.

Plan the route with the cable plugged in and the furniture in its normal position. Leave enough slack for a standing desk to move, a drawer to open, a laptop to shift, or a phone to reach your hand. Sharp turns can stress a cable jacket, so use gentle curves instead of tight right angles. If a cord needs to detach often, place the clip where it keeps the end accessible rather than locked behind the furniture.

Adhesive performance can depend on preparation. Dust, oil, cleaning products, humidity, and uneven texture can all reduce grip. Many products ask for a clean, dry surface and a waiting period before adding cable tension. Because those details vary, check the current instructions instead of assuming every adhesive pad works the same way.

For visible desks and nightstands, color and profile can matter. Clear clips may blend into glass or light surfaces but show trapped dust. White clips can look tidy on pale furniture and walls. Black clips may hide behind electronics but stand out on light paint. If the clips will be visible every day, choose a style that looks intentional rather than like a repair.

Limitations

  • Adhesive cable clips can help route lightweight cords, but they are not a safety device for overloaded power strips or damaged cables.
  • Removal may leave residue or surface marks, even when a listing describes the adhesive as removable.
  • Clips that work well on smooth laminate or metal may not hold on textured paint, unfinished wood, dusty surfaces, or humid areas.
  • Small clips may not fit thick power cords, flat cables, braided cords, or multiple cables at once.
  • Repositioning is often limited because many adhesive pads lose strength after the first installation.

Alternatives to compare

  • Under-desk cable trays for several power and monitor cords running across a workstation.
  • Cable sleeves or spiral wraps when multiple cords need to travel together along one path.
  • Cable management boxes for hiding a power strip and extra cord length.
  • Hook-and-loop cable ties for reusable bundling without sticking anything to furniture.
  • Magnetic or weighted cable holders for desktops where adhesive is not acceptable.

FAQ

Will adhesive cable clips damage paint or furniture?

They can. The risk depends on the adhesive, surface finish, age of the paint or furniture, cleaning residue, temperature, and removal method. Avoid delicate surfaces unless the current product guidance specifically fits your situation and you are comfortable with possible marks.

What cable size should I check before buying?

Check the cable diameter or the clip’s inner channel size first. Thin phone and USB cables may fit small clips, while thicker power cords, braided cables, or multiple cords may need a larger clip, sleeve, or tray.

Are adhesive cable clips good for phone chargers?

They can work well for keeping a phone charger from falling behind a desk or nightstand. Choose an opening that lets the cord lift out easily if you pick up the charger often, and avoid placing the clip where the cable bends sharply.

How many clips do I need for a desk?

Many desks only need one clip near the charging spot and a few more along the back edge if a cable must follow a route. Plan the cable path before sticking anything down so you do not use unnecessary adhesive points.

What should I use instead for several cords?

For several cords, compare an under-desk tray, cable sleeve, reusable ties, or a cable management box. Small adhesive clips are better for guiding individual lightweight cords than for holding a heavy bundle.

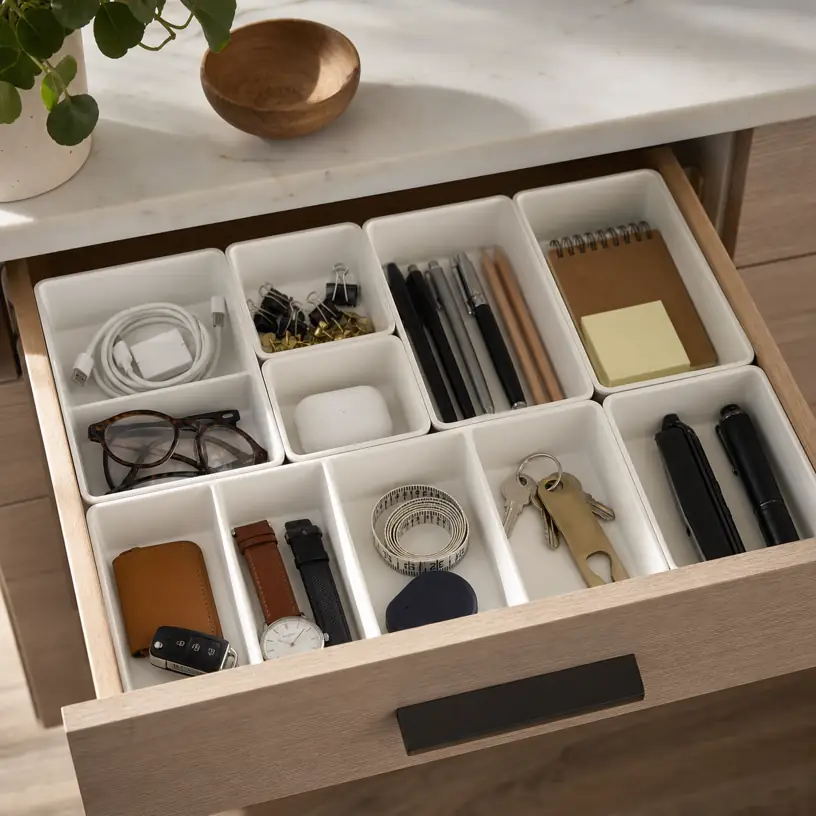
Drawer Organizer Trays for Kitchens, Desks, and Everyday Small Items

Product links are for reference. Verify current details on the retailer page before buying.

Illustrative image for a drawer organizer trays buying guide

Illustrative image, not an official product photo.

Short answer

Drawer organizer trays work best when a drawer already has a clear job: cutlery beside the sink, pens near a work surface, hair ties in a vanity drawer, or small tools in an entryway console. Start by emptying the drawer and grouping the items you actually keep there. Then compare tray dimensions, compartment shapes, material, cleanability, and whether the layout leaves enough open space for the few oversized items that never fit a perfect grid.

Search reference

Drawer organizer tray options

Compare compartment layouts, outside dimensions, material, drawer depth, and cleaning instructions before choosing trays for a specific drawer.

View matching options

Organize the drawer before choosing the organizer

A tray can make a drawer easier to use, but it cannot decide what belongs in that drawer. The most useful first step is to sort the contents into groups: everyday utensils, backup utensils, office supplies, cosmetics, batteries, keys, craft tools, or small hardware. If the drawer is holding several unrelated categories, a single molded tray may create more frustration than order.

Measure the drawer after removing bulky items and loose packaging. Note the inside width, depth, and height, then subtract a little room so the tray can slide in without scraping. For kitchen drawers, also check whether handles, serving spoons, peelers, or chopsticks are longer than standard compartments. For desk and vanity drawers, short compartments can be helpful for clips and bands, while longer channels are better for markers, brushes, and cords.

Think about maintenance. A kitchen tray may collect crumbs, spice dust, or utensil marks. A bathroom tray may need to handle damp items. A desk tray may only need a quick dusting. Material choice matters less as a status feature and more as a cleaning and fit decision.

Who this is for

  • Households trying to make a kitchen utensil drawer easier to scan during cooking.
  • Home office users who want pens, sticky notes, clips, chargers, and small tools separated.
  • Renters or first-apartment shoppers who need flexible organization without built-in cabinetry changes.
  • Parents setting up a craft, homework, or lunch-packing drawer with repeatable places for small items.
  • Anyone turning a catch-all drawer into a focused storage spot instead of a daily search zone.

Who should skip it

  • Skip fixed trays if the drawer contents change weekly or include many oddly shaped items.
  • Use a deeper bin or caddy if items need to be carried from room to room instead of stored in one drawer.
  • Avoid tall trays in shallow drawers; even a good layout is annoying if the drawer rubs or jams.
  • Do not rely on a tray alone for sharp tools, medications, batteries, or child-safety concerns that need more deliberate storage.

What to verify before buying

  • Measure the inside drawer width, depth, and usable height, not just the cabinet face.
  • Compare compartment length with your longest utensil, brush, marker, tool, or charger cable.
  • Check whether the tray is one fixed piece, a set of separate bins, expandable, or made with movable dividers.
  • Review material wording, edge shape, non-slip features, and whether the bottom may slide on smooth drawer liners.
  • Verify cleaning instructions, especially for kitchen, bathroom, craft, or makeup storage.
  • Check listing photos carefully to see whether accessories shown inside the trays are included or only display props.
  • Confirm the quantity and outside dimensions of every tray in the set before assuming it fills a drawer.

Choosing a layout that will stay useful

Fixed utensil trays are simple when the drawer has one predictable purpose. They are usually easiest for forks, spoons, knives, and a few cooking tools, but they can waste space if the drawer holds a mixed group. Separate modular trays give more freedom because you can leave open pockets for bulky items or rearrange the drawer after a few weeks of use.

Expandable trays can be helpful in wider kitchen drawers, but the expanded side sections are not always the same size as the main compartments. Before choosing one, decide what will live in the extra width. A side channel can work for tongs, straws, food clips, or measuring spoons, but it may not suit wide spatulas or stacked gadgets.

Clear trays make it easy to see crumbs and small items, which can be good or bad depending on the drawer. Bamboo or wood-look trays can feel warmer in a kitchen or desk, but buyers should still verify care instructions and actual material wording. Plastic trays can be light and easy to wipe, yet very thin walls may flex when a drawer is packed tightly. Metal mesh can work for office supplies, though small pieces may catch in openings.

If you are organizing a catch-all drawer, consider using several smaller trays rather than one large insert. The goal is not to fill every inch. A little empty space helps when a new tape roll, charger, notepad, or measuring spoon temporarily joins the drawer.

Limitations

  • A tray cannot fix a drawer that is storing too many unrelated categories.
  • Very specific compartment shapes may become inconvenient when your tools or utensils change.
  • Separate bins can shift unless the drawer liner, tray bottom, or layout keeps them stable.
  • Shallow trays may not contain tall items when the drawer opens quickly.
  • Materials and cleaning guidance vary, so verify the current retailer details before using trays in damp or messy areas.

Alternatives to compare

  • Adjustable drawer dividers for large open drawers or changing storage needs.
  • Small open bins for bathroom, craft, or utility drawers with mixed item sizes.
  • A countertop caddy when items need to move between rooms or work areas.
  • Drawer liners for reducing sliding when you already like the existing layout.
  • Wall hooks, rails, or countertop crocks for long utensils that do not fit comfortably in a drawer.

FAQ

How do I measure a drawer for organizer trays?

Measure the inside width from side to side, the inside depth from front to back, and the usable height below any drawer frame or countertop lip. Leave a little clearance so the tray can be placed and removed without scraping.

Are separate trays better than one large insert?

Separate trays are better when the drawer holds mixed items or may change over time. One large insert is simpler when the drawer has a stable purpose, such as everyday flatware or a focused desk-supply drawer.

What material works best for kitchen drawer organizers?

There is no single best material for every kitchen. Compare cleanability, moisture guidance, wall thickness, edge finish, and whether the tray fits your utensils without forcing long tools into short compartments.

Can drawer organizer trays help with junk drawers?

They can help if you first narrow the drawer to a few useful categories, such as batteries, tape, pens, and keys. If everything stays in the drawer, trays may only create smaller piles instead of a more usable system.

Should organizer trays fill the whole drawer?

Not always. Leaving some open space can make room for oversized tools, temporary items, or a future category. A drawer that is completely packed with compartments can be harder to adapt.