Choosing a Microwave Splatter Cover That Fits Your Plates and Routine

Product links are for reference. Verify current details on the retailer page before buying.
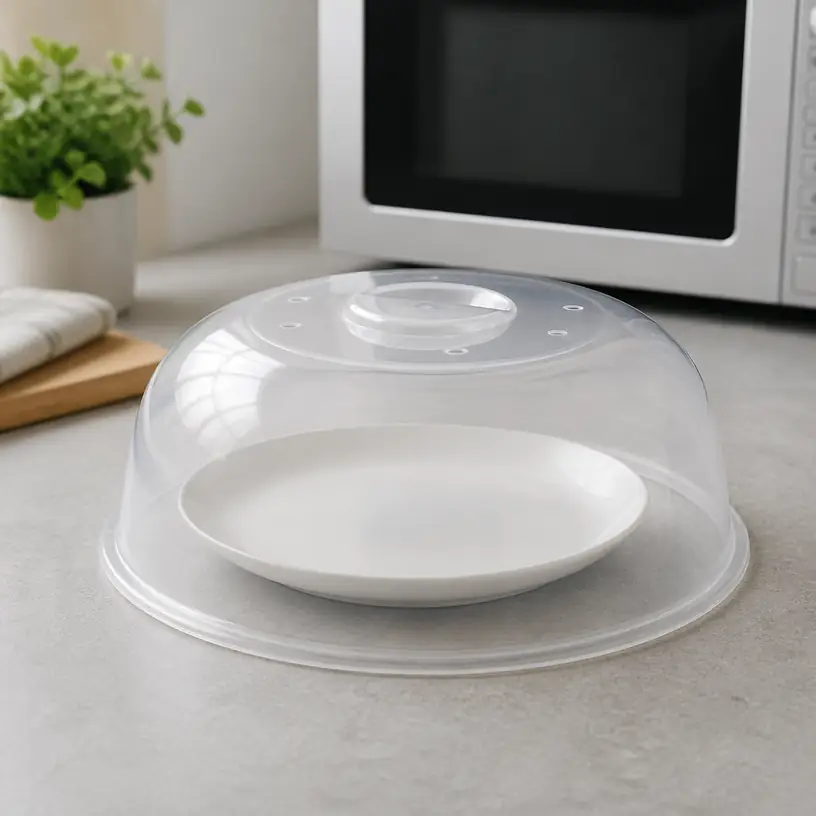
Illustrative image of a generic vented microwave splatter cover over a dinner plate

Illustrative image, not an official product photo.

Short answer

A microwave splatter cover is useful only if it clears both your usual plate and the tallest food you reheat without hitting the microwave ceiling or stopping the turntable. Measure diameter and usable interior height, then compare vent design, grip position, microwave-use instructions, cleaning method, and storage shape. A tall rigid dome favors clearance and simple setup; a collapsible design can save cabinet space but adds folds and moving sections that need thorough washing and drying.

Search reference

Microwave splatter cover options

Compare outside diameter, interior clearance, steam vents, grip placement, care directions, and storage height around the plates and microwave you already use.

View matching options

Begin with the space above the plate

A cover has to fit two boundaries at once. Its base must extend far enough to contain splashes from the plate or bowl, yet its full height must remain below the microwave ceiling and any internal rack. The turntable also needs to rotate without the cover brushing a wall. Measurements taken from the outside of the appliance will not answer those questions, so measure the usable cooking cavity and the actual dinnerware that goes inside it.

For diameter, note the widest plate or shallow bowl you routinely reheat. Compare that measurement with both the cover’s outside diameter and the supported area described by the seller. A dome that sits partly on food can smear sauce onto its underside, while one balanced on a narrow rim may shift as the turntable starts. Square food containers introduce another fit issue: their corners can reach beyond a round cover even when the listed widths look similar.

Height should be considered from the plate surface upward. A low cover may work for flat leftovers but touch a piled sandwich or a bowl with a raised rim. A very tall dome creates more clearance while taking up more storage space and possibly limiting use in a compact microwave. Product photos rarely provide a reliable sense of scale, so current dimensions matter more than appearance.

Who this is for

  • Households that regularly reheat saucy, oily, or moisture-rich food and want to contain routine splashes.
  • Shared kitchens where wiping a removable cover can be simpler than cleaning the microwave ceiling after every meal.
  • People who mostly use the same range of dinner plates and can match a cover to those known dimensions.
  • Small kitchens considering a collapsible cover because a rigid dome would occupy too much cabinet or drawer space.
  • Buyers replacing improvised coverings with an item whose instructions explicitly address microwave use.

Who should skip it

  • Skip a separate cover if your microwave or reusable container system already includes a suitable vented lid for the food you reheat.
  • Do not choose a cover that prevents the turntable from rotating freely or leaves too little clearance above the food.
  • Avoid any item whose current instructions do not clearly confirm the intended microwave use and care method.
  • A rigid dome may be impractical when no shelf, drawer, or wall-hanging space can hold its full diameter.
  • A cover does not replace the container, standing time, stirring, or venting directions for a particular food.

What to verify before buying

  • Measure the microwave cavity, turntable, largest regular plate, and typical food height; compare them with complete exterior and interior cover dimensions.
  • Confirm the material wording and the exact microwave-use restrictions supplied for the item rather than relying on a generic plastic or silicone appearance.
  • Check whether vents are permanently open, adjustable, or part of a collapsible section, and follow food-specific heating directions.
  • Look at where the grip sits and how it can be lifted without pressing fingers into hot condensation.
  • Verify whether the cover is rigid, collapsible, fold-flat, or designed for hanging, then measure its stored dimensions.
  • Read hand-wash or dishwasher guidance, including placement restrictions and whether hinges, folds, vents, or magnets need special care.
  • Confirm that any photographed plate, mat, utensil, or storage hook is actually included if that accessory matters.
  • Inspect the stated edge shape so the cover can rest securely around your dinnerware instead of rocking on a raised rim.

Vents manage steam, not every heating problem

Food covers generally need a route for steam to escape, but vent styles differ. Some domes use a pattern of always-open holes; others have an adjustable panel or a raised vent at the top. Collapsible models may vent through their folds or through a separate feature. Check the instructions for the exact design, because a visible hole pattern does not explain how much venting a particular food requires.

A splatter cover is not an airtight storage lid, and it should not be treated as one unless the manufacturer explicitly describes a separate use. It also does not make every container microwave compatible. The plate, bowl, or food container underneath still needs to be suitable for the appliance and used according to its own directions.

Condensation can collect on the underside of the dome, especially with moist food. Grip location therefore matters. A central knob is easy to see but may place a hand above the hottest steam path. Side tabs change the lifting motion but need enough room around the plate. Whatever the design, pause as directed, lift cautiously, and angle the cover so escaping steam moves away from your hands and face.

Rigid and collapsible covers solve different storage problems

A rigid cover has no expandable walls to set before use. Its continuous dome may also be straightforward to inspect for residue. The disadvantage is volume: even a lightweight cover can consume the better part of a shallow cabinet shelf. Before buying one, find a place where it will not be crushed beneath cookware or slide out when a door opens.

A collapsible model reduces stored height and may fit in a wide drawer. The tradeoff is additional geometry. Accordion folds, locking rings, and recessed vents create surfaces that must be opened, washed, rinsed, and allowed to dry. Check whether the cover stays fully expanded as it is moved and whether the stated collapsed height actually fits the planned drawer with handles and vents included.

Some covers advertise hanging features or magnets intended for storage. Do not assume either works in your kitchen. A hanging loop needs a suitably placed hook and enough wall clearance for the cover’s diameter. Magnetic storage depends on an appropriate surface and the maker’s instructions; it should not interfere with microwave operation or ventilation. Treat storage features as useful only after mapping them to a real location.

Cleaning is part of the daily workflow

A cover that catches sauce and condensation needs cleaning often enough to prevent residue from drying in its vents and edges. Smooth, open curves are easier to see at a glance, while textured grips, collapsible folds, and adjustable vent pieces may require more attention. If dishwasher use is important, verify permission and rack placement, then measure whether the dome can sit without blocking a spray arm or becoming distorted between tines.

After washing, dry the cover in its expanded shape when the care instructions allow. Closing damp folds can trap moisture where it is difficult to notice. Inspect vent holes before the next use, and retire a cover according to the maker’s guidance if it becomes warped, cracked, permanently loose, or otherwise damaged.

Color and transparency affect convenience rather than basic fit. A clear or lightly tinted dome can make it easier to see whether food is bubbling, though condensation may obscure the view. An opaque cover hides stains more readily but also hides activity beneath it. Neither appearance replaces stopping and stirring when the food’s heating directions call for it.

Limitations

  • A cover can reduce routine splashes but cannot guarantee a spotless microwave or contain an overflowing container.
  • Large outside dimensions do not guarantee useful interior clearance if the walls slope sharply inward.
  • Steam vents do not eliminate condensation or the need to lift the cover carefully.
  • Collapsible walls save space but add folds that may take longer to clean and dry.
  • A dome sized for dinner plates may not cover square meal-prep containers or tall bowls.
  • Material appearance alone does not confirm microwave, dishwasher, freezer, or heat-limit claims.

Alternatives to compare

  • A microwave-compatible container lid with a manufacturer-specified venting position for the matching container.
  • A reusable microwave-safe plate cover supplied for a particular dinnerware or storage system.
  • A sheet of microwave-compatible covering used exactly as its instructions direct when storage space is extremely limited.
  • A rigid plate-size dome for straightforward setup and a collapsible version when drawer height is the main constraint.
  • Smaller dedicated covers for bowls or mugs if a full dinner-plate dome would overwhelm a compact turntable.

FAQ

How wide should a microwave splatter cover be?

It should rest securely around the plate or bowl without sitting on the food, while remaining small enough to rotate freely inside the microwave. Compare your dinnerware diameter and the cavity’s usable width with both the cover’s outside and inside measurements.

Do microwave splatter covers need vents?

Steam needs a safe escape path, but the correct vent design and use depend on the cover and the food. Follow the item’s instructions and the heating directions for the meal rather than assuming that every visible hole provides the same result.

Is a collapsible cover better than a rigid dome?

It is better for shallow storage when its folds are easy to expand, wash, and dry. A rigid dome involves fewer moving sections but occupies its full volume all the time. Choose from your drawer or cabinet measurements and cleaning routine.

Can I put a microwave cover in the dishwasher?

Only if the current care instructions permit it. Check any rack-placement or temperature guidance, and make sure the full dome fits without touching a spray arm or being forced between tines.

Why does water collect under a splatter cover?

Steam from moist food can condense against the cooler cover. Let the food stand as directed, keep hands away from the steam path, and tilt the cover away from you when lifting it.

Will one cover fit plates, bowls, and square containers?

Not necessarily. Diameter, corner clearance, wall slope, and interior height can make a cover suitable for one piece of dinnerware but not another. Measure the largest shapes you actually reheat before choosing.
Dish Drying Mats: Counter Space, Airflow, and Cleanup

Product links are for reference. Verify current details on the retailer page before buying.

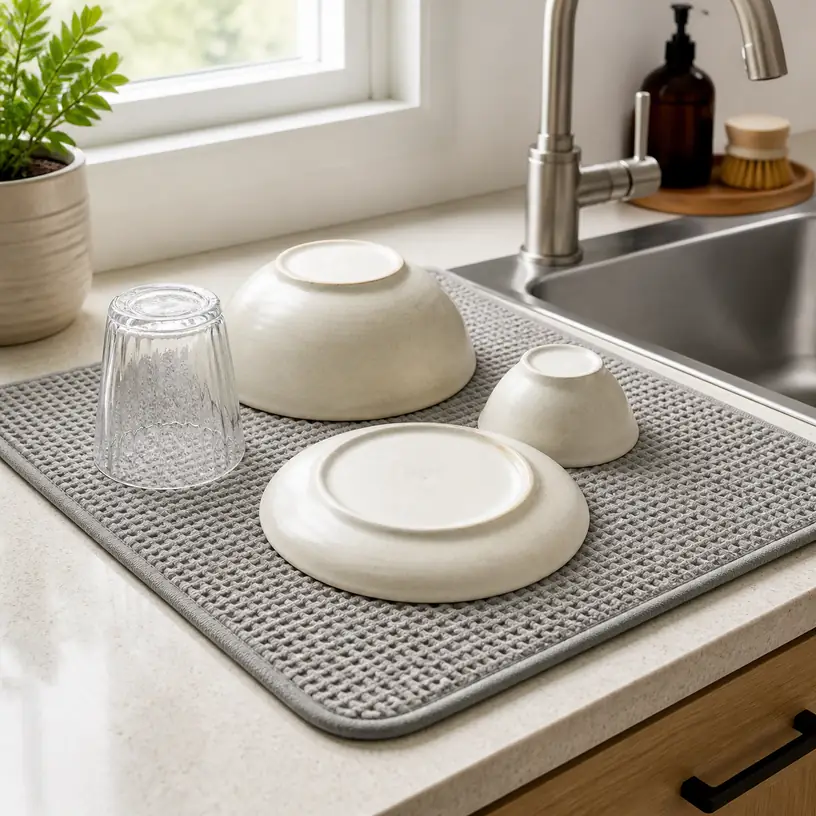
Illustrative image of a generic dish drying mat with plain dishes beside a kitchen sink

Illustrative image, not an official product photo.

Short answer

A dish drying mat makes the most sense when you hand-wash a modest batch, need the counter back afterward, and do not want a rigid rack occupying the same spot all day. Measure the open area beside the sink, including faucet reach and cabinet clearance, then decide where runoff should go. Absorbent mats hold moisture until they can dry; channeled or raised designs are intended to keep dishes above collected water; roll-up or foldable formats can be put away between uses. Whichever style you consider, leave room between items, check the care instructions, and plan a realistic place for the mat itself to dry.

Search reference

Dish drying mats for kitchen counters

Compare usable dimensions, surface design, care directions, storage method, and the way each mat handles water on your counter.

View matching options

Start with the wettest part of your routine

The useful size of a drying mat is not simply the largest rectangle that fits beside the sink. Watch one ordinary wash-up first. Count the dinner plates, glasses, utensils, lids, and awkward pieces that usually need a landing place. A wide mat can hold more, but crowding dishes together reduces the open space around them. A compact mat may work better if you wash in two short batches and put dry items away promptly.

Also notice how much water reaches the counter. Some people shake or drain each item over the sink before setting it down; others transfer pieces directly from rinse water. Flatware, bottle lids, and containers with deep rims can carry surprising pockets of water. An absorbent surface and a draining surface manage that water differently, so the right choice depends on what you are willing to empty, hang, wipe, or launder after the dishes are put away.

Counter geometry matters just as much as dish count. A mat placed across a cabinet seam may prevent a drawer from opening. One pushed beneath an upper cabinet can leave little vertical room for tall bottles. If it sits close to a wood edge, backsplash joint, appliance cord, or wall outlet, splashes may reach places that are inconvenient to wipe. Sketching the usable rectangle with a tape measure is more reliable than estimating from a listing photo.

Who this is for

  • Apartment and small-kitchen households that want a drying surface they can move after use.
  • People who hand-wash a few glasses, knives, reusable bottles, or cookware pieces between dishwasher loads.
  • Renters who prefer a counter solution that does not require mounting hardware or a permanent sink attachment.
  • Households that already have a small rack but need temporary overflow space during meal preparation.
  • Anyone willing to include the mat in a regular washing and drying routine instead of leaving it damp beneath dishes.

Who should skip it

  • A full rack may be more practical when several place settings are hand-washed at once and plates need individual support.
  • Skip a flat mat as the only solution if you regularly need to hold many plates, boards, or lids upright.
  • An over-sink rack may suit a kitchen with almost no safe counter area, provided its dimensions match the sink.
  • Avoid choosing a mat without first identifying somewhere to hang, stand, or lay it out after use.
  • If standing water must drain directly into the sink, compare racks or mats with a clearly described drainage path rather than assuming every surface will shed water.

What to verify before buying

  • Usable footprint: Compare the stated length and width with the clear counter area, not the counter’s total dimensions.
  • Thickness and edge shape: Check whether a raised rim, stitched border, or sloped edge changes the usable surface or catches nearby drawers.
  • Water strategy: Confirm whether the design absorbs moisture, holds it in channels, drains toward an edge, or uses an elevated surface.
  • Care instructions: Verify whether the mat is intended for machine washing, hand washing, wiping, or another method, and follow any drying guidance.
  • Material description: Read the current listing for the actual surface, core, backing, and any separate parts instead of inferring them from appearance.
  • Heat guidance: Do not place hot cookware on a drying mat unless the maker explicitly describes suitable temperatures and uses.
  • Folding or rolling: Determine how small it becomes and whether the design is meant to be folded, rolled, hung, or stored flat.
  • Backing and counter contact: Check the stated backing design and any instructions for delicate, sealed, or porous counter surfaces.
  • Included pieces: Confirm whether a utensil holder, rack insert, sling, or storage strap shown in photos is actually included.
  • Clearance for dishes: Make sure tall bottles, stemware, cutting boards, and pan handles will not collide with cabinets or fall into a traffic path.

Absorbent, channeled, and raised surfaces solve different problems

Absorbent mats

An absorbent mat accepts drips across its surface and can provide a soft landing for cups and bowls. That simplicity is useful for mixed small items, especially when the mat doubles as temporary overflow beside a rack. Its limitation is equally straightforward: water remains in the mat until it evaporates or the mat is washed and dried. A thick, damp mat folded immediately into a cabinet has little opportunity to air out.

Compare the complete care routine rather than focusing only on an absorbency claim. Check whether the product has multiple layers, whether all layers share the same washing instructions, and whether the mat needs to be reshaped or laid flat after cleaning. The surface should be inspected between uses for trapped crumbs, cooking residue, or water that migrated beneath it.

Channeled or flexible draining mats

A molded mat may use ridges or channels to lift dishes above part of the wet surface. This can separate an upside-down glass rim from pooled droplets, but the water still needs a destination. Some layouts retain runoff for later emptying; others may direct it toward an edge when placed in the intended orientation. Verify the drainage description and measure whether any lip or spout can actually reach the sink from your chosen counter position.

Grooves create more surface detail to clean. Look at the spacing and depth of channels, particularly if you dry small bottle parts or flatware that could settle between ridges. A flexible design may roll for storage, while a firmer one may need to stand vertically. Neither behavior should be assumed from a styled photo.

Rigid or quick-drying slabs

Some drying surfaces are sold as firm slabs rather than fabric or flexible mats. Their weight, fragility, cleaning method, edge construction, and counter-contact instructions can differ substantially from soft formats. Check how the current listing says the surface handles water and stains, whether it requires any conditioning, and how it should be stored. A rigid slab may look tidy left on display, but it will not offer the same fold-away convenience as a textile mat.

The broad lesson is to choose a water-management method, not just a color. If you want to put the mat in a laundry cycle, prioritize clear textile care instructions. If you prefer to wipe a structured surface, inspect the channels and edges. If direct drainage is essential, confirm an uninterrupted route to the sink before ordering.

Give dishes enough room to dry

A mat supplies a boundary; it does not organize every item automatically. Place cups and bowls so air can reach their interiors, and avoid nesting wet pieces tightly together. Bottles with narrow openings may benefit from an appropriate stand or rack because a flat surface alone does not hold them at an angle. Large knives should be placed where their edges and handles do not create a reaching hazard, following suitable knife-care practices.

Plates are another dividing line between mats and racks. A plate laid flat consumes substantial space, while several plates leaning without supports can shift. If plates dominate the daily load, a small rack or removable plate holder on top of a mat may use the counter more effectively. Verify that any separate rack is stable on the chosen surface and that its feet do not damage the mat.

Do not treat visible dryness on the top side as proof that the counter underneath is dry. Lift the mat after use, wipe the worktop as appropriate for its material, and let both surfaces air out. This step is especially important when the mat sits in the same place every day or when water can collect along a raised counter seam.

Build cleanup into the choice

The mat becomes part of the dishwashing load, even though it is easy to overlook. An absorbent style may need laundering; a grooved mat may need scrubbing or rinsing; a rigid surface may have its own care restrictions. Check the instructions before using strong cleaners, high heat, a dishwasher, or a washing machine. A generic material label is not a substitute for the maker’s directions for the assembled product.

Think about timing as well. If the household needs the mat again for the next meal, a design that takes longer to dry may require a second mat or an alternate drying spot. Two smaller mats can sometimes be rotated more easily than one large mat, but they also create extra edges and storage pieces. A hanging loop can be useful only if there is a hook in a ventilated location where drips will not reach the floor or wall.

Storage should happen after the mat and counter are dry. Rolling may suit one design while creasing or compressing may be discouraged for another. Measure the cabinet shelf or drawer where the cleaned mat will live, and account for any rigid insert that cannot bend. If convenient storage is the main reason for choosing a mat over a rack, this measurement is part of the purchase decision rather than an afterthought.

A mat can complement a rack instead of replacing it

The choice does not have to be all mat or all rack. A compact rack can hold plates and bowls upright, while a mat beside it catches overflow or supports large cookware. A removable utensil cup can keep forks and spoons from occupying the mat’s center. For occasional baking sheets or pans, an expanded drying area may be more useful than buying a much larger permanent rack.

This mixed setup works best when each component has a defined role. Keep the rack’s drainage area aligned with the sink or tray, and do not assume a mat underneath can compensate for runoff that extends beyond its edges. Check whether rack feet remain secure on the mat and whether the combined height fits beneath cabinets. Afterward, separate the pieces so hidden contact areas can dry.

For a kitchen that changes roles through the day, modular pieces can restore prep space quickly. The benefit comes only if the rack, mat, and accessories each have a storage location. Otherwise, a supposedly flexible system can become a loose stack that stays on the counter.

Limitations

  • A flat mat does not support plates or lids upright without a separate compatible holder.
  • Absorbed water still has to leave the mat through proper drying and care.
  • Channels and ridges can collect residue and require attention during cleaning.
  • Water may reach the counter beneath or beyond a mat, especially when wet items overhang its edges.
  • A large mat can interfere with drawers, appliances, food-prep space, or the natural route between sink and stove.
  • Soft surfaces may not be appropriate for hot cookware, sharp edges, or every counter finish; follow current product and surface-care guidance.
  • Foldable storage is not universal, particularly among rigid or layered designs.

Alternatives to compare

  • A compact dish rack when plates and lids need supported slots and a defined drainage tray.
  • An over-sink roll-up rack when counter space is limited and the sink dimensions allow a secure fit.
  • A wall-mounted or over-sink drying system where installation and load guidance make it appropriate.
  • A small rack placed over a separate washable mat for mixed loads and occasional overflow.
  • Clean kitchen towels for rare, light-duty drying when they can be changed and laundered promptly.

FAQ

What size dish drying mat should I choose?

Measure the uninterrupted counter space beside the sink, then subtract room needed to open drawers, operate the faucet, and keep dishes away from edges. Match that usable area to an ordinary wash load rather than buying around the largest holiday meal. If plates are common, allow room for a separate holder or compare a rack instead.

Is an absorbent mat or a draining mat easier to maintain?

It depends on the cleanup you prefer. An absorbent mat may fit a laundry-based routine, while a channeled mat may be rinsed or wiped according to its instructions. Both need to dry fully, and both require the counter underneath to be checked and cleaned. Review the exact care guidance before choosing.

Can I put hot pots on a dish drying mat?

Do not assume a drying mat is a heat-resistant pad. Materials, backings, adhesives, and layered construction vary. Use it for hot cookware only when the current maker explicitly states the relevant temperature guidance and intended use; otherwise use an appropriate trivet or pot holder.

How do I keep water from collecting under a drying mat?

Drain items over the sink before placing them, keep wet pieces within the mat’s edges, and lift the mat after the load is put away. Wipe the counter according to its surface-care instructions and let both sides of the mat dry. If runoff is heavy, compare a design with a clearly described tray or sink-directed drain.

Can a dish drying mat replace a rack?

It can replace a rack for small, stable items when flat counter space is more useful than plate slots. It is less effective for holding many plates, lids, boards, or narrow bottles at useful angles. A compact rack on or beside a mat may be a better compromise for mixed loads.

Choosing a Kitchen Sink Drain Strainer That Is Easy to Empty

Product links are for reference. Verify current details on the retailer page before buying.

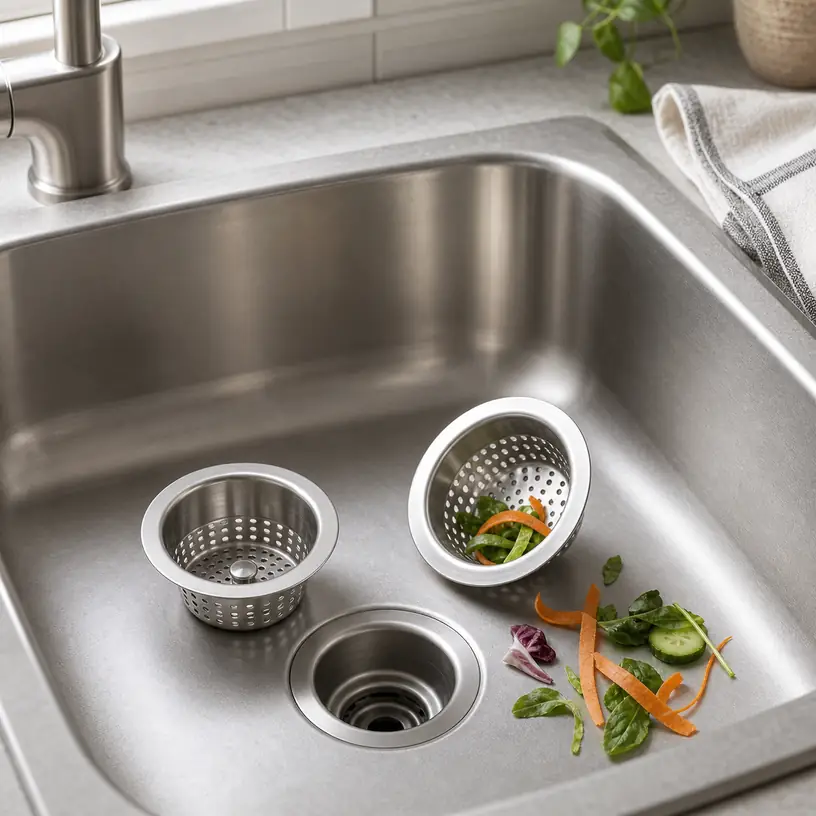
Illustrative image of generic removable drain strainer baskets beside a kitchen sink

Illustrative image, not an official product photo.

Short answer

A kitchen sink drain strainer should catch ordinary food scraps without making the basin slow to drain or becoming unpleasant to empty. Fit comes first: identify the drain style, measure the opening and surrounding recess, and note whether you need a simple removable screen or a basket that also closes as a stopper. Then compare hole size, basket depth, rim profile, underside clearance, and how easily you can lift the strainer without touching collected debris. A highly polished finish matters less than a stable fit and an open shape that can be scrubbed from both sides.

Search reference

Compare kitchen sink drain strainers

Review removable screens and basket-style designs while checking exact dimensions, drain configuration, perforation pattern, lifting method, care guidance, and included pieces.

View matching options

First decide what the strainer needs to do

The term “sink strainer” covers more than one product. A shallow perforated screen rests over or just inside a drain and catches scraps while water runs through. A deeper removable basket sits in an existing drain assembly. Some basket assemblies can also seal the drain when pushed, twisted, or positioned a certain way. Replacement parts may look interchangeable in a search grid even when their diameter, post, spring mechanism, or sealing surface differs.

If your sink already has a functional drain flange and you only want better debris capture, a drop-in screen may be the simplest option. If you are replacing a basket or stopper component, inspect the existing part before shopping. Photograph its top and underside, record its dimensions, and look for the way it engages with the drain. A basket that fits the opening but cannot sit at the intended height may drain poorly or fail to seal.

This guide focuses on removable household strainers rather than installing a complete drain body. Replacing plumbing hardware can involve seals and connections below the basin; that is a separate job from choosing a lift-out debris basket.

Who this is for

  • Home cooks who want to keep vegetable trimmings, rice grains, and other ordinary scraps from entering the kitchen drain.
  • Renters seeking a removable accessory that does not alter an existing sink assembly.
  • Households replacing a lost, bent, corroded, or difficult-to-clean strainer basket.
  • Shared kitchens where an easy-to-see and easy-to-empty catch basket can simplify the cleanup routine.
  • Buyers comparing a basic always-open screen with a basket that can also retain water in the sink.

Who should skip it

  • A sink with a garbage disposal may need a disposal-specific splash guard, stopper, or compatible strainer rather than a generic basket.
  • A damaged, leaking, loose, or corroded drain flange calls for diagnosis or repair, not merely a new drop-in screen.
  • Anyone expecting a strainer to prevent grease, fine sediment, or liquids from entering the drain needs a broader disposal routine.
  • A bathroom drain, utility sink, or unusually shaped drain may require a product designed for that fixture.

What to verify before buying

  • Drain opening and recess: Measure the usable diameter, depth, and the flat area where the rim will rest; do not choose from sink size alone.
  • Strainer type: Confirm whether the listing describes a shallow screen, replacement basket, stopper basket, complete drain assembly, or a part intended for a disposal.
  • Top and underside dimensions: Check rim diameter, basket diameter and depth, center post or stem details, and clearance beneath the basket.
  • Water flow: Compare the number, size, and placement of holes with the kinds of scraps you want to catch and the flow your sink needs.
  • Lift point: Look for a knob, loop, tab, or rim that can be grasped when the basket contains wet debris.
  • Sealing function: If you want to fill the sink, verify how the stopper engages and whether compatibility depends on a particular drain assembly.
  • Cleaning access: Favor smooth transitions and perforations that can be reached from both sides over hidden channels that trap residue.
  • Package contents: Check whether the offer includes one basket, a multi-pack, a stopper, seals, or installation components rather than relying on the main image.

Measure the drain, not the old product name

Begin with the drain empty and clean. Measure across the inner opening at more than one point, then measure the ledge or recessed area that supports the strainer rim. For a deeper basket, note how far it can extend before contacting hardware below. A ruler can provide a rough check, but calipers are useful when a replacement depends on a close fit.

Measure the old basket too, if it seated correctly. Record its outer rim, body width, overall depth, and any underside post. Do not assume a nominal description represents every relevant dimension. Two listings can use similar wording while differing enough to wobble, sit too high, or fall too deeply into the drain.

A silicone or flexible rim can reduce rattling in some designs, while a rigid metal rim can be thinner and easier to wipe. Neither approach fixes a dimensional mismatch. Also check whether a raised rim will interfere with a flat-bottomed dish placed in the basin.

Balance debris capture with drainage

Very fine perforations can catch small particles, but they offer less open area and may need to be emptied sooner. Large holes keep water moving yet allow smaller scraps through. Think about the actual cleanup load: rinsing a few coffee cups produces a different mix of debris from washing a pot after preparing rice or chopped vegetables.

Basket depth changes both capacity and handling. A deep basket may hold more before water backs up, but collected scraps can compress against the holes and become harder to knock out. A shallow screen is easy to see and remove, though it may shift when hit by a strong stream of water. Shape matters as much as capacity: rounded corners and a gently tapered basket are generally easier to brush clean than a tight seam between a flat base and vertical wall.

Do not treat the strainer as a tiny waste bin. Scrape plates and cookware into the appropriate household waste or compost container first. The strainer is the last catch for remnants left during rinsing, and it works better when emptied before a dense mat forms.

Stopper baskets need a closer compatibility check

A dual-purpose basket can drain in one position and seal in another. That convenience depends on how the basket meets the drain assembly. Some use a center post, ball, pin, spring, twist action, or pressure fit. A listing that says “universal” should still be checked against measured dimensions and the current compatibility notes.

If retaining water is important, look beyond the visible basket. Review the sealing surface, operating method, replacement guidance, and whether a separate gasket is involved. A basket may catch scraps perfectly yet be unsuitable as a stopper. Conversely, a secure stopper may require an extra action each time you want the sink to drain freely.

For disposal-equipped sinks, verify the entire arrangement before placing a metal basket or loose component near the opening. Use only a format described as compatible with the disposal and sink setup, and follow the appliance maker’s current safety guidance.

Make emptying part of the decision

Imagine removing the basket when it is wet and full. A tall center knob can be easy to grasp but may collect residue around its attachment point or interfere with items in the basin. A wire loop folds down neatly, though its hinge can add another cleaning spot. Rim tabs avoid a central obstruction but may be difficult to grip if they sit flush.

The easiest basket to live with can be lifted, tapped out, rinsed, and returned without turning it inside out or picking debris from a narrow groove. Check whether perforations have accessible edges and whether separate trim or silicone pieces can be removed for washing. Follow the current care directions for the stated materials; appearance alone does not establish dishwasher suitability or corrosion resistance.

Empty the basket after food preparation and before debris dries in place. Wash both sides, clear each blocked hole, and clean the drain recess where the rim sits. If the basket becomes sharp, distorted, cracked, or impossible to clean, replace it rather than forcing it to fit.

Limitations

  • A removable strainer reduces the amount of solid debris entering a drain but does not catch every fine particle.
  • It does not make grease, cooking oil, paint, or other unsuitable liquids safe to pour into plumbing.
  • Search results can mix simple screens, stopper baskets, complete drain assemblies, bathroom parts, and disposal accessories.
  • A close visual resemblance does not confirm fit; small differences in diameter, depth, and underside hardware can matter.
  • Fine holes may clog quickly during a heavy cleanup, while coarse holes may pass the smallest scraps.
  • A new basket cannot repair a leaking flange, blocked pipe, damaged seal, or malfunctioning garbage disposal.

Alternatives to compare

  • A flat mesh drain screen when the drain has little recess and only light debris needs catching.
  • A deeper basket strainer for food-preparation sinks that receive a larger volume of scraps.
  • A disposal-specific stopper or splash-guard accessory for a compatible garbage-disposal opening.
  • A sink stopper without perforations when retaining water matters and debris capture is handled separately.
  • A countertop scrap bowl or compost container to keep most preparation waste away from the sink entirely.

FAQ

How do I measure for a kitchen sink drain strainer?

Measure the inner drain opening, the recessed ledge or flat area supporting the rim, and any available depth below it. For a replacement basket, also measure the old rim, body, depth, and underside post or mechanism if the old part fit correctly.

Are kitchen sink drain strainers universal?

No. Many products cover common size ranges, but drain openings, recesses, basket depths, center posts, stopper mechanisms, and disposal configurations vary. Compare the listing’s exact dimensions and compatibility notes with your sink.

Is a mesh screen or perforated basket easier to clean?

A perforated basket with smooth, accessible holes is often quick to rinse, while fine mesh can catch smaller particles but may require more brushing. The better choice depends on the debris you usually encounter and how often you are willing to empty it.

Can I use a regular strainer with a garbage disposal?

Do not assume so. Disposal openings can require a specific stopper, splash guard, or strainer format. Confirm compatibility with the disposal and sink configuration and follow the appliance maker’s current instructions.

Why does water drain slowly through a new strainer?

The holes may offer too little open area for the water flow, the basket may be sitting too low, or debris may already be blocking the perforations. Remove and clean it, check its seating, and compare its dimensions and hole pattern with the drain.

Kitchen Sink Caddies That Keep the Wet Zone Manageable

Product links are for reference. Verify current details on the retailer page before buying.

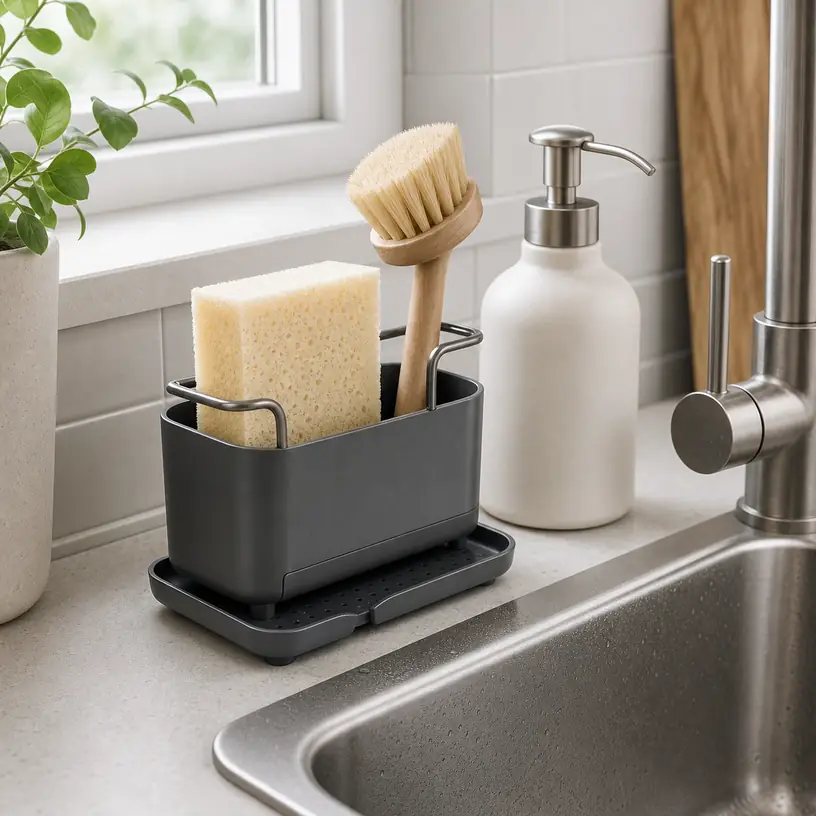
Illustrative image of a generic kitchen sink caddy holding a sponge and dish brush

Illustrative image, not an official product photo.

Short answer

A useful kitchen sink caddy gives damp sponges and brushes a defined place without turning the counter into a harder-to-clean obstacle course. Start with placement: decide whether the caddy should sit on the counter, attach inside the sink, bridge the faucet area, or hang over a divider. Then compare drainage direction, ventilation, capacity, and how easily every wet component can be removed and washed. The right model should suit the tools already in your kitchen rather than encouraging you to store every cleaning item beside the faucet.

Search reference

Compare kitchen sink caddy layouts

Look across counter, suction-mounted, saddle, and faucet-area designs while checking dimensions, drainage details, removable parts, and the number of tools each option is intended to hold.

View matching options

Begin with the sink, not the organizer

A caddy occupies one of the busiest and wettest spots in a kitchen. Before choosing a shape, watch what happens during a normal cleanup. Notice where the faucet handle travels, where the spray lands, whether a cutting board rests across the basin, and which side of the sink remains accessible when a large pan is soaking. A compact holder can still be annoying if it blocks a soap dispenser or must be moved every time the faucet is cleaned.

Countertop caddies are easy to reposition and do not depend on a perfectly smooth sink wall. Their main drawback is the surface underneath: trapped water and soap residue can collect if the base is broad or difficult to lift. In-sink holders free the counter, but they take up basin space and need a secure attachment point. Saddle designs can work across a double-sink divider, while faucet-area trays use otherwise idle space but must fit around the fixture without interfering with controls.

Measure the proposed location with the faucet, backsplash, sink rim, and everyday supplies in place. Product dimensions alone do not show whether a tall dish brush will lean into a window ledge or whether a tray will drain toward the basin. A paper outline on the counter is a quick way to test the footprint before committing to it.

Who this is for

  • Kitchens where a sponge, dish brush, bottle brush, or scraper tends to stay loose along the sink rim.
  • Small households that need a focused drying spot but do not want a full countertop organizer.
  • Shared kitchens where separating wet tools from soap bottles makes the cleanup routine easier to follow.
  • Renters who want removable storage rather than drilling or making a permanent change around the sink.
  • Anyone replacing an improvised dish or saucer that holds water instead of helping tools dry.

Who should skip it

  • Minimal kitchens that use one washable cloth and already have a ventilated place to hang it.
  • Households with no clear counter, basin, divider, or faucet space that can hold a caddy without disrupting washing.
  • Anyone expecting a small caddy to organize cleaners, gloves, spare sponges, and full-size soap bottles at the same time.
  • Buyers who cannot routinely remove and clean another object from the splash zone.

What to verify before buying

  • Overall and usable dimensions: Check the outer footprint as well as the width of compartments, brush openings, rails, and sponge slots.
  • Drainage destination: Determine whether water runs into the sink, collects in a tray, passes through an open base, or lands on the counter.
  • Attachment method: For suction cups, adhesive parts, hooks, or clamps, confirm the intended surface and current installation guidance.
  • Cleaning access: Look for removable trays, open corners, and parts that separate without requiring a complicated reassembly.
  • Tool fit: Compare the caddy with the thickness of your sponge, the handles of your brushes, and any sink stopper or scraper you plan to store.
  • Faucet clearance: Make sure tall tools will not obstruct a side lever, pull-down hose, sprayer, window, or wall-mounted fixture.
  • Material and care wording: Review the listing’s current instructions rather than assuming a metallic finish, plastic body, or flexible insert has a particular care requirement.
  • Included pieces: Confirm whether a drainage tray, soap rail, brush cup, towel bar, mounting hardware, or spare attachment is actually included.

Drainage matters more than extra compartments

A sink caddy is supposed to manage wet tools, so its water path deserves more attention than its compartment count. An open wire or perforated base can improve airflow, but only if the drips fall somewhere that is easy to rinse or wipe. A sloped tray may direct water into the basin when it sits close enough to the rim. Farther from the sink, that same tray may simply hold a shallow puddle.

Removable drip trays make water easier to carry away, yet they also introduce a hidden surface that needs regular washing. Look for a tray that slides out without lifting a fully loaded caddy and that does not have tight channels where residue can settle. If the entire organizer must be tipped to empty it, consider whether that action will send brushes and sponges onto the counter.

Ventilation and spacing are connected. A deep, solid-walled bin may conceal clutter, but damp tools pressed together can dry slowly. Separate zones for a sponge and upright brushes are often more useful than a single large compartment. Leave enough room for air instead of treating the listed capacity as a target that must be filled.

Match the holder to your actual cleanup kit

Lay out the items that genuinely live beside the sink. Many kitchens need space for only a sponge and one handled brush. Others rotate among a bottle brush, straw brush, pan scraper, dish wand, sink stopper, and cleaning cloth. The most suitable format depends on the tallest handle, widest brush head, and dampest item—not the total number of accessories shown in a styled image.

For upright brushes, check whether the base is broad and stable enough to resist tipping when a tool is pulled out from one side. A divided brush cup can prevent handles from tangling, while an open rail may better accommodate unusually shaped heads. Sponge slots should hold the sponge without squeezing it tightly; a narrow slot can be less useful once a scrubber absorbs water and expands.

Soap storage is optional rather than automatically beneficial. A combined soap-and-tool station can make the area look coordinated, but a heavy pump can shift the organizer or make the base harder to rinse. If you refill soap frequently, verify that the bottle can be lifted without knocking over wet tools. In a cramped corner, keeping the dispenser separate may make both items easier to clean around.

Attachment choices and their tradeoffs

Freestanding designs ask the least of the sink surface. They can move to either side and are simple to remove before deep cleaning. Stability depends on the base, feet, load distribution, and counter conditions, so check whether the design remains practical when brushes lean outward.

Suction-mounted holders can preserve counter space, but installation depends on the material, texture, curve, and cleanliness of the mounting area. Do not assume a suction cup will work equally well on every sink. Adhesive mounts may offer a different hold but can be less convenient to reposition. For either style, follow current preparation and load instructions and keep a fallback storage spot in mind if the attachment loosens.

Saddle caddies drape over a divider or edge and suit certain double-basin sinks. Measure divider width, height, and clearance on both sides. Flexible designs can still interfere with stacked dishes or get splashed from both basins. Faucet-neck or faucet-deck organizers need close attention to fixture diameter, hose movement, control access, and the direction in which water drains.

A simple maintenance routine

Treat the caddy as part of sink cleaning, not as permanent scenery. Empty it, wash or wipe the base and tray, clean the surface underneath, and let components dry before reloading. Rinse trapped food particles from sponge slots and brush cups rather than waiting for visible buildup. Follow the current care directions for the specific materials and removable pieces.

Reducing inventory makes maintenance easier. Store replacement sponges and less-used brushes in a dry cabinet, then reserve the caddy for items in active rotation. Retire worn tools on their own schedule; an organizer can improve airflow and contain drips, but it cannot make a neglected sponge sanitary.

Limitations

  • A caddy organizes wet tools but does not clean, sanitize, or fully dry them on its own.
  • Search results may mix counter, basin, saddle, adhesive, and faucet-mounted formats with very different installation needs.
  • Suction and adhesive performance depends on the surface and preparation, so compatibility cannot be inferred from appearance alone.
  • Open drainage can move water to the counter if the caddy is not positioned carefully.
  • Added soap holders and towel rails increase capacity but can also increase the footprint and cleaning effort.
  • A compact organizer will not solve broader under-sink or countertop storage problems.

Alternatives to compare

  • A simple ventilated sponge dish if only one scrubber needs a landing place.
  • A clip-on sponge holder for a basin with a compatible rim and enough interior clearance.
  • A wall or cabinet-door rail for brushes that benefit from hanging separately.
  • A narrow absorbent sink mat when several irregular tools need temporary drying space.
  • An under-sink bin for dry replacements and occasional-use cleaning accessories.
  • A compact dish rack when cups, lids, and small dishes—not just cleaning tools—also need to air-dry.

FAQ

Should a sink caddy drain into the sink or into a tray?

Direct-to-sink drainage reduces the need to empty a tray, but it works only when the caddy sits close enough and the slope reaches the basin. A removable tray is more flexible on distant counters, provided you are willing to empty and clean it regularly.

Are suction-cup sink caddies reliable?

They can be practical on a compatible, clean, smooth mounting surface. Sink material, texture, curves, moisture, preparation, and load all matter, so check the current attachment guidance and avoid assuming universal compatibility.

What should I keep in a kitchen sink caddy?

Keep the small wet tools used in the daily routine, such as one sponge, a dish brush, or a scraper. Store spare supplies and seldom-used tools elsewhere so air can circulate and the caddy remains easy to clean.

Is stainless steel automatically better for a wet sink area?

No material label removes the need for drainage, cleaning, and care. Review the exact material and finish wording, construction details, and care instructions for the current option instead of choosing on appearance alone.

How often should I clean the caddy?

Clean it often enough that water, soap film, and debris do not accumulate. The practical interval varies with use, but adding the caddy and its underside to the regular sink-cleaning routine is easier than waiting for visible buildup.