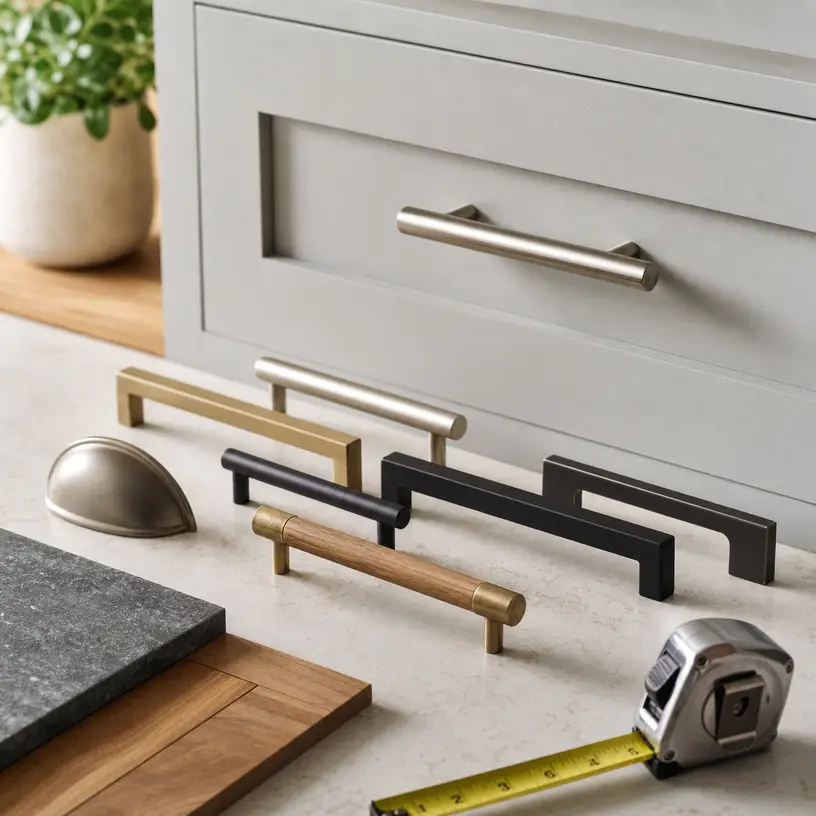
A Folding Step Stool for Home: Reach, Storage, and Stability

Product links are for reference. Verify current details on the retailer page before buying.
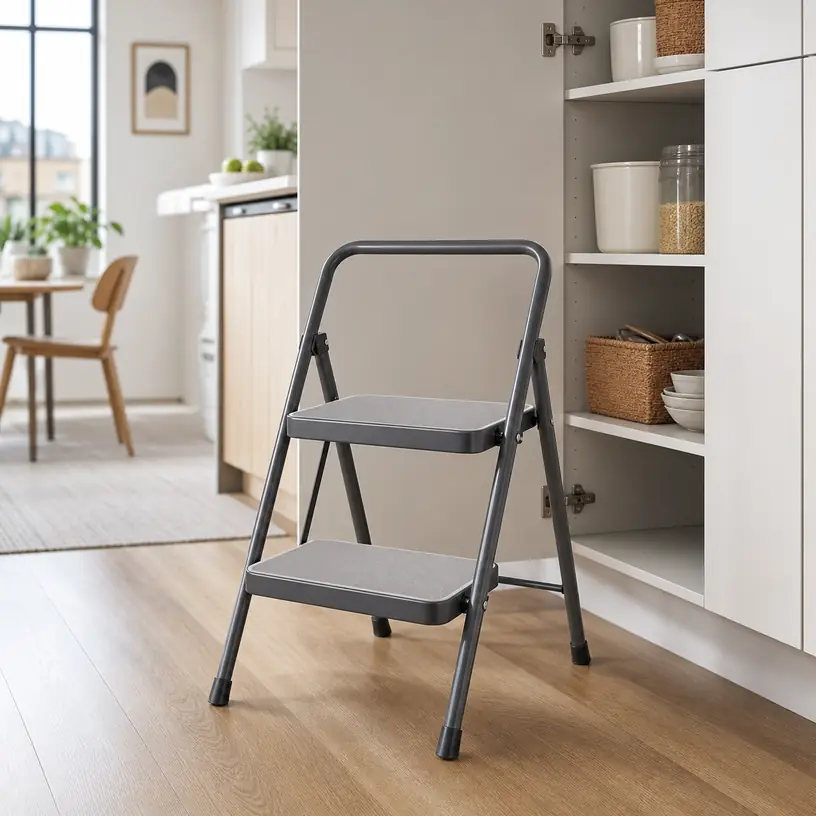
Illustrative image of a generic folding step stool beside a kitchen cabinet

Illustrative image, not an official product photo.

Short answer

Choose a folding step stool around one repeatable household task, such as reaching an upper kitchen shelf or a closet storage box. The number of steps matters, but so do the height of the highest permitted standing step, the space the stool occupies when open, the size of each tread, the locking or spreader mechanism, and where the folded stool will live. Confirm the current load rating and instructions, then make sure every intended user can open, climb, descend, and fold it without improvising.

Search reference

Folding step stool options for home use

Compare usable standing height, open and folded dimensions, tread depth, handhold design, load rating, and locking instructions for your intended room.

View matching options

Start with the shelf, not the stool

A vague goal such as “reach higher” can lead to an awkward choice. Instead, identify the shelf, cabinet, curtain rod, or storage area you access most often. Measure its height and note how close you can place a stool beneath it. A kitchen island, base cabinet, closet door, or laundry appliance may prevent a larger stool from getting into a comfortable position.

Next, consider the user’s reach from the standing level the manufacturer permits. Overall stool height is not the same as usable standing height, and a top cap or tool tray may not be a step. Product photos can make this distinction difficult to judge, so look for a dimension drawing and current instructions rather than estimating from the image.

The stool also needs a parking place. Measure the gap beside the refrigerator, inside a utility closet, or behind a door where you expect to store it. Include folded thickness, width, and height, and check whether protruding feet or a handle will catch on shelving. A model that stores neatly near the task is more practical than a taller one that has to be retrieved from another floor.

Who this is for

  • Households that regularly use upper kitchen cabinets, closet shelves, or laundry-room storage.
  • Apartment residents who need extra reach but have a narrow storage space for household tools.
  • Buyers replacing the unsafe habit of standing on a dining chair, box, or countertop.
  • People comparing one-, two-, and three-step designs for light indoor access tasks.
  • Shared homes where a clear opening, locking, carrying, and storage routine can be established.

Who should skip it

  • Anyone who needs to work on stairs, sloped ground, soft soil, or another uneven surface should use equipment specifically designed for that setting.
  • Skip a small household stool when the task requires substantial working height, extended overhead effort, or leaning around an obstacle.
  • Do not rely on a product whose load rating, permitted standing levels, locking instructions, or damage warnings are unclear.
  • A folding stool is not a substitute for professional access equipment where workplace rules or specialized safety requirements apply.
  • If balance, mobility, or safe climbing is a concern, avoid assuming that a rail or handle makes a model suitable; seek appropriate guidance for the individual situation.

What to verify before buying

  • Highest permitted standing level: Check the instruction diagram, not just the product’s total height or number of steps.
  • Load rating: Confirm the current stated capacity and follow the manufacturer’s definition, including the user and anything carried.
  • Open footprint: Measure the floor area from the front feet to the rear feet and the clearance needed to unfold it fully.
  • Step dimensions: Compare tread width, front-to-back depth, spacing, surface texture, and edge shape.
  • Locking design: Review how the frame reaches its fully open position and how the hinges, spreaders, or platform indicate that they are secured.
  • Feet and floor guidance: Check the intended surface, foot material, and care instructions, especially for smooth kitchen or finished wood floors.
  • Folded dimensions and weight: Make sure the stool fits its storage slot and can be carried there without dragging or catching.
  • Current documentation: Look for assembly requirements, inspection points, warnings, permitted uses, and any safety-standard wording stated on the listing or manufacturer page.

One, two, or three steps?

A one-step design can suit a modest reach increase and usually takes less room to store. Its usefulness depends on the actual platform height and where it can sit relative to the cabinet. Some compact products sold as step stools are primarily seats or children’s accessories, so confirm the intended use rather than relying on the product name.

Two-step models often balance reach and storage for kitchens and closets. Pay attention to whether both levels are intended for standing and whether the upper structure provides a handhold while stepping up or down. A handle can help with positioning, but it does not justify leaning sideways or climbing beyond the stated limit.

Three-step designs provide more height but create a larger open footprint and a longer folded frame. Check ceiling fixtures, cabinet doors, and nearby counters before choosing one. The extra level is only useful when the stool can be placed squarely in front of the task with all feet supported and enough room for a controlled descent.

Stability depends on the whole setup

Wide treads, textured surfaces, and substantial feet are useful comparison points, but no single feature guarantees stability. The frame must be fully opened, the locking system must be engaged as directed, and the floor must be firm, level, clean, and suitable for the feet. Inspect the stool before use and follow the current instructions for loose hardware, bent parts, worn feet, contamination, or other damage.

Placement also changes how a stool feels. Reaching sideways for a bowl or twisting with a storage box can shift the user away from the frame. It is better to descend and reposition the stool than to stretch beyond a centered stance. Keep cabinet doors, pets, children, and foot traffic out of the opening and landing area while the stool is in use.

Think about what will be carried. A large box can block the view of the steps or prevent use of a handhold. If a task cannot be done while maintaining the contact and body position required by the instructions, the stool may not be the right access method for that task.

Folding and storage details that matter later

Try to understand the full open-and-close sequence before buying. Some stools fold by lifting a platform; others release through a latch or hinge arrangement. Check where fingers and hands are meant to go, and keep them away from pinch points identified in the instructions. An easy-carry handle is helpful only if it remains accessible in the folded position.

For a narrow storage gap, folded thickness may be the deciding measurement. For a closet wall hook, verify whether hanging storage is permitted and whether the product includes an appropriate point for it. Do not assume a frame opening is designed to support the stool’s weight in storage.

Kitchen and utility-room use can expose feet and treads to grease, water, detergent, or dust. Review the care directions and keep climbing surfaces clean and dry. A stool stored beside frequently used supplies should not block an exit, fall into a walkway, or unfold when another item is removed.

Limitations

  • Listed dimensions may describe different parts of the stool, so compare a diagram showing both open and folded measurements.
  • A taller stool can be less convenient in a small room because it needs more floor and storage clearance.
  • Handrails and top handles vary in purpose and may not be designed for pulling, hanging, or standing support beyond the instructions.
  • Nonslip wording does not remove the need for a clean, level surface and correctly positioned feet.
  • Folding mechanisms create moving joints and potential pinch areas that require careful handling and periodic inspection.
  • Household step stools are not automatically suitable for outdoor, industrial, stairway, or extended-duration work.

Alternatives to compare

  • Reorganize frequently used items onto lower shelves and reserve upper storage for lightweight, occasional items.
  • Use a fixed pull-out kitchen step only when it is properly designed and installed for the cabinetry and intended load.
  • Choose a larger stepladder when the required height and task fall outside a compact stool’s permitted use.
  • Use a long-handled retrieval or cleaning tool when the object and task can be handled safely from floor level.
  • Ask for assistance when an item is bulky, the view of the steps would be blocked, or the task cannot be completed from a centered position.

FAQ

How tall should a folding step stool be for kitchen cabinets?

Measure the target shelf and compare it with the highest standing level the instructions permit, along with the user’s comfortable reach. Do not select by overall product height alone, because a top cap, handle, or tray may not be a standing surface.

Is a handrail necessary on a household step stool?

It depends on the design, user, and task. A rail or upper handle may provide a contact point during ascent and descent, but its intended use and load limits should be confirmed. It does not make leaning, side-reaching, or climbing above the permitted step safe.

Can I use a folding step stool on a kitchen floor?

Only if the instructions allow that surface and the floor is firm, level, clean, and dry. Check that every foot sits flat, inspect the foot material, and keep spills, loose mats, cabinet doors, and foot traffic away from the area.

What dimensions matter for storage?

Check folded thickness, width, and height as a set. Also allow room for feet, handles, latches, or hinges that protrude, and confirm that the stool can be removed from the storage gap without snagging nearby objects.

What should I inspect before each use?

Follow the manufacturer’s inspection guidance. Common points to examine include the frame, fasteners, hinges, spreaders or locks, treads, feet, and any signs of bending, cracking, contamination, looseness, or wear. Do not use a damaged stool.

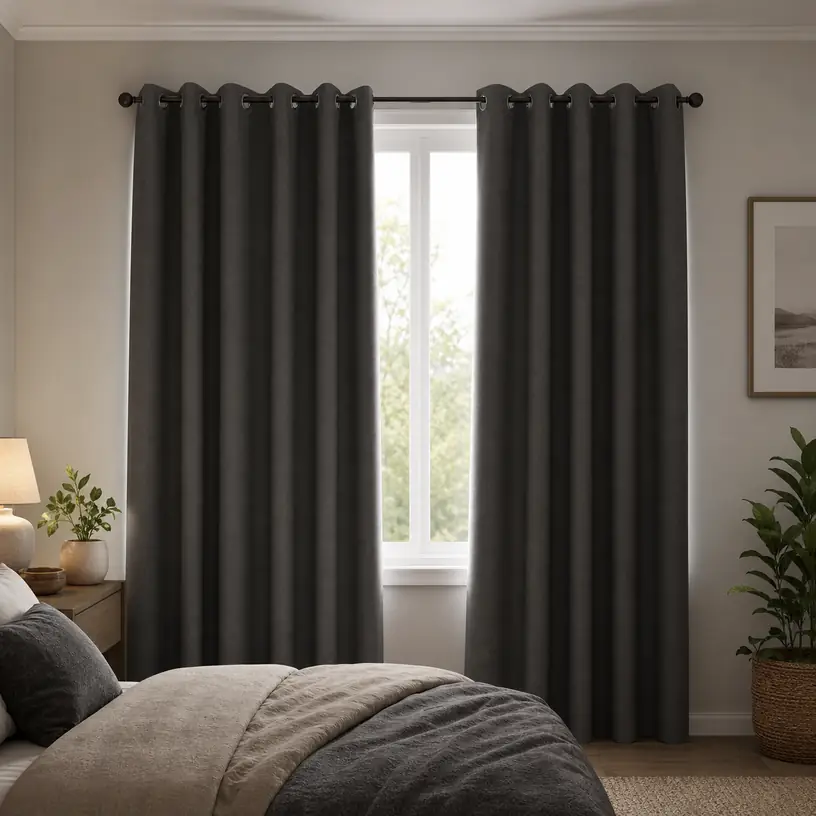
Choosing a Magnetic Screen Door for Busy Patios and Pet-Friendly Homes

Product links are for reference. Verify current details on the retailer page before buying.

Illustrative image of a generic magnetic mesh screen installed in a patio doorway

Illustrative image, not an official product photo.

Short answer

A magnetic screen door can make sense for a frequently used patio or back doorway when you want airflow while keeping the opening covered. Fit is the deciding factor: measure the inside of the frame, note where the mounting strips can attach, and compare those numbers with the finished dimensions rather than relying on a broad door-size label. For a household with children, pets, or armfuls of groceries moving through, also look closely at how the center seam opens, realigns, and closes near the floor.

Search reference

Compare magnetic screen door configurations

Use the current results to compare finished dimensions, mesh construction, center-closure layouts, mounting kits, and installation requirements for your doorway.

View matching options

Measure the opening, not the hinged door

A magnetic screen normally hangs around a doorway rather than replacing the hinged door itself. Measure the usable frame area from the points where the screen will actually attach. Record both width and height in more than one place, since trim, thresholds, and older frames may not be perfectly square. Then check whether the listed dimensions refer to the full screen, the opening it is intended to cover, or a nominal door size.

The center seam should fall where people can pass through without fighting the existing handle or latch. A screen that is stretched too tightly may not let the magnets meet naturally; one with too much extra material can drag at the threshold or bunch along the sides. If there is a sliding door, storm door, security door, or outward-swinging door in the same opening, map its movement before choosing a mounting position.

What this product type is

A magnetic screen door is a flexible mesh panel with a split down the middle. Magnets or weighted closures along that split are intended to separate as someone walks through and come back together afterward. Most versions use hook-and-loop strips, adhesive-backed fasteners, or a combination of temporary strips and reinforcing tacks around the frame.

It is a seasonal convenience product, not a structural replacement for a framed screen door. It will not lock an entrance, weather-seal a doorway, or provide the rigid barrier of a conventional screen. The useful comparison is therefore not just “does it fit,” but “does its mounting method and closing behavior fit this household’s traffic pattern?”

Who this is for

  • Households that open a patio, porch, balcony, garage, or back door repeatedly in mild weather.
  • People who often carry trays, laundry, garden supplies, or groceries through a doorway and value hands-free passage.
  • Pet owners comparing a flexible passage with a permanently installed pet door.
  • Renters who have permission to use removable fasteners and can test the frame finish first.
  • Homes needing a screen for part of the year, with a dry place available for off-season storage.

Who should skip it

  • Skip this format when the doorway needs security, a child barrier, or dependable pet containment.
  • Choose a framed solution if strong wind regularly reaches the opening or the screen must stay taut at all times.
  • Avoid adhesive mounting on crumbling paint, dusty masonry, damp wood, delicate finishes, or any surface the fastener instructions exclude.
  • Look for another approach when an existing door swings through the only practical mounting plane.
  • Do not assume a flexible screen will stop a determined pet from pushing around the edge or through the seam.

What to verify before buying

  • Finished panel width and height, recommended opening range, and whether the screen can be trimmed.
  • Required flat mounting space along the top and both sides of the frame.
  • Mesh material wording, edge reinforcement, seam construction, and care instructions.
  • Number and placement of magnetic or weighted closures, especially near the top and bottom of the seam.
  • Included fasteners and whether optional tacks are suitable for your frame material.
  • Threshold clearance so the lower edge will not drag, snag, or prevent the seam from settling.
  • Current removal guidance, replacement-fastener availability, and storage instructions.

Traffic, pets, and closure behavior

For a busy doorway, closure layout matters more than a long accessories list. Compare product diagrams to see whether magnets run continuously, alternate with gaps, or are concentrated at specific points. More closure points do not automatically guarantee better performance: the panel still needs to hang evenly, and its bottom edge needs enough weight and clearance to settle after someone passes.

Pets introduce a different set of tradeoffs. A dog may learn to push through the seam quickly, while a cautious or small animal may need gradual introduction. Claws can catch loose mesh, and an excited pet can pull at a poorly secured edge. Treat “pet friendly” as a use-case description rather than a promise of durability or containment, and review the current construction and installation details accordingly.

Mesh descriptions can be difficult to compare across listings. Instead of assuming that a named fabric tells the whole story, look for clear information about weave, visibility, airflow, reinforced borders, and cleaning. Finer-looking mesh may improve the visual barrier while also collecting more dust or pollen; heavier-looking mesh may hang differently and reduce the view. The right balance depends on the doorway and how often it will be used.

Installation details that affect the result

Clean and dry the mounting surface according to the fastener instructions, then lay the screen flat and identify the top center before attaching it. Starting from the middle can help keep the center split aligned. It is usually better to test the hang and closure before pressing every adhesive section firmly or adding any optional tacks.

Check the seam from both sides. The panels should meet without needing to be pulled together, and the bottom should clear the threshold while remaining low enough to cover the opening. Open the main door fully, walk through several times, and watch for contact with handles, mats, trim corners, and door closers. A small alignment problem during a slow test can become much more annoying during normal household traffic.

Limitations

  • Magnetic screens are not locks, weather doors, safety gates, or reliable animal-containment systems.
  • Closure can be affected by uneven installation, wind, a sloped threshold, wrinkles, or contact with the main door.
  • Adhesive performance varies with surface condition, temperature, humidity, preparation, and removal technique.
  • Flexible mesh and edge binding can wear where pets, shoes, packages, or hardware repeatedly rub them.
  • Dimensions, included fasteners, and installation instructions differ across current listings and must be checked individually.

Alternatives to compare

  • A hinged framed screen door for a more rigid, permanent entrance.
  • A retractable screen when keeping the opening visually clear is a priority.
  • A sliding screen panel for a compatible patio-door track.
  • A tension-mounted or track-based screen when adhesive is unsuitable for the frame.
  • A professionally fitted screen for unusually wide, arched, uneven, or heavily used openings.

FAQ

How should I measure for a magnetic screen door?

Measure the frame area where the screen will attach, not only the hinged door slab. Take width and height measurements at multiple points, note the available flat trim, and compare them with the listing’s finished panel dimensions and recommended opening range.

Can a magnetic screen door work with an outward-swinging door?

It may, but only if the screen can mount on a separate plane without blocking the door’s swing, handle, closer, or latch. Sketch the direction of movement and verify the proposed installation position before buying.

Will a magnetic screen door keep pets inside?

It should not be treated as dependable pet containment. Many pets can push through the center seam or around a flexible edge. Use a secure door, gate, or other appropriate barrier whenever containment matters.

Are adhesive strips safe for a rental doorway?

That depends on the fastener, paint, frame material, surface condition, and lease rules. Get permission when needed, follow removal instructions, and test an inconspicuous area rather than assuming “removable” means damage-free on every finish.

What causes the center seam to stay open?

Common fit-related causes include an off-center installation, a panel stretched too tightly, excess material dragging at the bottom, wrinkles near the top, or interference from the threshold or main door. Wind and wear can also affect closure.

Blackout Curtains for Bedrooms and Bright Rooms: Fit, Fabric, and Hanging Notes

Product links are for reference. Verify current details on the retailer page before buying.

Illustrative image for a blackout curtains buying guide

Illustrative image, not an official product photo.

Short answer

Blackout curtains are worth comparing when regular curtains leave a bedroom, nursery, media corner, or street-facing room too bright for the way the space is used. The important choice is not just the color of the fabric. Panel width, header style, lining, window coverage, mounting height, return gaps at the wall, and care instructions all affect how well the curtains control light in a real room.

Search reference

Blackout curtain options

Compare panel dimensions, lining descriptions, hanging style, fabric weight, care instructions, and whether the set includes one panel or a pair before matching curtains to your window.

View matching options

Think beyond the window glass

A blackout curtain only helps if it covers the places where light enters. Many bright-room problems come from the sides, top, and bottom of the window rather than the glass itself. A panel that looks wide enough in a product photo may still leave a vertical glow line if the rod is mounted too close to the window frame or if the fabric hangs perfectly flat instead of gathering.

Before shopping, measure the window frame, the wall space beside it, and the height from the planned rod position to the floor or sill. Decide whether the curtain should skim the sill, reach below the window, or fall closer to the floor. A bedroom with strong morning sun may benefit from wider panels mounted higher and farther outside the frame, while a small rental room may need a lighter solution that fits an existing rod.

Color is also not the whole story. Dark fabric can look light-blocking, but lining, weave density, and construction wording matter. Some curtains are marketed as room-darkening rather than full blackout. Treat those terms carefully and verify the current listing details before assuming a specific light-control level.

What this product type is

Blackout curtains are window panels designed to reduce incoming light more than standard decorative curtains. They may use dense fabric, a darker lining, a coated backing, layered construction, or a combination of those features. Common uses include bedrooms with early sunlight, nurseries, media rooms, home offices with screen glare, and apartments facing streetlights.

They are not a complete window replacement, and they do not guarantee a pitch-dark room in every installation. Rod placement, wall color, window shape, air vents, blinds, and gaps around the curtain can all affect the final result. For strong light control, the hanging setup is part of the purchase decision.

Who this is for

  • People trying to reduce morning sun, streetlight glow, or screen glare in a specific room.
  • Renters comparing options that can work with an existing curtain rod or minimal hardware changes.
  • Parents setting up a nursery or child’s room where daytime darkness needs to be easier to manage.
  • Shift workers or light-sensitive sleepers who want a room setup that blocks more light than thin curtains.
  • Media-room, guest-room, or home-office setups where privacy and glare control matter together.

Who should skip it

  • Skip fabric panels if the main issue is heat loss, damaged windows, or a gap around the frame that needs repair.
  • Avoid heavy curtains if the current rod, brackets, anchors, or wall material cannot support the listed weight.
  • Choose shades, blinds, or a different mounting system if there is no wall space for wider curtain coverage.
  • Do not assume blackout wording will solve light leakage from skylights, glass doors, transom windows, or open floor plans.

What to verify before buying

  • Confirm whether the listing includes one panel or two, then compare total coverage with your measured window width.
  • Check panel width, panel length, header style, grommet diameter, rod pocket size, tab design, or hook compatibility.
  • Review lining and light-control wording, including whether the curtains are described as blackout, room-darkening, thermal, or privacy focused.
  • Measure wall space around the frame so panels can overlap the window instead of stopping exactly at the edge.
  • Verify fabric care instructions, wrinkle handling, and whether steaming, ironing, or machine washing is allowed.
  • Check weight and mounting requirements, especially for drywall, plaster, wide windows, or rental restrictions.
  • Compare color options under your room lighting, since dark, light, matte, and shiny fabrics can look different once installed.

Main buying notes

Panel fullness is one of the easiest details to miss. Curtains need extra width so they can hang with folds while still covering the glass. If the panels are barely as wide as the frame, they may look stretched and leave gaps when closed. Many buyers should think in terms of total panel width rather than the width of one panel shown in a photo.

Header style changes both fit and light leakage. Grommet panels slide easily and have a casual look, but the rings can create small openings near the top. Rod-pocket curtains may sit closer to the rod, though they can be harder to move smoothly. Back-tab or hook-compatible styles can look cleaner, but they need the right rod, rings, or track system. Match the header to the hardware you already have unless you are ready to change the mounting setup.

Length affects the room as well as the light. Floor-length panels can feel more finished and may reduce bottom glow, but they can collect dust, interfere with vents, or brush against baseboard heaters if the room has them. Sill-length curtains may be better above a desk, radiator, toy storage, or pet bed, though they may leave more light around the lower edge. Measure the real obstacle zone before choosing a length.

Light gaps are often fixed by placement rather than by buying the thickest fabric. Mounting the rod higher, extending it several inches beyond the frame, and using enough width can reduce side and top leaks. For rooms that need stronger darkness, compare wraparound rods, curtain tracks, blinds behind the curtains, or layered window treatments instead of relying on panels alone.

Care matters because curtains are large textile items. A panel that is hard to clean may not be ideal near pets, children’s rooms, dusty windows, or kitchen-adjacent spaces. If the listing mentions coating, lining, or special backing, read the care instructions before washing or steaming.

Limitations

  • Search results change, so panel count, dimensions, fabric details, included hardware, and care instructions must be checked on the current retailer page.
  • Blackout curtains may still leak light around the top, sides, bottom, or center split if the mounting setup leaves gaps.
  • Heavier panels can require stronger rods, brackets, wall anchors, or more careful installation than thin decorative curtains.
  • Thermal, noise-reducing, and energy-related wording varies by product and should not be assumed without current listing support.
  • Fabric color may look different online, especially in rooms with warm bulbs, cool daylight, or painted walls that reflect color.

Alternatives to compare

  • Cellular shades when the window needs a cleaner inside-frame treatment and the frame depth supports it.
  • Roller shades for a simple flat look, especially in offices, apartments, or rooms with narrow wall clearance.
  • Blackout liner panels if you already like your decorative curtains but need more light control.
  • Wraparound curtain rods or ceiling tracks when side gaps are the main issue.
  • Blinds plus curtains for layered privacy, glare reduction, and more flexible daytime control.

FAQ

How wide should blackout curtains be?

Start with the window width, then allow extra fabric so the panels can overlap the frame and still hang with folds. Also measure wall space beside the window, because wider coverage can reduce side light leaks.

Are blackout curtains the same as room-darkening curtains?

Not always. Product wording varies, and some room-darkening curtains may reduce light without aiming for the same level of blocking as blackout curtains. Check the current listing description and images before buying.

Do I need a special curtain rod for blackout curtains?

Not always, but the rod and brackets should support the panel weight and fit the header style. A wraparound rod may help if light is leaking at the sides, while an existing straight rod may be fine for lighter room-darkening needs.

Should blackout curtains touch the floor?

Floor-length panels can reduce bottom glow and look more finished, but they are not always practical near vents, heaters, desks, pets, or dust-prone floors. Choose length based on the room layout and the listed panel dimensions.

Can renters use blackout curtains?

Renters can often use blackout curtains if an existing rod is already installed or if removable hardware is allowed. Check lease rules, wall material, panel weight, and hardware requirements before adding new brackets or anchors.

Felt Furniture Pads for Chairs, Tables, and Quiet Floor Protection

Product links are for reference. Verify current details on the retailer page before buying.

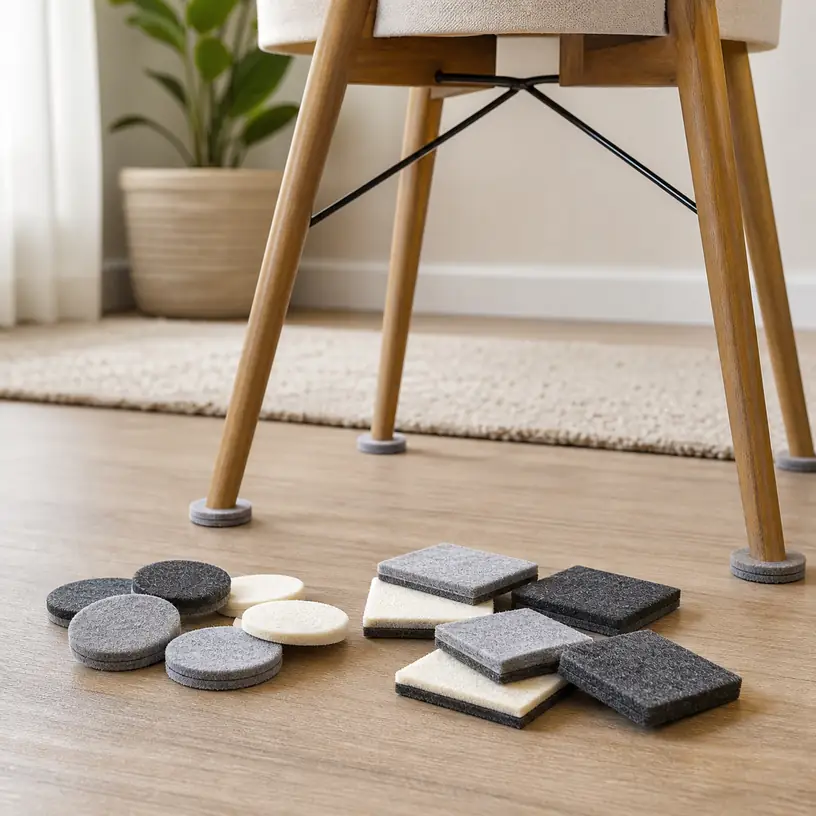
Illustrative image for a felt furniture pads buying guide

Illustrative image, not an official product photo.

Short answer

Felt furniture pads are small, inexpensive-looking items that can make a room feel easier to live in when chairs scrape, tables shift, or a sofa needs to move for cleaning. The main decision is not simply round versus square. Match the pad style to the furniture foot, the floor surface, how often the piece moves, and whether you want adhesive pads, nail-in glides, screw-in glides, or stretchy chair-leg covers with felt bottoms.

Search reference

Compare felt furniture pad options

Compare pad shapes, thickness, attachment style, stated floor compatibility, and package variety before choosing protectors for the furniture that moves most often.

View matching options

Start with the furniture that actually moves

Felt pads are most useful on furniture that slides repeatedly: dining chairs, counter stools, desk chairs without casters, small side tables, nightstands, and benches that get pulled in and out. A heavy bookcase that never moves may need leveling or stable contact more than a soft glide. A dining chair that moves dozens of times a week needs a pad that stays attached and does not catch grit.

Look at the foot shape before browsing. Some chair legs end in small round points, some are angled, some are square, and some have metal or plastic caps already installed. A flat adhesive pad can work well on a broad, clean, flat foot, but it may peel on a narrow angled leg. Stretch-on covers may fit certain round or square legs better, while nail-in or screw-in glides are more permanent and require a furniture foot that can safely accept them.

The floor matters too. Felt is usually chosen to reduce scraping and noise on hard surfaces, but the pad still needs regular checking. Dust, sand, pet hair, and tiny stones can get trapped in the felt and turn a protective pad into something that drags debris across the floor. In busy dining areas, the maintenance habit is almost as important as the pad itself.

Who this is for

  • Households with dining chairs, stools, benches, or small tables that scrape across hard floors.
  • Renters who want a non-permanent way to reduce chair noise and everyday scuffing.
  • Home offices where a small chair, printer stand, or side table needs to shift without harsh dragging sounds.
  • Families setting up a breakfast nook, apartment dining area, craft table, or homework table on a hard floor.
  • Anyone replacing old pads that have flattened, collected grit, or started sliding off furniture feet.

Who should skip it

  • Skip simple adhesive felt pads if the furniture foot is dirty, uneven, textured, very narrow, or angled in a way that gives the adhesive little contact area.
  • Use a proper furniture glide, caster cup, rug, or floor-specific protector if the item is extremely heavy or rarely moves.
  • Do not treat felt pads as a repair for loose chair joints, wobbly legs, sharp broken feet, or furniture that needs leveling.
  • Avoid nail-in or screw-in styles unless the furniture foot can accept hardware without splitting, cracking, or damaging a finish you care about.

What to verify before buying

  • Measure the contact area of the furniture foot, not just the visible leg width above it.
  • Check whether the pads are adhesive, nail-in, screw-in, slip-on, stretch-on, or mixed in a variety pack.
  • Compare round, square, strip, and sheet formats with the furniture shapes you need to cover.
  • Review stated floor compatibility and care notes for the current product page, especially for wood, laminate, tile, vinyl, and painted floors.
  • Confirm pad thickness if the furniture needs to remain level or if a chair must still tuck under a table or desk.
  • Check whether the package includes enough matching pieces for all legs, plus extras for replacement.
  • Look for guidance on cleaning the furniture foot before installation and replacing pads after wear.

Choosing an attachment style

Adhesive felt pads are the easiest starting point. They are useful for flat chair feet, table legs, decorative objects, and small furniture that does not put extreme sideways force on the pad. Installation is simple, but the surface needs to be clean and dry. If old adhesive, dust, wax, or floor-cleaner residue is left on the furniture foot, even a good pad may shift sooner than expected.

Nail-in and screw-in felt glides are better suited to furniture that moves often and has a foot designed to accept a small fastener. They can stay in place more securely than peel-and-stick pads, but they are not reversible in the same way. Before choosing them, check the furniture material, leg thickness, and whether installing hardware could split a small wooden foot or damage a piece you might later resell.

Slip-on or stretch-on chair-leg covers can be helpful when adhesive pads keep falling off narrow or angled legs. Many designs wrap around the leg and place felt on the bottom. The tradeoff is appearance and fit: a cover that is too loose can twist, while one that is too tight may be hard to install or may not sit flat.

Shape, thickness, and floor habits

Round pads are common for round chair feet, while square pads fit many straight table legs. Strips and sheets are useful when you want to cut a custom shape for an unusual foot, a cabinet, or a decorative object. Variety packs can be convenient for a whole room, but they can also leave you with many unused sizes. Count the pieces you actually need before assuming a large assortment solves the problem.

Thickness affects both cushioning and stability. A thicker pad can soften contact and help with small irregularities, but it also raises the furniture slightly. That may matter for a chair that must slide under an apron table, a cabinet door that sits close to the floor, or a table that already feels level. If only one leg gets a new thick pad while others remain thin, the furniture can rock.

The best pad will still need attention. Sweep or vacuum around chair legs, check pads for grit, and replace any piece that has compressed unevenly or shifted off-center. In dining rooms and kitchens, crumbs and sand can collect quickly. In entry-adjacent spaces, outdoor debris may make replacement more frequent.

Limitations

  • Felt pads reduce contact noise and everyday scraping, but they do not make furniture safe for every floor finish or every load.
  • Adhesive pads can loosen when the foot is dirty, uneven, damp, waxy, or under heavy sideways movement.
  • Felt can collect grit, so pads need periodic cleaning or replacement rather than being installed and forgotten.
  • Hardware-mounted glides can leave small holes or marks in furniture feet.
  • Floor finishes, cleaners, humidity, and furniture weight vary, so verify current product guidance before buying or installing.

Alternatives to compare

  • Rubber or silicone furniture cups when a heavy item should stay in place instead of sliding.
  • Clear chair-leg caps or sleeves when the leg shape makes flat adhesive pads unreliable.
  • Area rugs or dining mats when the whole chair zone needs cushioning and sound reduction.
  • Caster cups for furniture with wheels or small rolling bases.
  • Adjustable leveling glides when the main problem is wobble rather than scraping.

FAQ

Are adhesive felt pads enough for dining chairs?

They can be enough when the chair feet are flat, clean, and broad enough for the adhesive to hold. If chairs move constantly or the legs are narrow, angled, or textured, compare stretch-on covers or hardware-mounted felt glides.

How do I size felt pads for chair legs?

Measure the part of the leg that touches the floor and choose a pad that covers most of that contact area without hanging far over the edge. For unusual feet, cut-to-fit sheets or strips may be easier than a fixed round size.

Can felt furniture pads protect hardwood floors?

They can help reduce scraping on hard floors, but protection depends on correct sizing, clean installation, regular inspection, and the floor finish. Remove grit from the pads and verify the current product guidance for your floor type before using them.

Why do felt pads keep falling off?

Common reasons include dust, old adhesive residue, wax, moisture, narrow contact points, angled legs, or heavy sideways movement. Clean the furniture foot thoroughly and consider a different attachment style if peel-and-stick pads keep shifting.

How often should felt furniture pads be replaced?

Replace them when they flatten unevenly, collect grit that will not brush out, slide off-center, tear, or stop cushioning the furniture foot. High-use dining chairs may need more frequent checks than tables or decorative pieces.

Door Draft Stoppers for Apartments, Bedrooms, and Older Doors

Product links are for reference. Verify current details on the retailer page before buying.

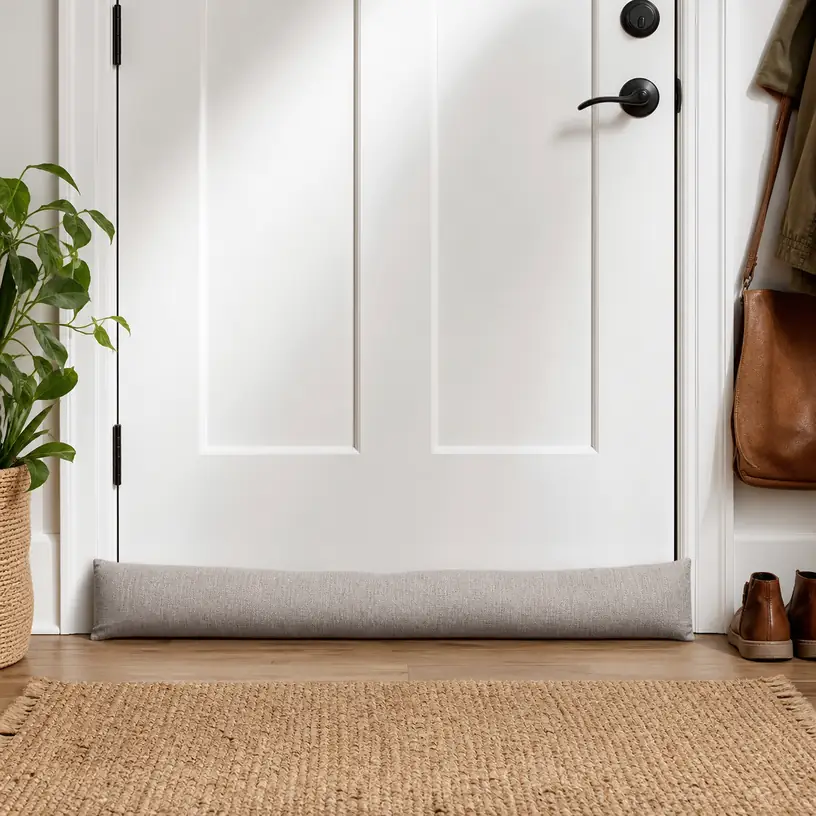
Illustrative image for a door draft stopper buying guide

Illustrative image, not an official product photo.

Short answer

A door draft stopper is worth considering when a small gap under a door makes a room feel breezy, lets hallway noise through, or allows dust and light to slip in. The right choice depends less on appearance and more on the door gap, the way the door swings, the flooring it crosses, and whether you can attach something permanently. For renters, a removable fabric draft blocker may be the least risky starting point; for frequently used exterior doors, a better-fitted sweep or adhesive seal may be more stable if the current retailer details confirm it suits the door.

Search reference

Compare door draft stopper options

Use the search page to compare removable fabric blockers, under-door sleeves, adhesive seals, and sweep-style designs before matching one to your door gap and floor surface.

View matching options

Start with the gap you can actually see

Before comparing materials or colors, close the door and look at the gap from both sides. A draft stopper that is too thin may look tidy but still leave air moving underneath. One that is too bulky can drag across the floor, catch on a rug, or keep the door from closing fully. Measure the visible space at several points because older doors and uneven thresholds are not always level from left to right.

The flooring matters as much as the door. A soft fabric tube may slide easily on hardwood but bunch up on thick carpet. A rigid sweep may work smoothly over a flat threshold but feel annoying where the floor rises near the latch side. If the door opens over a mat, rug, or uneven transition strip, include that clearance in your measurement rather than measuring the door alone.

What this product type is

Door draft stoppers are simple barriers placed at the bottom of a door to reduce unwanted air movement, light gaps, dust, and some everyday noise transfer. Common versions include loose weighted fabric tubes, double-sided sleeves that slide under the door, adhesive foam or silicone strips, and more hardware-like door sweeps.

They are not full insulation projects and they do not repair a warped door, loose threshold, or damaged frame. Think of them as small problem solvers for a specific gap. If the gap changes with the season or the door already rubs the floor, verify the attachment method and clearance guidance carefully before choosing a style.

Who this is for

  • Renters who want a removable way to reduce a hallway draft without changing the door permanently.
  • Homeowners checking small comfort fixes before taking on larger weatherproofing work.
  • Bedroom, nursery, or home office setups where light leakage and minor hallway noise are distracting.
  • Older homes or apartments where door bottoms are uneven but the door still opens and closes normally.
  • Entryways where a seasonal blocker is useful during cold, windy, or dusty periods.

Who should skip it

  • Skip a loose fabric stopper if the door is opened dozens of times a day and nobody will reposition it.
  • Avoid adhesive styles if the surface is painted, delicate, damp, dusty, or not approved for adhesive use.
  • Do not rely on a draft stopper to solve a damaged threshold, visible water intrusion, pest entry, or a door that no longer latches correctly.
  • Choose a different fix if the door already scrapes the floor; extra material at the bottom may make the problem worse.

What to verify before buying

  • Measure the door width and the under-door gap, then compare both with the current listing details.
  • Check whether the stopper is meant for interior doors, exterior doors, sliding doors, or a specific threshold type.
  • Confirm the attachment style: loose, slide-on, adhesive, screw-mounted, magnetic, or sweep-style.
  • Look for floor compatibility notes, especially if the door crosses carpet, tile transitions, rugs, or uneven flooring.
  • Verify cleaning instructions if the stopper will sit near shoes, pets, dust, or an entryway.
  • For rentals, confirm whether the design can be removed without leaving marks or residue.

Main buying notes

A loose weighted draft stopper is the most forgiving option when you are unsure about fit. It can be placed only during cold months, moved between rooms, and removed for cleaning. The tradeoff is habit: someone has to place it back after the door opens. This style makes the most sense for bedrooms, home offices, guest rooms, or a front door that is not opened constantly.

A double-sided under-door sleeve can stay attached as the door moves, which is convenient for daily use. The fit is more important, though. The sleeve has to match the door thickness and should not rub heavily on the floor. If the product details mention trimming, door thickness, or maximum gap coverage, read those points before assuming it will fit an older door.

Adhesive seals and sweep-style products can look cleaner once installed, but they are less flexible. Adhesive may fail on dusty surfaces or remove paint when taken off. A screw-mounted sweep can be sturdier but is usually a more permanent choice. These designs are better when the door, threshold, and floor clearance are already understood.

Material choice is practical rather than decorative. Fabric covers can blend into a room and may be easier to store, but they can collect pet hair and floor dust. Silicone or foam strips may seal a narrow gap neatly, yet they can deform, drag, or peel if the fit is wrong. For an entry door, also think about wet shoes, grit, and whether the bottom edge will need frequent wiping.

Limitations

  • Search results change, so dimensions, attachment methods, included pieces, and care instructions should be checked on the current retailer page.
  • A draft stopper reduces small gaps; it does not replace door repair, threshold replacement, or full weatherstripping work.
  • Loose fabric styles can move out of place when the door opens, pets push them, or people step near them.
  • Adhesive and sweep-style designs may leave marks, fail to stick, or interfere with door movement if the surface and clearance are not suitable.
  • Any floor-level item near an exterior door can collect moisture, dust, hair, or grit and should be cleaned periodically.

Alternatives to compare

  • Adhesive weatherstripping around the door frame if air is leaking from the sides or top rather than the bottom.
  • A replacement door sweep when an exterior door has an old or damaged bottom seal.
  • A threshold adjustment or repair if the gap is large, uneven, or related to a worn entry threshold.
  • Heavy curtains or room dividers when the main issue is comfort in a drafty room rather than the door gap itself.
  • Rugs or entry mats for floor protection, noting that they do not seal the door bottom on their own.

FAQ

How do I measure for a door draft stopper?

Measure the full door width and the visible gap under the closed door. Check both ends of the door because older floors and thresholds may be uneven. If a rug or mat sits in the door swing, measure with that obstacle in place.

Is a fabric draft stopper better for renters?

Often, yes. A loose fabric draft stopper usually avoids adhesive or hardware, so it is easier to remove when moving out. Still, verify the size, weight, cover material, and cleaning instructions before buying.

Will a door draft stopper block noise?

It may reduce some sound passing through the bottom gap, especially light hallway noise, but it is not a soundproofing product. Door mass, frame gaps, wall construction, and flooring all affect how much noise remains.

Can I use one on an exterior door?

You can compare options for exterior doors, but check the current details for weather exposure, threshold fit, moisture handling, and door movement. A loose indoor-style fabric tube may not be suitable for wet entry areas.

What if my door already rubs the floor?

A draft stopper may make rubbing worse. Fixing the door clearance, hinge alignment, threshold, or floor transition may be more important than adding extra material at the bottom.

Peel and Stick Wallpaper: Who It Fits and What to Check Before Buying

Product links are for reference. Verify current details on the retailer page before buying.

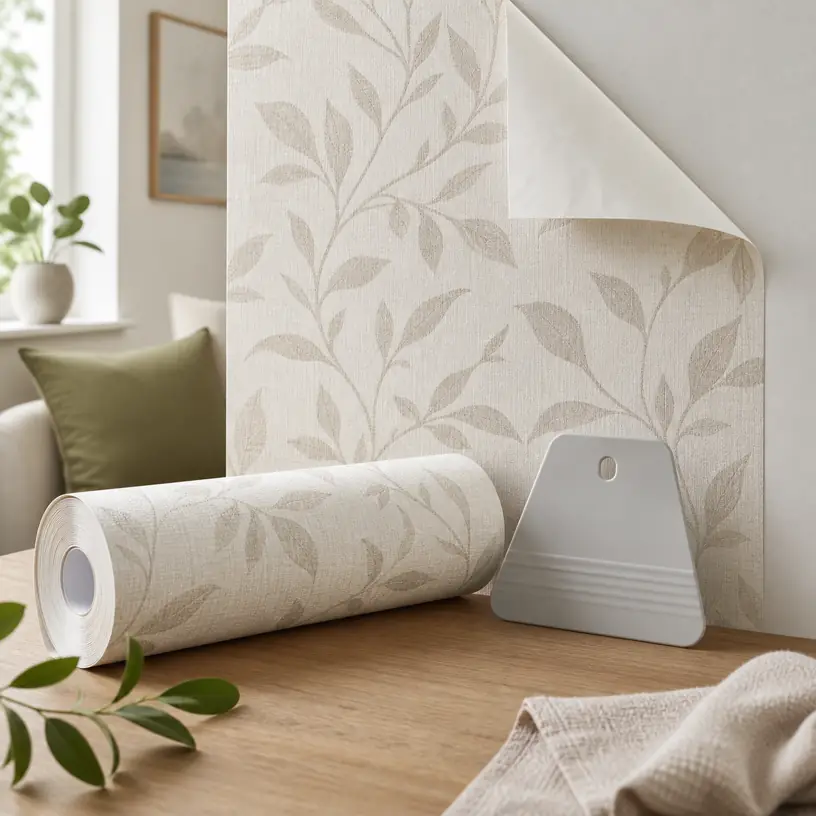
Illustrative image for a peel and stick wallpaper buying guide

Illustrative image, not an official product photo.

Short answer

Peel and stick wallpaper fits buyers who want a removable-style wall, shelf, cabinet, or accent update without traditional paste. Compare surface compatibility, roll size, pattern repeat, adhesive wording, texture, cleaning guidance, tool needs, and removal expectations before buying.

Search reference

Peel and stick wallpaper options

Compare current options and verify details on the retailer page before buying.

View matching options

What this product type is

Peel and stick wallpaper is a self-adhesive wall treatment sold in rolls or panels for decorative updates. Current listings vary by material wording, finish, pattern scale, repeat alignment, roll width, roll length, surface requirements, water-resistance wording, and removal guidance. The surface you apply it to matters as much as the design.
This guide treats the seed listing as a category signal only. Compare current matching options and verify details on the retailer page before buying.

Who this is for

  • Renters or homeowners planning a low-commitment decor update.
  • Buyers refreshing shelves, cabinets, small walls, or accent areas.
  • DIY users who can measure, align, smooth, and trim carefully.
  • Rooms where pattern and color change matter more than permanent renovation.

Who should skip it

  • Skip this type on rough, damp, dusty, or damaged surfaces unless the listing clearly supports them.
  • Choose traditional wallpaper or paint for large permanent renovations.
  • Avoid complex patterns if you do not want careful alignment work.

What to verify before buying

  • Check approved surface types and surface preparation instructions.
  • Verify roll width, roll length, coverage math, and pattern repeat.
  • Review adhesive wording, removal guidance, and cleaning instructions.
  • Check whether tools such as a smoother, knife, or measuring tape are needed.
  • Confirm color, finish, and texture from current listing information.
  • Review current seller information, warranty terms, and return policy.

Main buying notes

Measure more carefully than you think. Pattern repeat, trimming waste, and mistakes can change how much material you need.
Surface preparation is the difference between a tidy update and peeling corners. Clean, dry, smooth surfaces usually matter, but verify the current instructions.
Pattern scale changes the room feel. A small sample image can look different across a large wall, so compare product photos and dimensions carefully.
Removal wording should be read conservatively. Removable does not guarantee every paint or wall surface will stay unchanged.

Limitations

  • Adhesion can vary by paint, texture, humidity, and surface preparation.
  • Pattern matching can create extra waste.
  • Color can look different under different lighting.
  • Removal results may vary, especially on delicate or poorly prepared surfaces.

Alternatives to compare

  • Paint for permanent color changes.
  • Traditional wallpaper for larger long-term projects.
  • Wall decals for smaller accents.
  • Contact paper for shelves, drawers, or cabinet interiors.

FAQ

What should I verify before buying peel and stick wallpaper?

Verify surface compatibility, roll size, coverage math, pattern repeat, adhesive wording, cleaning guidance, warranty terms, and return policy.

Can peel and stick wallpaper work on textured walls?

Do not assume that. Check the current listing for surface requirements before buying.

How should I estimate how much peel and stick wallpaper I need?

Measure the area, check roll dimensions, account for pattern repeat, and allow extra material for trimming and mistakes.

Is peel and stick wallpaper always removable without damage?

No. Removal can depend on paint, wall condition, humidity, and application method. Verify current removal guidance.

What alternatives should I compare with peel and stick wallpaper?

Compare paint, traditional wallpaper, wall decals, and contact paper depending on the surface and project size.

Picture Hanging Kits: Who They Fit and What to Check Before Buying

Product links are for reference. Verify current details on the retailer page before buying.

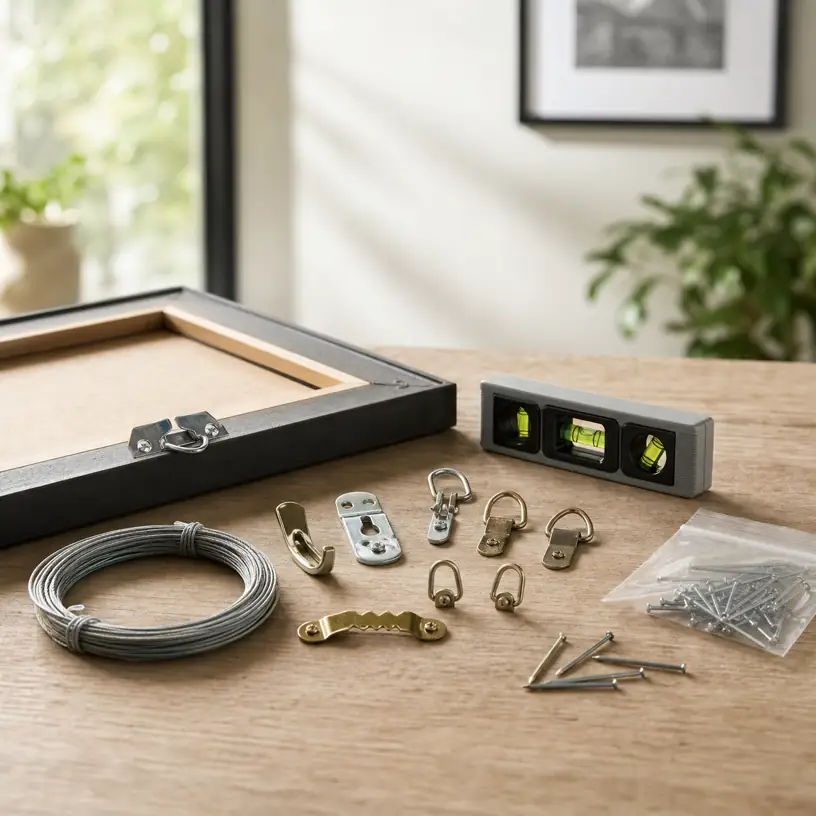
Illustrative image for a picture hanging kits buying guide

Illustrative image, not an official product photo.

Short answer

Picture hanging kits fit buyers who want assorted hardware for frames, canvas pieces, light decor, or basic wall layout work. Compare wall type, frame weight needs, hardware mix, included level, nail or hook style, storage case, and installation instructions before buying.

Search reference

Picture hanging kit options

Compare current options and verify details on the retailer page before buying.

View matching options

What this product type is

Picture hanging kits bundle hooks, nails, wire, sawtooth pieces, D-rings, anchors, or small layout tools depending on the set. Current listings vary by piece count, hardware sizes, claimed weight ranges, wall type guidance, included level, storage case, and whether instructions are clear. Start with your wall material and frame weight, not the number of pieces.
This guide treats the seed listing as a category signal only. Compare current matching options and verify details on the retailer page before buying.

Who this is for

  • Buyers hanging several frames or canvas pieces at once.
  • Renters or homeowners setting up a gallery wall.
  • People replacing scattered wall hardware with one organized kit.
  • Basic DIY users who want multiple hook and nail options available.

Who should skip it

  • Skip assorted kits if you only need one exact anchor type.
  • Choose specialty anchors for masonry, tile, heavy mirrors, or unusually heavy decor.
  • Avoid unclear listings when wall compatibility or weight guidance is not visible.

What to verify before buying

  • Check wall type guidance for drywall, wood, masonry, or other surfaces.
  • Verify frame or decor weight needs before choosing hardware.
  • Review the hardware mix, sizes, wire, D-rings, hooks, and nails included.
  • Check whether a level, storage case, or instructions are included.
  • Confirm tool requirements such as hammer, drill, measuring tape, or stud finder.
  • Review current seller information, warranty terms, and return policy.

Main buying notes

Piece count can be misleading. A kit with many tiny parts may not include the hardware you need for your wall or frame.
Wall type decides the hardware. Drywall, studs, plaster, brick, and tile can require different approaches, so verify compatibility first.
Layout tools matter for gallery walls. A small level or measuring guide can help, but careful measuring is still part of the job.
Heavy items need extra caution. Mirrors, shelves, and large frames may require specialty anchors or professional advice.

Limitations

  • Assorted kits may include extra pieces you never use.
  • Weight guidance can depend on wall condition and installation quality.
  • Some wall materials require tools or anchors not included in basic kits.
  • Poor measuring can still lead to crooked placement even with a kit.

Alternatives to compare

  • Dedicated drywall anchors for specific weight needs.
  • Adhesive strips for very light decor where suitable.
  • Stud-mounted screws for heavier items.
  • Professional installation for heavy mirrors or complex wall materials.

FAQ

What should I verify before buying a picture hanging kit?

Verify wall type guidance, frame weight needs, hardware mix, included tools, instructions, warranty terms, and return policy.

Is piece count the most important part of a picture hanging kit?

No. The hardware types and wall compatibility matter more than simply having many pieces.

Can picture hanging kits handle heavy mirrors?

Do not assume that. Heavy mirrors may need specialty anchors, studs, or professional installation.

How should I compare picture hanging kit hardware?

Check hooks, nails, wire, D-rings, anchors, level tools, and whether the kit matches your wall and frame setup.

What alternatives should I compare with picture hanging kits?

Compare dedicated drywall anchors, adhesive strips, stud-mounted screws, and professional installation for heavier projects.

Cabinet Pulls: Who They Fit and What to Check Before Buying

Product links are for reference. Verify current details on the retailer page before buying.

Illustrative image for a cabinet pulls buying guide

Illustrative image, not an official product photo.

Short answer

Cabinet pulls are useful for kitchen, bathroom, dresser, and storage updates when you want a small hardware change with visible impact. Compare hole spacing, overall length, finish, screw length, material wording, edge clearance, and installation needs before choosing a set.

Search reference

Cabinet pull options

Compare current options and verify details on the retailer page before buying.

View matching options

What this product type is

Cabinet pulls are handle-style hardware pieces mounted on drawers, doors, vanities, dressers, and storage cabinets. They are usually compared by center-to-center hole spacing, overall length, projection, finish, included screws, material wording, and set quantity. They can refresh a room, but the measurements must match the existing cabinet holes or the planned installation.
This guide treats the seed listing as a category signal only. Compare current matching options and verify details on the retailer page before buying.

Who this is for

  • Homeowners updating kitchen or bathroom cabinet hardware.
  • Renters or DIY buyers replacing worn pulls with matching measurements.
  • Furniture upcyclers working on dressers, cupboards, or storage units.
  • Buyers who want a visible home update without replacing cabinets.

Who should skip it

  • Skip new pulls if you cannot confirm hole spacing or cabinet thickness.
  • Compare knobs if you want a simpler single-hole installation.
  • Avoid drilling new holes unless you are comfortable measuring and patching.

What to verify before buying

  • Measure center-to-center hole spacing and compare it with the current listing.
  • Check overall length, projection, grip clearance, and cabinet edge clearance.
  • Verify finish name, material wording, screw length, and included hardware.
  • Confirm set quantity and whether all pieces in the order use the same finish.
  • Review installation requirements, tools needed, and template guidance.
  • Check return policy and seller information before buying.

Main buying notes

Hole spacing is the first filter. If the pull does not match existing holes, installation becomes a drilling or patching project.
Finish names can vary. Brushed nickel, matte black, brass, bronze, and champagne finishes may differ across sellers, so verify current photos and wording.
Screw length matters because cabinet doors and drawer fronts vary in thickness.
Projection affects daily use. A pull that sits too close to the surface may be harder to grip.

Limitations

  • Finish color can look different under kitchen, bathroom, or daylight conditions.
  • Existing holes may not match newer hardware sizes.
  • Included screws may not fit every cabinet thickness.
  • Installing new hole spacing can leave old holes visible unless patched.

Alternatives to compare

  • Cabinet knobs for single-hole installation.
  • Cup pulls for drawers with a traditional look.
  • Edge pulls for a cleaner modern cabinet face.
  • Soft-close hinges if cabinet function matters more than appearance.

FAQ

What should I verify before buying cabinet pulls?

Verify center-to-center hole spacing, overall length, projection, finish, screw length, set quantity, and return policy.

What does center-to-center spacing mean for cabinet pulls?

It means the distance between the two mounting screw holes. Measure your existing holes before buying.

Can I install cabinet pulls without drilling new holes?

Yes, if the new pulls match the existing hole spacing and screw requirements.

Do cabinet pulls include screws?

Many sets include screws, but you should verify screw length and included hardware on the current retailer page.

Should I choose pulls or knobs?

Choose pulls for a handle grip and knobs for simpler single-hole installation or smaller cabinet fronts.

Solar Pathway Lights: Who They Fit and What to Check Before Buying

Product links are for reference. Verify current details on the retailer page before buying.

Illustrative image for a solar pathway lights buying guide

Illustrative image, not an official product photo.

Short answer

Solar pathway lights are useful for marking walkways, garden edges, patios, and driveways without running new low-voltage wiring. Compare light style, placement needs, charging conditions, weather wording, stake design, battery access, and whether the glow is decorative or functional before choosing one.

Search reference

Solar pathway light options

Compare current options and verify details on the retailer page before buying.

View matching options

What this product type is

Solar pathway lights are outdoor lights with built-in solar charging panels and ground stakes or similar mounts. They are commonly used to outline paths, garden beds, steps, patios, and yard edges. Buyers usually compare light color, fixture height, stake strength, charging exposure, weather wording, and how many lights are included in a set.
This guide treats the seed listing as a category signal only. Compare current matching options and verify details on the retailer page before buying.

Who this is for

  • Homeowners who want simple path markers without new wiring.
  • Garden and patio users who want decorative evening lighting.
  • Renters who need removable outdoor lighting options.
  • Buyers comparing small home-improvement upgrades for walkways or yard edges.

Who should skip it

  • Skip them if the area gets little direct daylight for charging.
  • Skip decorative path lights if you need strong security lighting.
  • Compare wired landscape lights if consistent brightness is more important than easy installation.

What to verify before buying

  • Check fixture height, stake material, spacing needs, and the number of lights included.
  • Verify charging requirements and whether your planned location gets enough direct daylight.
  • Review brightness wording, light color, and whether the output is decorative or functional.
  • Check weather-resistance wording, battery access, and replacement guidance on the current retailer page.
  • Confirm installation steps, ground conditions, and whether tools are needed.
  • Review seller information and return policy before buying.

Main buying notes

Placement matters. A shaded path may look like a good location, but solar lights need daylight exposure before they can perform well at night.
Decorative glow and functional visibility are different goals. Decide whether you need ambiance, path marking, or stronger illumination.
Stake design affects installation. Hard soil, roots, gravel, and uneven ground can make lightweight stakes harder to place cleanly.
Weather wording should be checked on the current page. Outdoor conditions vary, and not every fixture is built for the same exposure.

Limitations

  • Solar lights depend on daylight exposure and local weather.
  • Runtime and brightness can vary across seasons and placement conditions.
  • Small decorative lights may not provide enough light for safety-critical areas.
  • Plastic stakes and small parts can be vulnerable in hard ground or busy yards.

Alternatives to compare

  • Low-voltage wired path lights for more consistent output.
  • Motion-sensor outdoor lights for entry points and security-focused areas.
  • Battery lanterns for temporary patio or camping use.
  • Smart outdoor lighting for scheduled or app-controlled scenes.

FAQ

Where should I place solar pathway lights?

Place them where they can receive enough daylight for charging and where their glow marks the path clearly.

What should I verify before buying solar pathway lights?

Verify fixture count, height, stake design, charging needs, light color, weather wording, battery access, and return policy.

Are solar pathway lights bright enough for safety?

Some are mainly decorative. Verify brightness wording and consider stronger lighting for steps, entrances, or safety-critical areas.

Do solar pathway lights work in shade?

They may work poorly in heavy shade because charging depends on daylight exposure.

Should I choose solar or wired path lights?

Choose solar for easy placement and wired lights for more consistent output where installation is practical.