Move Large Houseplants Without the Floor Scrape: A Rolling Plant Caddy Guide

Product links are for reference. Verify current details on the retailer page before buying.
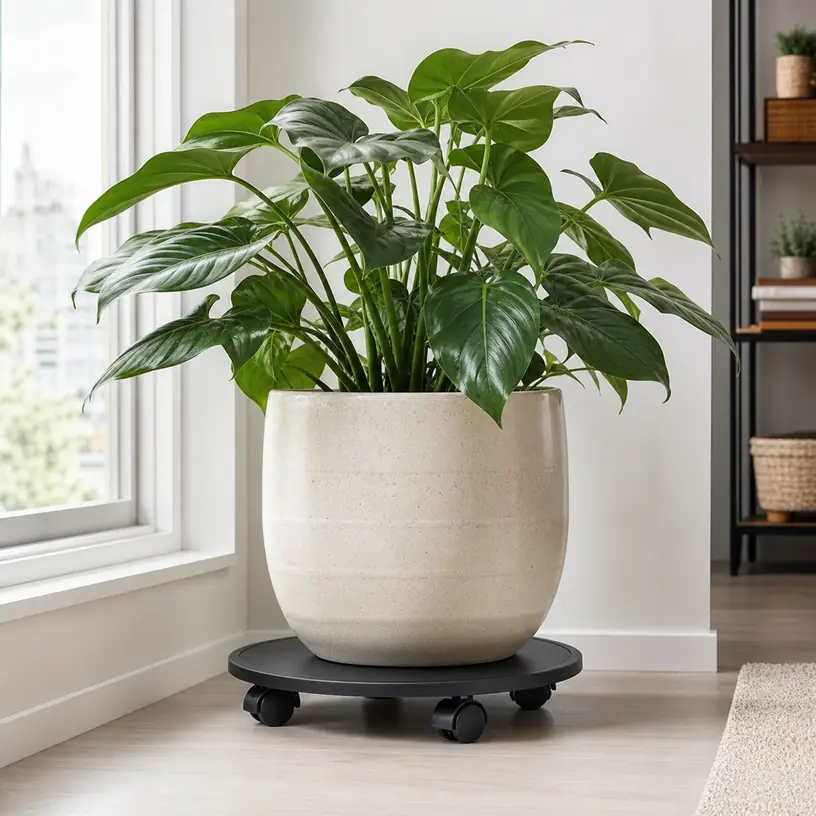
Illustrative image of a generic rolling caddy supporting a large indoor plant pot

Illustrative image, not an official product photo.

Short answer

A rolling plant caddy can make a large planter easier to turn for more even light, move away from a cold window, or roll aside for cleaning. The useful match starts with two numbers: the pot’s actual bottom diameter and the combined weight of the pot, growing medium, plant, and water. Then consider wheel material, caster count and placement, brake access, deck shape, floor transitions, and whether drainage water could reach the caddy or floor. A caddy is a positioning aid on a smooth, level route—not a license to move an unstable, top-heavy planter across thresholds or stairs.

Search reference

Rolling plant caddies for heavy pots

Compare deck dimensions, documented load guidance, caster construction, locking arrangement, surface contact, and moisture-care instructions for your planter and room.

View matching options

Why the pot footprint matters more than the leaf spread

Measure the part that will rest on the deck. A planter may flare outward at the rim while standing on a much narrower foot, or it may have a broad base hidden by a matching saucer. Record the maximum contact diameter and note whether the bottom is flat, ring-shaped, footed, or irregular. The caddy should support the intended contact area without forcing the pot to perch on a raised lip, wheel housing, or decorative edge.

Also look at where the plant’s mass sits. A tall plant in a narrow pot has a higher center of gravity than a compact plant in a wide container. Even when both fit the same deck, the tall arrangement can be less forgiving during starts, stops, and direction changes. Leaves, trellises, and branches add clearance needs that the base measurement will not reveal, so map the entire route before rolling.

A saucer changes the fit. If the saucer travels with the plant, measure its bottom rather than the planter alone and check that it sits steadily on the deck. If the caddy includes a recessed tray or raised perimeter, verify the usable interior diameter—not just the product’s outside diameter.

Who this is for

  • Houseplant owners who periodically rotate a large pot near a window while keeping it in one room.
  • People who need to clear a smooth floor for sweeping or vacuuming without repeatedly lifting a heavy planter.
  • Indoor gardeners moving a compatible pot a short distance for watering, pruning, or seasonal light changes.
  • Renters who want a removable mobility option rather than a built-in platform.
  • Sunroom, office, or conservatory setups with level routes and enough space to steer the whole plant.
  • Buyers replacing an undersized stand whose pot overhangs the deck or whose wheels are difficult to control.

Who should skip it

  • Skip a rolling platform when the route includes stairs, steep slopes, broken flooring, or a drop at the doorway.
  • Do not use a caddy to compensate for a cracked pot, unstable saucer, loose trellis, or severely top-heavy planting.
  • Choose another arrangement when children or pets could release the brakes, ride the platform, or push the plant into furniture.
  • Avoid rolling a planter over delicate flooring unless the wheel and floor manufacturer guidance supports that contact and the route can be kept free of grit.
  • Use appropriate handling help or equipment when the loaded planter is beyond what can be safely controlled by one person.
  • Skip designs that would block drainage inspection or trap water against a floor that requires prompt drying.

What to verify before buying

  • Loaded weight: Add the planter, saucer, plant, supports, growing medium, and water; compare that total with current documented load guidance and leave a sensible margin.
  • Usable deck: Confirm the flat supporting diameter or dimensions, including any recessed area, rim, center opening, or wheel hardware.
  • Caster arrangement: Check caster count, spacing, swivel behavior, attachment method, and whether wheels protrude beyond the deck where feet may catch them.
  • Brake layout: Determine how many wheels lock, what the lock controls, and whether each lever remains reachable beneath the chosen pot.
  • Floor contact: Review wheel material and maker guidance for hardwood, laminate, tile, vinyl, carpet, or other surfaces in the intended room.
  • Threshold clearance: Measure door saddles, grout changes, rug edges, floor vents, and other transitions along the route.
  • Moisture plan: Confirm whether the caddy is intended for damp environments and how drainage, spills, rust prevention, and cleaning should be handled.
  • Pot stability: Check for non-slip texture, a retaining edge, or other features suited to the actual pot bottom without assuming they secure every planter.
  • Overall height: Include the caddy in the plant’s final height so foliage still clears shelves, curtain rods, window hardware, and lights.
  • Assembly: Verify whether casters arrive installed, what tools or fasteners are required, and whether periodic tightening or inspection is specified.

Estimate the real load before comparing capacities

The empty pot is only part of the load. Growing medium can account for substantial mass, and watering changes it. A decorative cover pot may hide a nursery pot and saucer, creating several separate pieces on the same deck. Stakes, moss poles, stones, and self-watering reservoirs also belong in the estimate.

If weighing the full planter is impractical, build the total from known component weights or use a suitable scale and safe method before shopping. Do not guess from pot diameter alone: two containers of the same size can have very different construction and contents. Product capacity wording should be checked on the current listing and instructions, including any conditions attached to the stated figure.

A published capacity does not guarantee stability. It may describe the platform under controlled conditions, while your planter’s height, base shape, and route introduce other variables. A reasonable weight margin can reduce strain on casters, but it cannot correct an off-center or poorly supported pot.

Casters determine how the platform behaves

A three-caster layout can sit without rocking on an even plane, while four or more casters may spread support differently. The better choice depends on deck stiffness, wheel placement, and how the pot’s weight reaches the platform. Count alone does not establish smooth rolling or stability.

Swiveling casters make tight direction changes possible, but every caster must align when the platform first moves. A sharp sideways pull can make an unaligned wheel scrub across the floor or jerk the pot. Start slowly, guide from low on the pot when appropriate, and avoid pulling on stems, branches, or a trellis.

Wheel diameter affects transitions. Small wheels keep the deck low but are more easily stopped by grout edges, cords, grit, and rug borders. Larger wheels may roll over small changes more readily while raising the plant and increasing the caddy’s visible footprint. No caster size makes an ordinary plant caddy suitable for stairs or uncontrolled drops.

Brakes should be reachable after the pot is loaded

A lock hidden under a wide saucer is difficult to use. Before committing to a size, compare the brake-lever positions with the pot footprint. If only some wheels lock, think about which side should face the open room and whether the caddy can be parked without reaching behind foliage or furniture.

Check what “locking” means for the current design. Some mechanisms restrain wheel rotation, some may also limit swivel, and others use a separate stop. Park on a level surface even when brakes are fitted, engage them according to the instructions, and treat them as one control measure rather than a substitute for a safe location.

Protecting the floor requires more than soft-looking wheels

Wheel material is only one part of floor care. Dirt, potting grit, and tiny stones can become trapped at the contact point and mark a surface as the wheel turns. Sweep the route and inspect the casters before moving the plant. If the manufacturer recommends a particular floor type or cleaning method, follow that guidance.

Watch for long-term contact as well as movement. A loaded caddy parked for months can leave pressure marks or react with some finishes, mats, or coatings. Moisture from overwatering can travel through drainage holes, run under a saucer, collect in recesses, and reach the floor without being obvious. Use a compatible drainage arrangement, check beneath it periodically, and dry spills promptly according to the flooring and planter-care instructions.

Rugs create a separate problem. A wheel that rolls freely on hard flooring may sink into a soft rug or stop at its bound edge. Do not build speed to force the planter over the transition. Reposition the rug, use an appropriate route, or keep the plant stationary rather than risking a sudden tip.

Plan a controlled route and parking spot

Clear cords, toys, leaves, floor vents, and lightweight furniture before the caddy moves. Open doors fully and measure the narrowest passage at pot height as well as deck height. A planter that clears a doorframe at the base can still catch wide foliage or a stake higher up.

Move slowly with the plant upright. If a threshold must be crossed, confirm that the caddy is intended for it and that the loaded arrangement can remain controlled; otherwise unload or use a safer handling method. Never pull the caddy toward a stair edge or leave it where normal household traffic can push it into a drop.

The final parking place should be level and allow access to the brakes, saucer, and floor beneath. Keep wheels out of walkways. Confirm that the extra platform height does not put leaves against hot or cold glass, block a vent, or bring the plant too close to lighting equipment.

Watering and maintenance change the ownership experience

A caddy may be described as wood, composite, plastic, or metal, but material names alone do not establish resistance to standing water, corrosion, swelling, staining, or outdoor weather. Read the current care instructions. If watering in place, use a compatible saucer or cachepot arrangement and inspect for overflow rather than assuming the platform contains it.

Remove accessible soil and debris from the caster housings. Check fasteners, wheel axles, deck surfaces, and brakes at intervals suggested by the maker, and stop using the caddy if parts loosen, crack, deform, or no longer roll predictably. Do not lubricate or treat components unless the instructions permit the product used around the plant and floor.

Outdoor use adds uneven paving, weather, drainage, temperature changes, and wind exposure. A caddy that suits an indoor tile floor is not automatically suitable for a patio. Confirm the intended environment explicitly before choosing it for outdoor planters.

Limitations

  • A plant caddy reduces lifting for short repositioning but does not make an overloaded or top-heavy planter inherently safe.
  • Small casters can stop abruptly at grit, seams, thresholds, cords, and rug edges.
  • Wheel locks may be obstructed by a wide pot and may not restrain every kind of movement.
  • Water and potting debris can collect beneath the planter or around caster hardware without being immediately visible.
  • Wheel materials and parked loads can affect floors differently; generic “floor-safe” wording cannot replace current product and flooring guidance.
  • Added deck height may change light, window, shelf, and tipping clearances.
  • Decorative rims or recessed decks can reduce the usable footprint compared with the stated outside size.
  • Ordinary rolling caddies are not intended as stair-moving equipment, lifting devices, seating, toys, or ride-on platforms.

Alternatives to compare

A stationary plant stand with a broad base adds height without inviting movement and may suit a plant that rarely changes position. A low protective tray or saucer addresses drainage and floor separation when mobility is unnecessary. Furniture sliders matched to the surface and load may help with an occasional straight repositioning, though they lack casters and brakes and require their own suitability checks. A lighter nursery pot inside a decorative cachepot can make plant care easier when the inner pot can be removed safely. For very large planters, professional moving help or equipment intended for the load and route is more appropriate than improvising with a small household caddy.

FAQ

How much weight should I include when sizing a rolling plant caddy?

Include the pot, inner pot if present, saucer, plant, growing medium, stakes or trellis, decorative stones, and water. Compare the realistic wet-condition total with the current manufacturer’s load guidance; do not estimate from pot diameter alone.

Should the caddy be larger than the bottom of the pot?

The usable supporting deck should accommodate the pot or saucer’s actual contact area without unstable overhang or interference from a rim. Measure the bottom, then check the caddy’s flat usable area rather than relying only on its outside diameter.

Are locking wheels enough to keep a large plant from moving?

They can help on a level surface when engaged as directed, but their behavior and number vary. Confirm what the locks restrain, keep the caddy away from slopes and traffic, and make sure the levers are accessible after loading.

Can a rolling plant caddy go from hard floor onto a rug?

A rug edge can stop or redirect small casters, especially under a heavy or tall planter. Avoid forcing the transition. Verify the wheel guidance and route, remove the obstacle when practical, or use another handling method.

How do I prevent water damage under the caddy?

Use a drainage setup compatible with the planter and caddy, avoid overfilling, inspect the saucer and platform after watering, and dry the floor promptly according to its care requirements. Do not assume that a raised or wheeled deck is waterproof.

Can an indoor plant caddy be used on a patio?

Only if current product documentation supports the outdoor environment and expected load. Weather, uneven paving, drainage, corrosion, temperature, and wind create conditions that an indoor-focused model may not be designed to handle.
Before You Buy a Foil and Plastic Wrap Organizer, Measure the Whole Drawer

Product links are for reference. Verify current details on the retailer page before buying.

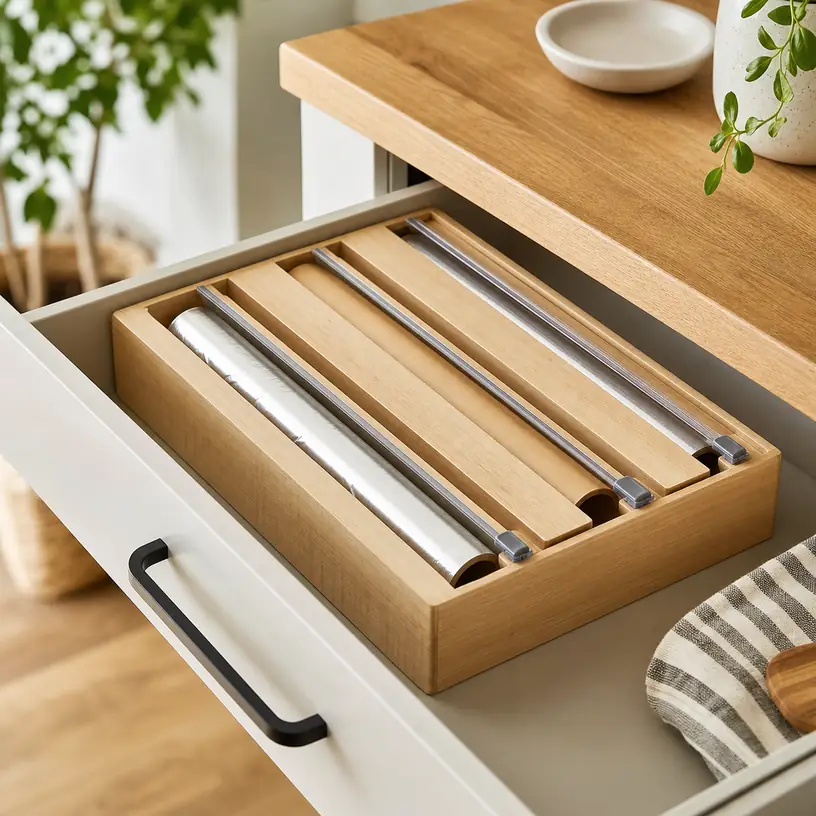
Illustrative image of a generic wooden foil and plastic wrap organizer in an open kitchen drawer

Illustrative image, not an official product photo.

Short answer

Do not size a wrap organizer from its outside length alone. First measure the drawer’s clear internal width, depth, and height, then repeat the height measurement under any rails, handle screws, or countertop overhang that the organizer must pass. Measure the rolls now in the kitchen too: package width, roll diameter, and the space required to load a replacement all matter. Decide whether you want to keep original boxes, move rolls into a dispenser, or simply divide a drawer. An integrated cutter can reduce loose boxes, but only if the roll turns freely, the cutting carriage is easy to reach, and the complete unit can be cleaned and refilled without an awkward struggle.

Search reference

Foil and plastic wrap organizers with cutters

Compare usable roll compartments, drawer clearance, refill access, cutter guards, mounting details, and cleaning instructions for the exact materials you store.

View matching options

Start with the route into the drawer

A product can match the drawer’s rectangular measurements and still refuse to go in. Many drawers have a narrower opening than the cavity behind the face. Side rails, a lowered countertop edge, a center support, or screws from the handle can also reduce usable clearance. Measure the opening through which the organizer will travel as well as the space where it will rest. If the unit is wider than the opening, tilting it may help only when there is enough height and depth to rotate it safely.

Empty the drawer before measuring. Record width at the front and back, depth on both sides, and height at several points. Older cabinets and drawer liners may not be perfectly square. Subtract room for finger access, normal drawer movement, and any liner that bunches at the edges. A tight friction fit may look efficient, but it can make removal for cleaning difficult and can transmit every pull on a cutter to the drawer sides.

Next, close the empty drawer slowly while watching the space above it. Tall rolls, raised knobs, protruding cutter carriages, and tabs can catch even when the organizer body sits below the rim. If the product will stand on a counter or mount to a wall instead, measure the working area in front of it. A dispenser needs more than storage depth; someone must be able to pull material forward and complete a cut without striking a backsplash, cabinet door, or nearby appliance.

Who this is for

  • Households that keep two or more rolls of foil, parchment, plastic wrap, or similar kitchen material in one frequently used drawer.
  • Cooks who want each roll to remain in a fixed position rather than stacking original boxes that shift when the drawer closes.
  • People prepared to measure current rolls and check new refills instead of assuming every package uses the same core, width, or diameter.
  • Small kitchens where consolidating compatible wraps can release useful drawer or shelf space.
  • Buyers who prefer an enclosed sliding cutter or another clearly documented cutting method over torn boxes and exposed serrated edges.
  • Renters who choose a drawer insert or another nonpermanent arrangement that does not require altering cabinets.

Who should skip it

  • Anyone whose drawer opening, interior height, or rail layout leaves no comfortable clearance around a rigid organizer.
  • Households that regularly buy unusually wide, thick, or high-capacity rolls without confirmed compartment dimensions.
  • People who want to preserve package instructions, material identification, or date information but have no plan to transfer those details when a roll leaves its box.
  • Shared kitchens where users may not recognize which unlabelled roll is foil, parchment, waxed paper, or plastic wrap.
  • Buyers who cannot mount a wall or cabinet unit using the specified method and suitable substrate.
  • Kitchens where a simple adjustable divider already keeps original boxes orderly without adding refill steps or another item to maintain.

What to verify before buying

  • Drawer opening and cavity: Compare the narrowest opening, internal width, depth, height, rail position, and handle hardware with the organizer’s complete external dimensions.
  • Usable roll space: Check each compartment’s internal width and diameter allowance, not just the unit’s overall length or the number of rolls shown.
  • Loading direction: Determine whether refills enter from an end, the top, a hinged panel, or a removable rod, and reserve room for that movement.
  • Roll control: Look at how the core is supported and whether a partly used roll can unwind without drifting, binding, or collapsing into the compartment.
  • Material separation: Confirm that each stored wrap remains identifiable after original packaging is removed and that labels can be updated without blocking operation.
  • Cutter design: Verify which materials the cutter is intended to handle, where its working edge rests, how fingers stay clear, and whether the carriage can be replaced.
  • Pulling direction: Check whether the dispenser is designed for in-drawer, countertop, vertical, or under-cabinet use; the same mechanism may not work securely in every orientation.
  • Mounting system: For mounted units, inspect fastener type, hole spacing, required tools, supported surfaces, installation template, and removal consequences.
  • Base stability: A counter unit should resist sliding or tipping while material is pulled. An in-drawer model should not slam into the drawer walls.
  • Cleaning access: Read the care instructions for the body, cutter channel, rod, finish, labels, adhesives, feet, and mounting parts.
  • Replacement parts: Find out whether cutter carriages, labels, rods, or other wear items are available and specific to the model.
  • Package contents: Confirm that product photos do not imply rolls, labels, mounting hardware, or extra cutters that are not actually included.

A three-slot organizer does not fit every set of three rolls

Slot count is only a rough description. Foil, parchment, and plastic wrap can arrive in packages with different widths and roll diameters, and larger refills may grow in diameter even when the material width stays familiar. Measure the physical rolls you expect the dispenser to hold, including a newly purchased full roll rather than only the nearly empty one in the drawer.

The core matters as well. Some dispensers use a rod through the center; others cradle the roll or depend on end caps. Compare the supported core range and loading mechanism with the refills you buy. A roll that technically enters the compartment may still bind if its sides rub the walls or if the core sits off center. Plastic wrap also behaves differently from stiff foil when it clings to itself, so a smooth material path and accessible leading edge are important.

Think about substitutions. If one slot normally holds parchment but occasionally stores waxed paper or a roll of bags, will everyone know what is loaded? Original boxes carry instructions and identity information that a bare roll does not. Retain relevant package information and use clear, changeable labels. Do not treat look-alike materials as interchangeable in cooking; follow the material maker’s current directions and the recipe or appliance instructions.

A little unused compartment width is useful for loading and rotation. Too much can allow the roll to shift sideways, creating an angled feed into the cutter. Look for documented internal dimensions or adjustment features rather than inferring fit from styled photos. When dimensions are incomplete, outline the proposed unit and roll positions with paper in the drawer before deciding whether the arrangement will improve access.

The refill motion needs its own space

The best time to discover a loading problem is before the organizer is wedged between other drawer inserts. A top-loading unit needs enough vertical clearance to lift a full roll over the compartment wall. A removable rod may need several inches of free space at one end. A hinged lid can collide with the cabinet frame, and an end cap can become inaccessible when the organizer is installed flush against a divider.

Imagine replacing the roll with the drawer in its normal position. Can the unit stay in place, or must the entire organizer be lifted out? If it must be removed, is there a safe place to set it while handling the roll? A long rigid body filled with several rolls can be awkward to turn in a narrow kitchen. Finger recesses or a clear gripping area may matter more than a perfectly filled drawer.

Before discarding any original packaging, load one roll and make a short trial feed according to the product instructions. Confirm that the material exits in the intended direction and that the leading edge remains available for the next use. Store the package information until you know the refill is compatible and clearly labelled.

Treat the cutter as a tool, not a decoration

Integrated cutters may use a sliding carriage, a recessed edge, or another mechanism. The product documentation should state which materials each cutter is intended to cut. A mechanism that handles foil acceptably may behave differently with thin cling film or heavy paper. Do not force a jammed carriage or substitute a material the instructions do not cover.

Look at the rest position. A working edge should not be where a hand naturally grips the organizer or searches for a loose end. A slider should move along a stable track without requiring fingers to cross the material path. If separate carriages serve adjacent rolls, clear labels or distinct positions can reduce confusion. Keep the area inaccessible to children if the design or household setup requires it, and follow the maker’s storage and use guidance.

A clean cut also depends on the dispenser staying still. On a counter, pulling a long sheet can drag a lightweight unit forward. Inside a drawer, the same force can make the organizer strike the sides or lift at one edge. Feet, a broad base, drawer fit, or the specified mounting hardware may help, but verify how the product is meant to resist the pull. Do not improvise screws or adhesive strips on a design that was not intended for them.

Food residue, dust, and scraps can collect in cutter tracks. Check whether the carriage, lid, or rod can be removed for cleaning and how to protect the working edge during that process. Follow the documented care method rather than soaking a wood body, putting an unknown assembly in a dishwasher, or probing the track with bare fingers.

Drawer insert, counter dispenser, or mounted rack?

An in-drawer insert keeps the counter clear and the cutters out of the main work area. It depends on drawer clearance and may occupy most of a shallow drawer. Pulling material while the drawer is open also changes the leverage on the slides, so use the mechanism as directed and avoid leaning on the drawer.

A countertop dispenser is quick to reach and easier to refill when there is open space around it. It remains visible, collects normal kitchen dust, and needs a stable location away from heat, water, and the edge of the counter. Measure the footprint with material extended into the working zone, not only the storage position.

A wall or cabinet-mounted organizer can release a drawer, but mounting is a separate project. Confirm the substrate, hidden utilities, fasteners, weight and pulling forces, door swing, and clearance around the loaded rolls. Renters should obtain permission where needed. Adhesive attachment is not automatically suitable for a repeated pulling load merely because a surface is smooth.

Some units advertise more than one orientation. Verify that the loading doors, roll supports, labels, and cutters are designed to operate in every claimed position. A body that can be physically turned sideways is not necessarily a functional wall dispenser.

Build a simple restocking routine

Consolidated storage removes the visual cue of a branded box becoming empty. Keep one replacement location and decide when a roll is low enough to add it to the shopping list. Avoid overfilling a compartment with a new roll before the old one is used; two layers can interfere with rotation and conceal scraps.

When changing materials, remove fragments from the track, inspect the cutter and supports as the instructions recommend, and update the label before the organizer returns to service. Keep relevant instructions from the refill packaging in a nearby file or photograph them clearly if the household relies on them. The organizer should reduce drawer clutter without erasing information needed to use each material appropriately.

Periodically lift the unit out and check the drawer beneath it. Loose foil edges, crumbs, and moisture can go unnoticed under a large insert. Clean and dry the organizer and cabinet according to their separate care requirements before reassembly. If the cutter becomes damaged, stop using that channel until the specified part can be repaired or replaced.

Limitations

  • Compartment dimensions are not always reported as clearly as the organizer’s exterior dimensions.
  • A refill that fits today does not guarantee that a differently sized package will fit later.
  • Removing rolls from their boxes can separate materials from useful identity and usage information.
  • Integrated cutters add tracks and moving parts that can jam, dull, collect debris, or require model-specific replacements.
  • A large in-drawer unit may consume space that adjustable dividers could use more flexibly.
  • Countertop models remain visible and require open pulling space, while mounted models introduce installation constraints.
  • Wood, plastic, metal, finishes, adhesives, labels, and cutter assemblies may require different cleaning methods.
  • No organizer makes foil, parchment, waxed paper, and plastic wrap interchangeable for cooking or storage tasks.

Alternatives to compare

An adjustable drawer divider keeps retail boxes upright while preserving their labels and built-in cutters. A long basket or open tray groups boxes without committing to fixed roll compartments and can be lifted out for cleaning. A vertical file-style rack uses cabinet height and leaves each package intact, though box widths and shelf clearance still matter. A door-mounted basket can free a drawer if the door, hinges, clearances, and mounting method support the arrangement. For households that use one roll much more than the others, a single-roll dispenser plus boxed storage may be easier to refill and replace than a large all-in-one unit.

FAQ

How do I measure a drawer for a foil and plastic wrap organizer?

Remove the contents and measure the narrowest drawer opening plus the internal width, depth, and height at several points. Note rails, handle screws, liners, and any reduced clearance under the cabinet frame. Compare those measurements with the organizer’s complete external dimensions and leave room to lift, tilt, refill, and clean it.

Will any standard roll fit a wrap organizer?

No universal fit should be assumed. Measure the full refill’s material width, outside diameter, and core, then compare them with each compartment and support mechanism. Check the loading path too; a roll may fit inside yet be impossible to insert when the organizer is in its final position.

Is it better to keep foil and plastic wrap in their original boxes?

Original boxes preserve identification, instructions, and a cutter chosen for that packaged material. A dispenser can consolidate storage and replace damaged boxes, but it adds compatibility, labelling, cleaning, and cutter questions. Choose the arrangement that keeps each material identifiable and easy to use correctly in your kitchen.

Can a drawer organizer also be mounted on a wall?

Only when the current product instructions explicitly support that orientation and provide an appropriate installation method. Mounting changes the pull direction and the load on the body and fasteners. Verify the wall or cabinet substrate, hardware, clearances, refill access, and cutter operation rather than improvising a mount.

How should I clean a wrap organizer with cutters?

Follow the maker’s instructions for every component. Remove rolls and secure or avoid the cutting edge before working near the track. Use only the recommended cleaning method, let all appropriate parts dry fully, and do not submerge, machine-wash, or dismantle the unit unless its documentation permits it.

A Recipe Card Box for a Kitchen That Is Still Collecting Recipes

Product links are for reference. Verify current details on the retailer page before buying.

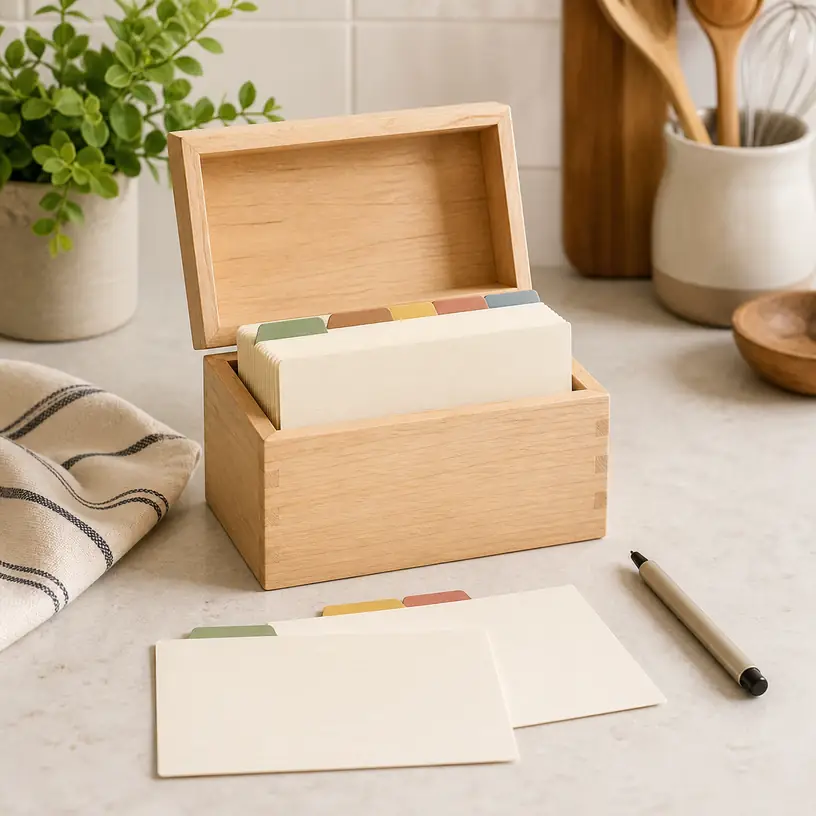
Illustrative image of a generic wooden recipe card box with blank cards and divider tabs on a kitchen counter

Illustrative image, not an official product photo.

Short answer

A useful recipe card box should fit the cards you already own, leave room for the collection to grow, and let you pull one recipe without unloading half the file. Measure the largest card, including any protective sleeve and raised tab, then compare that envelope with the box’s internal dimensions and lid clearance. Look beyond the number of cards a listing claims to hold: divider thickness, bent corners, handwritten inserts, and breathing room all reduce practical capacity. Stable footing, labels you can read while standing, and a lid that stays out of the way can make the box easier to use at the counter. If most recipes live on a phone or arrive as full sheets, a card box may add a transcription project rather than solve an organization problem.

Search reference

Recipe card boxes with dividers

Compare internal card clearance, divider positions, working space inside the file, lid behavior, and the material care instructions for a real kitchen.

View matching options

Begin with the recipes, not the box

Pull together a representative sample before shopping: an old family card, a newer card, a clipped recipe you intend to rewrite, any laminated favorites, and the thickest sleeve you use. Measure width and height at the widest points. A nominal card format such as 3 by 5 inches or 4 by 6 inches is only a starting description; handwriting tabs, curled edges, dividers, and sleeves can make the working file taller, wider, and thicker.

Decide whether everything truly needs to share one box. A mixed archive may include cards in two orientations, folded notes, printouts, photographs, and booklets. Choosing an oversized container for the largest odd item can leave ordinary cards leaning and sliding. It may be simpler to keep standardized working cards in the box and store source clippings or full-page originals in a separate folder.

Count the cards loosely rather than compressing them into a tight stack. Add the dividers you expect to use and leave enough free space to flip through sections with two fingers. A box filled edge to edge on the first day will be frustrating as soon as another recipe arrives. On the other hand, a mostly empty deep box lets cards fall forward unless it includes a follower block, adjustable support, or another suitable way to keep a small collection upright.

Who this is for

  • Home cooks who use handwritten or printed index cards more often than a screen at the counter.
  • Families consolidating a manageable set of inherited recipes while preserving the wording and notes on the original cards.
  • People who want a small, portable file that can move from a shelf to a prep area and return after the meal.
  • Recipe collectors willing to use consistent card sizes, category labels, and a simple filing routine.
  • Gift makers assembling a starter collection with blank cards and enough open capacity for the recipient’s additions.

Who should skip it

  • Cooks whose collection is mainly letter-size printouts, cookbook pages, saved web links, or notes in several unrelated formats.
  • Anyone who wants automatic search, scaling, sharing, meal planning, or backup; a paper box does not provide digital tools.
  • Very large archives that need multiple indexing levels, duplicate detection, or storage conditions beyond a kitchen shelf.
  • Households without a reasonably dry, clean place away from splashes, cooking vapor, direct heat, and strong sunlight.
  • Buyers who enjoy collecting recipes but are unlikely to rewrite, print, label, or return cards after use.

What to verify before buying

  • Internal dimensions: Compare usable width, depth, and height with the largest card, sleeve, and divider tab—not just the box’s exterior measurements.
  • Card orientation: Check whether cards stand in landscape or portrait orientation and whether your recipes are readable that way.
  • Divider fit: Confirm the number, material, writing area, tab position, and compatibility of included dividers with replacement cards.
  • Lid clearance: Make sure raised tabs and sleeves will not bend when the lid closes, and check how far the lid opens at the counter.
  • Working capacity: Treat stated card count as an estimate until card thickness, dividers, sleeves, and browsing space are considered.
  • Interior finish: Look for smooth card-contact surfaces, covered hardware, and corners that will not catch paper during filing.
  • Counter stability: Compare the base footprint, empty weight, feet, and how the box is meant to stay steady while cards are flipped.
  • Material care: Read the cleaning and moisture guidance for the complete box, including finishes, hinges, labels, windows, and adhesives.
  • Included cards: Verify their actual dimensions, quantity, printing layout, paper specification, and whether matching refills can be sourced.
  • Closure and hardware: Check how the lid or latch operates, whether fingers can stay clear of hinges, and whether spare hardware is available if relevant.

Dividers should follow the way dinner is planned

A preprinted divider set can look complete while using categories that do not match the household. One cook may search by meal—breakfast, lunch, dinner, dessert—while another thinks in techniques, main ingredients, family branches, seasons, or frequency. Before accepting the included labels, write ten recipes on slips of paper and decide where each would go. If several could reasonably belong in three places, the system needs a cross-reference or simpler categories.

Broad sections are easier to maintain than a forest of narrow tabs. Five to ten starting categories leave room to browse and can be subdivided later. Blank or erasable labels allow the file to evolve, but verify which pens or label materials are suitable and whether rewriting damages the divider. Alternating tab positions may make labels visible, provided the lid has clearance above the tallest row.

An alphabetical system works when recipe names are stable and memorable. It is less helpful when the same dish is known by a relative’s name, an ingredient, and a holiday nickname. A small index card at the front can map alternate names to the filing location. Numbering cards and maintaining a separate index adds control for a larger collection, but it also adds work every time a card is removed or added.

Avoid creating categories for imagined future recipes. Empty sections take space and make the file feel unfinished. Begin with the cards in hand, use temporary labels for a few weeks, and formalize the dividers after real cooking has shown where people look first.

The lid has a job during cooking

A box protects cards in storage, but its behavior while open deserves equal attention. A fully removable lid creates an extra object on a crowded counter. A hinged lid remains attached, though it needs overhead and rear clearance and should not pull a light box backward. Some designs describe a groove or clip for displaying a card; verify the card sizes, viewing angle, and whether the box remains stable when that feature is used.

Do not place the box where a propped card can fall toward a burner, sink, moving appliance, or wet prep area. A separate washable recipe stand may be safer and easier to position than using the storage box as a display. If a sleeve is used during cooking, confirm that it fits the stand and clean it according to its own instructions before returning it to the file.

Closures range from simple lift-off lids to hinges, magnets, clasps, or sliding panels. A tight closure may help keep shelf dust out, but it should not crush tabs or require two hands to fight with a loaded box. A carry handle can be useful for moving the archive, yet it does not establish how much weight the lid, handle, or fasteners can support. Carry the base unless the maker gives clear guidance for another method.

Paper needs protection without becoming inaccessible

Kitchens combine moisture, oils, crumbs, temperature changes, and frequent handling. No ordinary recipe box should be assumed to be waterproof or food-safe simply because it is sold for kitchen use. Keep it away from sink spray, kettles, ovens, dishwashers, and the path of raw ingredients. Wipe hands before browsing and return the box to a dry shelf after cooking.

Wood can bring warmth to an open shelf, but species, construction, finish, and cleaning limits vary. Metal may offer a different feel and thinner walls, yet edges, coatings, seams, and corrosion guidance still need checking. Plastic can be light and easy to see through, while hinges, latches, scratching, and heat sensitivity remain model-specific. Choose from documented dimensions and care instructions rather than assuming one material label guarantees durability.

Sleeves add a replaceable barrier for frequently used cards, but they also increase thickness and may create glare. Verify sleeve dimensions and opening direction so the card cannot slide out when placed on a stand. If an old handwritten card is fragile, repeated removal may be unwise even with a sleeve. A high-quality scan and a working copy can preserve the original while allowing the recipe to remain in regular rotation.

A box protects against ordinary handling; it is not an archival conservation system. Irreplaceable family cards may deserve scanning, backup copies in more than one location, and advice suited to the paper and ink. Do not apply tape, laminate, cleaners, or coatings to an original until their long-term effects are understood.

Capacity is about thumb room

Card-count claims are difficult to compare because paper weight, printing, coatings, sleeves, and dividers differ. Internal depth is a more useful starting point, but not every inch should become a solid block of paper. The user needs room to separate a section, read a title, pinch a card, and return it without scraping adjacent edges.

One practical check is to place the current collection, dividers, and sleeves into a temporary box or tray with similar internal dimensions. Add a small group of blank cards representing expected growth. If the file can be browsed without lifting out a chunk, the spacing is workable. Measure the occupied depth rather than relying on a visual guess.

A long box can hold more but may be awkward on a shallow shelf and heavy when full. Two smaller boxes can separate everyday recipes from an archive, different households, or sweet and savory cooking. The tradeoff is a second filing decision and a greater chance that a card returns to the wrong box. Labeling the exterior clearly matters when containers look alike.

Make the collection easy to hand forward

A recipe file is most valuable when another person can understand it. Put a dated note inside the lid or at the front explaining the categories, abbreviations, and ownership of fragile originals. Include source information where known, especially when a card has been adapted over time. Marking the date of a change helps preserve the history instead of silently replacing it.

Use one intake routine for new recipes. A loose clipping can go into a temporary inbox envelope rather than being wedged between finished cards. On a regular schedule, decide whether to discard it, digitize it, or copy it to the standard format. This keeps untested scraps from overwhelming the recipes people actually cook.

Photograph or scan both sides of handwritten cards, including stains and margin notes that carry context. Confirm that files are readable, named consistently, and backed up before treating the digitization as complete. The digital copy does not make the paper disposable; it simply reduces the risk that one kitchen accident erases the only version.

Limitations

  • Internal dimensions and practical card capacity are not always stated clearly or measured the same way.
  • Included cards and dividers may use a layout, paper thickness, tab sequence, or category scheme that is hard to match later.
  • A decorative box does not provide waterproof, fireproof, pest-proof, or archival storage unless the current specifications explicitly establish a relevant level of protection.
  • Hinges, clasps, magnets, display grooves, and handles add functions but also create points that may wear or interfere with cards.
  • Small boxes fill quickly once sleeves, thick dividers, folded notes, and browsing space are included.
  • Large boxes can be heavy, take up counter or shelf space, and allow a small collection to slump.
  • Paper filing cannot search ingredients, recalculate portions, synchronize edits, or create an off-site backup by itself.
  • No organizer can compensate for inconsistent labels or cards that are not returned after cooking.

Alternatives to compare

A three-ring recipe binder accommodates full sheets, sleeves, and printed pages, although it occupies more open counter space. An index-card file drawer provides growth and easier subdivision for a larger standardized collection. A photo storage case may separate cards into small removable groups, but internal fit, materials, and latch behavior need the same scrutiny. A document folder suits clippings and letter-size printouts better than small cards. A recipe app or ordinary note system adds search, sharing, backup, and scaling tools, while requiring a screen and a consistent import process. Many households will do well with a hybrid: preserve original cards in protected storage, keep working copies in the kitchen box, and maintain readable scans as a backup.

FAQ

What size recipe card box should I buy?

Measure the largest card you plan to file, including its sleeve and the tallest divider tab. Compare those measurements with the box’s internal width, depth, height, and closed-lid clearance. Leave enough depth for fingers to browse rather than sizing the box to a tightly compressed stack.

How much extra space should a recipe card box have?

There is no universal percentage because card and divider thickness varies. Add the dividers, sleeves, and a realistic batch of future cards, then preserve enough open space to separate sections and lift one card cleanly. If the collection is already near the box’s working limit, choose a larger file or divide the archive now.

Are 3-by-5 and 4-by-6 recipe cards interchangeable in one box?

Not automatically. A box sized for 4-by-6 cards may physically hold smaller cards, but they can lean, hide below tabs, or slide out of order. A box designed only for 3-by-5 cards will usually lack clearance for larger cards. Check orientation and internal measurements, and use an appropriate insert or separate section only if it supports the smaller cards without damaging them.

Should original family recipe cards stay in the kitchen box?

Frequently handled originals face spills, light, abrasion, and loss. Consider making clear scans and working copies, then storing fragile or irreplaceable originals under conditions appropriate to their paper and ink. If an original remains in the active box, use a suitable sleeve and keep the box away from food preparation hazards without applying unverified treatments to the card.

Is a wooden or metal recipe card box easier to maintain?

Material alone does not decide maintenance. Finish, seams, hinges, edge treatment, coatings, and the maker’s cleaning instructions all matter. Compare the complete product’s care guidance and keep any box in a dry location away from heat and splashes.

A Tiered Fruit Basket on the Kitchen Counter: Plan for Produce, Reach, and Space

Product links are for reference. Verify current details on the retailer page before buying.

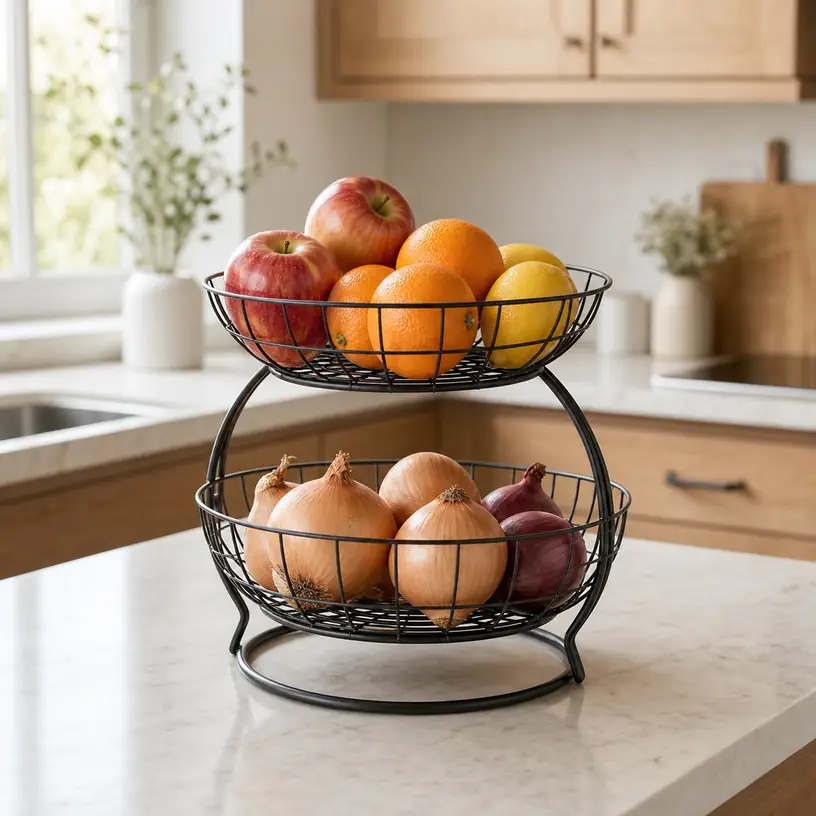
Illustrative image of a generic two-tier fruit basket on a kitchen counter

Illustrative image, not an official product photo.

Short answer

A tiered fruit basket can consolidate countertop produce without using the broad footprint of several bowls, but the upper basket does not create free space—it moves part of the load upward. Measure the full assembled height beneath cabinets, check how far the top tier projects, and make sure both levels remain easy to reach when filled. Then compare basket depth, opening shape, wire or slat spacing, base stability, removable-tier design, and cleaning access with the fruit and vegetables your household actually leaves at room temperature. The useful basket is not the one that holds the most in a listing photo; it is the one that keeps a modest working supply visible without bruising delicate items or taking over the food-prep zone.

Search reference

Tiered fruit baskets for kitchen counters

Compare assembled dimensions, tier access, basket depth, base construction, surface contact, and care instructions with your countertop and usual produce.

View matching options

Start with one week of countertop produce

Before shopping, notice what is already occupying bowls, plates, paper bags, or loose corners of the counter. A home that keeps a few apples and citrus fruits out needs a different organizer from one that regularly stores onions, garlic, bananas, and larger pieces of produce. Count an ordinary week rather than the fullest grocery trip of the year. This keeps an occasional melon or bulk purchase from driving the size of a permanent kitchen fixture.

Separate storage decisions from display decisions. A basket may improve visibility and circulation around some items, but it does not make every fruit or vegetable suitable for room-temperature storage. Ripeness, climate, household practices, and the guidance supplied with the produce still matter. Plan another appropriate place for items that need refrigeration, darkness, separation, or a different container. If you are uncertain about a particular item, check current food-storage guidance instead of treating the basket as a universal produce station.

Now divide the counter group by size and handling needs. Firm apples or citrus may tolerate a different position from soft pears, ripe peaches, tomatoes, or other easily marked produce. Tiny garlic bulbs can slip through large openings. Long bananas do not behave like round fruit, and a bunch may block access to everything below it. This simple inventory reveals whether two open baskets are useful, whether one tier needs a liner, or whether a separate banana hanger is an unnecessary complication.

Who this is for

  • Households that keep a repeatable, moderate amount of produce on the counter and want it visible in one defined zone.
  • Small kitchens where vertical storage could replace two or more separate bowls without blocking an upper cabinet.
  • Grocery routines that benefit from separating firm produce from softer or smaller items.
  • Renters who want freestanding storage with no drilling or permanent cabinet changes.
  • Cooks who prefer to see countertop produce before planning snacks and meals.
  • Shared kitchens where a clear basket boundary can keep loose fruit away from mail, keys, appliances, and the active prep surface.

Who should skip it

  • Skip a tall tiered unit if low cabinets leave too little room to load and unload the upper basket naturally.
  • Keep a simple low bowl if only a few pieces of fruit are normally stored at room temperature.
  • Choose another storage method when most of your produce follows refrigeration or other specific storage guidance.
  • Avoid a deep, narrow basket if shorter household members cannot see or reach the bottom safely.
  • Do not add a permanent organizer when the counter is already short on uninterrupted chopping and appliance space.
  • A wall-mounted or hanging solution is a separate installation decision; do not assume a freestanding frame can be improvised into one.

What to verify before buying

  • Assembled footprint: Measure the widest and deepest points, including feet, handles, outward-curving baskets, and any banana hook.
  • Total working height: Include the frame and anything expected to sit or hang above the upper rim, then allow hand clearance below cabinets and shelves.
  • Tier opening: Check whether the lower basket can be loaded from the front without lifting off the top basket or knocking produce against the frame.
  • Usable basket dimensions: Compare the inside width, depth, and rim height with the produce you buy, not merely the outside dimensions.
  • Gap size: Look at the spacing between wires, slats, or mesh and decide whether small items need a removable, washable liner.
  • Base and feet: Confirm how the frame contacts the counter, whether feet are attached, and what the maker says about use on your surface.
  • Load guidance: Review any stated weight limits and loading instructions for individual tiers and the complete unit.
  • Assembly and joints: Determine whether baskets hook on, screw into place, stack, or separate for independent use.
  • Cleaning access: Check whether the baskets detach, whether joints trap debris, and which cleaning and drying methods are specified.
  • Included pieces: Verify whether hooks, liners, labels, trays, or decorative produce shown in images are actually supplied.
  • Current storage instructions: Confirm that the items you plan to place inside are appropriate for the chosen kitchen location.

Measure the hand path, not only the frame

A dimension diagram can confirm that a basket fits under a cabinet while missing the more important question: can someone use it there? Put a cardboard box or stack of bowls in the proposed position and mimic adding an apple to the upper tier. Your hand needs to pass above the rim, and the fruit needs a short, controlled drop. If the cabinet leaves only an inch or two of clearance, the basket may technically fit but still require pulling the whole unit forward for every item.

The lower basket has a different access path. On many tiered designs, the upper level overlaps it. A low front rim and generous gap between tiers can make the lower section useful for everyday items, while a narrow gap turns it into storage that must be unloaded from the top or reached at an awkward angle. Compare the largest routine item with that front opening. A broad apple, an onion with loose skin, and a bunch of bananas need more maneuvering space than small citrus fruit.

Door and appliance movement also matter. Open the upper cabinet, refrigerator, dishwasher, and nearby drawers while the test object is in position. Leave room to wipe behind the basket and to move groceries through the area. If every counter object has to be shifted before the surface can be cleaned, the organizational gain may disappear during normal kitchen maintenance.

Basket geometry changes how produce rests

A photograph of a filled basket hides much of its internal shape. A rounded bowl draws items toward the center, potentially stacking them several layers deep. A broad, shallow basket spreads the same quantity across more surface area and keeps more pieces visible, but consumes additional counter width. Straight-sided bins use space predictably, though square corners can collect skins and debris.

Rim height affects both containment and reach. A high rim can help keep round fruit from rolling out, yet it asks you to lift each piece farther and may hide what remains at the bottom. An outward-flared rim enlarges the opening but can make the overall footprint greater than the listed base size. Handles are useful when a basket is intended to detach, provided they do not collide with the other tier or steal too much opening space.

Open wire designs leave much of the produce visible and allow air to move around it, but wire spacing should match the contents. Small items can protrude or fall through; delicate skins may rest against a limited number of contact points. Closely spaced mesh contains more shapes but has more intersections to clean. Solid bowls keep loose skins and debris off the counter, though they offer a different ventilation and cleaning arrangement. Material names alone do not settle these tradeoffs—look at the complete shape and follow the current care directions.

Two tiers need a deliberate loading plan

A tiered frame raises the center of gravity as the upper basket fills. Use the unit on a level, stable surface and follow its load guidance. Avoid turning the top into the default location for the heaviest available produce merely because it is easier to see. The best arrangement balances stability, access, ripeness, and the pressure placed on items at the bottom.

Place produce rather than tossing it. A deep pile can hide a softening piece under newer groceries and adds the weight of upper layers to lower ones. A smaller visible quantity is often easier to rotate through meals. When groceries come home, look through what remains before adding more; move items according to appropriate storage guidance and your meal plan rather than automatically burying the older supply.

If the tiers separate, they may offer more flexibility than a fixed tower. Two individual baskets can sit side by side during a large grocery week or move apart when cabinet clearance changes. Confirm whether each basket has feet or a finished bottom before assuming it can be used independently. A detachable upper basket is not necessarily designed to sit directly on a countertop.

Some models add a banana hook above or beside the baskets. Treat the hook as part of the full working envelope. A hanging bunch adds height, swings when touched, and may obscure the upper basket. Check the hook’s stated purpose and load guidance, then make sure the bunch will not contact a cabinet, wall, or fragile items below. If bananas are only an occasional purchase, a simpler two-tier frame may use space more efficiently.

Location matters beyond available space

A fruit basket belongs in a clean, stable place away from obvious contamination and interference with cooking. Do not position it where produce could be exposed to direct splatter, excessive heat, or contact with raw-food preparation. Leave safe clearance from the sink edge and cooking appliances according to the kitchen layout and appliance instructions. Direct sunlight and room conditions can also affect produce, so the brightest open counter is not automatically the most suitable location.

Think about traffic. A basket near the edge of an island may be easy to reach but vulnerable to bags, elbows, and children moving through the room. A deep back corner protects the frame from bumps while making the lower tier difficult to inspect. The practical location is usually visible from the prep area, reachable without leaning over a hot or wet zone, and far enough from the edge that a round item cannot roll directly to the floor.

Countertop material deserves care as well. Grit, trapped moisture, or a rough frame can mark some surfaces. Check the basket maker’s instructions and the counter manufacturer’s care guidance. Keep the contact area clean and dry as appropriate, and do not assume that an added adhesive pad, liner, or coating is compatible with a particular finish.

Cleanup should be part of the weekly routine

Produce baskets collect ordinary debris: onion skins, dried stems, dust, stickers, and residue from an unnoticed soft item. An airy visual design is not necessarily effortless to clean. Closely spaced wire intersections, hollow frame joints, decorative scrollwork, and nonremovable tiers can require more attention than a simple open bowl.

Before buying, imagine removing every item and carrying the empty basket to the cleaning area. Is the complete frame too tall for the sink? Do the baskets release without tools? Can the feet and underside be wiped without turning a heavy assembly awkwardly over the counter? Follow the listed cleaning method, dry the unit as directed, and inspect it before refilling. A removable liner can catch small debris, but it introduces another surface whose material and washing instructions need to be suitable for the intended use.

Cleaning time is also inventory time. Discard items according to household food-safety practices, inspect neighboring produce, and wipe the counter below. Avoid continuously topping up the basket without seeing the bottom. Visibility is one of the main reasons to buy open storage; a periodic empty-and-reset routine preserves that advantage.

Limitations

  • A tiered basket saves horizontal area only by using vertical space and may be awkward under low cabinets.
  • Open storage does not provide the temperature, humidity, darkness, or separation appropriate for every kind of produce.
  • Deep baskets can hide older or delicate items beneath a new grocery load.
  • Tall frames can be less stable if loaded unevenly or placed on an irregular surface.
  • Wire, mesh, slats, and decorative joints all create different contact points and cleanup challenges.
  • A basket full of produce can be heavier and harder to move than its empty product image suggests.
  • Added hooks and handles increase the working envelope and may interfere with cabinets or nearby appliances.
  • Permanent countertop storage reduces the clear surface available for food preparation and cleaning.

Alternatives to compare

A single shallow fruit bowl keeps a small supply easy to see and is simpler to lift for cleaning. Two separate baskets allow different items to occupy different locations without making one tall structure. A ventilated pantry bin may suit items whose storage guidance and pantry conditions are compatible, while keeping the main counter open. A hanging produce basket frees the work surface but introduces ceiling or wall attachment, movement, load, and reach considerations. A rolling kitchen cart creates a larger mobile zone for households with floor space, though it should not become a substitute for appropriate produce storage. For groceries that belong in cooler conditions, use the refrigerator drawers or other recommended storage method instead of choosing a larger countertop organizer.

FAQ

How much room should I leave above a tiered fruit basket?

Leave enough room for your hand and the largest routine item to pass over the upper rim without hitting a cabinet or shelf. Include any handle, hook, and hanging produce in the measurement. Testing the space with a box or stacked bowls is more useful than checking total frame height alone.

Is a two-tier fruit basket better than one large bowl?

It is useful when two levels improve visibility or separation and the kitchen has vertical clearance but limited counter width. One shallow bowl is simpler when the household keeps only a few pieces out, wants easier cleaning, or lacks comfortable access to a lower tier.

What should go in the top and bottom baskets?

There is no universal arrangement. Consider each item’s storage guidance, weight, ripeness, sensitivity to pressure, size, and how often it is used. Keep the frame stable, avoid deep piles, and place delicate produce where it will not be buried or dropped from a height.

Do wire fruit baskets need a liner?

A liner may help contain very small items or loose skins, but it changes airflow, surface contact, and cleanup. Check the basket and liner materials, make sure the liner is intended for the use, and follow its care directions rather than adding an improvised material that stays damp or blocks cleaning.

Can a tiered fruit basket sit under an upper cabinet?

Yes, if the complete unit fits and both levels can be loaded, inspected, and cleaned without repeatedly striking the cabinet or dragging the frame forward. Measure the hand path and the largest produce item as well as the basket itself.

How do I keep countertop produce from being forgotten?

Use a modest quantity, avoid burying older items, look through both tiers before adding groceries, and empty the basket regularly for cleaning and inspection. Plan meals around what is ready to use while following appropriate storage and food-safety guidance.

Choosing a Wall-Mounted Broom and Mop Holder for a Utility Area

Product links are for reference. Verify current details on the retailer page before buying.

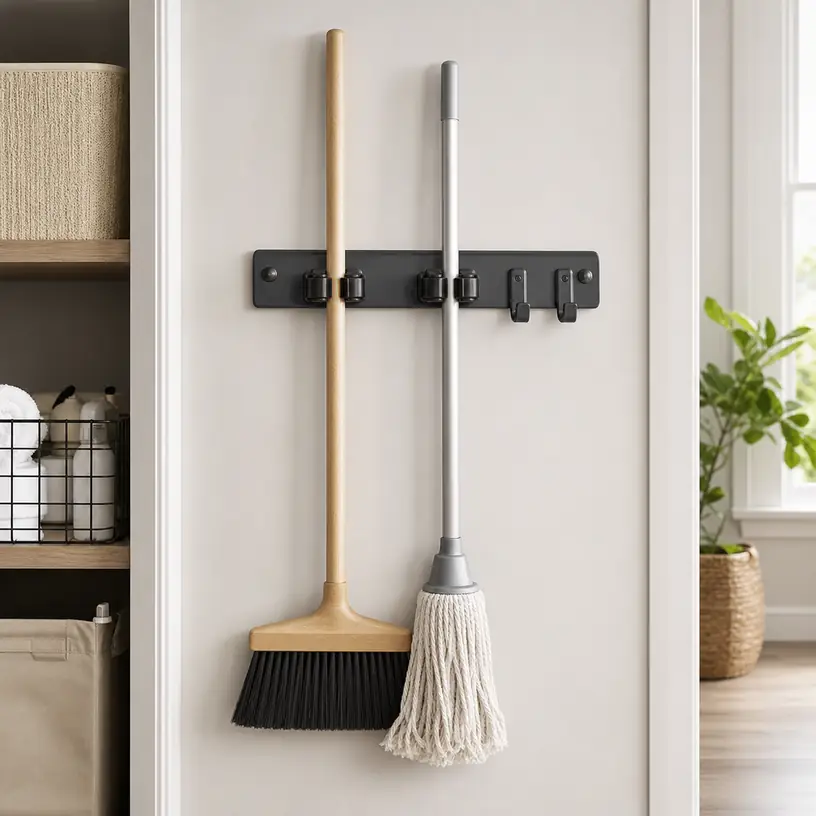
Illustrative image of a generic wall-mounted holder organizing a broom and mop in a utility area

Illustrative image, not an official product photo.

Short answer

A wall-mounted broom and mop holder can reclaim floor space, but the right rail is determined by more than the number of grip positions. Inventory the tools that will actually hang there, measure each handle where the grip will close, and allow room below for mop heads, broom bristles, dustpans, and hanging loops. Then match the mounting method to the wall—not just to the organizer. A rail that fits five handles on paper may feel crowded once wide broom heads and angled tools overlap. For damp mops, choose a location with ventilation and a floor surface that can tolerate drips rather than treating the holder as a drying system.

Search reference

Wall-mounted broom and mop holder options

Compare rail length, grip range, hook layout, mounting hardware, stated load guidance, and installation requirements against your own tools and wall surface.

View matching options

Start with a tool inventory, not a slot count

A storage rail is easiest to plan with the broom, mop, duster, floor squeegee, and dustpan in front of you. Product names often describe several gripping slots plus hooks, but those numbers do not explain whether your particular handles and tool heads can sit together comfortably.

Write down which items need a pressure grip and which can hang from a loop or hole. Measure handle diameter at the intended holding point; tapered handles may be substantially different near the top and middle. Notice where switches, foam grips, adjustment collars, or battery housings interrupt an otherwise smooth handle. A holder may close around a plain round shaft yet be unsuitable at a bulky joint.

Tool heads create a second spacing problem. Two narrow handles can fit adjacent grips while a broad push broom and string mop collide below them. Staggering the hanging heights can help, but only when the wall has enough vertical clearance. If the collection changes seasonally, leave an open position rather than designing a rail with every slot occupied from day one.

Who this is for

  • Households trying to move long-handled cleaning tools off a laundry-room, mudroom, garage, or utility-closet floor.
  • Renters who have permission to make suitable wall penetrations, or who can use a properly supported removable mounting approach within its stated limits.
  • Buyers who want frequently used tools visible and individually accessible instead of leaning in a crowded corner.
  • Small utility spaces where a carefully sized rail can use a narrow strip of wall between shelving, doors, and appliances.
  • Homes that can separate damp tools from dry storage and provide an appropriate place for each.

Who should skip it

  • Anyone who cannot confirm what is behind the proposed mounting area or whether the surface can support the installation.
  • Renters whose lease or building rules prohibit the required fasteners.
  • Households that need children to access cleaning tools containing chemicals, sharp edges, batteries, or other items that require controlled storage.
  • Spaces where a projecting tool would block a walkway, door swing, appliance vent, electrical panel, valve, or emergency access.
  • Buyers expecting one compact rail to safely store very heavy garden or workshop tools without product-specific load guidance and suitable anchoring.

The wall is part of the storage system

Mounting instructions are not interchangeable between drywall, wood studs, masonry, tile, paneled walls, and cabinet sides. Included screws or anchors may be intended for only certain surfaces. Before drilling, identify the wall construction and check for plumbing, wiring, ductwork, or other concealed services. If that cannot be done confidently, ask a qualified installer rather than guessing.

A stud-mounted installation may offer a different level of support from hollow-wall anchors, but rail hole spacing does not always align with the stud locations available. Masonry can require specialized bits and fasteners. Tile introduces crack risk and calls for an installation method appropriate to both the tile and the material behind it. Adhesive-mounted versions avoid holes, yet their performance depends on surface type, preparation, curing time, environment, and the maker’s load limits. Adhesive should not be treated as automatically renter-safe: removal can still damage paint or finishes.

Look at stated capacity carefully. Determine whether a number applies to the entire rail, each grip, each hook, or an installation under particular conditions. The combined weight of the tools is only one factor; tugging a handle out of a spring grip adds force, and long tools can act as levers when pulled sideways.

Allow room to take each tool down

A holder can fit the wall and still be frustrating in daily use. Some grips release when the handle is lifted; others need a controlled outward pull. Either action requires hand room and a clear path for the tool head. Mounting directly under a low shelf may prevent lifting, while placing a rail behind a door can cause repeated impacts.

Use painter’s tape to mark the proposed rail length and grip positions. Lean the actual tools against those marks, spreading wide heads into realistic positions. Open nearby doors and cabinets. Walk past the arrangement while carrying a laundry basket or taking out trash. This simple mock-up reveals conflicts that a dimension drawing may not show.

Height should suit the people who use the tools without placing broom heads so low that they remain on the floor. A grip point that is too high can make release awkward; one that is too low wastes vertical space and allows long handles to tip. In a shared household, test the reach of the shortest regular user before deciding.

Grip mechanisms and utility hooks

Rolling or spring-loaded grips are useful only within their stated handle range. A grip that is too loose can let a tool slide; one that is too tight may demand excessive pulling or mark a softer handle. Confirm the supported diameter range and check whether the mechanism is described for round, oval, or irregular profiles.

Hooks can hold a dustpan, hand brush, cleaning cloth, or lightweight accessory with a proper hanging loop. Fixed hooks make capacity easy to understand, while folding hooks can reduce projections when unused. Sliding modules offer layout flexibility but may move unless their locking method is secure. Whatever the style, check hook dimensions and individual load guidance instead of assuming every pictured accessory is supported or included.

Materials affect upkeep but should not be judged from appearance alone. Metal rails can use different alloys, coatings, fasteners, and plastic grip components. Polymer bodies vary in stiffness and temperature limitations. If the holder will be in a humid laundry area or garage, review the current product’s environmental and care notes and inspect fasteners periodically.

Wet tools need a separate plan

Hanging a damp mop above the floor does not guarantee that it will dry hygienically. Thick mop heads may retain water, touch the wall, or drip onto baseboards and flooring. Follow the mop maker’s washing and drying instructions, remove washable heads when directed, and use a ventilated location that can handle residual moisture.

Do not place wet tools above outlets, power strips, appliances, untreated wood, stored paper goods, or surfaces vulnerable to water. A washable tray may protect the floor from incidental drips, but it also needs cleaning and cannot substitute for wringing and drying the mop correctly. If the utility closet stays closed and humid, a separate drying location may be more practical than putting every tool on the same rail.

What to verify before buying

  • Overall rail length, depth, and mounting-hole spacing, including any modules that slide beyond the main body.
  • The handle-diameter range for each grip and whether tapered, padded, telescoping, or irregular handles are supported.
  • Total and per-position load guidance, along with the mounting conditions under which those figures apply.
  • Whether grips and hooks are fixed, folding, removable, or repositionable, and how movable parts lock in place.
  • The installation surfaces named by the manufacturer and which screws, anchors, templates, or covers are actually included.
  • Required clearance for inserting and releasing a handle, not only the organizer’s packaged dimensions.
  • Material, coating, humidity, temperature, and cleaning guidance for the whole assembly and its fasteners.
  • Whether replacement grip parts or additional modules are available if a mechanism wears or the tool collection changes.
  • Any installation exclusions near utilities, heat, weather exposure, or moisture.
  • The return terms in case the actual grip force or spacing does not suit your tools.

A safer installation and checkup routine

Lay out every component before installation and read the current instructions from start to finish. Use a level and mark holes only after confirming the finished rail will leave retrieval clearance. Choose fasteners for the actual substrate and expected load; do not substitute anchors merely because they fit the hole. Avoid overtightening, which can deform the rail, damage the wall, or crack a mounting surface.

Once mounted, test one light tool at a time. Pull in the direction the release mechanism expects rather than yanking sideways. Check whether the rail moves, fasteners loosen, or grips allow slow sliding. Add other tools gradually and stay within the applicable guidance. Reinspect the installation after the first several uses and periodically thereafter, especially if the wall experiences vibration or large temperature and humidity changes.

Keep the area beneath and around the holder uncluttered. A falling broom is inconvenient; a falling heavy tool can injure someone or damage a nearby appliance. Storage height should also reflect who can reach the tools and whether children or pets need to be kept away.

Limitations

  • Grip compatibility cannot be established from slot count alone; handle shape, diameter, surface texture, and release force all matter.
  • A wall rail does not make damp mops dry faster in an enclosed or poorly ventilated room.
  • Included mounting hardware may not suit your wall, even when it appears in product photos.
  • Capacity statements depend on installation conditions and do not justify storing unlisted heavy tools.
  • Closely packed tools can tangle, hide smaller accessories, and make one-at-a-time retrieval difficult.
  • Wall-mounted storage is less flexible than a freestanding rack when tools or room layouts change often.

Alternatives to compare

Freestanding cleaning-tool rack: Avoids wall penetration and can move with the room layout, though it occupies floor space and needs a stable base.

Utility cabinet with vertical dividers: Conceals supplies and can separate tools, but the cabinet must have enough height and ventilation for the intended contents.

Individual wall hooks: Allow custom spacing around wide tool heads. They may be simpler than a multi-grip rail when every item already has a strong hanging loop.

Pegboard storage: Offers a reconfigurable system for lightweight tools and accessories when the board, hooks, mounting, and loads are all compatible.

Over-door organizer: Uses otherwise idle door space, but added thickness and swinging tools can interfere with closure, trim, hinges, or nearby walls.

FAQ

How many broom and mop grips do I need?

Count the tools that require a pressure grip, then separate items that can use hooks. Leave room for wide heads and consider one spare position for a future or seasonal tool. A rail with more grips is not automatically useful if the tools cannot hang side by side.

Can a broom holder be mounted with adhesive instead of screws?

Only when the specific holder and adhesive system are approved for the surface, environment, tool weight, and pulling forces involved. Surface preparation and curing instructions matter. Adhesive can damage paint during removal and should not be assumed to work on textured, dusty, damp, or incompatible finishes.

How high should a broom and mop holder be installed?

There is no single height for every household. Place it so regular users can operate the release comfortably, tool heads clear the floor when appropriate, and handles avoid shelves and doors. Mock up the arrangement with tape and the actual tools before drilling.

Will a wall holder help a wet mop dry?

It may keep the mop off the floor, but drying still depends on how well the head is wrung out, airflow, humidity, and the mop maker’s care instructions. Do not let a damp head rest against the wall, and protect moisture-sensitive surfaces from drips.

Can the same rail hold garden tools?

Do not assume so. Garden tools can be heavier, longer, or more awkwardly balanced than household brooms. Verify the rail’s stated tool compatibility, handle range, per-position capacity, total capacity, and required mounting method before storing them.

A Folding Shopping Cart for Grocery Runs: Wheels, Frame, and Folded Size

Product links are for reference. Verify current details on the retailer page before buying.

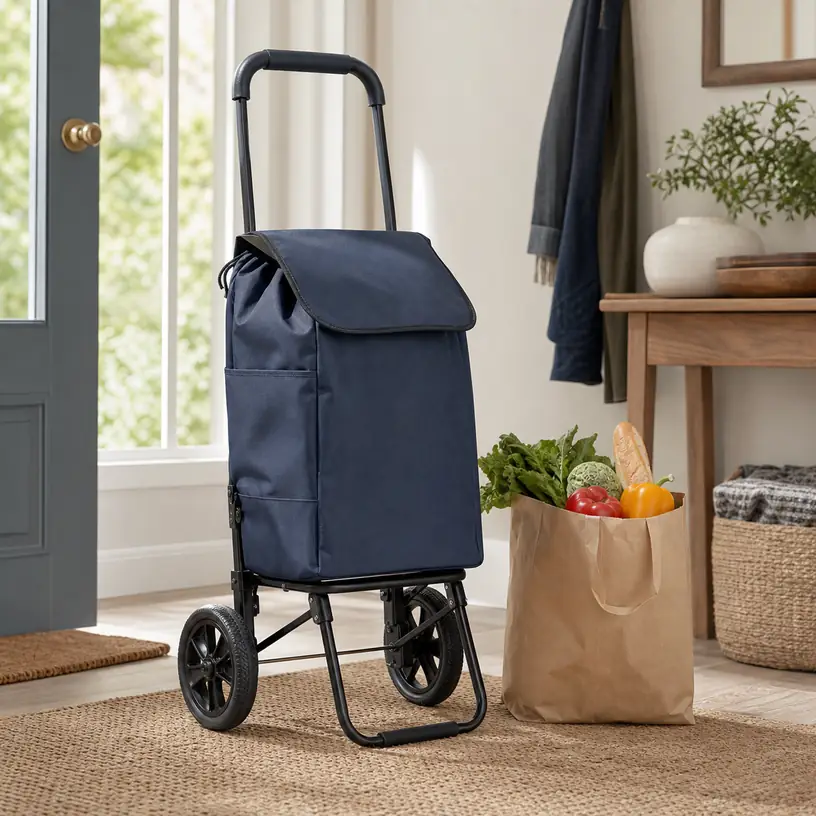
Illustrative image of a generic folding shopping cart with a fabric grocery bag

Illustrative image, not an official product photo.

Short answer

A folding shopping cart should be chosen around the route between the store and home, not around the largest bag in a listing photo. Count the curbs, thresholds, stairs, rough sidewalk sections, and tight turns you normally encounter. Then compare wheel diameter and layout, handle height, frame dimensions, stated load guidance, bag closure, and the cart’s size after folding. A cart that rolls smoothly when loaded and fits beside the door can be more useful than a higher-capacity design that is awkward to steer, lift, or store.

Search reference

Folding shopping carts for grocery trips

Compare wheel layout, handle dimensions, frame and bag construction, stated load guidance, folded size, and stair or curb suitability for your regular route.

View matching options

Walk the route before comparing capacities

Folding grocery carts serve a different job from the small multi-tier utility carts used inside a kitchen, office, or craft room. A grocery cart has to follow a person over outdoor surfaces, hold a changing load, negotiate store entrances, and return to a practical storage spot. Those demands make the route a more useful starting point than color, pocket count, or a broad capacity claim.

Begin at the place where the cart will wait between trips. Measure the available floor or wall space and note whether a folded cart must stand on its own, hang from an appropriate hook, or slide into a closet. Follow the path out of the building. A narrow elevator, heavy entrance door, short flight of steps, uneven paving, or high curb can eliminate designs that would work on a smooth store floor.

Do the same at the destination. Some stores permit a personal trolley to be used while shopping, while others expect it to remain folded until checkout; current local practice should be confirmed directly. Think through where the folded cart will sit before it is loaded and whether its empty frame is manageable alongside a store basket or cart.

Estimate a normal trip rather than an exceptional stock-up run. Bottles, canned goods, produce, boxed food, and household supplies distribute weight differently. A very large bag can invite a load that is difficult to stop, turn, or lift over the final threshold. If grocery trips vary, plan around the heaviest load you can comfortably manage rather than the maximum volume the bag might hold.

Who this is for

  • People who walk to a grocery store, farmers market, laundromat, library, or neighborhood shop and want the load to roll instead of hang from their hands.
  • Apartment residents who have a defined elevator or ground-floor route and a compact place to keep a folded frame.
  • Transit riders who can manage the cart at vehicle entrances and need groceries contained during the walk at either end of the trip.
  • Households making smaller, more frequent grocery runs rather than transporting everything in a car trunk.
  • Shoppers who can keep the cart within its stated use and load guidance and are comfortable slowing down for curbs, slopes, and crowded walkways.

What to verify before buying

  • Complete open dimensions: Check width at the wheels, frame depth, bag height, and handle height rather than relying only on bag measurements.
  • Folded shape: Compare folded thickness, wheel position, latches, and whether the cart is designed to stand, lie flat, or be stored another way.
  • Wheel arrangement: Confirm wheel diameter, number of wheels, axle width, material wording, and any explicit guidance for stairs, curbs, or uneven surfaces.
  • Handle position: Look for the height, grip width, padding or cover, and whether the handle is fixed, adjustable, or shaped for pushing as well as pulling.
  • Stated load guidance: Distinguish the frame limit from any separate bag guidance, and check whether the listing specifies how weight should be distributed.
  • Bag attachment: Determine whether the bag is removable, how it connects to the frame, and whether it can shift toward the wheels when partly loaded.
  • Opening and closure: Check whether the top uses a drawcord, flap, zipper, hook-and-loop section, or remains open, and imagine accessing it at checkout.
  • Base support: Review the platform or lower frame that supports the bag and whether small or soft items could sag into moving parts.
  • Care details: Verify current material wording, cleaning instructions, drying guidance, and any claims involving moisture or weather exposure.
  • Assembly and upkeep: Confirm what must be assembled, how wheel hardware is retained, and whether the listing discusses replacement parts or routine checks.

Wheels decide how the cart meets the street

Two-wheel carts are commonly pulled behind the user. Their simple footprint can be convenient for straight routes and compact storage, but pulling places the loaded cart at an angle. That angle changes how much weight is felt at the handle and how the bag settles against the frame. Check that the handle position and wheel clearance suit your stride so the cart does not repeatedly touch your heels.

Four-wheel formats may be designed to push, pull, or change orientation, depending on the frame. They can keep more of the load supported while standing, but the extra wheels add hardware and may increase the folded footprint. Small swivel wheels can turn neatly on smooth floors yet respond differently to sidewalk cracks and doorway transitions. Do not infer outdoor performance from wheel count alone.

Some carts use clusters of wheels described for stair movement. This layout may change how the cart contacts each step, but it does not remove the weight of the groceries or make every staircase suitable. Step height, landing space, cart width, wheel-cluster dimensions, and the user’s ability to control the load all matter. Verify the maker’s current instructions and consider whether carrying smaller grocery bags separately is safer for your actual stairs.

Larger wheels generally meet small surface changes at a different angle than tiny wheels, but diameter is only part of the system. Axle construction, tire material, alignment, frame stiffness, and the loaded center of gravity also affect how a cart tracks. Inspect wheel and hardware details in current listing images, and check the fasteners periodically according to the supplied instructions.

Fit the handle to the person doing the pulling

A poorly placed handle can make a manageable grocery load tiring. If it is too low, the user may lean or let the cart ride close to the heels. If it is too high or too far behind the frame, steering through a doorway can feel imprecise. Compare a stated handle height with a comfortable hand position while wearing the shoes normally used for errands. Adjustable handles add flexibility only when the adjustment range and locking method suit the user.

Grip shape matters during longer walks. A narrow rigid bar can concentrate pressure, while a wide grip may be difficult for smaller hands. Padding can feel comfortable when dry but may require more care after rain or spills. Check the current product details instead of assuming a fabric or foam-looking section is removable or weather-tolerant.

Also decide whether the cart will be pulled behind, pushed ahead, or used in either direction. Do not push a model merely because its handle looks suitable if the current instructions specify another method. When sharing the cart, make sure the least tall and tallest regular users can both control it without an awkward posture.

The bag should organize the load without hiding problems

A tall single compartment is flexible for cereal boxes, produce, and household packages, but heavy items can settle at the bottom and crush softer groceries. Pack dense, stable items low and keep delicate food in a separate layer or appropriate bag. Side pockets can hold a shopping list or small nonvaluable accessory, but they also add width and may catch on doorframes when full.

An inner liner or insulated-looking surface should not be treated as temperature control unless the current listing clearly describes the construction and intended use. Perishable food still needs an appropriate shopping and transport plan. Likewise, a covered opening can reduce casual exposure but does not automatically make the bag rainproof, spill-proof, or secure.

Removable bags can simplify cleaning and let the frame carry a suitably contained box or other load when the instructions permit. The connection points become important: check straps, hooks, loops, and lower support before each trip. A partly filled bag should remain clear of the wheels and axle. If the cart includes a rigid base insert, verify its orientation and care instructions rather than replacing it with an improvised panel that could interfere with folding.

Bring reusable produce bags or small totes when separation helps. The main cart bag does not need a dedicated pocket for every grocery category. A simple interior is often easier to unload and wipe, while smaller contained bags can be lifted out at the kitchen counter.

Folding is part of every trip

A folding frame earns its storage space only if the routine is manageable. Look at the complete sequence: empty the bag, release the correct latch, move the frame without placing fingers near a hinge, secure the folded shape, and put the cart away. Current instructions should control this process. A cart that collapses to a thin profile may still be tall, unstable when upright, or difficult to lift onto a shelf.

Measure the folded cart with the wheels and handle included. Wheels may prevent it from sliding into a gap that appears wide enough for the frame alone. A loose bag can add thickness or drag on the floor. If storage is behind a door, confirm the door can swing without contacting the cart.

Do not assume every frame can remain upright when folded. If it needs to lie flat, choose a clean, dry storage location where the wheel surfaces do not transfer outdoor debris to clothing or pantry goods. If it is intended to hang, use only a storage method suitable for the cart’s weight and structure; a convenient-looking handle is not necessarily a hanging point.

Who should skip it

  • Skip a large trolley if the route includes stairs or vehicle transfers that make the loaded cart harder to control than two smaller hand-carried bags.
  • Choose a backpack or balanced reusable bags when the grocery load is light and the walking surface is consistently unsuitable for small wheels.
  • A delivery or pickup option may be more practical for occasional heavy orders, severe weather, or routes without accessible crossings.
  • Avoid relying on a grocery cart for children, pets, seating, or any use not explicitly covered by its current instructions.
  • If the main need is movable indoor storage, compare a room-to-room utility cart rather than an outdoor grocery trolley.

Limitations

  • A high stated capacity does not mean that every user can safely steer, stop, or lift the fully loaded cart.
  • Small wheels can catch at cracks, thresholds, gravel, thick mats, and other abrupt surface changes.
  • Large or stair-oriented wheel systems can improve contact in some situations while adding width, weight, and storage bulk.
  • Soft bags do not prevent crushing, leaks, or temperature change without an appropriate packing plan.
  • Folding hinges, latches, axles, wheels, and bag attachments require inspection and care according to the supplied instructions.
  • A cart can free the hands from grocery bags, but it remains an object that must be controlled around traffic, slopes, doors, and other pedestrians.
  • Weather-related wording varies, and ordinary fabric should not be assumed to protect groceries from sustained rain.
  • Store, transit, and building rules differ and may change; confirm the current requirements that apply to the route.

Alternatives to compare

  • A grocery backpack for lighter loads on routes with stairs, while considering fit and comfortable carrying weight.
  • Two balanced reusable bags for short trips where wheels would add more inconvenience than help.
  • A collapsible wagon for suitable ground-level routes and larger loads, if its wider footprint and storage size are practical.
  • A bicycle basket or cargo setup designed for the bicycle and load, with appropriate securement and riding practices.
  • Grocery pickup or delivery for bulky stock-up trips, combined with smaller walking trips for fresh items.
  • A compact hand truck with separately secured containers when the job extends beyond groceries and the equipment is intended for that load.

FAQ

Are two wheels or four wheels better for a folding grocery cart?

Neither layout suits every route. Two-wheel carts are often pulled at an angle and can fold compactly. Four-wheel carts may support more of the load while standing or moving, but wheel size, steering design, surface conditions, and folded dimensions still matter. Follow the current instructions for whether a specific cart should be pushed, pulled, or used in multiple orientations.

What wheel size should I look for on uneven sidewalks?

Start by observing the largest cracks, thresholds, and curb transitions on the normal route, then compare them with the wheel details and intended-surface guidance in current listings. Diameter is useful, but axle construction, tire material, wheel alignment, frame stiffness, and load placement also affect rolling behavior.

Can a folding shopping cart go up apartment stairs?

Only if the specific design, current instructions, staircase, load, and user make that practical. A multi-wheel stair layout does not eliminate the weight or the need to control the cart at every step and landing. For difficult stairs, smaller grocery bags, a lighter load, an elevator, or another transport method may be more manageable.

How should groceries be packed in a rolling cart?

Place compact, stable items low without exceeding the stated guidance, keep leak-prone goods in appropriate closed containers, and protect bread, eggs, produce, and other easily damaged items from heavier packages. Keep the bag clear of wheels and hinges, and make sure the top closes without forcing it.

Where can a folding grocery cart be stored in a small apartment?

Use the cart’s complete folded dimensions, including its wheels and loose bag, to check a closet, entryway recess, or other dry location. Confirm whether the folded cart is intended to stand, lie flat, or use an approved hanging method. Keep outdoor wheel surfaces away from clean textiles and food-storage areas.

Bed Risers for Extra Storage: Measure the Bed Before You Raise It

Product links are for reference. Verify current details on the retailer page before buying.

Illustrative image of generic bed riser blocks beside a simple wooden bed leg

Illustrative image, not an official product photo.

Short answer

Start with the bed, not the storage bins. Count every point that actually touches the floor, measure the width and shape of each leg or foot, and note the present floor-to-frame clearance. Choose only enough lift to clear the containers you plan to use, then check the riser’s top recess, base footprint, stated load rating, floor guidance, and compatibility with the complete bed frame. Raising a bed also raises the mattress edge and changes how the frame handles movement, so the lowest suitable height is usually the more practical comparison point.

Search reference

Bed riser options

Compare lift height, recessed top dimensions, number of pieces, base width, load wording, and floor-contact design against your actual bed and storage plan.

View matching options

Map the bed’s support points first

Four risers are enough only for a bed with four load-bearing feet. Many frames have a center rail with one or more legs, extra supports near the headboard, paired feet under a platform, or glides that are easy to miss beneath fabric. Putting risers under the visible corners while leaving a center support on the floor changes the frame geometry instead of raising it evenly.

Inspect the assembled bed from all sides and count every floor contact. If the frame instructions specify center legs, brackets, or required support locations, preserve that arrangement. A set advertised for a four-legged piece of furniture may not contain enough matching pieces for a six- or nine-point bed frame. Mixing heights or improvising a support from unrelated blocks is not a substitute for a complete compatible set.

Measure each contact point rather than assuming they are identical. A wooden bed may have square corner posts and a narrower center leg; a metal frame may end in wheels, broad glides, angled feet, or a combination of shapes. Record the widest dimension at the point that would sit inside the riser. Also note whether a caster can be removed only when the frame maker allows it, because a wheel sitting loosely in a shallow recess can behave differently from a flat leg.

Who this is for

  • Renters and small-bedroom households trying to fit measured storage containers beneath an otherwise compatible freestanding bed.
  • Buyers whose bed has clearly identifiable, accessible support feet that match a riser’s stated top shape and dimensions.
  • People who need a modest increase in clearance and can still get into and out of the raised bed comfortably.
  • Households willing to raise every required support point evenly and inspect the setup after installation.
  • Organizers choosing bins after calculating usable clearance, rather than buying risers and hoping existing containers will fit.

Who should skip it

  • Skip generic risers if the bed or frame instructions prohibit raising, require proprietary supports, or do not confirm compatibility.
  • Do not assume they suit adjustable bases, bunk or loft beds, wall beds, waterbeds, trundle systems, hospital-style beds, or frames attached to another structure.
  • Avoid a riser whose recessed top cannot fully and predictably receive the bed’s legs, feet, or permitted casters.
  • A raised bed may be inconvenient when mattress height already makes sitting, transferring, or changing sheets difficult.
  • If the floor is uneven, damaged, heavily cushioned, or unsuitable under the riser’s instructions, solve the surface issue rather than using the risers as levelers.
  • A bed that is loose, bent, cracked, missing hardware, or unstable should be repaired or replaced before any change in height is considered.

What to verify before buying

  • Support count: Count corner, center, and intermediate legs and make sure the set provides one identical-height riser for every required floor contact.
  • Top fit: Compare the recess length, width or diameter, depth, edge shape, and any anti-slip insert with each bed foot.
  • Lift versus total height: Distinguish added lift from the product’s full outside height, then calculate the new mattress-edge height.
  • Load statement: Read how the current rating is defined and whether it applies per piece or per complete set; account for the bed, foundation, mattress, occupants, bedding, and anything else supported.
  • Base footprint: Check that each riser can sit fully on the floor without touching a baseboard, wall, rug edge, cable, or neighboring furniture.
  • Floor guidance: Confirm approved surfaces and whether a separate floor protector is allowed without changing stability.
  • Frame compatibility: Review the bed maker’s instructions, especially for center supports, removable casters, adjustable components, and headboards.
  • Stacking rules: Never assume risers can be stacked, nested, or combined to create another height unless the exact product instructions permit that configuration.
  • Installation method: Determine how the bed will be lifted and positioned without placing hands or feet beneath it, and arrange enough capable help for the complete setup.

Choose clearance from a real container

The useful number is not simply “six-inch riser” or another headline dimension. Measure the current vertical gap at the lowest point a bin must pass under, which may be the side rail, center rail, slat hardware, or a hanging fabric edge. Add the advertised lift, not the riser’s total height, to estimate the new opening. Then leave handling clearance above the container so it can pass beneath the rail without scraping or requiring the bed to flex.

Container lids, wheels, handles, and bowed contents all affect the height needed in practice. A soft zippered bag may catch on hardware even when its nominal dimensions fit. A rigid bin needs enough room for fingers at the front and enough open floor area to turn as it slides out. Map where center legs divide the under-bed area as well; the total footprint under a queen or king bed is not one uninterrupted rectangle.

The raised mattress height deserves its own calculation. Measure from the floor to the top edge now, add the planned lift, and compare that result with the people who use the bed. More storage is a poor trade if feet no longer reach the floor while sitting at the edge or if regular access requires an improvised step. Thick mattresses, toppers, and foundations can make even a modest riser feel like a large change.

The top recess matters more than the color

Most rigid risers use a recessed cup, channel, or textured platform to locate a furniture foot. That area must be wide enough for the foot to sit as directed but not so mismatched that a narrow leg can slide across a broad, shallow surface. Compare the usable inside dimensions, not just the outside block size shown in a photograph.

Depth also changes fit. A deep cup may help surround a compatible straight leg, yet it can conflict with an angled leg, decorative flare, horizontal frame member, or caster bracket. A shallow top can be easier to place under a broad flat foot but may provide less surrounding edge. There is no universally better shape; the relevant choice is the one documented for the support geometry beneath your bed.

Some sets use separate inserts or removable pads. Confirm whether these pieces are required, how they are oriented, and whether replacements are available. Adhesive grip material and floor pads should not be added casually: extra layers can compress, shift, or change how the riser sits unless the product instructions specifically allow them.

Load wording needs context

Large capacity numbers can be difficult to compare because listings may describe one riser, an entire set, static load, or a test condition that does not match a moving bed. Read the complete current statement and supporting instructions. The relevant load is not just the sleeper’s body weight; it includes the frame, mattress system, occupants, bedding, and any supported accessories.

A load rating does not prove compatibility or stability. A riser can have a substantial stated capacity while its top is the wrong size for a particular leg or its base is poorly placed on the room’s floor. Likewise, a frame still has to follow its own load and support requirements. Treat capacity, fit, support count, and surface conditions as separate checks that all need acceptable answers.

Beds experience movement as people sit down, turn, or get up. Added height can increase leverage at joints and make existing looseness more noticeable. Check frame fasteners according to the bed instructions before installation, and stop if the raised arrangement rocks, shifts, creaks in a new way, or leaves any support unloaded.

Plan installation and future access

Installing risers is not a one-person balancing task for many beds. Remove loose items and under-bed storage, clear a working path, and follow both the bed and riser directions. The goal is to lift and place the frame without anyone reaching beneath an unsupported load. Large frames, heavy mattresses, attached headboards, and tight rooms may require disassembly or professional assistance rather than a quick corner-by-corner lift.

After every support is positioned, inspect from several angles. Each foot should sit in the intended area, every riser base should be flat on the floor, and center supports should carry load as designed. Check clearance around outlets, cords, nightstands, wall trim, and anything attached to the headboard. Raising the bed can change the alignment of bedside furniture and expose gaps that were not present before.

Recheck the setup after initial use and during routine room cleaning, following the maker’s inspection guidance. Look for movement, cracks, deformation, worn pads, loosened frame hardware, or damage to the flooring. Do not drag the bed while it is on risers unless the instructions explicitly describe a safe way to move it; unload and reposition the system as directed instead.

Limitations

  • Risers create vertical clearance but do not remove center legs, low crossbars, or other obstructions beneath the frame.
  • Outside block dimensions do not reveal whether the top recess fits a particular bed foot.
  • A stated load rating cannot compensate for missing supports, an incompatible frame, or an unsuitable floor.
  • More lift raises the mattress, increases the visual height of the bed, and may change access to nightstands or wall-mounted fixtures.
  • Carpet, rugs, floor seams, and uneven boards can keep a wide base from contacting the floor as intended.
  • Under-bed containers still need room to enter, turn, open, and clear dust or floor transitions.
  • Generic risers are not automatically suitable for specialized, attached, stacked, folding, or powered bed systems.

Alternatives to compare

  • Low-profile under-bed bags or shallow rolling bins that fit the bed’s current clearance.
  • A bed frame designed with built-in drawers or documented storage clearance.
  • Vacuum storage bags for appropriate soft goods when reduced volume matters more than quick access.
  • Closet shelf, wardrobe, or over-door storage for items that should not be kept near the floor.
  • A compatible replacement frame with a taller fixed clearance if the current feet cannot safely accept risers.
  • Reducing the amount stored beneath the bed so frequently used items remain easy to reach and inspect.

FAQ

How many bed risers do I need?

You need one compatible riser for every support point the bed requires, not automatically four. Count corner feet, center legs, and any intermediate supports, then confirm that all can be raised evenly without changing the frame’s intended geometry.

How do I know whether a bed leg fits the riser?

Measure the leg or foot at the contact area and compare its shape with the riser’s usable recess length, width or diameter, and depth. Check for flared legs, caster brackets, angled members, or nearby hardware that could prevent the foot from seating as directed.

What height should I choose for under-bed bins?

Measure the present opening at its lowest obstruction, measure the bin including its lid, wheels, and handles, and add working clearance for sliding it in and out. Select the smallest compatible lift that creates that real opening, then calculate whether the new mattress height remains comfortable.

Can bed risers be stacked for more height?

Only when the instructions for that exact product explicitly allow a stated stacked configuration. Do not combine unrelated sets, invert blocks, or improvise extra layers to reach another height.

Do bed risers work on carpet?

Some may be intended for particular carpet types, while others may require a hard, level surface. Check the current floor guidance and base dimensions. The riser must remain flat and stable rather than rocking on padding, a rug edge, or a floor transition.

Can I use bed risers under a frame with wheels?

Do not assume so. Confirm both the frame maker’s guidance and the riser’s permitted foot or caster shapes. A wheel needs a specifically compatible recess or an approved conversion; removing casters or placing them in a generic cup without instructions can change fit and support height.

Wool Dryer Balls: Set Size, Care, and Smarter Laundry Habits

Product links are for reference. Verify current details on the retailer page before buying.

Illustrative image of generic wool dryer balls beside folded laundry

Illustrative image, not an official product photo.

Short answer

Wool dryer balls are reusable laundry accessories that tumble among damp textiles, helping separate items as the drum turns. A useful set should be sized for the loads you actually dry, made with clearly described materials, and backed by straightforward care and replacement guidance. They can suit households looking for an unscented, low-fuss addition to a dryer routine, but they do not replace correct sorting, washer spin performance, or the dryer’s sensor and lint-filter maintenance. Expect results to vary with load size, fabric mix, moisture level, and cycle settings—especially when static-prone synthetics are involved.

Search reference

Wool dryer ball sets

Compare ball count, stated fiber construction, dimensions, care instructions, and replacement guidance for the loads your household dries most often.

View matching options

Think in loads, not just ball count

Listings often make the number of balls the headline, yet the more useful question is how a set fits your normal dryer loads. A small household drying a few shirts and towels has a different routine from a family filling the drum with bedding. Too few balls in a crowded load may have little room to circulate. Adding more accessories cannot rescue a drum packed so tightly that the textiles barely tumble.

Before shopping, observe two or three ordinary laundry days. Note whether you usually dry small mixed loads, bulky towels, sheets, or mostly synthetic activewear. Also check the appliance manual for loading guidance and settings. This quick inventory gives the set a job to do instead of turning the purchase into a guess based on a staged product photo.

Who this is for

  • Households that want a reusable, usually unscented dryer accessory for compatible machine-dried laundry.
  • People who dry towels, cotton basics, or bedding and want more separation between damp items as they tumble.
  • Laundry rooms with a simple storage spot where the full set can stay together between cycles.
  • Shoppers willing to adjust cycle length and dryness settings instead of assuming one routine fits every fabric mix.
  • Anyone comparing non-plastic dryer-ball materials and comfortable using an animal-derived wool product.

Who should skip it

  • Skip wool if your household avoids animal-derived materials; reusable dryer balls made from other materials are an alternative to investigate.
  • Do not use dryer balls as a reason to machine-dry garments whose care labels call for line drying, flat drying, or another method.
  • Look for another approach if impact noise is disruptive in your home, particularly when the dryer shares a wall with a bedroom or work area.
  • Do not expect wool balls to eliminate static in every load. Dry air, over-drying, and synthetic fabrics can remain challenging.
  • Keep them out of the routine if a household member or pet may remove, chew, or play with loose laundry accessories.

What to verify before buying

  • Material wording: Confirm what the manufacturer says the ball is made from and whether a core, filler, coating, dye, or added fragrance is mentioned.
  • Ball dimensions: Product photos can make different sizes look alike. Check the stated diameter and consider how it will move among your typical items.
  • Set size guidance: Compare the seller’s current recommendation for small, regular, and bulky loads, then keep the appliance’s loading limit in charge.
  • Construction: Look for tightly felted, smooth surfaces without decorative pieces that could loosen in a tumbling drum.
  • Care directions: Verify how the balls should be cleaned, dried, reshaped, and stored if they pick up lint or become damp.
  • Service-life language: Treat an estimated number of loads as guidance rather than a guarantee. Replacement depends on visible condition and performance.
  • Dryer compatibility: Read both the accessory instructions and the appliance manual, especially for compact, combination, or shared machines.
  • Return and package details: Confirm the current quantity and included items rather than assuming baskets, storage bags, or laundry props shown in images come with the set.

How they fit into a drying cycle

Dryer balls move through the load as the drum rotates. Their practical role is mechanical: they can create temporary gaps between damp textiles rather than letting every item remain pressed into one dense mass. Whether that changes the cycle in a noticeable way depends on how freely the load tumbles, how much water remains after the washer spin, and how the dryer senses moisture.

That makes load preparation more important than marketing language. Shake out twisted garments and sheets before they enter the dryer. Separate pieces that have balled up inside fitted sheets. Clean the lint filter as directed, choose a setting that matches the care labels, and avoid filling the drum beyond the appliance guidance. Place the dryer balls throughout the loose load rather than burying the whole set in one bundled item.

If you are evaluating whether they help your routine, compare similar loads rather than relying on one unusual cycle. Towels one day and lightweight shirts the next are not a meaningful comparison. Use the dryer’s moisture-sensing mode when appropriate, and check the load near the end rather than automatically adding extra time. Over-drying wastes energy, increases wear, and can make static more noticeable.

Static, scent, and common expectations

Static is not a single-variable problem. Fabric type, indoor humidity, dryness level, and friction all contribute. Wool dryer balls may fit well in a load of absorbent natural-fiber basics yet feel less decisive in a load dominated by fleece or other synthetics. If static is the main concern, start by avoiding unnecessary extra drying and separating especially static-prone pieces when practical. The garment labels and appliance settings remain the first references.

Plain wool balls are often chosen for an unscented routine. Resist the temptation to pour fragrance or essential oil onto them unless both the dryer-ball maker and appliance instructions explicitly support the practice. Added liquids can transfer to fabric, leave residue, introduce an unwanted scent, or create a use the product was not designed to handle. An accessory sold as unscented is most predictable when used that way.
Noise also deserves realistic expectations. Any firm object striking a metal drum can be audible, and the sound may stand out more in a small load. A well-felted wool ball is different from a hard plastic design, but it is not silent. If your dryer sits near a quiet room, consider when cycles run and whether a return option is available if the sound proves distracting.

Care, storage, and replacement clues

After unloading, find the balls before they disappear into sleeves, pant legs, or fitted-sheet corners. A breathable basket or open container near the dryer makes the set easy to count and allows residual moisture to escape. Avoid sealing damp balls in a plastic bag or leaving them where children or pets can treat them as toys.

Surface fuzz and a few attached fibers do not necessarily mean immediate failure. Follow the maker’s directions for removing lint or refreshing the balls; cleaning methods vary, and an improvised hot wash may change their shape or density. Retire a ball if it splits, develops a loose internal section, sheds excessively, carries an odor that does not resolve with approved care, or no longer holds its shape. The condition in front of you matters more than an advertised lifetime estimate.

For a shared laundry room, decide whether the balls stay with one household basket or live beside the appliance. A small mesh storage pouch may help with transport, but the balls should be removed from the pouch before use. Count them going in and coming out so one is not accidentally carried away inside someone else’s laundry.

Limitations

  • Results vary by appliance, load composition, washer spin speed, cycle setting, room humidity, and how full the drum is.
  • Dryer balls do not clean laundry, remove stains, replace detergent, or make an unsuitable garment safe for tumble drying.
  • Static can persist, particularly in dry conditions or synthetic-heavy loads.
  • Wool is animal-derived and will not match every household’s material preferences.
  • The balls can produce impact noise and may hide inside large garments or bedding.
  • Product claims about cycle reduction or lifespan are not guarantees for a particular home; observe your own loads and follow current instructions.

Alternatives to compare

Reusable non-wool dryer balls may suit shoppers who want a different material, although hardness, noise, construction, and heat guidance still need checking. A sturdy drying rack is useful for care-label items that should air-dry and for households trying to move selected garments out of the machine cycle. Dryer sheets serve a different purpose and create ongoing consumable use, so compare their fabric-care and appliance guidance rather than treating them as an identical substitute. Sometimes the most effective alternative is procedural: run a stronger appropriate washer spin, untangle the load, clean the lint filter, use moisture sensing, and stop the cycle when textiles are dry rather than continuing by habit.

FAQ

How many wool dryer balls should go in one load?

Follow the current set instructions and keep the dryer’s loading guidance in mind. Small loads may need fewer than bulky towel or bedding loads, but balls need room to circulate. If the drum is overpacked, adding more balls is not a substitute for reducing the load.

Do wool dryer balls stop static completely?

No. Static depends on fabric mix, humidity, friction, and how dry the load becomes. Avoiding over-drying and separating strongly static-prone synthetics may help, but no reusable ball should be assumed to eliminate static in every cycle.

Can essential oils be added to wool dryer balls?

Do not add oils or other liquids unless the dryer-ball manufacturer and your appliance instructions explicitly permit it. Oils can introduce scent, residue, transfer marks, or other risks outside the product’s intended unscented use.

How do I know when a wool dryer ball needs replacing?

Inspect it for splitting, loss of shape, loose sections, excessive shedding, or persistent odor. Follow the maker’s care and replacement directions; a claimed load count is an estimate, while the ball’s actual condition is the more useful signal.

Why do dryer balls disappear inside the laundry?

Their rounded shape lets them settle into sleeves, pant legs, duvet covers, and fitted-sheet corners. Shake out large items during unloading, count the set, and keep a dedicated breathable container beside the dryer.

Choosing a Purse Organizer Insert That Fits Without Swallowing the Bag

Product links are for reference. Verify current details on the retailer page before buying.

Illustrative image of a generic fabric organizer insert beside an unbranded tote bag

Illustrative image, not an official product photo.

Short answer

A purse organizer insert works best when it leaves enough room for the bag to close, flex, and sit comfortably rather than filling every available inch. Measure the usable interior at the base, the narrowest point, and the opening—not just the bag’s advertised outside dimensions. Then map your daily items to the pocket layout, paying particular attention to bottle compartments, zipper access, key attachment points, and objects that are too bulky for small pockets. Compare the insert’s empty weight, wall stiffness, handles, removable sections, and care instructions. The goal is a layout you can see and transfer easily, not the largest possible number of compartments.

Search reference

Purse organizer insert options

Compare outside dimensions, wall structure, pocket openings, empty weight, transfer handles, and cleaning guidance against a bag you already use.

View matching options

Empty the bag before measuring it

Handbag size labels are an unreliable shortcut for insert fit. Two totes described with similar outside dimensions can have very different interiors because of thick seams, a tapered profile, a recessed zipper, a structured base, or a lining that hangs inward. An insert selected from the bag’s widest outside measurement may buckle at the corners or prevent the top from closing.

Start by removing everything, opening the bag fully, and checking how the interior changes from bottom to top. Measure the flat usable length and width at the base without forcing the lining outward. Then measure the interior height to the lowest closure, zipper track, snap, or inward-folding section. If the bag narrows near the top, record that narrower span too. The insert has to pass through the opening and sit below the closure, not merely fit the floor.

A simple cardboard mock-up can reveal more than a size name. Fold a strip or small open box to the listed insert dimensions and place it gently inside the empty bag. Do not stretch leather, fabric, seams, or hardware to make the mock-up fit. Check whether the bag can close, whether the handles still fall naturally, and whether there is room to reach any built-in zipper pocket. This also shows how much unstructured space will remain around the insert for a scarf, compact umbrella, or other item that does not belong in a narrow pocket.

Who this is for

  • People who regularly lose small items at the bottom of a roomy tote, work bag, or unstructured handbag.
  • Anyone who moves a similar daily kit between compatible bags and wants to lift most of it in one step.
  • Buyers who prefer removable organization over adding adhesive accessories or permanently altering a bag.
  • Bag owners who want frequently used items kept upright, separated, and easier to see.
  • Travelers using a personal-item tote who need a predictable place for documents, cables, and small essentials while keeping the main compartment flexible.

What to verify before buying

  • Finished outside dimensions: Use the assembled insert measurements, including any protruding handles or pockets, and compare them with the bag’s usable interior.
  • Shape at the base and top: Check for tapering, rounded corners, side wings, or a wider upper edge that may not match the bag profile.
  • Actual pocket openings: Count alone is not useful; confirm width, depth, gussets, closures, and whether bulky items can enter without distorting nearby sections.
  • Insert height: Make sure the organizer sits below the bag’s zipper or snap and does not expose private contents above an open tote.
  • Wall structure: Determine whether the insert is soft, reinforced, or intended to stand upright, and consider how that will change the bag’s drape.
  • Empty weight: Add it to the weight of the bag and normal contents before deciding whether the finished load will remain comfortable.
  • Transfer handles: Check whether they lie flat when not in use, remain reachable when loaded, and interfere with the bag closure.
  • Built-in bag access: Confirm that the insert will not cover a key leash, interior zipper pocket, charging pass-through, or other feature you use.
  • Removable sections: Verify how dividers or center pouches attach and whether the remaining fasteners will catch on belongings when a section is removed.
  • Care instructions: Review the stated textile, reinforcement, spot-cleaning or washing guidance, drying method, and restrictions before putting cosmetics or drinks inside.

Let your everyday items design the pockets

Before comparing listings, arrange your normal bag contents on a table. Group items by how you reach for them, not simply by size. Keys, transit cards, glasses, phone, and lip balm may need one-handed access. Charging cables and backup items can sit deeper. A notebook or tablet needs a broad uninterrupted section rather than several stitched pockets. Receipts and loose papers need a deliberate destination or they will simply migrate around the insert.

Measure a few objects that create fit problems. A wide sunglasses case can be too thick for a flat slip pocket. A bottle may fit by diameter but extend above the insert, where it can tip when the bag moves. A large phone can enter a pocket yet be hard to grasp if the opening is tight. Cosmetics in round cases often occupy more width than their individual measurements suggest when grouped together. Compare these real dimensions with pocket details when provided; do not infer scale from staged photos.

More pockets can make organization worse if every compartment is narrowly assigned. Empty stitched sections consume space and can hide small objects in several possible locations. A useful arrangement often combines a few visible perimeter pockets with one open center. That center can adapt to a lunch container, headphones, folded shopping bag, small camera, or other item whose shape changes from day to day.

Think about orientation too. If you naturally carry the bag on one shoulder, decide which side should hold a phone or keys. A pocket that faces the wrong way may require turning the whole insert. If the organizer includes two similar rows, use one side for items needed outside the home and the other for items used at a desk or destination. A consistent map is often more valuable than a specialized compartment for every object.

Structure changes the bag, not just the contents

Soft inserts conform to irregular bags and take little room when partly empty. They can be easier to move through a narrow opening, but shallow pockets may collapse together and a full bottle can pull one wall inward. Very flexible organizers may need the bag itself to provide support. If the tote is intentionally slouchy, this may preserve its appearance better than a rigid insert.

Reinforced inserts create clearer compartments and can give an unstructured tote a flatter base or more upright sides. That can be useful when you want the contents to remain visible. It also changes the silhouette and may press outward at the corners. Stiff panels can make a soft bag look boxy, increase the distance your hand must travel around the insert, or concentrate pressure on the lining. Match the organizer to the bag construction rather than assuming more stiffness is automatically an upgrade.

Observe how the insert sits when the bag is lifted. A base that fits while the bag rests on a table may shift when the handles pull the sides inward. Leave some breathing room so seams are not held under constant outward pressure. If the bag has feet or a shaped bottom, confirm that the insert does not create an uneven load above them.

Color affects visibility but also care. A lighter interior can make dark objects easier to locate in a deep tote, while a dark textile may show some powders and lint more clearly. Neither choice guarantees easier maintenance. Consider whether the fabric is likely to contact pens, cosmetics, snacks, or a damp umbrella, and follow the stated cleaning instructions rather than assuming a removable organizer is machine washable.

Plan the transfer, not only the storage

One appeal of an insert is moving a familiar set of belongings between bags. For that to work, the other bags need compatible openings, heights, and base shapes. Measure every bag you intend to use instead of choosing an organizer around the largest one and expecting it to serve all of them. A smaller insert can transfer more easily, but it will leave gaps in a large tote; decide whether those gaps are useful or annoying.

Handles make lifting easier only when they remain accessible and support the loaded insert as intended. Low fabric tabs may disappear beneath a notebook. Tall loops can tangle with the handbag handles or get caught in the zipper. Check how the handles fold and whether they crowd the center when not in use. Lift the insert with two hands when appropriate, keep the bag on a stable surface, and avoid treating a pocket or divider as a carrying handle unless it is designed for that purpose.

Not everything should transfer automatically. Remove expired transit slips, opened snacks, unneeded keys, and destination-specific objects instead of allowing the insert to become a portable junk drawer. Keep sensitive documents and valuable items under your control, particularly when moving between open bags. An organizer improves placement; it does not secure an open tote against loss or access.

Weight and comfort still come first

An insert makes unused space easier to fill, which can quietly increase the total carried weight. Check the organizer’s own weight, then weigh or estimate the complete daily load according to your needs. The presence of a bottle pocket is not a reason to carry a larger bottle than is comfortable, and a padded device sleeve does not establish that the bag or its handles are suitable for a particular device load.

Distribute denser objects near the bottom and avoid putting all heavy items along one side. A lopsided insert can twist inside the bag and make a shoulder strap feel less stable. Keep rigid or sharp-edged items from pressing directly against delicate lining. If the bag becomes uncomfortable, edit the contents rather than relying on additional dividers to make the weight feel organized.

Check the loaded bag in normal use: closed, lifted, set on a chair, and carried with the clothing you typically wear. The insert should not force a zipper, push a snap open, or make objects protrude where they can catch. Comfort depends on the entire bag, strap, load, and carrying duration; the organizer cannot correct handles that are too narrow or a bag that is already too heavy.

Who should skip it

  • Skip an insert when a compact handbag already has well-placed built-in compartments and little unused interior room.
  • Choose simple zip pouches if your daily contents change substantially and fixed pockets would remain empty or constrain larger items.
  • Avoid a stiff organizer when preserving a soft bag’s drape is more important than making it stand upright.
  • An insert may be a poor match for bags with very narrow openings, unusual curves, central dividers, or closures that sit low inside.
  • Do not use an organizer as a substitute for a protective case, approved insulated container, leak-resistant vessel, or secure closure where one is actually needed.

Limitations

  • Size labels such as small, medium, and large are not standardized across organizers or handbags.
  • Pocket count does not show whether openings and depths suit the objects you carry.
  • A structured insert can alter a bag’s silhouette and place pressure on its lining or corners.
  • Soft organizers may slump, shift, or lose pocket shape when the bag is partly empty.
  • The insert adds weight and can encourage carrying more than is comfortable.
  • Transfer handles, zipper sections, and removable dividers can consume usable interior space.
  • Fabric care and stain resistance vary; removable does not necessarily mean machine washable.
  • An insert organizes belongings but does not make an open bag secure, weatherproof, spill-proof, or protective enough for fragile electronics.

Alternatives to compare

  • Two or three zip pouches grouped by task, which adapt easily when contents change but require opening each pouch.
  • A small key clip or leash for the single item that repeatedly disappears, provided it attaches in a way intended for the bag.
  • A slim document folder for receipts and papers when loose sheets are the main source of clutter.
  • A dedicated bottle sleeve that fits the vessel and bag when upright drink storage is the only missing feature.
  • A bag with suitable built-in pockets and closure if the current tote’s overall layout, weight, or security is the underlying problem.
  • A compact packing cube for occasional travel organization when the insert would not be used during ordinary days.

FAQ

How much smaller should a purse organizer be than the bag?

There is no universal clearance because bags taper, flex, and close differently. Measure the usable interior at the base, the narrowest section, and the opening, then choose an insert that can sit without stretching the lining or obstructing the closure. A cardboard mock-up based on the listed dimensions can help reveal whether enough room remains.

Should the insert be as tall as the tote?

Usually it should remain below the lowest zipper, snap, or folding section and allow you to reach the contents comfortably. A tall insert can add privacy in an open bag, but it may cover built-in pockets or make the bag difficult to close. Compare the finished height with the actual interior rather than the outside bag height.

Is a felt organizer better than a nylon or fabric one?

The material label alone does not determine fit or usefulness. Compare wall stiffness, thickness, empty weight, edge finishing, pocket construction, and care instructions. A reinforced textile may hold its shape, while a thinner fabric may preserve more room and flexibility; the better choice depends on the bag and load.

Can one organizer fit several handbags?

It can if the bags have compatible base dimensions, openings, heights, and closure clearance. Measure each intended bag. An insert sized for the largest tote may not enter a smaller bag, while a compact one may slide around or leave substantial gaps in a larger tote.

Will a purse organizer protect against spills?

Do not assume so. Pockets can keep items separated, but seams, zippers, fabric, and reinforcement may allow liquid through. Use an appropriate closed container for drinks or cosmetics, follow the organizer’s care instructions, and remove spills promptly from both the insert and the bag.

Making Room Above the Toilet: How to Choose a Storage Rack That Fits

Product links are for reference. Verify current details on the retailer page before buying.

Illustrative image of a generic storage rack arranged above a toilet in a compact bathroom

Illustrative image, not an official product photo.

Short answer

An over-the-toilet rack can turn unused wall height into practical storage, but only when its open space fits around the toilet and leaves everyday access intact. Measure the toilet’s full width, tank height, depth from wall, lid movement, water connection, and any baseboard before comparing shelf count. Then look at stability provisions, adjustable feet, usable shelf spacing, moisture-appropriate care instructions, and a layout that keeps heavy or breakable items away from the upper shelves. The right rack should feel like part of the room rather than a narrow piece of furniture forced around plumbing.

Search reference

Over-the-toilet storage rack options

Compare the clear opening, overall footprint, shelf depth, anti-tip provisions, and assembly sequence against your bathroom measurements.

View matching options

Start with the empty space, not the shelf count

The area above a toilet looks open until you account for everything that moves or needs service. The tank lid lifts upward. A top-mounted flush control needs hand clearance. A supply valve may sit beside the bowl, and the flexible line should remain visible and reachable. Baseboards push narrow legs away from the wall, while a window sill, towel bar, outlet, or sloped ceiling can limit height. A rack can match the toilet’s nominal width and still fail in the room because one of these details was missed.

Make a simple front and side sketch before shopping. Record the widest point of the toilet, the height from floor to tank top, and the depth from the wall to the front of the tank. Add the distance between the wall and any plumbing or trim that occupies the leg path. Measure at several heights if the wall has a chair rail or uneven trim. Do not rely on a photograph to estimate clearance; product dimensions may refer to the outside frame rather than the usable opening.

Also decide what must remain possible after installation. Can the tank lid come off without moving the whole rack? Can a plumber reach the shutoff valve? Will the toilet seat stay open without striking a low crossbar? Can you clean the floor behind the bowl? These access questions often matter more than gaining one additional shelf.

Who this is for

  • Renters and homeowners who have limited bathroom cabinetry but usable vertical space above the toilet.
  • Small households that need a consistent place for spare toilet paper, folded hand towels, or lightweight daily supplies.
  • Buyers who can measure the room carefully and secure the unit according to its instructions and their wall conditions.
  • Bathrooms where the rack legs can stand on a reasonably level, unobstructed floor without pressing on plumbing.
  • People willing to use bins or trays so small items do not collect at the back of a deep shelf.

What to verify before buying

  • Clear opening: Confirm the inside width and height beneath the first fixed shelf or crossbar, not just the rack’s outside dimensions.
  • Overall depth: Check whether the shelves project into headroom, overlap the toilet seat area, or crowd a nearby door and walkway.
  • Leg placement: Compare the foot spacing with baseboards, supply lines, floor transitions, bath mats, and the shape of the toilet base.
  • Tank access: Leave enough room to lift and remove the lid, operate the flush control, inspect the supply connection, and reach the shutoff valve.
  • Stability system: Identify the included anti-tip parts, required wall attachment points, adjustable feet, and installation surface guidance.
  • Shelf configuration: Check which shelves are fixed, which are adjustable, and how much vertical room remains for bins, rolls, and folded linens.
  • Load guidance: Review the maker’s stated capacity for each shelf and the complete unit; do not infer capacity from frame thickness or styling.
  • Materials and care: Confirm the current material description, coating or finish, cleaning directions, and restrictions for a damp bathroom environment.
  • Assembly path: Determine whether the rack can be assembled around an installed toilet or must be built elsewhere and lifted into position.
  • Wall conflicts: Locate tile edges, mirrors, outlets, towel bars, windows, vents, and potential attachment points before ordering.

Freestanding, ladder-style, or wall-mounted?

A conventional freestanding rack places two legs on either side of the toilet and connects them with shelves above. It can offer substantial storage without making every shelf a permanent wall fixture, but “freestanding” should not be read as “no stabilization needed.” Tall, shallow furniture can shift when a bin is pulled forward or when the floor is uneven. Follow the supplied assembly and anti-tip instructions, and confirm that the specified attachment method suits the wall. If you cannot make the required attachment, choose a different storage approach rather than improvising.

Ladder-style units lean or taper toward the wall. Their visual footprint may feel lighter, but the lower leg position and intended wall contact still need careful measurement. A pronounced lean can require more floor depth than expected, and a shelf may sit farther forward at one height than another. Confirm how the design is meant to be stabilized instead of assuming gravity alone is the installation method.

Wall-mounted shelves leave the floor open and avoid legs around plumbing. They also shift the entire fit question to the wall: mounting surface, fasteners, hidden utilities, shelf depth, and installation skill. Tile and other bathroom finishes can complicate drilling, and not every renter can modify a wall. Use hardware and a method appropriate to the wall and expected load, following the product instructions. If the mounting conditions are uncertain, seek qualified help rather than guessing where it is safe to drill.

Give the tank and plumbing working room

The lowest structural member is the make-or-break dimension. A rack may clear the tank itself but block the lid from rising. Another may leave vertical room while placing a rear brace directly over a flush mechanism or against a water line. Photos typically show one generic toilet shape, so use the dimension diagram and compare every brace with your sketch.

Leave the shutoff valve accessible without squeezing a hand through the rack. It should remain visible enough to notice a leak or problem. Legs and stored items should not press on the supply line, conceal moisture, or make routine inspection difficult. If a foot would sit on a pipe cover, raised threshold, or thick mat, the rack may not stand as intended.

Think ahead to maintenance as well. Toilets eventually need cleaning, adjustment, or repair. A modular unit that can be emptied and moved deliberately may be easier to live with than one that traps the tank lid beneath a fixed shelf. Keep the assembly instructions and required tool details so the unit can be removed safely if service is needed.

Plan shelves around real bathroom supplies

Shelf count is useful only when the spacing matches what you plan to store. Measure a typical folded towel stack, the height of the bins you already own, and the diameter of your preferred toilet paper rolls. If shelves adjust only in large increments, a layout may waste vertical room. If the shelf lip is tall, subtract it when deciding whether a basket will slide out comfortably.

Open shelves keep frequently used items visible, which can reduce forgotten duplicates. They also expose everything to dust and bathroom moisture. Bins can group small supplies and make a shelf easier to wipe, but deep containers become heavy and awkward when placed overhead. Choose handles that can be grasped without standing on a fixture, and avoid stacking containers where the upper one has to be balanced during retrieval.

Reserve the easiest-to-reach shelf for light, frequently replaced items. Store heavier supplies lower, ideally somewhere other than directly above the toilet. Glass containers, unstable decor, and open liquids are poor choices for a high shelf where a bump could send them down. Keep medicines, cleaning chemicals, sharp grooming tools, and other restricted items in storage appropriate to the household rather than assuming height alone makes them secure from children or pets.

Depth changes how the room feels

Deep shelves hold larger baskets but project farther over the tank and toward the user. In a narrow bathroom, even a few extra inches can affect head clearance, sight lines, and the path between the toilet and vanity. Use painter’s tape on an adjacent wall, or hold a piece of cardboard at the proposed shelf edge, to visualize where the front of the rack will sit. Check the space from both standing and seated positions without using the toilet as a step.

Shallow shelves preserve more open space and discourage oversized containers. Their tradeoff is that rolls, folded towels, and bins may extend beyond the shelf or not fit at all. Confirm the usable shelf depth between rear supports and any front rail; overall product depth can include legs or decorative framing that does not support stored items.

Doors create another clearance test. An inward-swinging bathroom door, vanity drawer, medicine cabinet, or shower enclosure may cross the rack’s footprint. Observe the full motion of each before choosing a width or depth. A technically fitting unit is not successful if it turns normal movement into a series of collisions.

Stability begins during assembly

Tall bathroom storage should be assembled on a clear surface with all specified braces and fasteners in their correct positions. Tighten components in the sequence described by the maker so the frame can square up before final tightening. If the rack rocks, first check floor level, fastener seating, brace orientation, and adjustable feet rather than hiding the movement with a soft bath mat.

A toilet is not a workbench or ladder. Some units can be assembled in sections around it, while others need enough open room to be built flat and then moved into place. Read the sequence before unpacking every component. Lifting a completed rack over the toilet can require more ceiling and side clearance than the final installed dimensions suggest, and it may be safer with a second capable person if the instructions call for one.

Do not substitute casual adhesive hooks for specified anti-tip hardware. Attachment needs depend on the product, wall, fastener, and intended load. Locate hidden plumbing and wiring before drilling, and get appropriate assistance when wall construction is uncertain. Recheck the rack after loading it and periodically during use, especially if fasteners loosen, the floor shifts, or the unit is moved for cleaning.

Moisture, finishes, and cleaning

Bathrooms expose furniture to changing humidity, splashes, cleaning products, and condensation. Material labels such as metal, engineered wood, bamboo, or plastic cover many different constructions and finishes. None should be assumed immune to swelling, corrosion, staining, or coating damage. Review the care directions and ventilation needs for the actual unit.

Look for seams, hollow tube openings, unfinished edges, and tight corners where water or dust may sit. A smooth shelf tray can be quick to wipe, while wire shelves allow airflow but may tip narrow bottles or leave pressure marks in soft packages. Removable liners or bins can help, provided they do not trap moisture against the shelf.

Wipe spills promptly using a method compatible with the finish, and let damp towels dry elsewhere before stacking them. Periodically empty the shelves so you can inspect joints, wall contact points, feet, and the area behind the toilet. Storage should not hide a slow leak or make bathroom ventilation less effective.

Who should skip it

  • Skip this format if the toilet sits tightly between walls or cabinetry and there is no clear route for legs, braces, or assembly.
  • Choose another option when the wall cannot accept the required stabilization method or the floor is too uneven for the unit to stand as designed.
  • Avoid overhead storage if regular users cannot reach the shelves comfortably from the floor.
  • A rack is a poor fit when it would block the tank lid, shutoff valve, outlet, window, vent, or door movement.
  • Households needing secure storage for medicine or hazardous cleaning products should use an appropriate closed or lockable location instead.

Limitations

  • Over-toilet storage adds capacity but can make tank service and floor cleaning less convenient.
  • A tall, narrow frame may require wall stabilization even when marketed as freestanding.
  • Product dimension labels do not always make the usable opening, brace position, or shelf interior equally clear.
  • Open shelving exposes supplies to dust, humidity, and visual clutter.
  • Deep shelves can reduce headroom and make a small bathroom feel more crowded.
  • Legs may conflict with baseboards, plumbing, mats, uneven flooring, or broad toilet bases.
  • Moisture resistance varies by material and finish; bathroom use does not make a unit maintenance-free.

Alternatives to compare

  • Floating shelves when the wall and installation conditions are suitable and open floor access is the priority.
  • A slim rolling cart beside the vanity or toilet for supplies that need to move during cleaning.
  • A wall cabinet for items that benefit from doors, provided its depth and mounting height remain comfortable.
  • Over-the-door storage when the door, hinges, and top clearance can support the intended organizer without affecting closure.
  • Under-sink bins or drawer organizers when the real problem is grouping small items rather than adding more overall capacity.
  • A toilet paper stand or lidded floor basket for a small amount of low-level storage without overhead shelves.

FAQ

How much clearance should an over-the-toilet rack have above the tank?

Enough to remove the tank lid, operate the flush control, and reach any parts that require routine access without forcing the rack out of position. Measure to the lowest fixed shelf or brace using the maker’s dimension diagram; a small gap that merely clears the tank top may not be workable.

Do freestanding over-the-toilet racks need to be attached to the wall?

Many tall, shallow units include or specify anti-tip attachment, but requirements vary. Read the instructions for the exact rack and use the intended hardware and a method suitable for the wall. “Freestanding” describes the legs; it does not guarantee that wall stabilization is unnecessary.

Can I assemble the rack behind an installed toilet?

That depends on the frame and assembly sequence. Some models allow sections or lower braces to be positioned around the toilet, while others must be assembled first and moved into place. Check the instructions, ceiling clearance, plumbing, and available side space before choosing.

What should go on the lowest shelf?

Use it for light items that can be reached without leaning awkwardly over the toilet, while preserving tank-lid and flush access. A shallow bin of spare paper goods or neatly folded hand towels may be more practical than loose bottles, glass containers, or heavy bulk supplies.

Will a bathroom rack resist rust or moisture damage?

Bathroom placement alone does not guarantee resistance. Confirm the stated materials, finish, edge treatment, care instructions, and any limits on damp use. Ventilate the room, wipe spills, avoid storing wet textiles, and inspect joints and surfaces periodically.

Non-Adhesive Shelf Liner for Cabinets, Drawers, and Rental Kitchens

Product links are for reference. Verify current details on the retailer page before buying.

Illustrative image of a generic non-adhesive shelf liner on pantry shelves

Illustrative image, not an official product photo.

Short answer

Non-adhesive shelf liner is worth considering when you want a removable layer inside a cabinet, drawer, pantry, or utility shelf without permanently sticking material to the surface. Measure each interior section separately, then compare usable roll width, total length, texture, thickness, edge behavior, cleaning instructions, and the maker’s guidance for your shelf finish. The most decorative pattern is not necessarily the most practical choice: a liner that cuts cleanly, stays reasonably flat, and can be lifted for cleanup usually makes day-to-day maintenance simpler.

Search reference

Non-adhesive shelf liner options

Compare roll coverage, surface texture, backing style, cut guides, care directions, and suitability for the cabinet or drawer you plan to line.

View matching options

Start with the cabinet, not the roll

A shelf-liner project looks simple until the tape measure comes out. Cabinet interiors are not always square, adjacent shelves may have slightly different dimensions, and hinges or shelf clips can interrupt an otherwise clean rectangle. Drawers add another variable because the liner needs enough clearance to lie flat without bunching against the sides when the drawer closes.

Empty one area at a time and measure the usable width and depth at more than one point. Record obstacles such as center supports, plumbing cutouts, rounded corners, and adjustable shelf hardware. If several shelves look identical, label the measurements anyway rather than assuming one cut will fit every opening. A paper template can help with irregular spaces and avoids trimming the full roll by guesswork.

Then estimate coverage by layout, not just by total square footage. A roll may contain enough material in theory while its width forces awkward seams or leaves narrow offcuts that cannot cover another shelf. Sketching the cuts before ordering can reveal whether a different roll width would create less waste.

Why choose a removable liner?

A loose liner creates a separable layer between stored items and the shelf. That can be useful in a rental kitchen, a changing pantry arrangement, a craft cabinet, or a drawer whose contents are reorganized often. It can also make it possible to lift the liner and clean the surface beneath it, provided the material itself is handled according to its care instructions.

“Non-adhesive” does not describe one universal construction. Some liners use a cushioned open texture, some have a solid wipeable surface, and others rely on a grippy backing or their own weight. Those formats can behave differently under dishes, bottles, small tools, clothing, or office supplies. Read the current material and use guidance rather than assuming every removable liner is appropriate for every room.

This product type also has limits. A loose sheet is not a substitute for repairing a damaged shelf, containing an active leak, or correcting persistent moisture. It should not block ventilation openings or interfere with drawer slides, appliance clearances, or cabinet hardware.

Who this is for

  • Renters who want a reversible cabinet or drawer update and need to follow the terms of their lease.
  • Households lining pantry shelves where crumbs and dry spills make periodic lift-out cleaning useful.
  • People organizing drawers for utensils, tools, crafts, or toiletries without committing to a permanent surface layer.
  • Anyone refreshing older shelving while keeping the original finish accessible for inspection and cleaning.
  • Buyers who are willing to measure, trim, and test a small section instead of expecting every roll to fit straight from the package.

Who should skip it

  • Skip a loose liner if the shelf needs structural repair, sealing, or moisture remediation rather than a removable cover.
  • Choose a product specifically approved for the setting if the material will face unusual heat, prolonged water exposure, or another demanding condition.
  • Do not assume a liner is suitable for direct food contact; use trays or containers unless the maker explicitly states the intended contact use.
  • Avoid placing liner where it could obstruct vents, moving hardware, appliance instructions, or required airflow.
  • A bare, easy-to-clean shelf may be simpler when added texture would catch fine crumbs or make containers less stable.

What to verify before buying

  • Interior dimensions: Measure every shelf or drawer at multiple points and note clips, hinges, posts, pipes, and rounded corners.
  • Usable roll size: Confirm the actual width and length, then plan how the cuts will run before estimating how many rolls you need.
  • Construction: Check whether the liner is solid, perforated, cushioned, textured, or backed with a grip layer, and how that design suits the items stored above it.
  • Surface compatibility: Look for current guidance covering painted wood, finished wood, laminate, wire shelving, metal, or any other surface in your home.
  • Care method: Verify whether the liner can be wiped, hand-washed, rinsed, or only spot-cleaned, as well as how it should dry before being replaced.
  • Cutting features: Review thickness, flexibility, printed cut guides, and the recommended cutting tool if neat edges matter.
  • Movement control: Determine how the liner is intended to stay in place and whether corners or seams may need an approved solution.
  • Temperature and moisture guidance: Confirm the intended environment rather than using a general cabinet liner beside heat or recurring leaks.
  • Package contents: Check roll count, dimensions per roll, pattern direction, and whether props shown in listing photos are excluded.

Match the surface style to the storage job

Solid liners

A solid surface can make small dry debris easier to see and keep it from falling through to the shelf below. That can suit pantry shelves, drawers, and cabinets holding bottles or containers. On the other hand, liquid that reaches a solid layer may remain between the liner and shelf until the area is lifted and dried. Check both sides during routine cleaning, especially near sinks or plumbing.

Solid material also makes edge fit more visible. A clean template and a sharp tool suited to the material can produce a neater result than repeated trimming inside the cabinet. If the liner has a directional print, include pattern orientation in the cut plan so neighboring shelves do not look accidentally reversed.

Open-texture and cushioned liners

An open or cushioned texture may add light separation under dishes, cookware, or utility items, depending on the maker’s stated use. Openings can also collect particles or allow them to pass through, making periodic removal important. Narrow feet on jars, small containers, or organizers may sit less evenly on a pronounced texture than on a flat sheet.

Thickness affects clearance. In a shallow drawer, even a modest layer can change how tall utensils or organizers meet the frame above. On adjustable shelves, a thick edge may also press against clips or make a close-fitting container harder to slide. Measure the whole storage setup rather than treating thickness only as a comfort feature.

Grippy removable liners

Some non-adhesive liners are designed with tacky-feeling or high-friction surfaces. That may reduce everyday shifting, but “grip” is not the same as permanent attachment and does not guarantee that every container stays fixed. Dust, shelf finish, load, humidity, and how items are pulled can change the result.

Surface compatibility matters here. Materials can interact differently with paint, stain, coatings, or unfinished wood over time. Follow the maker’s placement guidance, test an inconspicuous spot when appropriate, and lift the liner periodically to inspect both the shelf and backing.

A cutting plan that reduces frustration

Let a tightly rolled liner relax on a clean, flat surface before measuring final cuts if the instructions permit it. Use the straight factory edge as a reference, mark the reverse side when possible, and keep the cutting surface protected. A metal ruler or straightedge can help guide long cuts, but the correct tool depends on liner construction and the maker’s recommendations.

For a basic rectangular shelf, start slightly generous and make small corrections after a test fit. For irregular openings, create a paper pattern and mark which side faces up. Do not cut around movable shelf clips so tightly that the liner becomes difficult to remove. A tiny practical clearance is often less noticeable than a buckled edge.

Seams deserve advance planning. Place them where containers are less likely to catch the edge, and keep pattern direction consistent if appearance matters. Do not overlap thick material unless the resulting ridge works with the items above it. If joining or anchoring sections requires tape or another accessory, confirm that the accessory is removable and suitable for both surfaces before using it.

Keep the liner removable in practice

A removable product only stays useful if it can be lifted without dismantling an entire cabinet. Group small packages in bins, leave a sensible path to the liner edge, and avoid packing shelves so tightly that cleaning is always postponed. In a pantry, inspect beneath containers that may drip. In a bathroom cabinet, watch for condensation or plumbing moisture rather than expecting the liner to hide it.

Clean spills promptly according to the liner and shelf instructions. If washing is allowed, let the material and cabinet dry fully before reinstalling it. Replacing a damp sheet can trap moisture out of sight. Also check for curling, tears, hardened residue, staining, or changes to the shelf finish during each removal.

When the storage layout changes, reassess the liner instead of automatically reusing the old cut. A sheet trimmed for lightweight pantry bins may not sit the same way under a different arrangement. Recutting a fresh section can be more practical than forcing stretched, creased, or undersized material into the new role.

Limitations

  • Non-adhesive liner can still slide, curl, wrinkle, or shift when containers are dragged across it.
  • Material described as removable may still require surface-compatibility checks and periodic inspection.
  • A liner can conceal crumbs, leaks, or moisture if it is never lifted during cleaning.
  • Roll coverage estimates may not account for pattern direction, seams, irregular cabinets, or unusable offcuts.
  • Texture and thickness can make narrow containers, drawer organizers, or stacked items less stable.
  • Shelf liner does not repair damaged surfaces or make an unsuitable storage area safe for food, heat, or wet conditions.

Alternatives to compare

  • Washable trays or shallow bins can contain small spills and lift out without lining an entire shelf.
  • Rigid shelf inserts may bridge wire shelving more evenly, but they require precise sizing and can be harder to store when removed.
  • Custom drawer organizers separate contents while leaving portions of the original drawer bottom exposed.
  • A sealed, repaired, and properly finished bare shelf may be the easier long-term option when the underlying surface needs attention.
  • Adhesive covering creates a different level of commitment and should only be considered after checking removal expectations, surface compatibility, and rental rules.

FAQ

How do I keep non-adhesive shelf liner from moving?

Begin with a clean, dry, compatible surface and cut the liner so it lies flat without pressing hard against the cabinet walls. Choose a construction intended to provide grip for your surface, and avoid pulling heavy containers across the sheet. If extra anchoring is suggested, use only a method approved for the liner and shelf finish.

Should shelf liner cover the entire shelf?

Full coverage can look tidy, but it is not mandatory. Leave clearance around hinges, shelf clips, vents, drawer slides, and irregular edges. A carefully fitted section that remains easy to lift may be more useful than a tight cut that buckles or traps debris.

Can non-adhesive liner be used in kitchen drawers?

It can suit many dry kitchen drawers when the current product guidance allows that use. Check liner thickness, drawer clearance, surface compatibility, and whether utensils or organizer trays remain stable. Keep it away from any area or item that conflicts with the maker’s safety and care instructions.

How much shelf liner should I order?

Measure each interior area and sketch how those rectangles fit within the stated roll width and length. Add a modest allowance for test cuts, trimming, pattern alignment, and irregular corners. Total square footage alone can be misleading because roll width determines how efficiently the pieces can be arranged.

How often should I lift and clean shelf liner?

There is no universal schedule. Inspect it when spills occur, during pantry or drawer resets, and often enough to prevent hidden crumbs or moisture from remaining underneath. Follow the care directions for both the liner and the shelf, and reinstall only after both are dry.

A Battery Organizer Case for the Junk Drawer: Capacity, Layout, and Safety Notes

Product links are for reference. Verify current details on the retailer page before buying.

Illustrative image for a household battery organizer case buying guide

Illustrative image, not an official product photo.

Short answer

A battery organizer case is useful when loose household batteries are scattered between a junk drawer, tool box, and utility shelf. Choose around the cell sizes you actually keep—not the largest advertised total capacity. The most practical case will fit its storage location, hold each battery securely enough to prevent a jumble, leave room to separate fresh cells from used ones, and open without spilling its contents. A built-in or removable tester can be convenient, but its supported battery types and required operating steps need to be checked rather than assumed.

Search reference

Household battery organizer case options

Compare current layouts for AA, AAA, 9V, C, D, and coin-size cells, then check closed dimensions, latch design, tester details, and whether the case is intended for a drawer, wall, shelf, or travel kit.

View matching options

Count the batteries you keep, not the empty slots in a photo

Battery organizers often emphasize total capacity, but the shape of that capacity matters more. A household that mainly uses AA and AAA cells for remotes, toys, flashlights, and computer accessories needs a different layout from one that also keeps 9V, C, D, camera, or coin-size batteries. Before shopping, gather the unopened and loose cells you already own and make a quick count by size. That five-minute inventory can prevent buying a large case with many compartments you will never use and too few slots for the batteries you replace most often.

Also consider how quickly your supply turns over. A compact drawer insert may be enough if you replenish batteries in small packs. A deeper hard-sided case can make sense for storm supplies, multiple children’s toys, seasonal decorations, or a workshop, but extra capacity can encourage keeping old cells long after their history is clear. Organization should make rotation easier, not simply hide a bigger stockpile.

The case format changes the routine. Flat organizers are easy to scan in a shallow drawer. Upright cases use less shelf width but may require removing batteries from rows to see what remains. Carrying cases add a handle and closure for moving supplies between rooms. Wall-mountable designs free drawer space, although mounting hardware, loaded weight, and placement need careful review.

Who this is for

  • Households that regularly use several sizes of replaceable batteries and want one known storage location.
  • Parents organizing batteries for toys while keeping the case in an appropriate place that children cannot access.
  • People building a labeled utility shelf, storm-supply cabinet, workshop drawer, or home maintenance kit.
  • Anyone who wants to separate fresh batteries from cells awaiting proper recycling or disposal.
  • Buyers who would use a compatible tester to check an uncertain battery before discarding or installing it.

Who should skip it

  • Skip a large organizer if you only keep one small unopened pack at a time; the original packaging may already be the simpler storage method.
  • Do not treat a basic household organizer as protection for damaged, leaking, swollen, recalled, or unusually hot batteries.
  • Avoid open trays in areas accessible to young children or pets, especially when coin or button cells are present.
  • Choose storage designed for your specific rechargeable battery system if cells need matched sets, charging records, or specialized transport protection.
  • Do not use a general organizer as a shipping container unless its current documentation explicitly supports that use and applicable carrier rules are followed.

What to verify before buying

  • List the exact battery sizes you own and compare that mix with the number of dedicated slots for each size.
  • Measure the organizer’s closed length, width, and height against the drawer, cabinet, shelf, or wall area where it will live.
  • Check whether batteries snap into individual recesses, slide into channels, or sit loosely beneath a lid.
  • Review the closure, hinges, handle, and orientation to judge what could happen if the loaded case is picked up or stored vertically.
  • Confirm which battery types an included tester supports, whether it is removable, and how its readings are described in the instructions.
  • Look for a practical way to distinguish fresh cells from used, uncertain, or rechargeable ones; separate compartments or your own labels can help.
  • Verify whether wall-mount hardware is included and suitable for the wall and loaded weight rather than relying on the empty-case weight.
  • Read the current care and safety guidance for both the organizer and every battery type you plan to store.

Drawer, shelf, wall, or carry case?

For a kitchen or office junk drawer, outside dimensions are the first filter. Measure the drawer at its narrowest usable point and account for screw heads, curved sides, dividers, and items stored above the organizer. A case that technically fits may still jam if its handle or latch catches the drawer frame. Check closed height as well as the footprint.

A shelf case benefits from a clear or easily scanned lid, but visibility should not override placement. Store batteries in a cool, dry location away from direct heat, moisture, metal clutter, and curious children. A strong handle is useful when the organizer must move, yet the latch and hinge become more important when a full case is carried. Look at how the batteries are retained if the case is turned upright rather than judging it only while flat.

Wall storage can keep a crowded workbench clear. It also concentrates the weight on the mounting points, so confirm the intended mounting method and choose hardware appropriate for the wall. Place the organizer where it will not be knocked, heated, splashed, or mistaken for something children may open. If a design can be used either flat or wall-mounted, check whether cells remain secure in both orientations.

Portable organizers work best when every cell has a defined recess and the lid closes without pressing on the battery terminals. If you only need a few spares for a flashlight or camera, a smaller battery holder may be more appropriate than carrying a household-size assortment. Air travel and shipping can involve battery-specific restrictions, so a convenient handle does not automatically make a case suitable for those purposes.

Slot design and sorting habits

Individual recesses make remaining quantities easy to see and reduce the chance that loose batteries roll together. They can also be frustrating when tolerances are tight or when wrapped rechargeable cells differ slightly from common disposable-cell dimensions. Product photos may suggest a fit without documenting it, so check current dimensions and compatibility wording, especially for less common sizes.

Coin and button cells require particular care because their small size presents a serious ingestion hazard. A shallow open pocket is not the same as child-resistant storage. If your household uses these cells, consider keeping them in intact original packaging or another secure, appropriately placed container rather than assuming every mixed battery organizer is suitable.

Sorting by condition is just as important as sorting by size. Avoid mixing fresh and used cells in one unlabeled row. A small removable bin or a separate clearly marked container can hold depleted batteries until they are taken to a collection or disposal location that follows local guidance. Damaged or leaking batteries need handling based on the battery manufacturer’s instructions and local requirements, not routine storage in the organizer.

Rechargeable and single-use cells can look similar at a glance. Dedicated rows or simple labels reduce mix-ups, particularly when several people replace batteries around the home. If devices require matched sets, keep those sets grouped in a way that preserves their identity rather than scattering them across open slots.

Is an included battery tester worth having?

A tester can help when a loose battery has an uncertain history or when a device stops working and you want to narrow down the cause. Convenience depends on access: a removable tester is easier to hold against some cell types, while a fixed tester is harder to misplace. Neither format is useful unless it supports your batteries and its instructions explain how to position them and interpret the display.

Tester results are not a complete assessment of battery condition, remaining runtime, or safety. Different devices place different demands on cells, and a simple reading may not predict performance under load. Never test a battery that appears damaged, leaking, swollen, corroded, or unusually warm. Follow the battery and tester manufacturers’ current instructions, and keep contact points from becoming another place where loose metal items collect.

Limitations

  • Advertised capacity may count many slots for sizes you rarely use and very few for the sizes you buy most often.
  • Plastic latches, hinges, handles, and tight-fitting recesses can wear, so current construction details and return terms are worth checking.
  • An organizer can reduce clutter but cannot make damaged batteries safe or replace battery-specific handling guidance.
  • Mixed-format cases may not fit every rechargeable cell, specialty battery, protected cell, or battery still in retail packaging.
  • A tester provides limited information and should not be treated as a guarantee of remaining runtime or battery condition.
  • A portable-looking case may still be unsuitable for air travel, mailing, or other transport governed by specific battery rules.

Alternatives to compare

  • Original retail packaging for a small supply that turns over regularly.
  • A shallow labeled drawer insert when batteries never need to leave one cabinet.
  • Small rigid battery holders for flashlight, camera, camping, or emergency-kit spares.
  • Separate containers for rechargeable sets when charge cycles and pairing matter.
  • A dedicated, clearly marked collection container for spent cells awaiting recycling or disposal according to local guidance.

FAQ

Should batteries stay in their original packaging?

Original packaging can be a sensible choice for a small supply because it keeps battery types identified and terminals separated. An organizer becomes more useful when you maintain several opened packs or sizes, provided the cells are stored according to their current manufacturer guidance.

Can I mix rechargeable and single-use batteries in one organizer?

They can share a case only if they remain clearly separated and identified. Do not mix rechargeable and single-use cells within a device, and preserve matched rechargeable sets when the device or charger instructions call for them.

Is a battery organizer child-resistant?

Do not assume it is. A latch or zipper intended to stop spills may not be child-resistant, and coin or button cells present a serious ingestion hazard. Store the entire organizer in an appropriate location inaccessible to children and follow product-specific safety guidance.

How should I separate fresh batteries from used ones?

Use different labeled rows, compartments, or containers so uncertain and depleted cells cannot drift back into the fresh supply. Keep batteries awaiting recycling or disposal in a setup consistent with local rules and manufacturer instructions.

Does every battery tester work with rechargeable batteries?

No. Supported chemistries, sizes, voltage ranges, and reading methods vary. Check the tester’s current documentation for the exact cells you own, and do not rely on a simple reading as a full measure of condition or remaining runtime.

Bed Sheet Straps for a Neater Fitted-Sheet Setup

Product links are for reference. Verify current details on the retailer page before buying.

Illustrative image for a bed sheet straps buying guide

Illustrative image, not an official product photo.

Short answer

Bed sheet straps can help when a fitted sheet repeatedly slips off a mattress corner or gathers across the sleeping surface. The useful choice depends on how much access you have beneath the mattress: corner straps need less routing, crisscross systems can distribute tension more broadly, and longer suspenders may require lifting or reaching under much of the bed. Before choosing, compare the strap layout, adjustment range, clip design, mattress setup, and whether the sheet fabric can tolerate concentrated tension.

Search reference

Bed sheet strap options

Compare corner, triangle, and cross-mattress layouts along with adjustment range, clip style, installation access, and current package contents.

View matching options

Start with why the sheet comes loose

A fastener can manage movement, but it cannot correct every bedding mismatch. If a fitted sheet is too shallow for a tall mattress, topper, or pad, pulling it tighter may place more stress on the elastic hem and fabric. If the pocket is much deeper than the mattress, extra material can still wrinkle even when the corners remain attached. Measure the full mattress depth with every layer in place, then compare that measurement with the sheet’s stated pocket range.

Also check the bed itself. A lightweight mattress may shift on the foundation, an adjustable base changes shape during use, and a smooth mattress protector can let fabric migrate more easily. Identifying the source of movement helps determine whether straps are a sensible fix or whether a better-fitting sheet, grippy mattress pad, or different protector would solve the problem more directly.

Who this is for

  • Sleepers whose fitted sheets fit reasonably well but work loose at one or more corners overnight.
  • Guest-room or sofa-bed setups where bedding needs a little extra hold during occasional use.
  • Beds with a mattress topper that changes the effective depth and makes the existing sheet less secure.
  • Households comparing a removable solution before replacing otherwise usable sheets.
  • People who can safely lift a mattress corner or reach the attachment points without overstraining.

Who should skip it

  • Skip straps if the sheet cannot cover the mattress corners without being stretched close to its limit.
  • Choose another approach if lifting or reaching under the mattress is unsafe or impractical.
  • Avoid clips on delicate, loosely woven, or damaged fabric unless the manufacturer specifically indicates compatibility.
  • Do not route long straps where they can interfere with adjustable-bed hardware, power cables, hinges, or moving components.
  • Replace worn bedding when failing elastic, tears, or severely distorted pockets are the main problem.

What to verify before buying

  • Determine whether the design uses individual corner straps, three-point corner triangles, side-to-side bands, or a full crisscross layout.
  • Check the listed adjustment range against the distance the straps must span on your mattress and sheet.
  • Review how the clips open, close, and grip; confirm whether any protective inserts or fabric-contact surfaces are described.
  • Verify the number of straps, clips, or sets included rather than relying on staged listing images.
  • Consider mattress weight and bed-frame access, especially with platform beds, wall-side corners, bunk beds, and heavy toppers.
  • Confirm laundering instructions and whether straps should be removed before the sheet goes into the washer or dryer.
  • For an adjustable base, review both the bed guidance and the fastener routing before attaching anything underneath.

Match the fastener layout to the bed

Short corner straps usually connect two edges around one mattress corner. They can be easier to install because only a small section of the mattress needs to be lifted, and they let you address the corner that causes trouble. Their reach is limited, however, and clip placement can become awkward if the sheet hem is thick or hidden beneath a protector.

Three-point or triangle-style fasteners add another attachment point around each corner. That layout may spread the pull across more of the sheet edge, but it also adds clips and setup steps. Check product diagrams carefully because similar-looking sets can differ in how far the elastic extends and where the center connection sits.

Cross-mattress suspenders span a larger distance beneath the bed. They may distribute tension beyond individual corners, yet installation can be inconvenient on a heavy mattress or a platform frame with little hand clearance. A full-length strap should never be guessed into place around mechanical parts. Plan the route before clipping it to the sheet.

Clips, tension, and sheet fabric

A secure clip is only useful if it holds without damaging the material. Metal and plastic clip designs vary, as do their teeth, locking mechanisms, and protective surfaces. Product photos can suggest how a clip works, but current instructions and compatibility wording are more reliable than appearance alone.

Use the least tension that keeps the sheet settled. Overtightening can pull the corners into an unnatural shape, concentrate force near the clip, or make the sheet difficult to remove. After installation, smooth the sleeping surface and check that the fitted-sheet seam still sits near the mattress corner rather than being dragged far underneath.

Fabric condition deserves attention. A sturdy sheet in good condition may handle removable fasteners differently from a thin, aged, or loosely woven one. If you see stretching, small holes, pulled threads, or clip marks after initial use, stop and reassess the placement or the entire solution.

Setup and everyday care

Installing straps is easier before the bed is fully dressed. Fit the sheet first, attach one area at a time, and avoid kneeling or reaching under an unsupported mattress. If the mattress is heavy, ask for help rather than trying to hold it up with one hand while operating a clip with the other.

Recheck the straps after the first few nights. Elastic can settle, clips can shift, and bedding layers may move differently once the bed has been used. Make modest adjustments instead of immediately pulling every strap tighter.

For laundry day, follow the product instructions. Removable hardware can catch other textiles or strike the washer or dryer if left attached. Keeping a small pouch near the linen closet gives loose straps and clips a predictable storage place between changes.

Limitations

  • Straps do not turn an incorrectly sized fitted sheet into a properly fitted one.
  • Clips may leave impressions or damage some fabrics, particularly when placed under excessive tension.
  • Installation can be difficult on heavy mattresses, low-clearance frames, wall-side beds, and top bunks.
  • Long under-mattress straps may be unsuitable around adjustable-base mechanisms or other moving hardware.
  • Elastic, clip construction, adjustment range, and package quantity vary across current listings and need individual verification.

Alternatives to compare

  • A fitted sheet with a pocket depth that more closely matches the mattress and topper.
  • Sheets with reinforced corner elastic or built-in corner bands.
  • A different mattress protector if a slick surface is contributing to movement.
  • Sheet grippers designed for individual corners rather than a full under-bed system.
  • Flat-sheet folding methods when the bed setup makes fitted sheets or under-mattress clips impractical.

FAQ

Do bed sheet straps work with a mattress topper?

They can when the fitted sheet already covers the combined mattress and topper without excessive stretching. Measure the total depth first and make sure the chosen strap layout can be installed without shifting or compressing the topper awkwardly.

Are corner straps easier to install than crisscross straps?

Usually, because corner straps require access to a smaller area beneath the mattress. Crisscross designs span farther and may take more lifting, routing, and adjustment, particularly on a platform bed.

Can sheet fastener clips damage fabric?

They can if the clip design is unsuitable, the fabric is delicate or worn, or the straps are overtightened. Inspect the contact points after initial use and stop if you notice holes, pulled threads, or distortion.

Should bed sheet straps stay attached during washing?

Follow the current care instructions for the fasteners and bedding. Removable clips and elastic hardware are often safer to take off so they do not catch other laundry or knock against the washer or dryer.

Can I use bed sheet straps on an adjustable bed?

Only if the routing is compatible with the base and does not cross hinges, motors, cables, or moving sections. Check the adjustable-bed guidance and the fastener instructions; when compatibility is unclear, use another sheet-holding approach.

Foldable Laundry Drying Racks: Plan the Load Before You Unfold

Product links are for reference. Verify current details on the retailer page before buying.

Illustrative image of a generic foldable laundry drying rack in a bright laundry room

Illustrative image, not an official product photo.

Short answer

Choose a foldable drying rack around one realistic wash load and one specific place where it can remain fully open. Count the long garments, small items, and pieces that need to lie flat, then compare that mix with the rail spacing and layout rather than relying on a total drying-space claim alone. The right rack also leaves walking clearance, stands level under damp weight, folds without a complicated routine, and fits its intended storage gap after the laundry is put away.

Search reference

Foldable laundry drying rack options

Compare open dimensions, rail spacing, supported load guidance, flat-drying areas, foot design, and folded size against your usual laundry routine.

View matching options

Sketch the open rack on the floor

A folded product can look compact while opening into a wide structure with wings, side rails, or several tiers. Measure the floor area where wet laundry will actually sit, not just the closet where the rack will be stored. Painter’s tape or a few sheets of paper can mark the listed open length and width so you can check door swings, cabinet access, heating vents, and the route through the room.

Allow extra space beyond the frame. Sleeves and towels can extend past the outer rails, and a loaded wing may be less visible at hip height than the legs below it. In a shared hallway, bedroom, or bathroom, a narrow vertical layout may preserve more floor space, while a low winged rack can offer a better surface for sweaters. Neither shape is automatically more compact once garments are added.

Who this is for

  • Apartment households that air-dry selected garments but cannot install a permanent clothesline.
  • Laundry rooms where a rack can stand open for several hours without blocking appliances or storage.
  • People who want a predictable place for delicates, knitwear, workout clothing, or items that should not go into a dryer.
  • Buyers who need the rack to fold between wash days and fit beside a washer, under a bed, or in a utility closet.
  • Homes that can provide ventilation and protect the floor beneath damp laundry.

Who should skip it

  • A wall-mounted or ceiling-mounted airer may suit a very small room better when installation is allowed and properly planned.
  • Skip a freestanding rack if every available location blocks an exit, walkway, heater, or frequently used door.
  • A single compact rack may be frustrating for households expecting it to hold several large loads at once.
  • Do not assume an indoor rack is suitable for balconies, wind, prolonged outdoor exposure, or uneven ground unless the current instructions say so.
  • Choose another method if the intended garments require a care routine the rack cannot support, such as fully flat drying without sagging.

What to verify before buying

  • Open dimensions: Check length, width, and height with wings, shelves, and extensions in their working positions.
  • Folded dimensions: Include feet, hinges, clips, and locking parts that may protrude into a storage gap.
  • Rail arrangement: Compare usable straight lengths, gaps between rails, tier spacing, and clearance for sleeves or trouser legs.
  • Supported load: Confirm the current total and section-specific guidance, and distribute damp items as directed.
  • Hinges and locks: Review how the rack reaches a stable open position and whether wings have defined working angles or supports.
  • Feet and floor contact: Check the intended flooring, foot material, leveling guidance, and recommendations for moisture beneath the rack.
  • Materials and care: Verify coating, corrosion-care instructions, cleaning method, and whether hardware or caps are replaceable.
  • Indoor or outdoor use: Do not infer weather resistance from a product photo; read the current placement and storage instructions.

Rail layout matters more than a single capacity number

Drying-space measurements often add every rail together, but a total does not show how comfortably a real load fits. Closely spaced rails may work for socks and light tops yet cause bulky items to overlap. A tall center tier can accommodate shirts on hangers, while a low horizontal shelf can support knitwear that should dry flat. Make a rough garment list and assign each piece to a part of the rack before comparing models.

Look at the distance between tiers as well as the rail count. A lower item should not bunch on the floor or press against the clothing above it. If you plan to use hangers, confirm that the relevant bar is intended for them and that the hooks have enough clearance without concentrating too much weight in one area.

Small-item clips or mesh shelves can be useful, but they also add pieces to open, clean, and store. A simpler frame may be faster for a few shirts and towels. For mixed loads, a rack with genuinely different zones can reduce the need to drape one garment across several rails.

Stability changes as damp clothes are added

An empty display image says little about balance under an uneven load. Damp jeans, towels, or a sweater can be substantially heavier than dry lightweight clothing. Follow the stated load guidance and spread heavier pieces across the frame rather than placing everything on one raised wing. Alternate items from side to side when practical, and make sure every foot remains fully supported on a firm, level surface.

Open all supports as directed before loading the rack. A hinge that looks straight may still need a brace, latch, or wing support to reach its working position. Keep children and pets away from folding joints and hanging garments, and avoid moving a loaded rack unless the instructions explicitly describe how to do so. Lifting by a rail or wing can stress a joint not designed as a handle.

Water can drip from hand-washed items, so consider what is under the rack. Protect moisture-sensitive flooring in a way that does not create an unstable or slippery base. Wring or spin garments according to their care labels, provide ventilation, and do not crowd wet fabrics against a wall.

Folding should be a routine, not a puzzle

A rack is easier to live with when opening and closing follow an obvious sequence. Product diagrams can reveal whether several wings must be aligned before the legs fold, whether a latch holds the closed frame, and where hands should be placed away from pinch points. If the rack will be folded after every load, those details may matter more than an occasional extra rail.

Measure the complete folded package and its retrieval path. A rack that technically fits behind a door may prevent the door from opening fully; one stored beside an appliance may be difficult to pull out without scraping a wall. Consider its weight and whether there is a clearly intended carrying point. Before storage, let the frame dry and follow the care instructions for removing lint, detergent residue, or moisture around joints.

Limitations

  • Published capacity may not reflect the size and spacing needs of your particular garments.
  • Closely packed laundry generally dries less evenly than items with air moving between them.
  • Wide wings increase hanging options but also increase the open footprint and the leverage placed on supports.
  • Tall racks save floor area only when tiers provide enough vertical clearance for the intended clothes.
  • Folding joints and removable accessories add potential pinch, loss, and wear points.
  • Coated metal, plastic, wood, and fabric components have different cleaning, moisture, and storage requirements.

Alternatives to compare

  • A wall-mounted retractable rack for a dedicated laundry area where secure installation is possible.
  • An over-the-door airer for a few lightweight items when door clearance and weight guidance permit it.
  • A flat mesh drying surface for sweaters and other garments that should be supported rather than hung.
  • A tension or fixed clothesline for a suitable space, installed and loaded according to its instructions.
  • A larger nonfolding rack when it can stay in one place and daily setup is the main inconvenience.

FAQ

How large should a drying rack be for one laundry load?

There is no universal load size. List the garments you normally air-dry, estimate which need long rails, hangers, clips, or flat support, and map them to the rack’s usable layout. Leave gaps for airflow instead of treating every inch of rail as continuously fillable.

Is a tiered rack better for a small apartment?

A tiered design can use less floor area, but only if its vertical gaps suit your clothing and the loaded rack still fits safely in the room. Long garments may overlap lower tiers, while a winged rack may work better for towels or flat-drying needs.

Can I put a foldable drying rack on a balcony?

Only when the product’s current instructions allow the setting. Wind, rain, sunlight, uneven surfaces, and the risk of items falling can change both stability and material wear. An indoor-only rack should not be assumed to be weather resistant.

How can I keep a drying rack stable?

Place it fully open on a firm, level surface, engage every support or lock as directed, stay within the stated load guidance, and distribute damp garments across the structure. Do not use a wing, tier, or accessory outside its intended position.

What should I measure for folded storage?

Measure folded height, width, and thickness, including feet and latches, plus the path used to put the rack away. Check that nearby doors and appliances still open and that you can retrieve the rack using its intended carrying point.

A Place for Spare Rolls: Choosing a Toilet Paper Storage Basket

Product links are for reference. Verify current details on the retailer page before buying.

Illustrative image for a toilet paper storage basket buying guide

Illustrative image, not an official product photo.

Short answer

A toilet paper storage basket earns its floor space when it keeps several spare rolls easy to reach without crowding the toilet, catching shower spray, or becoming difficult to clean around. Measure the narrowest part of the intended spot—including baseboards, plumbing, and door swing—then compare usable interior dimensions rather than relying only on a stated roll count. A lid hides the contents and limits dust, while an open basket makes refilling and grabbing a roll faster. In a humid or splash-prone bathroom, material and care instructions matter as much as appearance.

Search reference

Toilet paper storage basket options

Compare current floor dimensions, interior capacity, lid styles, handle designs, material descriptions, and cleaning guidance for the space beside your toilet.

View matching options

Start with the awkward gap, not the roll count

Spare-roll storage often has to fit into one of the least forgiving spaces in the home. The gap beside a toilet may look open at eye level but narrow near the floor because of a baseboard, shutoff valve, supply line, toilet-base curve, or vanity toe kick. Measure the actual floor footprint at several heights before choosing a tall basket. Also check whether a door, cabinet, toilet brush, or trash can needs to move through the same area.

Capacity labels are only a starting point. Toilet paper rolls vary in diameter and width, and a tapered basket may have much less usable room at the bottom than its opening suggests. If you already buy a particular roll format, place a few rolls in the intended arrangement and measure that group. This quick test is more useful than assuming every basket advertised for the same number of rolls will fit them comfortably.

Think about access while seated as well as access during cleaning. A basket wedged tightly between fixtures may keep rolls nearby but be frustrating to lift when the floor needs mopping. A little clearance around the sides can make the setup easier to live with than the largest container that technically fits.

Who this is for

  • Small bathrooms or powder rooms with no linen closet or vanity storage near the toilet.
  • Households that want guests to find a spare roll without opening drawers or leaving the room.
  • Renters who need freestanding storage rather than drilling for a wall cabinet or holder.
  • Bathrooms where an open package of rolls looks cluttered but a narrow floor container can fit beside a fixture.
  • Anyone who prefers to refill several rolls at once rather than move a single spare onto a stand repeatedly.

Who should skip it

  • Bathrooms where the only available floor spot receives regular shower spray or collects condensation.
  • Very tight toilet clearances where any basket would interfere with feet, mobility aids, cleaning, or the door.
  • Homes that need bulk-package storage; a small bathroom basket is better treated as a refill station than a place for the entire supply.
  • Anyone who cannot lift or move a floor container comfortably during routine cleaning.
  • Bathrooms where a wall shelf, vanity drawer, or over-tank solution would preserve more useful floor space.

What to verify before buying

  • Measure maximum width, depth, and height at the exact location, including baseboards, plumbing, toilet contours, and lid-opening clearance.
  • Compare interior measurements with the diameter and width of the rolls you normally purchase.
  • Check whether the sides taper and whether hinges, liners, frames, or inward-folded rims reduce usable capacity.
  • Review current material wording and care instructions for a humid bathroom; do not assume a woven appearance means either natural fiber or washable synthetic material.
  • Confirm whether the lid is attached, removable, hinged, or simply rests on top, and whether it can be opened in the available space.
  • Look for handles or grip points if the basket must be moved whenever the floor is cleaned.
  • Check the base design for feet, seams, exposed hardware, or rough surfaces that may trap moisture or mark the flooring.
  • Verify what is included, especially if listing photos show removable liners, dividers, labels, or other bathroom accessories.

Open basket or lidded container?

An open basket has the simplest routine: drop in clean rolls, see when the supply is low, and reach down without moving a lid. That convenience suits a busy family bathroom or a powder room where the basket is tucked neatly under a shelf. Open designs also make it easier to notice dust, dampness, or an accidental splash before it goes ignored.

A lidded basket creates a calmer look and keeps the paper less exposed to ordinary bathroom dust. It can be helpful when storage sits in clear view of the doorway. The tradeoff is access. A hinged lid needs room to swing, a lift-off lid needs somewhere to go while a roll is removed, and a lid that fits too tightly may turn a simple refill into a two-handed task.

Consider the lid from cleaning height, not only from standing height. Decorative loops and recessed pulls can look tidy but may be awkward in a narrow gap. If the basket slides under a floating vanity or shelf, include the open lid in your vertical measurement.

Material, moisture, and cleaning

Bathroom storage lives around humidity, dust, hair, and cleaning products. Woven-look baskets can range from natural plant fibers to synthetic strips over a frame, and those materials may require very different care. Fabric baskets may be lightweight and easy to carry, but a soft base can sag or lose shape when packed. Smooth plastic or coated surfaces may wipe clean more readily, although seams, textured weave, and frame joints can still collect dust.

Check the listing’s current care directions rather than choosing by appearance alone. If the floor is frequently damp, it is safer to move spare paper to a drier cabinet than to expect a container to protect it indefinitely. A lid is not the same as a waterproof seal, and a woven basket should not be treated as a barrier against direct spray.

The base deserves special attention. A basket that sits flat may trap unnoticed moisture beneath it; raised feet can improve clearance but may concentrate pressure on delicate flooring. Whatever the design, make lifting the container and drying the floor part of normal bathroom cleaning.

Build a practical refill routine

The best capacity is not necessarily the highest capacity. A basket holding a modest number of rolls can be topped up from a larger supply stored elsewhere. This keeps the bathroom from becoming a bulk-storage area and makes it easier to inspect the basket and floor regularly.

Placement should make a spare obvious without turning it into an obstacle. Guests should not have to reach behind plumbing, move a trash can, or lift a heavy container. At the same time, the basket should stay clear of the normal path into the shower, tub, sink, or doorway.

Handles are especially useful when the storage location is narrow. Cutout handles keep the exterior profile simple, while loop handles may be easier to grasp but add width. For a tall, slim basket, check whether lifting from one end could cause the container to tip or the rolls to catch under the lid.

Limitations

  • Search results and product options change, so dimensions, capacity claims, materials, included parts, and care directions need a current check.
  • Stated roll capacity may not match oversized or unusually wide rolls.
  • A lid can reduce dust exposure but does not make a basket waterproof or suitable for a wet floor.
  • Floor storage takes up cleaning clearance and may be inconvenient in a bathroom with very little space around the toilet.
  • Soft-sided and tapered designs may not hold their advertised shape or capacity in the way product photos suggest.
  • Any container can hide moisture underneath if it is not moved and the floor is not dried regularly.

Alternatives to compare

  • A freestanding vertical roll holder when the footprint must be very narrow and immediate access matters more than concealed storage.
  • An over-the-tank basket if the toilet design provides a stable, uncluttered surface and the placement does not interfere with use.
  • A slim rolling cart when spare rolls need to share storage with towels or toiletries.
  • A wall shelf or cabinet when floor clearance is more valuable and mounting is allowed.
  • A vanity drawer or linen closet bin for bathrooms where paper can stay nearby without being stored beside the toilet.

FAQ

How do I know whether large toilet paper rolls will fit a basket?

Measure the diameter and width of the rolls you buy, then compare those numbers with the basket’s usable interior dimensions. Account for tapered sides, liners, frames, and rims rather than relying only on a stated roll count.

Is a lid useful on a toilet paper storage basket?

A lid can hide spare rolls and limit ordinary dust, which may suit a visible powder room. It also needs opening clearance and adds a step when grabbing or refilling a roll, so an open basket can be more convenient in a busy bathroom.

Can I put a woven toilet paper basket next to a shower?

Only if the location stays dry and the current care guidance supports bathroom use. Woven-looking products use different materials, and neither a weave nor a lid should be assumed to protect paper from shower spray or a damp floor.

How many spare rolls should I keep beside the toilet?

Keep enough for the normal refill interval without forcing oversized rolls into the container. A smaller, easy-to-move basket replenished from storage elsewhere is often more practical than keeping a full bulk package in the bathroom.

What shape works best in a narrow bathroom?

A tall rectangular or oval basket can use a slim gap efficiently, but shape matters less than verified floor dimensions. Measure around baseboards, plumbing, the toilet-base curve, and door swing, then leave enough clearance to lift the basket for cleaning.

Countertop Spice Racks: Fit, Visibility, and Everyday Reach

Product links are for reference. Verify current details on the retailer page before buying.

Illustrative image of a generic countertop spice rack in a kitchen

Illustrative image, not an official product photo.

Short answer

A countertop spice rack earns its space when it keeps frequently used seasonings visible without crowding the food-prep zone. Start with the available footprint and the height below any upper cabinet, then consider how easily you can read and remove jars from the back row. Stable feet, an open layout, enough clearance for your existing containers, and a finish that tolerates routine kitchen cleaning matter more than decorative capacity claims.

Search reference

Countertop spice rack options

Compare footprints, tier spacing, jar access, base stability, and cleaning instructions with the containers and counter space already in your kitchen.

View matching options

Decide what deserves counter space

The best candidate for a countertop rack is not necessarily every spice you own. It is the smaller working set you reach for during an ordinary week: perhaps cooking oil seasonings near a prep area, baking spices in another zone, or salt-free blends kept together for a particular household routine. A rack that holds only this active group can be more useful than a larger unit packed with jars that rarely move.

Location changes the decision. A narrow section beside a refrigerator may suit a compact vertical rack, while an open island may call for a lower organizer that does not interrupt sightlines. Measure the proposed location with the nearby drawers and cabinet doors open. Remember that the counter still needs room for wiping, food preparation, and temporarily setting down utensils or groceries.

Heat, steam, direct sun, and cooking splatter also affect placement. Avoid assuming that the small gap beside a range is automatically the ideal spice zone. Check storage guidance on the seasonings themselves, and choose a location away from obvious heat and moisture exposure. Easy reach should not come at the cost of poor storage conditions.

Who this is for

  • Cooks who use a consistent group of seasonings and want them visible at a glance.
  • Renters who need removable organization rather than a wall-mounted or cabinet-mounted system.
  • Households with mixed jar shapes that do not fit a dedicated drawer insert.
  • Small kitchens where a carefully measured vertical organizer can free part of the working surface.
  • Anyone who finds a rotating organizer awkward because labels or containers are difficult to see.

Who should skip it

  • Skip a counter rack if your prep surface is already too limited for comfortable cooking.
  • Choose enclosed cabinet storage if the available counter location receives heavy splatter, steam, or direct sunlight.
  • Avoid a fixed-tier design when your jars vary widely in height and diameter unless the listed clearances work for the full set.
  • Consider a drawer solution if you prefer to see every label from above and have a suitable shallow drawer.
  • Do not buy a rack merely to display a large matching jar set if you only use a few of those seasonings regularly.

What to verify before buying

  • Measure width and depth at the base, plus the total height beneath upper cabinets, shelves, rails, and appliance doors.
  • Compare the usable shelf width and vertical clearance with the tallest, widest, and least stable jars you plan to store.
  • Check whether rear jars can be lifted out without removing the front row or striking the cabinet above.
  • Look at the feet and base construction, especially if the rack will sit on smooth stone, laminate, tile, or a textured counter.
  • Confirm whether assembly is required and whether the product can be moved safely while loaded.
  • Review care instructions for the rack material and finish; kitchen residue can collect around joints, corners, and feet.
  • Determine whether jars, labels, liners, or mounting hardware shown in styled photos are actually included.
  • Verify current dimensions and package contents on the retailer page rather than estimating from photos.

Choose a layout around the way you reach

Tiered racks

A stepped rack raises the back rows so labels are easier to scan. It works best when jars are similar enough in height that each step remains visible. Check the depth of every tier, not only the overall dimensions. Very shallow steps may suit standard spice jars but feel insecure with squat tins, grinders, or wider seasoning containers.

Access is the practical test. Imagine lifting the tallest rear jar upward under your cabinet. If there is little clearance, a rack that looks compact may force you to pull the whole unit forward every time. That repeated movement can become more irritating than opening a cabinet.

Shelves and narrow towers

A small shelf unit uses vertical space without creating a staircase footprint. It can accommodate different container heights if the shelves are adjustable or generously spaced. On the other hand, jars on a flat upper shelf may hide those behind them, and deep shelves can turn the back row into forgotten storage.

Pay attention to side rails and lips. A low barrier may help prevent a jar from sliding, but it can also obscure labels or make short tins harder to grasp. Tall side panels create a more enclosed appearance yet collect dust and cooking residue in corners.

Rotating designs

A rotating organizer can bring rear containers forward without reaching over another row. It needs turning clearance, however, and the useful surface may be smaller than its total diameter suggests. Test the idea by marking a circle on the counter and leaving space for fingers around it. If nearby appliances or a wall block rotation, the format loses much of its advantage.

A rotating rack also benefits from balanced loading. Widely different container sizes may make the surface feel cluttered or cause smaller jars to shift when it turns. Review the edge height and current dimensions before treating a rotating option as a universal solution.

Fit your existing spice containers first

Capacity numbers are difficult to compare because jar shapes differ. A rack advertised for a certain number of containers may have been counted with one narrow jar style. Your collection may include square glass jars, round plastic containers, refill pouches, tins, grinders, or tall seasoning bottles. Measure the actual group rather than relying on a headline capacity.

Arrange the jars on a table in the order you use them. This reveals how much linear shelf space they occupy and whether some items belong elsewhere. It is also a good time to check labels and dates according to your normal household practices. The organizer should support that routine, not encourage decanting into unfamiliar containers simply to make the rack look uniform.

If labels sit on the jar lids, a lower viewing angle may be unhelpful. Front labels benefit from a stepped layout, while top labels are often easier to scan in a drawer. Choose the organizer around how information appears on your containers.

Stability, materials, and cleanup

A narrow rack can become top-heavy when loaded with tall grinders or glass jars. A broad base, level construction, and feet suited to the counter surface are useful features. If a rack includes non-slip pads, confirm their placement and care guidance. Do not assume that every pad material is appropriate for every delicate countertop finish.

Material wording can indicate how a rack should be cleaned, but it does not guarantee long-term performance in a damp or greasy area. Look for clear instructions about wiping, drying, and avoiding abrasive products. Open wire forms usually expose more of the counter for cleaning, while solid shelves can catch small spills before they reach the surface. Both still need to be moved periodically so the area underneath can be cleaned.

Color and finish have practical effects too. Dark finishes may show flour or salt dust; bright metal may reveal fingerprints and water spots; wood-look surfaces may have specific moisture precautions. Choose based on your kitchen habits rather than staged photography alone.

Limitations

  • Keeping spices on the counter exposes the rack and containers to more visible dust and cooking residue than enclosed storage.
  • A compact footprint does not guarantee easy access, especially beneath low cabinets.
  • Published capacity may not match mixed jar sizes or tall grinders.
  • Countertop racks use space that may be more valuable for food preparation or small appliances.
  • An organizer cannot correct storage conditions that are too hot, humid, or sunny for the contents.
  • A matching jar system adds labeling and refilling work that some households may not want.

Alternatives to compare

  • A shallow drawer insert when top labels are easy to read and drawer height is sufficient.
  • A cabinet shelf riser for seasonings that are better kept away from the working surface.
  • A wall-mounted rack where installation is permitted and the wall location remains away from heat and moisture.
  • A rotating cabinet organizer if depth, rather than countertop visibility, is the main problem.
  • Small labeled bins that group baking, grilling, or everyday seasonings and can be removed as a set.

FAQ

How much clearance should I leave above a countertop spice rack?

Allow enough room to lift out the tallest container without tilting it into the upper cabinet. Measure with the actual jar in hand, and remember that a rear tier may raise it several inches above the counter. Current rack dimensions and usable tier heights should be checked before ordering.

Is a tiered rack better than a rotating spice organizer?

A tiered rack makes several front-facing labels visible at once, while a rotating organizer brings hidden containers around to you. The better choice depends on available depth, overhead clearance, turning space, label placement, and whether your jars are similar in size.

Can I put a spice rack next to the stove?

A nearby location may be convenient, but heat, steam, and splatter make it a poor choice in many layouts. Follow storage guidance for the seasonings and keep the rack away from obvious heat and moisture sources. Convenience should be balanced with suitable storage conditions and safe cooking space.

Should a spice rack include matching jars?

Not necessarily. A rack-only option lets you keep familiar containers and their original information. A set with jars can create uniform dimensions, but it also requires labeling, filling, and maintaining a separate system. Verify exactly what is included before buying.

How do I keep a countertop spice rack from becoming cluttered?

Reserve it for the seasonings used most often, group them by your real cooking routine, and return less-used items to a cabinet or pantry. Reassess the selection periodically instead of filling every available slot just because the rack has room.

Pot Lid Organizers for Cabinets: Match the Rack to Your Cookware

Product links are for reference. Verify current details on the retailer page before buying.

Illustrative image of a pot lid organizer inside a kitchen cabinet

Illustrative image, not an official product photo.

Short answer

A pot lid organizer works when its dividers fit the actual handles, rims, and diameters in your cookware collection. Before choosing one, place every lid you expect to store on the counter and measure the tallest handle, the widest lid, and the depth of the intended cabinet. A freestanding rack is easy to move and requires no installation; an adjustable rack handles mixed lid thicknesses; and a door-mounted holder can preserve shelf space only if the door, hinges, and nearby cookware leave enough clearance. The goal is not to create the most slots—it is to let you remove one lid without lifting or scraping three others.

Search reference

Pot lid organizer options for cabinets

Compare divider spacing, usable rack dimensions, installation method, and handle clearance against your own lids and cabinet layout.

View matching options

Begin with the lids, not the organizer

Cookware lids are awkward because they are thin in one direction and bulky in another. A glass lid may have a wide loop handle, a saucepan lid may have a tall knob, and a flat metal lid may slip through a divider designed for thicker rims. Counting lids tells only part of the story. The combination of handle shape, rim thickness, and diameter determines whether a rack will hold them securely.

Make a quick inventory before browsing. Set aside lids that stay on their pans, lids that belong to rarely used cookware, and any universal lid that replaces several separate pieces. Then arrange the lids you genuinely need to reach during an ordinary week. This often reveals that a household with ten lids only needs six stored in the main cooking zone.

Try the proposed storage shelf with a temporary setup. Stand the lids in a file holder or between small boxes, then open and close the cabinet and remove the largest lid. This simple test exposes problems that dimensions alone may miss, such as a shelf above the rack blocking a tall handle or a cabinet frame narrowing the opening.

Who this is for

  • Cooks who currently stack loose lids under pans and have to unpile cookware to find the right one.
  • Kitchens with a lower cabinet, deep drawer, pantry shelf, or island shelf that can hold lids vertically.
  • Households with several lid sizes that are used often enough to justify a dedicated storage zone.
  • Renters who want a freestanding or adhesive-free solution that can move to another cabinet.
  • Anyone reorganizing cookware around a smaller set of frequently used pots and pans.

Who should skip it

  • Skip a separate rack if each lid can rest upside down on its matching pot without wasting useful cabinet space.
  • Avoid a door-mounted style when the cabinet has shallow hinges, an inset panel, or crowded shelves that leave no room behind the closed door.
  • A narrow fixed-slot rack may be a poor match for lids with thick rims, oversized knobs, or long handles.
  • If the main problem is too many unused pieces rather than disorganized storage, edit the cookware collection before adding another organizer.

What to verify before buying

  • Measure cabinet width, depth, opening height, and any space lost to a face frame, center stile, hinge, pipe, or shelf support.
  • Compare slot spacing with the thickest rim and widest handle base among the lids you plan to store.
  • Check whether dividers are fixed, removable, or adjustable and whether unused sections can be shortened.
  • Confirm the largest supported lid size and remember that a large lid may lean beyond the rack footprint.
  • For vertical storage, make sure knob and loop handles will clear the shelf above and the cabinet opening during removal.
  • For door installation, verify the mounting method, required hardware, panel thickness, screw length, and closed-door clearance.
  • Review base design, feet, coating, care guidance, and current material details on the retailer page.
  • Check what is included; cookware, extra dividers, mounting hardware, and accessories shown in styled images may not all be part of the package.

Fixed slots or adjustable dividers?

Fixed-slot racks are straightforward: place the rack on a shelf and slide one lid into each divider. They work best when the collection is fairly consistent and the spacing comfortably accepts every rim. The tradeoff is that a tight slot may reject a thick lid while a wide slot can let a slim lid tilt. Look at the usable gap rather than relying on the total number of advertised positions.

Adjustable organizers let you assign more room to thick glass lids and less to flat metal ones. That flexibility is useful for mixed cookware or for storing a skillet vertically beside the lids. It also makes the rack easier to revise when a pan is replaced. Check how the dividers attach: a flexible layout is less useful if a divider pulls free every time a heavy lid is removed.

Expandable frames can fit several cabinet widths, but expansion may create a joint or an unsupported section. Compare the dimensions in both the compact and extended configurations. If the cabinet has a face frame, make sure the expanded rack can still pass through the narrower opening even when the shelf behind it is wider.

Shelf, drawer, or cabinet door

A shelf rack is the lowest-commitment arrangement. It can sit beside stacked pans, at the back of a deep cabinet, or in a pantry. The rack needs enough weight and grip to remain in place when a lid is pulled forward. If the base slides, a removable cabinet liner may help, provided it is suitable for the shelf surface.

Deep drawers offer excellent visibility because the lids come out toward you rather than hiding behind cookware. Measure drawer height at the lowest obstruction, not just at the drawer box. Tall knobs can collide with the countertop rail, and large lids may lean into the drawer sides. Also consider whether the rack and lids will shift when the drawer opens quickly.

Door-mounted holders use otherwise empty vertical space, but they demand the most careful fit check. Close the cabinet slowly with the proposed lid position mapped using cardboard. A lid can clear the shelf edge and still hit a pan handle, hinge arm, or center divider. Screws may not suit a thin or framed door, while adhesive mounting depends on the product instructions and the door surface. Renters should not assume that any mount is damage-free.

A layout that makes cooking easier

Put everyday lids where they can be removed with one hand and without moving the heaviest pot. Larger, less frequently used lids can go at the back of a deep rack, while small saucepan lids usually deserve the easiest positions. If two lids look nearly identical, store them next to their pans or label the shelf rather than testing both during dinner preparation.

Orientation affects access. Handles facing upward are easy to grab, but tall handles require more headroom. Handles angled toward the cabinet opening may improve reach in a low shelf, yet they can consume extra depth. For deep drawers, alternating handles can prevent them from crowding one another. There is no universal arrangement; use the one that lets each lid leave the rack independently.

Do not pack every available divider simply because it exists. An empty slot can provide finger room and keep glass or coated edges from rubbing. It also leaves space for a future replacement lid without forcing a complete cabinet reorganization.

Stability, surfaces, and care

Glass lids can be heavy, especially when several lean in the same direction. A broad base, connected frame, or secure mounting method helps keep an organizer steady. Check the maker’s current guidance for capacity and intended use rather than assuming a small rack can support baking sheets, cast-iron pieces, or cutting boards as well as lids.

Coated metal, plastic, wood, and other materials each have different cleaning needs. Kitchen storage collects dust and cooking residue even inside a cabinet, so consider whether the dividers are easy to wipe and whether the rack can be removed without unloading an entire shelf. Deep intersections and closely spaced wires may take more effort to clean than an open frame.

Pay attention to contact points. Rough edges or exposed hardware can mark a shelf or cookware finish. Soft feet may reduce movement, but their suitability depends on the cabinet surface and care instructions. If lids are stored while damp, trapped water can affect the rack, shelf, or cookware rim; let washed pieces dry before returning them to enclosed storage.

Limitations

  • No rack can compensate for a cabinet opening that is smaller than the lids passing through it.
  • Advertised slot counts do not guarantee that the organizer will hold the same number of thick glass lids.
  • Vertical racks may trade shelf width for faster access, so very small cabinets can lose useful pan space.
  • Door-mounted storage can interfere with hinges or interior cookware even when the door itself is large enough.
  • An organizer reduces stacking and searching, but it does not solve duplicate, mismatched, or rarely used cookware.

Alternatives to compare

  • Store each lid upside down on its matching pot when the handle sits safely inside and the pots do not need to nest deeply.
  • Use a wide deep-drawer divider system when lids, pans, and cutting boards all need vertical storage in one place.
  • Consider a wall rail or hanging system only where installation is appropriate and lids can hang without crowding the work area.
  • Use a sturdy file-style rack for lids and sheet pans if its dimensions, stability, and intended load suit both.
  • Reduce the collection with a compatible universal lid if it genuinely fits several commonly used pans and meets your cooking needs.

FAQ

How much space should I leave between pot lids?

Leave enough room for the thickest part of each rim plus finger access. Glass lids and wide loop handles often need more space than flat metal lids, so adjustable dividers can be useful for a mixed collection.

Can a pot lid organizer hold frying pans too?

Some racks are designed for both lids and cookware, but a frying pan adds more weight and leverage than a lid. Verify the organizer’s intended uses, divider strength, base stability, and current capacity guidance before combining them.

Is a door-mounted lid holder safe for cabinet doors?

It can be suitable when the mounting method matches the door construction and the loaded holder clears hinges and interior shelves. Check panel thickness, hardware length, installation instructions, and the weight of your lids before drilling or applying a mount.

Should pot lids be stored vertically or flat?

Vertical storage usually makes individual lids easier to see and remove, while flat storage can work when a lid rests securely on its matching pot. The better method is the one that fits the cabinet and does not require unstable stacking.

How do I measure a cabinet for a lid organizer?

Measure the inside shelf and the narrower cabinet opening, then note the face frame, hinges, shelf above, and nearby cookware. Add the height of your tallest lid handle and test whether the largest lid can enter and leave at a comfortable angle.

Choosing a Rolling Utility Cart for Flexible Room-to-Room Storage

Product links are for reference. Verify current details on the retailer page before buying.

Illustrative image of a generic three-tier rolling utility cart in a home storage area

Illustrative image, not an official product photo.

Short answer

A rolling utility cart is most useful when supplies need a home but not a permanent address. It can follow a craft project to the table, move toiletries out of a shared bathroom, or bring pantry items beside a prep area and roll away afterward. Choose by measuring the cart’s complete footprint—including handles and protruding wheels—then compare usable shelf clearance, caster behavior, load guidance, and whether the frame can pass through the tightest route in your home. A tall cart with tiny wheels is not automatically more useful than a shorter, steadier model with accessible shelves.

Search reference

Rolling utility cart options

Compare the full assembled dimensions, shelf spacing, caster layout, brakes, handles, and stated load guidance for the supplies you plan to move.

View matching options

Plan the route before choosing the cart

A mobile cart should be sized for movement, not just for the empty corner where it will be parked. Measure narrow doorways, gaps beside furniture, counter overhangs, and the turning space near the intended storage spot. Baseboards can make a wall gap narrower near the floor, while an outward-facing handle may add more depth than the shelf dimensions suggest.

Floor transitions matter too. Small hard casters may roll easily across a smooth kitchen floor yet catch at a thick rug edge or raised threshold. If the cart will stay in one room, compact wheels may be sufficient. If it will travel between a pantry, dining area, and home office, wheel size and route clearance deserve as much attention as shelf count.

Who this is for

  • Renters who want extra storage without drilling shelves into a wall.
  • Crafters who need to move current project supplies to and from a worktable.
  • Shared households where bathroom, laundry, or cleaning supplies must be rolled out of the way.
  • Small kitchens that need a movable station for lightweight pantry goods or prep tools.
  • Home offices that need flexible storage for paper, notebooks, cables, and frequently used supplies.

Who should skip it

  • Choose a fixed shelving unit when storage will never move and maximum stability is the priority.
  • Avoid a light utility cart for heavy appliances, large water containers, or other loads outside its stated guidance.
  • Consider a purpose-built tool cart if sharp, oily, or very heavy equipment needs secure transport.
  • A carry basket may be simpler when only a few lightweight items move between rooms.
  • Do not rely on an open cart where children or pets can easily reach unsafe household products.

What to verify before buying

  • Check assembled width, depth, and height rather than relying on shelf dimensions alone.
  • Compare usable clearance between tiers with the tallest bottle, bin, or tool you intend to store.
  • Review the stated total load and per-shelf guidance, including whether weight should be distributed evenly.
  • Confirm the number and type of casters, which wheels lock, and whether replacement casters are discussed.
  • Look for a handle position that works from the side you can reach in the intended parking spot.
  • Verify frame, tray, and fastener material wording along with cleaning and moisture-care instructions.
  • Check whether shelves have solid or ventilated bottoms, raised lips, drainage holes, or removable components.
  • Confirm what assembly is required and which pictured hooks, cups, liners, or bins are actually included.

Shelf layout changes how the cart works

Deep tray lips help contain small bottles and loose supplies while the cart is moving, but they can make a low shelf harder to see and reach. Open wire shelves offer visibility and may let crumbs or water pass through, though narrow items can tip unless a liner or bin is added. Solid shelves are easier to use with small objects, but any spills need to be noticed and cleaned rather than draining away.

Do not count tiers without checking vertical clearance. Three evenly spaced shelves may suit folded cloths and short jars, while a tall spray bottle or roll of paper can require an adjustable shelf or an open top tier. If the cart will change jobs over time, adjustable components can be useful—but only if the adjustment range matches realistic storage setups.

Wheels, brakes, and load placement

A cart feels different once it is filled. Place denser items low and spread weight rather than loading one upper corner. This lowers the center of gravity and can reduce tipping during turns, but it does not override the manufacturer’s load guidance. Side hooks and hanging cups also shift weight beyond the wheelbase, so treat them as storage for light accessories rather than a way to expand capacity indefinitely.

Wheel locks are helpful when the cart becomes a temporary station, but confirm what the lock controls. Some designs stop wheel rotation, some limit swiveling, and product wording may not make the distinction obvious. A brake also cannot compensate for a sloped floor, overloaded frame, or an uneven route.

Match the cart to one primary job

A cart can be repurposed, but choosing one main use prevents a collection of poorly fitting supplies. For a craft cart, check paper dimensions, upright tool storage, and whether small pieces need lidded bins. For bathroom use, think about airflow, splash exposure, and keeping personal items separated. A pantry cart needs clear bottle height and an easy-to-clean shelf surface. An office cart may benefit more from quiet rolling and file-friendly dimensions than deep tray walls.

If the contents should stay hidden, an open utility cart may create more visual clutter than it solves. Matching bins can organize small items, yet bins reduce usable shelf dimensions and add another measurement step. Account for both the outer bin size and the hand space required to lift it out.

Limitations

  • A narrow, tall cart can feel less stable when heavy items are placed on upper tiers.
  • Small casters may struggle on rugs, thresholds, grout lines, or uneven flooring.
  • Open shelves expose contents to dust and do not secure items during abrupt movement.
  • Locks reduce unwanted rolling but do not make a mobile cart equivalent to anchored furniture.
  • Added bins, hooks, and liners can improve organization while reducing clearance or changing weight balance.
  • Moisture resistance, load guidance, replacement parts, and included accessories vary by listing and should be checked before purchase.

Alternatives to compare

  • A fixed bookcase or modular shelf for higher-capacity storage that stays in one place.
  • A lidded storage tote for seasonal items that need dust protection rather than frequent access.
  • A carry caddy for a small group of cleaning, grooming, or craft supplies.
  • A drawer unit when contents should be concealed and separated into shallow categories.
  • A purpose-built kitchen island, tool cart, or laundry sorter when the main job requires a work surface or specialized features.

FAQ

Are three tiers enough for a rolling utility cart?

Three tiers suit many everyday setups, but shelf clearance matters more than the tier count. List the items for each level, measure the tallest one, and make sure your hand can reach it without unloading the shelf above.

Will a rolling utility cart work on carpet?

It may work on low-pile carpet, but small casters generally face more resistance on soft or uneven surfaces. Check the wheel design and intended floor guidance, then consider whether the loaded cart must cross rug edges or thresholds.

Should all the wheels have brakes?

Not necessarily, but you should know how many wheels lock, where they are positioned, and whether you can reach them after parking the cart. The right arrangement depends on how often the cart moves and whether it becomes a stationary work or supply station.

What should go on the bottom shelf?

Place compact, denser supplies low when practical, while staying within the stated shelf and total load guidance. Keep frequently used lightweight items higher, and avoid storing hazardous products where children or pets can reach them.

Can a utility cart be used in a bathroom?

It can hold towels and toiletries, provided its materials and care instructions are suitable for the room’s moisture and splash exposure. Allow wet items to dry, clean spills promptly, and do not assume every metal or composite cart is intended for humid conditions.

A Wall-Mounted Key Holder That Works with Your Entryway Routine

Product links are for reference. Verify current details on the retailer page before buying.

Illustrative image of a generic wall-mounted key holder in an entryway

Illustrative image, not an official product photo.

Short answer

A useful wall-mounted key holder should make keys easier to drop off than to leave on a counter. Start by choosing a spot along the route through your main door, then count the everyday key rings that need separate hooks. Check hook spacing for bulky fobs, the mounting method for your wall, and whether a shelf or mail slot would solve a real entryway problem. A compact rack is often better than a feature-heavy organizer if the larger design crowds a light switch, door frame, or narrow hallway.

Search reference

Wall-mounted key holder options

Compare current hook layouts, mounting hardware, shelf dimensions, and organizer formats with the wall space beside your usual entrance.

View matching options

Plan around the doorway, not the empty wall

The most important measurement is not the width of the key holder. It is the usable area where someone can reach it while arriving with a bag, closing the door, or turning on a nearby light. A rack that fits an open patch of wall may still be inconvenient if it sits behind the door, above shoulder height, or across the hall from the natural walking path.

Use removable tape to mark the proposed outline before ordering. Open the door fully, operate nearby switches, and make sure coats or tote bags will not snag on the hooks. In a shared entrance, place the rack where shorter household members can use it comfortably without creating a head-level obstacle for anyone else.

Placement also affects what belongs on the organizer. Keys used every day should have the easiest hooks. A shallow shelf can hold sunglasses or a small wallet, but it can also become a clutter ledge. Mail compartments are helpful only if paper really enters through that door and has another place to go after sorting.

Who this is for

  • Households that repeatedly misplace keys on counters, desks, or in different bags.
  • Renters or homeowners who want a small entryway landing zone without adding floor furniture.
  • Families that need separate, visible spots for house, car, mailbox, or utility key rings.
  • People combining keys with one or two lightweight departure items such as sunglasses or a dog leash.
  • Small hallways where a narrow wall organizer is more practical than a console table.

Who should skip it

  • Anyone who routinely keeps every key inside the same handbag, backpack, or closed drawer.
  • Renters who cannot make wall holes and do not have a suitable surface for the listed adhesive method.
  • Households needing secure or concealed key storage rather than an open rack near an entrance.
  • Entryways where exposed hooks would project into a tight walking path.
  • Buyers mainly trying to manage coats, heavy bags, or umbrellas, which usually need a different wall system.

What to verify before buying

  • Measure the full width, height, shelf depth, and hook projection against the intended wall area.
  • Count everyday key rings and allow extra side-to-side space for large car fobs and wrist straps.
  • Confirm whether mounting hardware is included and which wall materials it is intended to fit.
  • Check the stated installation process before assuming the rack can be mounted without drilling.
  • Review any shelf lip, mail slot, tray, or cubby dimensions rather than judging capacity from photos.
  • Look for care guidance appropriate to the listed wood, metal, plastic, or mixed-material finish.
  • Consider whether keys will be visible from a window or open doorway and choose placement accordingly.

Hooks, spacing, and usable capacity

Hook count is only a rough capacity guide. Closely packed hooks may look efficient, yet wide key fobs can overlap and hide the rings behind them. If several drivers use the organizer, compare center-to-center hook spacing and hook depth. Open hooks are quick to use; more enclosed hook shapes may hold a ring more securely but can take an extra moment to load.

Think about weight item by item. A normal key ring and a lightweight leash are different from a loaded handbag or winter coat. Do not treat every hook as general-purpose storage unless the current instructions explicitly support that use and the rack is installed into an appropriate wall structure.

Labels can help a shared household, but permanent printed categories are less flexible when routines change. A simple row of visually distinct hooks or small removable labels may be easier to adapt after a move, a new vehicle, or a change in who uses the entry.

Shelf, mail slot, or hooks only?

A hooks-only rack has a clear job and a shallow profile. It suits narrow hallways and households that already have a tray or drawer for pocket items. It is also less likely to collect receipts, loose change, and unopened mail.

A top shelf makes sense when one or two small departure items need to stay with the keys. Check whether the shelf has enough depth and a raised edge; a narrow, flat ledge may not hold rounded sunglasses cases or a wallet securely. Avoid placing fragile objects on a rack beside a door that vibrates when it closes.

Mail pockets can support a deliberate sorting routine, especially in a small apartment without a console table. They are less useful when envelopes accumulate for weeks or when thick catalogs prevent easy access to the hooks below. If paper management is the main goal, compare a dedicated wall file with a separate compact key rail.

Mounting choices deserve a closer look

Screw-mounted key holders can provide a stable installation when the supplied or separately chosen hardware matches the wall. Drywall, wood, masonry, tile, and other surfaces do not all use the same fasteners. Product instructions should guide the installation, and heavier intended loads may require anchoring into suitable structure.

Adhesive mounting avoids holes but is not automatically compatible with every painted, textured, damp, or porous surface. Check surface preparation, curing time, removal guidance, and load limits in the current listing. An adhesive rack that releases can damage items below even when the keys themselves are light.

Some organizers use hidden keyhole slots or a separate mounting plate. These can create a tidy appearance, though screw spacing must be accurate. Before drilling, use the actual product or its verified template rather than relying only on approximate dimensions from a search image.

Materials and entryway upkeep

Metal racks can keep hook profiles relatively slim, while wood or wood-look organizers may blend with entryway furniture. Mixed-material versions often add a shelf, basket, or mail compartment. Material names alone do not establish finish quality or load capacity, so compare the current construction description and installation instructions.

Keys swing against the wall and the organizer during daily use. A back panel can reduce direct contact with paint, while a rack made only from a rail and hooks may leave the wall exposed. If scuffs are a concern, look at the distance between the hooks and mounting surface.

Entryways collect dust, damp outerwear, and residue from frequently handled objects. Choose a finish with care instructions that fit your routine. Deep decorative cutouts and wire baskets may take longer to dust than a plain rail and shallow shelf.

Limitations

  • An open key rack makes keys visible, so placement should account for windows, visitors, and the view through the doorway.
  • Extra shelves and mail slots can attract clutter rather than improve the departure routine.
  • Included fasteners may not be suitable for every wall type or intended load.
  • Adhesive performance depends on the surface, preparation, curing, environment, and stated limits.
  • A key holder organizes items only when household members consistently return them to the assigned hooks.
  • Search listings can change; verify dimensions, materials, included hardware, and installation guidance on the current page.

Alternatives to compare

  • A small entryway tray when keys, earbuds, and wallets are usually emptied from pockets together.
  • A closed drawer or cabinet when keys should stay out of sight.
  • A magnetic key strip for compatible metal key rings and a very minimal setup.
  • A wall-mounted mail organizer when incoming paper is the larger problem and keys are secondary.
  • A freestanding console or narrow shoe cabinet when the entrance also needs substantial storage.

FAQ

How many hooks should a wall-mounted key holder have?

Count the key rings used regularly and give each one its own hook, then consider one or two spare positions. Hook spacing matters as much as the total because bulky car fobs can overlap when hooks are close together.

Where should I install a key holder near the front door?

Choose a reachable spot along the normal path into and out of the home. Check the door swing, light switches, coat movement, walking clearance, and visibility from outside before fixing the position.

Can an adhesive key holder work without drilling?

It can be an option only when the listed adhesive method suits the wall surface and intended load. Follow the current preparation and curing instructions, and do not assume textured or delicate paint is compatible.

Is a shelf useful on a key rack?

A shelf is useful when it has verified dimensions for a small wallet, sunglasses case, or another item that leaves with the keys. If it has no specific purpose, a shelf can simply become a place for clutter.

Should keys be stored beside the door?

Door-side storage is convenient, but an open rack should not expose keys to easy reach or a clear outside view. A less visible wall, closed cabinet, or drawer may be more appropriate for some entrances.

Choosing Bookends for Shelves, Desks, and Growing Book Collections

Product links are for reference. Verify current details on the retailer page before buying.

Illustrative image for a bookends for shelves buying guide

Illustrative image, not an official product photo.

Short answer

Bookends are worth comparing when a shelf, desk, windowsill, or media console has more books than a loose stack can handle, but not enough books to fill the whole span. Start with the books you need to support: tall hardcovers, slim paperbacks, notebooks, binders, children’s books, and cookbooks all lean differently. A useful pair should have enough weight or under-book grip for your shelf surface, a base that does not steal too much room, and a height that supports the tallest items without becoming the most noticeable object in the room.

Search reference

Bookends for shelves

Compare current styles by weight, base shape, height, finish, shelf surface compatibility, and whether the pair is meant for light paperbacks, mixed home office books, or taller display shelves.

View matching options

Why bookends are more about leverage than decoration

A bookend has one simple job: keep a partial row from sliding, tilting, or collapsing into the empty part of a shelf. The decorative shape matters less than how the support meets the books and the shelf. A lightweight bookend can look tidy in photos but may struggle if the books are tall, glossy, or placed on a slick painted surface. A heavier pair may feel more stable, but it can be bulky on a narrow shelf or too visually dominant on a small desk.

Think about how the shelf changes during the week. A row of reference books that stays untouched can use a different setup than a work desk where notebooks move in and out every day. Children’s books, cookbooks, art books, magazines, and binders also create different pressure points. If the row is constantly changing, a simple shape with an easy-to-slide base may be more practical than a sculptural piece that needs careful placement.

Shelf finish is part of the decision. Painted wood, laminate, metal, glass, veneer, and open wire shelving do not grip the same way. Some bookends depend on a flat base that sits under the first few books. Others rely more on weight, rubber feet, or a broad vertical panel. Before choosing by color, check whether the design makes sense for the surface and the books you actually own.

Who this is for

  • Readers who have partial rows of books on open shelves, small bookcases, nightstands, or media consoles.
  • Home office users who keep notebooks, manuals, journals, binders, or reference books within reach.
  • Parents organizing picture books or school books that are pulled out and returned often.
  • Renters or dorm residents who need shelf order without drilling, wall mounting, or permanent furniture changes.
  • Anyone styling a visible shelf but still wanting a support that works during daily use.

Who should skip it

  • Skip small decorative bookends if you need to support a heavy run of oversized art books, textbooks, or binders.
  • Choose a full bookcase, shelf divider, or bin if the main problem is overall storage capacity rather than a leaning row.
  • Avoid hard metal bases on delicate shelf finishes unless you can confirm foot material, padding, or surface protection.
  • Do not rely on bookends to make an overloaded shelf safer; shelf weight limits and anchoring concerns are separate issues.

What to verify before buying

  • Measure the shelf depth, usable width, and vertical clearance, especially if the shelf has a lip, back panel, or low upper shelf.
  • Compare bookend height with your tallest books; a very low support may not help much with tall hardcovers or binders.
  • Check the base style: some bases slide under books, while others depend mostly on weight or grippy feet.
  • Review material and finish wording if the bookends will touch wood, painted shelves, glass, veneer, or metal.
  • Confirm whether the listing is for a pair or a single piece, because product photos can make sets look larger than they are.
  • Look for notes about non-slip pads, rounded edges, sharp corners, and care instructions if children or delicate shelves are involved.
  • Check current dimensions and weight rather than assuming a decorative shape is suitable for heavy books.

Buying notes for real shelves

Base footprint is easy to overlook. A long under-book base can add stability because the books themselves help hold it down, but it also takes up shelf space and may be visible beneath short paperbacks. A freestanding weighted piece can be easier to move, though it needs enough mass and friction to resist the row’s sideways pressure. If you rearrange shelves often, choose a shape that can be repositioned without scratching or catching on book covers.

Height should match the row rather than the room decor. Low bookends can work for paperbacks, notebooks, or children’s board books, but tall books can lean above the support and create a fan-shaped row. Very tall bookends can support larger books, yet they may block cover art or look crowded on a shallow shelf. If your shelf mixes sizes, decide whether the tallest books can sit near the end or whether a separate section would be cleaner.

Material choice affects both function and mood. Metal bookends can be thin and space-saving, wood can feel warmer on visible shelves, acrylic can keep a light visual profile, and stone or ceramic styles may add weight. None of those materials is automatically better. The key is whether the finish, edge shape, feet, and base design suit the books and surface you plan to use.

For children’s rooms and busy desks, simple may be better than impressive. A smooth shape with rounded edges and an easy-clean finish is often more useful than a fragile decorative object. If books are pulled out several times a day, check whether the bookend can be nudged back into place without tipping or scraping the shelf.

Limitations

  • Search results change over time, so current dimensions, materials, included quantity, and color options should be verified on the retailer page.
  • Bookends help organize partial rows, but they do not increase shelf strength or replace proper furniture anchoring.
  • Very light designs may be better for display than for heavy books, even if they look sturdy in product photos.
  • A base that works on a flat wood shelf may not behave the same way on glass, wire shelving, or a slick painted surface.
  • Tall or oversized books may need a higher support, a deeper shelf, or a different storage method.

Alternatives to compare

  • Shelf dividers if you are organizing stacks of sweaters, bags, files, or books on a larger open shelf.
  • Magazine holders for thin booklets, workbooks, folders, or loose paper that will not stand cleanly between bookends.
  • A desktop file sorter if the items are mainly notebooks, mail, folders, or active paperwork.
  • Storage bins or baskets for children’s books that are handled more like toys than display items.
  • A larger bookcase or wall-mounted shelf if the collection has outgrown partial-row support.

FAQ

What height should bookends be for shelves?

Choose a height that supports the books near their middle, not just at the bottom edge. Low bookends can work for paperbacks and small notebooks, while tall hardcovers, binders, and cookbooks usually need a higher vertical panel.

Are heavy bookends always better?

Not always. Weight can help, but the base shape, shelf surface, book height, and whether books sit on top of the base also matter. A thin under-book base can be very practical when the first few books help hold it in place.

Do bookends scratch shelves?

They can if the edges are sharp, the base is rough, or the bookend is dragged across a delicate finish. Check material details, foot pads, and edge design before placing them on wood, veneer, painted shelves, or glass.

Should I buy bookends as a pair?

A pair is useful when a row has open space on both sides or when you want symmetry on a desk or shelf. If one side is already against a wall or bookcase panel, a single support may be enough, but confirm how the current option is sold.

What is better for children’s books, bookends or bins?

Bookends look tidier for books that stay upright, but bins can be easier for young children who pull books out quickly and return them without careful alignment. For a shared family shelf, a mix of bins and simple bookends may work better than one method everywhere.

Rotating Pantry Turntables for Spices, Condiments, and Deep Shelves

Product links are for reference. Verify current details on the retailer page before buying.

Illustrative image for a rotating pantry turntable buying guide

Illustrative image, not an official product photo.

Short answer

A rotating pantry turntable is most useful when small jars, oils, sauces, snacks, or cleaning bottles disappear at the back of a shelf. The right one is less about buying the biggest circle and more about matching diameter, rim height, surface grip, clearance, and load expectations to the exact cabinet or pantry zone. Measure the shelf depth and opening first, then decide whether a single-tier turntable, divided tray, high-rim spinner, or tiered rotating organizer fits the way you actually reach for items.

Search reference

Rotating pantry turntable options

Compare diameter, rim height, tier layout, base stability, cleaning guidance, and whether the organizer clears cabinet doors, hinges, and shelf edges.

View matching options

Why a turntable solves a different storage problem

Bins and rectangular trays are good when you want to pull a whole category forward. A turntable solves a different problem: it lets you bring the back row to the front without removing everything around it. That matters in upper cabinets, narrow pantry shelves, corner spaces, under-sink areas, craft cabinets, and refrigerator-adjacent condiment shelves where items are easy to lose behind taller bottles.

The tradeoff is shape. A round organizer leaves unused corners on a rectangular shelf, so it works best when access matters more than maximum square-inch storage. If a cabinet is already tight, a turntable can either make the space feel easier or waste useful room. The decision should start with the shelf, not with the product photo.

Who this is for

  • Home cooks who keep spices, oils, vinegars, extracts, or seasoning jars in a deep cabinet.
  • Pantry shelves where small jars, snack containers, vitamins, drink mixes, or condiments get hidden behind larger items.
  • Renters who want a non-permanent organizer for upper cabinets, bathroom storage, craft supplies, or under-sink bottles.
  • Households setting up a first apartment, shared kitchen, or guest kitchen where categories need to stay visible.
  • Anyone who prefers rotating access over pulling out a full bin or rearranging a shelf every time.

Who should skip it

  • Skip a round turntable if the shelf is very shallow, blocked by a center stile, or too narrow for the diameter you need.
  • Use rectangular bins if you want to maximize every corner of a pantry shelf or store many square packages together.
  • Avoid tiered rotating designs when cabinet clearance is low or tall bottles need to stand upright.
  • Do not rely on a lightweight spinner for heavy glass bottles, oversized jars, tools, or anything that could tip when rotated quickly.

What to verify before buying

  • Measure shelf depth, shelf width, door opening, hinge position, and the height available above the items you plan to store.
  • Check the listed diameter and remember that a circular organizer may need extra room to turn without rubbing the cabinet side.
  • Compare rim height: a low rim is easier for short jars, while a higher rim may help keep bottles from sliding during rotation.
  • Review whether the base has non-slip feet, a smooth bearing, a divided layout, handles, or removable sections.
  • Verify material wording, cleaning instructions, and whether the organizer is intended for pantry, refrigerator, bathroom, or under-sink use.
  • Confirm the number of pieces included if photos show multiple turntables, tiers, or staged accessories.
  • Check whether the listing mentions load guidance, especially if you plan to store oils, sauces, glass jars, or cleaning products.

Diameter, rim, and shelf clearance

Diameter is the first number to check, but it is not the only one. A turntable that technically fits inside a cabinet can still be frustrating if it hits the door frame, rubs against a side wall, or blocks nearby items. Leave enough clearance for your hand to rotate the tray and for taller items to move past the shelf edge.

Rim height changes how the organizer behaves. A low rim keeps labels easy to see and makes it simpler to lift out short spice jars. A high rim can feel more secure for bottles, packets, and small snack containers, but it may hide labels or make short items harder to grab. Divided turntables add separation, though fixed dividers can limit how larger bottles fit.

Tiered rotating organizers are tempting because they improve visibility, but they need careful height planning. Measure the tallest item on each tier and the cabinet opening, not just the open shelf interior. If a tiered unit only works when bottles are perfectly arranged, it may become annoying in a busy kitchen.

Where it works best around the home

In a spice cabinet, a turntable can keep frequently used seasonings from migrating behind rarely used jars. For cooking oils and sauces, a wider tray with a stable rim may make more sense than a small spice spinner. In a pantry, rotating organizers work well for small categories such as extracts, tea tins, drink drops, sprinkles, nut butters, or single-serve snacks.

Outside the kitchen, the same idea can help with bathroom bottles, craft paints, laundry additives, pet-care supplies, or small cleaning items. Under a sink, pay close attention to plumbing, door hinges, and bottle height. A turntable can make round bottles easier to reach, but it is not a substitute for leak-safe storage or child-safety planning.

Cleaning and everyday use

A turntable only stays useful if it is easy to reset. Smooth surfaces wipe faster than textured bottoms, while clear plastic can make small spills easier to notice. Open rims are simple, but sticky bottles and spice dust can collect around the edge. If the organizer has a bearing or rotating base, check whether the listing gives any cleaning restrictions before rinsing or soaking it.

Think about label visibility, too. If you store identical spice jars, a turntable may work better when labels face outward or when the jars are grouped by cooking routine. For mixed pantry items, keep the category small. A spinner filled with unrelated bottles, packets, and jars can become just as messy as the shelf it replaced.

Limitations

  • A round organizer improves access but may waste corner space on rectangular shelves.
  • Large bottles can tip or crowd the rim if the tray is too small or rotated too quickly.
  • Tiered designs can reduce vertical clearance and may not fit tall items inside closed cabinets.
  • Very light turntables may shift if the base lacks grip or if the shelf surface is slick.
  • Materials, cleaning instructions, load guidance, and included pieces vary by listing, so verify current details before buying.

Alternatives to compare

  • Pull-out cabinet bins when you want to remove a full category and see everything at once.
  • Stackable pantry bins for boxed snacks, packets, and rectangular packages.
  • Spice drawer inserts if you have a wide drawer and prefer labels facing up.
  • Door-mounted racks when cabinet shelves are full but the door has safe clearance.
  • Two-tier under-sink organizers for taller bottles that need vertical separation rather than rotation.

FAQ

What size rotating turntable should I choose for a pantry shelf?

Measure the usable shelf depth and width, then choose a diameter that leaves room for the tray to spin and for your hand to reach inside. Do not use the outside cabinet measurement alone, because door frames, hinges, and shelf lips can reduce the space.

Is a Lazy Susan turntable better than a rectangular bin?

A turntable is better when you want to rotate small items into view without pulling out a whole container. A rectangular bin is usually better when you need to use shelf corners efficiently or store boxed and square packages together.

Do high-rim turntables work for spice jars?

They can, but a very high rim may hide short labels or make small jars harder to lift out. For spice storage, compare jar height, label position, rim height, and whether the tray has dividers that match your jar sizes.

Can I use a rotating organizer under the sink?

Yes, if it fits around plumbing and leaves enough door clearance. Check bottle height, base stability, and cleaning guidance, and avoid storing anything that should be kept out of reach or protected from leaks without additional safety planning.

Are clear plastic turntables easier to maintain?

Clear plastic can make spills, crumbs, and misplaced items easier to see, but maintenance depends on the exact material and construction. Verify cleaning instructions and avoid assuming that every organizer can be soaked, dishwashed, or used in damp areas.

Bedside Caddies for Small Bedrooms, Dorms, and Bunk Beds

Product links are for reference. Verify current details on the retailer page before buying.

Illustrative image for a bedside caddy buying guide

Illustrative image, not an official product photo.

Short answer

A bedside caddy is worth considering when the area beside the bed is too narrow for a nightstand, shared with another sleeper, or already crowded with a lamp, water bottle, and charger. The most useful models keep small items within reach without sagging into the mattress gap, scratching the bed frame, or turning into a soft junk drawer. Compare attachment style, pocket depth, panel stiffness, fabric care, and whether the caddy fits the exact bed frame, rail, mattress, or sofa arm where it will be used.

Search reference

Bedside caddy options

Compare hanging method, pocket layout, panel stiffness, dimensions, fabric care, and compatibility with your bed frame or mattress setup.

View matching options

What this product type is

A bedside caddy is a hanging or tuck-in organizer that stores small items close to a bed, bunk, sofa, or sleeper chair. Instead of using floor space, it usually hangs from a rail, slips under a mattress, attaches to a headboard, or drapes over an armrest. Common storage targets include a phone, remote, paperback book, glasses, lip balm, tissues, charging cable, earplugs, or a small notebook.

The category looks simple, but the right choice depends heavily on the bed. A dorm loft, metal bunk, upholstered platform bed, adjustable bed base, and guest-room frame can all require different attachment decisions. A caddy that works neatly on a square rail may not stay put under a thick mattress or on a rounded headboard.

Who this is for

  • Students using dorm beds, loft beds, or bunks where a normal nightstand is awkward.
  • Small-bedroom setups where the bed is pushed against a wall or squeezed beside a closet door.
  • Guest rooms that need a place for visitors to keep glasses, a phone, and reading material.
  • Kids’ rooms where lightweight bedtime items need a repeatable landing spot.
  • Sofa sleepers, daybeds, or reading corners where a side table would block movement.

Who should skip it

  • Skip a bedside caddy if you need to store heavy books, large tablets, full water bottles, or electronics that need rigid support.
  • Choose a nightstand or wall shelf if you want a stable surface for a lamp, drink, alarm clock, or decor.
  • Avoid tuck-in designs if your mattress shifts easily or the bed base does not leave enough friction to hold the panel.
  • Do not use a soft caddy as cable management for hot power bricks, overloaded chargers, or tangled extension cords.

What to verify before buying

  • Measure the bed rail, mattress thickness, headboard, sofa arm, or bunk side where the caddy will attach.
  • Check whether the model hangs with hooks, straps, a tuck-in flap, hook-and-loop bands, or a rigid support panel.
  • Compare pocket depth and width with the specific items you want to store, especially glasses, remotes, e-readers, and small books.
  • Review material wording, panel stiffness, stitching, and whether the pocket openings are likely to sag when filled.
  • Verify cleaning instructions, color, and fabric texture if the caddy will sit against bedding or an upholstered frame.
  • Confirm whether any bedside accessories shown in photos are included or are only display props.
  • Check that the attachment style will not scratch, pinch, or interfere with the bed frame, guardrail, adjustable base, or mattress movement.

Main buying notes

Start with the attachment method, not the number of pockets. Hook-style caddies can be convenient on metal rails, wire bunks, and some headboards, but they may rattle or sit unevenly on rounded surfaces. Strap designs can be more flexible, though loose straps may slide if the rail is smooth. Tuck-in panels are discreet on standard beds, but they depend on mattress weight and friction to stay in place.

Pocket layout matters when you reach for items in the dark. One deep pocket may swallow a remote, cable, and glasses together. Several narrow pockets can keep items separated, but they may not fit a paperback or e-reader. If the caddy is for a child or guest room, simple open pockets may be easier to understand than many specialized slots.

Think about weight before the caddy is full. Soft fabric organizers often look tidy when staged, but heavy items can pull the panel outward or make the top edge fold. A stiffer back panel, reinforced seams, or a balanced pocket layout can help, but no soft bedside organizer should be treated like a shelf.

Cable use deserves a separate check. A small charging cable is one thing; a warm charger, power strip, or tightly coiled cord is another. Keep charging setups simple, follow device guidance, and make sure cords are not pinched between the mattress, frame, and organizer.

Limitations

  • A bedside caddy adds reach-in storage, not a level surface for drinks, lamps, or fragile items.
  • Sagging can happen if pockets are overloaded or the attachment method does not match the bed frame.
  • Tuck-in models may shift when the mattress is lifted, rotated, or used on a low-friction platform.
  • Deep pockets can hide small items unless the interior color and pocket openings make them easy to see.
  • Fabric, stitching, hooks, and cleaning guidance vary by listing, so verify current details before relying on a caddy for daily use.

Alternatives to compare

  • A narrow nightstand for rooms that still have a few inches of floor space.
  • A wall-mounted shelf if drilling or adhesive mounting is allowed and safe for the wall.
  • A headboard with built-in cubbies for a more permanent bedroom setup.
  • A rolling cart for shared bedrooms or guest rooms where storage needs change.
  • A simple tray on the floor or dresser if the goal is temporary bedtime storage rather than attached organization.

FAQ

Will a bedside caddy work on a bunk bed?

It can, but the attachment style must match the bunk rail. Measure the rail shape and thickness, check whether hooks or straps are included, and make sure the caddy does not interfere with climbing, guardrails, or bedding.

Is a tuck-in bedside caddy better than a hanging one?

A tuck-in caddy can look cleaner on a standard bed, while a hanging caddy may be easier on bunks, loft beds, and rails. The better choice depends on mattress friction, frame shape, and how much movement the bed gets.

What can I safely store in a bedside caddy?

Use it for lightweight bedtime items such as a phone, glasses, remote, paperback, tissues, earplugs, or charging cable. Avoid overloading soft pockets with heavy books, large bottles, or items that need a hard, stable surface.

How do I keep a bedside caddy from sagging?

Choose a model with an attachment method that fits your bed, keep heavier items in lower or balanced pockets, and avoid filling every compartment. Stiffer panels and reinforced seams may help, but weight limits and construction should be verified on the retailer page.

Is a bedside caddy useful in a guest room?

Yes, especially when the room has little space for furniture. A simple caddy can give guests a visible place for glasses, a phone, a book, and a small remote without adding another table to the room.

Vacuum Storage Bags for Bedding, Coats, and Seasonal Clothes

Product links are for reference. Verify current details on the retailer page before buying.

Illustrative image for a vacuum storage bags buying guide

Illustrative image, not an official product photo.

Short answer

Vacuum storage bags make the most sense for soft, bulky items you do not need every week: spare comforters, guest bedding, winter coats, sweaters, and off-season clothes. Choose them by matching bag size to the items and the storage spot, then check the seal design, valve style, included pump or vacuum compatibility, material thickness wording, and whether the compressed bag will sit flat in a closet, under a bed, or inside a storage bin.

Search reference

Vacuum storage bag options

Compare mixed-size sets, jumbo bedding bags, travel-size compression bags, valve designs, closure tools, and storage shape before deciding which style fits your closet or under-bed space.

View matching options

Start with the storage problem, not the biggest bag

A large vacuum bag looks efficient until it becomes too wide for the shelf, too heavy to move, or too stiff to slide under a bed. Before choosing a set, separate items into real storage groups: one guest bedding kit, one winter coat group, one sweater stack, or one extra blanket per bag. Smaller groups are easier to label, lift, and reopen without unpacking everything at once.

The storage location matters as much as the item volume. Under-bed bags need a flatter final shape. Closet shelf bags can be taller but still need to stack without sliding. Bags stored in bins should match the bin footprint after compression, not just before compression. If you plan to store items in a basement, garage, or attic, read the retailer page carefully for material, closure, and temperature-related wording instead of assuming every bag is suited to those conditions.

Also think about how often you will reopen the bags. For once-a-year seasonal clothing, maximum compression may be worth the extra effort. For guest bedding that is used every few months, a moderate-size bag with a simple valve and reliable closure tool may be more practical than a very large bag that must be wrestled flat each time.

Who this is for

  • Households storing bulky comforters, blankets, pillows, or guest bedding between uses.
  • Apartment renters trying to free up closet or under-bed space without adding more furniture.
  • Families rotating winter coats, sweaters, scarves, and seasonal clothing.
  • Dorm rooms, small bedrooms, and shared closets where soft goods take up too much shelf space.
  • Movers or organizers who want grouped textile storage that can be labeled and stacked.

Who should skip it

  • Skip vacuum storage bags for items you need to access daily or weekly.
  • Avoid them for delicate garments that should hang, breathe, or keep a natural shape.
  • Use rigid bins instead if the main problem is crushing, stacking strength, or pest-resistant structure.
  • Do not rely on compression bags as a substitute for cleaning and fully drying textiles before storage.
  • Choose travel packing cubes if you mainly need suitcase organization rather than long-term home storage.

What to verify before buying

  • Check the dimensions of each bag size and compare them with your closet shelf, bin, drawer, or under-bed clearance.
  • Confirm whether the set includes mixed sizes, only jumbo bags, or travel-size bags.
  • Look at the valve style and whether it works with a household vacuum, a hand pump, or both.
  • Review closure details, including the slider clip, double-zip wording, and instructions for sealing the opening.
  • Check material thickness wording, reuse guidance, and whether sharp zippers, buttons, or hangers should be avoided.
  • Verify whether any pump, labels, clips, or storage accessories shown in photos are included.
  • Read care and storage guidance on the retailer page before using bags in hot, damp, or rough storage areas.

Buying notes for bedding and clothing

For bedding, bag shape is often more important than maximum advertised capacity. A comforter or duvet can compress into a wide slab that is still awkward to move. If you store several beds’ worth of linens, separate each bed size or room into its own bag so you do not have to open a giant mixed bundle for one pillowcase set.

For clothing, avoid packing one bag with every winter item you own. Sweaters, base layers, scarves, and coats may be needed at different times. Grouping by season or person makes the bags easier to reopen. If garments have buttons, snaps, or stiff trim, fold them so hard edges do not press directly against the plastic during compression.

The valve should be easy to access after the bag is filled. A valve buried under a bulky blanket can make air removal frustrating, especially on large bags. If you do not want to pull out a full-size vacuum cleaner, check whether the listing includes a hand pump and whether that pump is intended for large bags or mainly for travel sizes.

Labels are worth planning even if the set does not include them. Once bedding and clothes are compressed, it can be surprisingly hard to identify what is inside through wrinkled plastic. A simple label with room, season, and contents can prevent unnecessary reopening.

Limitations

  • Compression reduces volume, but it does not reduce weight; large bags can become heavy and awkward.
  • Some bags may slowly let air back in if the seal, valve, or plastic is damaged or not fully closed.
  • Long-term compression may not suit delicate fabrics, structured coats, leather, down items, or garments that need to keep loft.
  • Very large bags can be hard to store if the compressed shape does not match your shelf, bin, or under-bed space.
  • Vacuum bags are not a cure for damp textiles; items should be clean and completely dry before storage.

Alternatives to compare

  • Clear lidded bins for stackable storage and easier protection from crushing.
  • Fabric under-bed bags if breathability and quick access matter more than compression.
  • Hanging garment bags for coats, dresses, suits, or items that should keep their shape.
  • Packing cubes for suitcase organization during travel.
  • Closet shelf dividers or blanket bags if you need order without removing air.

FAQ

What size vacuum storage bags should I buy for bedding?

Start by measuring the shelf, bin, or under-bed area where the compressed bag will sit. Jumbo bags can hold bulky comforters, but several medium or large bags may be easier to lift, label, and reopen for guest bedding.

Can vacuum storage bags be reused?

Many are sold as reusable, but reuse depends on the plastic, seal, valve, and how carefully the bag is handled. Avoid overfilling, keep sharp garment details away from the plastic, and verify the retailer’s reuse guidance before assuming long-term durability.

Do I need a vacuum cleaner for these bags?

Some bags are designed for a household vacuum, some include a hand pump, and some may support both. Check the valve description and included accessories, especially if you want to use the bags in a dorm, apartment, or travel setting without a full-size vacuum.

Are vacuum storage bags good for winter coats?

They can help with bulky soft coats, but structured, delicate, leather, or loft-sensitive garments may not be a good fit. Check garment care labels and avoid compressing anything that should hang, breathe, or keep its shape.

Why do some vacuum bags reinflate?

Reinflation can happen when the zipper seal is not fully closed, the valve cap is loose, the bag is overfilled, or the plastic has a small puncture. Filling the bag less tightly and running the closure tool along the seal slowly can help, but damaged bags may need replacing.

Stackable Pantry Bins for Cabinets, Shelves, and Small Kitchen Stockups

Product links are for reference. Verify current details on the retailer page before buying.

Illustrative image for a stackable pantry bins buying guide

Illustrative image, not an official product photo.

Short answer

Stackable pantry bins are most useful when shelves are deep, snacks slide around, or small packets disappear behind cans and jars. Choose them by the shelf you are trying to fix, not by how neat a product photo looks. The right set should fit the cabinet depth, stay stable when lightly stacked, let you see what is inside, and be easy to pull out without dumping the contents across the pantry.

Search reference

Compare stackable pantry bin options

Use the search page to compare current bin sizes, set counts, handle shapes, clear or opaque materials, and stacking details before matching a set to your shelves.

View matching options

Start with the shelf problem you actually have

A pantry bin is not automatically helpful just because it creates a category. It helps when it solves a specific daily annoyance: granola bars falling over, sauce packets spreading across a shelf, kids’ snacks being hard to reach, or backup cans hiding behind the first row. If the bin adds another layer to move before you can cook dinner, it may make the shelf look organized while slowing you down.

Before comparing sets, empty one shelf and group the items that cause the most clutter. Packets and pouches usually need a different shape than cans. Baking supplies may need taller sidewalls. Breakfast bars may work better in a shallow open bin that can be pulled forward quickly. The goal is to create zones that match how the household restocks and cooks, not to force every item into identical containers.

Stacking deserves extra attention. Some bins are designed to nest when empty, stack when filled, or accept a lid-like top edge. Others only appear stackable because the sides are straight. Look closely at whether stacked bins leave enough front access, whether handles remain usable, and whether the bottom bin can support the kind of weight you plan to store.

Who this is for

  • Kitchens with deep pantry shelves where smaller items get lost behind jars, boxes, or cans.
  • Families that keep grab-and-go snacks, packets, tea bags, drink mixes, or lunchbox items in repeated categories.
  • Renters who want a removable organization system without installing pull-out shelves or hardware.
  • Shared households where clear zones make it easier for everyone to put groceries back in the same place.
  • Small kitchens that need vertical shelf use but cannot add permanent cabinet organizers.

Who should skip it

  • Pantries that already work well with original boxes, shelf risers, or simple rows of cans.
  • Anyone storing heavy bulk goods without confirming the current bin size, material, and stacking guidance.
  • Very shallow cabinets where handles or front lips would waste more space than they save.
  • Households that prefer fully sealed food containers for freshness, pests, or spill protection.

What to verify before buying

  • Measure shelf width, depth, and height, then compare those numbers with the outside dimensions of each bin.
  • Check whether the bins are truly designed to stack when filled, and whether stacking requires lids or raised rims.
  • Confirm the set count and size mix; some sets include identical bins, while others combine narrow, wide, shallow, and tall pieces.
  • Look at handle placement, front cutouts, and sidewall height so the bin can be pulled out without trapping nearby items.
  • Review material wording, cleaning instructions, and any temperature or dishwasher guidance on the current listing.
  • Decide whether clear bins, tinted bins, labels, or open fronts will make the contents easier to manage in your pantry.
  • Check whether the shape fits your intended items, such as cans, spice packets, snack bars, tea boxes, produce, or baking add-ins.

Fit, visibility, and everyday reach

The most important measurement is often depth. A deep bin can turn a shelf into a drawer-like zone, but it can also become heavy and awkward if it holds too many cans or jars. A shorter bin may be easier for children or guests to use, while a longer one may work for backup snacks that are not opened every day. If the pantry has fixed shelves, remember that stacking two bins can reduce the usable height between shelves.

Visibility changes how often the system gets used. Clear bins make it easier to spot the last oatmeal packet or an opened bag of chips, but they also show clutter. Opaque or frosted bins can create a calmer shelf, though they may need labels if several bins look alike. Open fronts can help with quick access, while straight-sided bins may be better for items that need to stay contained.

Handles should match the shelf height. A front cutout is helpful when a bin sits at eye level or below. Side handles may be useful on open shelves but less helpful inside a narrow cabinet. If the bin will sit above shoulder height, avoid layouts that require lifting a loaded bin down at an awkward angle.

Stacking and weight tradeoffs

Stackable pantry bins are tempting because they promise more vertical storage without installation. That only works when the stacked items are light enough and the shelf remains easy to use. Snack pouches, tea bags, napkins, lightweight packets, and small boxed goods are better candidates than dense cans, glass jars, or large bottles.

If the bins rely on lids or raised edges to stack, confirm what is included in the current option. A lid may create a flatter top, but it can also add a step every time someone needs a snack. Open stacking can be faster, but the upper bin may block access to the lower one. In many pantries, using one stackable set for lightweight overflow and a separate shelf riser for cans is more practical than forcing every item into bins.

Cleaning matters too. Pantry bins collect crumbs, seasoning dust, and sticky residue from opened packages. Smooth corners are easier to wipe than decorative ridges or narrow seams. If dishwasher-safe cleaning is important, check the current care instructions rather than assuming all plastic storage bins can handle heat.

Limitations

  • Search results can change, so dimensions, set counts, and stacking claims should be checked on the current retailer page.
  • Bins organize loose items, but they do not seal food the way lidded food storage containers do.
  • Stacked bins can become inconvenient if the lower bin is used more often than the upper one.
  • Clear bins show contents quickly, but they can also make mixed packaging look visually busy.
  • Heavy cans, jars, bottles, or bulk bags may exceed what a lightweight pantry bin can handle comfortably.

Alternatives to compare

  • Shelf risers for cans, jars, and spices that need a stepped view instead of a pull-out bin.
  • Airtight food storage containers for flour, cereal, rice, or dry goods that need sealed storage.
  • Lazy Susan turntables for condiments, oils, or small jars in corner cabinets.
  • Drawer dividers or snack organizers if the clutter problem is inside a drawer rather than on a shelf.
  • Installed pull-out baskets when a deep pantry needs hardware-based access instead of removable bins.

FAQ

Are stackable pantry bins worth it for a small kitchen?

They can be, especially when one shelf needs clearer zones for snacks, packets, or lightweight backup items. In a very small kitchen, measure carefully so the bins add usable access rather than taking up shelf height you cannot spare.

What should I put in stackable pantry bins?

They work best for lightweight, frequently used categories such as snack bars, tea bags, seasoning packets, drink mixes, pouches, small baking add-ins, and lunchbox items. Heavy cans and glass jars may be better on a shelf riser or a sturdier pull-out system.

Do pantry bins need lids?

Not always. Open bins are faster for daily snacks and packets, while lids can help with stacking or dust control. If you need freshness or pest protection, compare sealed food storage containers instead of relying on open pantry bins.

How do I choose the right pantry bin size?

Measure the shelf first, then subtract room for your hand to pull the bin forward. Also check the tallest item you plan to store and whether two stacked bins would still leave enough clearance under the shelf above.

Are clear or opaque pantry bins better?

Clear bins make it easier to see when a category is running low. Opaque bins can look calmer on open shelves but may need labels. The better choice depends on whether fast visibility or a cleaner visual appearance matters more in your kitchen.

Entryway Boot Trays for Wet Shoes, Mudrooms, and Small Hallways

Product links are for reference. Verify current details on the retailer page before buying.

Illustrative image for an entryway boot tray buying guide

Illustrative image, not an official product photo.

Short answer

An entryway boot tray is a simple way to keep wet shoes, muddy boots, pet leashes, umbrellas, and winter gear from spreading mess across the floor. The useful details are not complicated, but they matter: measure the space beside the door, choose a rim high enough for slush or drips, make sure the surface is easy to rinse or wipe, and decide whether you need a narrow hallway tray, a wider family mudroom tray, or a decorative mat-style option that stays visible all year.

Search reference

Compare entryway boot tray options

Use the search page to compare current tray sizes, rim heights, surface textures, materials, and color options before matching one to the door area you use most.

View matching options

Think about the mess route through the door

A boot tray works best when it sits exactly where shoes are removed, not where the entryway happens to look neat in a photo. Watch the normal path through the door for a day: where do people step first, where do they drop bags, and where do wet soles usually touch the floor? A tray placed too far from the threshold can become another object to step around instead of a habit everyone uses.

The shape should match the doorway. A narrow apartment hallway may need a long, shallow tray that fits two or three pairs without blocking the door swing. A mudroom may be better served by a wider tray that can handle boots, kids’ shoes, and a dripping umbrella at the same time. If the tray will sit under a bench, check both the footprint and the clearance above the tray so taller boots still fit.

Rim height is the main difference between a shoe mat and a true boot tray. A low rim may be easier to step over and look cleaner in a front hall, while a taller rim is more helpful for melting snow, muddy gardening shoes, and rainy-day gear. The right choice depends on whether the tray is mostly for everyday shoe parking or for catching actual water and debris.

Who this is for

  • Homes where rain, snow, garden soil, beach sand, or muddy sidewalks regularly come in on shoes.
  • Small apartments that need a defined landing zone near the door without installing shelves or racks.
  • Families that want boots, kids’ shoes, umbrellas, and pet-walking items contained in one easy-to-clean spot.
  • Renters who need floor protection but cannot change the entryway flooring or add permanent storage.
  • Mudrooms, garages, laundry rooms, and side entrances that need a practical place for wet footwear.

Who should skip it

  • Entryways that already stay dry with a washable doormat and a separate shoe rack.
  • Homes that need vertical shoe capacity more than floor-level water containment.
  • Doorways so tight that a raised rim would create a tripping point or stop the door from opening fully.
  • Anyone storing tall boots under a bench without confirming the tray height and available clearance.

What to verify before buying

  • Measure the available floor area, including door swing, baseboards, bench legs, and nearby closet doors.
  • Check outside dimensions and usable inside dimensions; raised rims can reduce the space available for shoes.
  • Compare rim height with the kind of mess you expect, such as light drips, melting snow, or muddy boots.
  • Review material wording and care instructions, especially if the tray will sit in direct sun, a cold garage, or a damp mudroom.
  • Look at surface texture, drainage channels, or raised grids if wet soles need to sit above pooled water.
  • Confirm whether the underside is likely to stay put on your floor type or whether you may need a separate non-slip pad.
  • Decide whether appearance matters because the tray will be visible in a front entry rather than hidden in a utility area.

Size, rim height, and daily use

Start with the number of pairs that need to land on the tray at the same time. A two-person household may only need space for everyday shoes and one wet pair. A family entry can fill quickly with boots, sneakers, sandals, and the footwear guests remove near the door. If the tray is too small, shoes spill over the edge and the tray stops protecting the floor.

Depth is easy to underestimate. Adult boots and larger shoes may need more front-to-back room than a slim hallway tray provides. If shoes are placed sideways to fit, water can drip outside the rim. A longer but shallower tray may work for narrow halls, while a deeper tray is usually more comfortable in a mudroom or garage entry.

Rim height should be practical, not just high. A very low lip may only catch dust and light moisture. A taller lip can hold melting snow, pebbles, and mud, but it can also make the tray more noticeable underfoot. For older adults, children, or busy doorways, think carefully about whether the edge could become something people catch with a toe.

Materials and floor protection

Common boot trays are made from flexible plastic, rubber-like materials, metal, or decorative composites. Plastic and rubber-style trays are often easy to rinse and move, but you should still check the current care guidance. Metal trays can look tidy in a visible entry, though they may show scratches, dents, or water marks depending on finish and use.

The underside matters as much as the top. A tray that slides every time someone steps near it can be annoying and may scratch or scuff certain floors. If the entry has tile, hardwood, laminate, vinyl, or painted concrete, think about moisture trapped beneath the tray. Lifting and drying the area occasionally is safer than assuming a tray can sit in one place all season without attention.

Surface texture changes how the tray handles water. Raised channels or a grid-like pattern can keep shoe soles slightly above pooled water, while a smooth tray is easier to wipe quickly. Deep grooves may catch grit and require more rinsing. If the tray will collect leaf bits, road salt, potting soil, or pet mess, choose a shape that can be cleaned without a brush getting stuck in tiny corners.

Where a tray fits better than a rack

A shoe rack organizes pairs vertically, but it does not always catch drips. A boot tray is better when the problem is wetness or dirt rather than capacity. Many homes use both: a tray for the pairs currently drying and a rack or closet shelf for shoes that are already clean.

Boot trays can also be useful beyond footwear. They can sit under a dog bowl in a utility room, hold potted plants temporarily, catch water from an umbrella stand, or protect a garage floor under small outdoor items. If you plan to use one this way, verify the material and size for that purpose instead of assuming every entry tray can handle the same load or moisture level.

For a front entry, appearance may matter more than maximum capacity. A dark rubber tray can disappear near a side door, while a decorative tray may look better beside a console table. In a working mudroom, easy cleaning and enough space usually matter more than color.

Limitations

  • Search results can change, so dimensions, material wording, color availability, and included pieces should be checked on the current retailer page.
  • A boot tray contains water and debris only when shoes actually fit inside the raised edge.
  • Raised rims can be awkward in tight hallways, especially where people step through quickly.
  • A tray does not dry shoes by itself; wet footwear may still need ventilation and time.
  • Moisture trapped under any floor-level tray can be a problem if the area is not cleaned and dried periodically.

Alternatives to compare

  • Washable entry mats for low-profile dirt control when standing water is not the main issue.
  • Freestanding shoe racks when the entry needs more pairs stored vertically.
  • Over-the-door shoe organizers for closets where floor space is already crowded.
  • Mudroom benches with cubbies when seating and storage need to be combined.
  • Umbrella stands, wall hooks, or small caddies if the main clutter comes from rain gear rather than shoes.

FAQ

What size boot tray do I need for an entryway?

Measure the floor area first, then count how many pairs need to sit on the tray at one time. Leave room for the door to open and for people to step around the tray without catching the raised edge.

Is a rubber or plastic boot tray easier to clean?

Both can be practical, but the surface design matters. Smooth trays are usually faster to wipe, while deep grooves or raised patterns may need rinsing to remove grit, salt, or mud.

Should a boot tray have a high rim?

A higher rim is useful for melting snow, heavy rain, muddy boots, and gardening shoes. A lower rim may be enough for light drips and can feel less intrusive in a narrow hallway.

Can I put a boot tray on hardwood or laminate flooring?

You can use one as a protective landing area, but do not let moisture sit underneath for long periods. Lift the tray occasionally, dry the floor, and check whether the underside is appropriate for your floor finish.

Is a boot tray better than a shoe rack?

It solves a different problem. A boot tray catches water, mud, and debris from shoes that are currently in use, while a shoe rack stores more pairs vertically. Many entryways benefit from using a tray for wet shoes and a rack for dry storage.

Mesh Laundry Bags for Delicates, Dorms, and Shared Washers

Product links are for reference. Verify current details on the retailer page before buying.

Illustrative image for a mesh laundry bags buying guide

Illustrative image, not an official product photo.

Short answer

Mesh laundry bags are useful when small garments disappear in shared machines, delicate fabrics need gentler handling, or a household wants a simple way to sort socks, undergarments, baby clothes, or travel laundry before wash day. The most important buying details are not just the number of bags in a set. Compare mesh density, zipper protection, seam construction, bag sizes, and whether the shapes match the items you actually wash.

Search reference

Mesh laundry bag options

Compare current bag sizes, mesh styles, zipper covers, set combinations, and care instructions before choosing bags for delicates, socks, dorm laundry, or travel packing.

View matching options

Start with the laundry problem you are solving

A mesh laundry bag can do several jobs, but one bag shape rarely does all of them equally well. A small fine-mesh pouch may keep baby socks or lingerie from vanishing into a washer seal. A medium rectangular bag can separate workout pieces, masks, or lightweight tops. A large bag may help carry dorm laundry or protect sweaters from tangling, although overfilling it can reduce washing and rinsing movement.

Think about where the bag will be used. In a home laundry room, you may want a set that lives beside the hamper and separates garments before the cycle starts. In a dorm or apartment building, stronger zipper details and easy-to-spot sizes can matter because the bags may travel between a room, elevator, laundry basket, and shared machines. For travel, flat bags can double as suitcase organizers until laundry day.

The goal is organization and reduced snagging risk, not a guarantee that every fabric becomes machine-wash safe. Garment labels still matter, and some items need hand washing, a garment-specific cycle, or professional care instead of a mesh bag.

Who this is for

  • Households that lose small socks, undergarments, reusable pads, or baby items in the wash.
  • Dorm residents and apartment dwellers using shared washers and dryers.
  • People who want to separate delicates from towels, jeans, zippers, and heavier clothing.
  • Travelers who pack lightweight laundry bags for clean-and-worn clothing separation.
  • Anyone building a simple sorting routine before laundry reaches the machine.

Who should skip it

  • Skip mesh bags if you expect them to make every delicate garment safe for a normal wash cycle.
  • Use a sturdier laundry tote or hamper if the main need is carrying heavy loads, not protecting small garments.
  • Avoid very large bags for tightly packed loads if you need garments to move freely for washing and rinsing.
  • Do not use a generic mesh bag for items whose care label clearly requires hand washing, dry cleaning, or another special method.

What to verify before buying

  • Check the size mix in the set and match it to socks, bras, sweaters, baby clothes, athletic wear, or travel clothing.
  • Compare fine mesh and wider mesh; fine mesh can hold small items better, while wider mesh may allow more water movement.
  • Look for zipper covers or elastic zipper garages that help keep the pull from catching on other garments.
  • Review seam reinforcement, fabric edge binding, and whether the bag shape looks flat, boxy, cylindrical, or bra-specific.
  • Confirm whether the bags are intended for washing only or for both washing and drying.
  • Read the current care instructions instead of assuming every mesh bag tolerates the same water temperature or dryer setting.
  • Check whether accessories shown in photos are included or simply used for styling.

Buying notes for real laundry routines

Bag size should follow the garment, not the other way around. A bra or structured delicate may need enough room to sit without being crushed, while tiny socks need a pouch small enough that they do not scatter inside a half-empty bag. If you buy a multi-size set, decide where each size will live so the smallest bags do not disappear before laundry day.

Mesh density changes the tradeoff. Fine mesh is helpful for very small pieces and fabrics that snag easily, but it can reduce how much water and detergent move through a tightly packed bag. Wider mesh may clean and rinse more freely, yet it can let hooks, straps, or tiny pieces work closer to the openings. The best choice depends on what you wash most often.

Zippers deserve close attention. A zipper that opens during the cycle defeats the purpose of the bag, while an exposed metal pull can catch on other laundry. Many shoppers should look for a covered pull, a tucked zipper end, or a design that clearly shows how the closure stays shut. If you use shared machines, a visible zipper color can also make the bag easier to find quickly.

Do not overfill the bag. Clothes need movement for washing, rinsing, and spinning. A bag that is packed like a travel cube may protect items from tangling, but it can also limit cleaning. For mixed household loads, two or three medium bags may work better than one stuffed large bag.

Limitations

  • A mesh bag reduces contact and tangling, but it cannot override a garment’s care label.
  • Overfilled bags can limit cleaning, rinsing, and spin performance.
  • Zippers, seams, and mesh fabric can wear over time, especially in heavy or frequent loads.
  • Fine mesh may hold lint or detergent residue if the bag is packed too tightly.
  • Search results change, so confirm the current size set, closure details, and care guidance on the retailer page.

Alternatives to compare

  • A divided laundry hamper if the main problem is sorting loads before wash day.
  • A sturdy laundry backpack or tote for carrying clothing to a dorm or apartment laundry room.
  • Hand-wash basins or drying racks for garments that should not go through a machine cycle.
  • Bra-specific wash cases for structured items that need shape support.
  • Small fabric pouches for travel organization when you do not plan to put the pouch in the washer.

FAQ

What size mesh laundry bag should I use for delicates?

Choose a bag that gives the garment room to move without folding it tightly. Small pouches work for socks and tiny items, medium bags fit many undergarments or lightweight tops, and larger bags are better for sweaters or grouped travel laundry when they are not overfilled.

Are fine-mesh laundry bags better than wide-mesh bags?

Fine mesh is helpful for small items and snag-prone fabrics, while wider mesh may allow more water movement through the bag. The better option depends on whether your priority is holding tiny pieces securely or washing bulkier garments with more flow.

Can mesh laundry bags go in the dryer?

Some are intended for dryer use and some are not. Check the current care instructions before drying, especially if the bag has a zipper, elastic cover, coating, or delicate seam binding.

How full should a laundry bag be?

Leave enough space for garments to shift inside the bag. If the bag is packed solid, water and detergent may not circulate well, and the items may not rinse or spin as effectively.

Do mesh bags protect clothes from all damage?

No. They can reduce tangling, snagging, and separation problems, but they do not make harsh cycles safe for every fabric. Always follow garment care labels and use the appropriate washer setting for the items inside.

Drawer Organizer Trays for Kitchens, Desks, and Everyday Small Items

Product links are for reference. Verify current details on the retailer page before buying.

Illustrative image for a drawer organizer trays buying guide

Illustrative image, not an official product photo.

Short answer

Drawer organizer trays work best when a drawer already has a clear job: cutlery beside the sink, pens near a work surface, hair ties in a vanity drawer, or small tools in an entryway console. Start by emptying the drawer and grouping the items you actually keep there. Then compare tray dimensions, compartment shapes, material, cleanability, and whether the layout leaves enough open space for the few oversized items that never fit a perfect grid.

Search reference

Drawer organizer tray options

Compare compartment layouts, outside dimensions, material, drawer depth, and cleaning instructions before choosing trays for a specific drawer.

View matching options

Organize the drawer before choosing the organizer

A tray can make a drawer easier to use, but it cannot decide what belongs in that drawer. The most useful first step is to sort the contents into groups: everyday utensils, backup utensils, office supplies, cosmetics, batteries, keys, craft tools, or small hardware. If the drawer is holding several unrelated categories, a single molded tray may create more frustration than order.

Measure the drawer after removing bulky items and loose packaging. Note the inside width, depth, and height, then subtract a little room so the tray can slide in without scraping. For kitchen drawers, also check whether handles, serving spoons, peelers, or chopsticks are longer than standard compartments. For desk and vanity drawers, short compartments can be helpful for clips and bands, while longer channels are better for markers, brushes, and cords.

Think about maintenance. A kitchen tray may collect crumbs, spice dust, or utensil marks. A bathroom tray may need to handle damp items. A desk tray may only need a quick dusting. Material choice matters less as a status feature and more as a cleaning and fit decision.

Who this is for

  • Households trying to make a kitchen utensil drawer easier to scan during cooking.
  • Home office users who want pens, sticky notes, clips, chargers, and small tools separated.
  • Renters or first-apartment shoppers who need flexible organization without built-in cabinetry changes.
  • Parents setting up a craft, homework, or lunch-packing drawer with repeatable places for small items.
  • Anyone turning a catch-all drawer into a focused storage spot instead of a daily search zone.

Who should skip it

  • Skip fixed trays if the drawer contents change weekly or include many oddly shaped items.
  • Use a deeper bin or caddy if items need to be carried from room to room instead of stored in one drawer.
  • Avoid tall trays in shallow drawers; even a good layout is annoying if the drawer rubs or jams.
  • Do not rely on a tray alone for sharp tools, medications, batteries, or child-safety concerns that need more deliberate storage.

What to verify before buying

  • Measure the inside drawer width, depth, and usable height, not just the cabinet face.
  • Compare compartment length with your longest utensil, brush, marker, tool, or charger cable.
  • Check whether the tray is one fixed piece, a set of separate bins, expandable, or made with movable dividers.
  • Review material wording, edge shape, non-slip features, and whether the bottom may slide on smooth drawer liners.
  • Verify cleaning instructions, especially for kitchen, bathroom, craft, or makeup storage.
  • Check listing photos carefully to see whether accessories shown inside the trays are included or only display props.
  • Confirm the quantity and outside dimensions of every tray in the set before assuming it fills a drawer.

Choosing a layout that will stay useful

Fixed utensil trays are simple when the drawer has one predictable purpose. They are usually easiest for forks, spoons, knives, and a few cooking tools, but they can waste space if the drawer holds a mixed group. Separate modular trays give more freedom because you can leave open pockets for bulky items or rearrange the drawer after a few weeks of use.

Expandable trays can be helpful in wider kitchen drawers, but the expanded side sections are not always the same size as the main compartments. Before choosing one, decide what will live in the extra width. A side channel can work for tongs, straws, food clips, or measuring spoons, but it may not suit wide spatulas or stacked gadgets.

Clear trays make it easy to see crumbs and small items, which can be good or bad depending on the drawer. Bamboo or wood-look trays can feel warmer in a kitchen or desk, but buyers should still verify care instructions and actual material wording. Plastic trays can be light and easy to wipe, yet very thin walls may flex when a drawer is packed tightly. Metal mesh can work for office supplies, though small pieces may catch in openings.

If you are organizing a catch-all drawer, consider using several smaller trays rather than one large insert. The goal is not to fill every inch. A little empty space helps when a new tape roll, charger, notepad, or measuring spoon temporarily joins the drawer.

Limitations

  • A tray cannot fix a drawer that is storing too many unrelated categories.
  • Very specific compartment shapes may become inconvenient when your tools or utensils change.
  • Separate bins can shift unless the drawer liner, tray bottom, or layout keeps them stable.
  • Shallow trays may not contain tall items when the drawer opens quickly.
  • Materials and cleaning guidance vary, so verify the current retailer details before using trays in damp or messy areas.

Alternatives to compare

  • Adjustable drawer dividers for large open drawers or changing storage needs.
  • Small open bins for bathroom, craft, or utility drawers with mixed item sizes.
  • A countertop caddy when items need to move between rooms or work areas.
  • Drawer liners for reducing sliding when you already like the existing layout.
  • Wall hooks, rails, or countertop crocks for long utensils that do not fit comfortably in a drawer.

FAQ

How do I measure a drawer for organizer trays?

Measure the inside width from side to side, the inside depth from front to back, and the usable height below any drawer frame or countertop lip. Leave a little clearance so the tray can be placed and removed without scraping.

Are separate trays better than one large insert?

Separate trays are better when the drawer holds mixed items or may change over time. One large insert is simpler when the drawer has a stable purpose, such as everyday flatware or a focused desk-supply drawer.

What material works best for kitchen drawer organizers?

There is no single best material for every kitchen. Compare cleanability, moisture guidance, wall thickness, edge finish, and whether the tray fits your utensils without forcing long tools into short compartments.

Can drawer organizer trays help with junk drawers?

They can help if you first narrow the drawer to a few useful categories, such as batteries, tape, pens, and keys. If everything stays in the drawer, trays may only create smaller piles instead of a more usable system.

Should organizer trays fill the whole drawer?

Not always. Leaving some open space can make room for oversized tools, temporary items, or a future category. A drawer that is completely packed with compartments can be harder to adapt.

Choosing a Shower Caddy That Actually Fits Your Bathroom

Product links are for reference. Verify current details on the retailer page before buying.

Illustrative image for a shower caddy buying guide

Illustrative image, not an official product photo.

Short answer

A shower caddy is a good upgrade when bottles, razors, soaps, and washcloths keep crowding the tub ledge or shower floor. The right option depends on where it will attach, how much water reaches it, whether your bottles fit upright, and how easily you can clean behind it. Before choosing one, compare the mounting method, surface compatibility, drainage, shelf spacing, stated load guidance, material wording, and whether the layout works for a shared bathroom or a single-user shower.

Search reference

Compare shower caddy options

Use the search page to compare current hanging, corner, adhesive, suction, and tension-pole layouts before matching one to your shower space.

View matching options

Start with the shower, not the shelf

A shower caddy looks simple until it meets a real bathroom. A hanging model may need a shower arm with the right shape and enough wall clearance. Adhesive shelves need a surface that accepts the pad or strip. Suction cups can be convenient, but their usefulness depends on tile texture, grout lines, moisture, and weight. A tension-pole caddy can create vertical storage, but it needs a stable floor-to-ceiling or tub-to-ceiling span.

Look at the wettest area of the shower and the places you actually reach during a routine. If shampoo sits high but razors need to stay dry, one large basket may be less useful than several smaller levels. If multiple people share the bathroom, separate compartments can prevent the caddy from becoming another pile.

Who this is for

  • Renters who want more shower storage without a built-in renovation.
  • Small bathrooms where bottles and soaps have taken over the tub edge.
  • Shared households that need visible, separated storage for everyday products.
  • Guest bathrooms that need a neat place for basic toiletries and washcloths.
  • Buyers replacing a caddy that slips, traps water, stains surfaces, or is too cramped for current bottles.

When another storage plan may work better

A standard shower caddy may not solve the problem if the shower has textured stone, fragile tile, very narrow corners, unusual fixtures, or no good mounting surface. It also may be the wrong fix when you need child-safe storage, a sealed medicine area, a permanent built-in niche, or a place for heavy refill containers that exceed the listed load guidance.

What to verify before buying

  • Identify the mounting style: over-showerhead, over-door, adhesive, suction, corner shelf, freestanding, or tension pole.
  • Measure the available width, depth, vertical clearance, and distance from the shower spray.
  • Check whether the selected option works with your tile, glass, fiberglass, metal, painted surface, or shower door.
  • Compare shelf height and basket depth against the bottles and pump dispensers you use most often.
  • Look for drainage openings, removable trays, or open-wire layouts that reduce standing water.
  • Review the material and finish wording, including any care notes for damp environments.
  • Confirm stated load guidance, included hooks, soap dish placement, razor slots, and assembly or mounting parts.
  • Make sure the caddy leaves room to clean the wall, reach controls, and avoid blocking the shower stream.

Buying notes for wet bathroom storage

Mounting style changes the buying decision more than color or shape. Hanging caddies are easy to understand, but they can swing or slide if the top hook does not match the shower arm. Door-hanging designs can free the wall but may need enough clearance for the door to close properly. Adhesive shelves can look tidy, yet they depend on careful surface prep and the product’s stated installation limits.

Drainage is not just a neatness detail. Shelves that hold puddles can leave soap residue, encourage buildup, and make cleaning more annoying. Open baskets, slotted trays, and removable inserts are easier to evaluate than a smooth solid shelf with no obvious water path.

Bottle size matters because many modern pumps and refill bottles are taller or wider than older bath products. Check the shelf spacing and rail height before assuming a large bottle will stand upright. If several people use the same shower, consider whether the caddy separates tall bottles, smaller tubes, razors, and washcloths instead of mixing everything together.

Material claims should be read carefully. Metal, plastic, bamboo-look, and coated finishes can all work in the right setting, but damp bathrooms are hard on hardware. Rather than relying on a broad durability promise, check the care instructions, finish description, and any notes about ventilation, drying, or surface maintenance.

Limitations

  • Search results can change, so the linked page may show different mounting styles, bundles, or materials over time.
  • Product photos cannot confirm whether adhesive, suction, hooks, or poles will work with your exact bathroom surface.
  • Load guidance, finish performance, and long-term appearance can depend on installation, water exposure, ventilation, and cleaning habits.
  • A caddy can organize products, but it cannot fix poor drainage, loose tile, mildew problems, or unsafe storage habits.
  • Very heavy bottles, family-size refills, and crowded shared showers may require more than one storage solution.

Alternatives to compare

  • Built-in shower niches for a remodel or permanent upgrade.
  • Corner tension-pole organizers when vertical space is available.
  • Over-door shower organizers for stalls with a suitable door or enclosure.
  • Small waterproof bins outside the shower for backup bottles and less-used products.
  • Wall-mounted dispensers if the main goal is reducing bottle clutter rather than adding shelf space.

FAQ

Is a hanging shower caddy better than adhesive shelves?

Neither is automatically better. A hanging caddy can be easier to move, while adhesive shelves can look cleaner when the wall surface and installation instructions are a good match. Choose based on your fixture shape, wall material, bottle weight, and willingness to prep or remove adhesive.

What measurements matter for a shower caddy?

Measure the usable wall or corner area, shelf depth, height between tiers, door clearance if relevant, and the size of your tallest bottles. Also check whether the caddy will block controls, the shower stream, or normal cleaning access.

How can I reduce slipping or rust concerns?

Match the mounting method to the surface, follow the installation directions, avoid overloading the shelves, and choose a layout that drains well. For finish concerns, read the material wording and care instructions instead of assuming every metal or coated caddy performs the same way.

Should I choose a metal or plastic shower caddy?

Metal caddies can feel slim and sturdy, while plastic designs may be easier to rinse and less likely to scratch some surfaces. The better choice depends on drainage, weight, finish care, bottle size, and how damp the shower stays between uses.

Can one caddy work for a shared bathroom?

It can, but check the number of shelves, hooks, and compartments before relying on one organizer for several people. Shared bathrooms often work better with clear zones for tall bottles, small tubes, razors, soaps, and washcloths.

Choosing an Under-Sink Organizer for Awkward Cabinet Storage

Product links are for reference. Verify current details on the retailer page before buying.

Illustrative image for an under-sink organizer buying guide

Illustrative image, not an official product photo.

Short answer

An under-sink organizer is worth comparing when the cabinet has become a dark pile of cleaners, spare sponges, hair tools, trash bags, or bathroom supplies. The right choice depends less on how tidy it looks in a photo and more on whether it clears the drain pipe, garbage disposal, water lines, cabinet lip, and door hinges while still leaving space to reach shutoff valves and wipe up leaks.

Search reference

Compare under-sink organizer options

Use the search page to compare current shelf layouts, pull-out designs, height clearances, and mounting details before choosing one for your cabinet.

View matching options

Start with the cabinet, not the organizer

Under-sink storage is awkward because the most valuable space is interrupted by plumbing. A rectangular shelf may be perfect for a pantry cabinet but frustrating under a sink if the top tier collides with the drain trap or the sliding basket cannot pass the cabinet face frame.

Before shopping, empty the cabinet and note the usable footprint on each side of the plumbing. Check the width between the side wall and the pipe, the depth from the cabinet front to the back wall, and the height below the drain. Also look at the door opening, because some organizers fit inside the cabinet but cannot slide in through the front.

Kitchen sinks, bathroom vanities, laundry sinks, and utility cabinets can all need different layouts. A kitchen cabinet may need room for a disposal unit and cleaning bottles. A bathroom vanity may need smaller bins for toiletries, hair tools, and backup supplies. Treat the product photo as a layout idea, then match the actual dimensions to your cabinet.

Who this is for

  • Renters and homeowners trying to make daily cleaning supplies easier to reach.
  • Small bathrooms where the vanity cabinet needs to hold toiletries, paper goods, and extra grooming items.
  • Kitchens where bottles, dishwasher pods, trash bags, and scrub tools keep falling into one pile.
  • Shared households that need a clear place for frequently used supplies without remodeling the cabinet.
  • Buyers who want a removable storage upgrade rather than a built-in pull-out system.

Who should skip it

  • Anyone who cannot confirm the cabinet measurements or plumbing clearance before ordering.
  • Cabinets with active leaks, water damage, loose pipes, or electrical work that should be addressed first.
  • Households that need a custom built-in drawer system, child-safety locking plan, or exact match to existing cabinetry.
  • Very shallow vanities where a small open bin may work better than a sliding frame.

What to verify before buying

  • Measure usable width, depth, and height inside the cabinet, including the door opening.
  • Check the location of the drain trap, water lines, disposal unit, shutoff valves, and any filter hardware.
  • Confirm whether the organizer is freestanding, adhesive mounted, screw mounted, or designed to hook over a door.
  • Look at drawer travel and handle placement so the basket can open without hitting hinges or cabinet trim.
  • Review the material wording and care instructions, especially if damp bottles or cleaning sprays will sit on it.
  • Check whether baskets, dividers, hooks, liners, or assembly tools are included in the current option.
  • Make sure the layout still lets you inspect the cabinet floor and reach valves quickly.

Buying notes that matter under a sink

Two broad layouts show up often: open shelves that create vertical levels, and pull-out organizers that bring stored items toward the front. Open shelves can be simple and flexible, but items at the back may still be hard to reach. Pull-out baskets are easier to access, but they need enough clearance to move smoothly.

A narrow organizer can be useful beside a pipe, while a wider frame may work only when the plumbing is centered high enough or shifted to one side. If the product has adjustable shelves, verify the adjustment range rather than assuming it will clear every drain setup.

Material choice is also practical. Plastic baskets can be easy to wipe and may be less likely to scratch bottles. Metal frames can feel sturdy but may need protective coatings and good drying habits in damp cabinets. Wood-look or decorative pieces can be attractive in open vanity spaces, but hidden sink cabinets usually reward easy cleaning over appearance.

Think about what will live in the organizer. Tall spray bottles need vertical room. Shorter baskets work better for sponges, dishwasher tabs, grooming items, and spare soap. If children or pets are in the home, storage location and cabinet safety matter more than squeezing in the maximum number of items.

Limitations

  • Search results may include different cabinet sizes, mounting styles, and bundled accessories over time.
  • A product photo cannot confirm whether the organizer clears your exact drain, disposal, or valve placement.
  • Sliding baskets may feel less useful if the cabinet has a raised front lip or narrow door opening.
  • Adhesive or screw-mounted parts may not be suitable for every rental, cabinet finish, or damp surface.
  • Even a good organizer does not fix leaks, poor ventilation, or unsafe storage of household chemicals.

Alternatives to compare

  • Stackable open bins for shallow vanities or cabinets with low plumbing.
  • Lazy Susan turntables for round bottles in wider cabinets.
  • Door-mounted caddies when the cabinet floor must stay open for pipes or a trash bin.
  • Tension rods for hanging spray bottles if the drain layout leaves enough room.
  • Custom pull-out cabinet hardware when a built-in solution is worth the installation effort.

FAQ

How do I measure for an under-sink organizer?

Empty the cabinet, then measure the usable width, depth, and height around the plumbing rather than the full cabinet box. Include the door opening, front lip, hinges, and any hardware that could block a sliding basket.

Are sliding drawers always better under a sink?

Not always. Sliding drawers make items easier to reach, but they need clearance to open and can be blocked by pipes, trim, or a raised cabinet face. A simple open shelf or bin may work better in tight vanities.

What should I store on the lower level?

Put heavier or leak-prone items lower when the layout allows it, and keep frequently used bottles near the front. Avoid burying shutoff valves or anything you would need to reach quickly during a leak.

Can one organizer work for both kitchen and bathroom cabinets?

Sometimes, but the best layout may differ. Kitchens often need room for taller cleaning bottles and disposal hardware, while bathroom vanities may need smaller compartments for toiletries and grooming supplies.

Is adhesive mounting a good idea in a sink cabinet?

It can be convenient, but check the surface, moisture level, weight expectations, and removal concerns before relying on it. Freestanding organizers are easier to move, while screw-mounted systems may feel more secure when installation is appropriate.

Over-the-Door Shoe Organizers: Who They Fit and What to Check Before Buying

Product links are for reference. Verify current details on the retailer page before buying.

Illustrative image for an over-the-door shoe organizers buying guide

Illustrative image, not an official product photo.

Short answer

Over-the-door shoe organizers fit buyers who need shoe storage without adding a floor rack. Compare door fit, hook thickness, pocket or shelf layout, item capacity wording, material care, door swing clearance, and whether the organizer suits your shoe types before buying.

Search reference

Over-the-door shoe organizer options

Compare current options and verify details on the retailer page before buying.

View matching options

What this product type is

Over-the-door shoe organizers hang from a door to add vertical storage for shoes, sandals, accessories, or small closet items. Current listings vary by pocket count, tier layout, hook thickness, door clearance needs, fabric or mesh wording, weight guidance, and whether the organizer is better for shoes or mixed household storage. The main question is whether the door, closet, and items match the design.
This guide treats the seed listing as a category signal only. Compare current matching options and verify details on the retailer page before buying.

Who this is for

  • Small apartments, dorm rooms, closets, and entry areas with limited floor space.
  • Buyers who want shoes visible and easy to grab.
  • Households organizing sandals, flats, sneakers, or small accessories.
  • Renters who prefer non-permanent storage when door fit allows it.

Who should skip it

  • Choose a floor shoe rack if door clearance is tight or the door must close silently.
  • Skip pocket-style organizers if you mainly store tall boots or bulky shoes.
  • Avoid unclear listings when hook size, door fit, or material care is missing.

What to verify before buying

  • Check door thickness, top clearance, and whether included hooks fit your door.
  • Verify pocket count, shelf layout, and item size guidance.
  • Review material wording, stitching, mesh panels, and cleaning instructions.
  • Check whether the organizer may affect door closing or wall clearance.
  • Confirm whether it suits shoes, accessories, or mixed storage as intended.
  • Review current seller information, warranty terms, and return policy.

Main buying notes

Door fit comes first. Even a useful organizer can become annoying if the hooks scrape the frame or stop the door from closing properly.
Pocket layout should match shoe shape. Slim pockets may suit flats or sandals, while shelves may handle sneakers more comfortably.
Capacity wording should be treated as a rough guide. Bulky shoes can reduce the number of usable slots.
Material and cleaning details matter in entry areas. Verify whether dust, moisture, or scuffs can be managed with the care instructions shown.

Limitations

  • Door hooks may not fit every door or frame clearance.
  • Bulky shoes can reduce usable storage space.
  • A loaded organizer may swing or shift when the door moves.
  • Some designs may be visible from the room side of the door.

Alternatives to compare

  • Freestanding shoe racks for entryways or closets.
  • Under-bed shoe storage for seasonal pairs.
  • Stackable shoe boxes for dust protection.
  • Closet cubbies when permanent shelf storage is preferred.

FAQ

What should I verify before buying an over-the-door shoe organizer?

Verify door thickness, hook fit, pocket or shelf layout, item size guidance, material care, seller information, and return policy.

Can over-the-door shoe organizers hold boots?

Some may hold small or foldable boots, but many are better for flats, sandals, and sneakers. Verify current size guidance before buying.

Will an over-the-door shoe organizer stop my door from closing?

It can if the hooks are too thick or clearance is tight. Check door and frame clearance before buying.

How should I compare pocket and shelf shoe organizers?

Pocket organizers can save space for slim shoes, while shelf-style designs may work better for bulkier pairs. Compare layout with your shoe types.

What alternatives should I compare with over-the-door shoe organizers?

Compare freestanding racks, under-bed storage, stackable boxes, and closet cubbies depending on your space.

Laundry Hampers: Who They Fit and What to Check Before Buying

Product links are for reference. Verify current details on the retailer page before buying.

Illustrative image for a laundry hamper buying guide

Illustrative image, not an official product photo.

Short answer

Laundry hampers are useful when you want dirty clothes contained, sorted, and easier to carry. Compare capacity, footprint, handles, liner design, lid style, ventilation, and whether the hamper fits your bedroom, bathroom, dorm, or laundry area.

Search reference

Laundry hamper options

Compare current options and verify details on the retailer page before buying.

View matching options

What this product type is

A laundry hamper is a home storage container for clothing before washing. Options range from soft foldable baskets to structured hampers with lids, removable liners, dividers, wheels, or handles.

This guide treats the seed listing as a category signal only. Compare current matching options and verify details on the retailer page before buying.

Who this is for

  • Bedrooms, bathrooms, dorm rooms, and laundry closets that need cleaner clothing storage.
  • Households that want one container for daily laundry buildup.
  • Buyers who carry laundry between rooms or floors.
  • People comparing lids, liners, and divided sorting options.

Who should skip it

  • Skip large hampers if floor space is tight and a slim basket would fit better.
  • Skip lidded designs if you prefer maximum airflow.
  • Compare rolling carts if you move heavy laundry over longer distances.

What to verify before buying

  • Check capacity, height, width, and whether it fits your target location.
  • Verify handle style, liner attachment, and whether the liner is removable.
  • Compare lid design, opening size, and ventilation.
  • Check whether the hamper folds, stands rigidly, or needs assembly.
  • Review material notes, cleaning guidance, and moisture limitations.
  • Review seller information and return policy before buying.

Main buying notes

Capacity matters, but footprint matters too. A tall hamper may hold a lot while still fitting into a narrow corner.

Handles and liners change daily convenience. If you carry laundry to another room, verify how the load is supported.

Lids can hide clutter, but airflow may be better in open designs. Choose based on where the hamper will sit.

Material choice affects care. Fabric, bamboo, plastic, metal frames, and collapsible panels can behave differently in damp rooms.

Limitations

  • A hamper does not remove moisture or odor by itself.
  • Large soft hampers may lose shape when empty or overloaded.
  • Removable liners and handles can wear differently from the outer frame.
  • Size photos can be misleading, so verify dimensions before buying.

Alternatives to compare

  • Rolling laundry carts for heavier loads.
  • Slim laundry baskets for narrow spaces.
  • Divided sorters for separating clothing types.
  • Mesh laundry bags for dorms, gyms, or shared laundry rooms.

FAQ

What size laundry hamper should I compare?

Compare the capacity and footprint against your laundry volume, room size, and how often you wash clothes.

Is a lid useful on a laundry hamper?

A lid can hide clutter, but open designs may provide more airflow. Choose based on room placement and preference.

Should I choose a removable liner?

A removable liner can make carrying laundry easier, but you should verify how it attaches and how much weight it can handle.

Can a laundry hamper be used in a bathroom?

It can, but verify material notes and moisture guidance if the room gets humid.

What should I verify before buying?

Verify dimensions, capacity, handles, liner design, lid style, ventilation, material notes, and return policy.

Closet Organizers: Who They Fit and What to Check Before Buying

Product links are for reference. Verify current details on the retailer page before buying.

Illustrative image for a closet organizer buying guide

Illustrative image, not an official product photo.

Short answer

Closet organizers are useful when your closet has wasted vertical space or mixed storage needs. Measure carefully, compare installation requirements, and verify load guidance before choosing a system.

Search reference

Closet organizer options

Compare current options and verify details on the retailer page before buying.

View matching options

What this product type is

A closet organizer adds shelves, hanging space, drawers, cubes, or modular sections to a closet. The right choice depends on closet width, wall type, installation method, load guidance, and the mix of folded clothes, shoes, bags, and hanging garments you need to store.

This guide treats the seed listing as a category signal only. Compare current matching options and verify details on the retailer page before buying.

Who this is for

  • Homeowners or renters who need more structured clothing storage.
  • People organizing shared bedrooms, kids rooms, entry closets, or guest rooms.
  • Buyers comparing shelves, rods, drawers, cubes, and shoe storage in one setup.
  • Anyone planning a closet refresh without custom built-ins.

Who should skip it

  • Skip fixed systems if you cannot drill, anchor, or alter the closet area.
  • Skip large kits if you have not measured width, depth, height, and door clearance.
  • Compare freestanding racks if you move often or need temporary storage.

What to verify before buying

  • Measure closet width, depth, height, baseboards, and door swing before buying.
  • Confirm installation method, required tools, wall support, and mounting hardware details.
  • Verify load guidance for shelves, rods, drawers, and any modular sections.
  • Check whether parts can be trimmed, expanded, or rearranged for your closet layout.
  • Review finish, material notes, cleaning instructions, and current package contents.
  • Review seller information and return policy before buying.

Main buying notes

The biggest mistake is buying before measuring. Closet kits can look flexible, but real spaces have trim, doors, vents, outlets, and uneven walls.

Think by storage job. Hanging rods help shirts and jackets, shelves help folded clothes, drawers hide small items, and open cubes keep daily items visible.

Installation requirements matter. Some systems need wall anchoring, cutting, or extra tools. Verify the current retailer page and manufacturer instructions before buying.

A modular system can be easier to adjust over time, but modular parts still need the right dimensions and support.

Limitations

  • A closet organizer cannot fix poor measurements or weak wall support.
  • Some kits may require cutting, drilling, anchoring, or additional tools.
  • Load guidance depends on installation quality and wall conditions.
  • Large components can be difficult to return or move after assembly.

Alternatives to compare

  • Freestanding garment racks for temporary hanging storage.
  • Fabric hanging shelves for lightweight folded items.
  • Under-bed storage bins for seasonal clothing.
  • Drawer units or baskets if closed storage matters more than rods.

FAQ

What should I measure before buying a closet organizer?

Measure width, depth, height, baseboards, door clearance, wall obstacles, and the space needed for hanging clothes.

Do closet organizers always require drilling?

No, but many fixed systems do. Verify the current installation method, hardware, and wall support requirements before buying.

How do I choose the right layout?

Start with what you store: hanging clothes, folded clothes, shoes, bags, accessories, and seasonal items all need different sections.

Are modular closet organizers better?

They can be easier to adjust, but only if the dimensions, hardware, and load guidance match your closet and storage needs.

What should I verify on the retailer page?

Verify dimensions, package contents, materials, installation method, load guidance, finish, seller information, and return policy.