A Cookbook Stand for a Busy Kitchen Counter: Page Support, Angle, and Cleanup

Product links are for reference. Verify current details on the retailer page before buying.
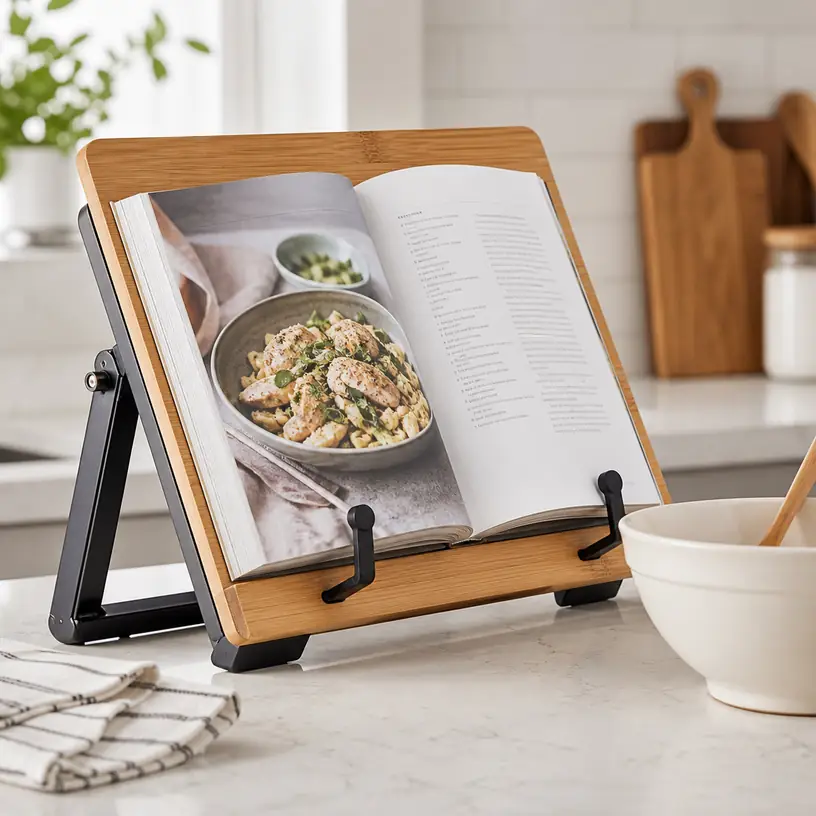
Illustrative image for a cookbook stand buying guide

Illustrative image, not an official product photo.

Short answer

A useful cookbook stand should keep the recipe readable without occupying the prep space needed for bowls, boards, and hot pans. Begin with the formats you actually cook from: a thick hardcover needs a deeper ledge and steadier base than a slim magazine, while a tablet introduces button access and charging-cable concerns. Check whether the viewing angle works at your eye level, whether page holders can move without covering ingredient quantities, and whether the stand can be wiped after a splash. A folding design is valuable in a small kitchen only if it remains stable when open and has a realistic place to go when cooking ends.

Search reference

Cookbook stand options

Compare stands by usable ledge depth, page-control design, viewing-angle range, counter footprint, cleaning guidance, and folded dimensions.

View matching options

Start with the recipe, not the stand

Cookbooks vary more than styled product photos suggest. A compact spiral-bound collection can lie nearly flat, whereas a new hardcover may push firmly against its pages until the binding relaxes. Loose printouts need broad backing so they do not slump, and a recipe displayed on a phone or tablet needs an unobstructed screen and access to controls. The most useful stand is therefore the one that fits your recurring recipe format, not necessarily the largest model.

Measure a few closed books and then open them to a typical recipe. Note the spine thickness, total spread, and how much force the pages need to remain in place. Compare those observations with the stand’s stated ledge depth, backing width, and page-holder arrangement. If a listing only shows a thin book, do not assume a deeper volume will sit securely.

The location matters too. A stand placed beneath an upper cabinet may have limited vertical clearance, especially when a tall book opens at an upright angle. On an island, the same design may have plenty of room but need better resistance to sliding. Choose the intended counter position before evaluating dimensions.

Who this is for

  • Home cooks who regularly follow recipes from hardcover books, spiral books, magazines, or printed sheets.
  • Bakers who want instructions at eye level while both hands are occupied with measuring and mixing.
  • Small-kitchen users looking to separate a recipe from damp or crowded prep surfaces.
  • Households that alternate between printed recipes and a tablet and can verify that one stand supports both formats.
  • Gift buyers who know the recipient’s counter space and usual cookbook size well enough to choose a practical footprint.

Who should skip it

  • Someone who cooks almost entirely from memory may not gain enough value to justify permanent counter or cabinet space.
  • A wall-mounted rail, shelf, or under-cabinet holder may suit a kitchen with almost no spare work surface.
  • A basic tablet stand may be a better fit when printed books are never used and charging access is the main concern.
  • Loose recipe cards may be easier to manage in a small clip holder rather than on a full-size book stand.
  • If recipes are routinely exposed to heavy splashes, a protected printout or device-safe setup may be more practical than placing a valuable book near the work zone.

What to verify before buying

  • Compare the usable ledge depth with the thickness of an open cookbook, not just its closed spine.
  • Check the backing width and height against large books, binders, magazines, or letter-size printouts used in your kitchen.
  • Confirm how many viewing positions are available and whether the hinge or support locks at each position.
  • Look closely at page holders: note their reach, tension, tip covering, and whether they can move away from important text.
  • Measure the stand both open and folded, including any rear support that extends behind the book.
  • Review the current material and cleaning instructions, particularly for hinges, unfinished edges, pads, and clear panels.
  • If the stand may hold a tablet, verify device thickness, case compatibility, control access, ventilation needs, and charging-cable clearance.
  • Check what assembly is required and whether protective feet or pads are included rather than merely shown.
  • Identify a storage location before choosing a heavy fixed stand or a wide folding model.

The viewing angle changes the working footprint

An upright recipe is easy to scan across the counter and usually consumes less depth at the front. It can also bring a tall book close to an upper cabinet. A lower angle may feel more natural when the stand sits nearby, but it pushes the rear support farther back and may collect more overhead splashes. Adjustable stands offer flexibility, though adjustment hardware adds parts that must stay secure and clean.

Test the angle using an improvised support at the counter where you normally cook. Stand where you mix or chop rather than directly in front of the recipe. You should be able to read a line without bending repeatedly or turning the book toward you each time. Household members of different heights may benefit from multiple positions, while a single cook with a fixed setup may prefer a simpler stand with fewer joints.

Depth measurements can be misleading when they describe only the folded item. Look for the open footprint at the intended angle. Leave room to lift a book on and off without striking a cabinet, utensil crock, or backsplash outlet.

Page control should be gentle and movable

Page arms solve a familiar problem, but their shape determines whether they help or interrupt the recipe. Short arms may not restrain a stiff hardcover. Long arms can reach farther across the page yet cover measurements printed near the lower edge. Flexible or pivoting arms can move around text, although they should not require so much pressure that turning a page becomes a two-handed task.

Consider the contact point. A covered tip may be gentler on paper than a sharp exposed edge, but the actual construction needs to be checked on the current listing. Collectible, fragile, or heavily used books deserve particular care. Avoid forcing a tight binding flat merely to fit the stand; a deeper ledge and a more supportive angle may reduce that strain.

For loose pages, backing coverage matters as much as the holders. A single sheet can curl around a narrow frame or move in airflow from a vent. A broad back offers support but creates more surface area to wipe. If recipes arrive as several printed sheets, decide whether you want to stack them, clip them, or turn them during cooking.

Stability depends on the counter and the load

A broad base is not automatically stable on every surface. Countertop texture, foot material, rear-support geometry, and the book’s center of gravity all play a role. A heavy book positioned too far forward can tip a shallow stand; a light folding stand may slide when a stiff page is turned. Product weight is useful context, but it should be considered alongside the open footprint and support design.

Non-slip feet can help on smooth stone or laminate if they remain attached and clean. Raised feet also create edges where crumbs or moisture can collect. Check pad placement and care instructions, and never assume that a stand is safe beside a hot burner merely because it is sold for kitchen use.

Place the stand outside the path between the sink, cooktop, and refrigerator. It should not block a backsplash outlet, sit beneath a cabinet door that opens downward, or require reaching across heat to turn a page. Good placement often protects the book more effectively than an extra accessory.

Materials and cleanup are part of the daily routine

Wood, metal, molded plastic, and clear panel designs each create different tradeoffs, but a material name alone does not establish durability or washability. Seams, fasteners, hinges, coatings, and edge treatments influence how a stand handles repeated wiping. Follow the maker’s current care directions rather than immersing a stand or using a cleaner that may affect its finish.

A clear front shield can reduce direct splatter on the lower page, but it may add reflections, fingerprints, and corners that need cleaning. It can also complicate page turning. An open stand leaves the recipe more accessible while relying on thoughtful placement and routine wiping. Neither approach makes a cookbook immune to steam, grease, flour, or spills.

If raw ingredients are being handled, avoid touching page arms and then returning to food preparation without following appropriate hand-cleaning practices. The stand is a kitchen accessory, not a food-preparation surface, and intricate hinges can be harder to clean than a simple panel.

Storage can decide whether it gets used

A decorative stand left on display is always ready, but it permanently claims counter space. A folding stand can fit in a drawer or vertical cabinet slot if its closed dimensions and protruding hardware suit that location. Folding also creates a repeated setup step; a design that is awkward to open may remain stored while the cookbook returns to the counter.

Think through the entire motion. Can you retrieve the stand with one hand, open it without pinching fingers, position it securely, and put it away after wiping? Does the folded support stay closed, or can it catch on nearby pans and boards? For a fixed stand, confirm that its base does not interfere with routine counter cleaning.

A stand that also holds a tablet can reduce duplicate accessories, provided it performs both jobs without compromise. A wide book ledge may obstruct a tablet screen, while a tablet-oriented groove may be too narrow for a thick cookbook. Treat dual-use claims as dimensions to verify, not as proof of universal compatibility.

Limitations

  • A cookbook stand uses counter space even when its footprint looks modest in an isolated product photo.
  • Page arms may cover text, leave marks, or struggle with thick, springy books.
  • Adjustable hinges and supports can loosen or become collection points for residue over time.
  • A clear guard may reduce some splashes but can reflect light and does not seal the whole book.
  • Folding designs still require suitable storage and may be less convenient if setup is fiddly.
  • Tablet compatibility varies with device size, protective case thickness, ports, buttons, and charging position.
  • No stand makes paper safe from heat, steam, grease, water, or contamination when placed poorly.
  • Large cookbooks can exceed the backing area or shift the center of gravity beyond what a compact stand supports.

Alternatives to compare

  • A simple tablet or phone stand when every recipe is digital.
  • A clipboard or magnetic clip for one-page printed recipes.
  • An under-cabinet device mount where counter space is scarce and installation is appropriate.
  • A wall shelf or rail-mounted holder in a kitchen already designed for that system.
  • A recipe-card box paired with a small card clip for short, frequently repeated dishes.
  • A washable printed copy kept away from a valuable cookbook during messy preparation.
  • A book weight or separate page clips when the cookbook already sits at a comfortable angle.

FAQ

How deep should the ledge of a cookbook stand be?

It should support the thickest open book you expect to use without forcing the spine forward or leaving the book balanced on an edge. Measure an open cookbook at the point where it meets the ledge, then compare that measurement with the stated usable depth. Account for page arms or a front lip that may reduce the available space.

Are page holders necessary on a cookbook stand?

They are helpful for new hardcovers, tightly bound books, and lightweight pages that will not remain open. A relaxed spiral-bound book may not need them. If holders are included, check whether they reach the page, move around printed measurements, and contact paper gently.

Can the same stand hold a tablet?

Possibly, but compatibility depends on more than screen size. Verify the tablet’s thickness with its case, the ledge or groove dimensions, button and port access, ventilation guidance, and space for a charging connector. Make sure the device remains stable at the intended viewing angle.

Is a splash guard worth having?

A clear guard can intercept some direct splatter near the lower part of a page, which may suit messy prep. It also adds a surface that can reflect light, collect fingerprints, and make page turning less direct. It does not protect the book from every direction, so placement still matters.

Where should a cookbook stand sit on the counter?

Place it where the recipe is readable from your main work position but outside sink splashes, cooking heat, steam, and busy traffic paths. Check clearance beneath cabinets and around outlets. Avoid any position that requires reaching over a hot surface to turn a page.
Choosing a Bread Box That Works on a Crowded Kitchen Counter

Product links are for reference. Verify current details on the retailer page before buying.

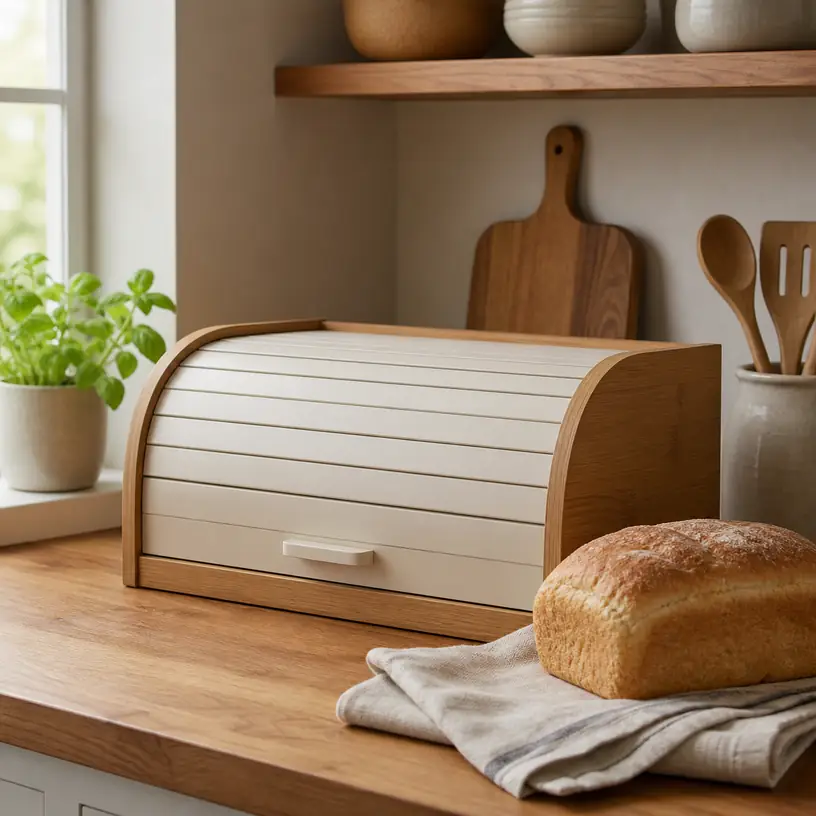
Illustrative image of a generic bread box on a kitchen counter

Illustrative image, not an official product photo.

Short answer

A useful bread box is not simply the biggest container that fits under a cabinet. It should hold the loaves, rolls, or pastries your household typically has at the same time, open fully in its intended location, and leave enough counter space for daily food preparation. Compare usable interior dimensions rather than exterior width alone. Then look at ventilation, closure design, cleaning access, food-contact guidance, and whether crumbs can be removed without turning the whole box upside down. A bread box can make the counter tidier and shield bread from light and incidental contact, but it does not give every type of bread the same storage life.

Search reference

Bread boxes for kitchen counters

Compare interior capacity, door clearance, ventilation, surface care, crumb cleanup, and the counter area each design occupies while open.

View matching options

Start with the bread, then measure the counter

Bread boxes are often photographed with one neatly centered loaf, while real kitchens may need to store a sandwich loaf, a bag of rolls, and half a bakery boule at once. Make a short inventory before comparing containers. Note the tallest and widest bread you buy regularly, whether it stays in a bag, and how many packages usually overlap between shopping trips. A slim box can be perfectly adequate for one household and become a frustrating stack of crushed bags in another.

Measure the proposed location in three dimensions. Width is only the beginning: wall cabinets limit height, a backsplash can interfere with a rear hinge, and an appliance cord may reduce usable depth. Leave practical room around the box instead of planning a millimeter-perfect fit. If it will sit beside a toaster or coffee maker, account for the space needed to use and clean those appliances and follow their placement instructions.

The door changes the working footprint. A front-hinged panel needs clear counter area in front and may become a temporary surface that collects crumbs or clutter. A roll-top or sliding door avoids that forward swing but can take up interior room. A top-hinged lid needs overhead clearance and may be awkward under a low cabinet. Sketch the door in its open position before deciding that the exterior dimensions fit.

Who this is for

  • Households that keep bread on the counter and want packages gathered in one defined place.
  • Small kitchens where a measured container can replace a loose pile without consuming the main preparation area.
  • Home bakers who need room for one or two familiar loaf shapes after the bread has cooled completely.
  • Shared kitchens where a visible, consistent storage location helps keep counters orderly.
  • Buyers willing to clean crumbs regularly and adjust storage habits for different bread types and room conditions.

Who should skip it

  • Skip a counter bread box if you rarely keep bread at home or already use freezer storage successfully.
  • A decorative box is a poor trade if it occupies the only safe, usable preparation space in a very small kitchen.
  • Do not use a bread box as a substitute for refrigeration when a specific product label or recipe requires refrigerated storage.
  • Anyone expecting a sealed container to make all bread last indefinitely should choose a storage method based on the particular bread instead.
  • A household that buys unusually long baguettes or several bulky loaves may find a pantry shelf, drawer, or dedicated cabinet more practical.

What to verify before buying

  • Usable interior dimensions: Compare the space inside with bread in its normal bag or wrap; exterior measurements do not reveal wall thickness, hinges, or door tracks.
  • Open-door clearance: Check forward, upward, or rear clearance in the exact counter location, including cabinet handles and backsplash edges.
  • Ventilation: Look for clearly described vents or adjustable airflow and consider how the design suits the bread and climate in your home.
  • Closure behavior: Confirm that the door moves smoothly, remains where intended, and does not require holding the box with a second hand.
  • Cleaning access: Check whether corners, tracks, seams, and ventilation holes can be reached and whether any crumb tray is actually removable.
  • Material and care: Review current cleaning instructions, food-contact wording, finish care, and restrictions involving water, detergents, or heat.
  • Base and feet: Make sure the box sits steadily and will not scratch or trap moisture against the counter surface.
  • Assembly details: For flat-packed designs, verify included hardware, tool requirements, panel alignment, and finished dimensions.
  • Placement guidance: Follow the maker’s directions about heat, moisture, sunlight, walls, and nearby appliances.

Door style matters in a working kitchen

A roll-top door is appealing when the counter in front of the box must remain available. The slatted panel usually travels along a curved track, so examine how much interior height and depth that mechanism consumes. Tracks also create places for crumbs to collect. A smooth path and accessible cleaning areas matter more over time than the visual novelty of the door.

Front-hinged doors provide a broad opening and make the back of the box easier to reach. Some are designed to rest horizontally, but that does not automatically make them a cutting board or load-bearing shelf. Use the panel only as described in the current instructions. Check where its handle lands and whether opening it blocks a drawer or pushes into the area where someone is preparing food.

A top lid can be mechanically simple and easy to wipe, yet low wall cabinets may prevent it from opening far enough. Lift-off lids require somewhere clean to set the lid down. Side-opening doors are less common but may suit a narrow counter if the adjacent area remains clear. There is no universally superior style; the best mechanism is the one that can be opened, loaded, and cleaned without rearranging the kitchen each time.

Airflow is not the same as a perfect storage environment

Bread storage involves competing changes. Too much exposure can contribute to drying, while trapped moisture can create an undesirable damp environment. Bread boxes approach that balance in different ways through small holes, seams, adjustable vents, or doors that are not airtight. Product descriptions do not always explain airflow precisely, so avoid treating words such as “fresh” or “ventilated” as a measurable guarantee.

The bread itself matters. A packaged sandwich loaf, a crusty bakery loaf, homemade enriched bread, and pastries with perishable fillings do not have identical storage needs. Keep and follow the product label, bakery guidance, or recipe instructions. Let home-baked bread cool fully before enclosing it; visible condensation or a damp interior is a reason to reassess the storage setup and clean the box.

Room conditions change the result as well. Heat, humidity, direct sun, steam from cooking, and proximity to a dishwasher or sink can affect the environment around the box. Choose a dry location away from obvious heat and splashes. Inspect stored food regularly and discard it when its condition is questionable rather than assuming the container has preserved it.

Materials change care more than appearance

Metal boxes can offer thin walls and a wipeable interior, though painted or coated finishes may have specific restrictions. Look for protected edges, stable hinges, and care instructions that address scratches, rust, and prolonged moisture. A metal shell may also show fingerprints or dents, which is mainly a household preference rather than a storage performance measure.

Wood and bamboo can add a warm counter appearance and may use thicker panels. Their care often differs from a washable plastic bin: soaking, harsh cleaners, or a dishwasher may be inappropriate. Check how joints, grooves, and unfinished surfaces should be cleaned and dried. Marketing names alone do not establish the exact material, coating, or food-contact suitability.

Plastic or mixed-material designs can be light and easy to move. Verify temperature limits, approved cleaning methods, latch construction, and whether removable components can be washed separately. A transparent window helps show what is inside without opening the box, but seals and window edges add more seams to inspect. Regardless of material, smooth reachable interior surfaces make routine crumb removal easier.

Capacity without counter takeover

Single-level boxes keep everything visible but can become wide. Two-level designs use vertical space and may separate loaves from rolls, yet they need sufficient clearance beneath wall cabinets and can hide items at the back. Check whether the shelves are fixed, adjustable, or removable, and whether the stated dimensions include handles and feet.

Avoid treating the top as bonus storage unless the manufacturer describes an appropriate load and use. Even a flat top can become cluttered with fruit, mail, or appliances that must be moved every time the lid opens. Storing heat-producing appliances on or against a bread box can also conflict with appliance clearance instructions. Plan the top as empty space unless both products’ directions support the arrangement.

If capacity needs fluctuate, a slightly larger interior may be useful, but oversized storage can encourage forgotten packages. An easy visual check is valuable: place older bread toward the front, avoid crushing soft items under heavy loaves, and clear empty bags promptly. Organization habits often make more difference than one extra tier.

Cleaning should be a weekly-sized task, not a project

Crumbs accumulate even when bread remains wrapped. Removable trays and wide openings can simplify cleanup, but only if they come out without disassembling hinges or spilling into tracks. Look closely at interior corners and door mechanisms. Decorative perforations and deep seams may be attractive in photos while adding work in actual use.

Follow the supplied care instructions rather than assuming every bread box can be rinsed in a sink. Unplug and move nearby appliances before cleaning the counter area when appropriate. Dry the box completely before putting food back inside, and investigate persistent moisture, odors, stains, or visible growth rather than covering them with another bag of bread.

A liner may seem like an easy solution, but it can block intentional vents or hold crumbs and moisture against a surface. Use one only if compatible with the design and clean it frequently. Strong fragrances can also transfer to food or linger in enclosed spaces, so use cleaning products approved for the material and rinse or wipe as directed.

Limitations

  • A bread box cannot guarantee a fixed storage life because bread formulation, packaging, room conditions, and handling differ.
  • Exterior size may overstate practical capacity once door mechanisms, shelves, hinges, and thick panels are considered.
  • Ventilation descriptions are not always quantified, and a design suited to one household or climate may not suit another.
  • Crumbs can collect in tracks, seams, vents, and corners even when most bread remains packaged.
  • Large boxes can reduce preparation space, interfere with appliances, or fail to open fully beneath wall cabinets.
  • Decorative tops and drop-down doors should not be treated as cutting boards, shelves, or appliance platforms unless specifically designed for that use.
  • Bread with perishable ingredients or storage instructions may require a different method regardless of the container.

Alternatives to compare

  • Freezer storage with portions wrapped and labeled for households that use bread slowly.
  • A dedicated pantry shelf or deep drawer when counter space is more valuable than at-a-glance access.
  • A clean bread bag or appropriate wrap inside a cabinet for one loaf at a time.
  • A tall pantry bin for packaged rolls and flatbreads, provided airflow and food-storage guidance remain suitable.
  • A smaller pastry container used only when its closure, capacity, and care fit the specific baked goods.

FAQ

Should a bread box be airtight?

Not necessarily. Many bread boxes use limited ventilation rather than an airtight seal, but the appropriate storage method depends on the kind of bread, its packaging, and the conditions in your kitchen. Follow label, bakery, or recipe guidance instead of relying on the closure alone.

Can I put warm homemade bread directly into a bread box?

Let it cool fully first. Warm bread can release moisture inside an enclosed space, changing both its texture and the condition of the box. Use the recipe’s storage guidance once cooling is complete.

How large should a bread box be for one loaf?

Measure the loaf in the bag or wrap you normally use and compare it with the listed interior dimensions. Leave enough room to insert and remove it without crushing the bread; do not rely only on the product’s exterior width.

Can the top of a bread box hold a toaster?

Only if the bread-box maker and toaster maker both support that placement, including weight, heat, and ventilation clearances. A flat lid is not automatically an appliance shelf, and the toaster may also prevent the box from opening.

How often should I clean a bread box?

Remove crumbs regularly and clean spills promptly, using the product’s care instructions. The practical interval depends on how often it is used, but do not wait when you notice moisture, odors, residue, or questionable food condition.

Countertop Spice Racks: Fit, Visibility, and Everyday Reach

Product links are for reference. Verify current details on the retailer page before buying.

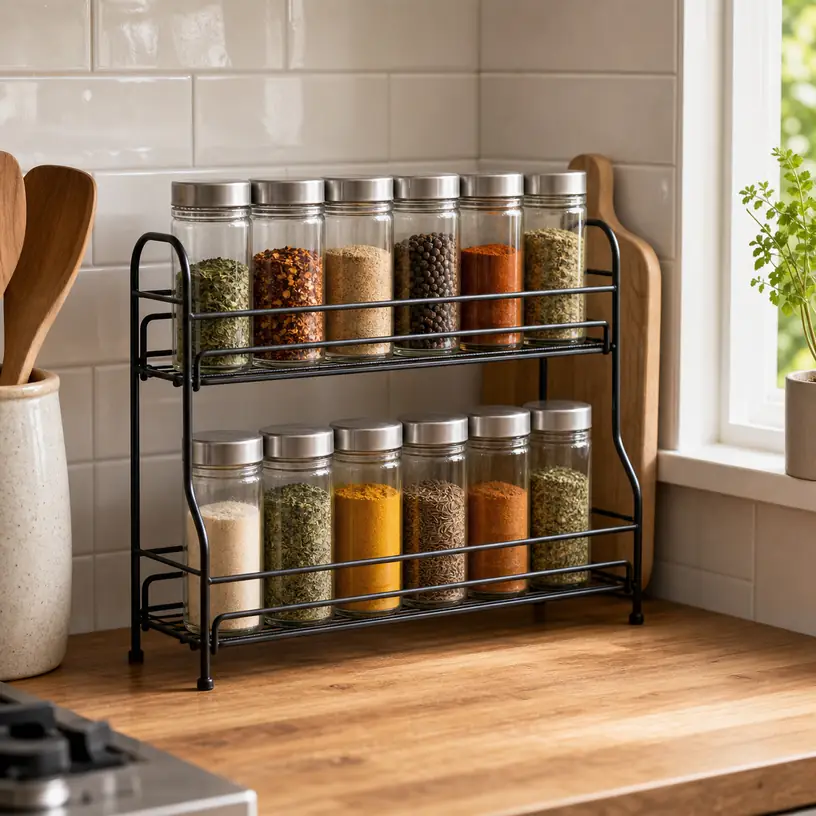
Illustrative image of a generic countertop spice rack in a kitchen

Illustrative image, not an official product photo.

Short answer

A countertop spice rack earns its space when it keeps frequently used seasonings visible without crowding the food-prep zone. Start with the available footprint and the height below any upper cabinet, then consider how easily you can read and remove jars from the back row. Stable feet, an open layout, enough clearance for your existing containers, and a finish that tolerates routine kitchen cleaning matter more than decorative capacity claims.

Search reference

Countertop spice rack options

Compare footprints, tier spacing, jar access, base stability, and cleaning instructions with the containers and counter space already in your kitchen.

View matching options

Decide what deserves counter space

The best candidate for a countertop rack is not necessarily every spice you own. It is the smaller working set you reach for during an ordinary week: perhaps cooking oil seasonings near a prep area, baking spices in another zone, or salt-free blends kept together for a particular household routine. A rack that holds only this active group can be more useful than a larger unit packed with jars that rarely move.

Location changes the decision. A narrow section beside a refrigerator may suit a compact vertical rack, while an open island may call for a lower organizer that does not interrupt sightlines. Measure the proposed location with the nearby drawers and cabinet doors open. Remember that the counter still needs room for wiping, food preparation, and temporarily setting down utensils or groceries.

Heat, steam, direct sun, and cooking splatter also affect placement. Avoid assuming that the small gap beside a range is automatically the ideal spice zone. Check storage guidance on the seasonings themselves, and choose a location away from obvious heat and moisture exposure. Easy reach should not come at the cost of poor storage conditions.

Who this is for

  • Cooks who use a consistent group of seasonings and want them visible at a glance.
  • Renters who need removable organization rather than a wall-mounted or cabinet-mounted system.
  • Households with mixed jar shapes that do not fit a dedicated drawer insert.
  • Small kitchens where a carefully measured vertical organizer can free part of the working surface.
  • Anyone who finds a rotating organizer awkward because labels or containers are difficult to see.

Who should skip it

  • Skip a counter rack if your prep surface is already too limited for comfortable cooking.
  • Choose enclosed cabinet storage if the available counter location receives heavy splatter, steam, or direct sunlight.
  • Avoid a fixed-tier design when your jars vary widely in height and diameter unless the listed clearances work for the full set.
  • Consider a drawer solution if you prefer to see every label from above and have a suitable shallow drawer.
  • Do not buy a rack merely to display a large matching jar set if you only use a few of those seasonings regularly.

What to verify before buying

  • Measure width and depth at the base, plus the total height beneath upper cabinets, shelves, rails, and appliance doors.
  • Compare the usable shelf width and vertical clearance with the tallest, widest, and least stable jars you plan to store.
  • Check whether rear jars can be lifted out without removing the front row or striking the cabinet above.
  • Look at the feet and base construction, especially if the rack will sit on smooth stone, laminate, tile, or a textured counter.
  • Confirm whether assembly is required and whether the product can be moved safely while loaded.
  • Review care instructions for the rack material and finish; kitchen residue can collect around joints, corners, and feet.
  • Determine whether jars, labels, liners, or mounting hardware shown in styled photos are actually included.
  • Verify current dimensions and package contents on the retailer page rather than estimating from photos.

Choose a layout around the way you reach

Tiered racks

A stepped rack raises the back rows so labels are easier to scan. It works best when jars are similar enough in height that each step remains visible. Check the depth of every tier, not only the overall dimensions. Very shallow steps may suit standard spice jars but feel insecure with squat tins, grinders, or wider seasoning containers.

Access is the practical test. Imagine lifting the tallest rear jar upward under your cabinet. If there is little clearance, a rack that looks compact may force you to pull the whole unit forward every time. That repeated movement can become more irritating than opening a cabinet.

Shelves and narrow towers

A small shelf unit uses vertical space without creating a staircase footprint. It can accommodate different container heights if the shelves are adjustable or generously spaced. On the other hand, jars on a flat upper shelf may hide those behind them, and deep shelves can turn the back row into forgotten storage.

Pay attention to side rails and lips. A low barrier may help prevent a jar from sliding, but it can also obscure labels or make short tins harder to grasp. Tall side panels create a more enclosed appearance yet collect dust and cooking residue in corners.

Rotating designs

A rotating organizer can bring rear containers forward without reaching over another row. It needs turning clearance, however, and the useful surface may be smaller than its total diameter suggests. Test the idea by marking a circle on the counter and leaving space for fingers around it. If nearby appliances or a wall block rotation, the format loses much of its advantage.

A rotating rack also benefits from balanced loading. Widely different container sizes may make the surface feel cluttered or cause smaller jars to shift when it turns. Review the edge height and current dimensions before treating a rotating option as a universal solution.

Fit your existing spice containers first

Capacity numbers are difficult to compare because jar shapes differ. A rack advertised for a certain number of containers may have been counted with one narrow jar style. Your collection may include square glass jars, round plastic containers, refill pouches, tins, grinders, or tall seasoning bottles. Measure the actual group rather than relying on a headline capacity.

Arrange the jars on a table in the order you use them. This reveals how much linear shelf space they occupy and whether some items belong elsewhere. It is also a good time to check labels and dates according to your normal household practices. The organizer should support that routine, not encourage decanting into unfamiliar containers simply to make the rack look uniform.

If labels sit on the jar lids, a lower viewing angle may be unhelpful. Front labels benefit from a stepped layout, while top labels are often easier to scan in a drawer. Choose the organizer around how information appears on your containers.

Stability, materials, and cleanup

A narrow rack can become top-heavy when loaded with tall grinders or glass jars. A broad base, level construction, and feet suited to the counter surface are useful features. If a rack includes non-slip pads, confirm their placement and care guidance. Do not assume that every pad material is appropriate for every delicate countertop finish.

Material wording can indicate how a rack should be cleaned, but it does not guarantee long-term performance in a damp or greasy area. Look for clear instructions about wiping, drying, and avoiding abrasive products. Open wire forms usually expose more of the counter for cleaning, while solid shelves can catch small spills before they reach the surface. Both still need to be moved periodically so the area underneath can be cleaned.

Color and finish have practical effects too. Dark finishes may show flour or salt dust; bright metal may reveal fingerprints and water spots; wood-look surfaces may have specific moisture precautions. Choose based on your kitchen habits rather than staged photography alone.

Limitations

  • Keeping spices on the counter exposes the rack and containers to more visible dust and cooking residue than enclosed storage.
  • A compact footprint does not guarantee easy access, especially beneath low cabinets.
  • Published capacity may not match mixed jar sizes or tall grinders.
  • Countertop racks use space that may be more valuable for food preparation or small appliances.
  • An organizer cannot correct storage conditions that are too hot, humid, or sunny for the contents.
  • A matching jar system adds labeling and refilling work that some households may not want.

Alternatives to compare

  • A shallow drawer insert when top labels are easy to read and drawer height is sufficient.
  • A cabinet shelf riser for seasonings that are better kept away from the working surface.
  • A wall-mounted rack where installation is permitted and the wall location remains away from heat and moisture.
  • A rotating cabinet organizer if depth, rather than countertop visibility, is the main problem.
  • Small labeled bins that group baking, grilling, or everyday seasonings and can be removed as a set.

FAQ

How much clearance should I leave above a countertop spice rack?

Allow enough room to lift out the tallest container without tilting it into the upper cabinet. Measure with the actual jar in hand, and remember that a rear tier may raise it several inches above the counter. Current rack dimensions and usable tier heights should be checked before ordering.

Is a tiered rack better than a rotating spice organizer?

A tiered rack makes several front-facing labels visible at once, while a rotating organizer brings hidden containers around to you. The better choice depends on available depth, overhead clearance, turning space, label placement, and whether your jars are similar in size.

Can I put a spice rack next to the stove?

A nearby location may be convenient, but heat, steam, and splatter make it a poor choice in many layouts. Follow storage guidance for the seasonings and keep the rack away from obvious heat and moisture sources. Convenience should be balanced with suitable storage conditions and safe cooking space.

Should a spice rack include matching jars?

Not necessarily. A rack-only option lets you keep familiar containers and their original information. A set with jars can create uniform dimensions, but it also requires labeling, filling, and maintaining a separate system. Verify exactly what is included before buying.

How do I keep a countertop spice rack from becoming cluttered?

Reserve it for the seasonings used most often, group them by your real cooking routine, and return less-used items to a cabinet or pantry. Reassess the selection periodically instead of filling every available slot just because the rack has room.

Countertop Paper Towel Holders: Stability, Tear Control, and Counter Space

Product links are for reference. Verify current details on the retailer page before buying.

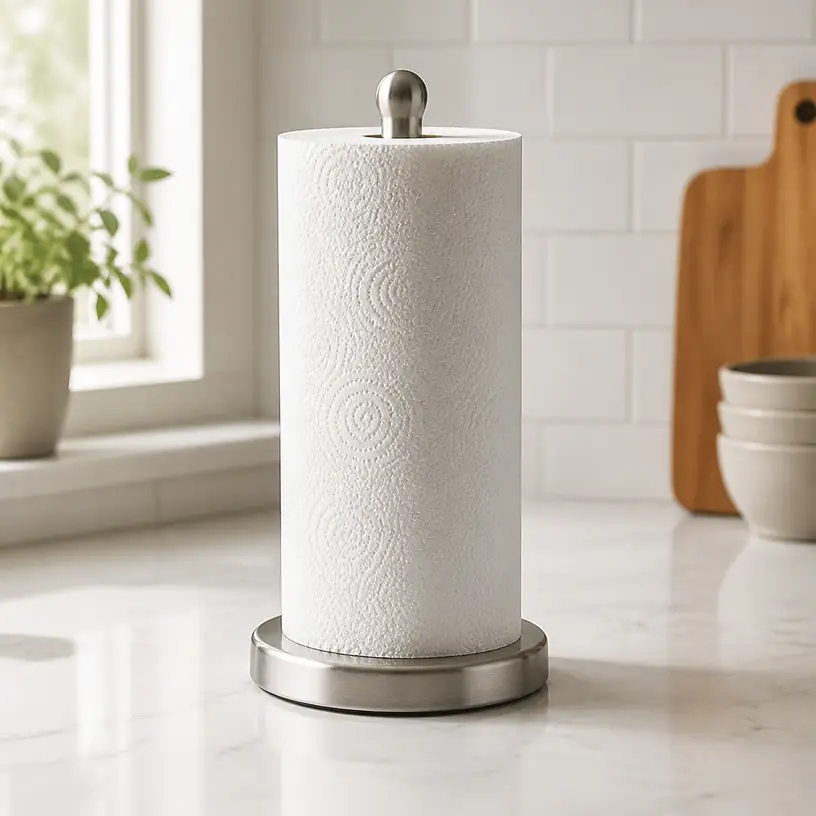
Illustrative image of a generic countertop paper towel holder in a kitchen

Illustrative image, not an official product photo.

Short answer

A countertop paper towel holder works well when the roll needs to stay visible, movable, and easy to replace without drilling into a wall or cabinet. Start by measuring the roll diameter and the patch of counter you can spare. Then compare base width and weight, spindle height, loading method, bottom grip, and any feature meant to keep the loose sheet from unwinding. A narrow stand saves surface area, but it still needs enough stability for the way you tear sheets. If you often reach with one wet hand, give more attention to controlled dispensing and a base that resists sliding than to decorative finish alone.

Search reference

Countertop paper towel holder options

Compare roll capacity, footprint, base stability, loading access, sheet control, and care instructions for your available counter space.

View matching options

Map the reach before choosing the stand

Paper towels tend to be used in a hurry: drying hands, catching a spill, wiping the edge of a sink, or covering food for a short task. The right location is therefore part of the product decision. Watch where you naturally reach during meal preparation and cleanup, then identify a spot that is accessible without leaning over a hot burner or carrying drips across the room.

That spot also needs a realistic footprint. Measure the base area rather than judging the holder only by its slim upright post. Leave room for the roll itself, which may extend beyond the base, and enough hand clearance to pull a sheet from the side. A holder squeezed between an appliance and a backsplash may technically fit but still be awkward to reload or clean around.

Placement near the sink is convenient, yet repeated splashes can reach the bottom sheets and the base. Near a cooktop, grease and heat become concerns. A portable holder can move between work zones, but it must be comfortable to lift and should not depend on a permanently attached surface. Decide whether the stand will have one home or travel from counter to table before comparing handles, top knobs, and overall weight.

How common countertop designs behave

Open spindle stands

The simplest form has a vertical post rising from a base. The roll drops over the top, so reloading is quick and there are few moving parts. This design makes it easy to see how much paper remains, but an exposed roll can unwind when pulled quickly or brushed while the stand is moved. The top of the spindle must also remain accessible under upper cabinets.

For an open stand, compare the post height with the paper products you normally buy and check whether the top cap, if present, must be removed during loading. A short post may leave a taller roll poorly guided. An oversized decorative knob can make carrying convenient, yet it may add a step when changing rolls.

Stands with a side arm

Some holders add a vertical or angled arm that rests against the outside of the roll. Depending on the design, it may provide light tension, keep the loose sheet closer to the roll, or create an edge against which to pull. The useful question is not simply whether an arm exists, but how it meets a full roll and follows the roll as it becomes smaller.

Check whether the arm is fixed, spring-loaded, flexible, or manually repositioned, and review how the maker describes its operation. An arm that presses too firmly for your preferred paper can make dispensing frustrating; one that barely touches may offer little control. Also account for the arm in the total footprint because it may project beyond the circular base.

Enclosed or guarded formats

A partial guard can shield part of the roll and reduce loose-sheet movement. It can also increase the holder’s width, limit the roll size, and create another surface to wipe. These designs may suit a busy counter where the roll is often bumped, provided there is enough opening to load and pull the paper comfortably.

Look closely at the route the sheet takes. If paper must be threaded through a slot or under a bar, consider whether replacing a roll will still feel simple during daily use. Confirm that the opening works with the sheet width and thickness you expect rather than assuming every roll format will feed the same way.

Who this is for

  • Renters and homeowners who want a paper towel station without drilling or attaching hardware.
  • Kitchens where the useful work zone changes and the roll needs to move between counter, island, and dining table.
  • Households with enough counter space to keep a roll visible and within reach.
  • People replacing a lightweight stand that tips, skids, or allows the paper to unravel.
  • Buyers who want easier roll changes than an enclosed wall-mounted dispenser may provide.

Who should skip it

  • Skip a countertop stand if every open section of work surface is needed for food preparation or small appliances.
  • Choose an under-cabinet or wall-mounted format when freeing the counter matters more than portability.
  • Avoid placing paper products close to an open flame, exposed heating element, or another location prohibited by the appliance or holder guidance.
  • A basic open spindle may disappoint if you require consistent one-handed dispensing and the design provides no practical sheet control.
  • Consider reusable cloths and a nearby drying or laundry routine if reducing disposable paper use is the main goal.

What to verify before buying

  • Roll dimensions: Compare the usable spindle height, clearance around any guard or arm, and stated roll capacity with the paper towels you purchase.
  • Base footprint: Measure the full base and any projecting arm, then allow additional space for the outer edge of a full roll.
  • Stability: Check base weight, width, weight distribution, and the surface types for which any nonslip pads are intended.
  • Dispensing method: Review whether the holder is designed for one-handed tearing, controlled resistance, or simply roll storage.
  • Loading access: Confirm whether a top knob, cap, arm, or cover must be removed and whether there is enough cabinet clearance to do so.
  • Carry point: If the holder will move often, look for a secure area to grip without lifting by the paper roll or a loosely fitted part.
  • Bottom contact: Inspect the stated pad material and care guidance so the base does not trap moisture or mark a sensitive counter finish.
  • Cleaning: Check how crumbs, splashes, and grease are removed from the post, base seam, tension arm, and any enclosed surfaces.
  • Current contents: Verify which parts are included and whether assembly is required; photos alone may not show separate pads, caps, or hardware clearly.

Stability is more than a heavy base

Weight can help a paper towel stand remain planted, but it does not explain the whole experience. A wide base generally creates a larger support area, while a tall roll raises the point where sideways force is applied. The direction of your pull matters too. A sharp outward tug can slide a stand that feels solid when pressed straight down.

Bottom pads add friction only when they suit the counter and remain clean. Dust, grease, water, or a warped pad can reduce contact. A ring-shaped pad may behave differently from several small feet on tile grout or a textured surface. Product descriptions may use broad phrases for grip, so inspect the base layout and confirm surface compatibility rather than treating “nonslip” as a guarantee.

If one-handed use is important, think of the holder, roll, perforations, and pulling motion as a system. A base can stay still while too much paper unspools, or a tension arm can control the roll while a narrow base rocks. User technique still matters: pulling close to the roll and changing direction at the perforation can place less leverage on the stand than yanking from several feet away.

Roll fit changes from the first sheet to the last

Paper towel rolls vary in height, outer diameter, core opening, sheet thickness, and winding firmness. A holder may accept the roll over its spindle yet leave too little room for a side arm or guard when the roll is full. Compare stated capacity with your usual product, especially if you buy oversized rolls.

The experience also changes as the roll shrinks. A full roll has more mass and may contact a tension arm near its outer edge. A nearly empty roll is lighter and brings the paper closer to the spindle. On some formats, that changes resistance and the angle needed to tear a sheet. Look for a design whose control feature follows the changing diameter if consistent dispensing matters to you.

Check the center opening as well. The post needs to fit without so much friction that the roll cannot turn, but an extremely thin post can allow the roll to lean and wobble. Do not assume outside dimensions alone settle the fit; review the maker’s current compatibility details.

Counter material and cleanup deserve attention

The area under a paper towel holder can collect crumbs and moisture because the base is lifted less often than smaller utensils. A smooth base with accessible edges is easier to wipe around than one with deep decorative grooves. Seams between a weighted insert and an outer shell may also need attention after a spill.

Before using cleaners, follow the holder’s care directions and the maintenance advice for your countertop. Abrasive products can affect some finishes, while leaving water trapped under a base can affect others. Lift the stand periodically, dry both surfaces, and check that pads remain attached and free of grit that could scratch when the holder is moved.

The paper itself should stay out of splash zones where practical. A raised base can help keep the lowest sheet away from a small amount of surface moisture, but it is not a sealed barrier. If the roll becomes wet or contacts a cleaning product, follow appropriate household handling guidance rather than relying on the stand to protect it.

Make portability intentional

A countertop format is often chosen because it can move, but not every stand is pleasant to carry. Grabbing the roll can lift it off the spindle while leaving the heavy base behind. Lifting by a removable top cap can do the same. If the stand will travel to an outdoor table or another room, identify a fixed grip point and check the overall weight before buying.

A recessed handle or secure top loop can simplify movement, although it may increase total height. Measure the path as well as the destination: a tall holder carried under cabinets or past hanging utensils can snag. For occasional transport, it may be safer to support the base with one hand instead of expecting the spindle to function as a handle.

Portability also means the holder encounters different surfaces. A bottom designed for a smooth stone counter may not feel as stable on a slatted patio table or soft tablecloth. Test placement before pulling a sheet, and keep the stand away from table edges where a heavy base could fall.

Limitations

  • A freestanding holder occupies counter space even when the roll is nearly empty.
  • One-handed tearing depends on base stability, roll resistance, paper perforations, pulling angle, and technique; the holder alone cannot guarantee it.
  • A weighted stand can still slide on a wet, dusty, uneven, or incompatible surface.
  • Side arms and guards may restrict oversized rolls or add areas that need cleaning.
  • An exposed roll remains vulnerable to splashes, grease, dust, and accidental unwinding.
  • Product photos do not reliably establish roll capacity, material, base weight, surface compatibility, or included parts.

Alternatives to compare

  • An under-cabinet holder preserves work surface while keeping the roll near a preparation zone, but it requires suitable mounting space and installation.
  • A wall-mounted holder can establish a fixed station away from wet counters, provided the wall and mounting method are appropriate.
  • An over-cabinet-door holder avoids drilling and saves the counter, though door clearance, cabinet finish, and movement need consideration.
  • A drawer-based roll holder hides the paper when not in use but requires a drawer layout intended for dispensing.
  • A basket of washable kitchen cloths can cover many routine wiping tasks when paired with a practical collection, washing, and drying system.

FAQ

How wide should the base of a countertop paper towel holder be?

There is no single ideal width. The base needs to fit your available counter while supporting the height and weight of a full roll during your normal pulling motion. Compare the complete footprint, base weight, bottom grip, and any projecting arm rather than choosing by diameter alone.

Will an oversized paper towel roll fit a freestanding holder?

It depends on spindle height, the roll’s outer diameter and core opening, and clearance around side arms or guards. Measure a new roll from the package you usually buy and compare those dimensions with the holder’s current capacity information.

Do weighted paper towel holders work with one hand?

Some are designed to improve one-handed dispensing, but weight by itself does not guarantee it. Roll resistance, tension features, bottom grip, paper perforations, and pulling direction all affect whether one sheet tears cleanly without moving the stand.

Can I put a paper towel holder next to the sink?

It can be convenient if the location stays away from direct splashes and leaves room to wipe beneath the base. Keep the paper dry, follow care guidance for the holder and counter, and choose another location if water regularly reaches the roll.

Is a countertop holder better than an under-cabinet holder?

A countertop holder is portable and usually avoids installation, while an under-cabinet holder preserves counter space and creates a fixed location. The better fit depends on available surface area, mounting permission, reach, cabinet clearance, and whether you want to move the roll.