A Better Read on the Cold: Refrigerator and Freezer Thermometers for Home Kitchens

Product links are for reference. Verify current details on the retailer page before buying.
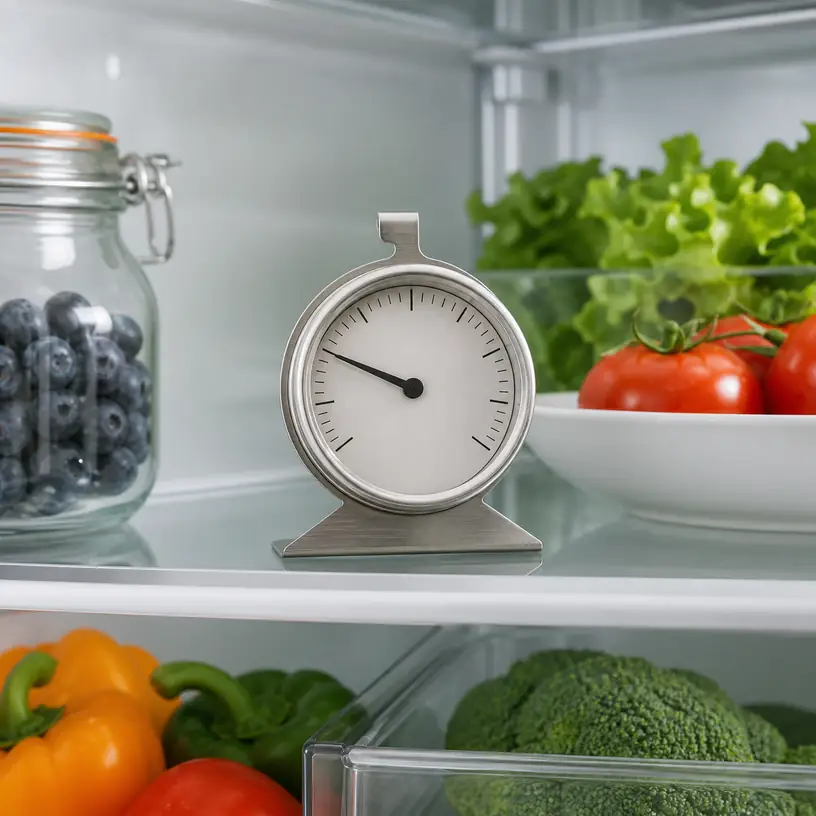
Illustrative image of a generic dial thermometer on a refrigerator shelf

Illustrative image, not an official product photo.

Short answer

A refrigerator or freezer thermometer gives you an independent reading inside an appliance, which is more useful than judging coldness by the control dial or by touching a container. Choose one that covers the temperatures you need to monitor, remains readable in its planned location, and can stand, hang, or attach without blocking vents or interfering with food. An analog dial avoids batteries and can be easy to check at a glance; a digital model may provide larger numbers, minimum-and-maximum memory, or an alarm. Those extras only help if the controls make sense and the device is rated for the compartment. Buy for a specific placement, allow the reading to stabilize, and compare it with the appliance manual and current food-storage guidance rather than treating one quick glance as a complete diagnosis.

Search reference

Refrigerator and freezer thermometer options

Compare rated temperature range, display visibility, placement hardware, stated accuracy, alert behavior, power needs, and cleaning instructions for the compartment you plan to monitor.

View matching options

Start with one shelf, not a feature list

Open the appliance and decide where a thermometer could remain visible without being knocked over, buried by groceries, or pressed against a wall. A crowded refrigerator may need a compact hanging model at the front of a middle shelf. A chest freezer can call for a display that is readable from above. A small dorm-style refrigerator may have no sensible place for a wide dial, while an upright freezer basket can make a loose digital unit disappear under packages.

That location shapes the buying decision. A broad dial is useful only when the markings can be seen through the shelf arrangement. A magnetic back requires a suitable metal surface and permission from the appliance instructions. A hook must fit the shelf wire or edge without hanging into a drawer. A stand needs a flat surface and enough depth to resist sliding when the door closes.

Also decide what question you want the thermometer to answer. Routine monitoring, checking a newly installed appliance, observing a garage freezer during seasonal weather, and investigating uneven refrigerator zones are different jobs. A simple dial can cover a stable visual check. Minimum-and-maximum memory may be more helpful when you want to know what happened between checks, while an audible alert may matter only if it can be heard where the appliance sits.

Who this is for

  • Households that want a reading independent of an appliance’s numbered or unlabeled control setting.
  • Renters checking an unfamiliar refrigerator without altering the appliance.
  • People organizing a refrigerator and trying to identify a practical, consistently cold shelf for particular foods.
  • Owners of an upright or chest freezer who want an easy visual check during normal use.
  • Households setting up a replacement appliance and following the maker’s stabilization instructions.
  • Buyers who can place the device safely, keep the display visible, and respond appropriately when readings change.

Who should skip it

  • Skip a loose display if the compartment is so crowded that the device will be buried, broken, or routinely moved; improve access or choose a securely compatible mounting style first.
  • Do not use an ordinary refrigerator thermometer as a substitute for a calibrated instrument where a business, laboratory, medication, or regulated process has specific monitoring requirements.
  • A wireless sensor system may be more suitable when the essential job is receiving alerts outside a detached garage, basement, or other remote location.
  • Do not assume a general indoor thermometer can tolerate freezer conditions, condensation, or food-area cleaning; use a model rated for the intended environment.
  • If the appliance has persistent temperature problems, damaged seals, unusual cycling, water leakage, or a fault warning, a consumer thermometer does not replace the appliance manual or qualified service.
  • Skip alarm features when no one in the household can reliably hear, interpret, test, and reset them.

What to verify before buying

  • Rated range: Confirm that the full stated operating and measuring ranges include the refrigerator or freezer conditions you need to observe.
  • Stated accuracy: Look for a clear accuracy specification and note whether it applies across the whole range or only within a narrower band.
  • Display resolution: Determine whether the scale or digital step is fine enough for useful decisions without implying greater accuracy than the specification supports.
  • Viewing angle: Check digit height, dial diameter, color contrast, glare, and whether the display remains legible from the direction the door opens.
  • Mounting choices: Verify the dimensions and operation of the stand, hook, clip, suction cup, or magnet instead of assuming it will fit your shelf.
  • Compartment compatibility: Look for explicit refrigerator and freezer suitability as needed, including any limits for moisture or condensation.
  • Response and stabilization: Review the maker’s guidance for placement and how long the unit should remain undisturbed before interpreting a reading.
  • Min/max memory: Check whether values persist until manually cleared, reset after a battery change, or include a time reference.
  • Alarm controls: For digital models, verify thresholds, sound level, delay behavior, mute function, and the indication for an active or silenced alert.
  • Power source: Confirm battery type, expected replacement procedure, low-battery indication, and whether settings survive a battery change.
  • Cleaning guidance: Read what can be wiped, what must stay dry, and whether the device may be immersed; do not infer washability from a sealed-looking face.
  • Calibration or checking instructions: Determine whether the maker provides a user check, an adjustment method, or a service recommendation.

Analog and digital displays solve different annoyances

An analog appliance thermometer is mechanically simple to read: open the door, locate the pointer, and compare it with the scale. It does not need a battery, and color bands can make a routine glance quick. The tradeoffs are physical size, small printed increments, parallax when viewed from an angle, and a pointer that may take time to settle after a large change. Inspect product dimensions, not only close-up images, because a dial that fills a listing photo can be modest inside a deep refrigerator.

Digital displays can offer larger numerals and avoid interpreting the space between scale marks. Some record minimum and maximum readings, which can reveal variation that is absent during a brief door opening. Others add alarms. These functions introduce menus, batteries, icons, reset behavior, and sometimes separate operating and display-temperature limits. A screen that becomes faint or slow in deep cold can be frustrating even when the sensor still works, so freezer suitability should be explicit.

Neither display type is inherently the correct one for every kitchen. A simple analog model may be the better tool for an appliance checked during daily cooking. A digital unit with memory can be more informative when you are comparing locations over a day. An alert is useful only when its threshold can be set appropriately, false alarms are understood, and someone is close enough to act.

Placement changes what the number means

Temperatures inside a refrigerator are not perfectly uniform. Door shelves experience warm air during opening, vents can create colder local zones, drawers alter circulation, and tightly packed containers can restrict airflow. A reading beside a vent should not automatically be treated as the temperature of every shelf. The appliance manual may identify airflow paths and recommended loading practices, so consult it before deciding that one location represents the whole cabinet.

For a first check, place the thermometer where it reflects the food-storage area you care about and where it will not touch the cooling surface, wall, or a cold package unless the instructions call for that method. Keep it away from a direct blast from a vent. Leave enough space for air to move around it, then allow the reading to settle for the period specified by the thermometer and appliance makers.

If you suspect an uneven cabinet, move the same thermometer between planned locations one at a time and give each position a comparable stabilization period. Changing location, shelf load, control setting, and door-opening pattern all at once makes the readings difficult to interpret. Write down the position, time, and relevant changes rather than relying on memory.

Freezers pose a visibility problem as well as a temperature problem. A thermometer hidden at the bottom of a chest freezer will rarely be checked. Secure placement near the top can improve access, but it must not obstruct the lid, hinge, baskets, or safe loading. In an upright freezer, avoid a loose unit that can fall when a drawer is pulled forward.

Opening a door lets warmer room air enter, and loading unfrozen groceries changes conditions. Defrost cycles and compressor operation can also create variation. A number observed immediately after one of these events may not describe the appliance’s established condition. Follow the appliance instructions after installation, loading, a control adjustment, cleaning, or a power interruption before drawing conclusions.

Trend information is where minimum-and-maximum memory can earn its place, but memory needs context. A recorded high may reflect a long grocery-loading session, a door left ajar, a power event, or normal operation within the product’s stated behavior. Clear the memory deliberately at the start of a known observation period and note when you did it. A value with no time stamp cannot tell you exactly when or for how long the condition occurred.

Current U.S. federal food-safety guidance commonly calls for keeping a refrigerator at 40°F (4°C) or below and a freezer at 0°F (-18°C). Consult current guidance and your appliance manual for your circumstances, especially after a power interruption or when deciding whether food remains suitable. A consumer thermometer supplies evidence; it does not determine food safety by itself.

When two thermometers disagree, do not average them and assume the result is correct. First give both units enough time in the same location, compare their specifications, check battery condition where applicable, and follow their stated checking or calibration procedures. A large or persistent disagreement is a reason to investigate the instruments and appliance, not to select the more reassuring number.

Alarms need a response plan

An alarm can draw attention to a change while the door is closed, but only if the threshold, delay, and reset behavior are understood. A model may sound immediately, wait through a delay, or continue showing an alert icon after the temperature returns. Read the current instructions before choosing a threshold, and test the sound and controls as directed.

Consider the room. An alarm inside a closed basement freezer may be inaudible upstairs. A loud signal in a compact apartment may trigger frequently during ordinary loading if the delay is too short. A remote sensor can address distance, but then wireless range, receiver location, pairing, battery status, and notification delivery become part of the system.

Make a short response checklist before relying on an alarm: confirm the door is closed, check for an obvious power issue, avoid unnecessary opening, consult the appliance manual, and follow current food-safety guidance. Repeated alerts without an obvious cause call for troubleshooting or service rather than continually widening the alarm range.

Cleaning and battery access matter over time

Spills and condensation can make a display hard to read. Place the thermometer away from leaking packages and follow the maker’s cleaning directions. “Water resistant” and “washable” are not interchangeable; many electronic displays should be wiped but never submerged. An analog housing can also trap moisture or residue around a seam even though it has no battery compartment.

For a battery-powered model, check whether the compartment can be opened without a tiny loose screw falling near food. Replace batteries according to the instructions and keep spare cells stored appropriately outside the appliance. A low-battery symbol is valuable only if it is visible during routine checks. If the screen fades, segments disappear, or readings behave erratically, treat the device as unreliable until the power and operation are checked.

Inspect hooks, stands, clips, and magnets while cleaning. A bent hook can let the unit drop onto glass; a weakened suction cup can release without warning; a folding stand can collect residue. Reposition the thermometer after restocking so its display and airflow remain unobstructed.

Limitations

  • A single thermometer reports conditions near its sensor, not every shelf, drawer, package, or corner of the appliance.
  • Consumer accuracy and resolution vary, and a detailed display does not guarantee a highly accurate measurement.
  • Door opening, loading, defrost cycles, airflow, and placement can cause readings to change.
  • Minimum-and-maximum memory may not show when a value occurred or how long it lasted.
  • An audible alarm cannot help if it is out of hearing range, muted, poorly configured, or powered by a depleted battery.
  • A magnet, hook, clip, or stand may not fit every appliance interior even when it appears versatile in photos.
  • Condensation and spills can affect readability and may damage models not designed for that exposure.
  • A refrigerator or freezer thermometer does not replace current food-safety guidance, appliance troubleshooting, or qualified repair.

Alternatives to compare

An appliance’s built-in display is convenient and may integrate with its own controls, but check the manual to understand what it measures and whether it shows a set point or a sensed temperature. A wireless refrigerator or freezer monitor can place a receiver or notification outside the compartment, making it more suitable for a remote garage or basement appliance. A data logger records readings over time and can provide more context, though setup, export, sensor placement, and calibration require additional work. An infrared thermometer measures surface temperature rather than the air or internal temperature of food, so it answers a different question. A food probe thermometer is intended for appropriate food-temperature checks and should not be treated as a permanent compartment display unless its instructions explicitly support that use.

FAQ

Where should I put a refrigerator thermometer?

Choose a visible location in the food-storage area you want to monitor, away from direct contact with a wall, cooling surface, vent blast, or recently chilled package unless the instructions specify otherwise. Do not block airflow. Follow the appliance and thermometer placement guidance, then allow the reading to stabilize before interpreting it.

Can the same thermometer be used in a refrigerator and a freezer?

Only if its stated measuring and operating ranges cover both environments. Check freezer suitability, display performance, condensation limits, mounting method, and battery guidance. A model can display low numbers without necessarily being designed to operate reliably at freezer temperatures.

Is an analog or digital refrigerator thermometer easier to use?

Analog models avoid batteries and can support a quick visual check, while digital models may offer larger numerals, memory, and alarms. Ease depends on display angle, lighting, controls, placement, and how often you need trend information. Choose the simplest format that answers your monitoring question.

Why does the temperature change after I open the door?

Room air enters when the door opens, while the sensor’s response and location affect how quickly the display changes. Loading groceries and moving the thermometer can add more variation. Close the door, avoid repeated checking, and wait for the stabilization period recommended by the relevant instructions.

Do I need a thermometer with minimum-and-maximum memory?

It is useful when you want to observe variation between checks or compare appliance locations over a defined period. Reset the memory at a known time and keep notes, because many models record the extreme values without showing exactly when or how long they occurred.

What should I do if two appliance thermometers disagree?

Place them together, allow adequate stabilization time, compare their accuracy specifications, check batteries, and use any manufacturer-provided check or calibration procedure. Do not simply average a large disagreement. Persistent differences call for further instrument checks and, if appliance performance is in doubt, appropriate troubleshooting or service.
Choosing a Butter Dish with a Lid for the Counter or Refrigerator

Product links are for reference. Verify current details on the retailer page before buying.

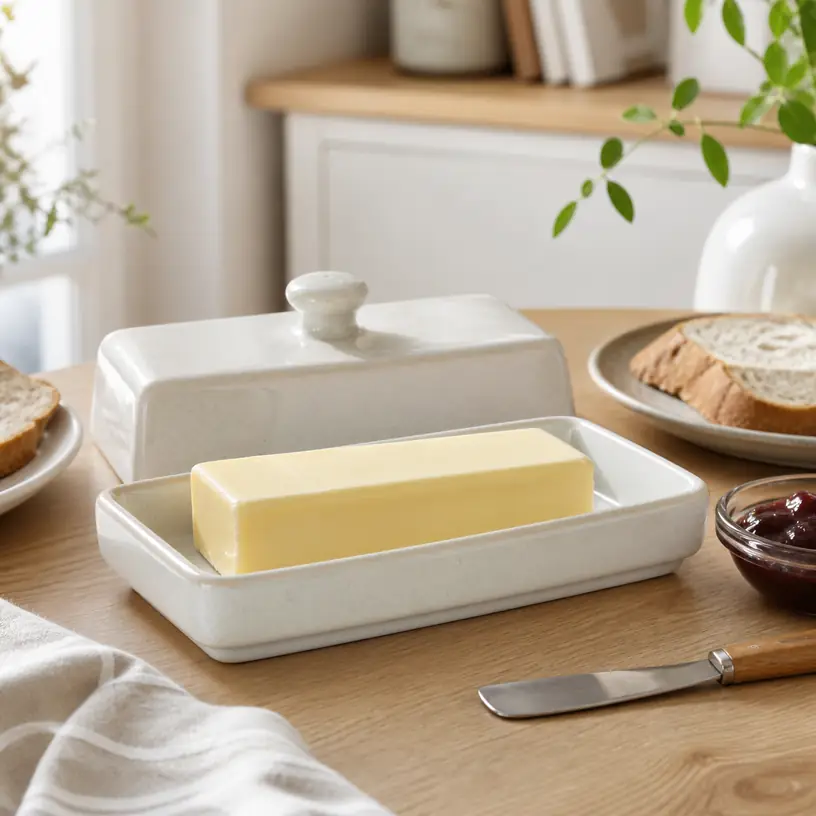
Illustrative image of a generic covered butter dish on a breakfast table

Illustrative image, not an official product photo.

Short answer

The right butter dish is determined less by its outside appearance than by the space beneath its lid. Measure the butter format you normally buy, including any extra height created when a partially used stick becomes uneven, and compare those figures with the dish’s usable interior length, width, and lid clearance. Then decide whether the dish will live mainly on a refrigerator shelf, travel between the refrigerator and table, or stay out only during meals. A stable base, a lid that can be lifted without slippery fingertips, and simple corners that are easy to clean tend to matter every day. Treat a lid as a cover rather than proof of an airtight seal, and always follow the butter package’s storage directions.

Search reference

Covered butter dish options

Compare interior dimensions, lid clearance, material, refrigerator footprint, handle shape, cleaning instructions, and whether the cover seals or simply rests on the base.

View matching options

Start with the butter, not the dish

A package labeled as a stick is not a complete size specification. Butter formats and wrapper proportions vary, while whipped, cultured, spreadable, block, and homemade butter may need a different footprint altogether. Even a dish that accepts a fresh stick can become awkward after the butter has softened, been cut at an angle, or been reshaped by a serving knife.

Measure a typical unopened portion and add reasonable clearance on all sides. Compare that result with interior dimensions rather than the widest exterior measurement. If a listing supplies only overall dimensions, the rim, wall thickness, recessed base, and lid shape may leave much less usable room than expected. Customer photos are not a reliable scale; a dimension diagram or maker specification is more useful.

Height is particularly easy to overlook. A low cover can touch the butter, collect smears, and drag them across the rim each time it is replaced. A very tall cover avoids contact but occupies more refrigerator space and may be easier to knock sideways. Look for enough clearance for the way people in the household actually cut and serve butter, not merely enough room for a perfectly rectangular new piece.

What this product type is

A butter dish with a lid is a small storage-and-serving vessel with a shallow base and removable cover. The base may be flat like a tray, recessed to hold the butter in place, or surrounded by a raised rim. The lid may rest loosely on that rim, overlap the outside edge, latch, or include a gasket. Common material descriptions include ceramic, glass, stainless steel, plastic, wood, bamboo, and mixed-material designs.

These constructions do not all provide the same storage conditions. A heavy ceramic cover may sit securely yet have no seal. A transparent cover makes the remaining amount visible but can show fingerprints and condensation. A gasketed container may reduce casual air exchange, although its actual sealing performance depends on the complete design and proper closure. Check the listing rather than inferring performance from the word “covered.”

Who this is for

  • Households that want to move butter from its wrapper to a tidier serving piece at breakfast or dinner.
  • People replacing a dish whose lid touches the butter, whose narrow handle is hard to grip, or whose base slides during serving.
  • Buyers trying to organize a crowded refrigerator shelf or door compartment around a known footprint.
  • Shared kitchens where a clearly contained portion is easier to identify and return to storage.
  • Home cooks who want a dedicated place for a butter portion while still following the package’s storage instructions.

Who should skip it

  • Skip fixed-size stick dishes if the butter you buy usually comes in tubs, broad blocks, or irregular homemade portions.
  • Anyone who needs a verified leak-resistant or airtight food container should not assume a loose covered dish provides that function.
  • A fragile glass or ceramic design may be a poor fit for households where it will be handled by young children or carried frequently across hard floors.
  • Avoid a counter-oriented design when its size, material, or care directions do not suit refrigerator storage and that is where the package says the butter belongs.
  • If you rarely serve butter separately, keeping it in its original package or a multipurpose food container may use less cabinet space.

What to verify before buying

  • Check the usable interior length, width, and height beneath the closed lid, not only the external footprint.
  • Compare those dimensions with the butter format and portion size normally used in your household.
  • Confirm whether the lid rests loosely, overlaps the base, latches, or uses a removable gasket; do not equate every lid with an airtight seal.
  • Look at how the cover is lifted. A knob, loop, side lip, or textured area should be reachable with the grip you expect to use.
  • Check the base for a rim or recess that contains smears without making the last portion difficult to reach.
  • Measure the intended refrigerator shelf, door bin, counter corner, or covered serving tray, including room to lift the lid vertically.
  • Review food-contact, temperature, refrigerator, microwave, freezer, and dishwasher wording separately. Suitability for one does not establish suitability for the others.
  • For glass or ceramic, check whether the maker describes thermal-shock precautions and inspect the item for chips or cracks before use.
  • For wood or bamboo components, read the washing, drying, oiling, and prolonged-moisture guidance.
  • Confirm what is included. A pictured knife, spreader, board, or replacement gasket may be a styling prop rather than part of the package.

The base should support cutting as well as storage

Serving butter applies sideways force. A broad, level base is less likely to rotate than a narrow foot, and a modest rim can keep a soft portion from sliding off the edge. At the same time, a deep lip can obstruct a knife when the butter is nearly gone. Think about whether users slice downward, scrape across the top, or soften a small amount before spreading; the most convenient base profile changes with that habit.

Surface texture also affects cleanup. Decorative grooves and sharp internal corners can trap butter, crumbs, and wash water. A smooth glazed or molded surface is usually easier to inspect, but only the manufacturer’s care directions can establish the permitted cleaning method. If the base will be used for cutting, verify that the material and finish are intended for that contact rather than assuming any serving tray is a cutting board.

A non-slip foot can be useful, but it adds another material junction to clean and inspect. Determine whether it is permanently bonded, removable, or merely an unattached pad. Check replacement availability for detachable rings or feet that are important to the dish’s stability.

Lid shape changes everyday handling

A cover is handled when fingers may be cool, damp, or lightly greasy. Small round knobs can look neat but offer little leverage. Long handles, raised arches, or opposing side tabs distribute the grip differently. The best choice is one that can be lifted and aligned without touching the butter or tilting the base.

Consider where the removed lid goes. A flat-topped cover may be easy to set down, while a rounded or knobbed lid can wobble if inverted. Setting the butter-contact side on the table can transfer residue, so plan for a clean resting place or choose a lid that remains clean inside during normal use. Some designs attach the cover, but hinges and latches introduce crevices and moving parts that need inspection.

Clear lids make it possible to check the contents without opening the dish. Opaque lids hide smears and visual clutter but also hide how much remains. Neither choice preserves butter by itself; light exposure, temperature, time, closure, and the butter maker’s directions still matter.

Material tradeoffs belong in the routine

Ceramic and stoneware-style dishes often feel stable on the table and come in many finishes. Their weight may be helpful during serving but inconvenient for one-handed handling. Verify dishwasher and temperature guidance, and retire chipped or cracked pieces according to the maker’s instructions.

Glass dishes provide visibility and usually have a nonporous surface when intact. They can be slippery when wet and need protection from impact and abrupt temperature changes. Molded ridges, seams, and lid-to-base contact points deserve a close look because they influence grip and cleaning.

Plastic containers are typically lighter and may offer clips or gaskets. Check food-contact wording, stain and odor care, heat restrictions, and whether replacement seals are available. A scratched, warped, cracked, or poorly closing container should be assessed using the manufacturer’s replacement guidance.

Stainless steel designs hide the contents but can be lightweight and resistant to ordinary table knocks. Thin bases may move during cutting, and polished covers can show fingerprints. Confirm whether other materials are used in handles, feet, or seals and clean each component as directed.

Wood or bamboo lids and bases add a warm serving-board appearance, but their care can differ sharply from the rest of the dish. Many wood components should not soak, and a wooden lid should not be presumed to create a seal. Mixed-material pieces can require hand washing or component-by-component care even when one part is dishwasher compatible.

Refrigerator, counter, and table are different settings

A compact rectangular dish often makes efficient use of a refrigerator shelf. Leave enough room above it to lift the lid without pulling the whole dish forward, and make sure neighboring containers cannot strike a fragile knob. Door storage is convenient but varies in dimensions and movement; measure the bin and verify that the dish remains level when the door opens and closes.

For table service, stability and comfortable lifting become more noticeable than stacking. A dish carried from a cold refrigerator may collect condensation in some room conditions, so place it on a suitable dry surface and handle it carefully. Return or discard the butter according to its package directions and applicable food-safety guidance rather than relying on a general room-temperature rule.

Counter storage deserves the same product-specific approach. Butter type, formulation, package instructions, room temperature, sunlight, contamination risk, and intended holding time can all affect the decision. A covered dish helps protect against casual contact and debris, but it does not make every butter product suitable for indefinite room-temperature storage.

Cleaning details that are easy to miss

Before first use, clean the dish as directed and inspect every food-contact surface. If the lid has a gasket, remove it only when the instructions say it is removable, clean the channel, and reinstall it fully dry and untwisted. Trapped residue can prevent closure even when the container looks clean from above.

“Dishwasher safe” may apply only to a particular component or rack position. Painted decoration, metallic trim, wood, adhesives, seals, and bonded non-slip feet can change the care method. Verify the complete instructions instead of applying the base material’s general reputation to a mixed-material dish.

Butter residue is easier to see on some colors than others. Regardless of finish, inspect corners, the underside of the lid, handle joints, and the base rim. Let components dry completely before closing them for storage so moisture is not trapped inside an empty dish.

Limitations

  • Interior capacity may be substantially smaller than the published outside dimensions.
  • A loose lid protects against contact and debris but does not necessarily form an airtight or leak-resistant seal.
  • Fragile materials can chip, crack, or break, while light dishes can slide during cutting.
  • Tall handles and domed covers consume refrigerator clearance that a simple footprint measurement misses.
  • Mixed materials may require separate cleaning methods and can make dishwasher claims component-specific.
  • No butter dish overrides the storage directions, date guidance, or handling instructions on the food package.
  • Decorative styling cannot compensate for an awkward grip, poor base stability, or a cover that touches the contents.

Alternatives to compare

  • The butter’s original wrapper placed inside a clean secondary container for added containment.
  • A small multipurpose food-storage box with verified interior dimensions and closure characteristics.
  • A lidded butter crock or butter bell, which uses a different holding arrangement and requires its own directions and upkeep.
  • A flat serving board with a separate dome for meal-only presentation and prompt return to appropriate storage.
  • A small ramekin with a compatible cover for irregular butter portions that do not fit stick-shaped dishes.
  • A divided condiment server when several spreads are presented together and removed after the meal.

FAQ

How much clearance should a butter dish lid have?

There should be enough usable height and side clearance for the butter portion, including the uneven top created during normal serving, without letting the lid touch or smear it. Because stick formats and lid interiors vary, measure your usual butter and compare it with published interior dimensions rather than relying on a generic “one stick” claim.

Does a covered butter dish make an airtight seal?

Not necessarily. Many lids simply rest on or overlap the base. A gasket or latch may indicate a more deliberate closure, but actual sealing performance should be confirmed in the current product description and instructions. Do not infer airtight or leak-resistant storage from the presence of a lid alone.

Can a butter dish stay on the kitchen counter?

Follow the storage directions on the specific butter package and applicable food-safety guidance. Butter type, formulation, room conditions, exposure, and time all matter. A lid limits casual contact and debris, but it does not create refrigeration or make every butter product suitable for prolonged counter storage.

Is ceramic, glass, metal, or plastic better for a butter dish?

Each suits a different routine. Ceramic can provide table stability, glass shows the contents, metal hides smears and handles ordinary bumps differently, and plastic can be lightweight or gasketed. Compare grip, fragility, interior space, cleaning instructions, temperature restrictions, and replacement parts instead of choosing by material alone.

Can a butter dish go in the dishwasher?

Only when the maker’s care instructions permit it. The base, lid, gasket, wood insert, decoration, handle, and non-slip foot may have different requirements. Check whether dishwasher guidance specifies a rack position or excludes any component, and allow all parts to dry fully before reassembly.

Reusable Silicone Stretch Lids: Matching Sizes to Bowls and Produce

Product links are for reference. Verify current details on the retailer page before buying.

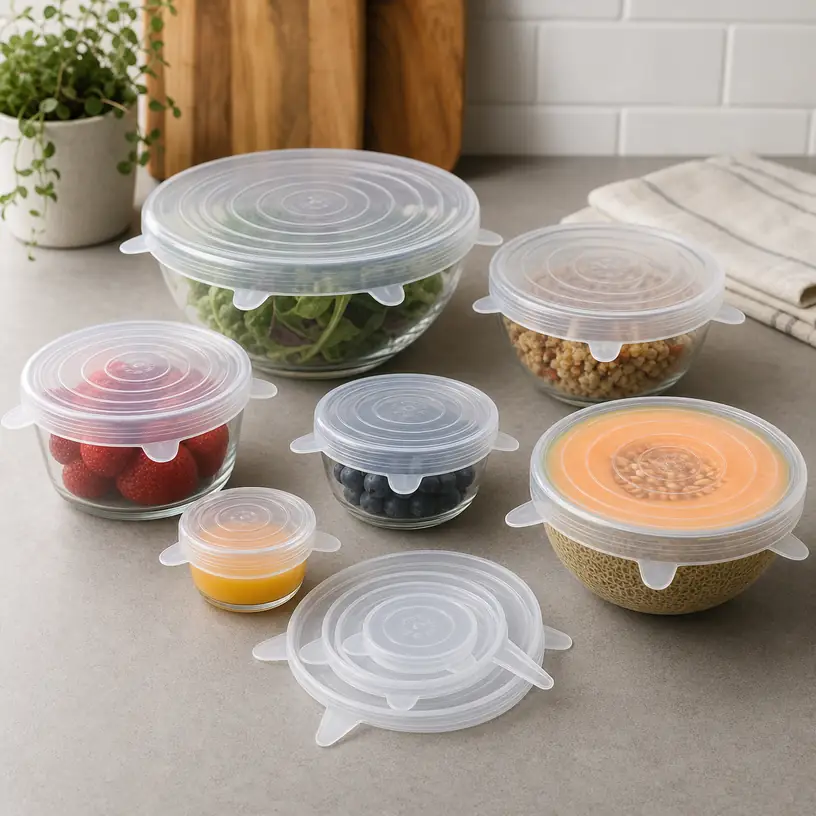
Illustrative image for a reusable silicone stretch lid buying guide

Illustrative image, not an official product photo.

Short answer

Reusable silicone stretch lids make the most sense when several lid sizes match containers you already reach for: a mixing bowl, an open can, half a melon, or a small leftover dish. Measure the outside diameter of those items instead of choosing by the number of pieces alone. Then compare the stated size range, compatible rim shapes, tab design, temperature guidance, and cleaning instructions. A lid still needs a clean, dry edge and an appropriate fit to stay in place.

Search reference

Reusable silicone stretch lid sets

Compare current size ranges, lid shapes, pull tabs, care directions, and stated container compatibility with the bowls and produce you plan to cover.

View matching options

Start with six measurements, not a set count

A six-piece set sounds complete, but adjacent lid sizes may cover nearly the same group of containers while missing the large bowl that prompted the purchase. Make a short list of the items that regularly lose their original lids, and measure the widest part of each rim. For cut produce, measure the diameter near the cut face rather than the whole fruit.

Compare those measurements with the maker’s stated unstretched and supported ranges. Stretch is useful for creating tension, but it should not be treated as unlimited extra size. A lid pulled to its maximum may be difficult to position, more likely to slip during handling, and less convenient for everyday reuse. If two frequently used bowls fall between sizes, a mixed set with closer increments may be more practical than a bundle centered on very small containers.

Who this is for

  • Households that often store leftovers in bowls without matching rigid lids.
  • Small kitchens where a nested set of flexible covers takes less drawer space than many container lids.
  • People who want temporary covers for cut onions, citrus, melons, or open cans when the size and shape are suitable.
  • Shared kitchens where quick visual size selection matters more than a perfectly matched container system.
  • Buyers willing to wash and dry flexible lids between uses and keep container rims clean before applying them.

Who should skip it

  • Choose locking food-storage containers when spill resistance during commuting or bag transport is the priority.
  • Keep purpose-made lids for containers that already have reliable fitted covers.
  • Skip stretch lids if most cookware has pronounced handles, pouring spouts, or irregular rims that interrupt contact.
  • Use another storage method when the food, temperature, or cleaning routine falls outside the current product’s stated guidance.

What to verify before buying

  • Measure the outside diameter and note whether each target rim is round, square, rectangular, lipped, or irregular.
  • Confirm the dimensions for every lid rather than relying on labels such as small, medium, or large.
  • Check the stated material, food-contact information, temperature limits, and refrigerator, freezer, microwave, and dishwasher guidance.
  • Look at the number and position of pull tabs, especially if wet or slippery lids are difficult for you to grip.
  • Confirm whether the lids are intended for cans and cut produce as well as bowls and containers.
  • Review care directions for oily foods, staining ingredients, odor removal, and full drying before nesting.
  • Check whether the set includes a storage holder or whether the lids can be stacked without sticking together.

Rim shape decides whether stretch becomes grip

Flexible material cannot compensate for every container shape. A smooth, even rim gives the lid a continuous surface to wrap around, while a spout, side handle, thick rolled lip, or sharp corner can create a gap. Square and rectangular dishes also ask the material to travel farther around corners than around a circle with a similar width.

Container condition matters too. Moisture, oil, crumbs, or condensation on the contact area can reduce grip. Wipe the rim and your hands dry before stretching the lid evenly from opposite sides. If the lid repeatedly rides upward or distorts the container, move to the next size rather than forcing more tension. Very lightweight cups and bowls may flex or tip while a tight lid is being applied.

Tabs, texture, and a repeatable routine

Small tabs can help center a lid, pull it over a rim, and lift an edge later. Their usefulness depends on placement and thickness: a tiny tab may be hard to hold with wet hands, while several prominent tabs take slightly more room when lids are nested. A textured outer surface can also improve handling, but grooves may need extra attention during washing.

For an easier routine, assign the sizes to familiar objects before storing the set. For example, keep the lid that fits the everyday mixing bowl on top of the stack, and avoid tightly nesting damp pieces. Some sets use colors or molded size markings; verify whether those cues are visible enough to be useful once the lids are in a drawer.

Storage expectations and food safety habits

A stretch lid is a cover, not a promise that a bowl can be turned upside down or carried loose in a backpack. Keep covered containers upright unless the maker explicitly describes and demonstrates a different use. For soups, dressings, and other spill-prone foods, a rigid container with a locking lid is generally the more predictable transport option.

Follow ordinary food-storage practices regardless of the cover style. Refrigerate perishable leftovers promptly, use containers appropriate for the food, and discard food according to relevant safety guidance. Check the current instructions before exposing a lid to heat, freezing temperatures, sharp edges, or direct contact with a heating element. Replace a lid if it tears, remains tacky after cleaning, or can no longer hold its intended shape.

Limitations

  • Real-world fit depends on rim geometry and surface condition, not diameter alone.
  • A size range may describe possible stretch rather than the easiest everyday fit.
  • Flexible covers can slip on wet, oily, dusty, or uneven edges.
  • Strong-smelling or deeply colored foods may require more careful cleaning according to the maker’s directions.
  • Stretch lids do not automatically make a container leakproof, stackable, or safe for travel.
  • Pulling a small lid over a large rim can make application and removal unnecessarily difficult.

Alternatives to compare

  • Rigid snap-on or locking containers for lunches and liquid leftovers.
  • Elastic fabric bowl covers for low-tension countertop or refrigerator covering where appropriate.
  • Flat silicone covers that rest on smooth bowl rims without wrapping around the sides.
  • Reusable storage bags for portions that do not need to retain a bowl’s shape.
  • Replacement lids from the container maker when only one frequently used piece is missing.

FAQ

How do I choose the right stretch-lid size?

Measure the outside diameter of the container rim and compare it with the individual lid dimensions and supported fit range. Select a lid that needs modest, even tension rather than the smallest one that can be forced over the edge.

Do silicone stretch lids fit square containers?

Some are described for multiple shapes, but corners, rolled rims, and side features can interrupt the seal. Check the current compatibility guidance and dimensions; a round-lid set should not be assumed to fit every square or rectangular dish.

Why does a stretch lid keep slipping off?

The lid may be too small or too large, or the rim may be damp, oily, uneven, or interrupted by a handle or spout. Clean and dry the contact area, center the lid, and try the next appropriate size without overstretching it.

Can a covered bowl be stored upside down?

Do not assume so. Stretch lids vary in fit and are not automatically leakproof. Keep the container upright unless the maker explicitly states that the specific lid and container combination supports another orientation.

How should reusable stretch lids be stored?

Wash and dry them according to the current care instructions, then stack or hang them without trapping moisture. A loose nested stack or simple holder can make sizes easier to separate than a tightly compressed bundle.

Reusable Produce Bags for Grocery Runs and Kitchen Storage

Product links are for reference. Verify current details on the retailer page before buying.

Illustrative image for a reusable produce bags buying guide

Illustrative image, not an official product photo.

Short answer

Reusable produce bags are useful when grocery trips leave you with a drawer full of thin plastic bags or when loose apples, onions, herbs, and greens need a tidier way to move from cart to fridge. The most practical set is not simply the one with the most bags. Look at bag sizes, tare weight visibility, fabric style, closure design, wash instructions, and whether the bags will actually fit the way you shop.

Search reference

Compare reusable produce bag options

Use the search page to compare current mesh, cotton, and mixed-size sets, then confirm bag counts, dimensions, closure details, and care instructions before choosing a set.

View matching options

Think about your grocery routine first

Produce bags work best when they match a repeated habit. A weekly shopper who buys leafy greens, citrus, potatoes, and bulk onions may need several larger bags and a few small ones. Someone who mostly buys bananas and a head of lettuce may only need a compact set that stays in a tote or car console.

Before comparing sets, picture the parts of the shopping trip where the bag will matter. Will cashiers need to see the contents quickly? Do you buy items by weight? Will damp herbs or washed greens go straight into the fridge? Do you want the bags to double as pantry organization for onions, garlic, or snacks? Those answers shape the fabric and closure choice more than a product photo does.

Who this is for

  • Shoppers who want a reusable option for loose fruits and vegetables.
  • Households that already use grocery totes but still rely on disposable produce bags inside the store.
  • People organizing fridge drawers, pantry shelves, farmers market purchases, or bulk-bin items.
  • Buyers who prefer a washable, packable set that can live with other shopping bags.
  • Shared households that need different sizes for quick weekday trips and larger restock runs.

Who should skip it

  • Anyone who rarely buys loose produce or usually buys pre-packed items.
  • Shoppers who cannot use reusable bags at a particular store, market, or local checkout system.
  • Buyers who need sealed, leakproof food containers rather than breathable bags.
  • Households that will not wash and dry the bags when they become damp or dirty.

What to verify before buying

  • Confirm the number of bags, each listed size, and whether the set includes small, medium, and large options.
  • Check the fabric description, such as mesh, cotton, polyester, or a blended set, and match it to visibility and storage needs.
  • Look for tare weight information if the bags will be used for items sold by weight.
  • Review the closure style, including drawstrings, toggles, color tabs, or zipper-like openings.
  • Read the care instructions so you know whether the bags can be machine washed and how they should be dried.
  • Check whether the current option is meant for produce only or also for bulk dry goods, pantry items, or travel organization.
  • Make sure the bags fold small enough to keep with your main grocery tote.

Fabric, visibility, and weighing details

Mesh bags are popular because they let cashiers and household members see what is inside. They also tend to feel light and packable. The tradeoff is that very fine items, small grains, or powdery bulk goods may need a tighter weave or a different container.

Cotton and muslin-style bags can feel more substantial and may be useful for pantry organization, but they can hide the contents and may weigh more at checkout. If your store weighs produce in the bag, the tare weight matters. Some reusable bags display it on a tag or label, while others require you to remember or write it down. Verify the current listing rather than assuming every set handles tare weight the same way.

Closures also deserve attention. A simple drawstring is easy to use, but loose cords can tangle in a drawer or washing machine. Toggles may keep heavier produce from spilling out, while color-coded tabs can help separate bag sizes. None of these details is universal, so compare the current set configuration carefully.

Cleaning and storage habits

Reusable bags only stay practical if they are easy to reset after shopping. If you put damp greens, soil-dusted potatoes, or farmers market produce inside them, plan for washing and full drying before the next trip. A bag that remains damp in a tote can develop odors or mildew, regardless of how convenient it seemed at checkout.

For fridge use, breathable mesh may help you see contents quickly, but it is not the same as a sealed storage container. Delicate herbs, cut produce, berries, or washed greens may need a different storage method depending on how quickly you plan to use them. Treat reusable produce bags as a transport and organization tool, not a universal freshness solution.

Limitations

  • Store policies, checkout equipment, and local rules can affect whether reusable produce bags are convenient to use.
  • Bags are not leakproof and should not replace sealed containers for wet, cut, or spill-prone food.
  • Dark or opaque fabric can make it harder for cashiers to identify produce quickly.
  • Heavier fabric may affect weighed purchases if tare weight is not handled correctly.
  • Drawstrings, toggles, and seams can wear over time, especially with heavy produce or rough washing.

Alternatives to compare

  • Standard reusable grocery totes for boxed, canned, and packaged items.
  • Collapsible crates or market baskets for farmers market trips and heavier produce.
  • Glass or plastic food containers for cut fruit, washed greens, and leftovers.
  • Silicone storage bags for sealed snacks or damp items that should not sit in mesh.
  • Open fridge bins when the main goal is drawer organization rather than shopping.

FAQ

How many reusable produce bags do I need?

For occasional grocery trips, a small mixed-size set may be enough. Larger households or weekly shoppers may want several medium and large bags so onions, apples, citrus, greens, and potatoes do not all share one overfilled bag.

Are mesh or cotton produce bags better?

Mesh is usually easier for visibility and quick checkout, while cotton or muslin-style bags can feel sturdier and may work well for pantry storage. The better choice depends on whether you value see-through convenience, fabric feel, or storage appearance.

What does tare weight mean for produce bags?

Tare weight is the weight of the empty bag. If produce is sold by weight, the bag weight may need to be accounted for at checkout. Check whether the current bag set lists tare weights and whether your store can use them.

Can reusable produce bags go in the refrigerator?

Many people use them in fridge drawers, but they are not sealed containers. For damp greens, cut produce, berries, or foods that need moisture control, compare the bag instructions with a dedicated food storage option.

How should I clean reusable produce bags?

Follow the care instructions for the specific fabric and closure hardware. In general, bags that touch damp or dirty produce should be washed when needed and dried fully before being stored in a tote or drawer.