Travel Shoe Bags: Separating Footwear Without Wasting Suitcase Space

Product links are for reference. Verify current details on the retailer page before buying.
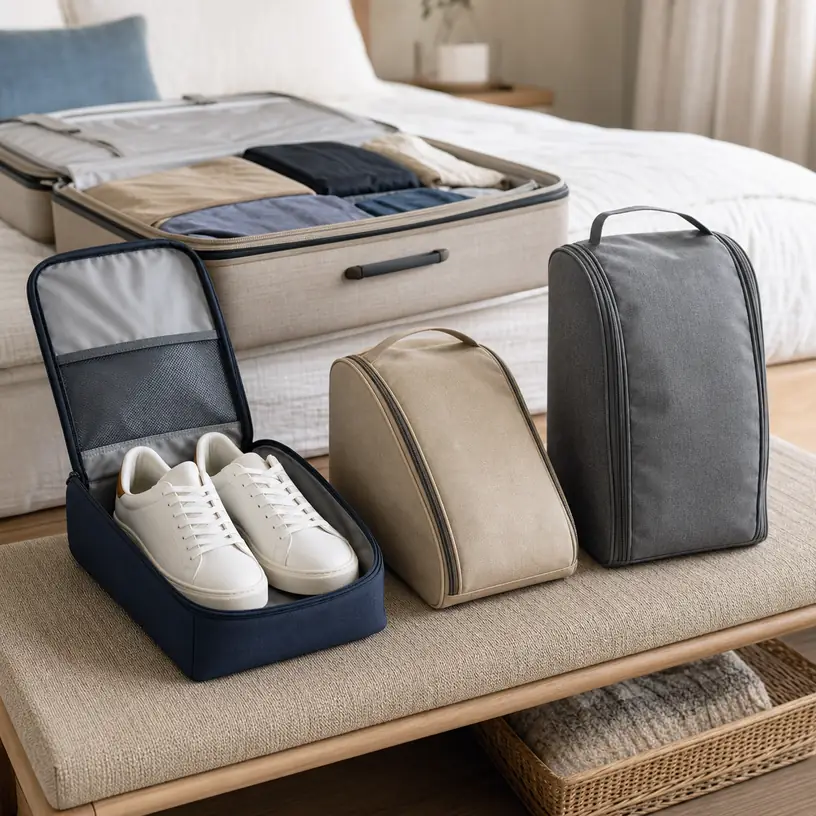
Illustrative image of generic travel shoe pouches beside an open suitcase

Illustrative image, not an official product photo.

Short answer

Choose a travel shoe bag around the largest pair that will actually make the trip, not around a generic shoe-size label. Measure each shoe’s sole length, widest point, and standing height, then allow room for the pair to settle without forcing the zipper around heels or bulky tread. Low sneakers may fit a flat zip pouch, while ankle boots, platform shoes, or two shoes packed side by side can require a taller, boxier shape. Also compare closure placement, empty bulk, carrying handle, current care instructions, and whether mesh or ventilation openings make sense for where the bag will sit. A shoe pouch separates surfaces and loose debris; it does not make damp footwear clean, dry, or odor-free.

Search reference

Travel shoe bags for suitcase packing

Compare listed interior dimensions with your longest and tallest pair, then check zipper layout, fabric, ventilation, care guidance, handle placement, and set configuration.

View matching options

Make a footwear packing map first

Shoe bags look simple, but the object going inside is awkward: a pair is long, often widest at the forefoot, taller at the heel, and rarely forms a neat rectangle. Product photos can make an empty pouch appear spacious even when the zipper opening or upper corners limit what fits. A quick measurement of the intended shoes is more useful than choosing by color or by the number of bags in a set.

Place the pair in the arrangement you would use for packing. Shoes nested heel-to-toe usually create a narrower bundle, while side-by-side placement can be easier to load but needs more width. Measure that bundle at its longest, widest, and tallest points. If the footwear has stiff uppers, a prominent heel, thick tread, or hardware, avoid assuming it can be compressed into dimensions intended for flexible low-cut shoes.

Next, map the suitcase. Decide whether the pouch will lie flat along the base, stand against a side wall, or occupy the space between a packing cube and the case frame. A tall rectangular shoe bag may load easily but waste space around low sneakers. A soft drawstring sack conforms to unused corners but provides less control over how the soles and uppers meet. The right format is the one that fits both the footwear bundle and a specific place in your normal luggage.

Who this is for

  • Travelers who want a removable layer between shoe soles and clothing, accessories, or the suitcase lining.
  • People packing a second pair for work, an event, a gym visit, or a change between walking and dress shoes.
  • Households that want each traveler’s footwear contained separately when several suitcases are packed together.
  • Anyone who prefers to lift a complete pair out of luggage without searching for two individually wrapped shoes.
  • Travelers willing to clean and dry footwear before packing rather than treating the pouch as a substitute for shoe care.

What to verify before buying

  • Usable dimensions: Look for internal or clearly defined bag measurements and compare all three dimensions with the packed pair. Exterior length alone does not describe heel or toe clearance.
  • Opening and zipper path: Check whether the lid opens across three sides, along the top, or through a narrower end panel. The opening must accommodate the widest part of the shoe without excessive bending.
  • Bag shape: Flat envelopes suit different footwear from gusseted boxes. Confirm whether the side panels stand at their listed depth once loaded.
  • Fabric description: Review current material wording, lining details, seam construction, and any water-resistance language. Do not interpret ordinary fabric or mesh as waterproof containment.
  • Ventilation: Identify where mesh panels, eyelets, or other openings are positioned and consider whether they could expose nearby luggage contents to loose debris or moisture.
  • Care method: Confirm whether the pouch is wipe-clean, hand-washable, or machine-washable according to current instructions. Check any drying restrictions as well.
  • Set composition: Verify the quantity and each size in a multipack. A large set is useful only when its mix fits the shoes and travelers in your packing plan.
  • Handle and identification details: Inspect handle attachment, label windows, and viewing panels if you expect to carry the bag separately or distinguish several similar pouches.

Match the pouch shape to the shoes

Flat zip pouches for low-profile pairs

An envelope-style bag can be an efficient choice for slippers, sandals, flats, and some low sneakers because it adds little structure of its own. Look at the zipper opening carefully. A pouch may have enough overall length yet remain difficult to load if the opening stops short of the corners or if the zipper must curve tightly around a thick sole.

A flat bag also encourages the two shoes to rest directly against one another. Decide whether sole-to-sole, heel-to-toe, or a thin internal separator works for the materials involved. Decorative surfaces, light-colored uppers, and projecting hardware may need more deliberate placement than durable casual footwear. Follow the shoe maker’s storage guidance when available.

Gusseted bags for everyday sneakers

A gusset creates depth and can give a pair a more predictable footprint inside the suitcase. This format is often easier to stack beside packing cubes because it loads like a soft rectangular block. However, listed capacity should still be checked against the shoe bundle. The gusset may taper near the toe, and a lid that looks tall in the center may offer less clearance around the zipper seam.

Inspect how the bag behaves when partly filled. Stiff panels preserve the shape but occupy space even without shoes. Very soft panels pack down between uses, though the pouch may slump while it is being loaded. Neither construction is automatically better; the useful choice depends on whether predictable stacking or minimal empty bulk matters more.

Taller formats for boots and raised heels

Ankle boots and other high-profile footwear need standing height as well as sole length. Some tall shoe bags orient footwear upright, while others place one shoe along each side. Study the loading diagram and compare it with the pair’s shaft height, heel profile, and rigidity. Folding a soft boot shaft may be acceptable for some footwear but unsuitable for another pair, so check relevant care guidance rather than assuming.

High heels can create concentrated pressure at the heel tip and an uneven bundle around the toe box. A generic tall pouch organizes the pair but does not necessarily protect its shape. If the shoes are delicate or highly structured, compare a fitted shoe case or the original suitable storage instead of relying on a thin travel bag.

One shared bag or one pouch per shoe?

Packing both shoes in one bag keeps the pair together and reduces the number of closures to manage. It works well when the shoes can be arranged without one sole rubbing an upper. Before departure, try the intended heel-to-toe layout and close the pouch without forcing it. If the zipper path presses directly against a heel or toe, a larger shape may be preferable to pulling harder on the closure.

Individual pouches let each shoe fill a narrow gap in the suitcase and prevent the two shoes from touching. They also make it easier to place footwear around wheel housings or along opposite edges. The tradeoff is tracking two bags and making sure both return after the trip. A set with distinct colors, labels, or another simple identification method can help when multiple travelers use similar pouches.

Some multipacks combine several sizes. That can serve a household packing sandals, sneakers, and boots, but size labels are not standardized. Read the dimensions of every included piece rather than assuming all bags in a set hold the same class of footwear. If only one size works, unused pouches add storage clutter rather than travel value.

Ventilation is a packing decision, not a cure

Mesh panels and eyelets allow more air exchange than a fully enclosed fabric wall, but ventilation does not make wet shoes ready for luggage. Footwear should be cleaned as appropriate, allowed to dry, and checked for trapped debris before it goes into a suitcase. Packing damp items can affect both the pouch and neighboring contents regardless of the marketing language used for the bag.

The placement of openings matters. A large mesh top makes identification easy but reduces separation from the rest of the suitcase. Small openings near the upper side may offer a different balance. If the pouch sits beside clean clothing, consider whether fine dust, sand, or moisture could pass through. A more enclosed wipeable bag may be easier to isolate after a messy outing, while a breathable pouch may suit clean, dry indoor shoes.

No soft shoe bag should be assumed to contain a liquid spill or provide complete odor control. Keep damp, muddy, or strongly soiled footwear out of packed luggage until it has been handled appropriately. If an unexpected wet pair must travel, use a packing method suitable for the situation and unpack it promptly rather than leaving it sealed for storage.

Closure, handles, and care details that earn their space

A three-sided zipper creates a wide lid and lets you place shoes rather than push them through an end opening. It also adds a longer track that can catch if the bag is overfilled. Check zipper position with the planned shoe layout: tread, laces, and heel tabs should remain clear of the slider. Dual pulls can make access flexible, but they do not increase the bag’s usable dimensions.

A short grab handle is useful for lifting the pouch out of a deep case or carrying it from a hotel room to a gym locker. Look at where the handle joins the body and how the loaded bag hangs. A handle on a soft lid may tip the contents differently from one attached to an end panel. Unless the current specifications support it, do not treat a small organizer handle as a feature for prolonged carrying.

Care instructions deserve attention before the first trip. A fabric that can be wiped after routine use may be enough for clean city shoes. A household packing hiking or sports footwear may value a washable construction, but zippers, coatings, stiffeners, and viewing windows can limit the permitted method. Follow the listed instructions, empty debris outdoors where appropriate, and let the pouch dry fully before it returns to a drawer or suitcase.

A simple loading routine

Clean and dry the footwear according to its own care requirements. Remove loose material from tread, fasten straps, and secure laces so they cannot enter the zipper. Arrange the shoes exactly as they were positioned for measurement. If you use a divider, shoe cover, or shape support, include it in the fit test rather than adding it after selecting the bag.

Load the pouch without forcing the corners, then run a finger safely along the inside edge to confirm fabric or laces are clear of the zipper. Close it while the bag rests on a stable surface. Place the packed pouch in its planned suitcase position and complete the rest of the load. A shoe bag buried under heavy rigid items can still transfer pressure to the footwear inside.

At the destination, remove the shoes and inspect the pouch. Let both air as appropriate before repacking. Keeping a small routine—clean, dry, arrange, close, position—does more for orderly luggage than expecting the organizer to correct footwear that was packed wet or dirty.

Who should skip it

  • Travelers wearing one pair for the entire trip may not need a dedicated organizer at all.
  • A disposable or washable wrapping method may be simpler for an occasional trip if storage space at home is limited.
  • Delicate, structured, or valuable shoes may need a fitted protective case rather than a soft pouch.
  • Very muddy or wet footwear should not be placed directly into regular luggage merely because a shoe bag is available.
  • Travelers who already use a suitcase compartment designed for footwear may find another layer redundant.

Limitations

  • Size labels such as small, large, or men’s and women’s do not replace actual interior measurements.
  • A soft pouch separates surfaces but does not prevent crushing, scuffing, shape loss, or impact in every packing arrangement.
  • Mesh and ventilation openings can allow fine debris or moisture to reach adjacent contents.
  • Water-resistant wording does not establish waterproof containment unless the current specification explicitly says so.
  • Dark or opaque fabric can make similar bags hard to identify when several travelers use the same set.
  • A gusseted or structured bag occupies suitcase volume even when the footwear inside is low-profile.
  • Washability depends on the complete construction, including zippers, coatings, windows, handles, and internal stiffeners.
  • Search listings, set quantities, dimensions, and materials can change; verify the current details before ordering.

Alternatives to compare

  • A suitcase with a built-in shoe compartment when its location and dimensions suit the pairs you travel with.
  • Separate washable drawstring sacks for flexible placement and minimal empty bulk.
  • A fitted hard or semi-structured shoe case for footwear that needs more shape protection.
  • Shower caps or another simple reusable sole-covering method for occasional packing, provided the fit and material are appropriate.
  • Wearing the bulkiest suitable pair in transit and packing only a low-profile change of shoes.
  • Reducing the footwear list so one versatile pair can cover more of the itinerary.

FAQ

What size travel shoe bag do I need for sneakers?

Measure the sneakers arranged as they will sit in the pouch, including sole length, combined width, and maximum height. Compare those numbers with usable interior dimensions and inspect the zipper opening. A shoe-size range alone cannot account for thick soles, wide toe boxes, or raised heel tabs.

Is it better to put both shoes in one bag?

One bag keeps a pair together and can create a tidy rectangular unit, provided the shoes fit without a sole rubbing a vulnerable upper. Separate pouches are useful when each shoe must fill a different suitcase gap or when you want the shoes isolated from one another. Try both layouts with the actual pair before deciding.

Should a travel shoe bag have mesh ventilation?

Mesh can help with identification and air exchange, but it also reduces the barrier between footwear and nearby contents. Use it for clean, dry shoes when that tradeoff fits the packing plan. Ventilation is not a substitute for cleaning and drying footwear before it enters luggage.

Can travel shoe bags go in a washing machine?

Only when the current care instructions permit machine washing. Fabric, coatings, zipper construction, clear windows, handles, and internal panels can all affect the approved method. Follow the product guidance and allow the bag to dry fully before storing or repacking it.

Do shoe bags keep the inside of a suitcase clean?

They provide a removable layer between footwear and the suitcase, which can help contain ordinary surface contact and some loose debris. They cannot guarantee containment of fine sand, moisture, mud, or odors, especially when the bag has mesh panels or is damaged. Clean and dry shoes first, and inspect the pouch after use.
Choosing a Clip-On Book Light for Bedtime Reading and Travel

Product links are for reference. Verify current details on the retailer page before buying.

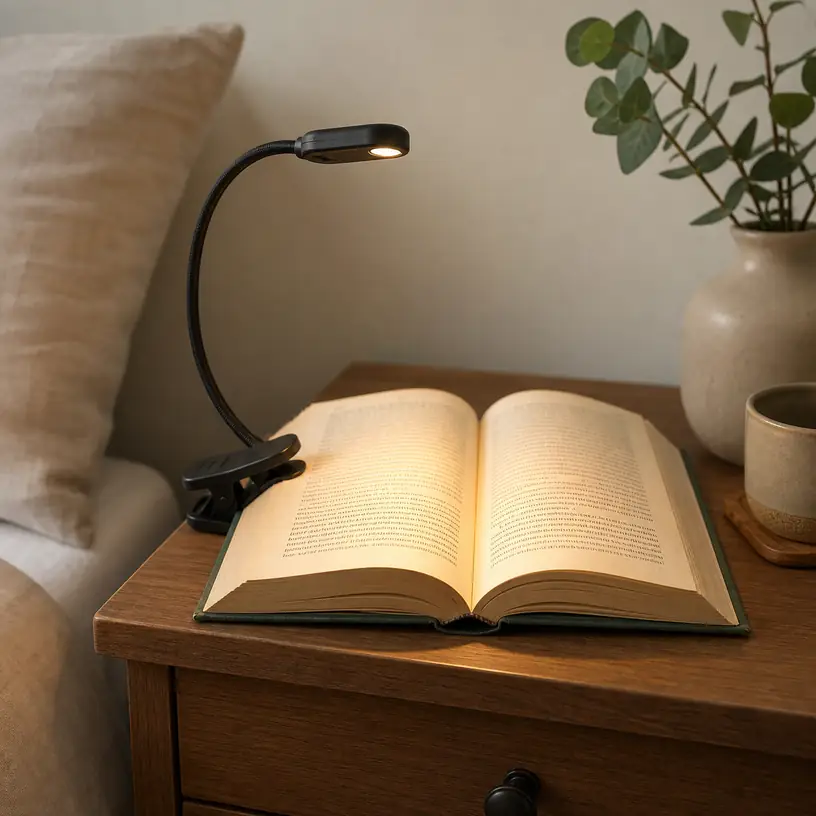
Illustrative image of a generic clip-on book light attached to an open book

Illustrative image, not an official product photo.

Short answer

A useful clip-on book light should illuminate the page you are reading without turning the rest of the room into a spotlight. Start with beam shape and low-level brightness rather than the highest advertised output. Then consider how securely the clamp fits your usual books, whether the neck stays in position, how the controls behave in the dark, and whether charging or replaceable batteries better suit your routine. For travel or a shared bedroom, compact folded size, weight, indicator-light behavior, and the ability to reduce glare matter as much as raw brightness.

Search reference

Clip-on book light options

Compare beam coverage, dimming steps, color settings, clamp dimensions, charging method, folded size, and the location of the controls before choosing.

View matching options

Read the page, not the whole room

The central job of a book light is narrower than that of a bedside lamp. It needs to cover the active page, or a two-page spread if you prefer, while keeping spill light under control. A broad beam can reduce the need to reposition the lamp, but it may also reach a sleeping partner or reflect from glossy paper. A tightly focused beam is more discreet yet can create a bright center and dim edges.

Product photos rarely show beam boundaries under identical conditions, so treat them as orientation rather than a direct comparison. Look for descriptions of adjustable brightness and color temperature, but also check how many button presses are required to reach a comfortable low setting. A light that remembers the previous setting can be convenient at bedtime; one that always starts at maximum may be disruptive in a dark room. Verify any memory function in the current product details rather than assuming it is included.

Paper type changes the experience. Matte paperback pages tolerate a stronger direct beam, while glossy magazines, illustrated books, or an e-reader screen can produce distracting reflections. A flexible neck or pivoting head helps move the reflection away from your eyes without moving the entire clamp.

Who this is for

  • Readers who want focused light after the main room lights are off.
  • Travelers who read in hotels, hostels, trains, or other spaces with inconsistent lighting.
  • Students and musicians who need a small light for notes, sheet music, or a compact stand.
  • Households where a full bedside lamp would disturb someone nearby.
  • Readers who move between a bed, chair, and desk and prefer one portable light.

A clip-on model is particularly practical when there is no nearby table or outlet. It can also be easier to aim than a fixed wall light, provided the clamp has a stable place to attach.

Who should skip it

  • Readers who need even illumination across an oversized art book or a large desk surface may be happier with a proper task lamp.
  • Anyone who dislikes extra weight on a paperback cover should consider a neck light or a freestanding bedside lamp.
  • A person who reads only on a front-lit e-reader may not need another light unless the device illumination is uncomfortable.
  • Children who may bend, chew, or mishandle a small rechargeable device need an age-appropriate option and adult supervision; confirm the maker’s guidance.
  • If the only attachment point is a thick headboard, shelf, or music stand, a small book clamp may not open far enough.

What to verify before buying

  • Low-light control: Check the number of brightness levels and whether the lowest setting is genuinely intended for dark-room reading.
  • Beam coverage: Look for a head shape and adjustment range that can cover your typical paperback, hardcover, or open spread.
  • Color settings: Warm light often feels less conspicuous at bedtime, while a neutral setting may make small print easier to distinguish. Confirm the available modes.
  • Clamp opening: Compare the stated maximum opening with the cover, headboard, shelf, or stand you plan to use.
  • Contact surfaces: Padding can reduce slipping and marks, but its placement and durability vary.
  • Neck stability: A flexible arm should hold its angle after repeated repositioning without slowly drooping toward the page.
  • Power arrangement: Confirm battery type, approximate runtime conditions, charging connector, included cable, and whether the light can operate while charging.
  • Controls: Buttons should be reachable without forcing the clamp or directing the lamp into your eyes.
  • Status indicators: A bright charging or power LED can be noticeable in a dark bedroom; check its location and behavior.
  • Folded dimensions: For travel, compare the packed shape rather than relying on the word “portable.”

Match the clamp to the way you read

Clipping directly to a book keeps the lamp and page together when you shift position, but clamp pressure and lamp weight become important. A rigid hardcover usually offers a more stable anchor than a thin paperback cover. On a paperback, clipping several pages along with the cover can improve stability, although you will need to move the clamp as you progress. Avoid forcing a clamp onto a decorative or fragile binding.

Clipping to a headboard or shelf removes weight from the book. That works only if the jaws open wide enough and the flexible arm can reach the reading area. Measure the attachment thickness and distance to the page. A clamp described for books may be too small for furniture, while a heavy-duty clamp may be unnecessarily bulky on a novel.

Also note where the hinge and buttons sit. A deep clamp can cover text near the top of a small page. Controls placed on the lamp head are easy to see but can change the aim when pressed; controls near the clamp may be less disruptive once you learn their position.

Brightness steps and color temperature

More modes are not automatically better. A long sequence of brightness and color combinations can make a simple bedtime adjustment feel like navigating a menu. Think about the setting you will use most often and how quickly you can return to it.

A very low mode is valuable after your eyes have adapted to darkness. Medium output is often more useful than maximum output for ordinary print, especially when the lamp is close to the page. Higher output may help with small type, diagrams, or a lamp mounted farther away, but can increase glare and reduce runtime.

Color temperature is partly a comfort preference. Warm illumination creates less visual contrast with a dark room and can be considerate in shared spaces. Neutral or cooler illumination can make black text appear crisper to some readers. Claims about sleep or health should not drive the purchase without appropriate evidence; choose based on comfort, readability, and room impact rather than expecting a book light to provide a medical benefit.

Battery and charging choices

Rechargeable lights reduce the need to keep spare cells, but charging details deserve attention. USB-C is convenient only when the device supports the cables and power sources you actually carry; connector shape alone does not guarantee every charging behavior. Some compact lights use a built-in plug, which eliminates a cable but may block neighboring ports or place strain on the light while charging.

Replaceable-battery models can make sense for long trips away from power or for occasional emergency use. Account for the cost and availability of the specified cell size, and remove batteries before long storage if the manufacturer recommends it.

Runtime figures depend on brightness, color mode, battery condition, and test method. A single headline number may represent the lowest setting. Look for mode-specific estimates and regard them as planning guidance, not a promise. For an overnight trip, charge the lamp before leaving even if the stated runtime sounds ample.

Packing it for travel

The best travel design folds so the lamp head and neck do not catch on cables, clothing, or the lining of a bag. A hard-sided pocket or small pouch can protect the hinge and prevent accidental activation. If the power button is exposed, check whether the model has a lockout or requires a long press.

Weight matters in two ways: in your luggage and on the book. A slightly larger light may provide a steadier clamp and wider beam, while an ultralight model may be easier on thin covers. There is no universal winner; decide whether the light will spend more time clipped to a paperback or mounted to furniture.

If you travel internationally, the low-voltage charging input is generally more relevant than a plug adapter, but always check the supplied charging instructions and your power source. Do not assume a cable, wall adapter, or storage case is included unless the current listing says so.

Shared-room etiquette

Even a warm, dim light can be annoying if its beam points across the bed. Place the clamp on the side that lets the lamp head face inward toward the book, and angle it down enough that the light source is not directly visible to the other person. A head with a recessed light-emitting surface or a small shield may help, but the geometry of your reading position matters more than marketing language.

Test the setup before the other person is asleep. Sit in your normal position, turn off the room lights, and view the lamp from the neighboring pillow or bunk if possible. You may find that moving the clamp a few inches works better than lowering brightness. A silent physical button can also be preferable to touch controls that are easy to trigger accidentally.

Limitations

  • A small lamp may leave the outer edges of a large book dim.
  • Clamp pressure can wrinkle pages or mark delicate covers if the contact surfaces are unsuitable.
  • Flexible necks and hinges can loosen over time, especially when used as carrying handles.
  • Rechargeable battery capacity gradually declines with age and use.
  • Runtime and perceived brightness vary substantially by selected mode and ambient light.
  • Product images may make the beam look more even or warmer than it appears in your room.
  • A clip-on light adds another object near the page and can interfere with frequent page turning.

Alternatives to compare

A neck reading light keeps weight off the book and can illuminate both pages, though it remains on your body and may feel awkward when reclining. A bedside task lamp offers broader, steadier light and is easier to use for writing, but needs surface space and may cast more light around the room. A wall-mounted reading lamp keeps the nightstand clear and can be positioned precisely, at the cost of installation and reduced portability. For an e-reader, the device’s built-in front light may already be sufficient and avoids carrying another charger.

Choose the format that fits the attachment point and reading posture you actually have, not the one shown in a staged photograph.

FAQ

Is warm or cool light better for bedtime reading?

Warm light is often less conspicuous in a dark shared room, while neutral or cooler light may make print look sharper to some readers. Comfort, page contrast, and spill control are the practical deciding factors. A model with multiple color settings lets you compare them in your own room.

Will a clip-on light damage a paperback?

It can leave an impression or bend a thin cover if the clamp is heavy, narrow, or strongly sprung. Look for padded contact points, clip over several pages when appropriate, and avoid fragile or collectible bindings. Do not force the clamp beyond its intended opening.

How much battery runtime do I need for a trip?

Estimate your nightly reading time, multiply it by the number of nights, and add a margin. Compare that total with runtime stated for the brightness mode you expect to use, not just the longest advertised figure. Bringing the correct charging cable is still sensible.

Can one book light cover both pages?

Some wider heads and well-positioned lamps can cover a typical two-page spread, but book size, neck length, and beam shape all affect the result. Large-format books may need repositioning or a broader task light.

Can I clip a book light to a headboard?

Only if the clamp opens far enough, grips the surface without damage, and the neck reaches the page while remaining stable. Measure the headboard thickness and inspect its finish before buying; a furniture-oriented clamp lamp may be more suitable.

Is a clip-on book light useful for an e-reader?

It can help if you use a device without a built-in front light, but a direct beam may reflect from the screen. Adjust the lamp angle so the reflection falls away from your eyes. If your e-reader already has comfortable, even illumination, an extra light may add little value.

Travel Cable Organizers for Chargers, Adapters, and Small Tech

Product links are for reference. Verify current details on the retailer page before buying.

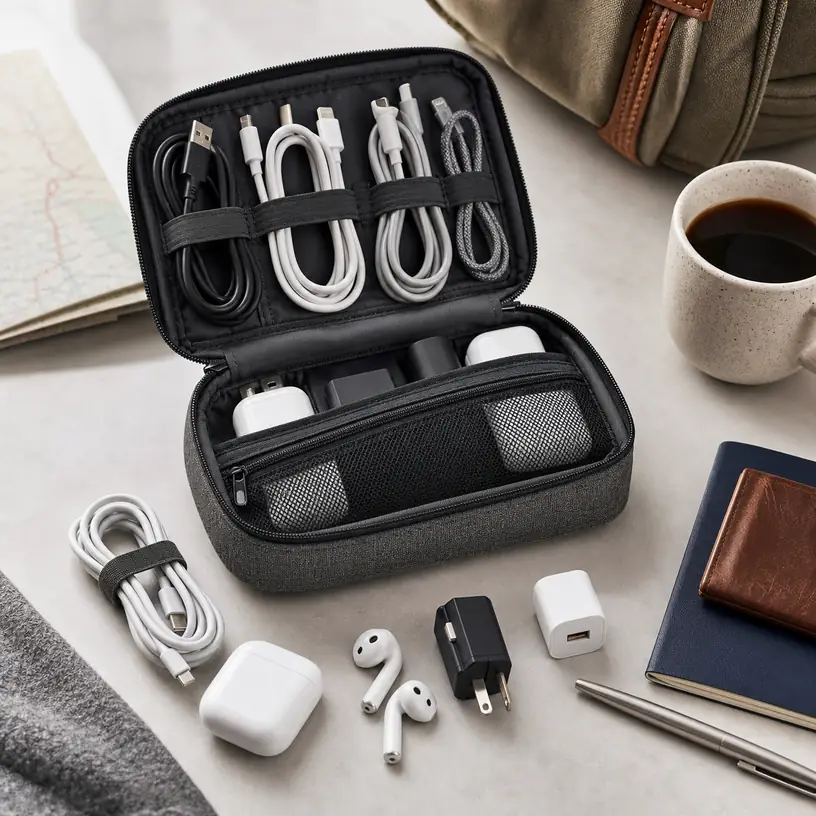
Illustrative image for a travel cable organizer buying guide

Illustrative image, not an official product photo.

Short answer

A travel cable organizer is most useful when your small tech items are already scattered between backpack pockets, desk drawers, and toiletry-style pouches. Choose one by laying out the exact items you carry: wall charger, charging cables, earbuds, adapters, power bank, memory cards, stylus, or small mouse. Then compare the pouch layout, elastic loops, pockets, zipper path, padding, and whether the organizer fits inside your usual bag without becoming a rigid brick.

Search reference

Travel cable organizer options

Compare pouch layouts, loop spacing, pocket depth, padding, closures, and outside dimensions against the chargers and accessories you actually carry.

View matching options

Think in kits, not just pockets

The right organizer depends on the kit you want to keep together. A weekend phone-and-earbuds kit can be small and soft. A work travel kit with a laptop charger, USB-C cables, adapters, and a compact power bank needs more structure and thicker pockets. A photography or handheld gaming kit may need flatter mesh compartments for cards, readers, and short cables.

Before comparing photos, coil your longest cable, stack your largest charger, and note which items you need to grab during a flight, in a hotel room, or at a conference table. A neat-looking pouch can be annoying if every cable must be threaded under tight elastic. On the other hand, a roomy pouch can waste space if you carry only two cords and a charger.

Visibility matters more than it seems. Mesh pockets, contrasting interiors, and divided sections make it easier to spot a small adapter before leaving a hotel room. Dark interiors and deep loose pockets may hide tiny pieces, especially when the pouch is packed inside a larger backpack.

Who this is for

  • Travelers who carry several charging cables, adapters, and earbuds in one bag.
  • Remote workers who move a small tech kit between home, office, coffee shop, and hotel.
  • Students who want chargers separated from pens, snacks, notebooks, and laptop sleeves.
  • Photographers or creators carrying card readers, short cables, spare batteries, or small accessories.
  • Households building one shared pouch for road trips, flights, or guest-room charging needs.

Who should skip it

  • Skip a dedicated cable organizer if one charger and one cable already stay neatly in your bag.
  • Choose a larger electronics pouch if you need to carry a full-size laptop power brick, hard drive, mouse, and dock together.
  • Avoid slim elastic-only designs if you dislike carefully re-coiling every cable after use.
  • Do not treat a soft organizer as protective storage for fragile electronics unless the listing clearly supports that use.

What to verify before buying

  • Check outside dimensions against the backpack pocket, carry-on pocket, desk drawer, or personal item where it will live.
  • Compare interior depth with your largest charger, power bank, plug adapter, or cable coil.
  • Look at loop spacing and pocket width; tight elastic may not suit thick braided cables or bulky adapters.
  • Review whether the pouch opens flat, book-style, clamshell-style, or only from the top.
  • Check closure style, zipper quality wording, handle placement, and whether the pouch can be opened while partly packed.
  • Verify material, padding, water-resistance language, and care instructions on the retailer page before assuming protection level.
  • Confirm whether any accessories shown in photos are included or are only styling props.

Buying notes for real travel days

A good travel cable organizer reduces searching, but it should not create a packing ritual you will ignore after two trips. If you frequently unplug cables on the move, choose a layout that lets you return items quickly. Loose mesh pockets are often more forgiving than narrow elastic ladders, while elastic can be useful for keeping short cables from tangling.

The pouch shape should match the bag around it. Flat book-style organizers slide well beside a laptop sleeve but may become wide when packed with chargers. Boxier pouches can handle bulky adapters and power banks, yet they may be harder to place in a slim backpack pocket. If your carry-on has a front compartment, measure that space before choosing a thick organizer.

Padding is helpful for keeping items from pressing into each other, but more padding also takes space. For ordinary cables and wall chargers, organization may matter more than cushioning. For small drives, camera accessories, or delicate adapters, check the retailer page for specific protection wording rather than relying on the product shape.

Color and interior contrast are practical details. A bright lining can make black adapters and tiny cards easier to see. A small handle is useful when pulling the pouch from a backpack, but a bulky handle may snag inside a crowded personal item.

Limitations

  • A cable organizer cannot make an overpacked tech kit lighter or smaller than the items inside it.
  • Tight loops can slow down packing if you often swap cables during the day.
  • Soft pouches may not protect fragile electronics from heavy pressure inside checked or crowded luggage.
  • Very compact designs may look tidy online but fail to fit larger wall chargers or international plug adapters.
  • Extra pockets add order only if you remember which pocket holds each item.

Alternatives to compare

  • A simple zip pouch for minimal charger and cable setups.
  • A tech pouch with more depth if you carry a mouse, power bank, hard drive, or compact dock.
  • A backpack with built-in cable pockets if you prefer fewer separate bags.
  • Small mesh laundry or accessory bags for low-cost visibility during family trips.
  • Drawer dividers or desk trays if the problem is home storage rather than travel packing.

FAQ

What size travel cable organizer should I choose?

Start with the largest charger or adapter you carry, then add your normal cable count. The organizer should close without forcing the zipper and still fit inside your backpack, carry-on pocket, or desk drawer.

Are elastic loops or mesh pockets better for cables?

Elastic loops keep short cables tidy when they fit well, but they can be slow with thick or oddly shaped cords. Mesh pockets are more flexible for mixed items, though small pieces may shift around unless the pocket is shallow enough.

Can a travel cable organizer hold a power bank?

Many can, but power banks vary in thickness and weight. Check the pouch depth, pocket dimensions, and closure path, and avoid forcing a heavy battery into a pocket that pulls against the zipper.

Is padding important for a cable organizer?

Padding helps separate accessories and can make the pouch feel more structured, but it also adds bulk. For basic chargers and cables, layout may matter more; for delicate drives or camera accessories, verify the protection wording before relying on it.

How do I keep a tech pouch from becoming cluttered?

Assign it to a specific kit, such as travel charging, work commute, or camera accessories. Remove duplicate cables after each trip, and keep only the adapters you actually used or expect to need on the next outing.

Digital Luggage Scales: Who They Fit and What to Check Before Buying

Product links are for reference. Verify current details on the retailer page before buying.

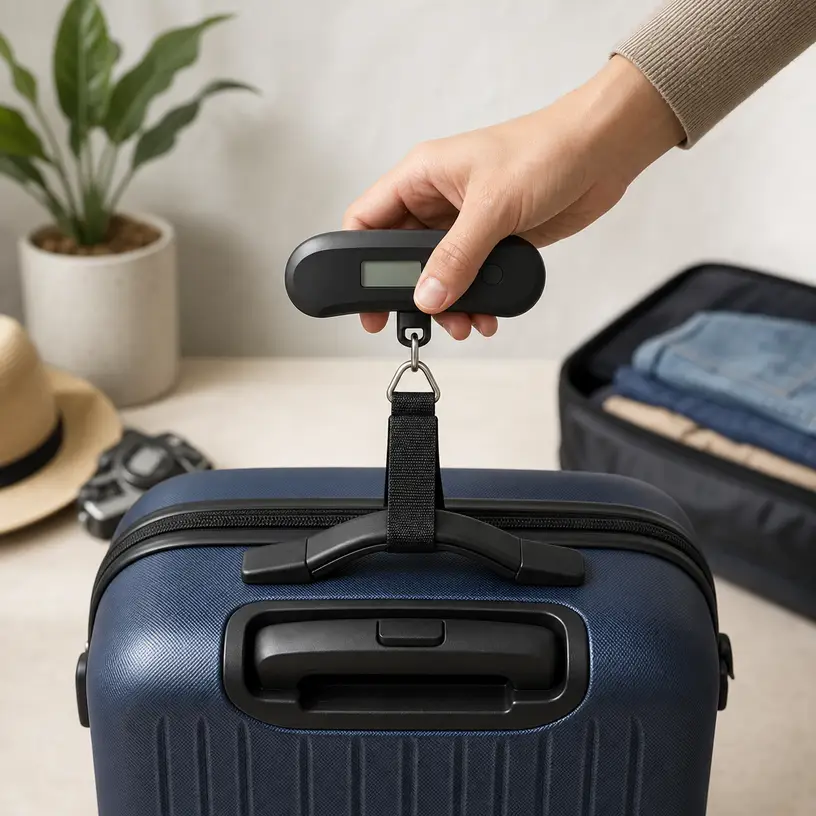
Illustrative image for a digital luggage scales buying guide

Illustrative image, not an official product photo.

Short answer

Digital luggage scales fit travelers who want a compact way to check bag weight before leaving for the airport. Compare capacity, unit switching, display readability, grip shape, strap or hook design, battery access, and storage size before choosing one.

Search reference

Digital Luggage Scales options

Compare current options and verify details on the retailer page before buying.

View matching options

What this product type is

Digital luggage scales are compact travel tools used to weigh bags before a trip. Common designs include a handle, strap or hook, digital display, unit switching, and battery-powered operation. Buyers usually compare weight capacity, display readability, grip comfort, strap design, portability, and battery access.
This guide treats the seed listing as a category signal only. Compare current matching options and verify details on the retailer page before buying.

Who this is for

  • Travelers packing checked bags or carry-on bags close to airline limits.
  • Households that share a simple travel tool across multiple trips.
  • People who want a compact accessory for suitcases, backpacks, or packages.
  • Gift buyers looking for a small practical travel item.

Who should skip it

  • Skip it if you rarely travel with weighed luggage.
  • Use a full floor scale if you need a larger weighing surface at home.
  • Avoid models with tiny displays if readability is a priority.

What to verify before buying

  • Check maximum supported weight and measurement units.
  • Verify display type, backlight wording, and readability details.
  • Review strap, hook, handle, and grip construction before buying.
  • Check battery type, included accessories, and auto-off wording.
  • Confirm packed size and whether it fits your travel pouch.
  • Review current seller information, warranty terms, and return policy.

Main buying notes

A travel scale should be easy to hold while lifting a bag. Grip shape and strap length matter more than a long feature list.
Display readability can make the difference between a quick check and an awkward lift-and-squint moment.
Battery access is worth checking before travel. Verify the battery type and whether it is included on the current retailer page.
Capacity should match the heaviest bags you normally carry, but accuracy claims should still be verified on the listing.

Limitations

  • A handheld scale still requires lifting the bag safely.
  • Small displays may be harder to read in dim rooms.
  • Battery-powered tools need battery checks before travel.
  • Very heavy or awkward items may be easier to weigh with a larger scale.

Alternatives to compare

  • Bathroom scales for home-only luggage checks.
  • Packing cubes or compression bags for volume management.
  • Luggage with built-in weight features if you are replacing the bag too.
  • Shipping scales for package-heavy home use.

FAQ

What should I verify before buying a digital luggage scale?

Verify weight capacity, supported units, display readability, strap design, battery type, packed size, and return policy.

Can a digital luggage scale work for backpacks?

Many can weigh backpacks, but you should verify strap or hook design and supported weight on the current retailer page.

Is display readability important for a luggage scale?

Yes. A clear display helps when the bag is lifted and the reading is only visible for a short time.

Do digital luggage scales need batteries?

Most digital models use batteries. Check the battery type and whether it is included before buying.

What alternatives should I compare with a digital luggage scale?

Compare bathroom scales, shipping scales, packing organizers, and luggage with built-in weighing features.