A Better Read on the Cold: Refrigerator and Freezer Thermometers for Home Kitchens

Product links are for reference. Verify current details on the retailer page before buying.
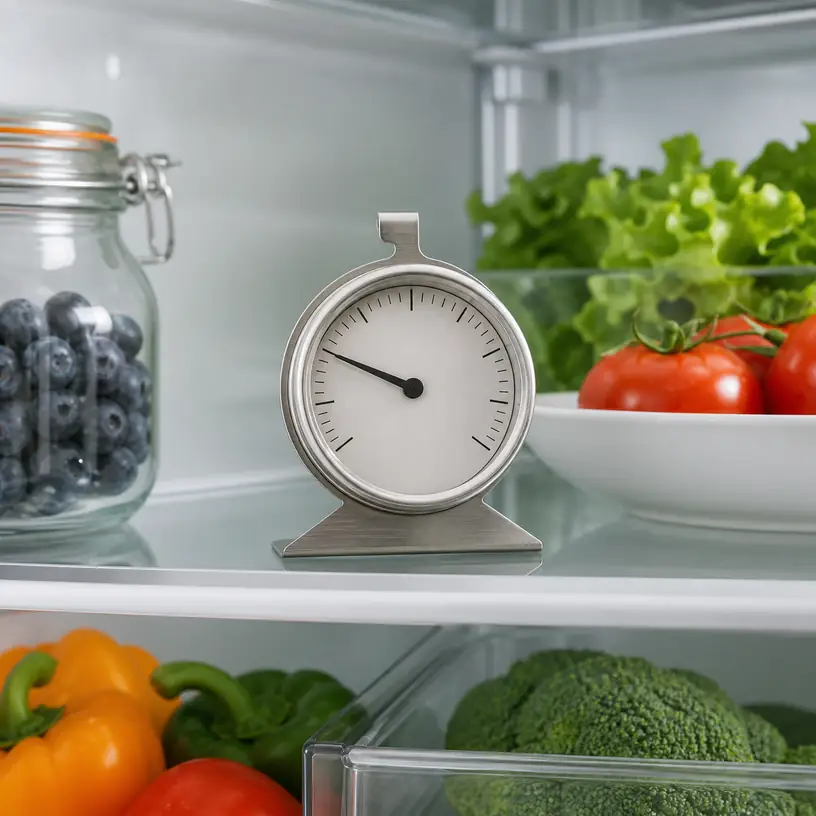
Illustrative image of a generic dial thermometer on a refrigerator shelf

Illustrative image, not an official product photo.

Short answer

A refrigerator or freezer thermometer gives you an independent reading inside an appliance, which is more useful than judging coldness by the control dial or by touching a container. Choose one that covers the temperatures you need to monitor, remains readable in its planned location, and can stand, hang, or attach without blocking vents or interfering with food. An analog dial avoids batteries and can be easy to check at a glance; a digital model may provide larger numbers, minimum-and-maximum memory, or an alarm. Those extras only help if the controls make sense and the device is rated for the compartment. Buy for a specific placement, allow the reading to stabilize, and compare it with the appliance manual and current food-storage guidance rather than treating one quick glance as a complete diagnosis.

Search reference

Refrigerator and freezer thermometer options

Compare rated temperature range, display visibility, placement hardware, stated accuracy, alert behavior, power needs, and cleaning instructions for the compartment you plan to monitor.

View matching options

Start with one shelf, not a feature list

Open the appliance and decide where a thermometer could remain visible without being knocked over, buried by groceries, or pressed against a wall. A crowded refrigerator may need a compact hanging model at the front of a middle shelf. A chest freezer can call for a display that is readable from above. A small dorm-style refrigerator may have no sensible place for a wide dial, while an upright freezer basket can make a loose digital unit disappear under packages.

That location shapes the buying decision. A broad dial is useful only when the markings can be seen through the shelf arrangement. A magnetic back requires a suitable metal surface and permission from the appliance instructions. A hook must fit the shelf wire or edge without hanging into a drawer. A stand needs a flat surface and enough depth to resist sliding when the door closes.

Also decide what question you want the thermometer to answer. Routine monitoring, checking a newly installed appliance, observing a garage freezer during seasonal weather, and investigating uneven refrigerator zones are different jobs. A simple dial can cover a stable visual check. Minimum-and-maximum memory may be more helpful when you want to know what happened between checks, while an audible alert may matter only if it can be heard where the appliance sits.

Who this is for

  • Households that want a reading independent of an appliance’s numbered or unlabeled control setting.
  • Renters checking an unfamiliar refrigerator without altering the appliance.
  • People organizing a refrigerator and trying to identify a practical, consistently cold shelf for particular foods.
  • Owners of an upright or chest freezer who want an easy visual check during normal use.
  • Households setting up a replacement appliance and following the maker’s stabilization instructions.
  • Buyers who can place the device safely, keep the display visible, and respond appropriately when readings change.

Who should skip it

  • Skip a loose display if the compartment is so crowded that the device will be buried, broken, or routinely moved; improve access or choose a securely compatible mounting style first.
  • Do not use an ordinary refrigerator thermometer as a substitute for a calibrated instrument where a business, laboratory, medication, or regulated process has specific monitoring requirements.
  • A wireless sensor system may be more suitable when the essential job is receiving alerts outside a detached garage, basement, or other remote location.
  • Do not assume a general indoor thermometer can tolerate freezer conditions, condensation, or food-area cleaning; use a model rated for the intended environment.
  • If the appliance has persistent temperature problems, damaged seals, unusual cycling, water leakage, or a fault warning, a consumer thermometer does not replace the appliance manual or qualified service.
  • Skip alarm features when no one in the household can reliably hear, interpret, test, and reset them.

What to verify before buying

  • Rated range: Confirm that the full stated operating and measuring ranges include the refrigerator or freezer conditions you need to observe.
  • Stated accuracy: Look for a clear accuracy specification and note whether it applies across the whole range or only within a narrower band.
  • Display resolution: Determine whether the scale or digital step is fine enough for useful decisions without implying greater accuracy than the specification supports.
  • Viewing angle: Check digit height, dial diameter, color contrast, glare, and whether the display remains legible from the direction the door opens.
  • Mounting choices: Verify the dimensions and operation of the stand, hook, clip, suction cup, or magnet instead of assuming it will fit your shelf.
  • Compartment compatibility: Look for explicit refrigerator and freezer suitability as needed, including any limits for moisture or condensation.
  • Response and stabilization: Review the maker’s guidance for placement and how long the unit should remain undisturbed before interpreting a reading.
  • Min/max memory: Check whether values persist until manually cleared, reset after a battery change, or include a time reference.
  • Alarm controls: For digital models, verify thresholds, sound level, delay behavior, mute function, and the indication for an active or silenced alert.
  • Power source: Confirm battery type, expected replacement procedure, low-battery indication, and whether settings survive a battery change.
  • Cleaning guidance: Read what can be wiped, what must stay dry, and whether the device may be immersed; do not infer washability from a sealed-looking face.
  • Calibration or checking instructions: Determine whether the maker provides a user check, an adjustment method, or a service recommendation.

Analog and digital displays solve different annoyances

An analog appliance thermometer is mechanically simple to read: open the door, locate the pointer, and compare it with the scale. It does not need a battery, and color bands can make a routine glance quick. The tradeoffs are physical size, small printed increments, parallax when viewed from an angle, and a pointer that may take time to settle after a large change. Inspect product dimensions, not only close-up images, because a dial that fills a listing photo can be modest inside a deep refrigerator.

Digital displays can offer larger numerals and avoid interpreting the space between scale marks. Some record minimum and maximum readings, which can reveal variation that is absent during a brief door opening. Others add alarms. These functions introduce menus, batteries, icons, reset behavior, and sometimes separate operating and display-temperature limits. A screen that becomes faint or slow in deep cold can be frustrating even when the sensor still works, so freezer suitability should be explicit.

Neither display type is inherently the correct one for every kitchen. A simple analog model may be the better tool for an appliance checked during daily cooking. A digital unit with memory can be more informative when you are comparing locations over a day. An alert is useful only when its threshold can be set appropriately, false alarms are understood, and someone is close enough to act.

Placement changes what the number means

Temperatures inside a refrigerator are not perfectly uniform. Door shelves experience warm air during opening, vents can create colder local zones, drawers alter circulation, and tightly packed containers can restrict airflow. A reading beside a vent should not automatically be treated as the temperature of every shelf. The appliance manual may identify airflow paths and recommended loading practices, so consult it before deciding that one location represents the whole cabinet.

For a first check, place the thermometer where it reflects the food-storage area you care about and where it will not touch the cooling surface, wall, or a cold package unless the instructions call for that method. Keep it away from a direct blast from a vent. Leave enough space for air to move around it, then allow the reading to settle for the period specified by the thermometer and appliance makers.

If you suspect an uneven cabinet, move the same thermometer between planned locations one at a time and give each position a comparable stabilization period. Changing location, shelf load, control setting, and door-opening pattern all at once makes the readings difficult to interpret. Write down the position, time, and relevant changes rather than relying on memory.

Freezers pose a visibility problem as well as a temperature problem. A thermometer hidden at the bottom of a chest freezer will rarely be checked. Secure placement near the top can improve access, but it must not obstruct the lid, hinge, baskets, or safe loading. In an upright freezer, avoid a loose unit that can fall when a drawer is pulled forward.

Opening a door lets warmer room air enter, and loading unfrozen groceries changes conditions. Defrost cycles and compressor operation can also create variation. A number observed immediately after one of these events may not describe the appliance’s established condition. Follow the appliance instructions after installation, loading, a control adjustment, cleaning, or a power interruption before drawing conclusions.

Trend information is where minimum-and-maximum memory can earn its place, but memory needs context. A recorded high may reflect a long grocery-loading session, a door left ajar, a power event, or normal operation within the product’s stated behavior. Clear the memory deliberately at the start of a known observation period and note when you did it. A value with no time stamp cannot tell you exactly when or for how long the condition occurred.

Current U.S. federal food-safety guidance commonly calls for keeping a refrigerator at 40°F (4°C) or below and a freezer at 0°F (-18°C). Consult current guidance and your appliance manual for your circumstances, especially after a power interruption or when deciding whether food remains suitable. A consumer thermometer supplies evidence; it does not determine food safety by itself.

When two thermometers disagree, do not average them and assume the result is correct. First give both units enough time in the same location, compare their specifications, check battery condition where applicable, and follow their stated checking or calibration procedures. A large or persistent disagreement is a reason to investigate the instruments and appliance, not to select the more reassuring number.

Alarms need a response plan

An alarm can draw attention to a change while the door is closed, but only if the threshold, delay, and reset behavior are understood. A model may sound immediately, wait through a delay, or continue showing an alert icon after the temperature returns. Read the current instructions before choosing a threshold, and test the sound and controls as directed.

Consider the room. An alarm inside a closed basement freezer may be inaudible upstairs. A loud signal in a compact apartment may trigger frequently during ordinary loading if the delay is too short. A remote sensor can address distance, but then wireless range, receiver location, pairing, battery status, and notification delivery become part of the system.

Make a short response checklist before relying on an alarm: confirm the door is closed, check for an obvious power issue, avoid unnecessary opening, consult the appliance manual, and follow current food-safety guidance. Repeated alerts without an obvious cause call for troubleshooting or service rather than continually widening the alarm range.

Cleaning and battery access matter over time

Spills and condensation can make a display hard to read. Place the thermometer away from leaking packages and follow the maker’s cleaning directions. “Water resistant” and “washable” are not interchangeable; many electronic displays should be wiped but never submerged. An analog housing can also trap moisture or residue around a seam even though it has no battery compartment.

For a battery-powered model, check whether the compartment can be opened without a tiny loose screw falling near food. Replace batteries according to the instructions and keep spare cells stored appropriately outside the appliance. A low-battery symbol is valuable only if it is visible during routine checks. If the screen fades, segments disappear, or readings behave erratically, treat the device as unreliable until the power and operation are checked.

Inspect hooks, stands, clips, and magnets while cleaning. A bent hook can let the unit drop onto glass; a weakened suction cup can release without warning; a folding stand can collect residue. Reposition the thermometer after restocking so its display and airflow remain unobstructed.

Limitations

  • A single thermometer reports conditions near its sensor, not every shelf, drawer, package, or corner of the appliance.
  • Consumer accuracy and resolution vary, and a detailed display does not guarantee a highly accurate measurement.
  • Door opening, loading, defrost cycles, airflow, and placement can cause readings to change.
  • Minimum-and-maximum memory may not show when a value occurred or how long it lasted.
  • An audible alarm cannot help if it is out of hearing range, muted, poorly configured, or powered by a depleted battery.
  • A magnet, hook, clip, or stand may not fit every appliance interior even when it appears versatile in photos.
  • Condensation and spills can affect readability and may damage models not designed for that exposure.
  • A refrigerator or freezer thermometer does not replace current food-safety guidance, appliance troubleshooting, or qualified repair.

Alternatives to compare

An appliance’s built-in display is convenient and may integrate with its own controls, but check the manual to understand what it measures and whether it shows a set point or a sensed temperature. A wireless refrigerator or freezer monitor can place a receiver or notification outside the compartment, making it more suitable for a remote garage or basement appliance. A data logger records readings over time and can provide more context, though setup, export, sensor placement, and calibration require additional work. An infrared thermometer measures surface temperature rather than the air or internal temperature of food, so it answers a different question. A food probe thermometer is intended for appropriate food-temperature checks and should not be treated as a permanent compartment display unless its instructions explicitly support that use.

FAQ

Where should I put a refrigerator thermometer?

Choose a visible location in the food-storage area you want to monitor, away from direct contact with a wall, cooling surface, vent blast, or recently chilled package unless the instructions specify otherwise. Do not block airflow. Follow the appliance and thermometer placement guidance, then allow the reading to stabilize before interpreting it.

Can the same thermometer be used in a refrigerator and a freezer?

Only if its stated measuring and operating ranges cover both environments. Check freezer suitability, display performance, condensation limits, mounting method, and battery guidance. A model can display low numbers without necessarily being designed to operate reliably at freezer temperatures.

Is an analog or digital refrigerator thermometer easier to use?

Analog models avoid batteries and can support a quick visual check, while digital models may offer larger numerals, memory, and alarms. Ease depends on display angle, lighting, controls, placement, and how often you need trend information. Choose the simplest format that answers your monitoring question.

Why does the temperature change after I open the door?

Room air enters when the door opens, while the sensor’s response and location affect how quickly the display changes. Loading groceries and moving the thermometer can add more variation. Close the door, avoid repeated checking, and wait for the stabilization period recommended by the relevant instructions.

Do I need a thermometer with minimum-and-maximum memory?

It is useful when you want to observe variation between checks or compare appliance locations over a defined period. Reset the memory at a known time and keep notes, because many models record the extreme values without showing exactly when or how long they occurred.

What should I do if two appliance thermometers disagree?

Place them together, allow adequate stabilization time, compare their accuracy specifications, check batteries, and use any manufacturer-provided check or calibration procedure. Do not simply average a large disagreement. Persistent differences call for further instrument checks and, if appliance performance is in doubt, appropriate troubleshooting or service.
Loose-Leaf Tea Infuser Baskets: Fit, Mesh, and Cleanup

Product links are for reference. Verify current details on the retailer page before buying.

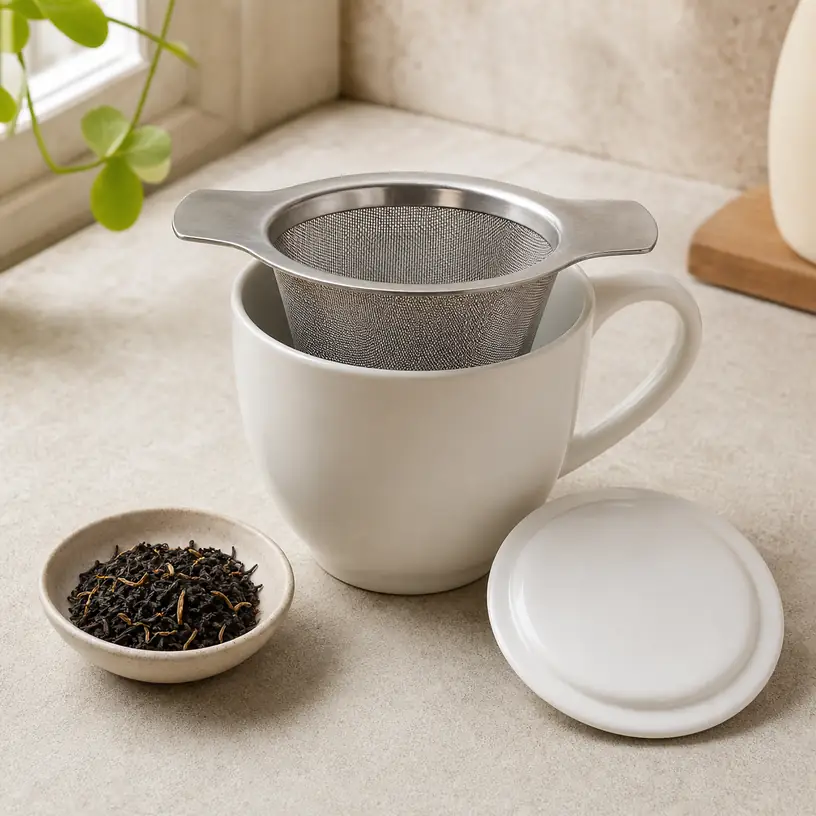
Illustrative image of a generic basket-style loose-leaf tea infuser resting across a ceramic mug

Illustrative image, not an official product photo.

Short answer

For most mug-by-mug brewing, a broad basket infuser is easier to fill and empty than a small tea ball because it gives leaves more room while keeping them contained. The useful dimensions are the ones that connect the basket to your own drinkware: its rim must span the cup opening, its body should sit below the waterline without touching the bottom, and its handles must remain easy to lift. Fine mesh helps with small particles, but a basket also needs open area for water flow and seams that do not trap wet leaves. A lid can reduce heat loss during steeping and may double as a drip rest afterward, provided its shape works both ways.

Search reference

Compare loose-leaf tea infuser baskets

Check rim span, basket depth, mesh construction, lid design, handle clearance, and cleaning guidance against the cups or teapot you already use.

View matching options

A basket has to fit two spaces at once

An infuser can look compact on a product page and still be a poor match for a favorite mug. It needs to bridge the opening securely while leaving enough of the basket inside the vessel for water to surround the leaves. If the support arms barely catch the rim, an accidental bump can tip the basket. If the basket is too shallow for a tall mug, part of the tea may sit above the water. If it is too deep, its base may press against the cup and reduce circulation around the lowest leaves.

Measure the inside opening of the smallest and largest vessels you expect to use. Then note their usable depth from rim to bottom and whether the lip is unusually thick, flared, or uneven. A handle that works on a straight ceramic mug may interfere with a travel-cup rim or teapot lid. Manufacturer dimensions should be checked carefully because listings may report the full handle-to-handle width rather than the basket diameter that enters the cup.

Capacity is not simply a question of how much dry tea fits inside. Leaves expand as they steep, and different cuts occupy space differently. Leaving room around them generally makes the basket easier to rinse and less likely to overflow when lifted. Choose for your usual serving size and brewing method rather than trying to maximize the stated capacity.

Who this is for

  • People who brew one mug or a small pot from loose tea and want a reusable alternative to disposable filters.
  • Households with several straight-sided mugs that can share one removable basket.
  • Tea drinkers who want to lift the leaves out at the end of a timed steep instead of leaving them in the vessel.
  • Anyone who finds a narrow tea ball awkward to load, empty, or scrub around its hinge.
  • Small kitchens where a basket, lid, and resting dish can take the place of a dedicated brewing pot.

Who should skip it

  • Choose disposable paper filters if containing very fine sediment and minimizing cleanup matter more than reusability.
  • Use a teapot with a compatible built-in filter if you routinely brew several servings at once.
  • Skip a rigid basket if your everyday vessel has an opening or lid system that does not provide a safe support point.
  • Consider a handled strainer used during pouring if you prefer leaves to move freely in the entire pot.
  • Avoid buying from photos alone when the listing does not provide enough dimensions to establish cup compatibility.

What to verify before buying

  • Basket diameter and depth: Compare the part that enters the vessel—not only the overall dimensions—with your mug or teapot opening and water level.
  • Support span: Confirm how far the arms or rim extend and whether they rest securely on both sides without blocking a drinking handle or teapot feature.
  • Mesh scale: Look for clear photos and wording about the perforations, especially if you brew small-cut leaves or blends with fine particles.
  • Seams and edge construction: Check where mesh joins the frame and whether folded edges, joints, or corners appear accessible for rinsing.
  • Lid purpose: Determine whether a lid is included, how it sits during steeping, and whether it is shaped to hold the wet basket afterward.
  • Handle temperature and grip: Review the design and current use instructions; do not assume every protruding handle stays cool or is intended for bare-hand lifting.
  • Material description: Verify the exact material wording for the basket, frame, lid, and any silicone or plastic parts instead of inferring composition from color.
  • Cleaning directions: Confirm whether hand washing or dishwasher cleaning is recommended and whether all pieces separate for care.

Mesh fineness is a tradeoff, not a finish line

A finer screen can retain more small fragments, yet no reusable infuser guarantees a completely sediment-free cup. Very small openings may drain slowly or hold particles against the surface, particularly when tea is densely packed. Larger perforations usually rinse more readily, but tiny leaf pieces and powdered ingredients can escape. Match the filter to what you brew most often rather than assuming the finest-looking mesh is universally superior.

Construction deserves equal attention. An apparently smooth basket may still have a rolled rim or lower seam where damp fragments collect. A reinforced frame can help the basket keep its shape, while excessive interior ledges make it harder to tap leaves into a compost or waste container. Inspect listing images for the transition from the base to the sidewall and for any brackets entering the brewing area.

Water flow also depends on how much of the basket is perforated. A deep basket with mesh only near the upper walls behaves differently from one with an open base and sides. Once the correct fit is established, compare the distribution of openings and leave expansion room during use. Follow the tea seller’s preparation guidance for quantity, water, and time rather than treating the infuser itself as a brewing recipe.

The lid can earn its storage space

A fitted lid may help retain warmth and keep the top of the basket covered while tea steeps. After lifting the infuser, turning that lid over can provide a convenient place for drips—if it is wide and stable enough for the basket. This two-stage use is worth checking in product photos because a domed cover, shallow saucer, and locking lid do not serve the same purpose.

Consider the removal sequence before choosing a design. You should be able to uncover the mug, lift the basket, and set it down without reaching across steam or carrying a dripping insert across the counter. A lid with a tiny knob may be harder to handle with wet fingers, while a broad flat cover may need more storage room. If no resting piece is included, an ordinary small plate can be a simpler alternative than paying for a feature that does not fit your routine.

Cups that already have their own lids require extra scrutiny. The infuser handles may prevent the vessel lid from closing, and the included infuser lid may not seal the mug. Treat claims about heat retention conservatively and verify how the exact pieces are intended to be arranged.

Cleanup begins before the leaves dry

A basket is easiest to maintain when it is emptied soon after use. Let excess liquid drain, move the spent leaves to the waste or compost stream accepted in your area, and rinse the mesh from both sides before fragments dry in place. Follow the stated care instructions for deeper cleaning and for any stains or buildup; abrasive tools and cleaning products can affect materials and finishes differently.

Wide openings simplify this routine because a spoon or gentle stream of water can reach the base. Hinges, latches, and narrow necks introduce places that are harder to inspect, which is one reason basket formats often suit daily brewing. Still, double-wall mesh, folded rims, or attached decorative parts can add their own hidden areas.

Storage should allow the infuser to dry fully. Nesting it inside the wet mug saves counter space but can hold moisture around both items. Keep the lid nearby so it does not become a mismatched saucer, and avoid stacking heavy utensils on fine mesh that could be bent out of shape.

Limitations

  • Even fine mesh may allow some tea dust or tiny particles into the drink.
  • Search results mix cup baskets, teapot inserts, tea balls, novelty strainers, and pouring strainers with different jobs.
  • A wide support rim does not guarantee compatibility with every mug, insulated tumbler, or teapot lid.
  • The infuser does not determine suitable water temperature, tea quantity, or steep time; those choices depend on the tea and preparation guidance.
  • Wet leaves and mesh still require prompt emptying, rinsing, and complete drying.
  • A single-mug basket may be inefficient when several servings need to be prepared together.

Alternatives to compare

  • Disposable paper tea filters for easier disposal and stronger containment of fine particles.
  • A tea ball or tong infuser for occasional brewing when compact storage matters more than leaf expansion room.
  • A teapot with a removable infuser when several cups are usually served at once.
  • A brewing mug supplied with a specifically fitted basket and lid when compatibility is the main concern.
  • A pour-through tea strainer for brewing leaves loose in a pot and filtering only when serving.
  • A French press reserved for tea if its capacity, filter style, and cleaning routine suit the household.

FAQ

How do I know whether an infuser basket will fit my mug?

Measure the mug’s inside opening and usable depth, then compare those numbers with the basket body and the support span. Check how a thick or flared rim affects the handles, and make sure the basket can reach the normal water level without resting awkwardly on the bottom.

Is fine mesh always better for loose-leaf tea?

Fine mesh is helpful for small-cut leaves, but it can drain more slowly and take more effort to rinse. Larger openings may suit broad whole leaves. Choose the balance that fits your usual tea, and expect some fine sediment with any reusable screen.

Does the basket need a lid?

No, but a lid can help cover the vessel during steeping and may serve as a drip rest after the basket is removed. Verify both functions from the current design, since not every included cover is stable when turned over.

How much tea should go into a basket infuser?

Use the preparation guidance for the specific tea and serving size, and leave space for the leaves to expand. Do not fill the basket simply because extra dry tea fits; crowding can make water circulation and cleanup more difficult.

Can I put a metal tea infuser in the dishwasher?

Only if the current care instructions say that all of its materials and parts are dishwasher compatible. Check the basket, frame, lid, grips, and any coating separately rather than assuming the metallic appearance answers the question.

Choosing a Cookie Scoop: Portion Size, Grip, and Batch Workflow

Product links are for reference. Verify current details on the retailer page before buying.

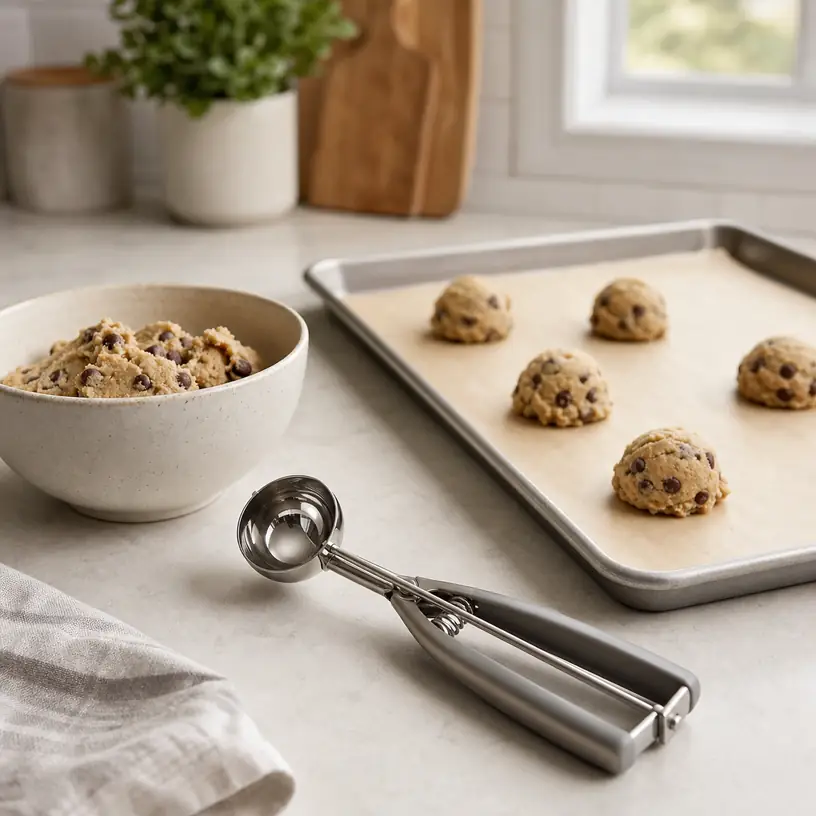
Illustrative image of a generic cookie scoop beside portioned dough on a baking counter

Illustrative image, not an official product photo.

Short answer

Choose a cookie scoop around the portions your recipes call for, not around a vague label such as small or medium. The useful comparison is the bowl’s stated volume and dimensions, followed by how much clearance the release sweeper leaves for dough. A scoop also has to feel manageable through an entire batch: compare squeeze-handle, thumb-lever, and spring-action designs; note which hand operates the trigger; and consider whether stiff, chilled dough will overload a light mechanism. A single scoop is enough if one portion size dominates your baking. A measured two- or three-size set makes more sense when you regularly switch among bite-size cookies, everyday cookies, and larger bakery-style portions.

Search reference

Cookie scoops for home baking

Compare stated bowl capacity, release style, hand fit, dough guidance, cleaning instructions, and set contents for the portions you make most often.

View matching options

Start with one recipe you know

Before comparing polished handles and multi-piece sets, open a cookie recipe you actually repeat. Does it specify tablespoons, a measured volume, a finished dough-ball weight, or a scoop number? Those descriptions are not always interchangeable. A scoop number traditionally relates to how many level portions make up a larger reference volume, but seller labels and product dimensions may be inconsistent. Treat the current capacity stated in tablespoons, teaspoons, milliliters, or fluid ounces as the more useful starting point, then check the bowl diameter and depth.

Make one portion with your existing measuring spoon and set it on a plate. This gives you a physical reference for the amount of dough, but remember that a rounded or heaped scoop contains more than a level measure. If a recipe relies on weight, weighing a few portions can be more repeatable than assuming that every pass through the dough fills the bowl identically.

Portion size affects more than the finished cookie’s width. Larger mounds may need different spacing and baking time than smaller ones, and a pan that holds twelve small portions may hold far fewer large ones. Follow the recipe when changing size rather than using a new scoop as the only adjustment.

Who this is for

  • Home bakers who want more consistent spacing and portion size across a tray of drop cookies.
  • People who portion soft dough, muffin batter, meatballs, or similar mixtures and want one dedicated tool for repeatable amounts.
  • Bakers replacing a scoop whose sweeper no longer clears the bowl or whose handle is uncomfortable during long batches.
  • Households selecting a first scoop based on a frequently used recipe rather than buying an assortment blindly.
  • Gift buyers who know the recipient’s preferred cookie style, hand needs, and cleaning routine.

Who should skip it

  • Skip a release scoop if your recipe uses rolled, sliced, piped, pressed, or cut dough instead of dropped portions.
  • Do not expect a small household scoop to force its way through frozen or very hard dough unless the maker explicitly supports that use.
  • Avoid a large set when the capacities are not clearly stated or when most sizes would remain unused.
  • Choose a simple spoon-and-scale workflow if exact portion weight matters more than speed or rounded shape.
  • A trigger located for one hand may be awkward for the other; left-handed users should not assume every mechanism is ambidextrous.

What to verify before buying

  • Bowl capacity: Look for an actual volume and, when available, bowl diameter and depth rather than relying only on small, medium, or large.
  • Release path: Check whether the sweeper travels close enough to the bowl to clear the mixtures you plan to portion.
  • Mechanism style: Compare a thumb trigger with squeeze handles and note the movement, spring placement, and hand required.
  • Intended mixtures: Read the maker’s guidance about soft batter, chilled dough, frozen desserts, or other uses; a similar shape does not guarantee equal strength.
  • Handle fit: Check handle length, width, padding, texture, and the space between moving parts for your grip.
  • Construction: Verify the stated food-contact materials, joints, plating or coatings, and how the bowl connects to the handle.
  • Care directions: Confirm whether hand washing or dishwasher cleaning is specified and how the mechanism should be dried.
  • Set contents: Match every listed capacity to the pieces shown, and check whether measurements are marked permanently or only printed on packaging.
  • Storage: Make sure a wide squeeze handle or nested set will fit the drawer without being compressed under heavier utensils.

How release mechanisms change the rhythm

A thumb-lever scoop holds the main handle in the palm while the thumb presses a side lever. It can be quick when the lever sits naturally under the thumb, but lever reach and spring resistance matter over dozens of portions. Check product images from both sides because a lever that favors the right hand may be inconvenient for a left-handed baker.

Squeeze-handle designs close two handles together to move the sweeper. They distribute the action across more of the hand, which some users may prefer, yet handle span can be too broad for smaller hands. Look at the handle position both open and closed. A soft grip can change the feel, but it does not by itself establish mechanism strength or long-term durability.

Some scoops use a gear, rack, spring, or linkage hidden near the bowl. More parts can create more places for dough and wash water to collect. Close-up photos should show whether the moving pieces are easy to inspect. If the release bar appears bent, sticks in the bowl, or no longer returns as intended, stop using it and follow the product’s support or replacement guidance rather than forcing it.

Match the scoop to dough consistency

Soft drop-cookie dough usually fills by drawing the scoop through the mixture, then leveling against the bowl or container. Sticky dough can cling to both the bowl and sweeper, so the release may not create a perfectly clean mound. Recipe temperature, ingredient balance, and technique all affect release; a nonstick claim should not be treated as a promise that no residue will remain.

Chilled dough presents a different load. If it has become too firm to enter the bowl without heavy force, allow it to reach the recipe’s workable stage rather than prying with the scoop. Twisting a light scoop through hard dough can strain its bowl-to-handle joint or release linkage. The same caution applies to dense mixtures with large chips, nuts, or other inclusions that can jam between the sweeper and bowl.

Wet batters may flow around the sweeper and drip before reaching the pan. A deeper bowl and short travel from mixing bowl to pan can help the workflow, but a spring scoop is not a sealed measuring vessel. For thin batter, a ladle, cup, dispenser, or piping method may give better control.

One scoop or a coordinated set?

One well-chosen scoop is practical when most recipes use approximately the same portion. It takes less drawer space, costs less to replace, and makes it easy to learn how a familiar bowl relates to pan spacing. Select it from the recipe you bake most, then use a scale or measuring spoon to understand the portion it produces with that particular dough.

A set earns its space when each size has a regular job. A small bowl might portion bite-size cookies or fillings, a middle size may cover routine drop cookies, and a larger one may help with muffins or deliberately oversized cookies. Those are possible roles, not universal size definitions. Write the actual capacities on a kitchen note until you recognize them, especially when handles are nearly identical.

Check whether a nested set really nests without squeezing the mechanisms together. Scoops with different handle structures may occupy more drawer width than expected. If the capacities overlap closely, the extra piece may add complexity without a meaningful difference on the baking sheet.

Consistency requires a repeatable fill

A scoop can only improve consistency if it is filled in a similar way each time. Level portions, rounded portions, compressed dough, and loosely gathered dough have different amounts even when they come from the same bowl. Decide which method the recipe intends and use it throughout the tray. If you scrape against the mixing bowl, avoid striking or bending the release bar.

For a new scoop, portion several pieces onto parchment and weigh them individually if consistency is important. The results show whether your hand motion is repeatable and whether inclusions are causing variation. You can then adjust how you fill and level the bowl without assuming the tool itself guarantees identical weights.

Keep pan workflow in mind. Portioning the full tray before placing it in the oven makes uneven gaps easier to spot. Leave the spacing directed by the recipe, and do not infer baking time from scoop size alone. If you intentionally change the portion, monitor according to the recipe’s doneness cues and food-safety guidance.

Cleaning and storage

Dough tends to collect beside the sweeper, under a gear cover, and where the bowl meets the handle. Follow the current washing directions and operate the mechanism carefully during cleaning so all accessible food residue can be removed. Do not put a scoop in a dishwasher simply because it is described as metal; springs, grips, plated parts, and joints may have separate restrictions.

Dry the moving areas before closing the tool in a drawer. Storing it under a heavy pan or utensil can press on the trigger and bend exposed parts. A divider or shallow tray keeps the bowl edge and linkage from catching on whisks and peelers. If the tool is part of a set, avoid forcing pieces together when their release bars touch.

Inspect the scoop before use. A loose handle, sharp edge, flaking surface, rust, misaligned sweeper, or mechanism that will not return deserves attention under the maker’s guidance. A scoop is a portioning aid, not a tool for chipping hard frozen food or levering ingredients from a container.

Limitations

  • Capacity labels can vary across listings, and a generic size name does not establish the portion produced.
  • A scoop measures bowl volume, while the actual dough amount changes with leveling, compression, stickiness, and inclusions.
  • Release sweepers may leave residue and can jam when hard pieces sit between the bar and bowl.
  • Changing cookie portion size can change tray spacing, yield, and baking time; follow recipe guidance.
  • Trigger reach, spring resistance, and handle span are personal fit questions that photos cannot fully answer.
  • Moving joints take more cleaning and inspection than an ordinary spoon, and not every scoop is dishwasher-safe.

Alternatives to compare

  • Measuring spoons plus a small spatula for occasional batches and recipes written in spoon measures.
  • A kitchen scale for recipes where repeatable portion weight is the priority.
  • Two ordinary spoons for soft drop dough when rounded uniformity is not essential.
  • A piping bag or batter dispenser for mixtures that flow rather than hold a scooped mound.
  • A plain ice cream spade or serving scoop for soft desserts when a mechanical sweeper is unnecessary.

FAQ

There is no universal everyday size. Start with the portion named in your recipe, then compare that amount with the scoop’s stated capacity and bowl dimensions. Labels such as medium can differ, and a heaped bowl contains more than a level one.

Do not assume they are presented consistently. When a number is shown, verify how the seller defines it and compare the accompanying volume and dimensions. Keeping those measurements in your recipe notes is more reliable than remembering a marketing size name.

Only when the dough is at a workable stage and the scoop’s instructions support that use. If filling the bowl requires prying or heavy twisting, let the dough soften as the recipe permits. Forcing a scoop through very hard dough can strain the release assembly and joint.

Is a squeeze-handle scoop better than a thumb trigger?

Neither mechanism is automatically better. Squeeze handles use a broader hand motion, while a thumb lever may feel faster to users who can reach it comfortably. Compare open handle span, trigger position, spring resistance, hand orientation, and the number of portions in a typical batch.

Use the same filling method for every portion—level, rounded, or otherwise specified—and avoid compressing some portions more than others. Weighing the first several mounds can reveal variation in your technique before you fill the entire tray.

Over-the-Cabinet Towel Bars: Fit the Hook Before You Hang the Towel

Product links are for reference. Verify current details on the retailer page before buying.

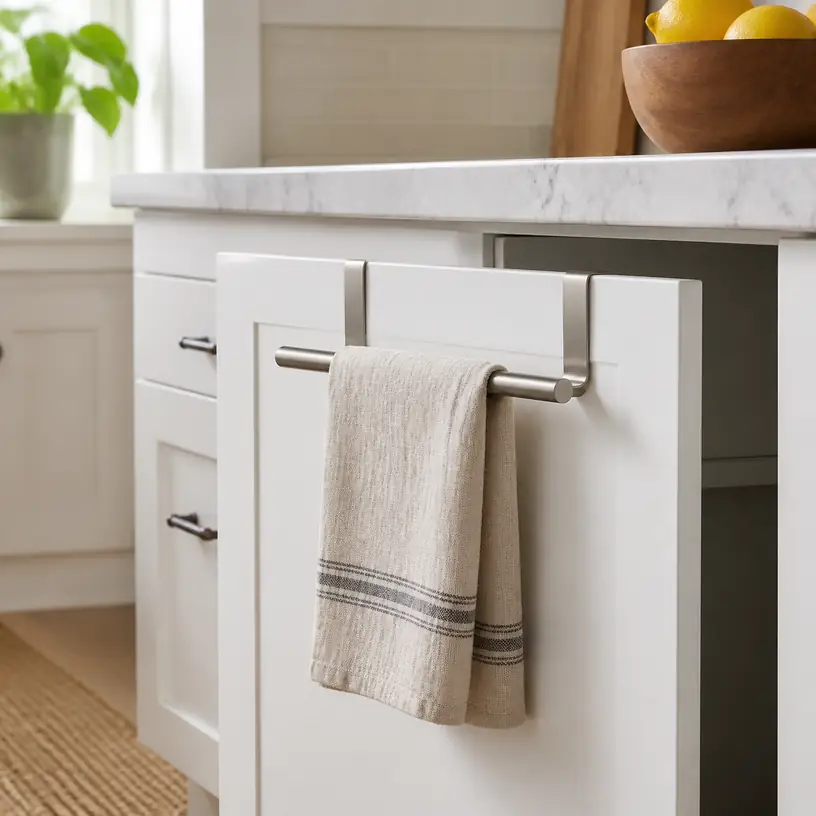
Illustrative image of a generic metal towel bar hanging over a white kitchen cabinet door

Illustrative image, not an official product photo.

Short answer

An over-the-cabinet towel bar can put a dish towel within reach without drilling, but the hook must fit the actual door before the bar style matters. Measure the door thickness and the gap above it, then inspect the space behind the door for shelves, drawer boxes, plumbing, and stored items. Compare the hook’s usable depth, protective lining, bar length, and distance below the door top. A good match should let the door close normally, keep the towel clear of the floor and nearby heat or food-preparation areas, and avoid concentrating pressure on a delicate cabinet finish.

Search reference

Over-the-cabinet towel bar options

Compare hook dimensions, door-clearance requirements, bar length, padding, inside-cabinet projection, and towel drop against the cabinet you plan to use.

View matching options

Start with one specific cabinet door

The useful installation spot is not simply “under the sink” or “near the stove.” Choose the exact door, open it, and look at all four edges. Some doors sit below a countertop with a visible gap; others close into a narrow reveal or overlap a face frame. An accessory that slips easily over one door may scrape the countertop, prevent an adjacent drawer from opening, or leave another door slightly ajar.

Measure the door itself rather than relying on a general cabinet description. Record its thickness at the top edge, the vertical clearance between that edge and the counter or frame, and the distance from the top edge to the lowest point of the towel bar. If the door has a routed panel or curved upper rail, check whether the hook would rest on a flat, structurally suitable section instead of a bevel or decorative edge.

Next, close the empty door slowly while watching the hook from the side. The part that wraps inside needs room between the door and cabinet structure. A shelf placed close to the top, a drawer box behind a false-looking front, or the rim of a pull-out bin can occupy that space. Under a sink, supply lines and cleaning bottles may not touch the hook when the door is still, yet could catch it as the door swings.

Who this is for

  • Renters and homeowners who want a removable place for a hand towel or dish towel without making holes.
  • Small kitchens where counter space is limited but a compatible base-cabinet door is available.
  • Households that can dedicate one door to towel storage without blocking a walkway, drawer, appliance, or second cabinet door.
  • Buyers willing to measure both the outside and inside of the door instead of choosing by bar length alone.
  • People who prefer a towel to hang from a bar rather than bunching it through a cabinet pull.

Who should skip it

  • Skip this format when the cabinet maker advises against hanging accessories over the door or applying pressure to its top edge.
  • A door with almost no closing gap, a thick decorative top, an angled edge, or an unusually fragile finish may not accept a generic hook.
  • Look elsewhere if the only available door puts the towel beside a burner, oven vent, open flame, trash opening, pet bowl, or heavily splashed work zone.
  • Do not use a bar that interferes with child locks, soft-close hardware, a pull-out shelf, plumbing, or the normal operation of an appliance.
  • A towel that would drag on the floor, become trapped between doors, or brush against stored chemicals needs a different location.
  • If the household routinely pulls hard on towels or hangs heavy wet items, a properly installed fixed solution may be more appropriate.

What to verify before buying

  • Door thickness: Compare the measured top edge with the hook’s stated usable opening, not just its overall outside width.
  • Top clearance: Confirm the metal and any protective liner can pass beneath the counter, rail, or drawer above without scraping.
  • Inside projection: Check how far the hook extends behind the door and whether it conflicts with shelves, bins, hinges, or plumbing throughout the swing.
  • Bar length: Make sure the bar fits on a flat section without crossing a neighboring door, handle, corner, or appliance front.
  • Towel drop: Calculate where the bottom of your usual folded towel will land after it is placed on the bar.
  • Surface protection: Read what contacts the front, top, and back of the door, and whether pads or liners are included and replaceable.
  • Finish and care: Verify cleaning instructions for the bar and compatibility guidance for painted, laminated, veneered, or wood cabinet surfaces.
  • Load wording: Check the current stated use and limit; a dish towel is a different load from a bath towel, damp apron, or filled bag.
  • Installation orientation: Some designs may be intended for a particular door direction or bar position, so follow the exact instructions.

Hook fit has three dimensions

Product photos tend to show the visible bar, while the hidden hook determines whether the accessory works. Its first critical dimension is the opening that receives the door. Too narrow and it will not seat fully; much wider and the bar may tilt, rattle, or shift unless the design includes a suitable spacer. Do not bend a rigid hook to force a new fit unless the maker explicitly describes that adjustment.

The second dimension is the material stacked above the door. Even when the hook opening matches the thickness, the top bridge must fit through the closing gap. Include attached pads in this calculation. Compressing a liner to make the door close can transfer pressure to the finish and may keep the door from sitting in its intended position.

The third dimension is the leg hidden inside the cabinet. A longer inner leg may help locate the hook on a compatible door, but it also reaches farther toward shelf contents. Observe the entire door swing, not only the closed position. The hook should not sweep across a tall bottle, catch the edge of a pull-out container, or press a bag against a hinge.

Cabinet pairs deserve extra attention. A bar mounted near the meeting edge can collide with the second door or cover its finger pull. Corner cabinets and doors beside dishwashers may create similar conflicts. A short piece of removable painter’s tape can mark the proposed bar width during measurement, but do not leave adhesive on a finish longer than its instructions allow.

Put the towel where kitchen work actually happens

Placement determines whether the bar is convenient or perpetually in the way. Near the sink, a hand towel is easy to reach, but repeated splashes may keep it damp. Near a prep area, it may be convenient for drying clean hands, yet it should not brush food, knife handles, cabinet contents, or the floor. Near an oven or cooktop, heat, steam, grease, and open flames make proximity a poor default; follow appliance clearances and choose a safer location.

Open the selected cabinet while someone stands in the normal work position. A long towel can swing into knees or catch on a projecting handle. In a narrow galley kitchen, a bar that adds only a small amount of depth can still snag clothing as people pass. The towel should remain reachable without requiring the user to lean across a hot, wet, or busy surface.

Consider which towel will live there. A small hand towel folded once over the bar has a different drop from a full-size kitchen towel hanging from one end. Measure the towel in its intended fold and add the distance from the cabinet top to the bar. If the calculated bottom is too low, choose a shorter towel, a higher bar geometry, or another door rather than relying on the product image.

Bar shape, stops, and usable width

Overall width and usable hanging width are not always the same. End caps, bends, hook brackets, or raised stops can take up part of the bar. A narrow bar may hold one folded towel neatly, while a longer one can allow more airflow or accommodate two small towels if its stated use permits. Extra length is not automatically useful when it crosses a door seam or invites the towel to slide into a walkway.

An open-ended arm can make it quick to slide a towel on and off, but the towel may also work its way off if the cabinet door moves briskly. A capped or closed bar can retain it more predictably, though threading a thick folded towel may take more room. Look at how the bar meets the hook: a connection that projects outward may change the effective depth more than a straight profile.

A smooth bar is easier to wipe than one with deep decorative joints. If the location is close to the sink, examine current care guidance and whether water can collect around seams, pads, or end caps. Finish names alone do not establish resistance to scratches, moisture, or cleaners, so use the recommended cleaning method and dry the accessory as directed.

Protect the door and check it over time

Pads are helpful only when they remain clean, aligned, and compatible with the surface. Dust, grit, or dried kitchen residue trapped beneath a pad can mark a finish as the bar shifts. Inspect every contact point before installation, wipe the door according to the cabinet care instructions, and make sure no sharp edge or exposed fastener touches it.

Install the accessory without forcing the door. Close it gently the first time and check the reveal around neighboring fronts. The latch or soft-close action should work as it did before. If the door springs open, sits proud, rubs the counter, or needs pressure to latch, remove the bar rather than treating that behavior as normal.

During routine cleaning, lift the bar off and inspect the top edge, front, and back of the door. Check for trapped moisture, pad movement, discoloration, abrasion, rust-like spots, loose joints, or bending. A damp towel adds moisture directly beside the cabinet, so allow both towel and contact area to dry. Follow the maker’s instructions about cleaning the accessory and replacing any protective parts.

Limitations

  • “No drilling” does not mean every cabinet finish or door profile is compatible.
  • A hook can match door thickness while still being too tall for the closing gap or too deep for the cabinet interior.
  • The bar uses part of the door edge and may interfere with paired doors, drawers, pull-outs, or countertop overhangs.
  • Wet towels can transfer moisture to the accessory and nearby cabinet surfaces.
  • A removable bar may shift or rattle when the towel is pulled or the door is opened quickly.
  • Long towels can hang into walkways, touch the floor, or swing into adjacent storage.
  • Generic search photos cannot confirm the fit of a specific cabinet; measurements and current product instructions remain necessary.

Alternatives to compare

  • A self-standing countertop towel holder when counter space is available and a movable location is useful.
  • A wall-mounted or cabinet-mounted bar installed with hardware appropriate for the surface and expected load.
  • A towel ring placed away from heat and splashes when only one small hand towel is needed.
  • A compatible appliance-handle towel clip that helps keep a towel from sliding, provided it does not affect appliance operation.
  • A removable hanging hook approved for the chosen surface, with enough surrounding airflow for the towel.
  • Keeping clean towels in a nearby drawer and placing the in-use towel at a dedicated sink-side drying point.

FAQ

How do I measure a cabinet door for an over-the-door towel bar?

Measure the thickness at the exact top section where the hook will sit, then measure the gap above the closed door and the unobstructed space behind it. Also mark the proposed bar width and calculate the bottom of the folded towel. Compare every measurement with the current product diagram and installation instructions.

Will an over-the-cabinet towel bar stop the door from closing?

It can if the top bridge and padding are thicker than the available gap or if the inner hook contacts cabinet structure. A compatible bar should not require force or change the door’s alignment. Remove it if the door rubs, sits open, or no longer closes normally.

Can I use this type of bar on a painted cabinet?

Only when the product guidance and cabinet care instructions indicate that the contact materials and mounting method are suitable. Inspect pads and edges, keep contact areas clean and dry, and check periodically for marks or finish changes.

Where should a cabinet towel bar go in a kitchen?

Choose a compatible door near the task but away from burners, open flames, oven vents, food-contact areas, trash openings, and crowded walkways. Test the door swing and make sure the towel cannot touch the floor, stored chemicals, or adjacent appliances.

Is a longer towel bar always better?

No. A longer bar offers more hanging width only if it stays within a clear, flat section of the door. It may otherwise cross a cabinet seam, block a neighboring front, or project into traffic. Match usable width to the towel and the available door area.

Can I hang more than a dish towel on the bar?

Use it only for the item types and load described by the current instructions. Do not assume that a design intended for a light hand towel can support a wet bath towel, apron, cleaning tools, or a filled bag.

Choosing a Bread Box That Works on a Crowded Kitchen Counter

Product links are for reference. Verify current details on the retailer page before buying.

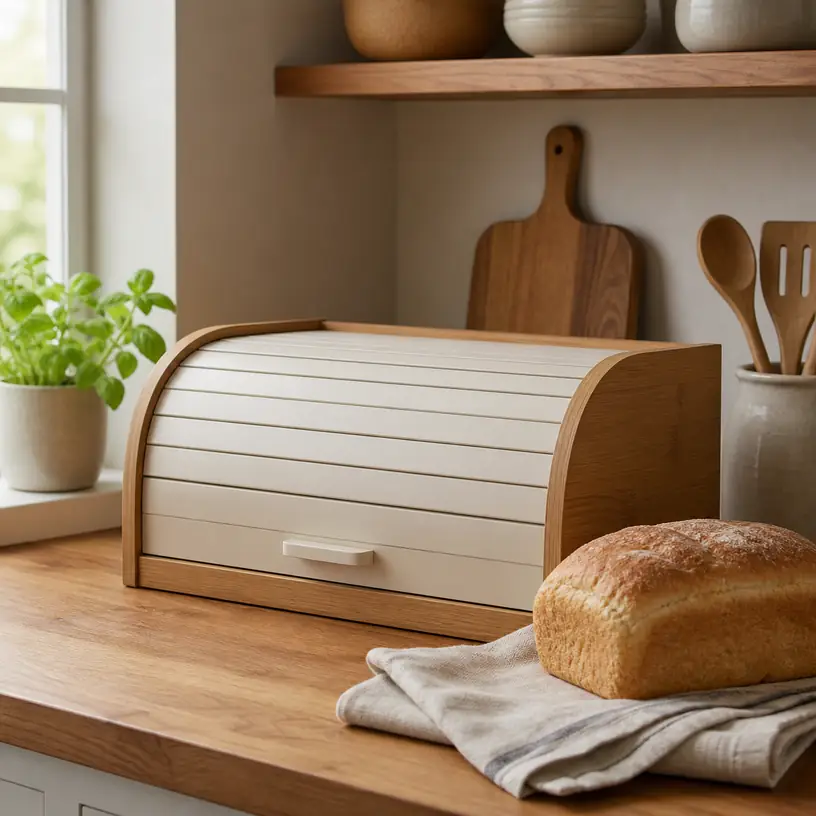
Illustrative image of a generic bread box on a kitchen counter

Illustrative image, not an official product photo.

Short answer

A useful bread box is not simply the biggest container that fits under a cabinet. It should hold the loaves, rolls, or pastries your household typically has at the same time, open fully in its intended location, and leave enough counter space for daily food preparation. Compare usable interior dimensions rather than exterior width alone. Then look at ventilation, closure design, cleaning access, food-contact guidance, and whether crumbs can be removed without turning the whole box upside down. A bread box can make the counter tidier and shield bread from light and incidental contact, but it does not give every type of bread the same storage life.

Search reference

Bread boxes for kitchen counters

Compare interior capacity, door clearance, ventilation, surface care, crumb cleanup, and the counter area each design occupies while open.

View matching options

Start with the bread, then measure the counter

Bread boxes are often photographed with one neatly centered loaf, while real kitchens may need to store a sandwich loaf, a bag of rolls, and half a bakery boule at once. Make a short inventory before comparing containers. Note the tallest and widest bread you buy regularly, whether it stays in a bag, and how many packages usually overlap between shopping trips. A slim box can be perfectly adequate for one household and become a frustrating stack of crushed bags in another.

Measure the proposed location in three dimensions. Width is only the beginning: wall cabinets limit height, a backsplash can interfere with a rear hinge, and an appliance cord may reduce usable depth. Leave practical room around the box instead of planning a millimeter-perfect fit. If it will sit beside a toaster or coffee maker, account for the space needed to use and clean those appliances and follow their placement instructions.

The door changes the working footprint. A front-hinged panel needs clear counter area in front and may become a temporary surface that collects crumbs or clutter. A roll-top or sliding door avoids that forward swing but can take up interior room. A top-hinged lid needs overhead clearance and may be awkward under a low cabinet. Sketch the door in its open position before deciding that the exterior dimensions fit.

Who this is for

  • Households that keep bread on the counter and want packages gathered in one defined place.
  • Small kitchens where a measured container can replace a loose pile without consuming the main preparation area.
  • Home bakers who need room for one or two familiar loaf shapes after the bread has cooled completely.
  • Shared kitchens where a visible, consistent storage location helps keep counters orderly.
  • Buyers willing to clean crumbs regularly and adjust storage habits for different bread types and room conditions.

Who should skip it

  • Skip a counter bread box if you rarely keep bread at home or already use freezer storage successfully.
  • A decorative box is a poor trade if it occupies the only safe, usable preparation space in a very small kitchen.
  • Do not use a bread box as a substitute for refrigeration when a specific product label or recipe requires refrigerated storage.
  • Anyone expecting a sealed container to make all bread last indefinitely should choose a storage method based on the particular bread instead.
  • A household that buys unusually long baguettes or several bulky loaves may find a pantry shelf, drawer, or dedicated cabinet more practical.

What to verify before buying

  • Usable interior dimensions: Compare the space inside with bread in its normal bag or wrap; exterior measurements do not reveal wall thickness, hinges, or door tracks.
  • Open-door clearance: Check forward, upward, or rear clearance in the exact counter location, including cabinet handles and backsplash edges.
  • Ventilation: Look for clearly described vents or adjustable airflow and consider how the design suits the bread and climate in your home.
  • Closure behavior: Confirm that the door moves smoothly, remains where intended, and does not require holding the box with a second hand.
  • Cleaning access: Check whether corners, tracks, seams, and ventilation holes can be reached and whether any crumb tray is actually removable.
  • Material and care: Review current cleaning instructions, food-contact wording, finish care, and restrictions involving water, detergents, or heat.
  • Base and feet: Make sure the box sits steadily and will not scratch or trap moisture against the counter surface.
  • Assembly details: For flat-packed designs, verify included hardware, tool requirements, panel alignment, and finished dimensions.
  • Placement guidance: Follow the maker’s directions about heat, moisture, sunlight, walls, and nearby appliances.

Door style matters in a working kitchen

A roll-top door is appealing when the counter in front of the box must remain available. The slatted panel usually travels along a curved track, so examine how much interior height and depth that mechanism consumes. Tracks also create places for crumbs to collect. A smooth path and accessible cleaning areas matter more over time than the visual novelty of the door.

Front-hinged doors provide a broad opening and make the back of the box easier to reach. Some are designed to rest horizontally, but that does not automatically make them a cutting board or load-bearing shelf. Use the panel only as described in the current instructions. Check where its handle lands and whether opening it blocks a drawer or pushes into the area where someone is preparing food.

A top lid can be mechanically simple and easy to wipe, yet low wall cabinets may prevent it from opening far enough. Lift-off lids require somewhere clean to set the lid down. Side-opening doors are less common but may suit a narrow counter if the adjacent area remains clear. There is no universally superior style; the best mechanism is the one that can be opened, loaded, and cleaned without rearranging the kitchen each time.

Airflow is not the same as a perfect storage environment

Bread storage involves competing changes. Too much exposure can contribute to drying, while trapped moisture can create an undesirable damp environment. Bread boxes approach that balance in different ways through small holes, seams, adjustable vents, or doors that are not airtight. Product descriptions do not always explain airflow precisely, so avoid treating words such as “fresh” or “ventilated” as a measurable guarantee.

The bread itself matters. A packaged sandwich loaf, a crusty bakery loaf, homemade enriched bread, and pastries with perishable fillings do not have identical storage needs. Keep and follow the product label, bakery guidance, or recipe instructions. Let home-baked bread cool fully before enclosing it; visible condensation or a damp interior is a reason to reassess the storage setup and clean the box.

Room conditions change the result as well. Heat, humidity, direct sun, steam from cooking, and proximity to a dishwasher or sink can affect the environment around the box. Choose a dry location away from obvious heat and splashes. Inspect stored food regularly and discard it when its condition is questionable rather than assuming the container has preserved it.

Materials change care more than appearance

Metal boxes can offer thin walls and a wipeable interior, though painted or coated finishes may have specific restrictions. Look for protected edges, stable hinges, and care instructions that address scratches, rust, and prolonged moisture. A metal shell may also show fingerprints or dents, which is mainly a household preference rather than a storage performance measure.

Wood and bamboo can add a warm counter appearance and may use thicker panels. Their care often differs from a washable plastic bin: soaking, harsh cleaners, or a dishwasher may be inappropriate. Check how joints, grooves, and unfinished surfaces should be cleaned and dried. Marketing names alone do not establish the exact material, coating, or food-contact suitability.

Plastic or mixed-material designs can be light and easy to move. Verify temperature limits, approved cleaning methods, latch construction, and whether removable components can be washed separately. A transparent window helps show what is inside without opening the box, but seals and window edges add more seams to inspect. Regardless of material, smooth reachable interior surfaces make routine crumb removal easier.

Capacity without counter takeover

Single-level boxes keep everything visible but can become wide. Two-level designs use vertical space and may separate loaves from rolls, yet they need sufficient clearance beneath wall cabinets and can hide items at the back. Check whether the shelves are fixed, adjustable, or removable, and whether the stated dimensions include handles and feet.

Avoid treating the top as bonus storage unless the manufacturer describes an appropriate load and use. Even a flat top can become cluttered with fruit, mail, or appliances that must be moved every time the lid opens. Storing heat-producing appliances on or against a bread box can also conflict with appliance clearance instructions. Plan the top as empty space unless both products’ directions support the arrangement.

If capacity needs fluctuate, a slightly larger interior may be useful, but oversized storage can encourage forgotten packages. An easy visual check is valuable: place older bread toward the front, avoid crushing soft items under heavy loaves, and clear empty bags promptly. Organization habits often make more difference than one extra tier.

Cleaning should be a weekly-sized task, not a project

Crumbs accumulate even when bread remains wrapped. Removable trays and wide openings can simplify cleanup, but only if they come out without disassembling hinges or spilling into tracks. Look closely at interior corners and door mechanisms. Decorative perforations and deep seams may be attractive in photos while adding work in actual use.

Follow the supplied care instructions rather than assuming every bread box can be rinsed in a sink. Unplug and move nearby appliances before cleaning the counter area when appropriate. Dry the box completely before putting food back inside, and investigate persistent moisture, odors, stains, or visible growth rather than covering them with another bag of bread.

A liner may seem like an easy solution, but it can block intentional vents or hold crumbs and moisture against a surface. Use one only if compatible with the design and clean it frequently. Strong fragrances can also transfer to food or linger in enclosed spaces, so use cleaning products approved for the material and rinse or wipe as directed.

Limitations

  • A bread box cannot guarantee a fixed storage life because bread formulation, packaging, room conditions, and handling differ.
  • Exterior size may overstate practical capacity once door mechanisms, shelves, hinges, and thick panels are considered.
  • Ventilation descriptions are not always quantified, and a design suited to one household or climate may not suit another.
  • Crumbs can collect in tracks, seams, vents, and corners even when most bread remains packaged.
  • Large boxes can reduce preparation space, interfere with appliances, or fail to open fully beneath wall cabinets.
  • Decorative tops and drop-down doors should not be treated as cutting boards, shelves, or appliance platforms unless specifically designed for that use.
  • Bread with perishable ingredients or storage instructions may require a different method regardless of the container.

Alternatives to compare

  • Freezer storage with portions wrapped and labeled for households that use bread slowly.
  • A dedicated pantry shelf or deep drawer when counter space is more valuable than at-a-glance access.
  • A clean bread bag or appropriate wrap inside a cabinet for one loaf at a time.
  • A tall pantry bin for packaged rolls and flatbreads, provided airflow and food-storage guidance remain suitable.
  • A smaller pastry container used only when its closure, capacity, and care fit the specific baked goods.

FAQ

Should a bread box be airtight?

Not necessarily. Many bread boxes use limited ventilation rather than an airtight seal, but the appropriate storage method depends on the kind of bread, its packaging, and the conditions in your kitchen. Follow label, bakery, or recipe guidance instead of relying on the closure alone.

Can I put warm homemade bread directly into a bread box?

Let it cool fully first. Warm bread can release moisture inside an enclosed space, changing both its texture and the condition of the box. Use the recipe’s storage guidance once cooling is complete.

How large should a bread box be for one loaf?

Measure the loaf in the bag or wrap you normally use and compare it with the listed interior dimensions. Leave enough room to insert and remove it without crushing the bread; do not rely only on the product’s exterior width.

Can the top of a bread box hold a toaster?

Only if the bread-box maker and toaster maker both support that placement, including weight, heat, and ventilation clearances. A flat lid is not automatically an appliance shelf, and the toaster may also prevent the box from opening.

How often should I clean a bread box?

Remove crumbs regularly and clean spills promptly, using the product’s care instructions. The practical interval depends on how often it is used, but do not wait when you notice moisture, odors, residue, or questionable food condition.

Rolling Pins for Home Baking: Match the Shape to the Dough

Product links are for reference. Verify current details on the retailer page before buying.

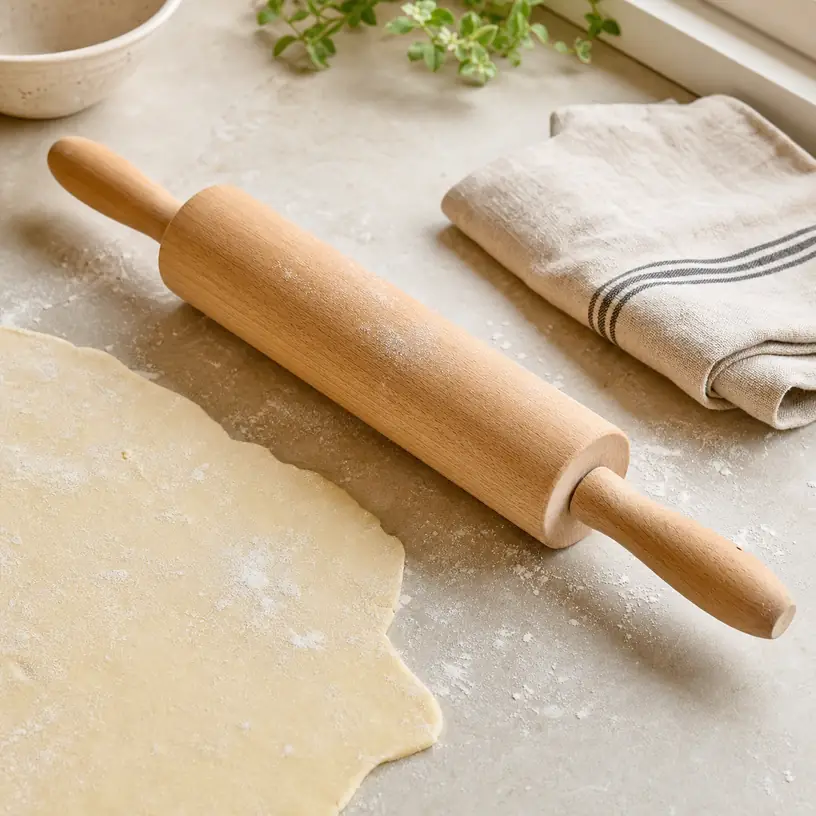
Illustrative image of a generic wooden rolling pin on a home baking counter

Illustrative image, not an official product photo.

Short answer

A useful rolling pin should suit both the dough you make and the clear counter space you have. A straight dowel gives the hands direct feedback and offers one continuous rolling surface. A handled pin keeps the hands in a familiar position while the barrel turns, but its bearings, handles, and axle add parts to inspect and clean. Tapered pins are easy to steer through curves, while straight sides help when you want an even strip or broad sheet. Compare usable rolling length rather than total length, then consider diameter, weight, surface texture, care instructions, and where the pin will live between baking sessions.

Search reference

Rolling pins for home baking

Compare dowel, tapered, and handled designs against your work surface, usual batch size, preferred grip, cleaning routine, and storage space.

View matching options

Begin with the dough, not the material

A rolling pin is simple enough that material can dominate the shopping page, but shape and working dimensions usually make a better first filter. Think about the task that sends you looking for the pin. Large batches of cookies need enough usable length to cross a broad piece of dough without leaving repeated ridges. A small pastry round benefits from control when turning and thinning the edges. Pizza, flatbread, pasta, decorative dough, and laminated pastry each place different demands on the tool and may also call for recipe-specific technique.

Measure the uninterrupted counter or board area where you actually roll. Include the room required for your hands, not just the dough. A pin that looks compact in isolation can become awkward beside a wall, sink, appliance, or raised board edge. Conversely, a very long tool may add no practical rolling area if its ends constantly hit nearby objects. If you use a rimmed board or a pastry mat, check how the pin’s handles or tapered ends interact with those boundaries.

Then note the largest sheet you make regularly. The relevant product dimension is the barrel or central working section that touches the dough. Overall length may include handles, rods, knobs, or narrow tapers that do not provide the same contact. Listings do not always label these dimensions consistently, so compare diagrams and current specifications carefully.

Who this is for

  • Home bakers replacing a short bottle, glass, or improvised roller with a dedicated tool.
  • Cookie and pastry makers who want a working length suited to their usual batch rather than the largest pin that fits a cabinet.
  • Cooks choosing between the direct feel of a dowel and the separate grips of a rotating handled pin.
  • Bakers who need a second pin for a different task, such as a tapered shape for round dough alongside a straight pin for broad sheets.
  • Anyone reorganizing a small baking station and willing to measure the counter, drawer, or hanging space before buying.

Who should skip it

  • Skip an oversized pin if most of your work is a single small crust or a narrow strip of dough on a compact board.
  • Do not choose a heavy stone or metal option solely for appearance if lifting, stopping, or storing it would be uncomfortable.
  • Avoid an unfinished wooden tool if your routine requires soaking or machine washing; follow the stated care method for the actual pin instead.
  • A pin with thickness rings is a poor match when the ring settings do not correspond to the recipes you follow or when the guides reduce usable width too much.
  • If limited hand movement makes two-handed rolling difficult, consider whether a press, pasta machine, or another task-specific tool would be easier to use.

What to verify before buying

  • Usable rolling length: Distinguish the dough-contact area from the complete end-to-end measurement.
  • Body shape: Confirm whether the working surface is straight, gently tapered, or shaped in another way and decide how that suits your common dough.
  • Maximum diameter: A thick dowel changes hand position; measure a familiar cylindrical item if the listed diameter is hard to visualize.
  • Weight: Check the actual stated weight and consider both downward pressure during rolling and the effort required to lift and reposition the pin.
  • Grip and movement: For handled models, look at handle size, clearance, axle construction, and whether the barrel is intended to rotate freely.
  • Surface and seams: Inspect descriptions for coatings, texture, joints, engraved measurement marks, or crevices where flour and dough could collect.
  • Care instructions: Verify washing, drying, conditioning, rust-prevention, dishwasher, and temperature guidance for the specific construction.
  • Guide rings: Check included thicknesses, measurement units, how firmly the rings attach, and how much rolling width remains between them.
  • Storage: Measure the full tool, including handles, and confirm whether any hanging feature is intended to support its weight.

Straight dowel, tapered pin, or rotating barrel?

A straight dowel is one solid cylinder or a cylinder-like body without separate handles. Your palms move across its surface while rolling, so pressure and dough thickness can be felt directly. Its uninterrupted length is useful across wide sheets, and the lack of an axle means fewer moving joints. The tradeoff is that a thick or slick dowel may feel unfamiliar, especially to someone accustomed to holding handles. Diameter, surface finish, and the user’s hand size all affect comfort.

A tapered pin narrows toward the ends. Moving one hand through a slightly longer stroke can help steer the pin around a circular piece of dough. That makes the form appealing for pie and other round work, though technique still matters. Because the ends narrow, only the center offers the maximum diameter and pressure profile. Look for a clear drawing of the taper and total working length instead of assuming all tapered pins have the same proportions.

A handled rolling pin has a barrel that turns around a central rod or axle while the hands hold separate grips. It can feel intuitive for long back-and-forth passes and keeps flour off the palms. The barrel length, not the distance across the handles, determines the broadest uninterrupted pass. Check that your fingers have clearance from the counter and that the handles suit your grip. Bearings or bushings should move as described, but the care instructions may limit soaking or dishwasher use because water and residue can reach the joints.

None of these designs is automatically the right one for every baker. If possible, mimic the hand position with objects of similar diameter before ordering. A straight cardboard tube can suggest whether a dowel feels too thick, while the handles of an existing kitchen tool can help you judge grip length. This will not reproduce weight or balance, but it can expose an obvious mismatch.

Material changes weight, feel, and upkeep

Wood is common because it offers a warm grip and a surface that is neither identical to polished metal nor stone. Species, grain, finish, and construction vary, so broad material labels do not define care. Confirm whether a particular pin is sealed, unfinished, laminated, or made from one piece, and follow its cleaning and conditioning directions. Wood should not be assumed dishwasher-safe, and prolonged soaking can be unsuitable. Inspect a new pin for rough areas or damage before it touches food.

Metal pins can have a smooth surface and may be designed to cool before use, but construction matters. A hollow pin and a solid pin will not feel alike, and not every product is intended for refrigeration or freezer exposure. Verify the stated material, seams, end caps, filling instructions if any, and cleaning guidance. Condensation can affect flour and dough behavior, so a cold surface is a technique choice rather than a universal advantage.

Stone pins often emphasize mass and a cool-feeling surface. That weight can provide steady pressure, yet it also makes the tool harder to stop, lift, and move to a sink or shelf. Stone can chip or damage another surface if dropped, and handles, axles, or stands may need separate care. Check the complete weight rather than judging from photos, and plan a low, stable storage location.

Silicone-covered or synthetic-surface pins may be marketed around release and cleanup, but coatings are not all the same. Review food-contact wording, temperature limits, seam construction, permitted cleaning methods, and what lies beneath the outer surface. Even a low-stick surface may still need flour according to the recipe, and soft coatings can be vulnerable to cuts or abrasion from nearby utensils.

How weight and diameter affect a rolling session

A heavier pin contributes more downward force before you deliberately press. That may help with firm dough, but it can also thin soft areas faster than expected or make frequent lifting tiring. A light pin is easier to reposition and can offer delicate control, though the user supplies more of the working pressure. Neither description establishes quality. Match mass to the dough, the length of the session, and what is comfortable for the person doing the baking.

Diameter changes leverage and hand posture. A slim pin can be nimble for small pieces but may require more revolutions or shorter strokes. A large-diameter dowel raises the hands farther above the counter and can cover distance smoothly, while also demanding a broader grip. Handled pins need enough clearance beneath the grips so knuckles do not brush the worktop.

Balance is difficult to judge from a single listing image. On a dowel, consistent shape and material distribution matter. On a rotating model, the barrel should remain centered and move without the handles loosening during normal use as defined by its instructions. Check the return terms before buying when weight, grip, or movement cannot be assessed in person.

Thickness rings and measurement marks

Removable guide rings lift the main barrel above the counter to target a nominal dough thickness. They can help with cookies and crackers when uniformity matters, but they only work while both rings stay on a level surface. A small board, mat edge, pile of flour, or counter seam can tilt the pin. Rings also reduce the effective width available for dough, and soft pieces may shift or compress differently under pressure.

Compare the included ring sizes with your recipes and confirm whether dimensions are shown in inches, millimeters, or both. If the listing provides only color coding, consider how you will identify the rings later. Check how they attach, whether replacements are available, and whether the pin can be used comfortably without them.

Printed or engraved ruler marks may help estimate width, but their location can also create texture where dough touches the pin. They do not measure thickness unless the product includes a separate mechanism for that purpose. Treat markings as a convenience to verify, not a substitute for a ruler, dough guides, or the recipe’s visual and tactile cues.

Cleaning and storage deserve a plan

Remove dough according to the maker’s instructions rather than reaching immediately for a sharp scraper that could gouge wood or cut a coating. Pay attention to the ends of a dowel, the edge of a sleeve, and the gaps beside rotating barrels. Flour can hide in joints even when the central surface looks clean. Wash only by the stated method, dry thoroughly, and apply any recommended maintenance at the specified interval.

Storage should protect the rolling surface from knife edges, moisture, falls, and the weight of other cookware. A long pin tossed into a crowded utensil drawer can jam the drawer or damage its surface. A stable shelf, deep drawer, or suitable hanging point can work, but verify that a loop or handle is designed for hanging. Heavy pins are generally better kept low, where a slip has less distance to travel.

If a pin comes with a stand, include the stand’s footprint in your measurement. Counter storage keeps the tool accessible but also exposes it to cooking splatter and sunlight. A cloth bag may reduce dust while trapping moisture if the tool is put away before it is fully dry. The simplest safe storage method is the one you can follow after every baking session.

Limitations

  • One rolling pin may not feel equally controlled on tiny pastry rounds, broad cookie sheets, firm pasta dough, and soft laminated dough.
  • Material names alone do not establish exact weight, surface finish, food-contact construction, or cleaning requirements.
  • Guide rings target a spacing from the counter but cannot correct an uneven surface or guarantee uniform dough after it springs back.
  • A cold pin does not replace recipe temperature control, and condensation may alter how the dough and flour behave.
  • Handles and rotating parts add grip options but also create joints that need inspection and product-specific care.
  • The comfortable weight and diameter for one baker can be tiring or awkward for another, particularly during large batches.

Alternatives to compare

  • Dough guide strips used with an existing straight pin when repeatable thickness is the main concern.
  • A compact pastry roller for small pans, edges, or limited work areas.
  • A tortilla or dough press for recipes designed around pressing rather than rolling.
  • A manual pasta machine for creating repeatable narrow sheets appropriate to the recipe.
  • A clean, suitable cylindrical substitute for occasional use, provided its material, surface, and shape are safe for food preparation.

FAQ

Is a dowel or handled rolling pin easier for beginners?

It depends on the grip that feels natural. A handled pin separates the hands from the moving barrel, while a dowel places the palms directly on the tool for immediate pressure feedback. Compare diameter, weight, usable length, and hand position rather than treating either style as universally easier.

What length rolling pin should I choose for cookies?

Measure the widest sheet of cookie dough you normally roll and the clear width of your work area. Then compare that with the pin’s usable rolling surface, not just its overall length. Leave room for both hands and for repositioning the dough without striking nearby objects.

Does a marble or metal rolling pin need to be chilled?

Only if the specific product instructions and the recipe support chilling. Confirm permitted temperatures and cooling methods first. A cool pin can gain condensation, and temperature-sensitive dough still requires appropriate handling of the ingredients, room, and work surface.

Are rolling pin thickness rings accurate?

Rings can establish a nominal gap when both ends travel on the same flat surface. Their result can be affected by an uneven counter, a mat edge, flour buildup, dough spring-back, or rings that shift. Verify the ring dimensions and check the dough with the method your recipe recommends.

Can a wooden rolling pin go in the dishwasher?

Do not assume so. Wood construction and finishes vary, and heat, prolonged water exposure, and detergent may be unsuitable. Follow the current care instructions for the exact pin; hand cleaning and prompt drying are common requirements but still need product-specific confirmation.

Muffin Pans for Batch Baking: Cup Shape, Capacity, and Cleanup

Product links are for reference. Verify current details on the retailer page before buying.

Illustrative image of a generic muffin pan in a home kitchen

Illustrative image, not an official product photo.

Short answer

A useful muffin pan matches three things: the portions you actually bake, the paper liners or recipes you commonly use, and the clear space inside your oven. A 12-cup metal pan is a familiar starting point for routine batches, while a 6-cup pan can be easier to handle in a compact oven. Before choosing, compare the stated cavity dimensions rather than trusting labels such as standard, jumbo, or mini. Also look at the pan’s overall footprint, rim or handle area, material and coating description, care instructions, and whether the cup shape leaves easy-to-clean corners.

Search reference

Muffin pan options

Compare cup counts, cavity measurements, pan footprints, material descriptions, liner compatibility, and cleaning instructions for your usual batch size.

View matching options

Think beyond the number of cups

Cup count is easy to compare, but it does not tell the whole story. Two 12-cup pans can have different cavity profiles and different amounts of metal around the outside. That changes how a paper liner sits, how much room the pan needs on an oven rack, and how confidently you can grip it with oven mitts. If you already have a recipe, storage shelf, or countertop oven in mind, those physical details are more useful than a broad size name.

Start with your normal baking rhythm. Someone who makes one breakfast batch for the week may appreciate a single 12-cup layout. A household that divides batter into different flavors might prefer two 6-cup pans that can be filled or removed separately. Mini cavities suit bite-size portions, while larger cavities change both portion size and recipe timing. Recipes may need adjustment when the cavity size differs, so a different pan format is not automatically interchangeable.

The empty spaces matter too. A broad outer rim can provide a more secure place to hold the pan without pressing an oven mitt against a hot muffin. On the other hand, extra-wide handles can prevent the pan from fitting into a toaster oven or a narrow cabinet. Check the full exterior length and width, including handles, rather than adding up cavity diameters.

Who this is for

  • Home bakers replacing a warped, scratched, stained, or awkwardly sized muffin pan.
  • Households that make muffins, cupcakes, egg bites, or other portioned oven recipes and want a dedicated cavity pan.
  • Small-space cooks choosing between a compact 6-cup pan and a full batch layout.
  • Bakers who want a second pan so two batches can be prepared before the first pan cools.
  • Gift buyers who know the recipient’s oven size and preferred style of baking.

Who should skip it

  • Skip a large rigid pan if your oven rack or cabinet cannot accommodate its complete exterior dimensions.
  • Choose individual baking cups or a flexible mold if storage shape matters more than a rigid frame.
  • Do not replace a specialty popover, mini cake, or doughnut pan with a muffin pan unless the recipe allows that change.
  • Avoid an unfamiliar coating or material when the listing does not provide the care, temperature, and food-contact information you require.
  • Do not buy a bundled set merely for a higher piece count if only one cavity size fits your recipes.

What to verify before buying

  • Confirm the number of cavities, each cavity’s top diameter, base diameter, and depth, plus the pan’s full exterior measurements.
  • Compare the cavity dimensions with the paper or reusable liners you plan to use; size labels alone may not establish a good fit.
  • Read the material and surface description carefully, including any coating and the utensils or cleaning methods the maker recommends.
  • Check the stated oven-temperature guidance against the recipes you bake most often.
  • Look for enough exposed rim or handle area to grip while wearing your own oven mitts.
  • Review hand-wash or dishwasher instructions and any guidance about soaking, abrasive pads, cooking spray, or metal tools.
  • Verify whether the pan is sold alone or with liners, lids, racks, or other pictured accessories.
  • Measure oven-rack clearance and the cabinet slot where the pan will be stored.

Metal, silicone, and surface choices

Metal pans are common because a rigid frame is straightforward to move when every cavity contains batter. Listings may describe steel, aluminized steel, aluminum, or other constructions, sometimes with a surface coating. The material name by itself does not establish weight, gauge, heat behavior, or durability. Compare the complete construction description and care guidance instead of assuming every pan made from a named metal will perform alike.

Silicone pans trade rigidity for flexibility. That can make release and compact storage appealing, but a flexible mold may need support from a sheet pan when it is filled or moved. Adding a supporting tray changes the total footprint and can affect how the setup fits in the oven. If you are considering silicone, check whether the maker calls for external support and whether that support is included.

A nonstick description can sound convenient, especially for batters that bake against the cavity wall. It still deserves a closer read. Confirm what utensils, liners, washing tools, and cooking sprays are recommended. If an older coated pan has damage, follow its maker’s replacement and care guidance rather than treating all marks as merely cosmetic. An uncoated pan may suit buyers who prefer to manage release with recipe-specific preparation, but it has its own cleaning and seasoning considerations.

Color should be a secondary filter. Dark and light surfaces can behave differently in an oven, but construction, recipe, rack position, oven calibration, and baking time all contribute to the result. A new pan may require observation during the first few batches instead of a permanent change based on color alone.

Fit, handling, and batch workflow

Before ordering, make a paper rectangle using the listed exterior dimensions and place it where the pan would sit on the oven rack. This simple check reveals conflicts with oven walls, rack handles, and nearby bakeware. It also shows whether the pan will fit flat in a cabinet or must be stored vertically. For a countertop oven, leave the clearances required by the appliance instructions rather than choosing a pan that barely slides inside.

Handling becomes important at the end of the bake. Batter rises near the cavities, so there may be little open surface available for a bulky mitt. A pronounced rim or dedicated grip area can help, provided it does not make the pan too wide. Look at the space between outer cavities and the edge, not only at decorative handle shapes.

For back-to-back batches, consider whether you want one large pan or two smaller ones. A single pan uses fewer pieces but must cool enough for safe handling before it is prepared again. Two pans let the next batch wait in a separate pan, although they require more storage and may not bake identically if their materials or cavity shapes differ. Matching pans simplify recipe notes when consistency between batches matters.

Liners, release, and cleanup

Paper liners are useful for serving and cleanup only when their base and side shape sit properly in the cavity. A liner that is too small can float or fold as batter is added; one that is too large may wrinkle sharply. Compare actual measurements and test a small liner pack before stocking up. Reusable liners add another care routine and can alter how the finished edges look, so verify that the recipe and pan combination suits them.

For unlined baking, follow the recipe’s preparation directions and the pan maker’s care instructions. More grease or spray is not always the answer, especially when a coating has specific restrictions. After baking, let the pan reach the handling stage recommended by the recipe before removing food. Digging around the edge with a sharp tool can damage both the bake and some pan surfaces.

Cleanup is easier when residue does not remain in tight seams or rolled edges. Check close-up images for the transitions between the cavity walls and top deck. If dishwasher use is important, confirm it explicitly; “easy to clean” does not necessarily mean dishwasher-safe. Drying the pan before storage also helps prevent trapped moisture between stacked bakeware.

Limitations

  • Cavity labels such as standard, mini, and jumbo are not a substitute for listed measurements.
  • Changing pan size can change portion count, baking time, browning, and the amount of batter needed per cavity.
  • A rigid 12-cup pan may not fit a countertop oven even when individual cavities appear compact.
  • Surface coatings require suitable utensils and cleaning methods, and no finish should be assumed maintenance-free.
  • Flexible molds can be awkward to carry when full unless the setup includes proper support.
  • Muffin pans occupy more storage space than loose baking cups and are not the ideal shape for every portioned recipe.

Alternatives to compare

  • Individual oven-safe baking cups when you want flexible batch counts and easier cabinet storage.
  • A loaf pan when the recipe supports one larger bake instead of individual portions.
  • A mini muffin pan for bite-size servings, short events, or recipes written for small cavities.
  • A jumbo muffin pan when larger portions are intentional and the recipe provides suitable timing guidance.
  • Specialty popover, doughnut, or mini cake pans when shape and structure are central to the recipe.
  • A supported silicone mold when flexible release and storage matter more than a fully rigid frame.

FAQ

Is a 6-cup or 12-cup muffin pan more practical?

A 12-cup pan suits common full-batch workflows, while a 6-cup pan can be easier to fit, lift, and store in a small kitchen. Check your recipes, oven dimensions, and usual number of servings rather than choosing on cup count alone.

Will standard paper liners fit every standard muffin pan?

Not necessarily. Size terms can vary, and liner shapes differ at the base and sides. Compare the listed liner measurements with the cavity’s top diameter, base diameter, and depth before buying in bulk.

Do I need to place a silicone muffin pan on a sheet pan?

Some flexible molds are easier or safer to move with rigid support, but requirements vary. Follow the specific product instructions and account for the supporting sheet pan when measuring oven clearance.

Can a muffin pan go in the dishwasher?

Only if its current care instructions permit it. Material, coating, seams, and attached grip components can affect the recommended method, so do not infer dishwasher compatibility from appearance.

What should I do before using a new muffin pan for the first time?

Read the maker’s washing, preparation, temperature, and utensil guidance, then compare it with the recipe. During the first batch, monitor progress according to the recipe rather than assuming the new pan will behave exactly like the old one.

Choosing a Kitchen Sink Drain Strainer That Is Easy to Empty

Product links are for reference. Verify current details on the retailer page before buying.

Illustrative image of generic removable drain strainer baskets beside a kitchen sink

Illustrative image, not an official product photo.

Short answer

A kitchen sink drain strainer should catch ordinary food scraps without making the basin slow to drain or becoming unpleasant to empty. Fit comes first: identify the drain style, measure the opening and surrounding recess, and note whether you need a simple removable screen or a basket that also closes as a stopper. Then compare hole size, basket depth, rim profile, underside clearance, and how easily you can lift the strainer without touching collected debris. A highly polished finish matters less than a stable fit and an open shape that can be scrubbed from both sides.

Search reference

Compare kitchen sink drain strainers

Review removable screens and basket-style designs while checking exact dimensions, drain configuration, perforation pattern, lifting method, care guidance, and included pieces.

View matching options

First decide what the strainer needs to do

The term “sink strainer” covers more than one product. A shallow perforated screen rests over or just inside a drain and catches scraps while water runs through. A deeper removable basket sits in an existing drain assembly. Some basket assemblies can also seal the drain when pushed, twisted, or positioned a certain way. Replacement parts may look interchangeable in a search grid even when their diameter, post, spring mechanism, or sealing surface differs.

If your sink already has a functional drain flange and you only want better debris capture, a drop-in screen may be the simplest option. If you are replacing a basket or stopper component, inspect the existing part before shopping. Photograph its top and underside, record its dimensions, and look for the way it engages with the drain. A basket that fits the opening but cannot sit at the intended height may drain poorly or fail to seal.

This guide focuses on removable household strainers rather than installing a complete drain body. Replacing plumbing hardware can involve seals and connections below the basin; that is a separate job from choosing a lift-out debris basket.

Who this is for

  • Home cooks who want to keep vegetable trimmings, rice grains, and other ordinary scraps from entering the kitchen drain.
  • Renters seeking a removable accessory that does not alter an existing sink assembly.
  • Households replacing a lost, bent, corroded, or difficult-to-clean strainer basket.
  • Shared kitchens where an easy-to-see and easy-to-empty catch basket can simplify the cleanup routine.
  • Buyers comparing a basic always-open screen with a basket that can also retain water in the sink.

Who should skip it

  • A sink with a garbage disposal may need a disposal-specific splash guard, stopper, or compatible strainer rather than a generic basket.
  • A damaged, leaking, loose, or corroded drain flange calls for diagnosis or repair, not merely a new drop-in screen.
  • Anyone expecting a strainer to prevent grease, fine sediment, or liquids from entering the drain needs a broader disposal routine.
  • A bathroom drain, utility sink, or unusually shaped drain may require a product designed for that fixture.

What to verify before buying

  • Drain opening and recess: Measure the usable diameter, depth, and the flat area where the rim will rest; do not choose from sink size alone.
  • Strainer type: Confirm whether the listing describes a shallow screen, replacement basket, stopper basket, complete drain assembly, or a part intended for a disposal.
  • Top and underside dimensions: Check rim diameter, basket diameter and depth, center post or stem details, and clearance beneath the basket.
  • Water flow: Compare the number, size, and placement of holes with the kinds of scraps you want to catch and the flow your sink needs.
  • Lift point: Look for a knob, loop, tab, or rim that can be grasped when the basket contains wet debris.
  • Sealing function: If you want to fill the sink, verify how the stopper engages and whether compatibility depends on a particular drain assembly.
  • Cleaning access: Favor smooth transitions and perforations that can be reached from both sides over hidden channels that trap residue.
  • Package contents: Check whether the offer includes one basket, a multi-pack, a stopper, seals, or installation components rather than relying on the main image.

Measure the drain, not the old product name

Begin with the drain empty and clean. Measure across the inner opening at more than one point, then measure the ledge or recessed area that supports the strainer rim. For a deeper basket, note how far it can extend before contacting hardware below. A ruler can provide a rough check, but calipers are useful when a replacement depends on a close fit.

Measure the old basket too, if it seated correctly. Record its outer rim, body width, overall depth, and any underside post. Do not assume a nominal description represents every relevant dimension. Two listings can use similar wording while differing enough to wobble, sit too high, or fall too deeply into the drain.

A silicone or flexible rim can reduce rattling in some designs, while a rigid metal rim can be thinner and easier to wipe. Neither approach fixes a dimensional mismatch. Also check whether a raised rim will interfere with a flat-bottomed dish placed in the basin.

Balance debris capture with drainage

Very fine perforations can catch small particles, but they offer less open area and may need to be emptied sooner. Large holes keep water moving yet allow smaller scraps through. Think about the actual cleanup load: rinsing a few coffee cups produces a different mix of debris from washing a pot after preparing rice or chopped vegetables.

Basket depth changes both capacity and handling. A deep basket may hold more before water backs up, but collected scraps can compress against the holes and become harder to knock out. A shallow screen is easy to see and remove, though it may shift when hit by a strong stream of water. Shape matters as much as capacity: rounded corners and a gently tapered basket are generally easier to brush clean than a tight seam between a flat base and vertical wall.

Do not treat the strainer as a tiny waste bin. Scrape plates and cookware into the appropriate household waste or compost container first. The strainer is the last catch for remnants left during rinsing, and it works better when emptied before a dense mat forms.

Stopper baskets need a closer compatibility check

A dual-purpose basket can drain in one position and seal in another. That convenience depends on how the basket meets the drain assembly. Some use a center post, ball, pin, spring, twist action, or pressure fit. A listing that says “universal” should still be checked against measured dimensions and the current compatibility notes.

If retaining water is important, look beyond the visible basket. Review the sealing surface, operating method, replacement guidance, and whether a separate gasket is involved. A basket may catch scraps perfectly yet be unsuitable as a stopper. Conversely, a secure stopper may require an extra action each time you want the sink to drain freely.

For disposal-equipped sinks, verify the entire arrangement before placing a metal basket or loose component near the opening. Use only a format described as compatible with the disposal and sink setup, and follow the appliance maker’s current safety guidance.

Make emptying part of the decision

Imagine removing the basket when it is wet and full. A tall center knob can be easy to grasp but may collect residue around its attachment point or interfere with items in the basin. A wire loop folds down neatly, though its hinge can add another cleaning spot. Rim tabs avoid a central obstruction but may be difficult to grip if they sit flush.

The easiest basket to live with can be lifted, tapped out, rinsed, and returned without turning it inside out or picking debris from a narrow groove. Check whether perforations have accessible edges and whether separate trim or silicone pieces can be removed for washing. Follow the current care directions for the stated materials; appearance alone does not establish dishwasher suitability or corrosion resistance.

Empty the basket after food preparation and before debris dries in place. Wash both sides, clear each blocked hole, and clean the drain recess where the rim sits. If the basket becomes sharp, distorted, cracked, or impossible to clean, replace it rather than forcing it to fit.

Limitations

  • A removable strainer reduces the amount of solid debris entering a drain but does not catch every fine particle.
  • It does not make grease, cooking oil, paint, or other unsuitable liquids safe to pour into plumbing.
  • Search results can mix simple screens, stopper baskets, complete drain assemblies, bathroom parts, and disposal accessories.
  • A close visual resemblance does not confirm fit; small differences in diameter, depth, and underside hardware can matter.
  • Fine holes may clog quickly during a heavy cleanup, while coarse holes may pass the smallest scraps.
  • A new basket cannot repair a leaking flange, blocked pipe, damaged seal, or malfunctioning garbage disposal.

Alternatives to compare

  • A flat mesh drain screen when the drain has little recess and only light debris needs catching.
  • A deeper basket strainer for food-preparation sinks that receive a larger volume of scraps.
  • A disposal-specific stopper or splash-guard accessory for a compatible garbage-disposal opening.
  • A sink stopper without perforations when retaining water matters and debris capture is handled separately.
  • A countertop scrap bowl or compost container to keep most preparation waste away from the sink entirely.

FAQ

How do I measure for a kitchen sink drain strainer?

Measure the inner drain opening, the recessed ledge or flat area supporting the rim, and any available depth below it. For a replacement basket, also measure the old rim, body, depth, and underside post or mechanism if the old part fit correctly.

Are kitchen sink drain strainers universal?

No. Many products cover common size ranges, but drain openings, recesses, basket depths, center posts, stopper mechanisms, and disposal configurations vary. Compare the listing’s exact dimensions and compatibility notes with your sink.

Is a mesh screen or perforated basket easier to clean?

A perforated basket with smooth, accessible holes is often quick to rinse, while fine mesh can catch smaller particles but may require more brushing. The better choice depends on the debris you usually encounter and how often you are willing to empty it.

Can I use a regular strainer with a garbage disposal?

Do not assume so. Disposal openings can require a specific stopper, splash guard, or strainer format. Confirm compatibility with the disposal and sink configuration and follow the appliance maker’s current instructions.

Why does water drain slowly through a new strainer?

The holes may offer too little open area for the water flow, the basket may be sitting too low, or debris may already be blocking the perforations. Remove and clean it, check its seating, and compare its dimensions and hole pattern with the drain.

Ice Cube Trays with Lids for an Easier Freezer Routine

Product links are for reference. Verify current details on the retailer page before buying.

Illustrative image for an ice cube tray with lid buying guide

Illustrative image, not an official product photo.

Short answer

An ice cube tray with a lid can make a crowded freezer easier to manage, but the lid is only one part of the decision. Start with the drinks you usually prepare, then compare cube dimensions, tray rigidity, release method, lid attachment, and the amount of level shelf space available. A low-profile tray may suit daily water bottles, while larger molds are better reserved for glasses that have enough room for slow-melting cubes.

Search reference

Ice cube trays with lids

Compare cube dimensions, covered stacking, fill method, release design, cleaning instructions, and freezer footprint across current options.

View matching options

Let the drinkware choose the cube

Cube shape matters more than an impressive cavity count. Small cubes fit narrow reusable bottles and chill drinks quickly, but a tray full of tiny cavities can take longer to refill. Standard cubes are flexible for everyday glasses. Oversized cubes occupy more freezer space and may not pass through a bottle opening, yet they can be useful for drinks served in wide tumblers.

Measure any narrow bottle mouth before choosing a specialty shape. Product photos can make cubes look smaller than they are, so look for stated cavity dimensions rather than relying on the serving glass shown in the listing. If the goal is batch preparation for a family, compare total usable ice volume as well as the number of cavities.

Who this is for

  • Households that want covered trays for tidier stacking in a shared freezer.
  • Apartment kitchens where several shallow trays are easier to place than a countertop ice maker.
  • People who prepare ice for water bottles, iced coffee, pitchers, or occasional guests.
  • Buyers replacing old open trays that spill when moved from the sink to the freezer.
  • Anyone comparing twist-style rigid trays, flexible-bottom trays, or push-release systems.

Who should skip it

  • Choose a countertop or refrigerator ice maker if the household needs large amounts of ice throughout the day.
  • Skip oversized molds when most drinks use narrow bottles or small glasses.
  • An open tray may be adequate if freezer stacking and covered storage are not concerns.
  • Avoid complicated release mechanisms if simple cleaning and few loose parts are the priority.

What to verify before buying

  • Check cavity length, width, and depth against the drinkware you actually use.
  • Confirm whether the lid snaps on, rests on top, slides into place, or is intended only as a loose cover.
  • Compare filled-tray dimensions with the clear, level area inside your freezer.
  • Review the stated materials, care instructions, temperature guidance, and dishwasher claims on the current listing.
  • Look for an explanation of the release method and whether the tray must sit briefly at room temperature before twisting or pressing.
  • Confirm how water is added and whether a fill line, removable lid, or drain opening affects the routine.

Lid fit and stacking are different questions

A covered tray is not automatically leakproof. Many lids are designed to keep the top covered and help trays stack; they may not prevent water from escaping if a freshly filled tray tilts. A rigid rim can make the trip from sink to freezer steadier, while a very flexible body may need support underneath until the water freezes.

For stacking, check whether the lid bears the weight of another filled tray without pressing into the cavities. Raised edges or alignment features can help, but usable stack height still depends on the freezer shelf. Leave enough clearance to lift the lid instead of sliding a full tray against the shelf above it.

Choosing a release style

Traditional rigid trays release ice by twisting the entire body. They are familiar and often quick, although the force required depends on the material and cavity shape. Flexible trays let you press individual cubes from below, which can be convenient when only a few cubes are needed. Some covered systems use a separate plate, lever, or bin to release a batch at once.

More parts can improve convenience but also add seams, hinges, and corners to wash. Think about whether you usually empty a complete tray or take two cubes at a time. For individual access, a flexible bottom can be useful; for party preparation, a batch-release design may save repeated handling if it works as described.

Filling without creating a freezer puddle

A tray with interconnected channels can distribute water across cavities, while isolated cavities give more control over the fill level. Neither approach is universally easier. Channels may reduce repetitive filling but can leave thin sheets of ice between cubes when overfilled. Isolated cavities take more attention but make it easier to prepare only part of a tray.

Set the tray on a level surface before filling and leave the amount of expansion space recommended by the maker. If the tray includes a lid with a fill port, check how excess water drains and whether the opening is accessible under your faucet. Do not assume the lid makes it safe to carry the tray vertically or at an angle.

Cleaning and repeat use

Ice trays contact both water and the freezer environment, so regular washing and thorough drying matter. Inspect removable lids and release components for narrow grooves that could retain water. If the listing describes the set as dishwasher-safe, verify which pieces that statement covers and whether a specific rack position is recommended.

Odors can also be a practical concern in a shared freezer. A lid may reduce direct exposure, but it is not a substitute for cleaning spills or storing strongly scented food properly. Replace a tray if the material cracks, the lid no longer fits as intended, or damaged surfaces become difficult to clean.

Limitations

  • A fitted lid may help with coverage and stacking without making the tray spillproof.
  • Cube dimensions, not just cavity count, determine whether the ice suits a particular bottle or glass.
  • Flexible trays can be awkward to carry when full unless the rim or base provides enough support.
  • Release performance can vary with fill level, freezer temperature, cavity shape, and how long the ice has been frozen.
  • Lids and multi-part release systems create additional pieces that need washing, drying, and storage.

Alternatives to compare

  • Standard open ice trays for a simple, low-part-count option.
  • Narrow stick molds for bottles with small openings.
  • Large-cube molds for wide glasses and smaller serving counts.
  • Reusable ice packs when the goal is cooling a lunch bag rather than chilling a drink.
  • Countertop ice makers for households that need frequent, higher-volume production.

FAQ

Are ice cube trays with lids leakproof?

Not necessarily. Many lids are intended for coverage and stacking rather than carrying a filled tray at an angle. Look for an explicit claim and handling instructions if spill resistance is essential.

Is a rigid or flexible ice tray easier to use?

A rigid tray is often steadier to carry, while a flexible tray can make individual cubes easier to press out. The better choice depends on whether transport stability or selective release matters more in your routine.

What cube size works for water bottles?

The cube must be narrower than the bottle opening. Measure the opening and compare it with the listed cavity dimensions; consider a narrow ice-stick mold when regular cubes will not fit.

Can covered ice trays be stacked before the water freezes?

Some are designed for filled stacking, but lid strength and alignment vary. Check the maker’s directions, keep trays level, and avoid placing weight on a lid unless the design specifically supports it.

How many ice trays does a household need?

Estimate how many cubes the household uses between refills, then account for freezing time and available shelf space. Two modest trays may be easier to rotate and store than one bulky mold.

Stainless Steel Mixing Bowls for Prep, Baking, and Easy Storage

Product links are for reference. Verify current details on the retailer page before buying.

Illustrative image for a stainless steel mixing bowls buying guide

Illustrative image, not an official product photo.

Short answer

Stainless steel mixing bowls are a good fit when you want durable prep bowls that can handle daily cooking, baking, tossed salads, marinating, and compact cabinet storage. The most useful set is not always the one with the most pieces. Look for a size range you will actually use, a shape that works with whisks and spatulas, rims that are comfortable to hold, and nesting that does not turn the cabinet into a noisy stack. If lids, non-slip bases, measurement marks, or dishwasher care matter to your routine, verify those details before choosing a set.

Search reference

Stainless steel mixing bowl options

Compare current bowl sizes, nesting sets, lid options, base styles, rim shapes, and care instructions before matching a set to your prep space.

View matching options

Start with the way bowls move through your kitchen

A mixing bowl set spends more time moving than sitting still. It may start in a cabinet, move to the counter for chopped vegetables, hold dough while you measure flour, chill a salad in the refrigerator, and then land near the sink. Stainless steel is popular because it is light for its size, difficult to break, and usually easy to rinse quickly. Those strengths matter most when the bowls fit the tasks you repeat every week.

Think about your most common bowl jobs before comparing extras. A small bowl may be enough for whisking a dressing or holding minced garlic. A medium bowl is often the workhorse for pancake batter, chopped produce, or seasoning potatoes. A large bowl helps with salad, popcorn, bread dough, or mixing ingredients without spilling over the edge. If a set skips the sizes you use most, extra pieces can become clutter instead of convenience.

Shape affects daily comfort. A deep, narrow bowl contains splatter and can work well for vigorous whisking, while a wider bowl gives more room for folding, tossing, or coating ingredients. A rounded interior helps a spatula reach the sides. A rolled rim can make a bowl easier to grip, but it also changes how lids fit and how water drains after washing. These small details decide whether a set becomes the one you reach for first.

Who this is for

  • Home cooks who want light, durable bowls for chopping prep, baking, marinating, and side dishes.
  • Small kitchens where nesting storage matters more than decorative serving presentation.
  • Meal-prep routines that need several bowls out at once for washed produce, sauces, dry ingredients, and cooked components.
  • Households that want bowls less fragile than glass or ceramic for busy counters, kids helping in the kitchen, or outdoor serving.
  • Bakers who need a range of bowl sizes for measuring, mixing, proofing, and staging ingredients.

Who should skip it

  • Skip stainless steel if you need microwave-safe bowls; metal should not be used in a microwave.
  • Choose glass if seeing the mixture from the side is important for your baking or prep routine.
  • Consider ceramic or serving bowls if table presentation matters more than lightweight handling.
  • Avoid very large bundled sets if you already own several prep bowls and only need one missing size.
  • Compare plastic or silicone options if low noise, bright colors, or kid-friendly grip matters more than metal durability.

What to verify before buying

  • Check the exact included sizes and capacities instead of relying only on the number of pieces in the set.
  • Confirm whether lids are included, and whether each lid matches a specific bowl size.
  • Review whether bases are plain metal, silicone, rubber-like, or otherwise designed to reduce slipping.
  • Look at rim shape, pour spouts, measurement marks, and interior curve if you bake or whisk often.
  • Verify care instructions, dishwasher guidance, and any warnings about acidic foods, salt, or long soaking.
  • Check nesting height and cabinet clearance, especially if you store bowls under a low shelf.
  • Read what is actually included; accessories in photos may be props rather than part of the set.

Size range, nesting, and counter space

The headline piece count can be misleading because lids, graters, or accessories may be counted alongside bowls. Start by listing the bowl sizes you would use in one normal cooking session. If dinner often involves a salad, a sauce, chopped vegetables, and marinated protein, a set with several mid-size bowls can be more useful than one huge bowl and several tiny ones.

Nesting is helpful only when the stack is stable and easy to separate. Thin bowls can save space, but they may feel more flexible in the hand. Heavier bowls may feel steadier, yet take more effort to move when full. If cabinet space is tight, look for the total nested height and the diameter of the largest bowl. A set that nests neatly but is too wide for the shelf still creates a storage problem.

Counter behavior matters during active prep. A rounded metal bottom can slide on a smooth countertop when whisking quickly. A flat base or non-slip base may feel more planted, but it can add cleaning edges or change dishwasher guidance. If you use a stand mixer, food processor, or kitchen scale nearby, make sure the bowl sizes will fit the workflow instead of crowding every appliance on the counter.

Lids, measurement marks, and cleaning details

Lids can turn mixing bowls into short-term storage containers, which is useful for chopped produce, rising dough, leftovers, picnic sides, or make-ahead ingredients. The tradeoff is storage: lids can warp, disappear, or become the part of the set that takes the most cabinet space. If lids are important, check whether they are described for storage, transport, or leak resistance rather than assuming every lid performs the same job.

Measurement marks sound convenient, but they should not replace careful measuring for recipes that need precision. They are more useful for quick prep decisions, such as estimating salad volume or portioning batter between bowls. If printed or etched marks matter to you, verify how they are shown and whether the markings are likely to remain readable after repeated washing.

Stainless steel usually cleans easily, but it is not maintenance-free. Sticky dough, oil, salt, tomato mixtures, and acidic marinades can leave residue if bowls sit too long. Smooth interiors are easier to wipe than decorative ridges or complicated bases. After washing, nested bowls should dry fully before storage so water does not sit trapped between pieces.

Limitations

  • Stainless steel bowls are not microwave-safe.
  • Metal bowls can be noisier than glass, ceramic, plastic, or silicone when stacked or whisked.
  • Very light bowls may slide on smooth counters unless the base design helps them stay put.
  • Lids, bases, and measurement marks vary widely, so do not assume every set includes the same features.
  • A bowl set will not solve storage problems if the largest bowl is wider than your cabinet or refrigerator space.

Alternatives to compare

  • Glass mixing bowls if you want microwave use, visibility through the sides, or a heavier feel.
  • Plastic prep bowls for lightweight, low-noise handling and color-coded food staging.
  • Ceramic bowls when serving appearance matters more than impact resistance or nested storage.
  • Collapsible bowls for camping, RV kitchens, or extremely tight storage spaces.
  • A single large salad bowl if you already own small prep bowls and only need more tossing capacity.

FAQ

What sizes should a stainless steel mixing bowl set include?

A practical set usually covers small prep, medium mixing, and larger tossing or baking tasks. Instead of chasing the highest piece count, compare whether the included capacities match how you cook, how much counter space you have, and what will fit in your cabinet.

Are stainless steel mixing bowls safe for the microwave?

No. Stainless steel is metal and should not be used in a microwave. If reheating is part of your bowl routine, compare glass, ceramic, or microwave-safe plastic options instead.

Do I need lids with mixing bowls?

Lids are useful if the bowls will also hold leftovers, prepped ingredients, rising dough, or picnic sides. They are less important if the bowls are mainly for active mixing and you already use separate food storage containers.

Why do some mixing bowls have non-slip bases?

A non-slip base can help a bowl stay steadier while whisking, tossing, or stirring on a smooth counter. The tradeoff is that the base may add weight, cleaning edges, or specific dishwasher guidance, so check the current care details.

Is stainless steel better than glass for mixing bowls?

Neither material is better for every kitchen. Stainless steel is light, durable, and easy to nest, while glass is heavier, transparent, and may be useful for microwave reheating if the specific bowl is labeled for that use.