Laptop Privacy Screen Filters: Measure the Display Before You Order

Product links are for reference. Verify current details on the retailer page before buying.
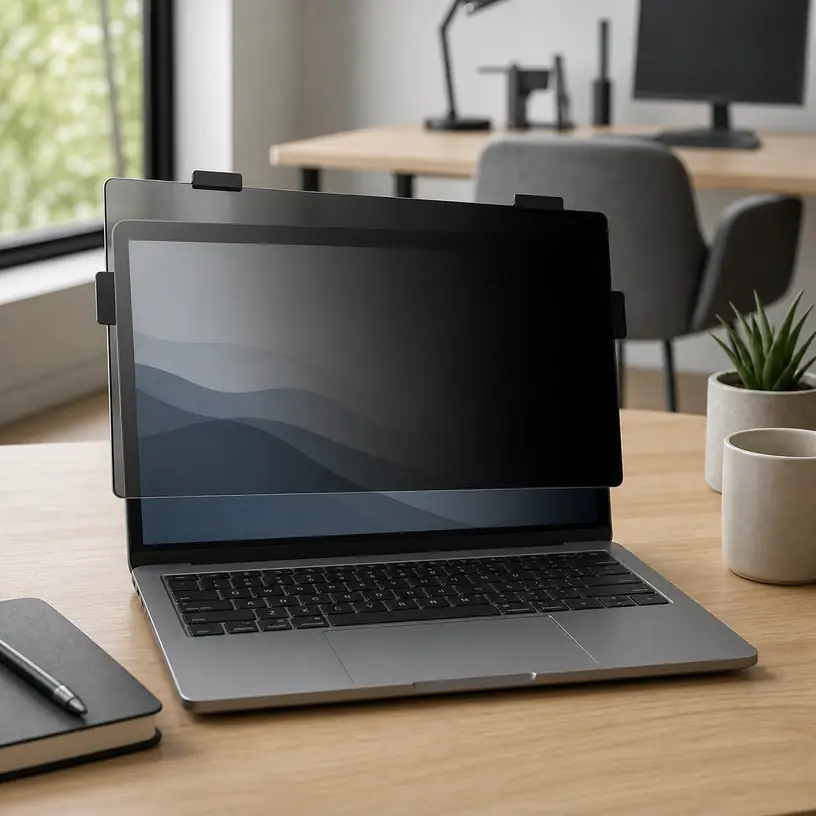
Illustrative image of a generic laptop and a removable privacy screen filter in a shared workspace

Illustrative image, not an official product photo.

Short answer

A privacy filter should be chosen for the laptop’s visible display area and aspect ratio, not for the computer’s overall width or its marketing name alone. Measure the illuminated rectangle without counting the bezel, then compare both dimensions with the filter maker’s fit chart. Decide whether the screen needs to stay attached every day or come off for color-sensitive work: slide tabs support repeat removal, while adhesive or magnetic systems have different bezel and lid-clearance requirements. Expect a narrower side-viewing zone and some change in brightness or appearance, but do not treat the accessory as protection against someone standing directly behind you, cameras, malware, or exposed information left on screen.

Search reference

Compare laptop privacy screen filters

Match the visible display dimensions and aspect ratio first, then compare mounting style, removability, finish, touch compatibility, and lid clearance.

View matching options

The diagonal number is only a starting point

Two laptops can share a stated diagonal size and still use screens with different proportions. A filter made for a wider 16:9 display will not neatly cover a taller 16:10 panel at the same diagonal. Rounded display corners, edge-to-edge glass, a raised bezel, a camera notch, and sensors near the top border can complicate the match further.

Open the laptop and measure the width and height of the active display—the part that shows an image. Keep those numbers separate from the outer lid and bezel measurements. Record the model identifier if it is available, but use a compatibility list only when the listing clearly distinguishes variants and production years. A broad claim such as “fits 14-inch laptops” is not enough to resolve differences in aspect ratio or bezel layout.

Product dimensions can also be ambiguous. Some listings describe the filter panel itself; others emphasize the compatible screen diagonal or include tabs in an overall measurement. Look for a diagram that identifies what was measured. If the filter is designed to sit inside a raised bezel, its exact panel dimensions matter. A magnetic frame that overlaps the border may use a different sizing method.

Who this is for

  • Commuters who sometimes work with ordinary documents in shared seating areas.
  • Students moving between libraries, classrooms, and other side-by-side workspaces.
  • Hybrid workers who want an extra visual barrier when a private desk is unavailable.
  • Laptop owners who can verify their active display dimensions and select a compatible mounting system.
  • People who prefer a removable filter for travel and can store it flat between uses.

Who should skip it

  • Skip a privacy filter if accurate color, wide-angle collaboration, or maximum display brightness is more important during most sessions.
  • Choose better seating or a more private location when people can stand directly behind the screen.
  • Do not rely on a filter as a substitute for screen locking, account security, careful document handling, or workplace privacy procedures.
  • Avoid an adhesive mount if the laptop maker’s care guidance restricts attaching materials to the bezel or glass.
  • A generic filter is a poor gamble when the listing provides no dimensions, aspect ratio, or mounting-clearance information.

Pick an attachment method for the way the laptop travels

Slide tabs are small guides placed around the display border. The filter slips into them and can be removed when several people need to see the screen. Check the number and position of the tabs, whether their adhesive contacts glass or bezel, and whether the panel can slide out without striking a camera bump. Tabs that project above the surface can also affect how fully a thin laptop closes.

Adhesive strips or dots hold the filter directly against the display area or surrounding border. They create fewer loose parts, but alignment and residue handling deserve attention. Verify whether the attachment is described as reusable, where it is intended to contact the laptop, and how it should be removed. Do not substitute household tape or solvent-based cleaning for the provided instructions.

Magnetic frames can make removal convenient when the computer has a compatible flat border. Magnets do not make a filter universal: frame width, sensor placement, webcam clearance, and the gap between keyboard and display when closed still matter. Confirm that the exact laptop is supported and that the computer maker does not prohibit the arrangement.

Some products offer more than one mounting option in the package. That flexibility is useful only when the included pieces suit the display construction. Count what is supplied and check whether replacement tabs or strips are available if the filter will move frequently.

What to verify before buying

  • Active display width and height: Measure the visible image area and compare both dimensions, not only the diagonal label.
  • Aspect ratio: Confirm whether the laptop uses 16:9, 16:10, 3:2, or another proportion and match the filter accordingly.
  • Bezel and corner shape: Note raised edges, curved corners, edge-to-edge glass, notches, cameras, light sensors, and infrared components.
  • Mounting method: Check where tabs, adhesive, or a magnetic frame will touch and how the filter is removed.
  • Closing clearance: Determine whether the laptop can close as intended with the complete attachment system installed.
  • Privacy direction: Verify whether the narrowing applies primarily from the left and right or is described for additional directions.
  • Intended viewing range: Review the maker’s angle guidance while remembering that real results depend on positioning and display settings.
  • Surface finish: Compare matte and glossy sides, if reversible, for reflections, texture, and the work you normally do.
  • Touch and pen use: Confirm explicit compatibility with the exact touchscreen or pen workflow rather than assuming any thin panel will work.
  • Care and storage: Check the approved cleaning method and whether a rigid sleeve or other flat storage is included.

Privacy has a direction and a seating geometry

Most laptop filters are intended to reduce readability from off-center side positions while leaving a usable view for the person facing the display. That means seating arrangement matters. A person directly behind your chair may have a view close to the same central axis, and someone looking from above may not be affected in the same way as a person beside you. Read how the particular filter describes its directions instead of assuming all-around coverage.

The user also has to remain near the intended centerline. If the laptop sits far to one side, is rotated toward a colleague, or is used with a very low seat, the owner may encounter the same darkening that is meant for neighboring viewers. Before opening sensitive material, arrange the chair and display, look at the surroundings, and apply the organization’s privacy rules. A filter is a supplemental visual control, not permission to ignore the room.

When collaboration starts, removal may be simpler than increasing brightness or asking everyone to crowd into the center. This is where a repeatable mounting system and safe storage become valuable. If the panel will come off several times a day, compare the complete removal routine rather than just the filter thickness.

Expect a visual tradeoff

Filtering off-axis light can change the on-axis experience too. The screen may appear dimmer, reflections may shift, and fine detail can look different through an added surface. Raising display brightness can affect battery runtime, so test a newly arrived filter under the lighting conditions and power settings you actually use. Product wording cannot guarantee the same result across every panel type and room.

A matte face can soften reflections in some settings but may introduce visible texture or reduce perceived crispness. A glossy face may preserve a different look while showing more direct reflections. Reversible designs let you compare the two, provided the product is truly intended to be mounted either way. People editing photos, preparing print colors, or sharing detailed visual work may prefer to remove the filter during those tasks.

Blue-light or glare wording should not be confused with side-view privacy, and a privacy filter should not be treated as medical eye protection. Choose it for its stated visual function, arrange sensible ambient lighting, and follow qualified guidance for any vision or comfort concerns.

Installation and daily handling

Clean the display only with methods approved by the laptop and filter makers, and let every surface dry before attachment. Lay out the parts first, identify the intended face, and test alignment without pressing permanent adhesive. The panel should cover the active area without blocking the camera, microphones, indicators, or sensors identified in the computer documentation.

After installation, close the laptop slowly the first time. Stop if the filter, frame, or tabs meet the keyboard deck or create resistance. Thin modern lids are not designed to have an arbitrary object compressed between their surfaces. If the instructions call for removal before closing or transport, make that part of the routine.

A removed filter should be held by its edges and stored flat. Sliding it loose beside cables, pens, or a power adapter can scratch or bend the surface. Keep any cleaning cloth free of grit, and follow the filter’s instructions for fingerprints rather than using an unapproved spray.

Limitations

  • A side-view filter does not reliably hide the display from a person directly behind the user.
  • Fit labels based only on diagonal size can be misleading when aspect ratios and bezel designs differ.
  • The panel can reduce apparent brightness or alter contrast, reflections, sharpness, and color perception.
  • Tabs, frames, and adhesive can interfere with sensors or safe lid closure when poorly matched or installed.
  • Touch and pen response may change, even when a product is marketed for touchscreen use.
  • The filter does not secure accounts, prevent screen capture, stop malware, or replace careful handling of confidential information.

Alternatives to compare

A better seat or privacy-aware desk position: A wall behind the user and fewer passing sight lines can address angles a side-view filter does not cover.

A monitor hood or workspace partition: Useful at a fixed desk when controlling surrounding light or neighboring sight lines matters more than portability.

A removable magnetic filter made for the exact laptop: Worth comparing when frequent collaboration makes fast removal important, but compatibility and closure clearance remain essential.

A portable monitor used only in private spaces: This separates collaborative and sensitive workflows, although it adds power, cable, storage, and placement requirements.

Software and operating habits: Automatic screen locking, limited notification previews, careful window placement, and approved access controls solve different exposure risks that a physical filter cannot.

FAQ

Do I measure the laptop lid or the visible screen for a privacy filter?

Measure the active image area—the illuminated rectangle—unless the filter maker explicitly requests a different measurement. Record its width and height and compare the aspect ratio. The outer lid and bezel can still matter for attachment, but they should not replace active-area measurements.

Will any 14-inch privacy screen fit a 14-inch laptop?

No. A diagonal label can cover displays with different aspect ratios, active-area dimensions, corners, bezels, cameras, and sensors. Use a dimensioned fit chart or an exact, clearly identified laptop compatibility listing.

Can I close my laptop with the privacy filter attached?

Only when the filter and laptop instructions allow it and there is adequate clearance for the panel, tabs, strips, or frame. Close the lid slowly after installation and stop if anything creates resistance. Some systems are intended to be removed first.

Does a laptop privacy filter work against someone standing behind me?

Not necessarily. Many filters primarily narrow the readable view from the left and right. A person close to the user’s central viewing axis may still see the display, so seating position and normal information-security practices remain important.

Are privacy filters suitable for photo or design work?

They can change brightness, reflections, sharpness, contrast, or color appearance. For work that depends on accurate visual judgment, a removable filter may be more practical so it can be taken off in an appropriately private workspace.

Will a privacy screen filter still work with touch input?

Some are designed for touchscreens, but compatibility and feel vary with the display, attachment, and panel construction. Confirm the exact product’s touchscreen and pen guidance, then test the full screen and closing clearance after installation.
Adding a Portable Monitor to a Laptop: Start with Ports, Power, and Placement

Product links are for reference. Verify current details on the retailer page before buying.

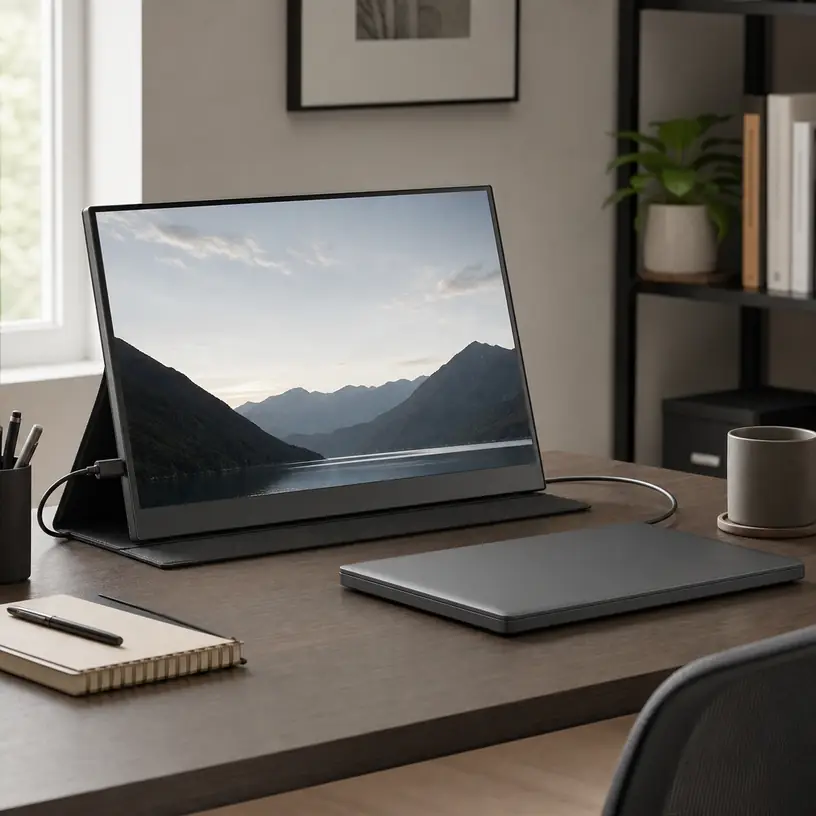
Illustrative image of a generic portable monitor and unbranded laptop on a compact desk

Illustrative image, not an official product photo.

Short answer

A portable monitor is useful only when the laptop can send it video, the setup has enough power, and the screen can stand securely in the space where it will be used. Trace those three things before comparing panel features. A USB-C port may support charging and data without carrying display video, while an HDMI connection usually still leaves the monitor needing a separate power cable. Check the laptop’s port specifications, map every cable and adapter, and measure the table depth with both devices open. Then compare screen size, resolution, finish, controls, stand design, weight, and protection as one complete travel system rather than treating the display alone as the purchase.

Search reference

Portable monitor options for laptops

Compare input requirements, power arrangements, included cables, screen dimensions, stand geometry, controls, and packed weight against your exact laptop and workspace.

View matching options

Draw the connection before choosing the screen

The cleanest product photo often shows one cable between a laptop and monitor. That arrangement is possible with some combinations, but the connector shape alone does not establish compatibility. USB-C is used for several different capabilities. The laptop port must provide an appropriate display-output mode, and the monitor must accept it. The cable also needs to support the required connection; a cable intended mainly for charging may not carry video.

Start with the laptop maker’s documentation for the exact model and port. Look for the display-output capabilities attached to each physical port, not a general statement that the computer “has USB-C.” If the monitor uses a compatible USB-C video input, find out whether it can receive video and operating power through the same connection under the intended settings. Some laptops or monitors may need another power source even when a picture travels over USB-C.

HDMI creates a different map. It commonly handles the video path, while USB or an adapter supplies power to the monitor. A laptop with only one HDMI port may also need that port for a projector at work or a television at home. A mini-HDMI connector on the display requires the correct cable orientation, and a small adapter protruding from the side can be vulnerable to bumps. List every occupied port, cable, adapter, and wall connection before buying; this makes a supposedly portable setup much easier to judge.

Who this is for

  • Laptop users who regularly need a second document, timeline, preview, dashboard, or communication window beside their main work.
  • People who move between temporary desks and can control the surface, power access, and cable arrangement.
  • Travelers willing to carry a protected display, stand, and compatible cables in addition to the laptop and charger.
  • Small-space users who want a screen that can be stored after work instead of remaining on a permanent monitor arm.
  • Presenters who need a separate viewer-facing screen and can confirm that the software and operating system support the intended display mode.
  • Console, camera, or other device users who have verified the source output, monitor input, audio plan, and power requirements for that exact combination.

The strongest reason to add this product is a repeatable two-screen task. If the second display will consistently hold reference material while the laptop remains the active workspace, even a modest portable panel can reduce window switching. If the use is only occasional, an existing tablet’s supported second-screen feature or a larger fixed monitor may be simpler.

Who should skip it

  • Skip a second panel when the laptop cannot provide a compatible video output and the required conversion path is uncertain or disproportionately complicated.
  • A commuter who already carries a heavy bag may get more value from improving the laptop-only workflow than adding a fragile screen, cover, stand, and cables.
  • Color-critical photo, print, or video work needs verified display performance and a suitable calibration workflow; “full color” marketing language is not enough.
  • Fast competitive play may call for carefully confirmed refresh, response, synchronization, and source compatibility rather than a general-purpose travel display.
  • A very narrow café table, tray table, or shared counter may not safely accommodate two open screens and side-facing connectors.
  • Anyone expecting a portable monitor to behave as a standalone computer should check the product type. Most conventional models need an external video source and do not run laptop applications independently.

What to verify before buying

  • Laptop video output: Identify which exact port can send display video and which protocol or alternate mode the current laptop documentation specifies.
  • Monitor inputs: Match the monitor’s full-size HDMI, mini-HDMI, USB-C, or other input to the source without assuming that similar-looking ports have identical functions.
  • Power path: Determine whether the laptop can power the monitor during real use, whether a second USB connection is required, and whether a wall adapter is included or merely shown.
  • Cable capabilities: Check that every included or planned cable supports its assigned job: video, power, or both. Note length and plug orientation as well.
  • Operating-system support: Confirm the number of external displays, resolutions, orientations, scaling options, and mirrored or extended modes supported by the laptop and its current configuration.
  • Visible and overall dimensions: Compare the panel size, bezel, thickness, and stand footprint with the desk and bag rather than shopping by diagonal measurement alone.
  • Resolution and scaling: Consider text size at your viewing distance and whether the operating system can create a comfortable scale across laptop and external screens.
  • Panel finish and viewing conditions: Decide whether reflections, off-angle viewing, and room brightness make a matte or glossy-looking surface more practical for the intended location.
  • Stand and orientation: Verify usable tilt angles, portrait support if needed, hinge stability, and whether plugs remain accessible in each orientation.
  • Controls: Locate the power, menu, brightness, input, and audio controls and check whether common adjustments can be made without navigating an awkward sequence.
  • Packed system: Add the weights and dimensions of the monitor, protective cover, separate stand, cables, adapters, and power source.
  • Return and support details: Connection problems can be specific to a device combination, so review the current documentation, support route, and return terms before committing.

Screen size is also a workspace decision

A larger diagonal gives windows more physical room, but it also increases the footprint and leverage on the stand. Put the laptop in its normal position and mark the proposed monitor width with paper or painter’s tape. Include the bezel and any side connector that cannot bend sharply. Then check whether a mouse, notebook, drink, and charger still have safe places to go.

Table depth matters as much as width. A folio-style cover may fold behind the panel, while a kickstand can extend farther back than expected. The laptop screen and portable panel should sit at usable angles without pressing against each other. On a shallow desk, turning the laptop toward the monitor can create an inward V shape that improves viewing but consumes front-edge space. A separate stand may reduce the rear footprint or raise the panel, yet it adds another item to carry and another joint that can move.

Compare packed dimensions with the actual laptop compartment or sleeve. Matching diagonal sizes do not guarantee that two devices have matching external dimensions. Do not place an unprotected monitor where plugs, pens, keys, or the laptop chassis can press against its display surface. If a protective cover also functions as the stand, assess both jobs: a cover that cushions the panel well may still offer only one unstable viewing angle.

Resolution, scaling, and the work you plan to put there

Resolution has to be considered with panel size, viewing distance, operating-system scaling, and the applications in use. A high pixel count does not automatically produce a more comfortable workspace if text becomes too small or the selected scale leaves too little logical desktop area. Conversely, enlarging text on a lower-resolution panel may make a detailed spreadsheet or editing timeline feel constrained.

Think in terms of the second screen’s assignment. A document, chat panel, music controls, or presentation notes may not need the same pixel density as a fine preview or densely arranged tool palette. If the laptop and portable monitor have very different pixel densities, windows can appear to change size when dragged between them. Current operating systems often provide per-display scaling controls, but application behavior can vary, so confirm the intended workflow where possible.

Orientation can be more meaningful than another specification increase. Portrait mode may suit a long document or code view, but only if the stand supports it securely, the operating system rotates the output, the controls and connectors remain reachable, and the viewing characteristics are acceptable after rotation. A monitor advertised as rotatable may still depend on a separate stand or manual software setting.

Power changes the meaning of portable

A screen drawing power from the laptop reduces the number of wall connections, but it can shorten laptop battery time. Brightness, audio, panel settings, laptop workload, and connection method all affect the result. A manufacturer-provided power figure can help compare options, yet it will not predict an exact unplugged runtime for every computer.

For an outlet-based desk, a compatible charger with sufficient connections may make the layout tidier. Confirm how power is divided when more than one device is connected and whether each port supports the required output. Do not assume a charger, cable, or power bank is suitable because the connector fits. Follow the current electrical and charging instructions for the laptop, monitor, and power source.

For travel, rehearse the complete setup at home. Connect it in the same order you expect to use, disconnect the wall power, and see how the laptop reports battery use. Test waking from sleep and reconnecting after a restart. Label similar-looking cables if only one reliably carries display video. This practical check is more informative than planning around an ideal one-cable diagram that has not been tried with the actual devices.

A stable stand matters more than a thin profile

Portable displays are light enough to move easily, which also means cable tension and table vibration can move them. A stand should support the chosen viewing angle without placing the screen close to tipping. Side-connected cables need relaxed bends and enough slack that a person brushing the cable does not pull the panel toward the floor.

Integrated kickstands can be quick to deploy and eliminate a loose accessory. Folio stands protect and support the panel but may rely on folds, magnets, or friction that work differently on smooth, soft, or uneven surfaces. A separate metal or plastic stand can offer more height and angle choices, although its stated size and load range still need to suit the monitor. Confirm that a clamp or magnetic attachment is intended for the product before using it; improvised mounting can obstruct ventilation, controls, or connectors.

On a public or shared table, position the setup away from the edge and route cables where they will not cross a walkway. Do not balance the display on bedding or other soft material that makes the stand unpredictable or blocks required ventilation. If someone will view the panel from the opposite side, test the angle and reflections from that seat rather than only from the keyboard position.

Small controls and built-in audio need realistic expectations

Thin enclosures leave little room for buttons and speakers. A wheel or rocker can be convenient after its direction is learned, while a set of identical edge buttons can be difficult to identify without looking. Check whether input selection and brightness remain available when a source is connected and whether settings persist after power is removed. On-screen menus vary, so current instructions are more useful than a photo of the control edge.

Built-in speakers may be enough for notification sounds or an occasional call in a quiet room, but speaker placement and available volume differ. Plan a separate audio path if sound quality or privacy matters. When video arrives over HDMI or USB-C, the operating system may automatically switch the audio output to the monitor; know how to select the laptop, headphones, or another device again.

Extras such as touch input, pass-through charging, high refresh modes, or automatic rotation require more than seeing the feature name. They may need a particular cable, operating system, power connection, driver, input, or source capability. Verify the entire requirement chain and decide whether the extra setup earns a place in the travel bag.

Limitations

  • A USB-C connector does not by itself confirm display output, one-cable operation, touch data, or charging behavior.
  • The complete kit can occupy more desk and bag space than the bare monitor dimensions suggest.
  • Powering the display from a laptop can reduce unplugged working time.
  • Folio and kickstand designs may offer limited height adjustment and can become unstable on small, soft, or uneven surfaces.
  • Mixed screen sizes and pixel densities can make scaling and window movement less consistent.
  • Reflections, modest built-in audio, small controls, and side-facing plugs can be more noticeable in temporary workspaces.
  • A travel panel is another fragile device to protect from pressure, twisting, drops, and cable strain.
  • Compatibility can depend on the exact source, port, cable, power supply, operating system, and display setting rather than the monitor alone.

Alternatives to compare

A fixed desktop monitor usually makes more sense when the workspace is permanent and height adjustment, a larger panel, or multiple inputs matter more than storage. A tablet with an officially supported second-screen feature may reduce the number of devices carried if you already own a compatible tablet, although software, latency, charging, and app limitations should be checked. A laptop stand plus improved window management keeps the kit simple when the main problem is screen position rather than screen area. A foldable or dual-screen laptop design integrates the display concept but changes the entire computer purchase and repair equation. For presenting to a room, a projector or installed display may suit the viewing distance better than a small panel facing the audience.

FAQ

Can one USB-C cable run a portable monitor?

Sometimes, but only when the laptop port supports compatible display output, the monitor accepts that signal, the cable carries the required video and power, and the available power is sufficient. Check all four parts for the exact devices instead of relying on the USB-C connector shape.

Why does a portable monitor turn on but show no signal?

Power and video can travel through different paths. The monitor may be receiving power from a port or charger while the selected input has no compatible video signal. Check the source port’s display capability, cable function, monitor input selection, adapters, and operating-system display settings in the order recommended by the device instructions.

Is 1080p enough for a portable laptop monitor?

It can be appropriate for many document, communication, and general second-screen tasks, but comfort depends on panel size, viewing distance, scaling, and the detail your applications need. Compare usable text size and workspace rather than judging the resolution label in isolation.

Will a portable monitor drain the laptop battery faster?

Usually, if the laptop is powering the display, because the panel adds to the system’s energy use. The actual change depends on brightness, connection method, monitor design, laptop workload, and battery condition. Test the intended setup and carry an appropriate power plan when unplugged time matters.

Can I use the same portable monitor with a phone or game console?

Only if the source can provide a compatible video signal and the monitor has the matching input, power arrangement, and any required audio or control support. Many phones do not send display video through every USB-C port, and consoles may need HDMI plus separate monitor power. Verify each source separately.

How do I keep a portable monitor stable on a small table?

Measure the complete stand footprint, keep the panel and hinge away from the table edge, and route cables with slack so they do not pull sideways. Use the stand only on a firm surface and test the intended tilt before placing other items nearby. A compact separate stand may help, but it must be rated and shaped for the display.

Choosing a USB-C Hub for a Laptop: Ports, Power, and Display Support

Product links are for reference. Verify current details on the retailer page before buying.

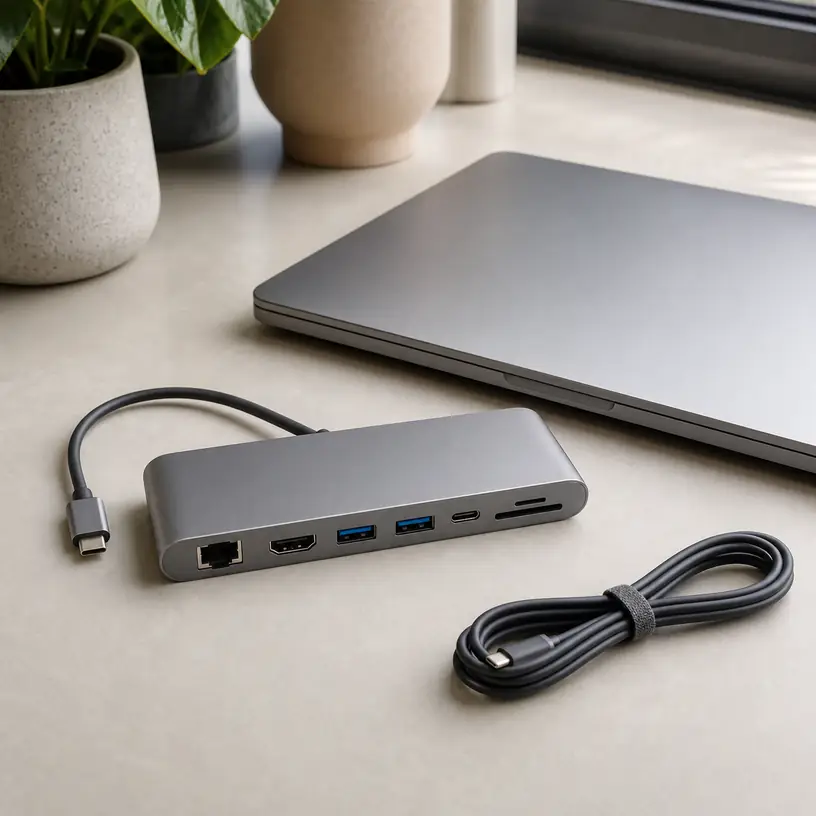
Illustrative image of a generic USB-C hub beside a laptop

Illustrative image, not an official product photo.

Short answer

Start with the exact functions your laptop’s USB-C port supports, then choose a hub that covers the devices you use together rather than the greatest possible port count. A practical match may need one display output, enough USB data ports for a keyboard and storage drive, a suitable card reader, and pass-through charging that aligns with the laptop’s requirements. Port labels alone are not enough: verify display resolution and refresh-rate combinations, data-speed wording, power behavior, operating-system support, and whether connected accessories share bandwidth.

Search reference

USB-C hub options for laptops

Compare host-port requirements, simultaneous display limits, charging input and output, data speeds, card formats, cable length, and supported operating systems.

View matching options

Map the setup before counting ports

A seven-port hub is not automatically more useful than a four-port model. Write down what you expect to connect during one typical session: perhaps a monitor, keyboard, mouse receiver, removable drive, memory card, wired network cable, and charger. Mark the devices that must run at the same time. This quickly separates essential connections from ports that only make a specification list look generous.

Next, inspect the laptop rather than assuming every USB-C socket behaves alike. A port may carry data, accept charging, send video, or combine some of those functions, but the connector shape by itself does not confirm which features are enabled. Laptop documentation and port markings are better starting points than a hub listing. If the host port cannot provide a required function, attaching a hub generally does not add that capability.

Think about where the hub will sit as well. A short built-in lead may work beside a notebook on a desk but hang awkwardly from a raised laptop stand. A crowded row of ports can make wide flash drives block adjacent sockets. For travel, an attached cable is one less part to lose; for a fixed workstation, a detachable and replaceable host cable may be more convenient when the product supports the correct cable specification.

Who this is for

  • Laptop users who regularly need to connect legacy USB devices, a display, removable media, or wired networking through one USB-C port.
  • Hybrid workers who want a compact connection point that can move between home, office, and meeting rooms.
  • Photographers and creators who need a card reader alongside storage or display connections, after confirming the required card format and speed.
  • People with thin laptops that have enough USB-C capability but too few physical connectors for their everyday desk setup.
  • Travelers who can accept a smaller selection of ports in exchange for lower bulk and fewer loose adapters.

Who should skip it

  • Skip a video-equipped hub if the laptop’s chosen USB-C port does not support the required display output.
  • Choose a powered desktop dock when the setup involves several demanding peripherals, multiple monitors, or a permanent workstation that needs more predictable expansion.
  • Use a single-purpose adapter when you only need one occasional connection and do not want extra size, heat, or compatibility variables.
  • Avoid relying on a compact hub as the sole charging solution until its pass-through behavior and the laptop’s power requirements are confirmed.
  • A wireless workflow may be simpler if your accessories, network, and display already connect reliably without cables.

What to verify before buying

  • Host-port capability: Confirm whether the laptop port supports data, video output, and charging as required; check model-specific documentation when several USB-C ports differ.
  • Display combinations: Verify the output connector, maximum supported resolution and refresh rate, number of simultaneous displays, and operating-system limitations for the exact arrangement.
  • USB data speed: Check the stated capability of each data port and remember that the hub’s upstream connection may be shared among active devices.
  • Power delivery: Compare supported charger input, reserved hub power, maximum laptop output, and the computer maker’s charging guidance. A charger may not be included.
  • Card-reader format: Match SD, microSD, or another named format to the cards you use, and verify whether multiple slots can operate together.
  • Network connection: If Ethernet matters, confirm the connector, stated network capability, driver needs, and whether the host setup can use it.
  • Port spacing: Look for enough room around wider plugs, receivers, card slots, and display cables without blocking neighboring connections.
  • Host cable: Check length, orientation, strain relief, and whether an included or detachable cable supports every advertised feature.
  • System compatibility: Review current support notes for the laptop model, operating system, monitors, and any specialized peripherals.

Video output is a chain, not a single port

Seeing an HDMI or DisplayPort connector on a hub only confirms that there is a physical output. A working display path also depends on the laptop’s host port, graphics hardware, operating system, hub design, cable, monitor input, and the requested resolution and refresh rate. If any part of that chain falls short, the display may use a lower mode or fail to behave as expected.

Multiple-monitor wording deserves particular care. Some operating systems and laptop families handle extended desktops through hubs differently, and a pair of physical outputs does not guarantee two independent external workspaces. Read the current compatibility notes for the exact computer and desired screen arrangement. A dedicated docking solution may be a better fit when two or more monitors are central to the desk.

Do not choose only by the highest resolution printed in a heading. A monitor used for office documents may prioritize stable connection and convenient wake behavior, while a high-refresh display requires a different bandwidth calculation. Confirm the complete resolution-and-refresh combination and whether other active hub functions change it.

Pass-through charging has a power budget

Many compact hubs include a USB-C input intended for a charger and pass some power onward to the laptop. The headline input figure and the power reaching the computer may not be identical because the hub and attached devices also need energy. Compare the hub’s stated input and output limits with the laptop’s normal charger requirement instead of assuming any USB-C power adapter will produce normal charging performance.

Use a charger and cable suitable for the required power and follow the laptop manufacturer’s guidance. If no charger is included, the hub does not create charging power on its own. Some notebooks may charge more slowly, display a power warning, or consume battery during heavy work when the delivered power is below demand.

Power-hungry portable drives and other accessories can also affect stability. If several devices disconnect under load, the solution may require a powered hub or dock rather than another bus-powered model. Avoid stacking adapters casually; every added connector and cable introduces another point to verify.

Shared bandwidth changes real-world use

A hub combines several connections into one upstream link, so simultaneous tasks may compete for available data capacity. Copying large files from a memory card to an external drive while driving other functions is a different workload from using a keyboard and mouse receiver. Product pages may state individual port capabilities without making every simultaneous combination equally clear.

Plan around the busiest realistic task. If fast external storage is important, a direct laptop connection or a hub with clearly documented performance may be preferable. A slow keyboard does not need a premium high-speed socket, so port placement can reserve the most capable connection for storage or another demanding device.

Wireless receivers can experience interference or poor range when tucked among metal connectors and active high-speed devices. A little physical separation, a short extension, or a different port can help with layout, but follow the accessory maker’s troubleshooting guidance rather than assuming the hub is defective.

Desk hub or travel hub?

A travel hub should protect its cable in a bag, avoid sharp protrusions, and provide the few ports you are likely to encounter away from home. Smaller housings can become warm during normal operation, so place the hub where air can circulate and follow its temperature and safety guidance. Do not bury it under papers or fabric while loaded.

A desk-focused model can justify a longer cable, more generous spacing, a network port, and additional display options. Rubber feet or a stable body may keep it from sliding when stiff cables pull in different directions. If the hub will remain connected every day, check whether the cable route strains the laptop port or leaves the housing suspended by its lead.

Labeling also matters more than it seems. Clear port symbols reduce mistakes when similar USB-C sockets serve different roles, such as host connection, charging input, or data. Before plugging in a device, confirm which function the socket is intended to provide.

Limitations

  • A USB-C connector does not guarantee video, charging, or a particular data speed; the laptop’s implementation controls what the hub can use.
  • Advertised port counts do not guarantee that every connection can run at its maximum capability simultaneously.
  • Pass-through charging can deliver less power to the laptop than the connected charger supplies to the hub.
  • Multi-display support may vary by laptop hardware, operating system, hub technology, resolution, and refresh rate.
  • Compact hubs can become warm and may place mechanical strain on a laptop port if heavy cables are poorly supported.
  • Card slots, network ports, and specialized peripherals may need system support or drivers, and compatibility can change with updates.
  • A hub adds connectivity but does not replace backups, safe drive-ejection practices, surge protection, or proper handling of storage devices.

Alternatives to compare

  • A single USB-C-to-HDMI, Ethernet, or USB-A adapter for one occasional connection with fewer compatibility questions.
  • A powered desktop dock for a permanent workspace with multiple displays, several peripherals, and higher charging needs.
  • A monitor with built-in USB-C connectivity and downstream ports, after confirming laptop charging and hub functions.
  • Direct laptop connections for high-speed storage or critical devices, leaving the hub for keyboards, receivers, and lower-demand accessories.
  • Bluetooth or network-based accessories when reducing cable clutter matters more than using existing wired devices.

FAQ

Will any USB-C hub work with any USB-C laptop?

No. The plugs may fit, but video, charging, data speed, and multi-display behavior depend on the laptop port and system support. Compare the hub requirements with documentation for the exact laptop model.

Can a USB-C hub charge my laptop?

Only if the hub supports pass-through power, the selected laptop port accepts charging, and a suitable charger and cable are connected. Verify the maximum power delivered to the laptop, not only the hub’s charger-input figure.

Why does a hub with two display outputs not always provide two extended monitors?

Physical outputs are only part of the display path. Laptop graphics capabilities, operating-system behavior, hub technology, cables, and the requested resolution and refresh rate determine which monitor arrangements are supported.

Do all ports on a USB-C hub run at full speed together?

Not necessarily. Several ports may share the hub’s upstream data connection and power budget. Check current documentation for simultaneous-use limits, especially when transferring files between fast storage devices.

Is a powered dock better than a compact hub?

It can be for a fixed desk with multiple demanding peripherals, several displays, or substantial laptop charging needs. A compact hub is usually easier to carry and may be sufficient for a simpler connection map.

Lap Desks for Laptops: Find a Stable Fit for the Sofa or Bed

Product links are for reference. Verify current details on the retailer page before buying.

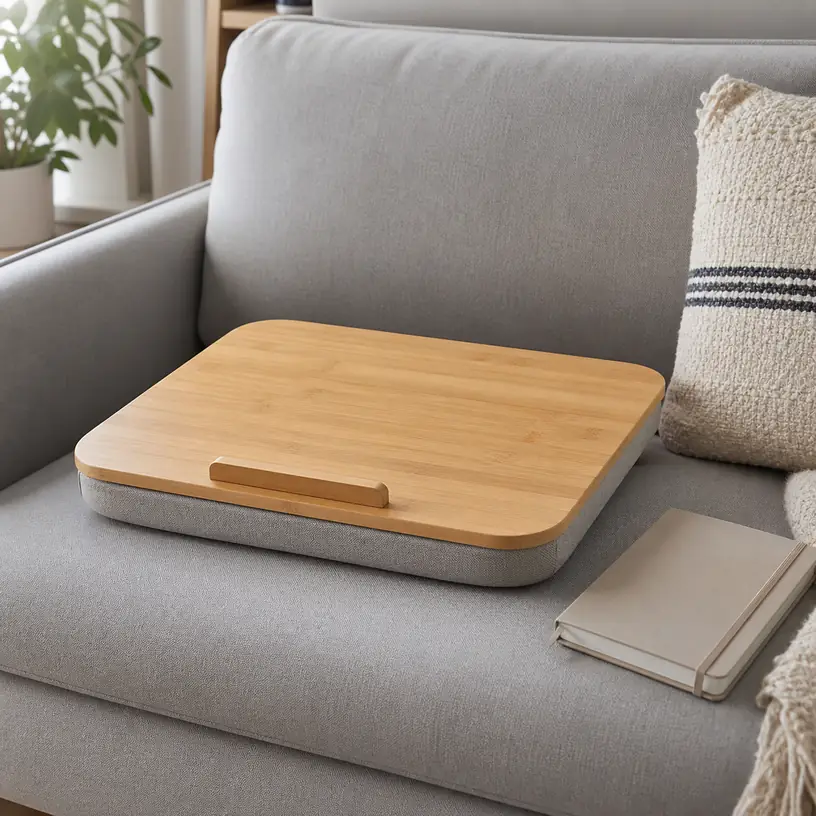
Illustrative image of a generic cushioned lap desk on a sofa

Illustrative image, not an official product photo.

Short answer

Choose a lap desk by matching its usable work surface—not merely its outside width—to your laptop and the way you use a mouse, notebook, or phone. A good fit should keep the computer from hanging over the edges, resist sliding when you shift position, and sit at a manageable height on your lap. Also compare the underside shape, ventilation clearance, wrist-edge design, total weight, carrying handle, and where the desk will be stored between sessions.

Search reference

Lap desk options for laptops

Compare surface dimensions, cushion layout, device stops, weight, and room for your usual accessories before choosing a portable work surface.

View matching options

Start with the laptop, then add working room

Laptop screen size is an imperfect shortcut for fit. Two computers with the same advertised screen size can have different chassis dimensions, and a raised lip, phone slot, wrist pad, or mouse area can reduce the flat space available. Measure the laptop’s actual width and depth, including any case you leave attached. Compare those numbers with the listing’s usable surface dimensions and the location of built-in features.

Next, recreate a normal session. If you use the trackpad exclusively, a compact board may be enough. A separate mouse needs a reasonably level area beside the computer, while handwritten notes need more depth or a wider platform. Avoid assuming that every object shown in a staged image fits comfortably at the same time.

Who this is for

  • People who occasionally answer email, study, or browse from a sofa, armchair, or bed.
  • Apartment and dorm residents who need a work surface that stores more easily than another table.
  • Laptop users who want a firm barrier between the computer and soft upholstery.
  • Households that move a temporary workspace between rooms.
  • Buyers who understand that a lap desk is a portable surface rather than a full ergonomic workstation.

Who should skip it

  • Use a regular desk when you need a large monitor, full-size keyboard, several accessories, or precise mouse control.
  • Skip cushion-heavy models if added height would make your shoulders rise or leave the screen uncomfortably high.
  • A lap desk is a poor substitute for a stable table around drinks, fragile equipment, or energetic pets and children.
  • People who work for long uninterrupted periods may need a more adjustable setup than a fixed portable board can provide.

What to verify before buying

  • Measure the laptop body and compare it with the flat, unobstructed portion of the work surface.
  • Check whether a front stop, wrist pad, or slot changes where the laptop can sit or interferes with ports.
  • Review the underside design: a single cushion, two bolsters, molded base, or bean-filled pad will each settle differently.
  • Confirm the desk’s overall weight and dimensions if it will be carried between rooms or packed for travel.
  • Look for clear guidance about surface cleaning and, where applicable, removable-cover care.
  • Check how the design preserves access to the laptop’s vents and whether the manufacturer states any device-size limits.
  • Verify that handles, storage pockets, mouse pads, lights, or device holders shown in images are actually included.

Cushion shape changes the working angle

A soft underside can distribute contact across the legs, but softness alone does not guarantee stability. A single deep cushion may conform to a sofa or blanket yet tilt as the filling shifts. Two separate bolsters can create airflow space and an angled surface, although the angle is usually fixed by their shape. A rigid molded underside may feel steadier but less forgiving against the legs.

Consider height before choosing a thick cushion. The desk, laptop base, and keyboard together raise the hands above the lap. If that stack pushes the elbows outward or shoulders upward, the setup may become tiring. Product measurements can help, but cushion compression also depends on construction and how the desk is supported.

Some lap desks intentionally slope toward the user. That can alter the keyboard angle, so a front device stop becomes important. Check the height and position of the stop: it should help prevent sliding without pressing sharply into the wrists or blocking the laptop from opening as intended.

Heat and ventilation need a clear path

A firm lap desk separates a laptop from blankets and clothing, but it does not automatically solve every cooling concern. Vent locations vary by computer. Inspect the underside and side edges of your device, then make sure padding, raised stops, or accessory pockets will not obstruct the intended airflow. Follow the laptop maker’s placement and ventilation guidance.

Material descriptions such as wood-look, plastic, or fabric do not by themselves establish cooling performance. Treat fan-equipped lap desks as a separate category: they may require power, add noise and weight, and depend on vent alignment. If extra active cooling is the goal, compare a dedicated laptop cooling pad as well.

Small features that earn their space

A carrying handle is useful only if it is comfortable and does not make the desk too wide for its storage spot. Phone slots can keep a device visible, but their width, depth, viewing angle, and case compatibility vary. Elastic corner bands and raised edges may secure a laptop during movement, yet they can also cover ports or limit device placement.

Built-in mouse surfaces save setup time, though their texture and usable area matter more than the label. Storage pockets work best for light items such as a cable or pen; loading a side pocket can make the desk feel unbalanced. Prioritize the main platform and support shape before treating extras as deciding features.

Limitations

  • A fixed lap desk offers little control over keyboard height, screen distance, or viewing angle.
  • Soft cushions can compress unevenly and may feel different on a sofa, mattress, or chair.
  • Compact boards often leave no practical room for a mouse or notebook.
  • Wide models provide more surface area but become harder to carry and store.
  • Fabric undersides and wrist pads may retain lint or require more care than wipe-clean surfaces.
  • A lap desk reduces direct contact with soft furnishings but cannot guarantee suitable cooling for every laptop.

Alternatives to compare

  • A folding laptop table when independent legs and more surface area are priorities.
  • A height-adjustable side table that can slide beside a sofa or chair.
  • A laptop stand paired with an external keyboard at a conventional desk.
  • A cooling pad when fan-assisted airflow is the specific requirement.
  • A plain rigid tray for occasional use when padding, slots, and pockets are unnecessary.

FAQ

What size lap desk do I need for my laptop?

Measure the laptop’s full width and depth, then compare those dimensions with the lap desk’s usable flat area. Leave extra room for a mouse or notebook only if you use one, and account for any lip, wrist pad, or phone slot that reduces the available surface.

Is a cushioned lap desk stable on a bed?

It can be, but stability depends on the cushion construction and the softness of the mattress or bedding. A desk that feels steady on a chair may tilt on a deep duvet, so compare the underside shape and use it only where the laptop remains securely supported.

Does a lap desk keep a laptop from overheating?

It can provide a firm barrier between the computer and soft fabric, but cooling depends on the laptop’s vent layout and the desk design. Keep vents unobstructed and follow the computer manufacturer’s guidance rather than treating the lap desk as a guaranteed cooling device.

Should I choose a lap desk with room for a mouse?

Choose the wider surface if a mouse is part of your normal workflow and the added width still fits your body, chair, and storage space. Trackpad users may prefer a lighter, narrower desk without unused side space.

Can I travel with a laptop lap desk?

Some models move easily between rooms or in a car, but many are too bulky for regular air travel. Check outside dimensions, weight, handle design, and luggage fit; a slim folding stand may pack more efficiently when space is limited.