Choosing a Tablet Pillow Stand for Reading on the Sofa or in Bed

Product links are for reference. Verify current details on the retailer page before buying.

Illustrative image of a generic tablet resting in a fabric pillow stand on a sofa

Illustrative image, not an official product photo.

Short answer

A tablet pillow stand is a soft support for relaxed reading, recipes, video calls, or long-form viewing where a rigid desk stand feels out of place. The useful choice is not simply the largest cushion. Match the stand’s ledge width and recommended device range to the tablet with its usual case attached, then look at how the viewing angle is created, whether the tablet remains clear of fabric, and how the base behaves on a sofa, bed, lap, or floor. A removable washable cover and unobstructed charging port make everyday use easier. Remember that a cushion stand is neither a protective case nor a precision mount: it may settle into soft upholstery, shift when the screen is tapped, and retain more warmth around a device than an open metal frame.

Search reference

Tablet pillow stands for reading

Compare supported device dimensions, ledge depth, viewing positions, case and port clearance, cover care, and stability on the surface where you plan to read.

View matching options

Begin with the place where you actually read

A stand that behaves well on a dining table may not solve the problem that brought you to a pillow design. Soft tablet supports are most useful when the reading surface is irregular: a deep sofa cushion, a comforter, crossed legs, or the carpet beside a low chair. Each location puts the tablet at a different height and gives the base a different amount of support.

Try the intended spot with a closed book or a folded towel first. Note where the object naturally settles, how far it sits from your eyes, and whether you need portrait orientation for books or landscape orientation for magazines and video. If the tablet must sit on a narrow armrest, measure that space rather than assuming a broad wedge will balance there. For bed use, consider whether the stand will be placed on top of a blanket, across the lap, or beside you; those are three different stability problems.

A product photo on a firm, level surface cannot show how deeply a base will sink into your upholstery. A wide footprint generally distributes the load better, but overall width alone does not reveal the shape of the underside or how the filling moves. Check the stated dimensions, then compare them with the real area available around blankets, remotes, drinks, and other items.

Device fit includes the case, ledge, and screen edge

Tablet compatibility labels often list familiar size classes, but diagonal screen size does not describe the full exterior dimensions. Measure the tablet’s width and thickness while it is in the case you normally use. A folio folded behind the device, a rugged corner bumper, or a keyboard cover can make the assembly much thicker than the bare tablet.

The front ledge must be deep enough to stop the device from sliding, yet low enough that it does not cover an uncomfortable amount of the display. Check whether the ledge interferes with an on-screen navigation area, fingerprint sensor, stylus attachment point, or case flap. If a stylus is stored magnetically on an exposed edge, decide whether it can remain attached without being knocked off when the stand is moved.

Some cushion stands use one raised ridge; others provide several grooves or multiple faces that can be rotated into position. Look for the usable slot width and device-thickness guidance for each position. A heavily cased tablet may fit the upright groove but not the shallower reading groove. Conversely, a thin device in a very wide slot may rock noticeably when the screen is tapped.

Portrait placement deserves its own check. A tall tablet raises the center of gravity and may need more rear support than it does in landscape. Make sure the intended orientation is shown or explicitly supported, especially if the base is narrow or the reading angle is shallow.

How the stand makes an angle matters

A pillow stand can create viewing positions in several ways. A triangular cushion may be rotated so each face gives a different slope. A block-shaped model may place parallel grooves across the top. Another design may use a soft base with a firmer internal support. These arrangements feel different in daily use even when they advertise a similar number of angles.

Do not treat the number of positions as a guarantee that every one will suit your device and seat. A shallow angle can be convenient for tapping or drawing but may reflect overhead light. A steeper angle can improve straight-ahead viewing yet become less stable with a large tablet in portrait orientation. Multiple grooves also take up surface area and can collect crumbs or lint around their seams.

Consider how you change the angle. Rotating the entire cushion usually means lifting the tablet first. Moving between grooves may be faster, but only if the device clears the ridge without catching its case. If the support has separate pieces or a movable backrest, check how they remain aligned on a soft surface.

No fixed-angle accessory can automatically set a comfortable viewing position for every seat and user. Plan to move the whole stand, adjust your seating, and take breaks rather than relying on an “ergonomic” label as proof of a particular outcome.

Stability should survive a page turn

Reading involves frequent small touches. A stand can hold a static tablet nicely and still wobble each time you swipe a page, open a menu, or adjust brightness. Stability comes from the combination of base footprint, filling, internal structure, fabric grip, tablet weight, angle, and the surface underneath.

A very soft filling may conform pleasantly to the lap but compress or migrate after repeated use. A firmer foam shape may preserve its geometry better but feel bulkier to store. Listings do not always make the internal construction clear, so verify whether the support is a single foam form, loose fill, layered padding, or another arrangement. Also check whether it arrives compressed and whether the maker specifies setup or recovery time before use.

On a lap, leave enough room that the device cannot tip toward the floor when you shift position. On a bed or sofa, avoid perching the stand at an edge. Keep drinks and charging cables out of the likely fall path. A pillow holder does not clamp the tablet, and its soft exterior does not provide drop protection.

Who this is for

  • Readers who use a tablet on a sofa, bed, floor cushion, or lap and want a softer alternative to a desktop mount.
  • People who switch between portrait reading and landscape viewing, provided the chosen stand supports both orientations with their device.
  • Households that want a portable support for ebooks, digital magazines, recipes, video calls, or casual viewing in more than one room.
  • Tablet users who prefer a broad base without clamps, hinges, or a surface that must accept an adhesive pad.
  • Buyers willing to measure a cased device and check each position rather than relying only on a screen-size label.
  • Anyone who values a removable cover and can follow the separate cleaning directions for the cover and inner form.

Who should skip it

  • Choose a rigid adjustable stand if you need precise height, tilt, or repeatable camera framing at a desk.
  • A clamped arm or purpose-built mount may suit a workstation better when the tablet must remain elevated above the surface.
  • Skip a pillow design if the available resting area is narrower than its base or frequently disturbed by children or pets.
  • A user who types extensively on the screen may find a soft base too mobile under repeated pressure.
  • Do not use a passive cushion as an equipment mount in a moving vehicle or any location where the tablet must be mechanically secured.
  • If the tablet already runs unusually warm, investigate the device, app, case, and charging setup rather than surrounding it with more fabric.

What to verify before buying

  • Overall device range: Compare maximum stated dimensions with the tablet’s real length, width, and thickness in its everyday case.
  • Ledge or groove width: Confirm that the cased device can enter fully without forcing seams or leaving it loose enough to rock.
  • Screen clearance: Check how much of the lower bezel or display the front support covers in both orientations.
  • Viewing positions: Identify whether angles come from rotation, separate grooves, an insert, or another mechanism, and which positions support portrait use.
  • Base dimensions: Measure the sofa arm, lap area, bedside space, or other intended surface against the full footprint.
  • Port access: Locate charging, speaker, button, camera, and stylus areas for the orientations you plan to use.
  • Cover construction: Look for a genuinely removable cover, the closure location, fabric-care instructions, and whether the inner form can be cleaned.
  • Internal support: Verify the described filling or foam structure and any instructions for unpacking, reshaping, or restoring it after compression.
  • Carrying details: Check total size and weight as well as any handle; soft does not necessarily mean compact enough for a travel bag.
  • Condition on arrival: Inspect seams, zipper ends, grooves, foam shape, fabric tension, and any internal support before placing a device on it.

Charging and heat need open space

Reading sessions often overlap with charging, but a cable can change how the tablet sits. Check whether the port remains above the ledge and whether the plug can enter without a sharp bend. A right-angle connector and a straight connector need different clearance. Route the cable so it does not pull the device sideways or create a loop where someone may catch a foot or hand.

Fabric can obstruct vents, speaker openings, or exposed areas of the case. Follow the tablet and case makers’ guidance for operation and charging, keep required openings clear, and stop using the setup if the device shows a temperature warning or behaves abnormally. Do not place the entire arrangement under bedding, and do not assume that a groove visible in a photo provides adequate airflow for every tablet.

If you mainly use demanding games, video editing, or other workloads that make the device warm, an open rigid stand may allow more exposed surface area. The same may be true when the tablet must remain connected to a dock, hub, keyboard, or several cables. A pillow support is primarily a positioning accessory, not a cooling product or cable-management system.

Cover care determines whether the stand stays pleasant to use

A removable cover is helpful around snacks, pets, makeup, and everyday dust, but “removable” does not always mean machine washable. Read the care label for the exact fabric. Before washing, note how the cover fits around grooves and corners so it can be reinstalled without twisting the support.

The inner form may have completely different care limits. Loose fill, molded foam, and structural inserts should not be soaked unless the instructions explicitly permit it. For a small mark, spot treatment may be safer than saturating the cushion. Let every component dry fully before returning the tablet; residual moisture has no place next to charging electronics.

Look at zipper placement as well as washability. A zipper or pull resting against a finished table could scratch it, while an exposed closure under the tablet might press into a thin case. After cleaning, inspect seams and verify that the inner form has returned to the intended orientation before trusting the ledge again.

Limitations

  • A soft base can compress, settle, or tilt differently on each sofa, mattress, blanket, or lap.
  • Fixed grooves provide a limited set of angles and normally do not raise the tablet to eye level like an adjustable desktop arm.
  • A tablet may wobble during frequent tapping even when it remains stable for passive reading or viewing.
  • Device-size claims may not account for a thick folio, keyboard case, rugged shell, stylus, or attached cable.
  • Fabric surrounding more of the device may leave less open area for heat to dissipate than a minimal frame.
  • The stand does not grip the tablet like a clamp and offers no guarantee against falls, spills, or impact.
  • A broad cushion can be awkward to pack and may not regain its shape immediately after being compressed.
  • Comfortable positioning still depends on the chair, viewing distance, lighting, session length, and the person using it.

Alternatives to compare

A folding tabletop stand packs smaller and often offers more tilt adjustment, but its feet need a fairly firm surface. A weighted desktop stand can raise the screen and resist taps at a work area, though it is less convenient to carry between rooms. A clamp-mounted tablet arm clears desk space and offers a wider positioning range when attached to a suitable structure; confirm attachment limits and keep the tablet away from pinch points. A folio case with a built-in stand travels with the device and adds little extra bulk, but it may offer only one or two orientations. If the goal is simply to read with fewer interruptions, a lightweight e-reader cover stand sized for a specific smaller device may be less cumbersome than a universal cushion.

FAQ

Will a tablet pillow stand work with a thick case?

It depends on the usable width and depth of the ledge or groove, not just the advertised screen-size range. Measure the tablet at its thickest point with the case installed, including a folded folio flap, and compare that number with the current fit guidance for each viewing position.

Can I use the same stand in portrait and landscape orientation?

Many designs can support both, but portrait placement raises the center of gravity and may be less stable at a shallow angle. Confirm that portrait use is shown or specified for your device range, then test it away from the edge of furniture before settling in to read.

Is a tablet pillow stand suitable for typing or drawing?

It can handle occasional taps and short notes, especially at a low angle, but a soft base may move under repeated pressure. For sustained typing, precise stylus work, or keyboard use, compare a rigid stand that rests on a firm work surface.

Can I charge the tablet while it is in the cushion stand?

Only when the port and plug remain unobstructed, the cable is not sharply bent or pulling sideways, and the device instructions permit the setup. Keep fabric and bedding away from required openings, follow charging guidance, and stop if the tablet displays a temperature warning.

How do I clean a tablet cushion holder?

Remove the tablet and cable first. Follow the label separately for the outer cover and inner support; a removable cover may be washable while foam or fill is spot-clean only. Reassemble the stand only after every layer is completely dry and the support has returned to its intended shape.

Is a pillow stand safe to use on the edge of a bed?

It should be placed well back from the edge on a surface broad enough for its full base. Because the device is supported rather than clamped, shifting blankets, a cable tug, or a change in position can still tip it. Keep the likely fall area clear and move the stand before getting up.


Laptop Privacy Screen Filters: Measure the Display Before You Order

Product links are for reference. Verify current details on the retailer page before buying.

Illustrative image of a generic laptop and a removable privacy screen filter in a shared workspace

Illustrative image, not an official product photo.

Short answer

A privacy filter should be chosen for the laptop’s visible display area and aspect ratio, not for the computer’s overall width or its marketing name alone. Measure the illuminated rectangle without counting the bezel, then compare both dimensions with the filter maker’s fit chart. Decide whether the screen needs to stay attached every day or come off for color-sensitive work: slide tabs support repeat removal, while adhesive or magnetic systems have different bezel and lid-clearance requirements. Expect a narrower side-viewing zone and some change in brightness or appearance, but do not treat the accessory as protection against someone standing directly behind you, cameras, malware, or exposed information left on screen.

Search reference

Compare laptop privacy screen filters

Match the visible display dimensions and aspect ratio first, then compare mounting style, removability, finish, touch compatibility, and lid clearance.

View matching options

The diagonal number is only a starting point

Two laptops can share a stated diagonal size and still use screens with different proportions. A filter made for a wider 16:9 display will not neatly cover a taller 16:10 panel at the same diagonal. Rounded display corners, edge-to-edge glass, a raised bezel, a camera notch, and sensors near the top border can complicate the match further.

Open the laptop and measure the width and height of the active display—the part that shows an image. Keep those numbers separate from the outer lid and bezel measurements. Record the model identifier if it is available, but use a compatibility list only when the listing clearly distinguishes variants and production years. A broad claim such as “fits 14-inch laptops” is not enough to resolve differences in aspect ratio or bezel layout.

Product dimensions can also be ambiguous. Some listings describe the filter panel itself; others emphasize the compatible screen diagonal or include tabs in an overall measurement. Look for a diagram that identifies what was measured. If the filter is designed to sit inside a raised bezel, its exact panel dimensions matter. A magnetic frame that overlaps the border may use a different sizing method.

Who this is for

  • Commuters who sometimes work with ordinary documents in shared seating areas.
  • Students moving between libraries, classrooms, and other side-by-side workspaces.
  • Hybrid workers who want an extra visual barrier when a private desk is unavailable.
  • Laptop owners who can verify their active display dimensions and select a compatible mounting system.
  • People who prefer a removable filter for travel and can store it flat between uses.

Who should skip it

  • Skip a privacy filter if accurate color, wide-angle collaboration, or maximum display brightness is more important during most sessions.
  • Choose better seating or a more private location when people can stand directly behind the screen.
  • Do not rely on a filter as a substitute for screen locking, account security, careful document handling, or workplace privacy procedures.
  • Avoid an adhesive mount if the laptop maker’s care guidance restricts attaching materials to the bezel or glass.
  • A generic filter is a poor gamble when the listing provides no dimensions, aspect ratio, or mounting-clearance information.

Pick an attachment method for the way the laptop travels

Slide tabs are small guides placed around the display border. The filter slips into them and can be removed when several people need to see the screen. Check the number and position of the tabs, whether their adhesive contacts glass or bezel, and whether the panel can slide out without striking a camera bump. Tabs that project above the surface can also affect how fully a thin laptop closes.

Adhesive strips or dots hold the filter directly against the display area or surrounding border. They create fewer loose parts, but alignment and residue handling deserve attention. Verify whether the attachment is described as reusable, where it is intended to contact the laptop, and how it should be removed. Do not substitute household tape or solvent-based cleaning for the provided instructions.

Magnetic frames can make removal convenient when the computer has a compatible flat border. Magnets do not make a filter universal: frame width, sensor placement, webcam clearance, and the gap between keyboard and display when closed still matter. Confirm that the exact laptop is supported and that the computer maker does not prohibit the arrangement.

Some products offer more than one mounting option in the package. That flexibility is useful only when the included pieces suit the display construction. Count what is supplied and check whether replacement tabs or strips are available if the filter will move frequently.

What to verify before buying

  • Active display width and height: Measure the visible image area and compare both dimensions, not only the diagonal label.
  • Aspect ratio: Confirm whether the laptop uses 16:9, 16:10, 3:2, or another proportion and match the filter accordingly.
  • Bezel and corner shape: Note raised edges, curved corners, edge-to-edge glass, notches, cameras, light sensors, and infrared components.
  • Mounting method: Check where tabs, adhesive, or a magnetic frame will touch and how the filter is removed.
  • Closing clearance: Determine whether the laptop can close as intended with the complete attachment system installed.
  • Privacy direction: Verify whether the narrowing applies primarily from the left and right or is described for additional directions.
  • Intended viewing range: Review the maker’s angle guidance while remembering that real results depend on positioning and display settings.
  • Surface finish: Compare matte and glossy sides, if reversible, for reflections, texture, and the work you normally do.
  • Touch and pen use: Confirm explicit compatibility with the exact touchscreen or pen workflow rather than assuming any thin panel will work.
  • Care and storage: Check the approved cleaning method and whether a rigid sleeve or other flat storage is included.

Privacy has a direction and a seating geometry

Most laptop filters are intended to reduce readability from off-center side positions while leaving a usable view for the person facing the display. That means seating arrangement matters. A person directly behind your chair may have a view close to the same central axis, and someone looking from above may not be affected in the same way as a person beside you. Read how the particular filter describes its directions instead of assuming all-around coverage.

The user also has to remain near the intended centerline. If the laptop sits far to one side, is rotated toward a colleague, or is used with a very low seat, the owner may encounter the same darkening that is meant for neighboring viewers. Before opening sensitive material, arrange the chair and display, look at the surroundings, and apply the organization’s privacy rules. A filter is a supplemental visual control, not permission to ignore the room.

When collaboration starts, removal may be simpler than increasing brightness or asking everyone to crowd into the center. This is where a repeatable mounting system and safe storage become valuable. If the panel will come off several times a day, compare the complete removal routine rather than just the filter thickness.

Expect a visual tradeoff

Filtering off-axis light can change the on-axis experience too. The screen may appear dimmer, reflections may shift, and fine detail can look different through an added surface. Raising display brightness can affect battery runtime, so test a newly arrived filter under the lighting conditions and power settings you actually use. Product wording cannot guarantee the same result across every panel type and room.

A matte face can soften reflections in some settings but may introduce visible texture or reduce perceived crispness. A glossy face may preserve a different look while showing more direct reflections. Reversible designs let you compare the two, provided the product is truly intended to be mounted either way. People editing photos, preparing print colors, or sharing detailed visual work may prefer to remove the filter during those tasks.

Blue-light or glare wording should not be confused with side-view privacy, and a privacy filter should not be treated as medical eye protection. Choose it for its stated visual function, arrange sensible ambient lighting, and follow qualified guidance for any vision or comfort concerns.

Installation and daily handling

Clean the display only with methods approved by the laptop and filter makers, and let every surface dry before attachment. Lay out the parts first, identify the intended face, and test alignment without pressing permanent adhesive. The panel should cover the active area without blocking the camera, microphones, indicators, or sensors identified in the computer documentation.

After installation, close the laptop slowly the first time. Stop if the filter, frame, or tabs meet the keyboard deck or create resistance. Thin modern lids are not designed to have an arbitrary object compressed between their surfaces. If the instructions call for removal before closing or transport, make that part of the routine.

A removed filter should be held by its edges and stored flat. Sliding it loose beside cables, pens, or a power adapter can scratch or bend the surface. Keep any cleaning cloth free of grit, and follow the filter’s instructions for fingerprints rather than using an unapproved spray.

Limitations

  • A side-view filter does not reliably hide the display from a person directly behind the user.
  • Fit labels based only on diagonal size can be misleading when aspect ratios and bezel designs differ.
  • The panel can reduce apparent brightness or alter contrast, reflections, sharpness, and color perception.
  • Tabs, frames, and adhesive can interfere with sensors or safe lid closure when poorly matched or installed.
  • Touch and pen response may change, even when a product is marketed for touchscreen use.
  • The filter does not secure accounts, prevent screen capture, stop malware, or replace careful handling of confidential information.

Alternatives to compare

A better seat or privacy-aware desk position: A wall behind the user and fewer passing sight lines can address angles a side-view filter does not cover.

A monitor hood or workspace partition: Useful at a fixed desk when controlling surrounding light or neighboring sight lines matters more than portability.

A removable magnetic filter made for the exact laptop: Worth comparing when frequent collaboration makes fast removal important, but compatibility and closure clearance remain essential.

A portable monitor used only in private spaces: This separates collaborative and sensitive workflows, although it adds power, cable, storage, and placement requirements.

Software and operating habits: Automatic screen locking, limited notification previews, careful window placement, and approved access controls solve different exposure risks that a physical filter cannot.

FAQ

Do I measure the laptop lid or the visible screen for a privacy filter?

Measure the active image area—the illuminated rectangle—unless the filter maker explicitly requests a different measurement. Record its width and height and compare the aspect ratio. The outer lid and bezel can still matter for attachment, but they should not replace active-area measurements.

Will any 14-inch privacy screen fit a 14-inch laptop?

No. A diagonal label can cover displays with different aspect ratios, active-area dimensions, corners, bezels, cameras, and sensors. Use a dimensioned fit chart or an exact, clearly identified laptop compatibility listing.

Can I close my laptop with the privacy filter attached?

Only when the filter and laptop instructions allow it and there is adequate clearance for the panel, tabs, strips, or frame. Close the lid slowly after installation and stop if anything creates resistance. Some systems are intended to be removed first.

Does a laptop privacy filter work against someone standing behind me?

Not necessarily. Many filters primarily narrow the readable view from the left and right. A person close to the user’s central viewing axis may still see the display, so seating position and normal information-security practices remain important.

Are privacy filters suitable for photo or design work?

They can change brightness, reflections, sharpness, contrast, or color appearance. For work that depends on accurate visual judgment, a removable filter may be more practical so it can be taken off in an appropriately private workspace.

Will a privacy screen filter still work with touch input?

Some are designed for touchscreens, but compatibility and feel vary with the display, attachment, and panel construction. Confirm the exact product’s touchscreen and pen guidance, then test the full screen and closing clearance after installation.

Webcam Privacy Covers: Check the Clearance Before You Close the Laptop

Product links are for reference. Verify current details on the retailer page before buying.

Illustrative image for a laptop webcam privacy cover buying guide

Illustrative image, not an official product photo.

Short answer

A sliding webcam cover can provide a visible physical barrier over a conventional camera, but the tiny accessory must suit the device around it. Before attaching one, check the computer maker’s guidance, the gap between the closed display and keyboard, and the positions of the camera, indicator light, microphones, and face-recognition sensors. The cover should reveal the full lens when open, stay clear of neighboring components, and add no more thickness than the device can safely tolerate. On laptops with very tight lid clearance, a removable cover or the manufacturer’s built-in shutter may be the more sensible choice.

Search reference

Laptop webcam privacy cover options

Compare current dimensions, stated thickness, opening size, adhesive layout, device guidance, and pack contents against the camera area on your own computer.

View matching options

The smallest measurement may be the most important one

Webcam privacy covers look simple: a thin frame sticks around the camera while a small tab slides across the lens. That simplicity is useful only when the frame fits the exact space available. Modern laptop bezels can be narrow, and the camera area may also hold microphones, an activity light, ambient-light hardware, or infrared components used for face recognition. A cover chosen by appearance alone can block something it was never meant to cover.

Closed-lid clearance deserves equal attention. Some laptops are designed with very little space between the display glass and the opposite surface. Adding an accessory near the top edge may create a pressure point when the lid is shut or when the computer is carried in a packed bag. A listing that calls a cover “thin” does not establish compatibility with every laptop. Measure when dimensions are available, but also consult current device-maker guidance before applying anything to the display assembly.

A physical cover has a deliberately limited job. It can block the camera’s view when placed correctly and closed. It does not manage microphone access, remove software permissions, secure an account, or replace operating-system updates. Treat it as one visible control rather than a complete privacy solution.

Who this is for

  • Desktop monitor users whose conventional webcam has no built-in shutter and has enough flat bezel space for a small adhesive frame.
  • Laptop owners whose device documentation permits a cover and whose closed-lid clearance can accommodate the verified thickness.
  • Shared-workspace users who want an easy visual check that the camera lens is covered between video calls.
  • People managing several compatible computers who can use a multipack after measuring each camera area separately.
  • Users who prefer a slider that stays attached, provided it opens fully and does not interfere with sensors or indicators.

Who should skip it

  • Skip an adhesive cover when the laptop maker advises against adding material near the camera or display.
  • Do not attach one if the lid closes with almost no gap or the cover could press against the screen, keyboard deck, or palm rest.
  • Avoid covering infrared emitters, depth sensors, microphones, ambient-light sensors, or the camera activity light.
  • Choose another approach for a tablet, phone, glass-front display, or unusually shaped camera module unless the accessory is explicitly suitable and safely placed.
  • Do not rely on a camera cover as a substitute for microphone controls, app-permission review, security updates, or account protection.

What to verify before buying

  • Find the camera lens and identify every nearby opening or sensor using the device manual or current support information.
  • Measure the available flat bezel area, then compare the cover’s complete outer width and height—not only the slider opening.
  • Check the stated thickness against manufacturer guidance and the actual clearance when the laptop lid closes.
  • Confirm that the open slider exposes the complete camera field rather than leaving a dark edge in video calls.
  • Look at the adhesive shape and make sure it surrounds the intended lens without sitting on an opening, curved edge, or display pixels.
  • Verify whether the cover is intended for laptops, monitors, external webcams, tablets, or another surface; these are not automatically interchangeable.
  • Check how the slider is operated and whether the tab is large enough to move without pressing hard on the display.
  • Review removal instructions before installation, especially for coated glass, delicate bezels, work-issued devices, or equipment you may return.

Map the camera area before peeling the backing

Start with the computer turned off and the camera area clean enough to inspect. A phone flashlight aimed from the side can help reveal small openings, but the device’s support diagram is a better reference for identifying their purpose. The visible camera lens may not be the only imaging component. Systems that support face recognition can use additional infrared hardware, and some camera lights sit very close to the lens.

Use the published outer dimensions of a prospective cover to make a simple paper outline. Hold that outline near the bezel without adhesive. This dry fit makes conflicts easier to notice: a frame that overlaps the active display, a slider that opens toward a microphone, or a body that sits partly on a curved lip. Also check whether the laptop has a built-in mechanical shutter that the add-on would obstruct. If the device already provides a shutter, using the integrated control avoids adding thickness.

Once a cover is attached, test the camera with the slider fully open. Look for shadowing, blur, or a cropped edge, and confirm that any face-recognition feature you intend to use still operates as expected. Check the activity indicator rather than hiding it. If opening the slider requires pushing against the panel, the mechanism is not a comfortable match for that device.

Think about the laptop when it is closed

The top bezel does not exist in isolation. Closing a laptop brings it near the keyboard, palm rest, or another part of the chassis. Even a small raised object can concentrate force, especially when the device is carried under books or squeezed inside an overfilled backpack. That is why external dimensions and thickness are buying criteria rather than minor details.

Do not test clearance by snapping the lid shut over a newly installed cover. Lower it slowly without pressure and stop if it meets resistance or leaves an unusual gap. Follow the device manufacturer’s instructions if they are more restrictive. A computer issued by an employer or school may also have an equipment policy that rules out adhesive accessories.

A cover that is acceptable on a thick desktop monitor bezel may be unsuitable for a thin notebook. Conversely, an ultra-small laptop cover may have an opening too narrow for a separate USB webcam. Buy for the measured host device, not for the generic product label.

Slider design and adhesive both affect daily use

An open webcam cover should remain open during a call instead of drifting partly across the lens. When closed, it should cover the lens without requiring a forceful push. Very small tabs keep the profile low but may be awkward for people with limited dexterity or long fingernails. A larger tab can be easier to move, although it may need more bezel room.

Adhesive keeps the frame aligned, but stronger is not automatically better. The mounting area may have a coating, texture, curve, or narrow border that gives the adhesive little contact. Residue and finish damage are possible during removal. Clean only as the device maker recommends; household solvents can harm display coatings and plastic finishes.

Multipacks are useful when the same measurements work across several devices, but do not assume every screen in a household has the same layout. Fit each computer independently. Keep unused covers on their backing until needed, and avoid trying to reposition a frame if the adhesive is designed for one application.

Limitations

  • A closed cover blocks a correctly aligned camera lens, but it does not block microphones or control software permissions.
  • Added thickness can be inappropriate for laptops with tight display-to-keyboard tolerances and may create a pressure point when closed.
  • Nearby sensors, lights, and microphones vary by device, so a cover that fits one computer may interfere with another.
  • Adhesive can leave residue, lose grip, or affect a delicate surface during removal.
  • A narrow slider opening may vignette the camera image even when the cover appears open.
  • Device designs and manufacturer instructions change; current compatibility information should take priority over generic package claims.

Alternatives to compare

  • A built-in mechanical shutter, if the laptop, monitor, or external webcam already includes one.
  • A removable non-adhesive camera cover that is taken off before the laptop lid is closed.
  • A small piece of low-residue material used only when permitted, removed before closing, and kept clear of sensors and the activity light.
  • Operating-system camera permissions and per-app controls for deciding which software can request camera access.
  • An external webcam with an integrated shutter, combined with disabling or managing the internal camera according to device guidance.

FAQ

Can a webcam cover damage a laptop screen?

It may create a risk if it is thicker than the clearance designed into the closed laptop or if pressure is applied while the device is carried. Check the computer maker’s current guidance and do not install a cover where the lid cannot close normally without contact.

How do I know whether a cover will block face recognition?

Identify the camera, infrared components, and other sensors from the device documentation, then compare their positions with the full outer shape of the cover. If the frame or slider overlaps required hardware, choose another method rather than guessing.

Should the webcam activity light remain visible?

Yes. A cover should not hide indicators or neighboring openings. Keeping the activity light visible preserves an important status cue, while the physical slider provides a separate visual cue.

Can I use the same webcam cover on a desktop monitor and a laptop?

Only if its outer dimensions, opening, adhesive surface, and thickness are suitable for each device. Desktop bezels and laptop lid clearances differ, so compatibility should be checked separately.

Does a webcam cover stop microphone access?

No. A camera cover does not block or manage microphones. Review microphone permissions and hardware controls separately, and keep microphone openings clear rather than covering them accidentally.

Choosing a Rechargeable Headlamp for Repairs, Campsites, and Power Outages

Product links are for reference. Verify current details on the retailer page before buying.

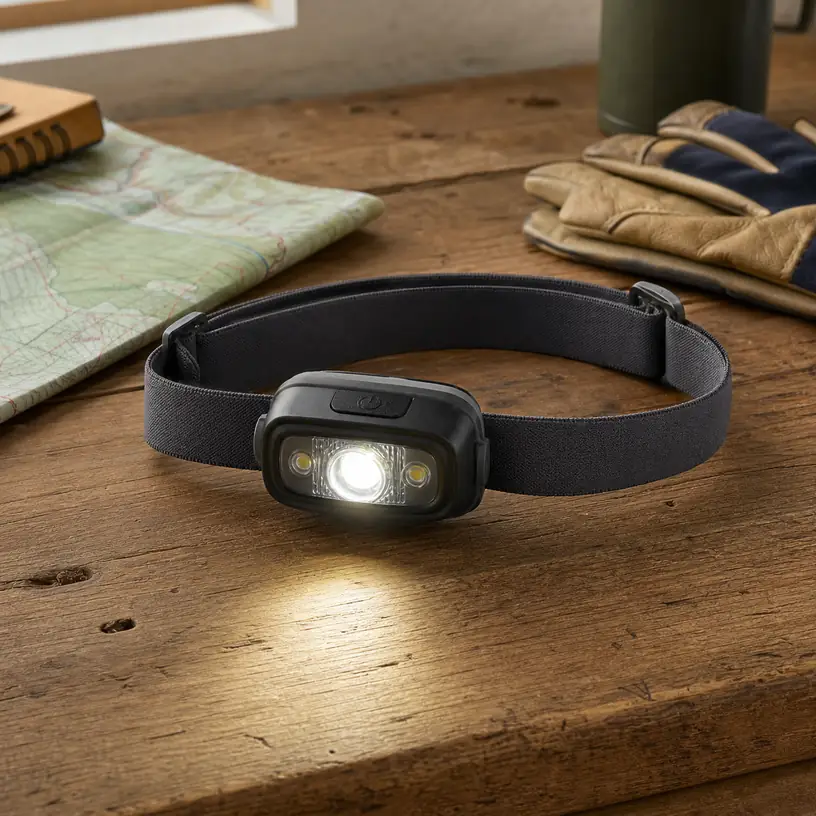
Illustrative image of a generic rechargeable headlamp on a workbench beside gloves and a folded trail map

Illustrative image, not an official product photo.

Short answer

A useful rechargeable headlamp puts steady light where your eyes are looking without becoming a distraction on your forehead. For close repairs, beam width and low-mode control often matter more than a dramatic maximum-output claim. For walking after dark, look for an even beam that reveals the ground ahead without forcing you to tilt your head constantly. Before choosing, compare runtime at the mode you would actually use, how output changes as the battery drains, charging-port protection, total weight, strap adjustment, button logic, and verified resistance to rain or dust. A well-matched moderate mode, predictable controls, and a comfortable fit usually serve longer tasks better than specifications you will rarely use.

Search reference

Rechargeable headlamp options

Compare models by the working beam, practical runtime, fit, and charging routine required for your actual task—not by the largest number on the listing.

View matching options

Begin with the task and viewing distance

“More light” is not a complete requirement. Replacing a sink fitting, sorting a dark storage closet, pitching a tent, and following a trail place the subject at different distances and call for different beam patterns. Write down the two jobs the lamp will handle most often, then estimate how far away your hands, tools, path, or campsite will be. This simple exercise makes product descriptions easier to interpret.

Close work benefits from a broad, even pool of light with a genuinely usable low setting. A narrow central hotspot can reflect from metal, glossy paint, white walls, or instruction sheets and make surrounding details harder to see. A lamp that tilts downward helps put the beam on a workbench without requiring a bowed neck. Check how many tilt positions are available and whether the hinge appears intended to hold its angle through normal movement.

Walking calls for enough forward reach to see changes in the route while retaining useful illumination near the feet. A very narrow beam may reveal a distant point but leave the edges of a path obscure. A flood-only pattern can feel comfortable nearby yet offer little warning farther ahead. If a listing describes separate spot and flood emitters, verify whether they can operate independently, together, or only through a fixed sequence.

Emergency use has a different priority: the lamp must be easy to find, sufficiently charged, and understandable by someone who has not practiced with it recently. Complicated mode trees and touchy gesture sensors can undermine that goal. A basic lamp stored in a known location and checked on a schedule may be more dependable for a household than a feature-rich model left discharged in a drawer.

Who this is for

  • DIY users who need both hands available for repairs, assembly, inspection, or cleanup in dim spaces.
  • Campers who want personal area lighting without pointing a handheld flashlight at every task.
  • Walkers and dog owners seeking a head-directed light for dark routes where local rules permit its use.
  • Households adding a portable, hands-free light to a power-outage kit.
  • People who can maintain a charging routine and want to reduce dependence on loose disposable cells for frequent use.

Who should skip it

  • Anyone who needs lighting approved for hazardous, explosive, industrial, firefighting, diving, or other regulated environments; a general consumer headlamp is not a substitute for task-specific certified equipment.
  • Users who cannot recharge reliably during extended travel and would be better served by a light with an appropriate replaceable-cell plan.
  • Work where color accuracy, inspection intensity, electrical isolation, mounting, or beam placement is governed by a professional procedure.
  • People sensitive to pressure around the forehead who cannot comfortably test strap tension and lamp weight.
  • Road users expecting a headlamp alone to satisfy bicycle, vehicle, workplace, or pedestrian visibility requirements.

What to verify before buying

  • Beam description: Look for useful information about spot, flood, mixed, or adjustable patterns rather than relying only on a maximum-output figure.
  • Mode-specific runtime: Confirm which brightness setting each runtime claim represents and whether the seller explains declining or regulated output.
  • Controls: Check the button count, press sequence, mode memory, lockout function, and whether a separate red-light or sensor control can be activated accidentally.
  • Charging connection: Verify the port type, cable requirements, charging indicator, port cover, and whether the lamp can operate while connected to an external power source if that matters to you.
  • Battery arrangement: Determine whether the cell is built in, user-replaceable, or housed in a rear pack, and follow the maker’s charging and replacement instructions.
  • Weight and balance: Compare the complete ready-to-use weight and note whether the battery sits at the front or is balanced at the back.
  • Strap system: Check adjustment range, removable top strap, helmet compatibility claims, buckle position, and cleaning guidance.
  • Weather and dust rating: Look for a stated test rating and its exact scope; “weather resistant” alone does not explain acceptable exposure.
  • Impact claims: Verify the stated test method and limits rather than treating a rugged appearance as proof of drop resistance.
  • Low-battery behavior: Check for an indicator, warning, step-down pattern, or reserve mode so loss of light is less surprising.
  • Included items: Confirm whether the charging cable, clips, storage pouch, replacement strap, or helmet mounts shown are actually included.

Runtime is a curve, not just a number

A runtime headline may refer to the lowest mode, while a prominent brightness figure may describe a short high mode. Those two numbers do not necessarily occur together. Read the mode table and supporting notes closely. If the listing provides a runtime graph, look at how long output remains useful rather than only the point when the lamp finally turns off. Some lights reduce output as heat rises or battery charge falls; that behavior can protect the electronics but also changes the illumination available for the task.

Estimate a realistic session. A forty-minute household repair, a three-hour evening at camp, and repeated short dog walks create different charging needs. Add time for setup and delays, then choose a normal mode with margin instead of planning every outing around the highest setting. Cold conditions can also affect battery performance, so follow the manufacturer’s operating and storage guidance for the temperatures you expect.

Recharge before an important use and inspect the cable and port. Do not assume every USB-shaped source, fast charger, cable, or power bank is suitable. Match the lamp’s specified input, keep the connection dry, and stop using a battery-powered device that is swollen, damaged, unusually hot, leaking, or behaving abnormally. Disposal and transport rules for rechargeable batteries vary, so use the applicable local and carrier guidance.

Fit can decide whether the lamp stays on your head

The listed weight does not tell the whole comfort story. A compact front-heavy lamp can bounce when walking, pull downward during overhead work, or require excessive strap tension. A rear battery pack distributes mass differently and may feel steadier, but it introduces another housing and sometimes a cable around the head. Neither arrangement is universally better.

Consider what will sit beneath the strap. Bare skin, a thin cap, a winter hat, a hard hat, and a bicycle helmet all change circumference and grip. A headlamp described as helmet compatible may still require specific clips or a particular strap path; verify both the helmet maker’s and lamp maker’s guidance. Do not improvise an attachment that interferes with protective equipment, vents, suspension, adjustment controls, or required visibility.

Buckle placement matters when leaning against a headrest or working beneath a cabinet. Exposed edges and cable routing can catch hair or press through a thin cap. If you expect long sessions, prioritize broad adjustment and stable weight distribution. The strap should be snug enough to limit bounce without causing headache, skin irritation, or a pressure mark that lingers.

Straps absorb sweat, dust, sunscreen, and workshop residue. Check whether the band can be removed and how it should be washed. Let all components dry as directed before storage, paying attention to the charging port and battery housing. A sealed-looking enclosure is not permission to submerge or machine-wash the lamp.

Controls should work before your eyes adjust

Mode selection is easiest when the light has a predictable starting state. Some models return to the previous setting; others always start in a default mode or require cycling past several brighter levels. Either design can work, but it should match the situation. For bedside emergency storage, an obvious main button and a moderate first mode reduce fumbling. For work, mode memory may save repeated clicks. For shared household use, simpler controls can be more valuable than extra effects.

A lockout prevents accidental activation in a bag, which can drain the battery and create heat against other items. Verify how lockout is entered and exited, then practice it. Mechanical button guards and electronic locks behave differently. Store the lamp according to its instructions rather than assuming a long press makes every model safe for transport.

Motion or gesture sensors can help when gloves are dirty, but they can also react when a hand, branch, cabinet, or other object passes near the lamp. Check whether sensor control is optional and has a visible status. Test it in a safe setting before relying on it near tools, stairs, traffic, or technical tasks.

Red modes are often chosen to reduce disruptive white light in a shared tent or preserve a gentler low-light environment, but implementation varies. Confirm whether red starts without flashing through white modes and how low it actually appears in the intended space. A red emitter is not a guarantee of preserved night vision, wildlife suitability, signaling compliance, or any specialized safety function.

Match the lamp to three common situations

Close household repairs

Favor a wide beam, a low mode that does not glare from pale surfaces, and a tilt mechanism that places light on the hands. Check the lamp’s front depth if you will work inside cabinets or close to a wall. Keep the light away from live electrical parts, liquids, rotating machinery, flammable materials, and any space where the equipment instructions prohibit an ordinary battery light. A headlamp improves visibility; it does not isolate energy or make a hazardous repair safe.

Campsite routines

A controllable low or red mode can be less intrusive around other people, while a broader white beam helps with cooking-area setup and gear sorting. Use the lamp only where open battery-powered lighting is permitted, and do not confuse water resistance with submersion capability. Pack a backup lighting method appropriate to the trip, especially when route finding or essential camp work continues after dark.

Power-outage storage

Choose a fixed storage location, include the compatible cable, and set a recurring charge-and-function check. Avoid leaving the lamp permanently connected unless its instructions specifically allow that practice. Household members should know the main control and lockout. A headlamp is useful for moving hands-free, but place separate area lights where broad room illumination is needed and keep flames out of the lighting plan.

A five-minute fit and function check

  1. Charge the lamp using the specified method and confirm the indicator behaves as described.
  2. Inspect the housing, lens, strap, hinge, cable, port, and cover before first use.
  3. Adjust it over the same hat or protective equipment you expect to wear, without altering safety gear improperly.
  4. Try the lowest useful mode on a white wall and a reflective object to check glare and beam uniformity.
  5. Walk a familiar, obstacle-free route and notice bounce, forehead pressure, button access, and the angle needed to see the ground.
  6. Practice lockout, mode changes, and low-battery checks without reading the instructions mid-task.
  7. After use, clean and dry the unit as directed, recharge if appropriate, and return it to its planned location.

This brief rehearsal often reveals more than comparing one additional headline specification. It can expose an awkward mode sequence, a harsh hotspot, a loose hinge, a slipping strap, or a charging cover that is difficult to seat correctly.

Limitations

  • Maximum output does not describe beam quality, sustained brightness, or runtime at that level.
  • Built-in batteries simplify the package but may limit field replacement and eventual serviceability.
  • High modes can create glare, heat, shorter runtime, and abrupt step-downs.
  • A head-directed beam can shine into another person’s eyes whenever the wearer turns to speak.
  • Water and dust resistance apply only within the stated test conditions and may depend on correctly closed covers.
  • Cold, age, storage state, charging habits, and mode choice can change practical battery performance.
  • Elastic straps stretch, absorb residue, and may need cleaning or replacement over time.
  • Consumer headlamps do not automatically meet requirements for roads, workplaces, hazardous locations, rescue, or protective equipment.
  • Hands-free lighting still leaves shadows and cannot replace fixed task lighting where a procedure requires it.

Alternatives to compare

A handheld flashlight offers deliberate aiming and can be passed between users, though it occupies one hand. A clip light attaches to clothing, a pocket, or a nearby edge and avoids forehead pressure, but its aim changes with the mounting point. A magnetic work light can spread light across a repair area when a suitable mounting surface is available. A lantern is better for broad campsite or room illumination shared by several people. For long trips away from charging, compare a headlamp designed for approved replaceable cells and carry batteries according to the device, transport, and storage instructions.

FAQ

How many lumens does a rechargeable headlamp need for household repairs?

There is no single useful number because working distance, beam width, surface reflectivity, and sustained output all matter. For close repairs, prioritize an even flood pattern and a controllable low or medium mode that illuminates the hands without harsh glare. Compare mode-specific runtime and beam information rather than choosing by the maximum figure alone.

Is a front battery or rear battery pack more comfortable?

A rear pack can balance a heavier lamp, while an all-front design has fewer housings and may be easier to pack. Comfort depends on total weight, head shape, strap tension, movement, headwear, and how long the lamp is worn. Check complete weight and adjustment range, then test the intended setup if returns are possible.

Can a rechargeable headlamp be used in rain?

Only within the maker’s stated water-resistance conditions. Verify a specific rating, read what it covers, close the charging-port cover correctly, and inspect the lamp for damage. Water resistance is not the same as waterproofing for every depth, duration, spray, or charging situation, and wet charging should be avoided unless the instructions explicitly provide a safe procedure.

Should I choose a headlamp with a red light?

A red mode can be convenient for low-level tasks around other people, but brightness, control sequence, and beam spread vary. Confirm that red can start without cycling through bright white modes if that matters to you. Do not treat it as proof of a specialized signaling, wildlife, safety, or night-vision capability.

How often should an emergency headlamp be recharged?

Follow the manufacturer’s storage and charging schedule because battery chemistry, standby drain, and indicators differ. Create a recurring household check that includes charge state, a brief function test, cable condition, port-cover condition, and signs of battery damage. Recharge after use when directed rather than discovering an empty lamp during an outage.

Adding a Portable Monitor to a Laptop: Start with Ports, Power, and Placement

Product links are for reference. Verify current details on the retailer page before buying.

Illustrative image of a generic portable monitor and unbranded laptop on a compact desk

Illustrative image, not an official product photo.

Short answer

A portable monitor is useful only when the laptop can send it video, the setup has enough power, and the screen can stand securely in the space where it will be used. Trace those three things before comparing panel features. A USB-C port may support charging and data without carrying display video, while an HDMI connection usually still leaves the monitor needing a separate power cable. Check the laptop’s port specifications, map every cable and adapter, and measure the table depth with both devices open. Then compare screen size, resolution, finish, controls, stand design, weight, and protection as one complete travel system rather than treating the display alone as the purchase.

Search reference

Portable monitor options for laptops

Compare input requirements, power arrangements, included cables, screen dimensions, stand geometry, controls, and packed weight against your exact laptop and workspace.

View matching options

Draw the connection before choosing the screen

The cleanest product photo often shows one cable between a laptop and monitor. That arrangement is possible with some combinations, but the connector shape alone does not establish compatibility. USB-C is used for several different capabilities. The laptop port must provide an appropriate display-output mode, and the monitor must accept it. The cable also needs to support the required connection; a cable intended mainly for charging may not carry video.

Start with the laptop maker’s documentation for the exact model and port. Look for the display-output capabilities attached to each physical port, not a general statement that the computer “has USB-C.” If the monitor uses a compatible USB-C video input, find out whether it can receive video and operating power through the same connection under the intended settings. Some laptops or monitors may need another power source even when a picture travels over USB-C.

HDMI creates a different map. It commonly handles the video path, while USB or an adapter supplies power to the monitor. A laptop with only one HDMI port may also need that port for a projector at work or a television at home. A mini-HDMI connector on the display requires the correct cable orientation, and a small adapter protruding from the side can be vulnerable to bumps. List every occupied port, cable, adapter, and wall connection before buying; this makes a supposedly portable setup much easier to judge.

Who this is for

  • Laptop users who regularly need a second document, timeline, preview, dashboard, or communication window beside their main work.
  • People who move between temporary desks and can control the surface, power access, and cable arrangement.
  • Travelers willing to carry a protected display, stand, and compatible cables in addition to the laptop and charger.
  • Small-space users who want a screen that can be stored after work instead of remaining on a permanent monitor arm.
  • Presenters who need a separate viewer-facing screen and can confirm that the software and operating system support the intended display mode.
  • Console, camera, or other device users who have verified the source output, monitor input, audio plan, and power requirements for that exact combination.

The strongest reason to add this product is a repeatable two-screen task. If the second display will consistently hold reference material while the laptop remains the active workspace, even a modest portable panel can reduce window switching. If the use is only occasional, an existing tablet’s supported second-screen feature or a larger fixed monitor may be simpler.

Who should skip it

  • Skip a second panel when the laptop cannot provide a compatible video output and the required conversion path is uncertain or disproportionately complicated.
  • A commuter who already carries a heavy bag may get more value from improving the laptop-only workflow than adding a fragile screen, cover, stand, and cables.
  • Color-critical photo, print, or video work needs verified display performance and a suitable calibration workflow; “full color” marketing language is not enough.
  • Fast competitive play may call for carefully confirmed refresh, response, synchronization, and source compatibility rather than a general-purpose travel display.
  • A very narrow café table, tray table, or shared counter may not safely accommodate two open screens and side-facing connectors.
  • Anyone expecting a portable monitor to behave as a standalone computer should check the product type. Most conventional models need an external video source and do not run laptop applications independently.

What to verify before buying

  • Laptop video output: Identify which exact port can send display video and which protocol or alternate mode the current laptop documentation specifies.
  • Monitor inputs: Match the monitor’s full-size HDMI, mini-HDMI, USB-C, or other input to the source without assuming that similar-looking ports have identical functions.
  • Power path: Determine whether the laptop can power the monitor during real use, whether a second USB connection is required, and whether a wall adapter is included or merely shown.
  • Cable capabilities: Check that every included or planned cable supports its assigned job: video, power, or both. Note length and plug orientation as well.
  • Operating-system support: Confirm the number of external displays, resolutions, orientations, scaling options, and mirrored or extended modes supported by the laptop and its current configuration.
  • Visible and overall dimensions: Compare the panel size, bezel, thickness, and stand footprint with the desk and bag rather than shopping by diagonal measurement alone.
  • Resolution and scaling: Consider text size at your viewing distance and whether the operating system can create a comfortable scale across laptop and external screens.
  • Panel finish and viewing conditions: Decide whether reflections, off-angle viewing, and room brightness make a matte or glossy-looking surface more practical for the intended location.
  • Stand and orientation: Verify usable tilt angles, portrait support if needed, hinge stability, and whether plugs remain accessible in each orientation.
  • Controls: Locate the power, menu, brightness, input, and audio controls and check whether common adjustments can be made without navigating an awkward sequence.
  • Packed system: Add the weights and dimensions of the monitor, protective cover, separate stand, cables, adapters, and power source.
  • Return and support details: Connection problems can be specific to a device combination, so review the current documentation, support route, and return terms before committing.

Screen size is also a workspace decision

A larger diagonal gives windows more physical room, but it also increases the footprint and leverage on the stand. Put the laptop in its normal position and mark the proposed monitor width with paper or painter’s tape. Include the bezel and any side connector that cannot bend sharply. Then check whether a mouse, notebook, drink, and charger still have safe places to go.

Table depth matters as much as width. A folio-style cover may fold behind the panel, while a kickstand can extend farther back than expected. The laptop screen and portable panel should sit at usable angles without pressing against each other. On a shallow desk, turning the laptop toward the monitor can create an inward V shape that improves viewing but consumes front-edge space. A separate stand may reduce the rear footprint or raise the panel, yet it adds another item to carry and another joint that can move.

Compare packed dimensions with the actual laptop compartment or sleeve. Matching diagonal sizes do not guarantee that two devices have matching external dimensions. Do not place an unprotected monitor where plugs, pens, keys, or the laptop chassis can press against its display surface. If a protective cover also functions as the stand, assess both jobs: a cover that cushions the panel well may still offer only one unstable viewing angle.

Resolution, scaling, and the work you plan to put there

Resolution has to be considered with panel size, viewing distance, operating-system scaling, and the applications in use. A high pixel count does not automatically produce a more comfortable workspace if text becomes too small or the selected scale leaves too little logical desktop area. Conversely, enlarging text on a lower-resolution panel may make a detailed spreadsheet or editing timeline feel constrained.

Think in terms of the second screen’s assignment. A document, chat panel, music controls, or presentation notes may not need the same pixel density as a fine preview or densely arranged tool palette. If the laptop and portable monitor have very different pixel densities, windows can appear to change size when dragged between them. Current operating systems often provide per-display scaling controls, but application behavior can vary, so confirm the intended workflow where possible.

Orientation can be more meaningful than another specification increase. Portrait mode may suit a long document or code view, but only if the stand supports it securely, the operating system rotates the output, the controls and connectors remain reachable, and the viewing characteristics are acceptable after rotation. A monitor advertised as rotatable may still depend on a separate stand or manual software setting.

Power changes the meaning of portable

A screen drawing power from the laptop reduces the number of wall connections, but it can shorten laptop battery time. Brightness, audio, panel settings, laptop workload, and connection method all affect the result. A manufacturer-provided power figure can help compare options, yet it will not predict an exact unplugged runtime for every computer.

For an outlet-based desk, a compatible charger with sufficient connections may make the layout tidier. Confirm how power is divided when more than one device is connected and whether each port supports the required output. Do not assume a charger, cable, or power bank is suitable because the connector fits. Follow the current electrical and charging instructions for the laptop, monitor, and power source.

For travel, rehearse the complete setup at home. Connect it in the same order you expect to use, disconnect the wall power, and see how the laptop reports battery use. Test waking from sleep and reconnecting after a restart. Label similar-looking cables if only one reliably carries display video. This practical check is more informative than planning around an ideal one-cable diagram that has not been tried with the actual devices.

A stable stand matters more than a thin profile

Portable displays are light enough to move easily, which also means cable tension and table vibration can move them. A stand should support the chosen viewing angle without placing the screen close to tipping. Side-connected cables need relaxed bends and enough slack that a person brushing the cable does not pull the panel toward the floor.

Integrated kickstands can be quick to deploy and eliminate a loose accessory. Folio stands protect and support the panel but may rely on folds, magnets, or friction that work differently on smooth, soft, or uneven surfaces. A separate metal or plastic stand can offer more height and angle choices, although its stated size and load range still need to suit the monitor. Confirm that a clamp or magnetic attachment is intended for the product before using it; improvised mounting can obstruct ventilation, controls, or connectors.

On a public or shared table, position the setup away from the edge and route cables where they will not cross a walkway. Do not balance the display on bedding or other soft material that makes the stand unpredictable or blocks required ventilation. If someone will view the panel from the opposite side, test the angle and reflections from that seat rather than only from the keyboard position.

Small controls and built-in audio need realistic expectations

Thin enclosures leave little room for buttons and speakers. A wheel or rocker can be convenient after its direction is learned, while a set of identical edge buttons can be difficult to identify without looking. Check whether input selection and brightness remain available when a source is connected and whether settings persist after power is removed. On-screen menus vary, so current instructions are more useful than a photo of the control edge.

Built-in speakers may be enough for notification sounds or an occasional call in a quiet room, but speaker placement and available volume differ. Plan a separate audio path if sound quality or privacy matters. When video arrives over HDMI or USB-C, the operating system may automatically switch the audio output to the monitor; know how to select the laptop, headphones, or another device again.

Extras such as touch input, pass-through charging, high refresh modes, or automatic rotation require more than seeing the feature name. They may need a particular cable, operating system, power connection, driver, input, or source capability. Verify the entire requirement chain and decide whether the extra setup earns a place in the travel bag.

Limitations

  • A USB-C connector does not by itself confirm display output, one-cable operation, touch data, or charging behavior.
  • The complete kit can occupy more desk and bag space than the bare monitor dimensions suggest.
  • Powering the display from a laptop can reduce unplugged working time.
  • Folio and kickstand designs may offer limited height adjustment and can become unstable on small, soft, or uneven surfaces.
  • Mixed screen sizes and pixel densities can make scaling and window movement less consistent.
  • Reflections, modest built-in audio, small controls, and side-facing plugs can be more noticeable in temporary workspaces.
  • A travel panel is another fragile device to protect from pressure, twisting, drops, and cable strain.
  • Compatibility can depend on the exact source, port, cable, power supply, operating system, and display setting rather than the monitor alone.

Alternatives to compare

A fixed desktop monitor usually makes more sense when the workspace is permanent and height adjustment, a larger panel, or multiple inputs matter more than storage. A tablet with an officially supported second-screen feature may reduce the number of devices carried if you already own a compatible tablet, although software, latency, charging, and app limitations should be checked. A laptop stand plus improved window management keeps the kit simple when the main problem is screen position rather than screen area. A foldable or dual-screen laptop design integrates the display concept but changes the entire computer purchase and repair equation. For presenting to a room, a projector or installed display may suit the viewing distance better than a small panel facing the audience.

FAQ

Can one USB-C cable run a portable monitor?

Sometimes, but only when the laptop port supports compatible display output, the monitor accepts that signal, the cable carries the required video and power, and the available power is sufficient. Check all four parts for the exact devices instead of relying on the USB-C connector shape.

Why does a portable monitor turn on but show no signal?

Power and video can travel through different paths. The monitor may be receiving power from a port or charger while the selected input has no compatible video signal. Check the source port’s display capability, cable function, monitor input selection, adapters, and operating-system display settings in the order recommended by the device instructions.

Is 1080p enough for a portable laptop monitor?

It can be appropriate for many document, communication, and general second-screen tasks, but comfort depends on panel size, viewing distance, scaling, and the detail your applications need. Compare usable text size and workspace rather than judging the resolution label in isolation.

Will a portable monitor drain the laptop battery faster?

Usually, if the laptop is powering the display, because the panel adds to the system’s energy use. The actual change depends on brightness, connection method, monitor design, laptop workload, and battery condition. Test the intended setup and carry an appropriate power plan when unplugged time matters.

Can I use the same portable monitor with a phone or game console?

Only if the source can provide a compatible video signal and the monitor has the matching input, power arrangement, and any required audio or control support. Many phones do not send display video through every USB-C port, and consoles may need HDMI plus separate monitor power. Verify each source separately.

How do I keep a portable monitor stable on a small table?

Measure the complete stand footprint, keep the panel and hinge away from the table edge, and route cables with slack so they do not pull sideways. Use the stand only on a firm surface and test the intended tilt before placing other items nearby. A compact separate stand may help, but it must be rated and shaped for the display.

Choosing a USB-C Hub for a Laptop: Ports, Power, and Display Support

Product links are for reference. Verify current details on the retailer page before buying.

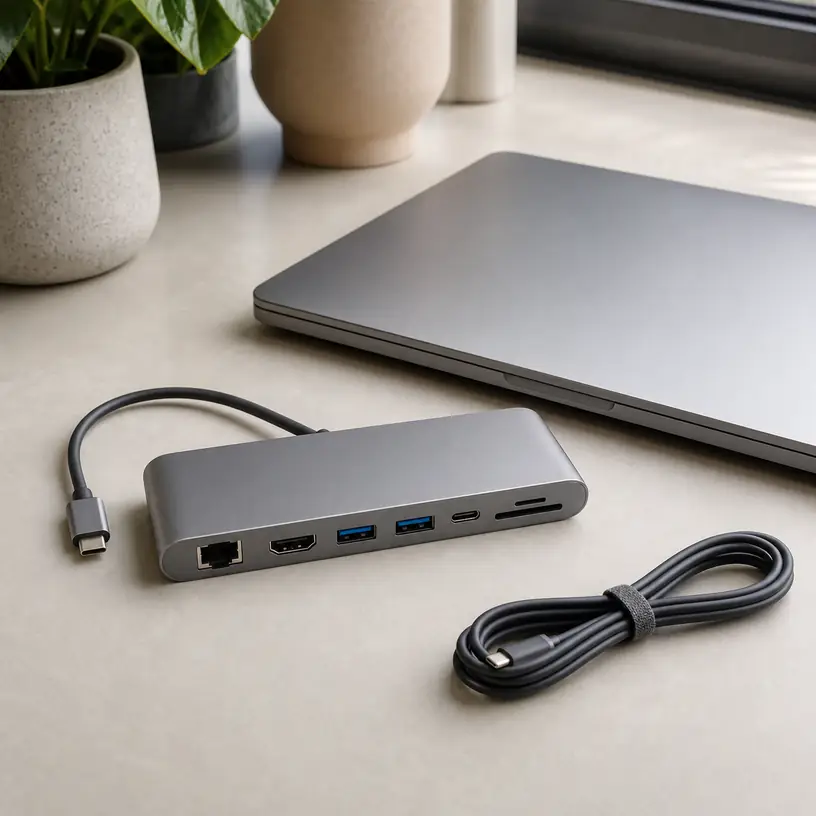
Illustrative image of a generic USB-C hub beside a laptop

Illustrative image, not an official product photo.

Short answer

Start with the exact functions your laptop’s USB-C port supports, then choose a hub that covers the devices you use together rather than the greatest possible port count. A practical match may need one display output, enough USB data ports for a keyboard and storage drive, a suitable card reader, and pass-through charging that aligns with the laptop’s requirements. Port labels alone are not enough: verify display resolution and refresh-rate combinations, data-speed wording, power behavior, operating-system support, and whether connected accessories share bandwidth.

Search reference

USB-C hub options for laptops

Compare host-port requirements, simultaneous display limits, charging input and output, data speeds, card formats, cable length, and supported operating systems.

View matching options

Map the setup before counting ports

A seven-port hub is not automatically more useful than a four-port model. Write down what you expect to connect during one typical session: perhaps a monitor, keyboard, mouse receiver, removable drive, memory card, wired network cable, and charger. Mark the devices that must run at the same time. This quickly separates essential connections from ports that only make a specification list look generous.

Next, inspect the laptop rather than assuming every USB-C socket behaves alike. A port may carry data, accept charging, send video, or combine some of those functions, but the connector shape by itself does not confirm which features are enabled. Laptop documentation and port markings are better starting points than a hub listing. If the host port cannot provide a required function, attaching a hub generally does not add that capability.

Think about where the hub will sit as well. A short built-in lead may work beside a notebook on a desk but hang awkwardly from a raised laptop stand. A crowded row of ports can make wide flash drives block adjacent sockets. For travel, an attached cable is one less part to lose; for a fixed workstation, a detachable and replaceable host cable may be more convenient when the product supports the correct cable specification.

Who this is for

  • Laptop users who regularly need to connect legacy USB devices, a display, removable media, or wired networking through one USB-C port.
  • Hybrid workers who want a compact connection point that can move between home, office, and meeting rooms.
  • Photographers and creators who need a card reader alongside storage or display connections, after confirming the required card format and speed.
  • People with thin laptops that have enough USB-C capability but too few physical connectors for their everyday desk setup.
  • Travelers who can accept a smaller selection of ports in exchange for lower bulk and fewer loose adapters.

Who should skip it

  • Skip a video-equipped hub if the laptop’s chosen USB-C port does not support the required display output.
  • Choose a powered desktop dock when the setup involves several demanding peripherals, multiple monitors, or a permanent workstation that needs more predictable expansion.
  • Use a single-purpose adapter when you only need one occasional connection and do not want extra size, heat, or compatibility variables.
  • Avoid relying on a compact hub as the sole charging solution until its pass-through behavior and the laptop’s power requirements are confirmed.
  • A wireless workflow may be simpler if your accessories, network, and display already connect reliably without cables.

What to verify before buying

  • Host-port capability: Confirm whether the laptop port supports data, video output, and charging as required; check model-specific documentation when several USB-C ports differ.
  • Display combinations: Verify the output connector, maximum supported resolution and refresh rate, number of simultaneous displays, and operating-system limitations for the exact arrangement.
  • USB data speed: Check the stated capability of each data port and remember that the hub’s upstream connection may be shared among active devices.
  • Power delivery: Compare supported charger input, reserved hub power, maximum laptop output, and the computer maker’s charging guidance. A charger may not be included.
  • Card-reader format: Match SD, microSD, or another named format to the cards you use, and verify whether multiple slots can operate together.
  • Network connection: If Ethernet matters, confirm the connector, stated network capability, driver needs, and whether the host setup can use it.
  • Port spacing: Look for enough room around wider plugs, receivers, card slots, and display cables without blocking neighboring connections.
  • Host cable: Check length, orientation, strain relief, and whether an included or detachable cable supports every advertised feature.
  • System compatibility: Review current support notes for the laptop model, operating system, monitors, and any specialized peripherals.

Video output is a chain, not a single port

Seeing an HDMI or DisplayPort connector on a hub only confirms that there is a physical output. A working display path also depends on the laptop’s host port, graphics hardware, operating system, hub design, cable, monitor input, and the requested resolution and refresh rate. If any part of that chain falls short, the display may use a lower mode or fail to behave as expected.

Multiple-monitor wording deserves particular care. Some operating systems and laptop families handle extended desktops through hubs differently, and a pair of physical outputs does not guarantee two independent external workspaces. Read the current compatibility notes for the exact computer and desired screen arrangement. A dedicated docking solution may be a better fit when two or more monitors are central to the desk.

Do not choose only by the highest resolution printed in a heading. A monitor used for office documents may prioritize stable connection and convenient wake behavior, while a high-refresh display requires a different bandwidth calculation. Confirm the complete resolution-and-refresh combination and whether other active hub functions change it.

Pass-through charging has a power budget

Many compact hubs include a USB-C input intended for a charger and pass some power onward to the laptop. The headline input figure and the power reaching the computer may not be identical because the hub and attached devices also need energy. Compare the hub’s stated input and output limits with the laptop’s normal charger requirement instead of assuming any USB-C power adapter will produce normal charging performance.

Use a charger and cable suitable for the required power and follow the laptop manufacturer’s guidance. If no charger is included, the hub does not create charging power on its own. Some notebooks may charge more slowly, display a power warning, or consume battery during heavy work when the delivered power is below demand.

Power-hungry portable drives and other accessories can also affect stability. If several devices disconnect under load, the solution may require a powered hub or dock rather than another bus-powered model. Avoid stacking adapters casually; every added connector and cable introduces another point to verify.

Shared bandwidth changes real-world use

A hub combines several connections into one upstream link, so simultaneous tasks may compete for available data capacity. Copying large files from a memory card to an external drive while driving other functions is a different workload from using a keyboard and mouse receiver. Product pages may state individual port capabilities without making every simultaneous combination equally clear.

Plan around the busiest realistic task. If fast external storage is important, a direct laptop connection or a hub with clearly documented performance may be preferable. A slow keyboard does not need a premium high-speed socket, so port placement can reserve the most capable connection for storage or another demanding device.

Wireless receivers can experience interference or poor range when tucked among metal connectors and active high-speed devices. A little physical separation, a short extension, or a different port can help with layout, but follow the accessory maker’s troubleshooting guidance rather than assuming the hub is defective.

Desk hub or travel hub?

A travel hub should protect its cable in a bag, avoid sharp protrusions, and provide the few ports you are likely to encounter away from home. Smaller housings can become warm during normal operation, so place the hub where air can circulate and follow its temperature and safety guidance. Do not bury it under papers or fabric while loaded.

A desk-focused model can justify a longer cable, more generous spacing, a network port, and additional display options. Rubber feet or a stable body may keep it from sliding when stiff cables pull in different directions. If the hub will remain connected every day, check whether the cable route strains the laptop port or leaves the housing suspended by its lead.

Labeling also matters more than it seems. Clear port symbols reduce mistakes when similar USB-C sockets serve different roles, such as host connection, charging input, or data. Before plugging in a device, confirm which function the socket is intended to provide.

Limitations

  • A USB-C connector does not guarantee video, charging, or a particular data speed; the laptop’s implementation controls what the hub can use.
  • Advertised port counts do not guarantee that every connection can run at its maximum capability simultaneously.
  • Pass-through charging can deliver less power to the laptop than the connected charger supplies to the hub.
  • Multi-display support may vary by laptop hardware, operating system, hub technology, resolution, and refresh rate.
  • Compact hubs can become warm and may place mechanical strain on a laptop port if heavy cables are poorly supported.
  • Card slots, network ports, and specialized peripherals may need system support or drivers, and compatibility can change with updates.
  • A hub adds connectivity but does not replace backups, safe drive-ejection practices, surge protection, or proper handling of storage devices.

Alternatives to compare

  • A single USB-C-to-HDMI, Ethernet, or USB-A adapter for one occasional connection with fewer compatibility questions.
  • A powered desktop dock for a permanent workspace with multiple displays, several peripherals, and higher charging needs.
  • A monitor with built-in USB-C connectivity and downstream ports, after confirming laptop charging and hub functions.
  • Direct laptop connections for high-speed storage or critical devices, leaving the hub for keyboards, receivers, and lower-demand accessories.
  • Bluetooth or network-based accessories when reducing cable clutter matters more than using existing wired devices.

FAQ

Will any USB-C hub work with any USB-C laptop?

No. The plugs may fit, but video, charging, data speed, and multi-display behavior depend on the laptop port and system support. Compare the hub requirements with documentation for the exact laptop model.

Can a USB-C hub charge my laptop?

Only if the hub supports pass-through power, the selected laptop port accepts charging, and a suitable charger and cable are connected. Verify the maximum power delivered to the laptop, not only the hub’s charger-input figure.

Why does a hub with two display outputs not always provide two extended monitors?

Physical outputs are only part of the display path. Laptop graphics capabilities, operating-system behavior, hub technology, cables, and the requested resolution and refresh rate determine which monitor arrangements are supported.

Do all ports on a USB-C hub run at full speed together?

Not necessarily. Several ports may share the hub’s upstream data connection and power budget. Check current documentation for simultaneous-use limits, especially when transferring files between fast storage devices.

Is a powered dock better than a compact hub?

It can be for a fixed desk with multiple demanding peripherals, several displays, or substantial laptop charging needs. A compact hub is usually easier to carry and may be sufficient for a simpler connection map.

Laptop Sleeves for Commuting: Fit, Closure, and Bag Protection

Product links are for reference. Verify current details on the retailer page before buying.

Illustrative image for a laptop sleeve buying guide for commuters

Illustrative image, not an official product photo.

Short answer

A commuter laptop sleeve should fit the computer itself, fit inside the bag you actually carry, and add useful cushioning without becoming another bulky case. Compare the laptop’s full outside dimensions—not only its advertised screen size—with the sleeve’s stated interior dimensions. Then look at corner protection, zipper placement, lining, closure security, and whether an accessory pocket stays reasonably flat when loaded. A sleeve can reduce everyday scuffs and minor bumps, but it does not make a laptop waterproof or safe from a hard drop.

Search reference

Laptop sleeve options for commuting

Compare current interior measurements, padding layout, closure style, lining, pocket depth, and care notes against both your laptop and the work bag that will carry it.

View matching options

Two fits matter on a daily commute

Laptop sleeves are often selected by screen-size labels such as 13-inch, 14-inch, or 15-inch, but that number describes a diagonal display measurement rather than the computer’s outer footprint. Two laptops sold in the same screen class may differ in width, depth, thickness, feet, hinges, and edge shape. A close sleeve fit can limit sliding, while an overly tight fit may strain the zipper or press against the device. Too much spare room allows the laptop to shift before the padding can help.

The second fit is easy to overlook: a padded sleeve must still slide into your backpack, tote, briefcase, or bike pannier. Exterior seams, handles, pockets, and thick corner padding make the sleeve larger than its interior cavity. Measure the bag opening as well as its laptop compartment. A sleeve that technically fits inside a bag may still catch on a narrow zipper or crowd out a lunch container, headphones, or travel umbrella.

For commuting, the best choice is usually not the sleeve with the longest feature list. It is the one that makes packing and unpacking predictable at a desk, security checkpoint, train seat, or shared workspace without leaving the laptop loose in a bag.

Who this is for

  • Commuters whose backpack or tote has little padding around its laptop compartment.
  • Hybrid workers who move one computer between home, office, and occasional coworking spaces.
  • Students carrying a laptop in the same bag as books, notebooks, chargers, and other firm objects.
  • Travelers who want a removable protective layer that can transfer between a carry-on and day bag.
  • People who sometimes carry a laptop by hand for short indoor walks and want a simple grip or handle.

Who should skip it

  • Skip a sleeve-only setup if you need a rigid case for demanding transport conditions or frequent handling around heavy equipment.
  • Choose a dedicated laptop backpack if adding a separate sleeve makes your current bag too crowded or slow to organize.
  • Avoid assuming any ordinary fabric sleeve can protect electronics from rain, spills, or submersion.
  • Consider a fitted shell only if you need protection that stays attached while the laptop is in use and the shell is compatible with the exact model.
  • Do not use a tight sleeve that presses keys, obstructs vents while the laptop is running, or requires force to close.

What to verify before buying

  • Measure the laptop’s maximum width, depth, and thickness, including feet or a thin attached shell, and compare all three numbers with the listed interior dimensions.
  • Check the sleeve’s exterior dimensions against the narrowest part of the intended bag opening and compartment.
  • Look at where cushioning is placed, especially along corners, edges, and the bottom that meets the floor when a bag is set down.
  • Confirm whether the closure is a zipper, flap, hook-and-loop tab, magnetic closure, or open top, and consider how securely it stays shut in a moving bag.
  • Examine zipper-guard wording and lining details so metal hardware is less likely to rub directly against the computer.
  • Check what the accessory pocket can hold without pressing bulky chargers or adapters against the laptop.
  • Verify handle construction if the sleeve will be carried on its own, rather than treating a decorative strap as a load-bearing handle.
  • Review cleaning instructions, current material descriptions, seller details, and return terms before ordering.

Padding should protect the vulnerable route, not just look plush

Thick foam across the large flat panels can feel reassuring, but commuting wear often reaches a laptop through its edges and corners. Bags are placed on floors, nudged under seats, squeezed in lockers, and bumped against door frames. A sleeve with a padded lower edge or raised corner construction may address those moments more directly than soft lining alone. Current product diagrams can help show the padding layout, but confirm dimensions and construction in the listing rather than judging only from staged photos.

More padding also has a cost. It occupies bag space, adds weight, and can trap more heat if a warm laptop is put away immediately. Shut the computer down or let it reach an appropriate state before storage according to its manufacturer guidance. A sleeve is intended for transport, not for operating a laptop with ventilation covered.

If your route includes crowded public transportation, think beyond impact padding. A closure that stays shut and an outer surface that is easy to grip may matter every day. For bicycle commuting, a sleeve still needs to sit inside a suitable bag; it should not be treated as weatherproof cargo protection unless the current specifications explicitly support the conditions you expect.

Closure and opening direction change the routine

A three-sided zipper creates a wide opening and can make it easier to place a close-fitting laptop without scraping its edges. It also adds more hardware around the device. Look for an internal zipper guard or a layout that keeps the slider from resting against the laptop. Before lifting a sleeve by its handle, make it a habit to check that the closure is fully secured.

A flap or envelope closure can avoid a zipper along the device edge and may create a cleaner profile. The tradeoff is that retention depends on the flap overlap and fastening method. An open-top sleeve offers quick access inside another secure compartment but is less reassuring when carried alone or turned upside down.

Opening direction matters in tight spaces. A top-loading sleeve may work well inside a vertical backpack compartment. A side-opening design may be easier on a desk but awkward if the bag compartment only exposes one short edge. Picture the actual sequence of removing the sleeve and laptop on your usual route before choosing.

Keep the accessory pocket realistic

An exterior pocket is useful for a slim charging cable, small hub, pen, or a few documents. A large power adapter, mouse, portable drive, and multiple cables can turn a flat sleeve into an uneven bundle. That bulk may press against the laptop panel, stress the pocket seam, or prevent the sleeve from sliding into the bag compartment.

If you carry several accessories, a separate organizer can be easier to pack and keeps hard objects away from the computer. It also lets you leave the sleeve thin on days when only the laptop is needed. For a single charger, check whether the pocket has its own padding or merely places the adapter directly against the device through one fabric layer.

Cable storage deserves a little care. Disconnect accessories before packing, avoid tight bends near connector ends, and do not let plugs sit where they can press into the laptop. A roomy pocket is not automatically a safe place for every object that fits.

Fabric, lining, and weather limits

Common sleeve descriptions may mention woven fabric, synthetic leather, felt-like material, foam, or soft lining. Those terms do not establish identical durability, cushioning, or water resistance across products. Check the current material and care wording, and consider how the exterior will handle a dusty floor, drink spill, or repeated rubbing inside a bag.

“Water-resistant” should not be read as waterproof. Seams, zippers, pocket openings, and closures may admit water even when droplets bead on the outer fabric. Keep drinks separated from electronics, use a suitable weather-protective bag when rain is likely, and dry a damp sleeve fully before putting a laptop back inside. If liquid reaches the computer, follow the device maker’s safety guidance rather than relying on the sleeve to contain it.

A pale soft lining can make small debris easier to notice, while a dark lining may hide marks. Either way, check the interior before inserting the laptop. Sand, crumbs, staples, or a forgotten adapter can cause damage that padding cannot prevent.

Limitations

  • A soft sleeve can reduce scuffs and cushion minor everyday contact, but it cannot guarantee protection from drops, crushing, or bending forces.
  • Screen-size labels do not guarantee device fit; exact laptop and sleeve dimensions still need comparison.
  • Water-resistant exterior material does not make seams, zippers, or the complete sleeve waterproof.
  • Thick padding and loaded accessory pockets can make a sleeve too bulky for a bag that previously fit the bare laptop.
  • Soft lining can collect grit or debris and should be checked and cleaned according to the listed care instructions.
  • Search results may change, so current dimensions, included straps, pocket layouts, materials, and closure details require verification.

Alternatives to compare

  • A backpack or briefcase with a suspended, padded laptop compartment for an all-in-one commute setup.
  • A rigid or semi-rigid laptop case when resistance to compression matters more than low bulk.
  • A model-specific snap-on shell for scratch protection that remains attached during use, after checking ventilation and fit.
  • A separate tech pouch for chargers, hubs, drives, and cables that would make a sleeve pocket too bulky.
  • A weather-protective backpack liner or suitable dry storage when the route involves sustained rain or open transport.

FAQ

Can I choose a laptop sleeve by screen size alone?

No. Screen size is a diagonal display measurement and does not fully describe the laptop’s width, depth, or thickness. Measure the device and compare all dimensions with the sleeve’s stated interior measurements.

How snug should a commuter laptop sleeve be?

It should limit unnecessary sliding while allowing the laptop to enter and leave without force. Leave enough clearance for the zipper or flap to close without pressing hard on the corners, hinge, or any attached shell.

Should a charger go in the sleeve pocket?

Only if the pocket can hold it without creating a hard pressure point against the laptop or straining the seams. A separate accessory pouch is often more practical for a large adapter, mouse, hub, and several cables.

Is a water-resistant laptop sleeve enough for rain?

Do not assume so. Water can enter through zippers, seams, and openings even when the outer fabric resists light droplets. For a wet commute, place the sleeve inside a bag designed for the expected conditions and keep electronics away from wet items.

Does more padding always mean better protection?

Not necessarily. Padding placement, corner coverage, closure security, device fit, and how the sleeve sits inside the main bag all matter. Extra foam that makes the sleeve difficult to pack may not improve the real commute.

Wireless Game Controllers: Who They Fit and What to Check Before Buying

Product links are for reference. Verify current details on the retailer page before buying.

Illustrative image for a wireless game controllers buying guide

Illustrative image, not an official product photo.

Short answer

Wireless game controllers fit players who want a couch-friendly or desk-friendly input device without relying only on a keyboard and mouse. Compare platform support, connection modes, battery setup, button layout, stick and trigger wording, grip shape, and software requirements before buying.

Search reference

Wireless game controller options

Compare current options and verify details on the retailer page before buying.

View matching options

What this product type is

Wireless game controllers are input devices for PC, console, mobile, or handheld-style gaming depending on the model. Current listings vary by supported platforms, wireless adapter type, wired fallback, battery design, button layout, trigger style, vibration wording, app support, and firmware update process. Platform compatibility is the first thing to confirm.
This guide treats the seed listing as a category signal only. Compare current matching options and verify details on the retailer page before buying.

Who this is for

  • PC or console players who prefer controller input for certain games.
  • Buyers replacing a worn controller with drifting sticks or weak buttons.
  • Living-room setups where a cable is inconvenient.
  • Families who need an extra controller for shared play.

Who should skip it

  • Skip this type if your games work better with keyboard and mouse.
  • Choose an officially licensed controller if platform certification is required for your setup.
  • Avoid unclear listings when platform support, battery type, or adapter requirements are not visible.

What to verify before buying

  • Check supported platforms and whether your device is listed.
  • Verify wireless mode, adapter needs, Bluetooth wording, and wired fallback.
  • Review battery type, charging port, and expected charging routine.
  • Check stick, trigger, button, vibration, and remapping wording.
  • Confirm size, grip shape, and whether software or firmware updates are needed.
  • Review current seller information, warranty terms, and return policy.

Main buying notes

Compatibility is not universal. A controller can work well on one platform and need extra steps on another, so verify the current listing and your device requirements.
Battery setup changes ownership. Built-in rechargeable batteries, replaceable batteries, and wired use each have different trade-offs.
Button layout matters if you play fast games or switch between systems. Compare labels, stick placement, trigger shape, and remapping support before deciding.
Wireless convenience can depend on distance, adapter placement, and interference. Keep a wired fallback in mind if reliability is critical.

Limitations

  • Some games may not support controller input cleanly.
  • Wireless performance can vary by adapter, device, and room setup.
  • Software features may require an app or firmware update.
  • Grip comfort and button feel are personal and hard to confirm from images alone.

Alternatives to compare

  • Wired controllers for lower setup complexity.
  • Official platform controllers when certification matters.
  • Keyboard and mouse for competitive PC control.
  • Mobile controller grips for phone-focused play.

FAQ

What should I verify before buying a wireless game controller?

Verify platform support, connection mode, adapter needs, battery setup, button layout, software requirements, warranty terms, and return policy.

Will one wireless game controller work with every platform?

Do not assume that. Check the current listing and your device requirements before buying.

Is wired fallback useful on a wireless controller?

Yes, it can help when charging, pairing, or connection reliability becomes inconvenient.

How should I compare controller battery setups?

Check whether the controller uses a built-in battery, replaceable batteries, or wired power, then choose the routine you prefer.

What alternatives should I compare with wireless game controllers?

Compare wired controllers, official platform controllers, keyboard and mouse setups, and mobile controller grips.

Laptop Cooling Pads: Who They Fit and What to Check Before Buying

Product links are for reference. Verify current details on the retailer page before buying.

Illustrative image for a laptop cooling pads buying guide

Illustrative image, not an official product photo.

Short answer

Laptop cooling pads fit buyers who want a raised laptop surface with extra airflow for desk work, gaming, or long sessions. Compare laptop size fit, fan layout, USB power needs, angle adjustment, noise wording, grip design, and desk footprint before buying.

Search reference

Laptop cooling pad options

Compare current options and verify details on the retailer page before buying.

View matching options

What this product type is

Laptop cooling pads are desk accessories that lift a laptop and use vents, fans, or airflow space to support heat management during everyday work or gaming. Current listings vary by supported laptop size, number of fans, USB power method, angle adjustment, surface grip, noise wording, lighting, and portability. Treat the pad as part of a desk setup, not a guaranteed repair for a laptop with deeper thermal issues.
This guide treats the seed listing as a category signal only. Compare current matching options and verify details on the retailer page before buying.

Who this is for

  • Laptop users who work or game for long sessions at a desk.
  • People who want a raised typing or viewing angle with added airflow.
  • Buyers with compact desks who need a slim accessory rather than a full stand.
  • Students or remote workers building a low-cost laptop setup.

Who should skip it

  • Skip this type if the laptop is overheating because of a hardware fault or blocked vents that need service.
  • Choose an ergonomic stand if screen height matters more than active cooling.
  • Avoid unclear listings when laptop size fit, fan power, or noise details are missing.

What to verify before buying

  • Check the supported laptop size range and actual pad dimensions.
  • Verify fan count, fan placement, and whether speed controls are listed.
  • Review USB power requirements and whether a cable is included.
  • Check angle adjustment, stopper tabs, and surface grip design.
  • Verify noise wording, lighting controls, and portability details if those matter.
  • Review current seller information, warranty terms, and return policy.

Main buying notes

Laptop size fit matters more than the general category name. A pad that is too narrow can feel unstable, while a large pad can dominate a small desk.
Fan layout should line up with how your laptop vents. Check the current listing images and specifications before assuming airflow will help.
USB power is part of cable management. Verify whether the pad needs one port, includes pass-through ports, or uses a cable length that fits your desk.
Noise and lighting are comfort details. If you work in quiet rooms, look for clear wording about fan controls and lighting behavior.

Limitations

  • A cooling pad cannot fix internal dust, failing fans, dried thermal paste, or poor laptop maintenance.
  • Fan noise can distract some users in quiet rooms.
  • Extra USB cables may add clutter to a small desk.
  • Raised angles can change typing comfort depending on wrist position.

Alternatives to compare

  • Passive laptop stands for screen height and airflow space.
  • External keyboards and mice for a more ergonomic desk setup.
  • Laptop maintenance or repair when heat issues are severe.
  • Desktop PCs when sustained performance matters more than portability.

FAQ

What should I verify before buying a laptop cooling pad?

Verify laptop size fit, fan layout, USB power needs, angle adjustment, grip design, noise wording, seller information, and return policy.

Can a laptop cooling pad fix overheating?

It may help with airflow in some desk setups, but it cannot repair internal dust, failing fans, or hardware thermal problems.

How should I compare laptop cooling pad fan layouts?

Check where your laptop intake vents are, then compare that with the fan placement shown on the current retailer page.

Do laptop cooling pads need USB power?

Many active cooling pads use USB power. Verify cable type, port needs, and any pass-through port details before buying.

What alternatives should I compare with laptop cooling pads?

Compare passive laptop stands, external keyboards and mice, maintenance service, and desktop computers depending on your main problem.

Wireless Earbuds: Who They Fit and What to Check Before Buying

Product links are for reference. Verify current details on the retailer page before buying.

Illustrative image for a wireless earbuds buying guide

Illustrative image, not an official product photo.

Short answer

Wireless earbuds fit buyers who want compact audio for commuting, calls, workouts, or desk use without a cable. Compare ear tip fit, Bluetooth compatibility, charging case size, controls, microphone needs, battery wording, and water-resistance claims before buying.

Search reference

Wireless earbud options

Compare current options and verify details on the retailer page before buying.

View matching options

What this product type is

Wireless earbuds are small Bluetooth audio devices that usually pair with a charging case. They are commonly compared by fit style, case size, controls, microphone needs, battery wording, water-resistance wording, and device compatibility. Because comfort and audio preference are personal, the current listing details matter more than broad marketing language.
This guide treats the seed listing as a category signal only. Compare current matching options and verify details on the retailer page before buying.

Who this is for

  • Commuters who want compact everyday audio.
  • People who take calls from a phone or laptop.
  • Gym users who need cable-free listening.
  • Buyers replacing wired earbuds with a small charging case setup.

Who should skip it

  • Choose over-ear headphones if comfort for long sessions matters more than pocket size.
  • Skip tiny earbuds if you often lose small accessories.
  • Avoid listings with unclear compatibility, charging, or water-resistance wording.

What to verify before buying

  • Check supported Bluetooth version and device compatibility wording.
  • Verify ear tip sizes, fit style, and whether replacement tips are included.
  • Review battery wording for both earbuds and charging case.
  • Check charging port type, cable inclusion, and case size.
  • Verify microphone, controls, app, and noise-control wording if those features matter.
  • Review current seller information, warranty terms, and return policy.

Main buying notes

Fit is the first practical filter. Earbuds with the wrong shape can sound worse and feel uncomfortable even if the feature list looks strong.
Battery wording can describe earbuds alone, the case, or a combined total. Read the current listing carefully before comparing numbers.
Controls vary. Some earbuds use touch controls, some use physical buttons, and some depend on a companion app.
Water-resistance wording should be verified. Do not assume sweat, rain, or submersion support unless the current listing clearly states it.

Limitations

  • Small earbuds can be easy to misplace.
  • Microphone quality varies by environment and device.
  • Battery performance can change with volume, call use, and features.
  • Comfort and sound preference are highly personal.

Alternatives to compare

  • Over-ear Bluetooth headphones for longer listening sessions.
  • Wired earbuds for simple plug-in use.
  • Open-ear headphones when awareness matters.
  • USB microphones or headsets for frequent calls.

FAQ

What should I verify before buying wireless earbuds?

Verify fit style, Bluetooth compatibility, battery wording, charging case details, microphone features, controls, warranty terms, and return policy.

Are wireless earbuds good for calls?

They can be useful for calls, but microphone performance varies. Verify microphone wording and compare current options before buying.

Do wireless earbuds need a charging case?

Most true wireless earbuds use a charging case for storage and recharging. Check case size, port type, and charging details before buying.

How should I compare wireless earbud battery claims?

Check whether the listing describes earbud runtime, case runtime, or a combined total, then compare those details carefully.

What alternatives should I compare with wireless earbuds?

Compare over-ear headphones, wired earbuds, open-ear headphones, and dedicated headsets depending on your main use.

Wireless Gaming Mice: Who They Fit and What to Check Before Buying

Product links are for reference. Verify current details on the retailer page before buying.

Illustrative image for a wireless gaming mouse buying guide

Illustrative image, not an official product photo.

Short answer

Wireless gaming mice fit players who want a cleaner desk, cable-free movement, and gaming-focused controls without switching to a fully wired setup. Compare shape, hand fit, connection type, battery setup, weight, button layout, software support, and compatibility before choosing one.

Search reference

Wireless gaming mouse options

Compare current options and verify details on the retailer page before buying.

View matching options

What this product type is

A wireless gaming mouse is a computer mouse designed for games, usually with a gaming sensor, adjustable sensitivity, extra buttons, and wireless connection through a USB receiver, Bluetooth, or multiple modes. Buyers usually compare shape, weight, switch feel, receiver storage, charging or battery type, button count, software requirements, and platform compatibility.
This guide treats the seed listing as a category signal only. Compare current matching options and verify details on the retailer page before buying.

Who this is for

  • PC players who want cable-free movement on a gaming desk.
  • Laptop users who switch between work and casual gaming.
  • Buyers replacing a basic mouse with a more configurable option.
  • People who want extra buttons for shortcuts, games, or productivity.

Who should skip it

  • Skip it if you do not want to manage batteries or charging.
  • Compare wired mice if lowest possible latency is your only priority.
  • Avoid complex software-heavy models if you need simple plug-and-play use.

What to verify before buying

  • Check connection type, receiver requirements, Bluetooth support, and platform compatibility.
  • Verify battery type, estimated runtime wording, charging cable, and receiver storage.
  • Review shape, size, weight, grip style, and whether the design suits your hand.
  • Check button count, onboard memory wording, software requirements, and profile support.
  • Confirm sensor claims, sensitivity range, polling-rate wording, and warranty details on the current page.
  • Review return policy and seller information before buying.

Main buying notes

Shape matters more than spec sheets for many buyers. A mouse can have strong technical claims and still feel wrong in hand.
Wireless connection type should match your setup. Some mice rely on a USB receiver, while others offer Bluetooth or wired fallback.
Battery setup affects daily use. Replaceable batteries, rechargeable packs, and USB charging all change the routine.
Software can be helpful, but it can also be a hassle. Check whether required features need a desktop app.

Limitations

  • Battery life varies with settings, lighting, and usage.
  • Some advanced features may require software that is not available on every platform.
  • Wireless receivers can be easy to misplace if there is no storage slot.
  • Fit, weight, and click feel are personal and hard to judge from specs alone.

Alternatives to compare

  • Wired gaming mice for simple connection and no battery management.
  • Lightweight office mice for productivity-first setups.
  • Ergonomic vertical mice for wrist-position comfort.
  • Trackpads or compact travel mice for portable use.

FAQ

What should I verify before buying a wireless gaming mouse?

Verify connection type, battery setup, hand fit, weight, button layout, software support, compatibility, and return policy.

Is Bluetooth enough for a wireless gaming mouse?

Bluetooth may be fine for casual use, but many gaming mice also include a USB receiver. Verify the connection modes before buying.

Do wireless gaming mice need software?

Some features may require software. Check whether sensitivity, buttons, lighting, or profiles need an app.

Should I choose rechargeable or replaceable batteries?

Choose rechargeable if you prefer cable charging, or replaceable batteries if quick swaps fit your routine better.

Does a higher sensitivity number make a better mouse?

Not by itself. Shape, sensor behavior, weight, buttons, and software support also matter.

Over-Ear Bluetooth Headphones: Who They Fit and What to Check Before Buying

Product links are for reference. Verify current details on the retailer page before buying.

Illustrative image for a over ear bluetooth headphones buying guide

Illustrative image, not an official product photo.

Short answer

Over-ear Bluetooth headphones are useful for commuting, desk work, travel, and private listening when comfort and wireless use matter. Compare fit, ear-cup size, controls, battery wording, charging port, microphone needs, noise features, and connection compatibility before choosing one.

Search reference

Over-ear Bluetooth headphone options

Compare current options and verify details on the retailer page before buying.

View matching options

What this product type is

Over-ear Bluetooth headphones are wireless headphones with ear cups that sit around the ears instead of directly inside them. Buyers usually compare comfort, clamping pressure, battery wording, microphone quality, control layout, codec or wired-use notes, app support, and whether noise-control features fit their environment.
This guide treats the seed listing as a category signal only. Compare current matching options and verify details on the retailer page before buying.

Who this is for

  • Commuters who want wireless listening with more ear coverage than earbuds.
  • Desk workers who wear headphones for long sessions.
  • Travelers comparing portable audio gear for flights, hotels, or shared spaces.
  • Buyers who want physical controls and larger ear cups instead of tiny earbuds.

Who should skip it

  • Skip them if you need pocket-size audio gear above all else.
  • Skip bulky over-ear designs if heat buildup or hair pressure bothers you.
  • Compare wired studio headphones if low-latency wired monitoring is your main need.

What to verify before buying

  • Check battery wording, charging port, and included cable details on the current retailer page.
  • Verify Bluetooth version, device compatibility, and whether wired use is supported.
  • Compare ear-cup size, headband padding, folding design, and case availability.
  • Review microphone and call-control notes if you plan to use them for meetings.
  • Check noise-control wording and do not assume every model cancels sound the same way.
  • Review seller information and return policy before buying.

Main buying notes

Comfort is personal. Ear-cup depth, clamping pressure, and headband padding can matter more than a long feature list.
Battery claims should be verified on the current page. Your actual runtime can vary with volume, noise settings, calls, and age of the battery.
Noise features are not all equal. Some models focus on passive isolation, while others add active noise-control modes.
Controls should match your routine. Check whether volume, pairing, calls, and sound modes are easy to use without looking.

Limitations

  • Over-ear headphones are bulkier than earbuds.
  • Long sessions can feel warm depending on padding and room temperature.
  • Wireless audio latency can vary by device, app, and connection mode.
  • Battery performance and noise-control behavior can vary by model and settings.

Alternatives to compare

  • True wireless earbuds for pocketable daily carry.
  • Wired headphones for no-battery listening.
  • Open-back headphones for quiet home listening where sound leakage is acceptable.
  • On-ear headphones for a smaller design with less ear coverage.

FAQ

Are over-ear Bluetooth headphones better than earbuds?

They can offer more ear coverage and larger controls, while earbuds are usually smaller and easier to pocket.

What should I verify before buying over-ear Bluetooth headphones?

Verify comfort details, battery wording, connection compatibility, controls, microphone notes, noise features, and return policy.

Do all over-ear Bluetooth headphones cancel noise?

No. Check the current retailer page for the exact noise-control wording and feature set.

Can I use over-ear Bluetooth headphones for calls?

Many models support calls, but you should verify microphone and call-control notes before buying.

Is battery life the most important feature?

Battery life matters, but comfort, connection stability, controls, and intended use can matter just as much.

Anker USB-C to USB-C Cable 2-Pack: Who It Fits and What to Check Before Buying

Product links are for reference. Verify current details on the retailer page before buying.

Illustrative USB-C cable image for a buying guide

Illustrative image, not an official product photo.

Short answer

The Anker USB-C to USB-C cable 2-pack is worth considering if you need spare USB-C cables for charging compatible phones, tablets, or laptops. The most important step is confirming that both ends, length, charging support, and data or display limitations match your devices.

Search reference

USB-C to USB-C cable 2-pack options

Compare current options and verify details on the retailer page before buying.

View matching options

What this product is

This is a USB-C to USB-C cable listing for a two-cable pack.

Visible product information references a 3.3 ft length, 60 W Power Delivery wording, 480 Mbps data-transfer wording, and a note that it is not a USB-A or Lightning cable.

This draft does not independently confirm cable certification, charging results, display output behavior, or compatibility with every device. Verify the current retailer page before buying.

Who this is for

This USB-C charging cable set may fit:

  • buyers who need USB-C on both ends rather than USB-A to USB-C
  • people who want spare charging cables for a desk, bag, or travel kit
  • phone, tablet, and laptop users comparing cable length and charging support
  • users who understand that the charger and device also affect charging speed

Who should skip it

Skip or compare more options if:

  • your charger has a USB-A port instead of a USB-C port
  • your device still uses a Lightning connector and no adapter is planned
  • you need a cable for video display output and cannot verify support
  • you need a longer cable for bedside, couch, or car use

What to verify before buying

  • Confirm both ends are USB-C and match your charger and device.
  • Check the selected cable length and pack count before buying.
  • Verify charging wattage wording against your device and charger requirements.
  • Check whether data-transfer speed and video-output limitations match your use case.
  • Review current compatibility notes, seller information, and return policy.

Main buying notes

USB-C cables can look similar while supporting different charging, data, and display behavior. Before buying, match the cable to your actual charger, device, and use case.

A two-pack can be useful when you want one cable at a desk and one in a travel pouch. It is less useful if the listed length is not right for where you charge.

The visible listing includes a note that the cable does not work with Lightning port devices or USB-A chargers. That distinction is often the deciding factor for buyers.

Limitations

  • It is not for USB-A chargers unless you also use a separate compatible adapter.
  • It is not for Lightning-only devices without an adapter or different cable.
  • Visible listing information says it does not support media display; verify current wording before buying.
  • Fast charging depends on the cable, charger, device, and charging protocol together.

Alternatives to compare

  • USB-A to USB-C cables if your charger has USB-A ports
  • longer USB-C cables for bedside or couch charging
  • higher-rated USB-C cables if your laptop requires more power
  • USB-C cables with verified video support if display output matters
  • short cables for power banks and compact travel kits

FAQ

Is this USB-C on both ends?

Yes. The visible listing describes a USB-C to USB-C cable. Confirm your charger and device both use USB-C before buying.

Will it work with a USB-A charger?

The visible listing note says it is not for USB-A chargers. Use a matching cable or charger for your setup.

Will it work with Lightning port devices?

The visible listing note says it does not work with Lightning port devices. Verify your device connector before buying.

Does it support video output?

The visible listing note says it does not support media display. Choose a cable with verified display support if you need video output.

What should buyers check first?

Start with connector type, cable length, charging support, data-transfer needs, display-output needs, and seller information.

Govee Smart Light Bulbs A19 4-Pack: Who It Fits and What to Check Before Buying

Product links are for reference. Verify current details on the retailer page before buying.

Illustrative smart light bulbs image for a buying guide

Illustrative image, not an official product photo.

Short answer

The Govee Smart Light Bulbs A19 4-pack is worth considering if you want color-changing smart bulbs for basic smart-home lighting and you already plan to verify app, network, and voice-assistant compatibility.

The main things to verify are the current bulb base, Wi-Fi requirements, app setup, room brightness needs, and whether the listed assistant compatibility matches your existing smart-home setup.

Search reference

A19 smart light bulb options

Compare current options and verify details on the retailer page before buying.

View matching options

What this product is

This is a Govee smart LED light bulb listing for a color-changing A19 bulb 4-pack.

Visible product information from the linked page shows:

  • Brand: Govee
  • Product type: smart LED light bulbs
  • Form factor wording: A19
  • Pack size: 4-pack
  • Connectivity wording: Wi-Fi and Bluetooth
  • Compatibility wording: Alexa and Google Assistant
  • Color wording: RGBWW color output
  • Brightness wording visible in the title: 800 lumens
  • Feature wording: music sync

The visible information does not confirm the exact base type, supported Wi-Fi band, app requirements, dimmer-switch compatibility, or room coverage in this draft. Verify those details on the retailer page before buying.

Who this is for

These smart bulbs may fit buyers who:

  • want several smart bulbs for one room or a small multi-room setup
  • want color-changing lighting rather than only warm or cool white lighting
  • already use Alexa or Google Assistant and want to compare compatibility
  • want Wi-Fi and Bluetooth wording in the listing
  • want a 4-pack instead of buying a single bulb

They may also fit renters or casual smart-home users who want lighting changes without installing new fixtures.

Who should skip it

Skip or compare more options if:

  • your fixtures do not accept the current bulb base or bulb shape
  • your home network setup is not compatible with the listed requirements
  • you need verified support for a specific smart-home platform not shown in the visible title
  • you need very high brightness for task lighting
  • you need bulbs that are explicitly compatible with wall dimmer switches

Do not assume every fixture, router, dimmer, or automation platform will work. Compatibility should be checked before buying.

What to verify before buying

Before buying, verify these details on the product page:

  • Confirm the bulb base and fixture compatibility
  • Check the required Wi-Fi band and app setup process
  • Confirm whether Bluetooth is used for setup, control, or both
  • Check whether Alexa and Google Assistant support matches your devices
  • Compare 800-lumen wording with your room brightness needs
  • Confirm whether the bulbs are compatible with enclosed fixtures or dimmer switches
  • Check return policy, delivery timing, and seller information

Main buying notes

The main appeal is smart color lighting in a multi-bulb pack. A19 smart bulbs can be useful for bedrooms, living rooms, desks, lamps, and ambient lighting where color scenes and app control matter.

The trade-off is setup dependency. Smart bulbs rely on the correct fixture, network, app, account, and assistant connection. If one part of that chain does not match your home, the experience can become annoying fast.

If your priority is simple white light, compare standard LED bulbs or tunable white bulbs. If your priority is automation, check platform compatibility first.

Limitations

  • The visible product information does not confirm the exact bulb base in this draft.
  • The visible product information does not confirm the required Wi-Fi band.
  • The visible product information does not confirm compatibility with enclosed fixtures or wall dimmer switches.
  • Voice-assistant compatibility should be verified against your current smart-home devices.
  • Long-term app support, connection stability, and color accuracy cannot be judged from the visible product information alone.

Alternatives to compare

Before deciding, compare it with:

  • single smart bulbs if you only need one fixture
  • tunable white bulbs if color lighting is unnecessary
  • smart light strips for indirect accent lighting
  • smart plugs if you want to control existing lamps without replacing bulbs
  • bulbs with clearly listed support for your preferred smart-home platform

The right choice depends on whether you value color scenes, voice control, brightness, app setup, or platform compatibility most.

FAQ

Is this a 4-pack of smart bulbs?

Yes. The visible title describes a color-changing A19 smart bulb 4-pack. Verify the current selected listing before buying.

Does it support Wi-Fi and Bluetooth?

The visible product information lists Wi-Fi and Bluetooth connectivity. Check the current page for setup details and network requirements.

Does it work with Alexa and Google Assistant?

The visible product information lists compatibility with Alexa and Google Assistant. Verify current compatibility details against your own devices before buying.

How bright are the bulbs?

The visible title states 800 lumens. Compare that wording with your room size, fixture type, and brightness expectations before buying.

What should buyers check first?

Start with bulb base, fixture fit, Wi-Fi requirements, app setup, voice-assistant compatibility, and whether your fixture uses a wall dimmer.

Wireless Mice: Who They Fit and What to Check Before Buying

Product links are for reference. Verify current details on the retailer page before buying.

Illustrative image for a wireless mouse buying guide

Illustrative image, not an official product photo.

Short answer

Wireless mice are a simple upgrade for laptop and desk setups when you want less cable clutter and more comfortable pointer control. Compare receiver type, Bluetooth support, hand fit, battery setup, and device compatibility before buying.

Search reference

Wireless mouse options

Compare current options and verify details on the retailer page before buying.

View matching options

What this product type is

A wireless mouse is a cable-free pointing device for laptops, desktops, tablets, and compact workspaces. Buyers usually compare connection type, hand shape, button layout, battery style, tracking behavior, and operating system compatibility.

This guide treats the seed listing as a category signal only. Compare current matching options and verify details on the retailer page before buying.

Who this is for

  • Laptop users who want a more comfortable pointer than a trackpad.
  • Desk users who prefer a cleaner setup with fewer cables.
  • Students or office users who need a compact mouse for a bag.
  • Buyers comparing basic productivity mice rather than specialized gaming gear.

Who should skip it

  • Skip basic wireless mice if you need advanced gaming latency controls or many programmable buttons.
  • Skip USB receiver models if your device lacks a matching port and you do not want an adapter.
  • Compare ergonomic designs if standard small mice cause hand discomfort.

What to verify before buying

  • Confirm whether the mouse uses Bluetooth, a USB receiver, or both.
  • Check device and operating system compatibility on the current retailer page.
  • Verify battery type, charging method, and any battery-life wording.
  • Compare hand size, shape, grip style, and button placement.
  • Check tracking surface guidance if you use glass, fabric, or uneven desks.
  • Review seller information and return policy before buying.

Main buying notes

Connection type is the first decision. A USB receiver can be simple, but it occupies a port. Bluetooth can reduce dongles, but setup depends on the device.

Hand fit matters more than a spec sheet suggests. A compact mouse is easy to carry, while a larger shape may feel better for long desk sessions.

Battery setup changes daily use. Some models use replaceable batteries, while others recharge by cable. Verify current wording before buying.

For work and study, a reliable basic mouse may be enough. For gaming, design, or accessibility needs, compare more specialized options.

Limitations

  • Wireless performance can depend on the receiver, Bluetooth environment, surface, and device settings.
  • Small travel mice may not be comfortable for long sessions.
  • Battery-life wording is not a guarantee for every usage pattern.
  • Some features may require software that is not available on every operating system.

Alternatives to compare

  • Wired mice if you want no batteries or pairing steps.
  • Ergonomic vertical mice for wrist-position preferences.
  • Trackballs for small desks or limited arm movement.
  • Gaming mice if adjustable performance and extra buttons matter.

FAQ

Should I choose Bluetooth or a USB receiver?

Choose based on your device ports, pairing preference, and whether you want to keep a receiver connected. Verify compatibility before buying.

Is a compact wireless mouse good for daily work?

It can be, but hand size and grip style matter. Compare dimensions and shape if you use a mouse for long sessions.

What battery details should I check?

Check whether the mouse uses replaceable batteries or rechargeable power, and verify the current battery-life wording on the retailer page.

Will a wireless mouse work on every surface?

No. Tracking can vary by surface and sensor type, so verify surface guidance if you use glass, fabric, or glossy desks.

What should I verify first?

Verify connection type, compatibility, hand fit, battery setup, button layout, and return policy before buying.