Taking Cake on the Road: Choosing a Carrier with Enough Room

Product links are for reference. Verify current details on the retailer page before buying.
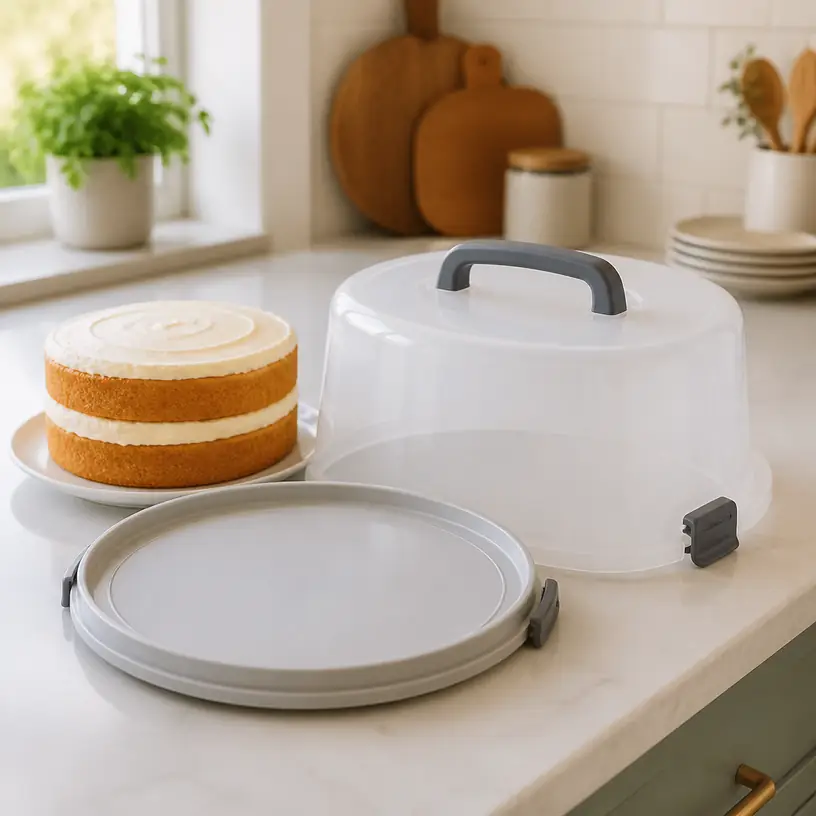
Illustrative image of a generic cake carrier with a handled dome lid on a kitchen counter

Illustrative image, not an official product photo.

Short answer

Measure the cake after frosting and decorating, not just the pan that baked it. A useful carrier needs spare room around the widest decoration and above the tallest swirl, topper, or stacked layer. Compare the carrier’s usable interior diameter and height with those finished measurements, then inspect how the base supports the cake board, where the latches sit, and whether the top handle transfers the load through a secure structure. A reversible base can add serving flexibility, while a flat interior is usually easier to clean and less likely to catch a thin board. For occasional trips, fit and dependable closure matter more than extra compartments. For frequent baking, also plan where the bulky dome will live between events.

Search reference

Cake carriers with lids

Compare usable interior dimensions, base profile, latch placement, handle support, care instructions, and storage footprint for the cakes you actually make.

View matching options

Draw a box around the finished cake

A cake carrier is really a clearance decision. Start with a cake you make regularly and note four measurements: the diameter of the cake board, the widest frosting or decoration, the height from the bottom of the board to the top of the cake, and the tallest removable or permanent topper. If the cake is rectangular, measure both sides as well as the diagonal clearance needed to set it down without scraping an edge.

External product dimensions do not answer this question. The lid wall may taper inward, the handle may intrude into the dome, or a ridge around the base may reduce the flat area available to a cake board. Look for interior measurements and a diagram showing where those measurements were taken. If only overall dimensions are listed, there is not enough information to promise that a close-fitting cake will clear the lid.

Leave working room rather than matching the numbers exactly. Fingers or a cake lifter need space to lower and retrieve the board. Piped borders can extend beyond the sponge, and tall frosting can shift slightly during a warm trip. Extra clearance should not be confused with stability, though: a much larger base lets the board slide unless the carrier or your transport setup provides an appropriate restraint.

Who this is for

  • Home bakers carrying layer cakes, cheesecakes, coffee cakes, or other round desserts to family gatherings, school events, and shared meals.
  • Hosts who want one covered container that can move from kitchen counter to vehicle to serving table.
  • People replacing improvised cardboard boxes that do not close over tall frosting or offer a reusable handle.
  • Bakers who already use cake boards and can select a carrier around a repeatable board size.
  • Households that have cabinet, pantry, or shelf space for a wide dome when it is not in use.

Who should skip it

  • Skip a round carrier when sheet cakes, loaf cakes, or long rectangular bakes make up most of your transport needs.
  • Choose a cupcake carrier when individual wells and vertical clearance for many frosted cupcakes are the main requirement.
  • Do not rely on a basic plastic dome for multi-tier cakes, elaborate sugar work, or deliveries that require professional boxing and support.
  • A low-profile keeper may be sufficient if the container will stay on the counter and never be lifted by its handle.
  • Anyone short on storage should measure the empty cabinet first; a rigid dome can occupy more space than the bakeware it serves.

What to verify before buying

  • Usable diameter: Confirm the flat area available to the cake board, excluding raised rims, latch housings, and decorative grooves.
  • Usable height: Check clearance at both the center and the outer edge because some domes curve or taper.
  • Base orientation: Determine whether the base is flat, recessed, footed, or reversible, and which side is intended to hold food.
  • Board compatibility: Compare the flat surface with your usual cake-board diameter, thickness, and edge treatment.
  • Latch arrangement: Count the latches, inspect how they engage, and check whether closure can be seen or felt from each side.
  • Handle structure: Look at how the handle joins the lid and how the closed lid joins the base; the entire load depends on that path when carried from the top.
  • Stated load guidance: If a load limit or carrying restriction is provided, compare it with the filled carrier rather than the empty container.
  • Food-contact materials: Verify the current material description and intended contact surfaces instead of inferring suitability from appearance.
  • Care instructions: Check dishwasher placement, hand-washing guidance, temperature limits, and whether latches or seals are removable.
  • Storage dimensions: Measure the full diameter and height, including the handle when folded and when standing upright.
  • Included pieces: Confirm whether cake boards, serving tools, trays, cupcake inserts, or cold packs shown in photos are actually included.

The base does more work than the dome

The base has to keep a cake level while providing room to lift or serve it. A shallow raised rim may help locate the dome, but it can conflict with a board that nearly fills the platform. Deep grooves and molded decoration can collect crumbs or press into an unboarded cake. A simple flat center is versatile, especially when the carrier will also hold pies, tarts, or unfrosted cakes.

Some carriers advertise a reversible base: one side may be flatter for cake while the other has divided sections or molded supports for another food. Inspect both configurations. Reversing the tray can alter the available height, change how the lid engages, or place feet and ridges near the cake board. Versatility only helps when the cake side still provides the dimensions and closure you need.

A cake board is worth planning into the system. It gives you a surface for decorating, moving, and serving without sliding a spatula directly under soft cake at the event. The board should be stiff enough for the finished cake and should sit fully on the carrier base. A board that bridges a raised center or hangs over the flat area can rock even if it technically fits under the dome.

Read the closure before trusting the handle

A top handle is convenient because it leaves the other hand free for a door or bag, but it also encourages the user to suspend the whole cake from the lid. The handle, lid, latches, and base all become part of one load path. A comfortable handle cannot compensate for latches that are only partly engaged.

Look for product photos that show each latch both open and closed. The closure should be accessible without pushing against frosting through the dome, and its engaged position should be easy to confirm. Several distributed latches can help draw the lid down evenly, provided each one is closed. A single missed latch can let the base hang unevenly when the carrier is lifted.

Before the first real trip, practice with the empty carrier and then with a nonfragile, evenly distributed load that stays within the maker’s guidance. Close every latch on a level counter, lift only a short distance, and observe whether the base remains seated. This is a setup check, not a reason to exceed a stated limit or imitate the weight of an unsupported tall cake.

Carry the container level and support it from below whenever conditions are uncertain. A handle does not turn the carrier into a swing-proof case. Keep the other hand ready under the base on stairs, over thresholds, and during transfers into or out of a vehicle.

A carrier cannot correct a warm, unstable cake

The cake itself needs to be ready to travel. Cool and set it according to the recipe before enclosing it. Warm cake can soften frosting and create condensation inside a closed dome. Decorations that lean before departure are unlikely to improve on the road, no matter how strong the carrier looks.

Check whether the dessert requires refrigeration and follow the recipe’s food-storage guidance. A cake dome is an enclosure, not automatically an insulated cooler. If the carrier supports a cold pack, verify where it sits and whether it changes interior height or creates direct contact the recipe does not permit. Do not assume that an optional insert can maintain a safe temperature for a particular duration.

Odors and residual moisture also matter. Wash and dry the carrier before the event, especially if it previously held savory food. Clear plastic makes it easy to see presentation damage, but it may also show condensation. Venting the carrier should only be done when consistent with the recipe, environment, and transport needs.

Plan the vehicle space before departure

The safest available vehicle location is usually a clean, level, stable surface where the carrier cannot slide, tilt, or be struck by other cargo. A soft seat slopes and compresses; a lap moves with the passenger; a trunk may become hot; and the floor may be uneven or dirty. Conditions vary, so inspect the actual vehicle rather than assuming a familiar spot will work.

Measure the carrier’s full footprint and lid height against the intended space. Make sure a door, seatback, parcel shelf, or hatch will not strike the handle. Keep groceries, drink bottles, and loose serving pieces separate so they cannot roll into the dome. Drive smoothly and avoid abrupt turns or stops where possible, but treat physical placement—not careful driving alone—as the primary defense against movement.

At arrival, open the vehicle and clear a path before lifting the cake. Ask another person to handle doors and carry accessories. Place the carrier on a level serving surface before releasing any latch. Open closures gradually and lift the dome straight up so its rim does not drag across decorations.

Tall domes, low domes, and adjustable designs

A low dome stores more easily and may be adequate for unfrosted cakes, pies, or a single modest layer. It is less forgiving of piped tops and center decorations. A tall dome provides options but raises the center of gravity, needs more vehicle clearance, and occupies more cabinet space.

Some products use collapsible, telescoping, or multi-position lids. These can reduce storage height or adapt to several bakes, but seams and moving sections add areas to inspect and clean. Verify whether the lid is meant to travel in every position and how the selected height locks. A collapsible wall that stays stable on a shelf may behave differently when the filled container is lifted.

Opaque carriers protect the cake from view and may hide scuffs, while transparent domes let you monitor clearance and presentation. Visibility does not reveal whether a latch is structurally engaged unless the closure itself is visible. Choose the material and shape around care, fit, and closure rather than appearance alone.

Cleanup and the awkward question of storage

Frosting tends to reach the lid rim, latch recesses, handle joints, and grooves in the base. Review cleaning directions for every piece. “Dishwasher safe” may apply only to a certain rack or component, and a tall dome may not fit without blocking a spray arm. Hand washing is often easier in a large sink, but the dome can be slippery when wet; support it rather than holding it only by the handle.

Dry latch cavities and nested surfaces before reassembly. Closing a damp dome for long storage can trap odors and moisture. If pieces nest, place a soft barrier only if the maker permits it and make sure the lid is not distorted by a heavy object stacked on top.

Measure storage with the handle in its normal resting position. A folding handle can reduce height, but wide latch tabs still add to the footprint. The top of a refrigerator may seem convenient, yet heat, dust, and difficult lifting can make it a poor everyday location. A low shelf where the carrier can be moved with two hands is easier to manage.

Limitations

  • Seller dimensions may describe the exterior rather than the usable cake space, and curved walls reduce clearance near the top.
  • A secure-looking dome does not establish a load capacity or guarantee that every latch is fully engaged.
  • Rigid round carriers are bulky and do not efficiently fit rectangular cakes or mixed dessert assortments.
  • A cake can still slide inside an oversized carrier if the board and base do not provide an appropriate, stable fit.
  • Plastic surfaces may scratch, cloud, stain, retain odors, or deform when cleaned or stored outside their stated limits.
  • A covered carrier does not automatically provide refrigeration, insulation, leak resistance, or protection from severe impact.
  • Tall decorations and tiered structures may need a specialized box, internal supports, or professional transport methods.
  • Product photos cannot show how comfortably a handle feels at the actual filled weight.

Alternatives to compare

A bakery-style cake box and matching board is lightweight, available in many sizes, and easier to store flat, though it may not offer a reusable top handle or moisture-resistant surface. A pie keeper suits lower desserts and may take less cabinet space. A rectangular food carrier accommodates sheet cakes and mixed trays but can leave unused space around a round cake. A cupcake carrier uses individual supports to separate small cakes. A cake stand with a dome works well for serving and counter storage when portability is secondary. Complex stacked cakes may call for tier-specific boxes, supports, and delivery equipment rather than a general household carrier.

FAQ

How much larger should a cake carrier be than the cake?

There is no single allowance that works for every decoration. Measure the cake board and the widest frosting detail, then choose a usable interior diameter that leaves room for fingers or a lifter without letting the board move freely. For height, include all layers, frosting, and permanent toppers, and remember that a curved dome may narrow near the top.

Can I carry the container only by its top handle?

Only as allowed by the current product instructions and load guidance, with every latch completely engaged. Test the closure before the event, keep the carrier level, and support the base with your other hand during uncertain transfers. A top handle is not evidence that the container can tolerate swinging, impact, or an unspecified heavy cake.

Will a standard cake board fit inside a cake carrier?

It depends on the carrier’s flat usable base, not its outside diameter. Compare the board’s actual diameter and thickness with the interior platform, raised rim, and latch housings. If the listing does not provide usable dimensions, ask for them rather than assuming a named cake size proves compatibility.

Can a cake carrier keep a frosted cake cold in the car?

A basic carrier should not be treated as a cooler unless the maker describes an insulated system and explains how it is used. Follow the recipe’s refrigeration guidance, limit exposure as appropriate, and verify any cold-pack placement. The lid’s presence alone does not establish temperature control.

What is the easiest way to store a large cake dome?

Measure a low cabinet or pantry shelf before buying and include the handle and latch tabs. A reversible base or folding handle may help, while a collapsible dome can reduce height if its design and cleaning requirements suit you. Store all pieces clean and dry without placing weight that could distort the lid or closure.
A Tiered Fruit Basket on the Kitchen Counter: Plan for Produce, Reach, and Space

Product links are for reference. Verify current details on the retailer page before buying.

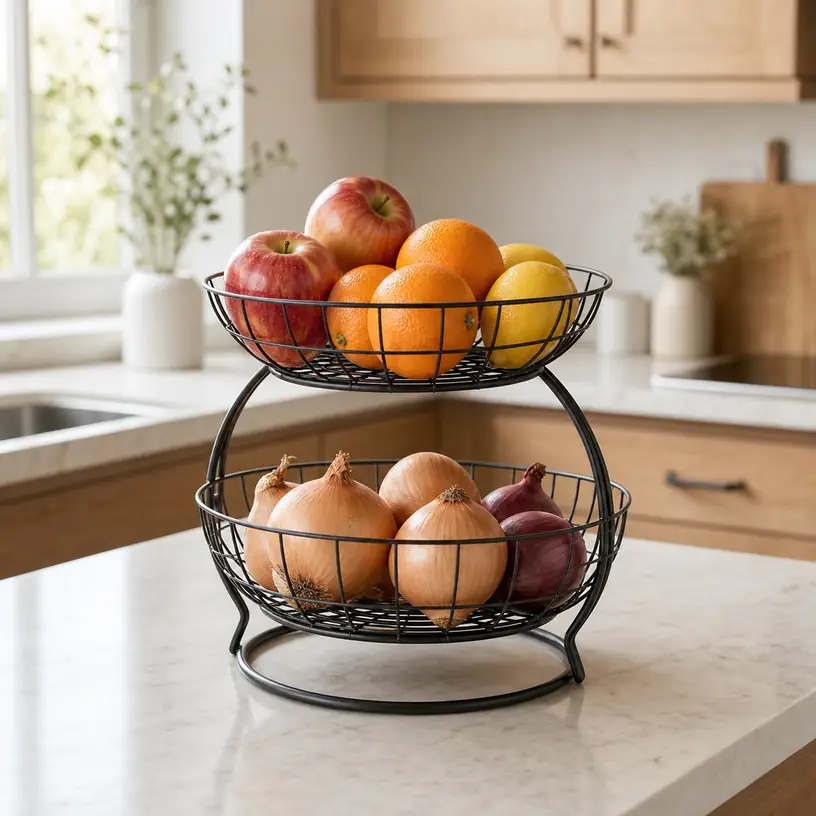
Illustrative image of a generic two-tier fruit basket on a kitchen counter

Illustrative image, not an official product photo.

Short answer

A tiered fruit basket can consolidate countertop produce without using the broad footprint of several bowls, but the upper basket does not create free space—it moves part of the load upward. Measure the full assembled height beneath cabinets, check how far the top tier projects, and make sure both levels remain easy to reach when filled. Then compare basket depth, opening shape, wire or slat spacing, base stability, removable-tier design, and cleaning access with the fruit and vegetables your household actually leaves at room temperature. The useful basket is not the one that holds the most in a listing photo; it is the one that keeps a modest working supply visible without bruising delicate items or taking over the food-prep zone.

Search reference

Tiered fruit baskets for kitchen counters

Compare assembled dimensions, tier access, basket depth, base construction, surface contact, and care instructions with your countertop and usual produce.

View matching options

Start with one week of countertop produce

Before shopping, notice what is already occupying bowls, plates, paper bags, or loose corners of the counter. A home that keeps a few apples and citrus fruits out needs a different organizer from one that regularly stores onions, garlic, bananas, and larger pieces of produce. Count an ordinary week rather than the fullest grocery trip of the year. This keeps an occasional melon or bulk purchase from driving the size of a permanent kitchen fixture.

Separate storage decisions from display decisions. A basket may improve visibility and circulation around some items, but it does not make every fruit or vegetable suitable for room-temperature storage. Ripeness, climate, household practices, and the guidance supplied with the produce still matter. Plan another appropriate place for items that need refrigeration, darkness, separation, or a different container. If you are uncertain about a particular item, check current food-storage guidance instead of treating the basket as a universal produce station.

Now divide the counter group by size and handling needs. Firm apples or citrus may tolerate a different position from soft pears, ripe peaches, tomatoes, or other easily marked produce. Tiny garlic bulbs can slip through large openings. Long bananas do not behave like round fruit, and a bunch may block access to everything below it. This simple inventory reveals whether two open baskets are useful, whether one tier needs a liner, or whether a separate banana hanger is an unnecessary complication.

Who this is for

  • Households that keep a repeatable, moderate amount of produce on the counter and want it visible in one defined zone.
  • Small kitchens where vertical storage could replace two or more separate bowls without blocking an upper cabinet.
  • Grocery routines that benefit from separating firm produce from softer or smaller items.
  • Renters who want freestanding storage with no drilling or permanent cabinet changes.
  • Cooks who prefer to see countertop produce before planning snacks and meals.
  • Shared kitchens where a clear basket boundary can keep loose fruit away from mail, keys, appliances, and the active prep surface.

Who should skip it

  • Skip a tall tiered unit if low cabinets leave too little room to load and unload the upper basket naturally.
  • Keep a simple low bowl if only a few pieces of fruit are normally stored at room temperature.
  • Choose another storage method when most of your produce follows refrigeration or other specific storage guidance.
  • Avoid a deep, narrow basket if shorter household members cannot see or reach the bottom safely.
  • Do not add a permanent organizer when the counter is already short on uninterrupted chopping and appliance space.
  • A wall-mounted or hanging solution is a separate installation decision; do not assume a freestanding frame can be improvised into one.

What to verify before buying

  • Assembled footprint: Measure the widest and deepest points, including feet, handles, outward-curving baskets, and any banana hook.
  • Total working height: Include the frame and anything expected to sit or hang above the upper rim, then allow hand clearance below cabinets and shelves.
  • Tier opening: Check whether the lower basket can be loaded from the front without lifting off the top basket or knocking produce against the frame.
  • Usable basket dimensions: Compare the inside width, depth, and rim height with the produce you buy, not merely the outside dimensions.
  • Gap size: Look at the spacing between wires, slats, or mesh and decide whether small items need a removable, washable liner.
  • Base and feet: Confirm how the frame contacts the counter, whether feet are attached, and what the maker says about use on your surface.
  • Load guidance: Review any stated weight limits and loading instructions for individual tiers and the complete unit.
  • Assembly and joints: Determine whether baskets hook on, screw into place, stack, or separate for independent use.
  • Cleaning access: Check whether the baskets detach, whether joints trap debris, and which cleaning and drying methods are specified.
  • Included pieces: Verify whether hooks, liners, labels, trays, or decorative produce shown in images are actually supplied.
  • Current storage instructions: Confirm that the items you plan to place inside are appropriate for the chosen kitchen location.

Measure the hand path, not only the frame

A dimension diagram can confirm that a basket fits under a cabinet while missing the more important question: can someone use it there? Put a cardboard box or stack of bowls in the proposed position and mimic adding an apple to the upper tier. Your hand needs to pass above the rim, and the fruit needs a short, controlled drop. If the cabinet leaves only an inch or two of clearance, the basket may technically fit but still require pulling the whole unit forward for every item.

The lower basket has a different access path. On many tiered designs, the upper level overlaps it. A low front rim and generous gap between tiers can make the lower section useful for everyday items, while a narrow gap turns it into storage that must be unloaded from the top or reached at an awkward angle. Compare the largest routine item with that front opening. A broad apple, an onion with loose skin, and a bunch of bananas need more maneuvering space than small citrus fruit.

Door and appliance movement also matter. Open the upper cabinet, refrigerator, dishwasher, and nearby drawers while the test object is in position. Leave room to wipe behind the basket and to move groceries through the area. If every counter object has to be shifted before the surface can be cleaned, the organizational gain may disappear during normal kitchen maintenance.

Basket geometry changes how produce rests

A photograph of a filled basket hides much of its internal shape. A rounded bowl draws items toward the center, potentially stacking them several layers deep. A broad, shallow basket spreads the same quantity across more surface area and keeps more pieces visible, but consumes additional counter width. Straight-sided bins use space predictably, though square corners can collect skins and debris.

Rim height affects both containment and reach. A high rim can help keep round fruit from rolling out, yet it asks you to lift each piece farther and may hide what remains at the bottom. An outward-flared rim enlarges the opening but can make the overall footprint greater than the listed base size. Handles are useful when a basket is intended to detach, provided they do not collide with the other tier or steal too much opening space.

Open wire designs leave much of the produce visible and allow air to move around it, but wire spacing should match the contents. Small items can protrude or fall through; delicate skins may rest against a limited number of contact points. Closely spaced mesh contains more shapes but has more intersections to clean. Solid bowls keep loose skins and debris off the counter, though they offer a different ventilation and cleaning arrangement. Material names alone do not settle these tradeoffs—look at the complete shape and follow the current care directions.

Two tiers need a deliberate loading plan

A tiered frame raises the center of gravity as the upper basket fills. Use the unit on a level, stable surface and follow its load guidance. Avoid turning the top into the default location for the heaviest available produce merely because it is easier to see. The best arrangement balances stability, access, ripeness, and the pressure placed on items at the bottom.

Place produce rather than tossing it. A deep pile can hide a softening piece under newer groceries and adds the weight of upper layers to lower ones. A smaller visible quantity is often easier to rotate through meals. When groceries come home, look through what remains before adding more; move items according to appropriate storage guidance and your meal plan rather than automatically burying the older supply.

If the tiers separate, they may offer more flexibility than a fixed tower. Two individual baskets can sit side by side during a large grocery week or move apart when cabinet clearance changes. Confirm whether each basket has feet or a finished bottom before assuming it can be used independently. A detachable upper basket is not necessarily designed to sit directly on a countertop.

Some models add a banana hook above or beside the baskets. Treat the hook as part of the full working envelope. A hanging bunch adds height, swings when touched, and may obscure the upper basket. Check the hook’s stated purpose and load guidance, then make sure the bunch will not contact a cabinet, wall, or fragile items below. If bananas are only an occasional purchase, a simpler two-tier frame may use space more efficiently.

Location matters beyond available space

A fruit basket belongs in a clean, stable place away from obvious contamination and interference with cooking. Do not position it where produce could be exposed to direct splatter, excessive heat, or contact with raw-food preparation. Leave safe clearance from the sink edge and cooking appliances according to the kitchen layout and appliance instructions. Direct sunlight and room conditions can also affect produce, so the brightest open counter is not automatically the most suitable location.

Think about traffic. A basket near the edge of an island may be easy to reach but vulnerable to bags, elbows, and children moving through the room. A deep back corner protects the frame from bumps while making the lower tier difficult to inspect. The practical location is usually visible from the prep area, reachable without leaning over a hot or wet zone, and far enough from the edge that a round item cannot roll directly to the floor.

Countertop material deserves care as well. Grit, trapped moisture, or a rough frame can mark some surfaces. Check the basket maker’s instructions and the counter manufacturer’s care guidance. Keep the contact area clean and dry as appropriate, and do not assume that an added adhesive pad, liner, or coating is compatible with a particular finish.

Cleanup should be part of the weekly routine

Produce baskets collect ordinary debris: onion skins, dried stems, dust, stickers, and residue from an unnoticed soft item. An airy visual design is not necessarily effortless to clean. Closely spaced wire intersections, hollow frame joints, decorative scrollwork, and nonremovable tiers can require more attention than a simple open bowl.

Before buying, imagine removing every item and carrying the empty basket to the cleaning area. Is the complete frame too tall for the sink? Do the baskets release without tools? Can the feet and underside be wiped without turning a heavy assembly awkwardly over the counter? Follow the listed cleaning method, dry the unit as directed, and inspect it before refilling. A removable liner can catch small debris, but it introduces another surface whose material and washing instructions need to be suitable for the intended use.

Cleaning time is also inventory time. Discard items according to household food-safety practices, inspect neighboring produce, and wipe the counter below. Avoid continuously topping up the basket without seeing the bottom. Visibility is one of the main reasons to buy open storage; a periodic empty-and-reset routine preserves that advantage.

Limitations

  • A tiered basket saves horizontal area only by using vertical space and may be awkward under low cabinets.
  • Open storage does not provide the temperature, humidity, darkness, or separation appropriate for every kind of produce.
  • Deep baskets can hide older or delicate items beneath a new grocery load.
  • Tall frames can be less stable if loaded unevenly or placed on an irregular surface.
  • Wire, mesh, slats, and decorative joints all create different contact points and cleanup challenges.
  • A basket full of produce can be heavier and harder to move than its empty product image suggests.
  • Added hooks and handles increase the working envelope and may interfere with cabinets or nearby appliances.
  • Permanent countertop storage reduces the clear surface available for food preparation and cleaning.

Alternatives to compare

A single shallow fruit bowl keeps a small supply easy to see and is simpler to lift for cleaning. Two separate baskets allow different items to occupy different locations without making one tall structure. A ventilated pantry bin may suit items whose storage guidance and pantry conditions are compatible, while keeping the main counter open. A hanging produce basket frees the work surface but introduces ceiling or wall attachment, movement, load, and reach considerations. A rolling kitchen cart creates a larger mobile zone for households with floor space, though it should not become a substitute for appropriate produce storage. For groceries that belong in cooler conditions, use the refrigerator drawers or other recommended storage method instead of choosing a larger countertop organizer.

FAQ

How much room should I leave above a tiered fruit basket?

Leave enough room for your hand and the largest routine item to pass over the upper rim without hitting a cabinet or shelf. Include any handle, hook, and hanging produce in the measurement. Testing the space with a box or stacked bowls is more useful than checking total frame height alone.

Is a two-tier fruit basket better than one large bowl?

It is useful when two levels improve visibility or separation and the kitchen has vertical clearance but limited counter width. One shallow bowl is simpler when the household keeps only a few pieces out, wants easier cleaning, or lacks comfortable access to a lower tier.

What should go in the top and bottom baskets?

There is no universal arrangement. Consider each item’s storage guidance, weight, ripeness, sensitivity to pressure, size, and how often it is used. Keep the frame stable, avoid deep piles, and place delicate produce where it will not be buried or dropped from a height.

Do wire fruit baskets need a liner?

A liner may help contain very small items or loose skins, but it changes airflow, surface contact, and cleanup. Check the basket and liner materials, make sure the liner is intended for the use, and follow its care directions rather than adding an improvised material that stays damp or blocks cleaning.

Can a tiered fruit basket sit under an upper cabinet?

Yes, if the complete unit fits and both levels can be loaded, inspected, and cleaned without repeatedly striking the cabinet or dragging the frame forward. Measure the hand path and the largest produce item as well as the basket itself.

How do I keep countertop produce from being forgotten?

Use a modest quantity, avoid burying older items, look through both tiers before adding groceries, and empty the basket regularly for cleaning and inspection. Plan meals around what is ready to use while following appropriate storage and food-safety guidance.

Ice Cube Trays with Lids for an Easier Freezer Routine

Product links are for reference. Verify current details on the retailer page before buying.

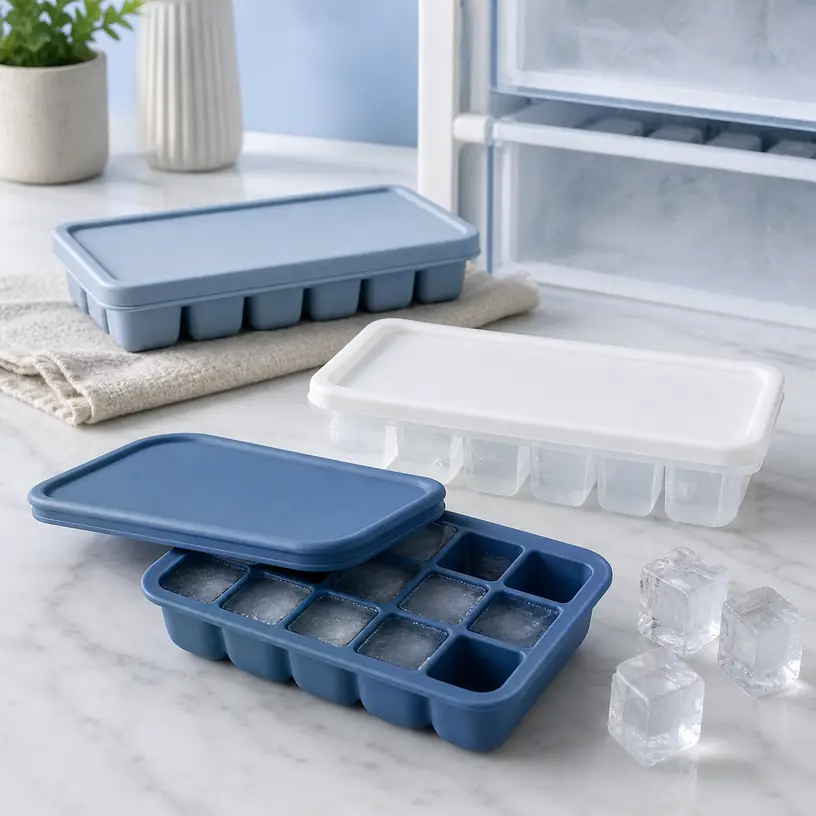
Illustrative image for an ice cube tray with lid buying guide

Illustrative image, not an official product photo.

Short answer

An ice cube tray with a lid can make a crowded freezer easier to manage, but the lid is only one part of the decision. Start with the drinks you usually prepare, then compare cube dimensions, tray rigidity, release method, lid attachment, and the amount of level shelf space available. A low-profile tray may suit daily water bottles, while larger molds are better reserved for glasses that have enough room for slow-melting cubes.

Search reference

Ice cube trays with lids

Compare cube dimensions, covered stacking, fill method, release design, cleaning instructions, and freezer footprint across current options.

View matching options

Let the drinkware choose the cube

Cube shape matters more than an impressive cavity count. Small cubes fit narrow reusable bottles and chill drinks quickly, but a tray full of tiny cavities can take longer to refill. Standard cubes are flexible for everyday glasses. Oversized cubes occupy more freezer space and may not pass through a bottle opening, yet they can be useful for drinks served in wide tumblers.

Measure any narrow bottle mouth before choosing a specialty shape. Product photos can make cubes look smaller than they are, so look for stated cavity dimensions rather than relying on the serving glass shown in the listing. If the goal is batch preparation for a family, compare total usable ice volume as well as the number of cavities.

Who this is for

  • Households that want covered trays for tidier stacking in a shared freezer.
  • Apartment kitchens where several shallow trays are easier to place than a countertop ice maker.
  • People who prepare ice for water bottles, iced coffee, pitchers, or occasional guests.
  • Buyers replacing old open trays that spill when moved from the sink to the freezer.
  • Anyone comparing twist-style rigid trays, flexible-bottom trays, or push-release systems.

Who should skip it

  • Choose a countertop or refrigerator ice maker if the household needs large amounts of ice throughout the day.
  • Skip oversized molds when most drinks use narrow bottles or small glasses.
  • An open tray may be adequate if freezer stacking and covered storage are not concerns.
  • Avoid complicated release mechanisms if simple cleaning and few loose parts are the priority.

What to verify before buying

  • Check cavity length, width, and depth against the drinkware you actually use.
  • Confirm whether the lid snaps on, rests on top, slides into place, or is intended only as a loose cover.
  • Compare filled-tray dimensions with the clear, level area inside your freezer.
  • Review the stated materials, care instructions, temperature guidance, and dishwasher claims on the current listing.
  • Look for an explanation of the release method and whether the tray must sit briefly at room temperature before twisting or pressing.
  • Confirm how water is added and whether a fill line, removable lid, or drain opening affects the routine.

Lid fit and stacking are different questions

A covered tray is not automatically leakproof. Many lids are designed to keep the top covered and help trays stack; they may not prevent water from escaping if a freshly filled tray tilts. A rigid rim can make the trip from sink to freezer steadier, while a very flexible body may need support underneath until the water freezes.

For stacking, check whether the lid bears the weight of another filled tray without pressing into the cavities. Raised edges or alignment features can help, but usable stack height still depends on the freezer shelf. Leave enough clearance to lift the lid instead of sliding a full tray against the shelf above it.

Choosing a release style

Traditional rigid trays release ice by twisting the entire body. They are familiar and often quick, although the force required depends on the material and cavity shape. Flexible trays let you press individual cubes from below, which can be convenient when only a few cubes are needed. Some covered systems use a separate plate, lever, or bin to release a batch at once.

More parts can improve convenience but also add seams, hinges, and corners to wash. Think about whether you usually empty a complete tray or take two cubes at a time. For individual access, a flexible bottom can be useful; for party preparation, a batch-release design may save repeated handling if it works as described.

Filling without creating a freezer puddle

A tray with interconnected channels can distribute water across cavities, while isolated cavities give more control over the fill level. Neither approach is universally easier. Channels may reduce repetitive filling but can leave thin sheets of ice between cubes when overfilled. Isolated cavities take more attention but make it easier to prepare only part of a tray.

Set the tray on a level surface before filling and leave the amount of expansion space recommended by the maker. If the tray includes a lid with a fill port, check how excess water drains and whether the opening is accessible under your faucet. Do not assume the lid makes it safe to carry the tray vertically or at an angle.

Cleaning and repeat use

Ice trays contact both water and the freezer environment, so regular washing and thorough drying matter. Inspect removable lids and release components for narrow grooves that could retain water. If the listing describes the set as dishwasher-safe, verify which pieces that statement covers and whether a specific rack position is recommended.

Odors can also be a practical concern in a shared freezer. A lid may reduce direct exposure, but it is not a substitute for cleaning spills or storing strongly scented food properly. Replace a tray if the material cracks, the lid no longer fits as intended, or damaged surfaces become difficult to clean.

Limitations

  • A fitted lid may help with coverage and stacking without making the tray spillproof.
  • Cube dimensions, not just cavity count, determine whether the ice suits a particular bottle or glass.
  • Flexible trays can be awkward to carry when full unless the rim or base provides enough support.
  • Release performance can vary with fill level, freezer temperature, cavity shape, and how long the ice has been frozen.
  • Lids and multi-part release systems create additional pieces that need washing, drying, and storage.

Alternatives to compare

  • Standard open ice trays for a simple, low-part-count option.
  • Narrow stick molds for bottles with small openings.
  • Large-cube molds for wide glasses and smaller serving counts.
  • Reusable ice packs when the goal is cooling a lunch bag rather than chilling a drink.
  • Countertop ice makers for households that need frequent, higher-volume production.

FAQ

Are ice cube trays with lids leakproof?

Not necessarily. Many lids are intended for coverage and stacking rather than carrying a filled tray at an angle. Look for an explicit claim and handling instructions if spill resistance is essential.

Is a rigid or flexible ice tray easier to use?

A rigid tray is often steadier to carry, while a flexible tray can make individual cubes easier to press out. The better choice depends on whether transport stability or selective release matters more in your routine.

What cube size works for water bottles?

The cube must be narrower than the bottle opening. Measure the opening and compare it with the listed cavity dimensions; consider a narrow ice-stick mold when regular cubes will not fit.

Can covered ice trays be stacked before the water freezes?

Some are designed for filled stacking, but lid strength and alignment vary. Check the maker’s directions, keep trays level, and avoid placing weight on a lid unless the design specifically supports it.

How many ice trays does a household need?

Estimate how many cubes the household uses between refills, then account for freezing time and available shelf space. Two modest trays may be easier to rotate and store than one bulky mold.

Drawer Organizer Trays for Kitchens, Desks, and Everyday Small Items

Product links are for reference. Verify current details on the retailer page before buying.

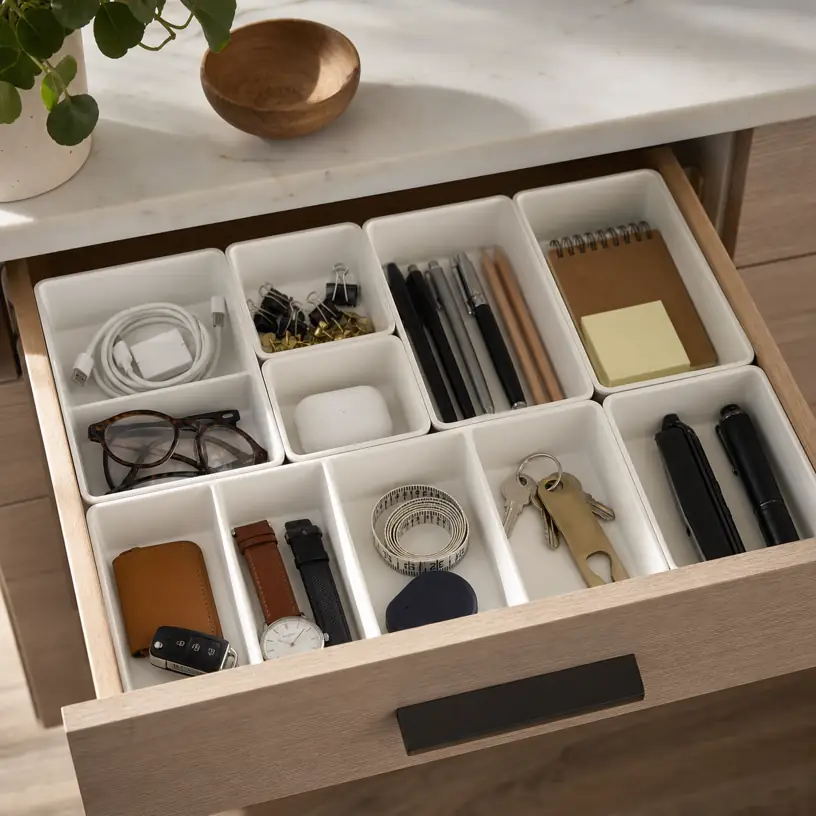
Illustrative image for a drawer organizer trays buying guide

Illustrative image, not an official product photo.

Short answer

Drawer organizer trays work best when a drawer already has a clear job: cutlery beside the sink, pens near a work surface, hair ties in a vanity drawer, or small tools in an entryway console. Start by emptying the drawer and grouping the items you actually keep there. Then compare tray dimensions, compartment shapes, material, cleanability, and whether the layout leaves enough open space for the few oversized items that never fit a perfect grid.

Search reference

Drawer organizer tray options

Compare compartment layouts, outside dimensions, material, drawer depth, and cleaning instructions before choosing trays for a specific drawer.

View matching options

Organize the drawer before choosing the organizer

A tray can make a drawer easier to use, but it cannot decide what belongs in that drawer. The most useful first step is to sort the contents into groups: everyday utensils, backup utensils, office supplies, cosmetics, batteries, keys, craft tools, or small hardware. If the drawer is holding several unrelated categories, a single molded tray may create more frustration than order.

Measure the drawer after removing bulky items and loose packaging. Note the inside width, depth, and height, then subtract a little room so the tray can slide in without scraping. For kitchen drawers, also check whether handles, serving spoons, peelers, or chopsticks are longer than standard compartments. For desk and vanity drawers, short compartments can be helpful for clips and bands, while longer channels are better for markers, brushes, and cords.

Think about maintenance. A kitchen tray may collect crumbs, spice dust, or utensil marks. A bathroom tray may need to handle damp items. A desk tray may only need a quick dusting. Material choice matters less as a status feature and more as a cleaning and fit decision.

Who this is for

  • Households trying to make a kitchen utensil drawer easier to scan during cooking.
  • Home office users who want pens, sticky notes, clips, chargers, and small tools separated.
  • Renters or first-apartment shoppers who need flexible organization without built-in cabinetry changes.
  • Parents setting up a craft, homework, or lunch-packing drawer with repeatable places for small items.
  • Anyone turning a catch-all drawer into a focused storage spot instead of a daily search zone.

Who should skip it

  • Skip fixed trays if the drawer contents change weekly or include many oddly shaped items.
  • Use a deeper bin or caddy if items need to be carried from room to room instead of stored in one drawer.
  • Avoid tall trays in shallow drawers; even a good layout is annoying if the drawer rubs or jams.
  • Do not rely on a tray alone for sharp tools, medications, batteries, or child-safety concerns that need more deliberate storage.

What to verify before buying

  • Measure the inside drawer width, depth, and usable height, not just the cabinet face.
  • Compare compartment length with your longest utensil, brush, marker, tool, or charger cable.
  • Check whether the tray is one fixed piece, a set of separate bins, expandable, or made with movable dividers.
  • Review material wording, edge shape, non-slip features, and whether the bottom may slide on smooth drawer liners.
  • Verify cleaning instructions, especially for kitchen, bathroom, craft, or makeup storage.
  • Check listing photos carefully to see whether accessories shown inside the trays are included or only display props.
  • Confirm the quantity and outside dimensions of every tray in the set before assuming it fills a drawer.

Choosing a layout that will stay useful

Fixed utensil trays are simple when the drawer has one predictable purpose. They are usually easiest for forks, spoons, knives, and a few cooking tools, but they can waste space if the drawer holds a mixed group. Separate modular trays give more freedom because you can leave open pockets for bulky items or rearrange the drawer after a few weeks of use.

Expandable trays can be helpful in wider kitchen drawers, but the expanded side sections are not always the same size as the main compartments. Before choosing one, decide what will live in the extra width. A side channel can work for tongs, straws, food clips, or measuring spoons, but it may not suit wide spatulas or stacked gadgets.

Clear trays make it easy to see crumbs and small items, which can be good or bad depending on the drawer. Bamboo or wood-look trays can feel warmer in a kitchen or desk, but buyers should still verify care instructions and actual material wording. Plastic trays can be light and easy to wipe, yet very thin walls may flex when a drawer is packed tightly. Metal mesh can work for office supplies, though small pieces may catch in openings.

If you are organizing a catch-all drawer, consider using several smaller trays rather than one large insert. The goal is not to fill every inch. A little empty space helps when a new tape roll, charger, notepad, or measuring spoon temporarily joins the drawer.

Limitations

  • A tray cannot fix a drawer that is storing too many unrelated categories.
  • Very specific compartment shapes may become inconvenient when your tools or utensils change.
  • Separate bins can shift unless the drawer liner, tray bottom, or layout keeps them stable.
  • Shallow trays may not contain tall items when the drawer opens quickly.
  • Materials and cleaning guidance vary, so verify the current retailer details before using trays in damp or messy areas.

Alternatives to compare

  • Adjustable drawer dividers for large open drawers or changing storage needs.
  • Small open bins for bathroom, craft, or utility drawers with mixed item sizes.
  • A countertop caddy when items need to move between rooms or work areas.
  • Drawer liners for reducing sliding when you already like the existing layout.
  • Wall hooks, rails, or countertop crocks for long utensils that do not fit comfortably in a drawer.

FAQ

How do I measure a drawer for organizer trays?

Measure the inside width from side to side, the inside depth from front to back, and the usable height below any drawer frame or countertop lip. Leave a little clearance so the tray can be placed and removed without scraping.

Are separate trays better than one large insert?

Separate trays are better when the drawer holds mixed items or may change over time. One large insert is simpler when the drawer has a stable purpose, such as everyday flatware or a focused desk-supply drawer.

What material works best for kitchen drawer organizers?

There is no single best material for every kitchen. Compare cleanability, moisture guidance, wall thickness, edge finish, and whether the tray fits your utensils without forcing long tools into short compartments.

Can drawer organizer trays help with junk drawers?

They can help if you first narrow the drawer to a few useful categories, such as batteries, tape, pens, and keys. If everything stays in the drawer, trays may only create smaller piles instead of a more usable system.

Should organizer trays fill the whole drawer?

Not always. Leaving some open space can make room for oversized tools, temporary items, or a future category. A drawer that is completely packed with compartments can be harder to adapt.

Choosing Glass Food Storage Containers for Leftovers and Meal Prep

Product links are for reference. Verify current details on the retailer page before buying.

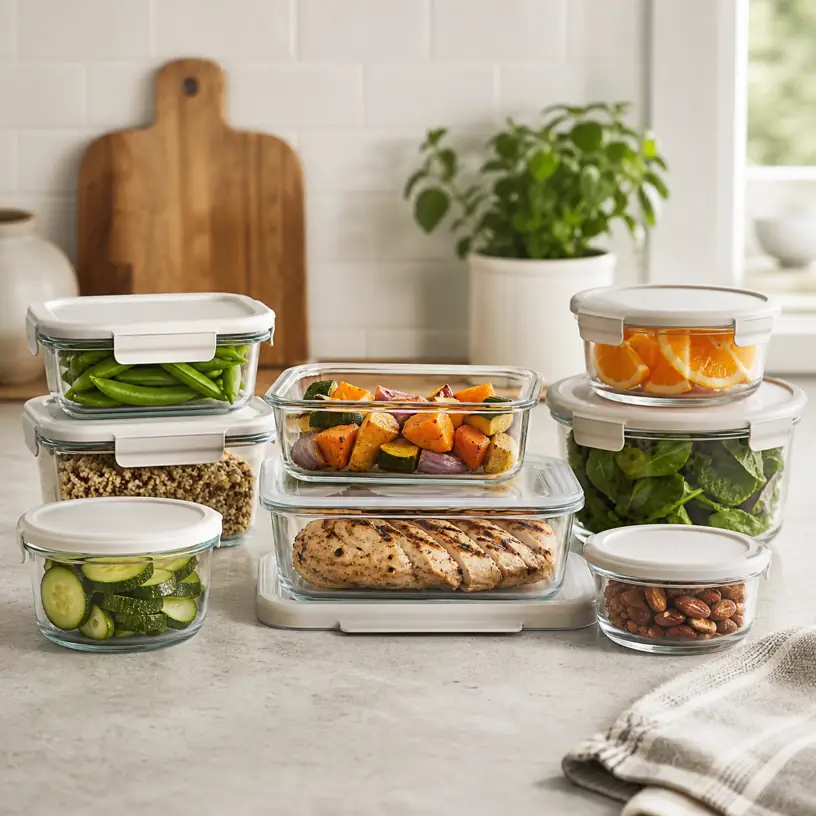
Illustrative image for a glass food storage containers buying guide

Illustrative image, not an official product photo.

Short answer

Glass food storage containers are worth comparing when you want a reusable way to store leftovers, prep lunches, or move food from refrigerator to microwave without switching bowls. Start with the shapes and capacities you actually use, then compare lid design, nesting space, weight, oven or microwave guidance, dishwasher notes, and how easy replacement lids may be to find later.

Search reference

Glass food storage container options

Compare set sizes, lid styles, shape mixes, and care instructions, then verify current details on the retailer page before choosing.

View matching options

Think in meals, not just pieces

A large container set can look generous in a listing, but the useful count depends on how your household stores food. A person packing lunches may need a few shallow rectangular containers that fit a bag neatly. A family saving dinner leftovers may prefer deeper bowls, larger rectangles, or several medium sizes that stack in the refrigerator without hiding the food inside.

The lids matter as much as the glass. Some sets use snap-lock tabs, some use softer press-on lids, and some are designed mainly for storage rather than carrying. If you plan to take soup, sauce, or dressed salads outside the home, read the lid wording carefully and avoid assuming every container is leakproof, freezer safe, or suitable for reheating with the lid attached.

Who this is for

  • Households that regularly store leftovers and want containers that show contents clearly in the refrigerator.
  • Meal-prep routines built around lunches, cut fruit, cooked grains, or ready-to-reheat portions.
  • Kitchens where stain resistance and odor control matter more than the lightest possible container.
  • People replacing mismatched plastic tubs with a smaller set of predictable shapes.
  • Anyone who wants containers that can double as serving bowls when the design and care instructions allow.

Who should skip it

  • Skip glass if you need the lightest option for commuting, school bags, hiking, or frequent travel.
  • Choose another material if containers will often be handled by young children or used on hard outdoor surfaces.
  • Avoid large sets if your cabinets cannot spare room for heavier bowls and loose lids.
  • Do not buy for oven use unless the listing clearly states the glass type, temperature guidance, and lid restrictions.

What to verify before buying

  • Confirm the listed capacities and compare them with your usual portions, not just the number of pieces in the set.
  • Check whether the piece count includes lids, because a 24-piece set may mean 12 containers and 12 lids.
  • Review lid claims for leak resistance, freezer use, microwave use, dishwasher placement, and replacement availability.
  • Compare container shapes with your refrigerator shelves, lunch bag, dishwasher rack, and cabinet space.
  • Look for clear care instructions about thermal shock, hot ovens, sudden temperature changes, and chipped glass.
  • Verify whether containers nest with lids off and whether lids stack together without becoming difficult to match.

Main buying notes

Shape is the first practical choice. Rectangular containers make efficient use of refrigerator shelves and lunch bags, while round bowls can be easier for soups, grains, and stirring. Shallow containers cool food quickly and keep single portions visible, but deeper containers may work better for stews, salad greens, or batch-cooked ingredients.

Lid construction affects daily satisfaction. Snap-lock lids can feel secure, yet the tabs and gaskets may need more careful washing. Flexible press-on lids are simple, but they may not be the best choice for carrying liquids. If the listing mentions removable seals, check how they are cleaned and whether replacements are sold separately.

Glass is also heavier than many alternatives. That weight can make a container feel sturdy on the table, but it can be awkward in a crowded lunch bag or high cabinet. A smaller coordinated set may be more useful than a large bundle with sizes you rarely reach for. If you cook in batches, count the containers needed for your typical week rather than choosing the largest set by default.

Limitations

  • Glass containers can chip, crack, or break if dropped, stacked carelessly, or exposed to temperature changes outside the maker’s guidance.
  • Lids may stain, warp, trap odors, or wear out before the glass bases do.
  • Leak resistance varies by design and should not be assumed for soups, sauces, or commuting.
  • Heavier containers may be inconvenient for kids, office bags, picnics, or upper cabinets.
  • Some sets include awkward sizes that increase the piece count without matching everyday portions.

Alternatives to compare

  • Plastic food storage containers for lighter bags, lower weight, and casual travel.
  • Stainless steel containers for durable dry storage or packed lunches where microwave reheating is not needed.
  • Silicone bags for flexible freezer storage and compact empty storage.
  • Mason jars for soups, overnight oats, sauces, or pantry ingredients when the shape fits the task.
  • Disposable containers for sending food home with guests or taking meals where returns are unlikely.

FAQ

Are glass food storage containers better than plastic?

They solve different problems. Glass is useful when you care about visibility, stain resistance, and reheating guidance, while plastic is usually lighter and less fragile. The better choice depends on where the container will be used and who will carry it.

What size containers are most useful for meal prep?

Many meal-prep routines work best with several medium rectangular containers for single portions, plus a few larger containers for batch-cooked ingredients. Check the listed capacities against your usual lunches instead of relying on photos alone.

Can glass containers go from freezer to microwave?

Do not assume that all glass containers can handle sudden temperature changes. Read the current care instructions for freezer use, thawing, microwave use, lid position, and thermal shock warnings before buying or reheating.

Should I choose round or rectangular containers?

Rectangular containers usually store more efficiently in refrigerators and bags. Round containers can be comfortable for soups, stirring, or serving. A mixed set can help if you store both portioned meals and loose leftovers.

Do replacement lids matter?

Yes. Lids often wear out before the glass bases, especially if they have tabs or removable seals. If you expect to keep the set for years, check whether replacement lids are available for the exact shapes and sizes.

Reusable Produce Bags for Grocery Runs and Kitchen Storage

Product links are for reference. Verify current details on the retailer page before buying.

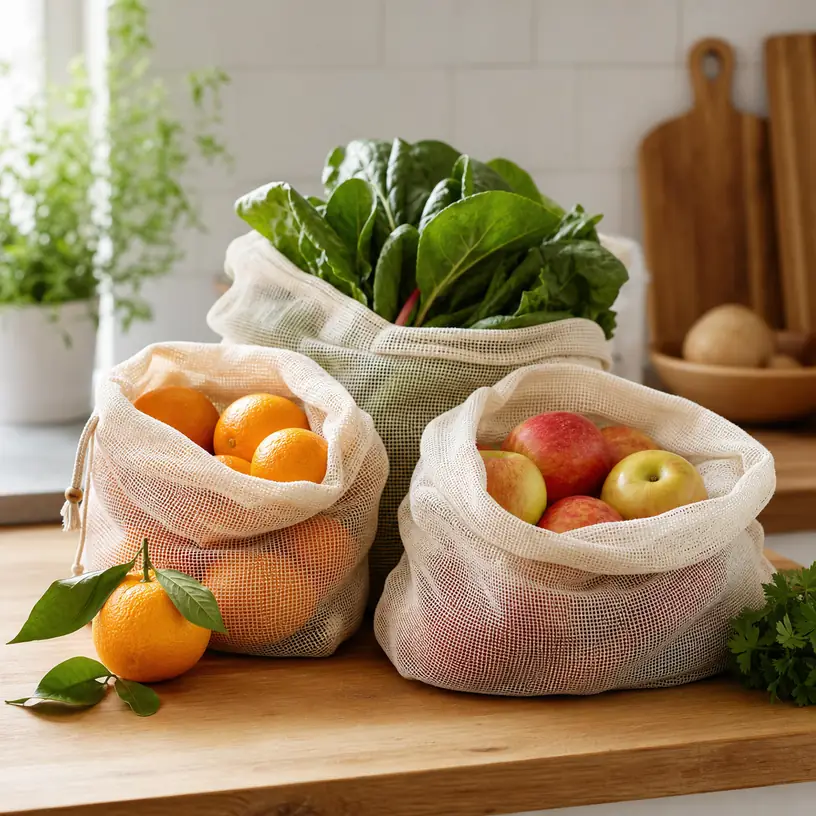
Illustrative image for a reusable produce bags buying guide

Illustrative image, not an official product photo.

Short answer

Reusable produce bags are useful when grocery trips leave you with a drawer full of thin plastic bags or when loose apples, onions, herbs, and greens need a tidier way to move from cart to fridge. The most practical set is not simply the one with the most bags. Look at bag sizes, tare weight visibility, fabric style, closure design, wash instructions, and whether the bags will actually fit the way you shop.

Search reference

Compare reusable produce bag options

Use the search page to compare current mesh, cotton, and mixed-size sets, then confirm bag counts, dimensions, closure details, and care instructions before choosing a set.

View matching options

Think about your grocery routine first

Produce bags work best when they match a repeated habit. A weekly shopper who buys leafy greens, citrus, potatoes, and bulk onions may need several larger bags and a few small ones. Someone who mostly buys bananas and a head of lettuce may only need a compact set that stays in a tote or car console.

Before comparing sets, picture the parts of the shopping trip where the bag will matter. Will cashiers need to see the contents quickly? Do you buy items by weight? Will damp herbs or washed greens go straight into the fridge? Do you want the bags to double as pantry organization for onions, garlic, or snacks? Those answers shape the fabric and closure choice more than a product photo does.

Who this is for

  • Shoppers who want a reusable option for loose fruits and vegetables.
  • Households that already use grocery totes but still rely on disposable produce bags inside the store.
  • People organizing fridge drawers, pantry shelves, farmers market purchases, or bulk-bin items.
  • Buyers who prefer a washable, packable set that can live with other shopping bags.
  • Shared households that need different sizes for quick weekday trips and larger restock runs.

Who should skip it

  • Anyone who rarely buys loose produce or usually buys pre-packed items.
  • Shoppers who cannot use reusable bags at a particular store, market, or local checkout system.
  • Buyers who need sealed, leakproof food containers rather than breathable bags.
  • Households that will not wash and dry the bags when they become damp or dirty.

What to verify before buying

  • Confirm the number of bags, each listed size, and whether the set includes small, medium, and large options.
  • Check the fabric description, such as mesh, cotton, polyester, or a blended set, and match it to visibility and storage needs.
  • Look for tare weight information if the bags will be used for items sold by weight.
  • Review the closure style, including drawstrings, toggles, color tabs, or zipper-like openings.
  • Read the care instructions so you know whether the bags can be machine washed and how they should be dried.
  • Check whether the current option is meant for produce only or also for bulk dry goods, pantry items, or travel organization.
  • Make sure the bags fold small enough to keep with your main grocery tote.

Fabric, visibility, and weighing details

Mesh bags are popular because they let cashiers and household members see what is inside. They also tend to feel light and packable. The tradeoff is that very fine items, small grains, or powdery bulk goods may need a tighter weave or a different container.

Cotton and muslin-style bags can feel more substantial and may be useful for pantry organization, but they can hide the contents and may weigh more at checkout. If your store weighs produce in the bag, the tare weight matters. Some reusable bags display it on a tag or label, while others require you to remember or write it down. Verify the current listing rather than assuming every set handles tare weight the same way.

Closures also deserve attention. A simple drawstring is easy to use, but loose cords can tangle in a drawer or washing machine. Toggles may keep heavier produce from spilling out, while color-coded tabs can help separate bag sizes. None of these details is universal, so compare the current set configuration carefully.

Cleaning and storage habits

Reusable bags only stay practical if they are easy to reset after shopping. If you put damp greens, soil-dusted potatoes, or farmers market produce inside them, plan for washing and full drying before the next trip. A bag that remains damp in a tote can develop odors or mildew, regardless of how convenient it seemed at checkout.

For fridge use, breathable mesh may help you see contents quickly, but it is not the same as a sealed storage container. Delicate herbs, cut produce, berries, or washed greens may need a different storage method depending on how quickly you plan to use them. Treat reusable produce bags as a transport and organization tool, not a universal freshness solution.

Limitations

  • Store policies, checkout equipment, and local rules can affect whether reusable produce bags are convenient to use.
  • Bags are not leakproof and should not replace sealed containers for wet, cut, or spill-prone food.
  • Dark or opaque fabric can make it harder for cashiers to identify produce quickly.
  • Heavier fabric may affect weighed purchases if tare weight is not handled correctly.
  • Drawstrings, toggles, and seams can wear over time, especially with heavy produce or rough washing.

Alternatives to compare

  • Standard reusable grocery totes for boxed, canned, and packaged items.
  • Collapsible crates or market baskets for farmers market trips and heavier produce.
  • Glass or plastic food containers for cut fruit, washed greens, and leftovers.
  • Silicone storage bags for sealed snacks or damp items that should not sit in mesh.
  • Open fridge bins when the main goal is drawer organization rather than shopping.

FAQ

How many reusable produce bags do I need?

For occasional grocery trips, a small mixed-size set may be enough. Larger households or weekly shoppers may want several medium and large bags so onions, apples, citrus, greens, and potatoes do not all share one overfilled bag.

Are mesh or cotton produce bags better?

Mesh is usually easier for visibility and quick checkout, while cotton or muslin-style bags can feel sturdier and may work well for pantry storage. The better choice depends on whether you value see-through convenience, fabric feel, or storage appearance.

What does tare weight mean for produce bags?

Tare weight is the weight of the empty bag. If produce is sold by weight, the bag weight may need to be accounted for at checkout. Check whether the current bag set lists tare weights and whether your store can use them.

Can reusable produce bags go in the refrigerator?

Many people use them in fridge drawers, but they are not sealed containers. For damp greens, cut produce, berries, or foods that need moisture control, compare the bag instructions with a dedicated food storage option.

How should I clean reusable produce bags?

Follow the care instructions for the specific fabric and closure hardware. In general, bags that touch damp or dirty produce should be washed when needed and dried fully before being stored in a tote or drawer.