Luggage Straps for Suitcases: Measure the Packed Case First

Product links are for reference. Verify current details on the retailer page before buying.
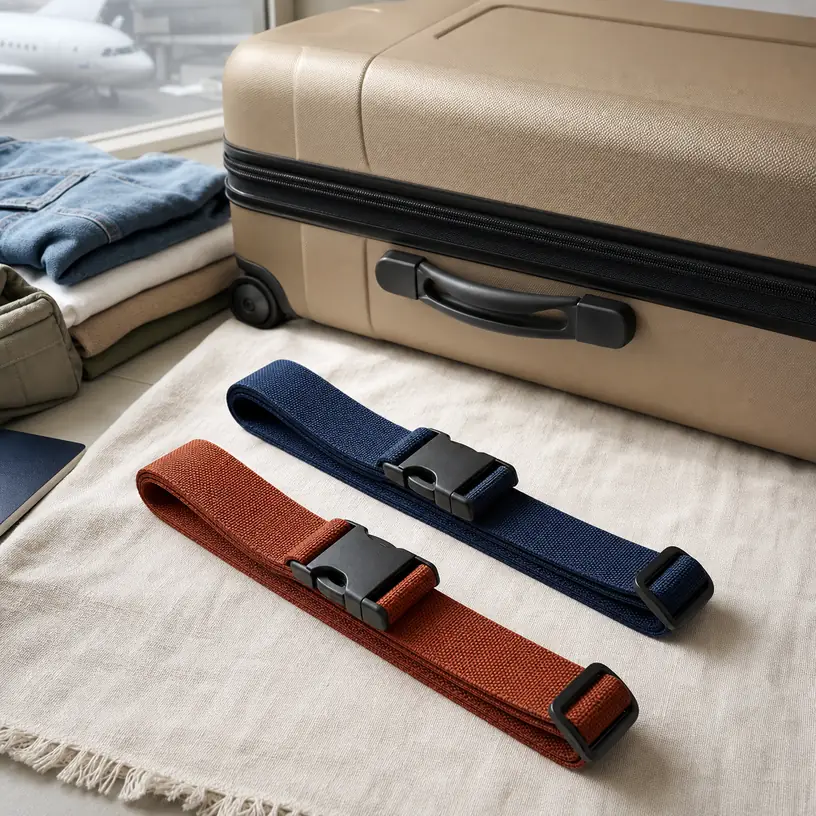
Illustrative image of generic adjustable luggage straps beside a plain suitcase

Illustrative image, not an official product photo.

Short answer

Measure the suitcase as it will actually travel before choosing a luggage strap. Pack and close the case, decide whether the belt will run around its height or width, and measure that complete route while avoiding wheels, feet, handles, and retractable-handle hardware. Then compare the measurement with the strap’s stated adjustment range, leaving enough room to open and close the buckle without relying on an extreme end of that range. A useful strap also needs a buckle that lies flat, an adjuster that holds its position, and a keeper that controls the loose tail. Treat it as an external organizing accessory and a visual identifier—not as a guarantee against opening, loss, damage, or unauthorized access.

Search reference

Adjustable luggage straps for suitcases

Compare adjustment range, webbing width, buckle layout, tail keepers, identification details, and set quantity against the packed cases you plan to use.

View matching options

Draw the strap route before measuring

A suitcase is not a simple box once its wheels, feet, side handle, top handle, zipper path, and telescoping tubes are taken into account. The shortest circumference may be a poor strap route if the belt would sit against a wheel or slide over a rounded corner. Put the closed suitcase upright and trace the intended path with a flexible measuring tape. The tape should lie where the webbing can stay flat without blocking parts needed for normal lifting and rolling.

Measure a soft-sided or expandable case in the packing state you expect to use. An empty case can be noticeably smaller than a filled one, and opening an expansion panel changes the route again. If you alternate between compact and expanded configurations, record both circumferences and check that one strap can accommodate the full interval. For hard-shell luggage, note whether pronounced ribs, tapered sides, or highly rounded corners encourage a belt to migrate.

The advertised strap length may refer to the webbing end to end, the useful closed loop, or a broad adjustment range. Those are not interchangeable. Look for a clear minimum and maximum fitted circumference, then choose a route that falls comfortably inside it. A buckle forced to close at maximum extension leaves little tolerance for packing changes; a strap reduced to its minimum may create a long loose tail or place the adjuster awkwardly against the case.

Who this is for

  • Travelers who want a removable belt around a zippered or latched suitcase as an additional external organizing measure.
  • Households with similar-looking cases that can use a distinct strap color or pattern as one identification cue.
  • People who occasionally use a suitcase expansion panel and are willing to readjust the belt after packing.
  • Travelers replacing a worn strap whose buckle, stitching, adjuster, or webbing no longer inspires confidence.
  • Anyone prepared to remove, inspect, and refit the accessory for each trip rather than leaving it permanently tightened on an empty case.

What to verify before buying

  • Closed-loop adjustment range: Compare both the stated minimum and maximum with your measured packed circumference. Confirm what the seller’s length specification actually describes.
  • Webbing width and route clearance: Check that the belt can lie flat between raised features and does not interfere with wheels, feet, handles, zipper access, or retractable-handle movement.
  • Buckle design: Inspect how the two halves join, where release points sit, and whether the buckle will rest against a relatively flat part of your suitcase.
  • Adjustment hardware: Look for a clear threading path and a means of retaining the free end. The strap should not depend on a dangling tail staying out of the way by chance.
  • Stitching and end finishing: Review close images and current construction details around buckle attachments, loops, labels, and cut webbing ends.
  • Set configuration: Verify whether the listing contains one belt, two independent belts, or an integrated cross-strap assembly. Count alone does not explain how the pieces connect.
  • Identification features: Check the size and placement of any label window or writing panel, as well as the instructions for marking it. A bright belt does not replace a secure luggage tag.
  • Lock wording: If a buckle includes a lock, confirm its operation, key or combination requirements, and current inspection-related claims. Do not assume a lock prevents removal or guarantees suitcase security.
  • Care and storage: Find the approved cleaning method and any guidance on drying, folding, buckle care, or exposure to heat and moisture.

One belt, two belts, or an integrated cross?

A single belt uses the least storage space and is quick to fit. It can create one visible band around the case and may help keep the two sides drawn together, but it supports only one axis. Its route needs to be chosen carefully: a vertical loop may pass near top and bottom handles, while a horizontal loop can approach side handles, expansion zippers, or wheel housings. The better direction is the one that stays clear and stable on your particular suitcase.

Two independent straps let you run one in each direction or use one on each of two cases. Crossing them can reduce movement in more than one axis, but the overlap introduces another raised area and two buckles must be positioned. Independent straps can also drift apart because nothing connects them at the intersection. Fit the complete arrangement at home and roll, lift, and set down the case to see whether either belt shifts toward an edge.

An integrated cross design connects the horizontal and vertical sections at a central point. That connection can make alignment more predictable, yet it also makes sizing more specific: both loops and the location of their intersection must match the suitcase. Check whether each direction adjusts separately and whether the connected section will sit on a smooth panel rather than over a handle recess, zipper junction, or shell contour.

More webbing is not automatically more useful. Each added buckle, adjuster, and crossing point needs somewhere to rest without becoming a protrusion. If one correctly routed strap addresses your organizing goal, a complicated harness may add fitting time and storage bulk without solving a separate problem.

Put the buckle where it can lie flat

The buckle is usually thicker and less flexible than the webbing. Position it on a broad face of the suitcase when the product instructions allow, rather than at a sharp corner or directly beneath a carry handle. A buckle on the bottom can strike the floor; one next to a wheel may interfere with rolling; one over a zipper can complicate access during an inspection or repacking stop.

Before tightening, straighten every twist in the webbing. Feed slack through the adjuster gradually and keep the buckle centered in its planned area. The goal is a snug belt that stays in place during ordinary handling, not maximum compression. Overtightening can distort a soft case, press on contents, pull the belt toward a narrow point, or load the buckle and seams unnecessarily.

After closing the buckle, inspect the free tail. A separate elastic loop, sliding keeper, or compatible retaining detail can keep excess webbing close to the belt. Verify that the keeper still works at your setting—some arrangements look tidy near the middle of the range but leave too much material when fitted to a smaller carry-on. Do not knot the tail or alter the threading unless the maker directs it, because improvised routing can make release and readjustment difficult.

Color helps identification, but use more than one cue

A contrasting strap can make a plain suitcase easier to notice among similar cases, especially when the belt runs across a large visible panel. However, common colors and patterns are shared by many travelers, and an external strap can shift or go missing. Confirm identity using the luggage tag and other appropriate details before taking a bag from a carousel.

If the strap has an address or name panel, decide what information you are comfortable displaying publicly and follow the product’s marking directions. Check whether the panel remains visible after fitting and whether writing can transfer to the case. A label window should hold its insert securely without creating a flap that catches on nearby objects.

Color can also serve a household packing system: one shade for each traveler or a matching pair for a two-bag set. Record which strap belongs to which case before departure. That simple step is more dependable than trying to remember whether a loose belt was fitted to the large checked bag or the smaller case on the return trip.

Fit and inspect it before travel day

Pack the suitcase normally, close all primary fasteners, and route the open strap around the planned path. Keep it clear of moving and lifting parts. Adjust the loop until it is snug, connect the buckle according to its instructions, and secure the free end. Check all sides rather than judging the fit from the front.

Now use the suitcase. Extend and retract the telescoping handle, lift from every intended carry handle, roll across a clean indoor floor, and place the case upright and flat. The strap should not move into a wheel, cover a grip, drag on the floor, or slide abruptly toward a tapered end. Open and refit it once as practice so the threading and buckle are familiar before a busy departure.

Inspect the webbing for cuts, heavy abrasion, fraying, pulled fibers, contamination, or permanent creases. Look closely at stitching, buckle edges, release tabs, adjustment bars, and any lock or label component. Replace a damaged accessory rather than expecting a knot, tape, or travel-day repair to restore its original construction.

At the destination, remove the strap before opening the suitcase. Check whether it picked up moisture or debris, clean it only as directed, and let it dry completely before storage. Loosening it rather than leaving it cinched around an empty soft case also avoids storing the luggage under unnecessary compression.

Keep inspection and carrier handling in mind

A luggage strap does not exempt a bag from security screening or carrier procedures. Personnel may need to open or remove it, and external accessories can be lost or damaged during handling. Review current airline, airport, and security guidance for your route and luggage type before departure. If a product makes a specific inspection-compatible lock claim, verify that wording and understand how the mechanism is intended to be used.

Do not use the belt to attach a loose item to the outside of checked luggage unless the carrier permits that arrangement and the product is expressly intended for it. A jacket, shoe pouch, bottle, or small bag trapped under ordinary webbing can shift or create a snag. Keep the strap itself streamlined, with no dangling tail, decorative charm, or improvised loop.

The belt also does not change baggage size or weight rules. Compression around a bulging soft case may alter its shape without making the packed item compliant, and an extra accessory contributes some weight. Measure and weigh luggage in its final travel configuration, then verify current carrier limits separately.

Who should skip it

  • Travelers whose suitcase maker or carrier advises against external straps or whose case offers no route clear of functional hardware.
  • Anyone expecting a removable belt to prevent theft, guarantee closure, or protect a suitcase from impact and rough handling.
  • Minimal packers using a secure small carry-on who would gain little from another item to fit, remove, and store.
  • Owners of heavily tapered, irregular, or feature-covered luggage on which a flat belt cannot remain positioned.
  • Travelers who cannot manage the buckle or adjustment hardware comfortably; a difficult fastener is unlikely to become easier in a crowded terminal.

Limitations

  • A strap may loosen, shift, snag, break, be cut, or be removed during transit.
  • It cannot guarantee that a zipper, latch, seam, or overpacked case will remain closed.
  • Bright webbing is only one visual cue and cannot establish that a suitcase belongs to you.
  • Locking buckles do not make the webbing tamper-proof or the suitcase secure against every form of access.
  • Generic length labels may omit the practical closed-loop range, buckle position, or amount of loose tail at smaller settings.
  • One fit may not work for both empty and expanded states or for suitcases with different proportions.
  • External hardware can add a protruding point even when the webbing itself sits flat.
  • Airline, airport, and inspection practices can change and may differ by route; check current guidance before traveling.

Alternatives to compare

A suitcase with a closure and latching system that suits your travel pattern avoids adding a separate belt, though its condition still needs inspection. A zipper-pull fastener or suitable lock addresses a different point on compatible luggage; verify current screening and carrier guidance rather than treating it as equivalent to a circumference strap. A distinctive luggage tag and subtle identifier can help with recognition without wrapping the case. An internal compression panel or packing system organizes contents without adding external hardware. If an aging suitcase repeatedly bulges, opens, or sheds components, replacing or repairing the luggage appropriately may be more sensible than using a strap to compensate for structural wear.

FAQ

How do I measure a suitcase for a luggage strap?

Pack and close the suitcase, choose a route that clears wheels, handles, feet, and retractable hardware, then measure the full circumference along that route with a flexible tape. Compare the result with the stated closed-loop adjustment range, not merely the strap’s total end-to-end length. Measure again if you use an expansion panel.

Should a luggage strap go around the height or the width?

Use the direction that gives the strap a flat, stable route without blocking functional parts. The best orientation varies with handle placement, wheel housings, shell shape, zipper layout, and expansion panels. Test the fitted case by rolling and lifting it before the trip.

How tight should a suitcase strap be?

It should be snug enough to stay on its planned route during an at-home handling check, while still allowing the buckle and adjuster to operate normally. Do not pull it so tightly that it distorts the case, compresses contents excessively, strains hardware, or slides toward a narrower part of the luggage.

Are two luggage straps better than one?

Two straps can support two axes or serve two separate suitcases, but they also add another buckle, adjuster, and potential snag point. Use two only when each has a clear route and purpose. An integrated cross design should be checked for independent adjustment and correct intersection placement.

Does a luggage strap keep a suitcase from opening?

A strap can provide an additional external band around a suitcase, but it cannot guarantee that the case stays closed or that the belt remains attached. It does not repair a damaged zipper, latch, seam, or shell, and it should not be treated as theft prevention. Inspect the luggage itself and follow current carrier guidance.
Travel Shoe Bags: Separating Footwear Without Wasting Suitcase Space

Product links are for reference. Verify current details on the retailer page before buying.

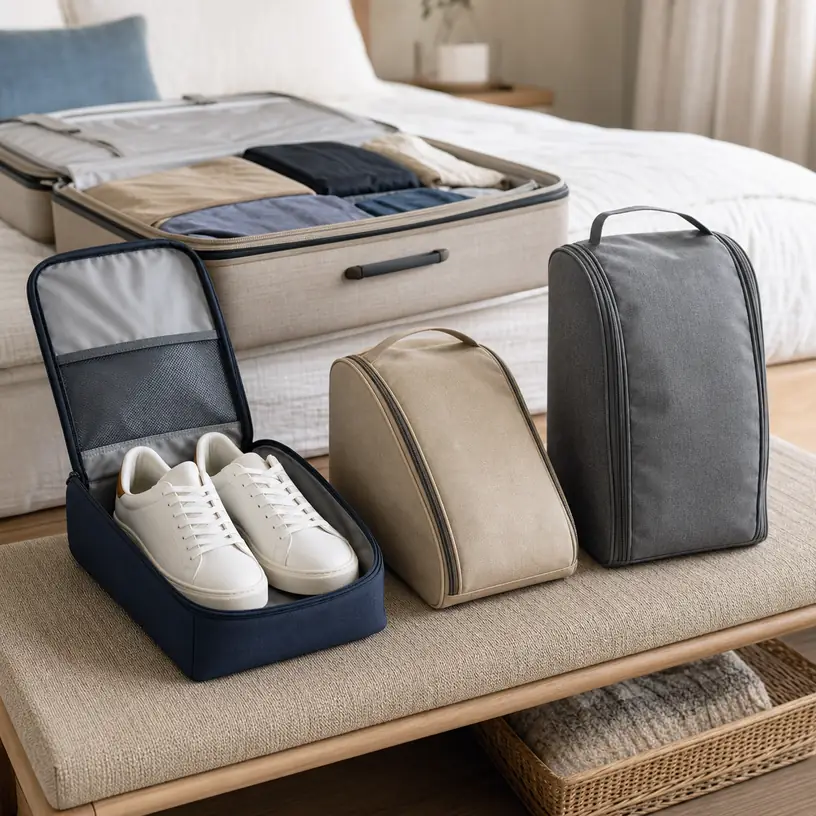
Illustrative image of generic travel shoe pouches beside an open suitcase

Illustrative image, not an official product photo.

Short answer

Choose a travel shoe bag around the largest pair that will actually make the trip, not around a generic shoe-size label. Measure each shoe’s sole length, widest point, and standing height, then allow room for the pair to settle without forcing the zipper around heels or bulky tread. Low sneakers may fit a flat zip pouch, while ankle boots, platform shoes, or two shoes packed side by side can require a taller, boxier shape. Also compare closure placement, empty bulk, carrying handle, current care instructions, and whether mesh or ventilation openings make sense for where the bag will sit. A shoe pouch separates surfaces and loose debris; it does not make damp footwear clean, dry, or odor-free.

Search reference

Travel shoe bags for suitcase packing

Compare listed interior dimensions with your longest and tallest pair, then check zipper layout, fabric, ventilation, care guidance, handle placement, and set configuration.

View matching options

Make a footwear packing map first

Shoe bags look simple, but the object going inside is awkward: a pair is long, often widest at the forefoot, taller at the heel, and rarely forms a neat rectangle. Product photos can make an empty pouch appear spacious even when the zipper opening or upper corners limit what fits. A quick measurement of the intended shoes is more useful than choosing by color or by the number of bags in a set.

Place the pair in the arrangement you would use for packing. Shoes nested heel-to-toe usually create a narrower bundle, while side-by-side placement can be easier to load but needs more width. Measure that bundle at its longest, widest, and tallest points. If the footwear has stiff uppers, a prominent heel, thick tread, or hardware, avoid assuming it can be compressed into dimensions intended for flexible low-cut shoes.

Next, map the suitcase. Decide whether the pouch will lie flat along the base, stand against a side wall, or occupy the space between a packing cube and the case frame. A tall rectangular shoe bag may load easily but waste space around low sneakers. A soft drawstring sack conforms to unused corners but provides less control over how the soles and uppers meet. The right format is the one that fits both the footwear bundle and a specific place in your normal luggage.

Who this is for

  • Travelers who want a removable layer between shoe soles and clothing, accessories, or the suitcase lining.
  • People packing a second pair for work, an event, a gym visit, or a change between walking and dress shoes.
  • Households that want each traveler’s footwear contained separately when several suitcases are packed together.
  • Anyone who prefers to lift a complete pair out of luggage without searching for two individually wrapped shoes.
  • Travelers willing to clean and dry footwear before packing rather than treating the pouch as a substitute for shoe care.

What to verify before buying

  • Usable dimensions: Look for internal or clearly defined bag measurements and compare all three dimensions with the packed pair. Exterior length alone does not describe heel or toe clearance.
  • Opening and zipper path: Check whether the lid opens across three sides, along the top, or through a narrower end panel. The opening must accommodate the widest part of the shoe without excessive bending.
  • Bag shape: Flat envelopes suit different footwear from gusseted boxes. Confirm whether the side panels stand at their listed depth once loaded.
  • Fabric description: Review current material wording, lining details, seam construction, and any water-resistance language. Do not interpret ordinary fabric or mesh as waterproof containment.
  • Ventilation: Identify where mesh panels, eyelets, or other openings are positioned and consider whether they could expose nearby luggage contents to loose debris or moisture.
  • Care method: Confirm whether the pouch is wipe-clean, hand-washable, or machine-washable according to current instructions. Check any drying restrictions as well.
  • Set composition: Verify the quantity and each size in a multipack. A large set is useful only when its mix fits the shoes and travelers in your packing plan.
  • Handle and identification details: Inspect handle attachment, label windows, and viewing panels if you expect to carry the bag separately or distinguish several similar pouches.

Match the pouch shape to the shoes

Flat zip pouches for low-profile pairs

An envelope-style bag can be an efficient choice for slippers, sandals, flats, and some low sneakers because it adds little structure of its own. Look at the zipper opening carefully. A pouch may have enough overall length yet remain difficult to load if the opening stops short of the corners or if the zipper must curve tightly around a thick sole.

A flat bag also encourages the two shoes to rest directly against one another. Decide whether sole-to-sole, heel-to-toe, or a thin internal separator works for the materials involved. Decorative surfaces, light-colored uppers, and projecting hardware may need more deliberate placement than durable casual footwear. Follow the shoe maker’s storage guidance when available.

Gusseted bags for everyday sneakers

A gusset creates depth and can give a pair a more predictable footprint inside the suitcase. This format is often easier to stack beside packing cubes because it loads like a soft rectangular block. However, listed capacity should still be checked against the shoe bundle. The gusset may taper near the toe, and a lid that looks tall in the center may offer less clearance around the zipper seam.

Inspect how the bag behaves when partly filled. Stiff panels preserve the shape but occupy space even without shoes. Very soft panels pack down between uses, though the pouch may slump while it is being loaded. Neither construction is automatically better; the useful choice depends on whether predictable stacking or minimal empty bulk matters more.

Taller formats for boots and raised heels

Ankle boots and other high-profile footwear need standing height as well as sole length. Some tall shoe bags orient footwear upright, while others place one shoe along each side. Study the loading diagram and compare it with the pair’s shaft height, heel profile, and rigidity. Folding a soft boot shaft may be acceptable for some footwear but unsuitable for another pair, so check relevant care guidance rather than assuming.

High heels can create concentrated pressure at the heel tip and an uneven bundle around the toe box. A generic tall pouch organizes the pair but does not necessarily protect its shape. If the shoes are delicate or highly structured, compare a fitted shoe case or the original suitable storage instead of relying on a thin travel bag.

One shared bag or one pouch per shoe?

Packing both shoes in one bag keeps the pair together and reduces the number of closures to manage. It works well when the shoes can be arranged without one sole rubbing an upper. Before departure, try the intended heel-to-toe layout and close the pouch without forcing it. If the zipper path presses directly against a heel or toe, a larger shape may be preferable to pulling harder on the closure.

Individual pouches let each shoe fill a narrow gap in the suitcase and prevent the two shoes from touching. They also make it easier to place footwear around wheel housings or along opposite edges. The tradeoff is tracking two bags and making sure both return after the trip. A set with distinct colors, labels, or another simple identification method can help when multiple travelers use similar pouches.

Some multipacks combine several sizes. That can serve a household packing sandals, sneakers, and boots, but size labels are not standardized. Read the dimensions of every included piece rather than assuming all bags in a set hold the same class of footwear. If only one size works, unused pouches add storage clutter rather than travel value.

Ventilation is a packing decision, not a cure

Mesh panels and eyelets allow more air exchange than a fully enclosed fabric wall, but ventilation does not make wet shoes ready for luggage. Footwear should be cleaned as appropriate, allowed to dry, and checked for trapped debris before it goes into a suitcase. Packing damp items can affect both the pouch and neighboring contents regardless of the marketing language used for the bag.

The placement of openings matters. A large mesh top makes identification easy but reduces separation from the rest of the suitcase. Small openings near the upper side may offer a different balance. If the pouch sits beside clean clothing, consider whether fine dust, sand, or moisture could pass through. A more enclosed wipeable bag may be easier to isolate after a messy outing, while a breathable pouch may suit clean, dry indoor shoes.

No soft shoe bag should be assumed to contain a liquid spill or provide complete odor control. Keep damp, muddy, or strongly soiled footwear out of packed luggage until it has been handled appropriately. If an unexpected wet pair must travel, use a packing method suitable for the situation and unpack it promptly rather than leaving it sealed for storage.

Closure, handles, and care details that earn their space

A three-sided zipper creates a wide lid and lets you place shoes rather than push them through an end opening. It also adds a longer track that can catch if the bag is overfilled. Check zipper position with the planned shoe layout: tread, laces, and heel tabs should remain clear of the slider. Dual pulls can make access flexible, but they do not increase the bag’s usable dimensions.

A short grab handle is useful for lifting the pouch out of a deep case or carrying it from a hotel room to a gym locker. Look at where the handle joins the body and how the loaded bag hangs. A handle on a soft lid may tip the contents differently from one attached to an end panel. Unless the current specifications support it, do not treat a small organizer handle as a feature for prolonged carrying.

Care instructions deserve attention before the first trip. A fabric that can be wiped after routine use may be enough for clean city shoes. A household packing hiking or sports footwear may value a washable construction, but zippers, coatings, stiffeners, and viewing windows can limit the permitted method. Follow the listed instructions, empty debris outdoors where appropriate, and let the pouch dry fully before it returns to a drawer or suitcase.

A simple loading routine

Clean and dry the footwear according to its own care requirements. Remove loose material from tread, fasten straps, and secure laces so they cannot enter the zipper. Arrange the shoes exactly as they were positioned for measurement. If you use a divider, shoe cover, or shape support, include it in the fit test rather than adding it after selecting the bag.

Load the pouch without forcing the corners, then run a finger safely along the inside edge to confirm fabric or laces are clear of the zipper. Close it while the bag rests on a stable surface. Place the packed pouch in its planned suitcase position and complete the rest of the load. A shoe bag buried under heavy rigid items can still transfer pressure to the footwear inside.

At the destination, remove the shoes and inspect the pouch. Let both air as appropriate before repacking. Keeping a small routine—clean, dry, arrange, close, position—does more for orderly luggage than expecting the organizer to correct footwear that was packed wet or dirty.

Who should skip it

  • Travelers wearing one pair for the entire trip may not need a dedicated organizer at all.
  • A disposable or washable wrapping method may be simpler for an occasional trip if storage space at home is limited.
  • Delicate, structured, or valuable shoes may need a fitted protective case rather than a soft pouch.
  • Very muddy or wet footwear should not be placed directly into regular luggage merely because a shoe bag is available.
  • Travelers who already use a suitcase compartment designed for footwear may find another layer redundant.

Limitations

  • Size labels such as small, large, or men’s and women’s do not replace actual interior measurements.
  • A soft pouch separates surfaces but does not prevent crushing, scuffing, shape loss, or impact in every packing arrangement.
  • Mesh and ventilation openings can allow fine debris or moisture to reach adjacent contents.
  • Water-resistant wording does not establish waterproof containment unless the current specification explicitly says so.
  • Dark or opaque fabric can make similar bags hard to identify when several travelers use the same set.
  • A gusseted or structured bag occupies suitcase volume even when the footwear inside is low-profile.
  • Washability depends on the complete construction, including zippers, coatings, windows, handles, and internal stiffeners.
  • Search listings, set quantities, dimensions, and materials can change; verify the current details before ordering.

Alternatives to compare

  • A suitcase with a built-in shoe compartment when its location and dimensions suit the pairs you travel with.
  • Separate washable drawstring sacks for flexible placement and minimal empty bulk.
  • A fitted hard or semi-structured shoe case for footwear that needs more shape protection.
  • Shower caps or another simple reusable sole-covering method for occasional packing, provided the fit and material are appropriate.
  • Wearing the bulkiest suitable pair in transit and packing only a low-profile change of shoes.
  • Reducing the footwear list so one versatile pair can cover more of the itinerary.

FAQ

What size travel shoe bag do I need for sneakers?

Measure the sneakers arranged as they will sit in the pouch, including sole length, combined width, and maximum height. Compare those numbers with usable interior dimensions and inspect the zipper opening. A shoe-size range alone cannot account for thick soles, wide toe boxes, or raised heel tabs.

Is it better to put both shoes in one bag?

One bag keeps a pair together and can create a tidy rectangular unit, provided the shoes fit without a sole rubbing a vulnerable upper. Separate pouches are useful when each shoe must fill a different suitcase gap or when you want the shoes isolated from one another. Try both layouts with the actual pair before deciding.

Should a travel shoe bag have mesh ventilation?

Mesh can help with identification and air exchange, but it also reduces the barrier between footwear and nearby contents. Use it for clean, dry shoes when that tradeoff fits the packing plan. Ventilation is not a substitute for cleaning and drying footwear before it enters luggage.

Can travel shoe bags go in a washing machine?

Only when the current care instructions permit machine washing. Fabric, coatings, zipper construction, clear windows, handles, and internal panels can all affect the approved method. Follow the product guidance and allow the bag to dry fully before storing or repacking it.

Do shoe bags keep the inside of a suitcase clean?

They provide a removable layer between footwear and the suitcase, which can help contain ordinary surface contact and some loose debris. They cannot guarantee containment of fine sand, moisture, mud, or odors, especially when the bag has mesh panels or is damaged. Clean and dry shoes first, and inspect the pouch after use.

Travel Jewelry Organizers: Keeping Chains, Studs, and Rings Separated

Product links are for reference. Verify current details on the retailer page before buying.

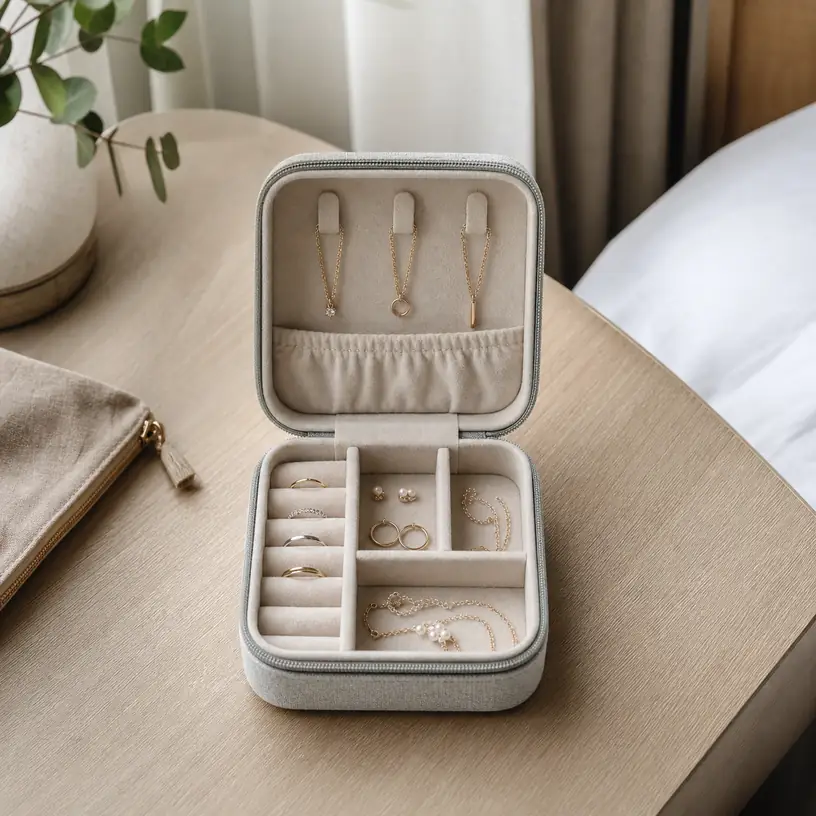
Illustrative image of an open generic travel jewelry organizer with separate compartments

Illustrative image, not an official product photo.

Short answer

A useful travel jewelry organizer keeps delicate pieces from meeting one another in transit. Start with what you actually pack: necklace chains need individual anchor points and enclosed pockets, studs need holes that are easy to reach from both sides, rings need a padded bar or divided space, and rigid bangles need enough internal width. Then compare the organizer’s closed dimensions, depth, empty weight, zipper path, lining, and the way each section stays covered when the case is turned or compressed inside a bag. A tiny case can work for a weekend pair of earrings and two rings, while a longer trip or several necklaces may call for a flatter roll or a structured case with more separation.

Search reference

Travel jewelry organizer options

Compare the closed size with your packing space, then inspect necklace anchors, earring access, ring capacity, compartment depth, lining, and closure details.

View matching options

Lay out the pieces before choosing the case

The number of compartments tells only part of the story. A tray of small squares may suit rings and stud earrings but leave no safe route for a long pendant chain. A row of necklace hooks may look generous until wide pendants overlap below them. Before comparing organizers, place the jewelry intended for a typical trip on a soft, clear surface and group it by storage need rather than by appearance.

Count complete pairs of earrings, not individual pieces. Note the longest necklace from clasp to pendant, the widest rigid bracelet, the tallest ring setting, and any item with a sharp post or fragile projecting detail. Decide which pieces should never touch. These observations create a practical packing map and make product photos less persuasive than usable measurements and construction details.

Consider whether every piece needs to travel. A smaller, deliberately chosen set can be easier to secure, inventory, and coordinate than filling every slot. Photographing the planned selection for your own reference can also make repacking easier. For valuable or irreplaceable items, review travel and insurance considerations separately; an organizer provides separation, not security or loss protection.

Who this is for

  • Travelers who bring several small jewelry pieces and want them separated from toiletries, cables, and loose items in a bag.
  • People who find necklace chains tangled after using a shared pouch or zip-top bag.
  • Wedding guests, event attendees, and business travelers carrying a few coordinated accessories for different outfits.
  • Anyone who wants a repeatable way to count earrings, rings, and necklaces when packing and checking out of a room.
  • Travelers choosing between a compact hard-sided case, a slim folding book, or a jewelry roll based on a specific packing list.

What to verify before buying

  • Closed measurements and weight: Compare length, width, depth, and empty weight with the exact suitcase pocket, personal-item compartment, or hotel-safe space you expect to use.
  • Necklace separation: Check the number and spacing of anchors, the position of any lower pocket or elastic, and whether pendants have room without stacking.
  • Earring access: Confirm how studs and hooks attach, whether both sides of the panel are reachable, and where backs will sit when the organizer closes.
  • Ring storage: Look at the bar diameter, usable length, attachment method, and clearance for raised settings rather than estimating capacity from a photo.
  • Compartment depth: Make sure thicker pieces will not press against the lid, zipper, mirror, or neighboring jewelry.
  • Interior surfaces: Review the current material description, seams, exposed hardware, and any rough hook-and-loop edges that could contact delicate finishes.
  • Closure and containment: Determine whether internal sections stay covered when the case is held vertically, inverted, or placed beneath soft luggage.
  • Removable parts: Check whether pouches, trays, or dividers remain secure during transit and whether unused fasteners can snag chains.
  • Care guidance: Verify the listed cleaning method and allow the case to dry fully before jewelry is returned to it.
  • Seller and return details: Confirm current specifications, included components, return terms, and seller information before ordering.

Match the format to the packing job

Structured cases protect the layout

A box-style case can preserve compartments and make small pieces easy to see on a dresser. Its shape is especially useful when rings or earrings have raised details that should not be flattened. The tradeoff is fixed volume: a case occupies roughly the same space whether it holds two pieces or every compartment is full. Rounded corners may pack more smoothly, but the outside measurements still need to fit the intended pocket.

Do not treat a firm shell as impact-proof. Check the stated construction and closure rather than assuming a case can protect jewelry from a hard drop or from heavy luggage placed on top. Pack it where crushing pressure is limited, and keep it under your control according to the needs and value of its contents.

Folding books favor a slim profile

Book-style organizers typically spread storage across panels and fold into a relatively flat package. They can separate studs, rings, and chains without the depth of a box. Look closely at the hinge area and the order in which sections fold. Jewelry near a crease may shift or press against an adjacent panel, especially when every position is occupied.

A flat organizer also needs enough closed depth for earring backs, pendants, and ring settings. If photos show only the empty case, seek listed interior dimensions and closure details. A zipper that closes easily when empty may become strained when hardware protrudes from both sides of a panel.

Rolls adapt to narrow luggage spaces

A jewelry roll wraps flexible layers around the contents and can fit along the edge of a packing cube or inside a narrow drawer. Separate zip pockets are useful for pieces that do not need rigid support, while tabs or loops may help route chains. Rolling too tightly, however, can place pressure on raised settings or bend pieces not intended to flex.

Check the roll’s dimensions both open and closed, how it is secured, and whether pocket zipper pulls or other hardware will sit against jewelry in the next layer. A soft roll is an organization tool, not a protective case for every item.

Give each jewelry type the right kind of space

Necklaces need separation along more than one point. An upper hook can hold the clasp end, but the lower portion of the chain and pendant also needs restraint. Look for enough distance between anchors and a lower pocket, elastic band, or individual covered section that prevents chains from drifting together. Very long chains may need to be gently routed according to their design rather than doubled sharply around a small tab.

Stud earrings require access to both the decorative front and the backing. A panel crowded against the case wall can make backs difficult to install or remove. Check whether long posts could contact the opposite surface when the case closes. Hook earrings may need a covered pocket or a panel designed for their shape so they cannot lift free during movement.

A ring bar should be evaluated with the actual ring profiles in mind. Low bands use space differently from wide rings or raised settings. Check how the bar opens and closes and whether removing one ring requires sliding off every piece before it. Individual compartments may offer quicker access, but loose rings can migrate if the lid does not sit close enough above the dividers.

Rigid bracelets, watches, brooches, and statement earrings often exceed the scale suggested by a compact case. Measure them. A large open compartment may be more appropriate than trying to force them into a specialized slot. Keep clasps, posts, and hard edges from bearing against softer pieces, and follow the jewelry maker’s care and storage guidance where available.

Pack it so the layout survives the trip

Load the organizer on a stable, well-lit surface. Fasten necklace clasps, secure earring backs, close internal pockets, and check that nothing crosses the outer zipper path. Gently move the closed organizer through the orientations it may encounter—upright, flat, and on its side—without shaking it aggressively. Reopen it to see whether small pieces escaped their sections or chains moved into contact.

Place the organizer where it will not be squeezed by shoes, bottles, or hard chargers. Liquids belong in appropriate closed containers and should remain separate; a zippered jewelry case should not be assumed to resist a toiletry spill. If the organizer goes into a personal item, make sure it does not sit where a laptop edge or overfilled outer pocket will press into it.

At the destination, use one consistent surface for opening and closing the case. Avoid sinks, drains, rumpled bedding, and dark carpet where a dropped backing can disappear. Return each piece to its assigned position after use rather than creating a loose pile beside the organizer. Before departure, compare the contents with your packing photo or written count and inspect drawers, the safe, and the immediate dressing area.

Who should skip it

  • Use a small individual pouch or the original suitable case when you travel with only one durable item and do not need multiple compartments.
  • Leave irreplaceable or very valuable jewelry at home when the trip, lodging, or transit plan cannot provide security appropriate to it.
  • Choose a larger protective storage format for oversized, fragile, or sculptural pieces that would be compressed by a compact organizer.
  • Skip panels with fixed holes or narrow loops when the jewelry shapes do not match those positions.
  • A travel case is not a substitute for suitable long-term storage if the jewelry has specific humidity, tarnish-prevention, or material-care requirements.

Limitations

  • Compartment counts do not reveal whether the spaces fit the height, width, and shape of particular jewelry.
  • Soft rolls and folding organizers can transmit pressure from other packed items.
  • A structured case still cannot guarantee protection against impact, crushing, theft, loss, moisture, or spills.
  • Chains may tangle if anchors are too close, lower sections are not restrained, or the case is overfilled.
  • Earring backs and small rings can migrate between dividers unless internal clearances keep sections contained.
  • Mirrors, removable trays, magnetic details, and decorative hardware can consume usable space; verify how these features interact with the pieces being packed.
  • Lining descriptions alone do not establish suitability for every metal, stone, coating, or finish.
  • Search results and product specifications change, so current dimensions, materials, and included accessories need to be checked at the time of purchase.

Alternatives to compare

  • Individual soft pouches for a very small selection, with each chain stored separately rather than combined in one bag.
  • The original fitted box for a fragile or unusually shaped piece, if its size works with the travel plan.
  • A compact divided pill-style case used only when its materials, compartment dimensions, and closure are appropriate for the jewelry; avoid assuming every container is suitable.
  • A larger jewelry case kept at the destination when travel is frequent between the same two places.
  • Bringing fewer pieces and choosing versatile accessories when minimizing luggage and tracking small valuables matter more than having many options.

FAQ

How do I keep necklaces from tangling in a travel jewelry organizer?

Choose separate anchors with enough spacing, fasten each clasp, and secure the lower chain and pendant in its own pocket or restraint. Do not layer several loose chains in one compartment, and reopen the case after a gentle orientation check to see whether the selected layout holds.

Is a hard jewelry case better than a jewelry roll for travel?

It depends on the contents and packing space. A structured case preserves compartment shape and may provide more clearance for raised pieces, while a roll can fit narrow spaces and adapt to a smaller load. Neither format should be assumed to resist crushing, moisture, or loss without confirming its construction and using an appropriate packing location.

What size travel jewelry organizer should I buy?

Build a typical trip selection first, measure the largest pieces, and choose the smallest organizer that gives them separate space without crowding. Check the case’s closed dimensions against the exact bag compartment where it will travel, including clearance for the zipper and surrounding items.

Can stud earrings stay on a panel while the case is closed?

Only if the panel provides access for the backs and enough closed clearance for the posts and fronts. Check the organizer’s design and dimensions carefully; long posts or raised earrings may press into the opposite surface or interfere with other stored pieces.

Does a travel jewelry organizer make valuables secure?

No. It helps arrange and separate jewelry, but it does not prevent theft, accidental loss, or damage in every situation. Decide what to bring based on the item’s value and replaceability, keep the case under appropriate control, and review lodging, transport, and insurance considerations separately.

Choosing a Garment Bag for Travel Without Overpacking

Product links are for reference. Verify current details on the retailer page before buying.

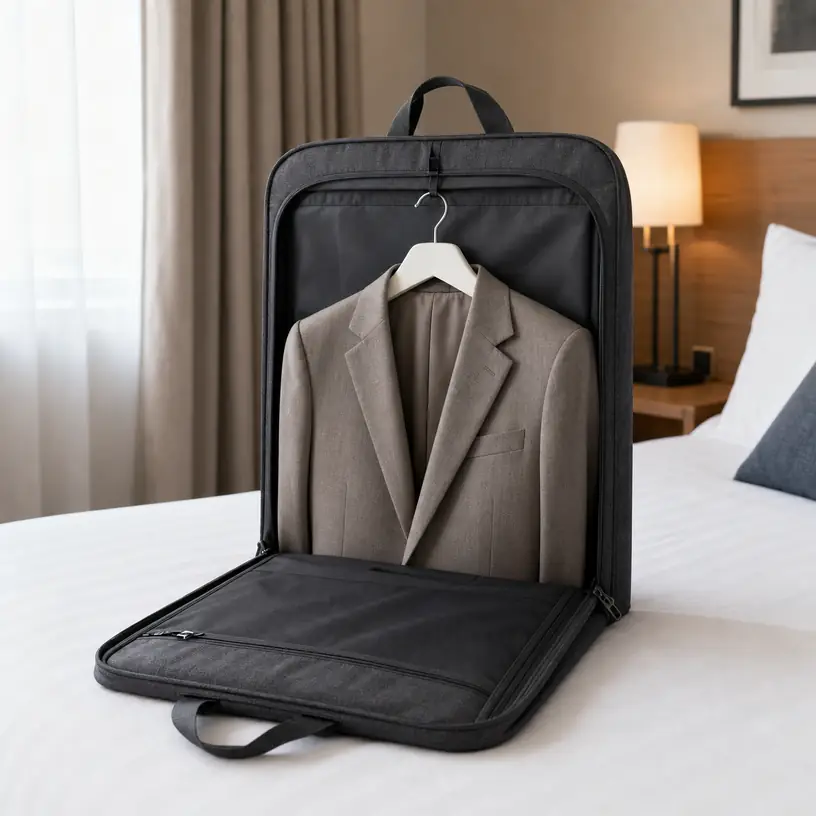
Illustrative image of a generic garment bag for a travel buying guide

Illustrative image, not an official product photo.

Short answer

A useful travel garment bag should protect the clothes you actually plan to hang without becoming an awkward second suitcase. Begin with the longest jacket, dress, or outfit you expect to carry. Then compare the bag’s open length, folded dimensions, hanger opening, closure, handles or shoulder strap, and whether its extra pockets help your packing plan or merely add bulk. A simple hanging sleeve can suit a car trip, while a foldable carrier with secure handles may be easier to manage through stations and airports.

Search reference

Garment bags designed for travel

Compare open and folded dimensions, hanger retention, carrying options, pocket placement, and closure details for the kinds of outfits and trips you take.

View matching options

Start with the journey, not the pocket count

Garment bags solve several different packing problems under one product name. A lightweight cover keeps hanging clothes together in a car. A structured fold-over carrier is intended to move like a separate piece of luggage. Some designs combine a garment compartment with shoe pockets or duffel-style storage. Those formats are not interchangeable, even if their listings use similar travel language.

Map the trip before comparing features. Will the bag go from closet to car to hotel room, or will you carry it through an airport along with a rolling case? Does it need to hold one jacket and shirt, a long dress, or several complete outfits? Will you be able to hang it on arrival? These questions narrow the field faster than choosing by appearance.

The longest garment is the key measurement. An open bag that is too short can force fabric into a tight fold at the bottom. A longer carrier may reduce that problem, but it also creates a larger folded package. Check both measurements because the useful hanging length and the size you carry are separate concerns.

Who this is for

  • Travelers carrying suits, jackets, dresses, uniforms, or coordinated outfits they prefer to keep on hangers.
  • Wedding guests, interview candidates, conference attendees, performers, and business travelers who want a separate clothing compartment.
  • Drivers who can hang or lay a garment bag across the back seat rather than compressing formalwear into a suitcase.
  • People who unpack promptly and want clothes to move directly from the carrier to a hotel closet.
  • Travelers willing to manage an additional bag when their primary luggage lacks a suitable garment section.

Who should skip it

  • Skip a separate carrier if all of your clothing rolls or folds comfortably into one small suitcase.
  • A basic hanging cover may be inconvenient for long walks or public transit if it has weak handles or no secure folded closure.
  • Do not assume a garment bag eliminates wrinkles; fabric, packing density, trip duration, and handling still matter.
  • Travelers trying to keep their luggage count low may prefer a suitcase with a fold-out garment panel or a compact packing folder.
  • If the trip includes rain or outdoor transfers, avoid treating ordinary fabric as weatherproof unless the current listing explicitly supports that use.

What to verify before buying

  • Measure the longest garment and compare it with the usable interior length, not only the bag’s exterior dimensions.
  • Check the folded size and current carrier rules if you intend to bring the bag onto a flight; product labels do not guarantee acceptance.
  • Confirm how hangers enter and stay in place, including the width of the top opening and any retaining strap or hook.
  • Review the main closure, fold points, buckles, handles, shoulder strap attachment, and luggage-handle pass-through if listed.
  • Look at pocket locations while imagining the bag folded; bulky shoes or toiletries can press into the clothing compartment.
  • Verify care instructions, material wording, lining details, and any claims about water resistance on the retailer page.

Match the format to the trip

A hanging sleeve for short transfers

The simplest design resembles a zippered clothing cover with a hanger opening at the top. It can be enough for a drive to an event, seasonal closet storage, or a short move between buildings. Its main advantages are low bulk and an easy transition to a closet. The tradeoff is that it may not fold into a tidy, balanced package for sustained carrying.

Inspect the bottom and sides rather than focusing only on the front zipper. If the carrier will be laid flat in a vehicle, a fully enclosed bottom helps keep clothing contained. Handles positioned for folding can make the sleeve easier to lift, but their placement should not pull the garment into a hard crease.

A fold-over carrier for active travel

A purpose-built foldable garment carrier generally secures into a shorter shape and provides handles, straps, or both. This format can be easier to carry alongside a suitcase. The design still needs to balance correctly when loaded. A long shoulder strap sounds convenient, but attachment points and folded weight determine whether the bag hangs comfortably or tips forward.

Look for product photos or diagrams that show the bag both open and closed. Confirm which way the clothes fold, where the hanger heads sit, and whether zippers or buckles prevent the package from opening unexpectedly. If a pass-through sleeve matters, verify its placement against the handle width of your own rolling luggage.

A hybrid garment-and-duffel design

Hybrid bags promise one place for hanging clothes, shoes, and folded items. They may be useful for a short event trip, but the packing sequence is important: contents placed in the center can shape the garment compartment around them. Overfilling the duffel area may work against the reason for choosing a garment bag in the first place.

Treat published capacity as only one clue. Sketch a realistic packing list and decide where every bulky item would go. Shoes may fit better in a separate pouch, while toiletries should be isolated from clothing in case of a leak. A hybrid is most convincing when its layout replaces another bag rather than simply adding more compartments to carry.

Small design details that affect arrival-day clothing

Hanger management deserves attention. A narrow top slot may work with slim wire hangers but not broad wooden or padded ones. A wide opening is flexible, yet it can also leave more space around the hook. Some bags use an internal bar, loop, or clamp instead. Check what is included and whether you must supply a particular hanger style.

Interior tie-down straps can stop clothing from sliding as the bag changes orientation. Their position matters: a strap across a jacket body may behave differently from one near the hangers. Likewise, a smooth lining can reduce snagging, but no lining can compensate for packing too many garments into a shallow compartment.

External identification windows and quick-access pockets are useful only when they remain accessible in the folded configuration. Put travel documents and small essentials in a bag you can supervise closely; an exterior pocket is not automatically secure. Avoid loading one side heavily, since uneven weight can twist soft handles and make the carrier tiring to manage.

Before the first important trip, do a home packing trial. Load the intended outfit, close the bag, carry it around for several minutes, and then leave it packed for roughly the same duration as the journey. Unpack and inspect the fold locations. This rehearsal reveals whether the bag is too short, too full, or uncomfortable before event-day timing becomes a factor.

Limitations

  • A garment bag can organize hanging clothes but cannot promise wrinkle-free arrival.
  • Long garments may still need a soft fold, especially in compact travel formats.
  • Added pockets, structure, and hardware increase weight before anything is packed.
  • A carry handle, shoulder strap, or pass-through does not guarantee comfortable handling with every load.
  • Airline size and luggage policies can change and should be checked directly for each itinerary.
  • Water-resistant wording, where present, should not be read as full waterproof protection without explicit current specifications.

Alternatives to compare

  • A packing folder inside a suitcase for shirts, trousers, and other clothes that tolerate careful folding.
  • A suitcase with an integrated garment panel when you want one primary piece of luggage.
  • A basic breathable clothing cover for closet storage and short car transfers.
  • Packing cubes for casual clothing that does not need to remain on hangers.
  • Shipping or local formalwear rental for specialized outfits when carrying them through a complex itinerary is impractical.

FAQ

How long should a travel garment bag be?

Measure the longest item you plan to hang from the hanger shoulder to the hem, then compare that number with the bag’s stated usable interior length. Also check how and where the carrier folds. A long open measurement can still place a fold across the garment during transport.

Does a garment bag count as a carry-on?

That depends on the carrier, the bag’s packed dimensions, and the applicable rules for your itinerary. A listing that describes a bag as suitable for travel does not guarantee that it will be accepted as a carry-on. Check current policies directly before departure.

Should shoes go inside the garment bag?

Only if the design provides a suitable compartment and the added bulk does not press hard against hanging clothes. Keep soles and possible moisture isolated. For a formal outfit, a separate shoe pouch in another bag may preserve more space around the garment.

Can I use regular hangers in a travel garment bag?

Often, but hanger openings, internal bars, and retaining systems vary. Broad wooden, padded, or unusually shaped hangers may not fit a design made around slimmer hangers. Verify the holder style and opening dimensions where available.

Is a hybrid garment duffel better for a weekend trip?

It can be if the layout genuinely holds your complete packing list without overstuffing the garment section. It is less appealing when shoes and folded clothing create a bulky center that presses into formalwear. A trial pack is the best way to judge the format for your routine.

Compact Travel Umbrellas: A Packing Guide for Commuters and Carry-Ons

Product links are for reference. Verify current details on the retailer page before buying.

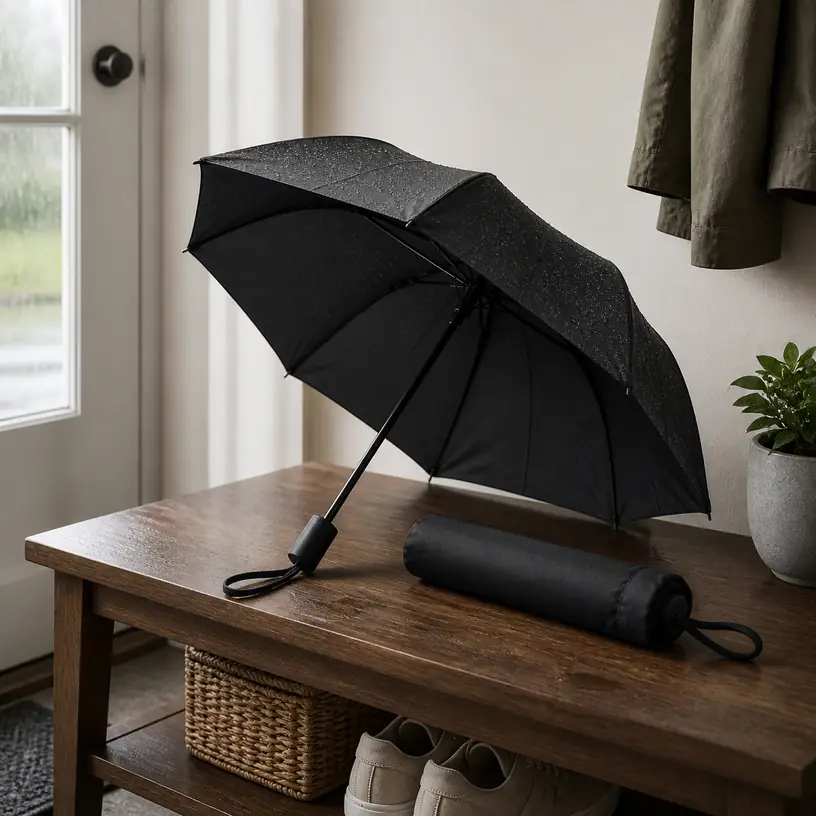
Illustrative image for a compact travel umbrella buying guide

Illustrative image, not an official product photo.

Short answer

A compact travel umbrella makes sense when it needs to stay in a work bag, daypack, car compartment, or carry-on instead of waiting by the front door. Choose around the space it must fit first, then balance folded length and weight against canopy coverage, handle comfort, opening mechanism, sleeve design, and drying needs. The smallest model is not automatically the most useful: very short handles and tight canopies can feel awkward during a long walk or when sharing sidewalk space with a bag.

Search reference

Compact travel umbrella options

Compare folded dimensions, listed weight, canopy measurements, manual or automatic operation, handle shape, and sleeve design for the bag and route where the umbrella will actually be carried.

View matching options

Start with where the umbrella will live

“Compact” can describe several different priorities. One umbrella may be short enough for a small crossbody bag but relatively thick when folded. Another may be slim and light yet long enough to protrude from a shallow tote pocket. Before comparing canopy materials or rib counts, measure the pocket, bottle sleeve, organizer pouch, or glove compartment you plan to use.

That storage decision also affects what happens after the rain. A wet umbrella placed inside a laptop bag can create a larger problem than the shower it solved. If your commute includes a train, office lobby, or restaurant, consider whether there is room for a separate waterproof pouch and whether the umbrella can stand partly open to dry at the destination. The included fabric sleeve may keep a folded umbrella tidy, but it should not be assumed to contain all water unless the current product description clearly says so.

What this product type is

A compact travel umbrella is a collapsible umbrella designed to take up less storage space than a full-length stick umbrella. Its telescoping shaft and folding ribs let the canopy pack down for daily carrying. Models vary in folded length, folded thickness, listed weight, open canopy size, handle shape, and whether opening or closing is manual or button operated.

The category includes ultralight umbrellas for occasional showers, sturdier commuter designs, and automatic models intended for quick entry and exit. Those labels are not standardized. Compare actual measurements and current construction details rather than relying on terms such as mini, windproof, or heavy duty by themselves.

Who this is for

  • Commuters who want rain coverage available in a backpack, tote, briefcase, or desk drawer.
  • Travelers reserving limited carry-on space for an umbrella that can move between a suitcase and day bag.
  • Students walking between buildings and looking for something easier to store than a full-length umbrella.
  • Drivers who want a folding umbrella for a door pocket, center console, or emergency kit, provided the measured space is suitable.
  • City walkers who value portability but still want enough canopy room for a coat, shoulder bag, or small backpack.

Who should skip it

  • Choose a full-length umbrella if a larger grip, simpler shaft, and less folding are more important than packability.
  • Skip the smallest pocket models if you regularly carry a broad backpack or need to cover two people.
  • Consider a rain jacket or poncho when you need both hands free, expect extended rain, or will be walking on exposed trails.
  • Avoid storing any wet umbrella inside an electronics compartment unless you have a suitable separate wet-storage plan.

What to verify before buying

  • Check folded length, folded diameter or thickness, open canopy dimensions, and listed weight; do not use product photos as a scale reference.
  • Confirm whether both opening and closing are manual, fully automatic, or a combination such as automatic opening with manual shaft reset.
  • Review handle length, shape, texture, and any wrist-strap details, especially if you expect to carry it for more than a short dash.
  • Read the current wording for frame and canopy materials without assuming that a higher rib count alone guarantees better performance.
  • Check whether a sleeve or case is included and whether it is described as a simple fabric cover or a water-containing pouch.
  • Verify the reset procedure for automatic models, since some shafts require noticeable force to compress after closing.
  • Review care and drying guidance, replacement terms, current seller information, and return policy before ordering.

Main buying notes

Packed size has more than one dimension

Folded length is easy to compare, but thickness often determines whether an umbrella fits a crowded bag. Multiple folding sections can reduce length while producing a wider bundle. If the destination pocket has a zipper, allow clearance for the zipper path rather than measuring only the empty pocket interior.

Weight matters most when the umbrella is carried every day but used only occasionally. A few extra ounces may be reasonable for a handle that is easier to hold or a canopy that offers more practical coverage. For a minimalist day bag, however, those ounces compete with a charger, water bottle, and other essentials. Use the listed measurements to make that tradeoff deliberately.

Canopy coverage should match the load you carry

An umbrella that comfortably covers one person without a bag may leave a backpack or one shoulder exposed. Compare the stated open diameter or arc measurement carefully, since sellers may describe canopy size in different ways. Also consider your normal walking environment. A wide canopy can provide useful coverage on open sidewalks but may be cumbersome at crowded crossings, narrow station stairs, and storefront entrances.

Very compact canopies reward centered positioning. If you tend to angle an umbrella into wind or carry groceries in the other hand, a little more coverage may be worth a larger folded bundle.

Automatic operation trades speed for complexity

A button-operated umbrella can be convenient when stepping out of a vehicle or building with one hand occupied. Check exactly what the button controls. Some designs open automatically but require the canopy and shaft to be collapsed manually; others retract the canopy at a press but still need the telescoping shaft pushed back into place.

Manual umbrellas can be lighter and straightforward, but small sliders or stiff mechanisms may be uncomfortable for some users. Look for clear operating instructions and verify return options if hand strength or dexterity is a concern. Keep fingers away from moving joints and follow the maker’s instructions rather than forcing a reluctant mechanism.

Grip comfort shows up on longer walks

Short handles help an umbrella pack down, yet they provide less room for changing hand position. A slim cylinder may disappear neatly into a pouch but feel tiring with wet hands. Compare handle dimensions, texture, and wrist-strap placement. If you usually hold a phone, transit card, leash, or shopping bag at the same time, think through which hand will control the umbrella and whether a button could be pressed accidentally.

Drying is part of the routine

Folding an umbrella while damp traps moisture between canopy layers. When possible, reopen it in an appropriate ventilated area and let it dry before returning it to its sleeve. At work or in a hotel, a compact drip tray, bathroom area, or designated umbrella stand may be more practical than leaning it against a wall. Follow the listed care guidance and avoid leaving a wet umbrella sealed in a hot car or closed bag for long periods.

Limitations

  • A smaller folded package usually involves compromises in grip size, canopy room, frame complexity, or all three.
  • No compact umbrella should be treated as fail-safe in strong gusts; seek shelter and close it if conditions become unsafe.
  • Wind-resistance labels and test claims vary, so they should be checked on the current listing rather than compared as universal ratings.
  • Automatic mechanisms add moving parts and may require more force to reset than a shopper expects.
  • A standard sleeve may organize the umbrella without fully containing runoff from a wet canopy.
  • Search results change, so included accessories, dimensions, material descriptions, and warranty terms require current verification.

Alternatives to compare

  • A full-length stick umbrella for a roomier handle, broad canopy choices, and home or office storage.
  • A packable rain jacket when hands-free movement and coverage beyond the shoulders matter more than quick deployment.
  • A rain poncho for sightseeing, outdoor events, or carrying a pack that needs additional coverage.
  • A compact emergency poncho for very small kits where an umbrella would still take too much room.
  • Separate umbrellas kept at home and work if daily carrying is the main inconvenience.

FAQ

How small should a compact travel umbrella be?

Small enough to fit the specific pocket or compartment where you will carry it, with room for the zipper or closure to work. Compare folded length and thickness together; optimizing only for the shortest measurement can result in a bulky bundle.

Is a lighter travel umbrella always better?

No. Low weight is useful for everyday packing, but it can come with a smaller handle, less canopy coverage, or different frame choices. Balance the listed weight with the comfort and coverage needed for your usual route.

Is an automatic umbrella better for commuting?

Automatic opening can be convenient at vehicle doors and building exits, particularly when one hand is occupied. Check whether closing is also automatic and how the shaft resets, because the operating sequence differs among models.

Will the umbrella sleeve keep the inside of a bag dry?

Do not assume it will. Many included sleeves are simple fabric covers intended for storage rather than sealed wet bags. Verify the current sleeve description and use separate wet storage when needed.

Can a compact umbrella go in carry-on luggage?

Rules and screening decisions can vary by carrier, airport, route, and umbrella design. Check current airline and security guidance before the trip, especially if the umbrella has an unusual handle or pointed components.

Travel Cable Organizers for Chargers, Adapters, and Small Tech

Product links are for reference. Verify current details on the retailer page before buying.

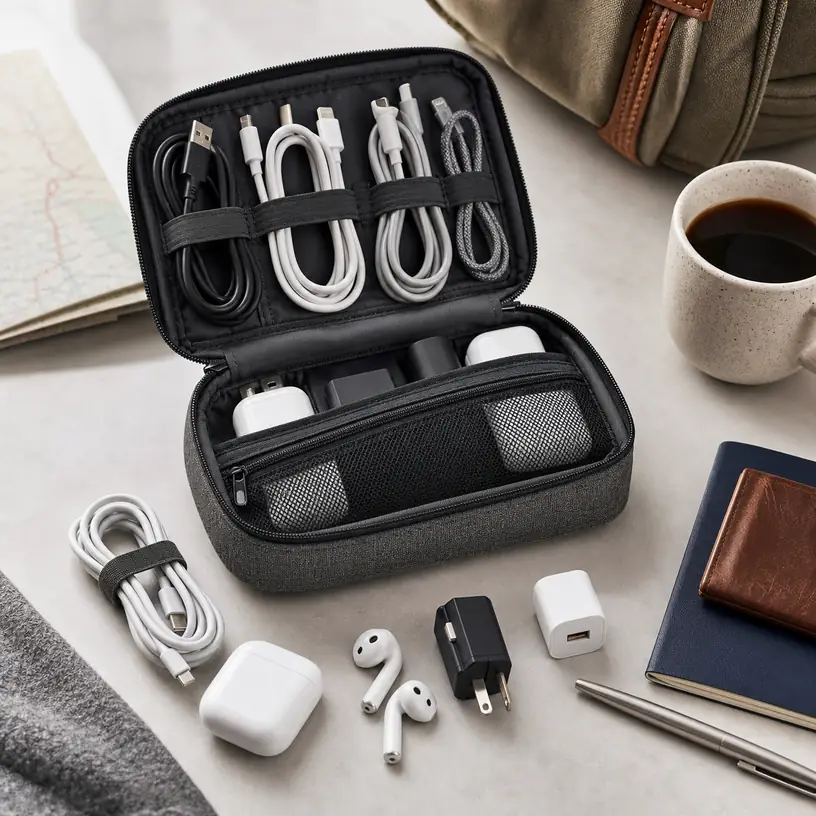
Illustrative image for a travel cable organizer buying guide

Illustrative image, not an official product photo.

Short answer

A travel cable organizer is most useful when your small tech items are already scattered between backpack pockets, desk drawers, and toiletry-style pouches. Choose one by laying out the exact items you carry: wall charger, charging cables, earbuds, adapters, power bank, memory cards, stylus, or small mouse. Then compare the pouch layout, elastic loops, pockets, zipper path, padding, and whether the organizer fits inside your usual bag without becoming a rigid brick.

Search reference

Travel cable organizer options

Compare pouch layouts, loop spacing, pocket depth, padding, closures, and outside dimensions against the chargers and accessories you actually carry.

View matching options

Think in kits, not just pockets

The right organizer depends on the kit you want to keep together. A weekend phone-and-earbuds kit can be small and soft. A work travel kit with a laptop charger, USB-C cables, adapters, and a compact power bank needs more structure and thicker pockets. A photography or handheld gaming kit may need flatter mesh compartments for cards, readers, and short cables.

Before comparing photos, coil your longest cable, stack your largest charger, and note which items you need to grab during a flight, in a hotel room, or at a conference table. A neat-looking pouch can be annoying if every cable must be threaded under tight elastic. On the other hand, a roomy pouch can waste space if you carry only two cords and a charger.

Visibility matters more than it seems. Mesh pockets, contrasting interiors, and divided sections make it easier to spot a small adapter before leaving a hotel room. Dark interiors and deep loose pockets may hide tiny pieces, especially when the pouch is packed inside a larger backpack.

Who this is for

  • Travelers who carry several charging cables, adapters, and earbuds in one bag.
  • Remote workers who move a small tech kit between home, office, coffee shop, and hotel.
  • Students who want chargers separated from pens, snacks, notebooks, and laptop sleeves.
  • Photographers or creators carrying card readers, short cables, spare batteries, or small accessories.
  • Households building one shared pouch for road trips, flights, or guest-room charging needs.

Who should skip it

  • Skip a dedicated cable organizer if one charger and one cable already stay neatly in your bag.
  • Choose a larger electronics pouch if you need to carry a full-size laptop power brick, hard drive, mouse, and dock together.
  • Avoid slim elastic-only designs if you dislike carefully re-coiling every cable after use.
  • Do not treat a soft organizer as protective storage for fragile electronics unless the listing clearly supports that use.

What to verify before buying

  • Check outside dimensions against the backpack pocket, carry-on pocket, desk drawer, or personal item where it will live.
  • Compare interior depth with your largest charger, power bank, plug adapter, or cable coil.
  • Look at loop spacing and pocket width; tight elastic may not suit thick braided cables or bulky adapters.
  • Review whether the pouch opens flat, book-style, clamshell-style, or only from the top.
  • Check closure style, zipper quality wording, handle placement, and whether the pouch can be opened while partly packed.
  • Verify material, padding, water-resistance language, and care instructions on the retailer page before assuming protection level.
  • Confirm whether any accessories shown in photos are included or are only styling props.

Buying notes for real travel days

A good travel cable organizer reduces searching, but it should not create a packing ritual you will ignore after two trips. If you frequently unplug cables on the move, choose a layout that lets you return items quickly. Loose mesh pockets are often more forgiving than narrow elastic ladders, while elastic can be useful for keeping short cables from tangling.

The pouch shape should match the bag around it. Flat book-style organizers slide well beside a laptop sleeve but may become wide when packed with chargers. Boxier pouches can handle bulky adapters and power banks, yet they may be harder to place in a slim backpack pocket. If your carry-on has a front compartment, measure that space before choosing a thick organizer.

Padding is helpful for keeping items from pressing into each other, but more padding also takes space. For ordinary cables and wall chargers, organization may matter more than cushioning. For small drives, camera accessories, or delicate adapters, check the retailer page for specific protection wording rather than relying on the product shape.

Color and interior contrast are practical details. A bright lining can make black adapters and tiny cards easier to see. A small handle is useful when pulling the pouch from a backpack, but a bulky handle may snag inside a crowded personal item.

Limitations

  • A cable organizer cannot make an overpacked tech kit lighter or smaller than the items inside it.
  • Tight loops can slow down packing if you often swap cables during the day.
  • Soft pouches may not protect fragile electronics from heavy pressure inside checked or crowded luggage.
  • Very compact designs may look tidy online but fail to fit larger wall chargers or international plug adapters.
  • Extra pockets add order only if you remember which pocket holds each item.

Alternatives to compare

  • A simple zip pouch for minimal charger and cable setups.
  • A tech pouch with more depth if you carry a mouse, power bank, hard drive, or compact dock.
  • A backpack with built-in cable pockets if you prefer fewer separate bags.
  • Small mesh laundry or accessory bags for low-cost visibility during family trips.
  • Drawer dividers or desk trays if the problem is home storage rather than travel packing.

FAQ

What size travel cable organizer should I choose?

Start with the largest charger or adapter you carry, then add your normal cable count. The organizer should close without forcing the zipper and still fit inside your backpack, carry-on pocket, or desk drawer.

Are elastic loops or mesh pockets better for cables?

Elastic loops keep short cables tidy when they fit well, but they can be slow with thick or oddly shaped cords. Mesh pockets are more flexible for mixed items, though small pieces may shift around unless the pocket is shallow enough.

Can a travel cable organizer hold a power bank?

Many can, but power banks vary in thickness and weight. Check the pouch depth, pocket dimensions, and closure path, and avoid forcing a heavy battery into a pocket that pulls against the zipper.

Is padding important for a cable organizer?

Padding helps separate accessories and can make the pouch feel more structured, but it also adds bulk. For basic chargers and cables, layout may matter more; for delicate drives or camera accessories, verify the protection wording before relying on it.

How do I keep a tech pouch from becoming cluttered?

Assign it to a specific kit, such as travel charging, work commute, or camera accessories. Remove duplicate cables after each trip, and keep only the adapters you actually used or expect to need on the next outing.

Digital Luggage Scales: Who They Fit and What to Check Before Buying

Product links are for reference. Verify current details on the retailer page before buying.

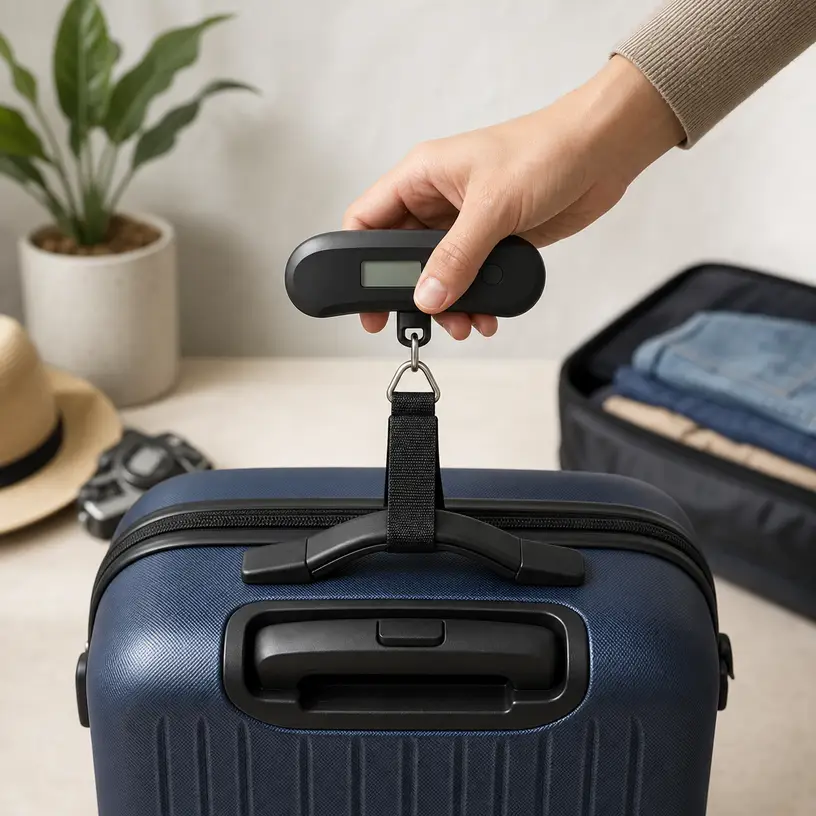
Illustrative image for a digital luggage scales buying guide

Illustrative image, not an official product photo.

Short answer

Digital luggage scales fit travelers who want a compact way to check bag weight before leaving for the airport. Compare capacity, unit switching, display readability, grip shape, strap or hook design, battery access, and storage size before choosing one.

Search reference

Digital Luggage Scales options

Compare current options and verify details on the retailer page before buying.

View matching options

What this product type is

Digital luggage scales are compact travel tools used to weigh bags before a trip. Common designs include a handle, strap or hook, digital display, unit switching, and battery-powered operation. Buyers usually compare weight capacity, display readability, grip comfort, strap design, portability, and battery access.
This guide treats the seed listing as a category signal only. Compare current matching options and verify details on the retailer page before buying.

Who this is for

  • Travelers packing checked bags or carry-on bags close to airline limits.
  • Households that share a simple travel tool across multiple trips.
  • People who want a compact accessory for suitcases, backpacks, or packages.
  • Gift buyers looking for a small practical travel item.

Who should skip it

  • Skip it if you rarely travel with weighed luggage.
  • Use a full floor scale if you need a larger weighing surface at home.
  • Avoid models with tiny displays if readability is a priority.

What to verify before buying

  • Check maximum supported weight and measurement units.
  • Verify display type, backlight wording, and readability details.
  • Review strap, hook, handle, and grip construction before buying.
  • Check battery type, included accessories, and auto-off wording.
  • Confirm packed size and whether it fits your travel pouch.
  • Review current seller information, warranty terms, and return policy.

Main buying notes

A travel scale should be easy to hold while lifting a bag. Grip shape and strap length matter more than a long feature list.
Display readability can make the difference between a quick check and an awkward lift-and-squint moment.
Battery access is worth checking before travel. Verify the battery type and whether it is included on the current retailer page.
Capacity should match the heaviest bags you normally carry, but accuracy claims should still be verified on the listing.

Limitations

  • A handheld scale still requires lifting the bag safely.
  • Small displays may be harder to read in dim rooms.
  • Battery-powered tools need battery checks before travel.
  • Very heavy or awkward items may be easier to weigh with a larger scale.

Alternatives to compare

  • Bathroom scales for home-only luggage checks.
  • Packing cubes or compression bags for volume management.
  • Luggage with built-in weight features if you are replacing the bag too.
  • Shipping scales for package-heavy home use.

FAQ

What should I verify before buying a digital luggage scale?

Verify weight capacity, supported units, display readability, strap design, battery type, packed size, and return policy.

Can a digital luggage scale work for backpacks?

Many can weigh backpacks, but you should verify strap or hook design and supported weight on the current retailer page.

Is display readability important for a luggage scale?

Yes. A clear display helps when the bag is lifted and the reading is only visible for a short time.

Do digital luggage scales need batteries?

Most digital models use batteries. Check the battery type and whether it is included before buying.

What alternatives should I compare with a digital luggage scale?

Compare bathroom scales, shipping scales, packing organizers, and luggage with built-in weighing features.

Memory Foam Travel Pillows: Who They Fit and What to Check Before Buying

Product links are for reference. Verify current details on the retailer page before buying.

Illustrative image for a memory foam travel pillow buying guide

Illustrative image, not an official product photo.

Short answer

Memory foam travel pillows are useful for flights, train rides, car passengers, and office rest breaks when neck support matters more than packing flat. Compare support shape, firmness, cover care, size, closure style, heat retention, and how the pillow packs before choosing one.

Search reference

Memory foam travel pillow options

Compare current options and verify details on the retailer page before buying.

View matching options

What this product type is

A memory foam travel pillow is a portable neck pillow designed to support the head and neck while sitting upright. Designs vary from classic U-shaped pillows to wrap-style, raised-side, and compact foldable versions. Buyers usually compare fit, foam feel, cover material, washable parts, storage pouch, attachment loop, and whether the shape works with airplane seats or high-backed chairs.
This guide treats the seed listing as a category signal only. Compare current matching options and verify details on the retailer page before buying.

Who this is for

  • Travelers who want neck support during flights or long rides.
  • Commuters who rest while sitting upright.
  • Buyers building a simple travel comfort kit.
  • People who prefer cushioned support over inflatable pillows.

Who should skip it

  • Skip it if you need a pillow that packs nearly flat.
  • Choose an inflatable option if luggage space is the main concern.
  • Avoid bulky shapes if your seat setup or backpack space is tight.

What to verify before buying

  • Check pillow shape, neck opening, closure design, and support height.
  • Verify dimensions, packed size, weight, and whether a storage pouch is included.
  • Review cover material, cleaning instructions, zipper access, and care limits.
  • Check firmness wording and whether the design may feel warm during use.
  • Confirm how it attaches to luggage or a backpack.
  • Review return policy and current seller information before buying.

Main buying notes

Fit is personal. A pillow that supports one traveler may push another person’s head forward. Check shape and height carefully.
Packing size matters. Memory foam is cushioned but can be bulkier than inflatable options.
Cover care is worth checking before travel. Removable covers are easier to refresh after flights and transit days.
Warmth can be a tradeoff. Foam and plush covers may feel cozy, but some travelers prefer cooler fabrics.

Limitations

  • Neck support depends on body size, seat shape, and sleeping position.
  • Memory foam can be bulkier than inflatable travel pillows.
  • Some covers may require specific washing instructions.
  • A pillow cannot fix poor seat ergonomics by itself.

Alternatives to compare

  • Inflatable travel pillows for smaller packing size.
  • Wrap-style neck supports for more structured side support.
  • Lightweight scarves or hooded travel blankets for warmth.
  • Lumbar pillows if lower-back comfort is the bigger issue.

FAQ

What should I verify before buying a memory foam travel pillow?

Verify shape, neck opening, firmness, cover care, packed size, attachment method, and return policy.

Are memory foam travel pillows good for flights?

They can help on flights, but comfort depends on pillow shape, seat design, and your sleeping position.

Do memory foam travel pillows pack small?

Some compress into a pouch, but many remain bulkier than inflatable pillows.

Can I wash a memory foam travel pillow?

Check the current care instructions. Many designs have removable covers, but the foam core may have different care limits.

Should I choose memory foam or inflatable travel support?

Choose memory foam for cushioned support, or inflatable support when pack size and adjustability matter more.

Foldable Duffel Bags: Who They Fit and What to Check Before Buying

Product links are for reference. Verify current details on the retailer page before buying.

Illustrative image for a foldable duffel bag buying guide

Illustrative image, not an official product photo.

Short answer

Foldable duffel bags are useful as lightweight extra travel bags, gym bags, overnight bags, or backup luggage. Compare packed size, open capacity, strap comfort, zipper layout, fabric notes, shoe compartments, and whether the bag fits your airline or storage needs before choosing one.

Search reference

Foldable duffel bag options

Compare current options and verify details on the retailer page before buying.

View matching options

What this product type is

A foldable duffel bag is a soft-sided bag that packs down smaller when empty and opens into a larger carry bag when needed. Buyers usually compare capacity, shoulder strap design, handle reinforcement, zipper access, fabric feel, compartment layout, and how small the bag stores between trips.
This guide treats the seed listing as a category signal only. Compare current matching options and verify details on the retailer page before buying.

Who this is for

  • Travelers who want a spare bag for return-trip purchases or overflow packing.
  • Gym users who need a soft bag that stores easily when not in use.
  • Weekend travelers comparing lightweight bags for clothing and simple gear.
  • Buyers who want a bag that can live inside a closet, car, or suitcase until needed.

Who should skip it

  • Skip it if you need rigid protection for fragile items.
  • Skip lightweight foldable bags if you usually carry heavy equipment.
  • Compare rolling luggage if long airport walks are your main use case.

What to verify before buying

  • Check unfolded dimensions, folded dimensions, and stated capacity on the current retailer page.
  • Verify airline size rules yourself if you plan to use it for flights.
  • Review strap design, handle reinforcement, and zipper layout before buying.
  • Check fabric notes, water-resistance wording, and cleaning guidance.
  • Confirm whether compartments, shoe pockets, or trolley sleeves are included in the specific option.
  • Review seller information and return policy before buying.

Main buying notes

Folded size decides whether the bag is convenient as a backup. A bag that is too bulky may stop being a true spare.
Capacity claims need context. A large soft bag may hold more clothing, but it can become uncomfortable if the straps are thin or the load is unbalanced.
Compartments can help separate shoes, laundry, or small items. They also add seams and zippers, so check layout and access before buying.
Travel rules can change by carrier and route. Always verify current size rules directly before using any bag as flight luggage.

Limitations

  • Soft bags offer less structure than hard luggage.
  • A large packed load can be uncomfortable without supportive straps.
  • Water-resistance wording does not mean every bag handles heavy weather the same way.
  • Airline fit depends on current carrier rules and how fully the bag is packed.

Alternatives to compare

  • Rolling carry-on luggage for longer walks and heavier loads.
  • Travel backpacks for hands-free carrying.
  • Packing cubes for organizing items inside existing luggage.
  • Rigid storage totes for car trips and household gear.

FAQ

What is a foldable duffel bag best for?

It is best for overflow packing, gym use, short trips, and situations where compact storage matters between uses.

Can a foldable duffel bag be used as carry-on luggage?

Maybe, but you must verify current airline size rules and compare them with the bag dimensions before travel.

What should I verify before buying a foldable duffel bag?

Verify dimensions, capacity, strap design, zipper layout, fabric notes, compartment details, and return policy.

Are foldable duffel bags good for heavy gear?

They can work for light to moderate loads, but heavy gear may need stronger structure, padding, or wheels.

Do shoe compartments matter?

They matter if you separate footwear, laundry, or wet items, but they also affect interior space and bag layout.

LANSKLBD 8-Set Packing Cubes: Who It Fits and What to Check Before Buying

Product links are for reference. Verify current details on the retailer page before buying.

Illustrative packing cubes image for a buying guide

Illustrative image, not an official product photo.

Short answer

The LANSKLBD 8-set packing cubes are worth considering if you want multiple zip organizers for separating clothes, shoes, laundry, toiletries, and small travel items. The key is to verify the current set contents, sizes, fabric wording, and care instructions before buying.

Search reference

Packing cube set options

Compare current options and verify details on the retailer page before buying.

View matching options

What this product is

This is a travel packing organizer listing for a multi-piece packing cube set.

Visible product information references multiple pouch sizes and travel uses such as clothes, shoes, laundry, toiletries, and electronic accessories.

This draft does not independently confirm exact dimensions, fabric durability, water resistance, zipper quality, or care instructions. Verify those details on the retailer page before buying.

Who this is for

This travel packing cubes may fit:

  • travelers who want to separate clothing categories inside a suitcase
  • families who pack shared luggage and need visible organization
  • business travelers who want shirts, underlayers, laundry, and accessories separated
  • buyers who want a set rather than buying single organizers one at a time

Who should skip it

Skip or compare more options if:

  • you already use compression bags and need maximum volume reduction
  • you need waterproof dry bags for wet gear or outdoor trips
  • your luggage is very small and you have not checked each cube size
  • you prefer rigid storage boxes instead of soft zip pouches

What to verify before buying

  • Confirm the current piece count and which pouch types are included.
  • Check each listed size against your suitcase, backpack, or drawer space.
  • Verify fabric, mesh panel, zipper, handle, and care wording on the current page.
  • Check whether any item is described as water resistant or only as a general organizer.
  • Review seller information, return policy, and delivery timing before buying.

Main buying notes

Packing cubes help when the problem is sorting, not necessarily shrinking. They can make it easier to find shirts, underlayers, socks, accessories, and laundry without emptying the whole suitcase.

The most useful set is the one whose sizes match your luggage. A large set can still be awkward if the cubes do not fit your bag layout.

If you travel with liquids, toiletries, or wet clothing, verify whether the relevant pouch is appropriate for that use. Do not assume every pouch in a packing set is water resistant.

Limitations

  • Packing cubes organize items but may not reduce volume like compression bags.
  • Soft fabric organizers may not protect fragile items from impact.
  • Exact sizes, fabric weight, zipper design, and washing guidance should be checked on the current page.
  • The set may include pouch types you do not personally need.

Alternatives to compare

  • compression packing cubes if volume reduction is more important
  • clear toiletry bags for liquids and airport screening
  • laundry bags if separating used clothing is the main need
  • shoe bags if footwear is the only issue
  • rigid tech organizers for chargers, cables, and fragile accessories

FAQ

Is this a multi-piece packing cube set?

Yes. The visible listing describes an 8-set travel packing organizer. Confirm the current included pieces before buying.

Are packing cubes the same as compression bags?

No. Packing cubes mainly organize items. Some travel organizers compress, but you should verify that feature on the current page.

Can these be used for toiletries?

The visible title references a toiletry bag, but you should verify the current included pouch type and liquid-handling suitability before buying.

Will they fit every suitcase?

No. Compare the current dimensions with your luggage layout before buying.

What should buyers check first?

Start with piece count, pouch sizes, fabric wording, zipper design, care instructions, and seller information.

LOVEVOOK 40L Carry-On Travel Backpack: Who It Fits and What to Check Before Buying

Product links are for reference. Verify current details on the retailer page before buying.

Illustrative carry-on travel backpack image for a buying guide

Illustrative image, not an official product photo.

Short answer

The LOVEVOOK 40L carry-on travel backpack is worth considering if you want a large travel backpack with packing cubes and laptop space in one travel-ready bag.

The main things to verify are the actual airline size rules for your trip, the selected color or variation, the laptop fit, and whether the listed waterproof wording matches the level of weather protection you expect.

Search reference

Carry-on travel backpack options

Compare current options and verify details on the retailer page before buying.

View matching options

What this product is

This is a LOVEVOOK travel backpack listed as a 40L carry-on style backpack for women and men.

Visible product information from the linked page shows:

  • Brand: LOVEVOOK
  • Product type: travel backpack / carry-on backpack / weekender backpack
  • Capacity: 40L
  • Laptop fit: up to 17 inches
  • Included accessories: 3 packing cubes
  • Listed travel positioning: airline-approved carry-on luggage
  • Weather wording visible on the page: waterproof

The visible information does not confirm the exact material, zipper construction, strap padding details, or measured dimensions in this draft. Verify those details on the retailer page before buying.

Who this is for

This travel backpack may fit buyers who:

  • want one backpack for short trips, weekend travel, or carry-on packing
  • prefer a larger 40L travel bag instead of a compact daypack
  • want packing cubes included with the bag
  • need laptop space for a device up to 17 inches
  • want a bag that can be compared against carry-on luggage and weekender backpacks

It may also fit travelers who want a more organized packing setup without buying separate packing cubes first.

Who should skip it

Skip or compare more options if:

  • you need a small daily backpack instead of a large travel pack
  • your airline has strict personal-item size rules and you need exact dimensions first
  • you carry a laptop larger than the listed fit
  • you need verified material, zipper, or water-resistance details before buying
  • you prefer a wheeled carry-on instead of wearing a backpack

Do not assume it will fit every airline, every seat area, or every packing style. Airline rules and gate enforcement can vary.

What to verify before buying

Before buying, verify these details on the product page:

  • Confirm the current listed dimensions and compare them with your airline rules
  • Check whether 40L is the right size for your trip length and packing habits
  • Confirm that your laptop size fits the listed laptop compartment
  • Check what the 3 packing cubes include and whether they match your packing style
  • Review the current waterproof or water-resistant wording carefully
  • Check strap design, back padding, handle placement, and pocket layout
  • Confirm return policy, delivery timing, and seller information

Main buying notes

The main appeal is capacity and organization. A 40L travel backpack with included packing cubes can be useful for travelers who want a single soft-sided bag for clothes, laptop gear, and small essentials.

The trade-off is size. A larger backpack may be easier to pack but less comfortable when fully loaded. It can also be more sensitive to airline size rules than a smaller personal-item backpack.

If you travel with a laptop and clothing in the same bag, compare the laptop compartment, packing cube layout, and access style before deciding. If your trips are mostly overnight or minimalist, a smaller backpack may be easier to carry.

Limitations

  • The visible product information does not confirm the exact material.
  • The visible product information does not confirm measured dimensions in this draft.
  • The waterproof wording should be verified on the retailer page before buying.
  • Airline-approved wording does not guarantee acceptance on every airline or flight.
  • Long-term comfort and durability cannot be judged from the visible product information alone.

Alternatives to compare

Before deciding, compare it with:

  • smaller 28L to 35L travel backpacks for lighter packing
  • wheeled carry-on luggage if you do not want to wear the load
  • travel backpacks with clearly listed dimensions and materials
  • laptop backpacks with stronger daily commute features
  • separate packing cubes if you already own a suitable backpack

The right choice depends on whether you value capacity, organization, laptop fit, or carry comfort most.

FAQ

Is this a 40L travel backpack?

The visible product information identifies it as a 40L travel backpack. Still, verify the selected variation and current listing details before buying.

Does it include packing cubes?

The visible product information says it includes 3 packing cubes. Check the retailer page for the current included items before buying.

What laptop size does it fit?

The visible product information says it fits up to a 17-inch laptop. Confirm your laptop dimensions and the current compartment details before buying.

Is it suitable as a personal item on every airline?

Do not assume that. The page uses carry-on and airline-approved wording, but airline rules vary. Compare the current listed dimensions with your specific airline before travel.

Is the backpack waterproof?

The visible page wording includes waterproof. Buyers should verify the current wording, material details, and realistic weather protection expectations on the retailer page.

tomtoc Travel Backpack 28L: Who It Fits and What to Check Before Buying

Product links are for reference. Verify current details on the retailer page before buying.

Illustrative compact travel backpack image for a buying guide

Illustrative image, not an official product photo.

Short answer

The tomtoc Travel Backpack 28L is worth considering if you want a compact travel backpack that is lighter and smaller than many large carry-on packs while still offering laptop space.

The main things to verify are the current dimensions, laptop compartment fit, TSA-friendly layout, and whether 28L is enough capacity for your actual packing style.

Search reference

28L travel backpack options

Compare current options and verify details on the retailer page before buying.

View matching options

What this product is

This is a tomtoc travel backpack listed as a 28L carry-on personal-item style bag.

Visible product information from the linked page shows:

  • Brand: tomtoc
  • Product type: travel backpack / carry-on personal item bag
  • Capacity: 28L
  • Laptop fit: 16-inch laptop
  • Listed features: TSA-friendly, flight-approved, water-resistant, lightweight
  • Style positioning: business-style rucksack

The visible information does not confirm the exact fabric composition, zipper model, measured dimensions, or internal pocket layout in this draft. Verify those details on the retailer page before buying.

Who this is for

This travel backpack may fit buyers who:

  • want a compact travel backpack for short trips or light packing
  • need laptop space for a 16-inch laptop
  • prefer a backpack that is easier to carry than a larger 40L travel pack
  • want a bag positioned for air travel and business-style use
  • care about water-resistant wording but still plan to verify the details

It may also fit travelers who want a personal-item style backpack rather than a maximum-capacity carry-on bag.

Who should skip it

Skip or compare more options if:

  • you need maximum packing capacity for longer trips
  • you carry a laptop larger than the listed fit
  • you need exact dimensions before deciding
  • you want a backpack with confirmed material and construction details
  • you prefer built-in packing cubes or a suitcase-style clamshell layout

A 28L bag can be easier to carry, but it may feel limiting if you pack bulky clothing, extra shoes, or camera gear.

What to verify before buying

Before buying, verify these details on the product page:

  • Confirm the current listed dimensions and compare them with your airline rules
  • Check whether 28L is enough for your trip length and packing habits
  • Confirm that your laptop fits the 16-inch laptop compartment
  • Check the TSA-friendly opening style and whether it matches how you travel
  • Review the current water-resistant wording and material details
  • Check pocket layout, strap padding, luggage pass-through, and handle design
  • Confirm return policy, delivery timing, and seller information

Main buying notes

The main appeal is a smaller travel-backpack format. A 28L backpack can be easier to carry through airports, offices, and public transit than a larger travel pack.

The trade-off is capacity. It may work well for light packers, short trips, or business travel, but it may not replace a larger carry-on for people who pack multiple outfits, shoes, or bulky items.

If your priority is portability and laptop travel, this is a reasonable option to compare. If your priority is maximum storage, compare it with larger travel backpacks before deciding.

Limitations

  • The visible product information does not confirm exact measured dimensions in this draft.
  • The visible product information does not confirm the exact fabric composition.
  • Water-resistant wording should be verified on the retailer page before buying.
  • TSA-friendly or flight-approved wording does not guarantee acceptance on every airline.
  • A 28L capacity may be too small for longer trips or bulky packing lists.

Alternatives to compare

Before deciding, compare it with:

  • larger 35L to 45L carry-on backpacks for more capacity
  • smaller laptop backpacks for daily commuting
  • travel backpacks with included packing cubes
  • wheeled carry-on luggage if you do not want to carry weight on your shoulders
  • bags with clearly listed dimensions and material details

The right choice depends on whether you value compact carry, laptop organization, or packing capacity most.

FAQ

Is this a 28L travel backpack?

The visible product information identifies it as the tomtoc Travel Backpack 28L. Verify the selected variation and current listing details before buying.

What laptop size does it fit?

The visible product information says it fits a 16-inch laptop. Confirm your laptop dimensions and the current compartment details before buying.

Is it TSA-friendly?

The visible product information describes it as TSA-friendly. Check the current page details to understand the opening style and whether it matches your travel routine.

Is it water-resistant?

The visible product information includes water-resistant wording. Verify the material details and realistic weather protection expectations on the retailer page before buying.

Is 28L enough for travel?

It depends on your packing style. A 28L backpack may work for short trips and light packing, but travelers with bulky clothing or extra gear should compare larger options.

Travel Toiletry Bags: Who They Fit and What to Check Before Buying

Product links are for reference. Verify current details on the retailer page before buying.

Illustrative image for a travel toiletry bag buying guide

Illustrative image, not an official product photo.

Short answer

Travel toiletry bags are useful if you want toiletries, grooming tools, and small liquids in one organized place. Compare capacity, pocket layout, hanging hook strength, leak control, and packed size before choosing an option.

Search reference

Travel toiletry bag options

Compare current options and verify details on the retailer page before buying.

View matching options

What this product type is

A travel toiletry bag keeps grooming items, small bottles, brushes, and daily-care accessories grouped in luggage. Common comparison points include capacity, hanging hook design, pocket layout, water-resistance wording, and whether it packs flat enough for your bag.

This guide treats the seed listing as a category signal only. Compare current matching options and verify details on the retailer page before buying.

Who this is for

  • Travelers who want bathroom items grouped instead of loose inside luggage.
  • People packing small bottles, razors, brushes, and daily grooming accessories.
  • Hotel, gym, or weekend-trip users who want a bag that can hang open.
  • Families or frequent travelers comparing compartment layouts.

Who should skip it

  • Skip it if you only carry one or two small items and a simple pouch is enough.
  • Skip bulky hanging styles if your suitcase or backpack has very limited space.
  • Compare clear pouches if you need visibility for security checks or shared storage.

What to verify before buying

  • Check internal dimensions, pocket layout, and whether full-size bottles are supported.
  • Verify hanging hook material, attachment point, and how the bag opens when loaded.
  • Confirm water-resistance wording and remember it may not mean fully waterproof.
  • Review zipper style, handle placement, and whether the bag packs flat.
  • Check current color or size selection before buying.
  • Review seller information and return policy before buying.

Main buying notes

Capacity is the first tradeoff. A larger toiletry bag can hold more, but it can also take over valuable luggage space.

A hanging hook helps in small bathrooms where counter space is limited. Verify the hook and seam design if you plan to load the bag heavily.

Pocket layout should match what you carry. Tall bottles, electric grooming tools, brushes, and small cosmetics need different pocket shapes.

Water-resistance wording should be read carefully. It may help with splashes, but it does not automatically protect luggage from every leak.

Limitations

  • A toiletry bag cannot prevent every bottle leak, especially during air travel or rough packing.
  • Hanging styles can become bulky when filled with rigid containers.
  • Clearance, liquid rules, and carry-on requirements vary by trip, so verify travel rules separately.
  • Pocket dimensions may not fit every brush, bottle, or grooming tool.

Alternatives to compare

  • Clear quart-size pouches for simple liquid organization.
  • Flat packing cubes for dry accessories and clothing.
  • Small cosmetic bags for daily essentials only.
  • Hard toiletry cases if crush resistance matters more than packability.

FAQ

Is a hanging toiletry bag worth it?

It can be useful if you often use small bathrooms or shared spaces. Verify hook design, loaded shape, and capacity before buying.

What size travel toiletry bag should I compare?

Compare the bag size against your bottles, grooming tools, luggage space, and trip length rather than choosing by appearance alone.

Does water-resistant mean leakproof?

Not necessarily. Water-resistance wording usually needs careful reading, and liquid bottles should still be closed and packed carefully.

Can this replace packing cubes?

Usually no. A toiletry bag is for bathroom and grooming items, while packing cubes are better for clothing and soft travel organization.

What should I verify before buying?

Verify dimensions, pocket layout, hook design, material notes, zipper access, current color or size, and return policy.