Bed Risers for Extra Storage: Measure the Bed Before You Raise It

Product links are for reference. Verify current details on the retailer page before buying.
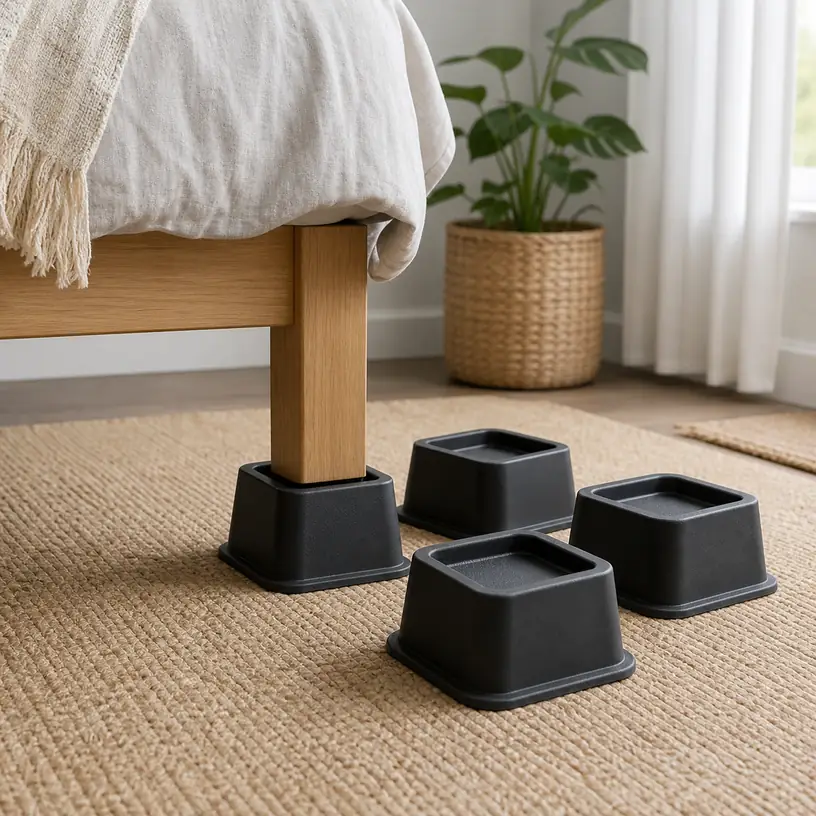
Illustrative image of generic bed riser blocks beside a simple wooden bed leg

Illustrative image, not an official product photo.

Short answer

Start with the bed, not the storage bins. Count every point that actually touches the floor, measure the width and shape of each leg or foot, and note the present floor-to-frame clearance. Choose only enough lift to clear the containers you plan to use, then check the riser’s top recess, base footprint, stated load rating, floor guidance, and compatibility with the complete bed frame. Raising a bed also raises the mattress edge and changes how the frame handles movement, so the lowest suitable height is usually the more practical comparison point.

Search reference

Bed riser options

Compare lift height, recessed top dimensions, number of pieces, base width, load wording, and floor-contact design against your actual bed and storage plan.

View matching options

Map the bed’s support points first

Four risers are enough only for a bed with four load-bearing feet. Many frames have a center rail with one or more legs, extra supports near the headboard, paired feet under a platform, or glides that are easy to miss beneath fabric. Putting risers under the visible corners while leaving a center support on the floor changes the frame geometry instead of raising it evenly.

Inspect the assembled bed from all sides and count every floor contact. If the frame instructions specify center legs, brackets, or required support locations, preserve that arrangement. A set advertised for a four-legged piece of furniture may not contain enough matching pieces for a six- or nine-point bed frame. Mixing heights or improvising a support from unrelated blocks is not a substitute for a complete compatible set.

Measure each contact point rather than assuming they are identical. A wooden bed may have square corner posts and a narrower center leg; a metal frame may end in wheels, broad glides, angled feet, or a combination of shapes. Record the widest dimension at the point that would sit inside the riser. Also note whether a caster can be removed only when the frame maker allows it, because a wheel sitting loosely in a shallow recess can behave differently from a flat leg.

Who this is for

  • Renters and small-bedroom households trying to fit measured storage containers beneath an otherwise compatible freestanding bed.
  • Buyers whose bed has clearly identifiable, accessible support feet that match a riser’s stated top shape and dimensions.
  • People who need a modest increase in clearance and can still get into and out of the raised bed comfortably.
  • Households willing to raise every required support point evenly and inspect the setup after installation.
  • Organizers choosing bins after calculating usable clearance, rather than buying risers and hoping existing containers will fit.

Who should skip it

  • Skip generic risers if the bed or frame instructions prohibit raising, require proprietary supports, or do not confirm compatibility.
  • Do not assume they suit adjustable bases, bunk or loft beds, wall beds, waterbeds, trundle systems, hospital-style beds, or frames attached to another structure.
  • Avoid a riser whose recessed top cannot fully and predictably receive the bed’s legs, feet, or permitted casters.
  • A raised bed may be inconvenient when mattress height already makes sitting, transferring, or changing sheets difficult.
  • If the floor is uneven, damaged, heavily cushioned, or unsuitable under the riser’s instructions, solve the surface issue rather than using the risers as levelers.
  • A bed that is loose, bent, cracked, missing hardware, or unstable should be repaired or replaced before any change in height is considered.

What to verify before buying

  • Support count: Count corner, center, and intermediate legs and make sure the set provides one identical-height riser for every required floor contact.
  • Top fit: Compare the recess length, width or diameter, depth, edge shape, and any anti-slip insert with each bed foot.
  • Lift versus total height: Distinguish added lift from the product’s full outside height, then calculate the new mattress-edge height.
  • Load statement: Read how the current rating is defined and whether it applies per piece or per complete set; account for the bed, foundation, mattress, occupants, bedding, and anything else supported.
  • Base footprint: Check that each riser can sit fully on the floor without touching a baseboard, wall, rug edge, cable, or neighboring furniture.
  • Floor guidance: Confirm approved surfaces and whether a separate floor protector is allowed without changing stability.
  • Frame compatibility: Review the bed maker’s instructions, especially for center supports, removable casters, adjustable components, and headboards.
  • Stacking rules: Never assume risers can be stacked, nested, or combined to create another height unless the exact product instructions permit that configuration.
  • Installation method: Determine how the bed will be lifted and positioned without placing hands or feet beneath it, and arrange enough capable help for the complete setup.

Choose clearance from a real container

The useful number is not simply “six-inch riser” or another headline dimension. Measure the current vertical gap at the lowest point a bin must pass under, which may be the side rail, center rail, slat hardware, or a hanging fabric edge. Add the advertised lift, not the riser’s total height, to estimate the new opening. Then leave handling clearance above the container so it can pass beneath the rail without scraping or requiring the bed to flex.

Container lids, wheels, handles, and bowed contents all affect the height needed in practice. A soft zippered bag may catch on hardware even when its nominal dimensions fit. A rigid bin needs enough room for fingers at the front and enough open floor area to turn as it slides out. Map where center legs divide the under-bed area as well; the total footprint under a queen or king bed is not one uninterrupted rectangle.

The raised mattress height deserves its own calculation. Measure from the floor to the top edge now, add the planned lift, and compare that result with the people who use the bed. More storage is a poor trade if feet no longer reach the floor while sitting at the edge or if regular access requires an improvised step. Thick mattresses, toppers, and foundations can make even a modest riser feel like a large change.

The top recess matters more than the color

Most rigid risers use a recessed cup, channel, or textured platform to locate a furniture foot. That area must be wide enough for the foot to sit as directed but not so mismatched that a narrow leg can slide across a broad, shallow surface. Compare the usable inside dimensions, not just the outside block size shown in a photograph.

Depth also changes fit. A deep cup may help surround a compatible straight leg, yet it can conflict with an angled leg, decorative flare, horizontal frame member, or caster bracket. A shallow top can be easier to place under a broad flat foot but may provide less surrounding edge. There is no universally better shape; the relevant choice is the one documented for the support geometry beneath your bed.

Some sets use separate inserts or removable pads. Confirm whether these pieces are required, how they are oriented, and whether replacements are available. Adhesive grip material and floor pads should not be added casually: extra layers can compress, shift, or change how the riser sits unless the product instructions specifically allow them.

Load wording needs context

Large capacity numbers can be difficult to compare because listings may describe one riser, an entire set, static load, or a test condition that does not match a moving bed. Read the complete current statement and supporting instructions. The relevant load is not just the sleeper’s body weight; it includes the frame, mattress system, occupants, bedding, and any supported accessories.

A load rating does not prove compatibility or stability. A riser can have a substantial stated capacity while its top is the wrong size for a particular leg or its base is poorly placed on the room’s floor. Likewise, a frame still has to follow its own load and support requirements. Treat capacity, fit, support count, and surface conditions as separate checks that all need acceptable answers.

Beds experience movement as people sit down, turn, or get up. Added height can increase leverage at joints and make existing looseness more noticeable. Check frame fasteners according to the bed instructions before installation, and stop if the raised arrangement rocks, shifts, creaks in a new way, or leaves any support unloaded.

Plan installation and future access

Installing risers is not a one-person balancing task for many beds. Remove loose items and under-bed storage, clear a working path, and follow both the bed and riser directions. The goal is to lift and place the frame without anyone reaching beneath an unsupported load. Large frames, heavy mattresses, attached headboards, and tight rooms may require disassembly or professional assistance rather than a quick corner-by-corner lift.

After every support is positioned, inspect from several angles. Each foot should sit in the intended area, every riser base should be flat on the floor, and center supports should carry load as designed. Check clearance around outlets, cords, nightstands, wall trim, and anything attached to the headboard. Raising the bed can change the alignment of bedside furniture and expose gaps that were not present before.

Recheck the setup after initial use and during routine room cleaning, following the maker’s inspection guidance. Look for movement, cracks, deformation, worn pads, loosened frame hardware, or damage to the flooring. Do not drag the bed while it is on risers unless the instructions explicitly describe a safe way to move it; unload and reposition the system as directed instead.

Limitations

  • Risers create vertical clearance but do not remove center legs, low crossbars, or other obstructions beneath the frame.
  • Outside block dimensions do not reveal whether the top recess fits a particular bed foot.
  • A stated load rating cannot compensate for missing supports, an incompatible frame, or an unsuitable floor.
  • More lift raises the mattress, increases the visual height of the bed, and may change access to nightstands or wall-mounted fixtures.
  • Carpet, rugs, floor seams, and uneven boards can keep a wide base from contacting the floor as intended.
  • Under-bed containers still need room to enter, turn, open, and clear dust or floor transitions.
  • Generic risers are not automatically suitable for specialized, attached, stacked, folding, or powered bed systems.

Alternatives to compare

  • Low-profile under-bed bags or shallow rolling bins that fit the bed’s current clearance.
  • A bed frame designed with built-in drawers or documented storage clearance.
  • Vacuum storage bags for appropriate soft goods when reduced volume matters more than quick access.
  • Closet shelf, wardrobe, or over-door storage for items that should not be kept near the floor.
  • A compatible replacement frame with a taller fixed clearance if the current feet cannot safely accept risers.
  • Reducing the amount stored beneath the bed so frequently used items remain easy to reach and inspect.

FAQ

How many bed risers do I need?

You need one compatible riser for every support point the bed requires, not automatically four. Count corner feet, center legs, and any intermediate supports, then confirm that all can be raised evenly without changing the frame’s intended geometry.

How do I know whether a bed leg fits the riser?

Measure the leg or foot at the contact area and compare its shape with the riser’s usable recess length, width or diameter, and depth. Check for flared legs, caster brackets, angled members, or nearby hardware that could prevent the foot from seating as directed.

What height should I choose for under-bed bins?

Measure the present opening at its lowest obstruction, measure the bin including its lid, wheels, and handles, and add working clearance for sliding it in and out. Select the smallest compatible lift that creates that real opening, then calculate whether the new mattress height remains comfortable.

Can bed risers be stacked for more height?

Only when the instructions for that exact product explicitly allow a stated stacked configuration. Do not combine unrelated sets, invert blocks, or improvise extra layers to reach another height.

Do bed risers work on carpet?

Some may be intended for particular carpet types, while others may require a hard, level surface. Check the current floor guidance and base dimensions. The riser must remain flat and stable rather than rocking on padding, a rug edge, or a floor transition.

Can I use bed risers under a frame with wheels?

Do not assume so. Confirm both the frame maker’s guidance and the riser’s permitted foot or caster shapes. A wheel needs a specifically compatible recess or an approved conversion; removing casters or placing them in a generic cup without instructions can change fit and support height.

Bed Sheet Straps for a Neater Fitted-Sheet Setup

Product links are for reference. Verify current details on the retailer page before buying.

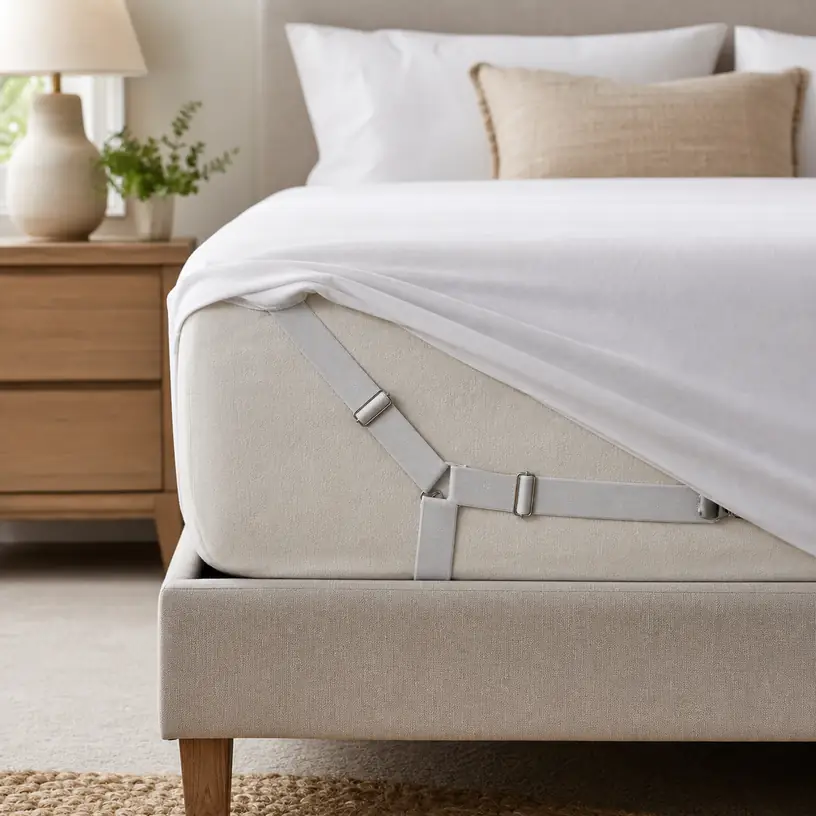
Illustrative image for a bed sheet straps buying guide

Illustrative image, not an official product photo.

Short answer

Bed sheet straps can help when a fitted sheet repeatedly slips off a mattress corner or gathers across the sleeping surface. The useful choice depends on how much access you have beneath the mattress: corner straps need less routing, crisscross systems can distribute tension more broadly, and longer suspenders may require lifting or reaching under much of the bed. Before choosing, compare the strap layout, adjustment range, clip design, mattress setup, and whether the sheet fabric can tolerate concentrated tension.

Search reference

Bed sheet strap options

Compare corner, triangle, and cross-mattress layouts along with adjustment range, clip style, installation access, and current package contents.

View matching options

Start with why the sheet comes loose

A fastener can manage movement, but it cannot correct every bedding mismatch. If a fitted sheet is too shallow for a tall mattress, topper, or pad, pulling it tighter may place more stress on the elastic hem and fabric. If the pocket is much deeper than the mattress, extra material can still wrinkle even when the corners remain attached. Measure the full mattress depth with every layer in place, then compare that measurement with the sheet’s stated pocket range.

Also check the bed itself. A lightweight mattress may shift on the foundation, an adjustable base changes shape during use, and a smooth mattress protector can let fabric migrate more easily. Identifying the source of movement helps determine whether straps are a sensible fix or whether a better-fitting sheet, grippy mattress pad, or different protector would solve the problem more directly.

Who this is for

  • Sleepers whose fitted sheets fit reasonably well but work loose at one or more corners overnight.
  • Guest-room or sofa-bed setups where bedding needs a little extra hold during occasional use.
  • Beds with a mattress topper that changes the effective depth and makes the existing sheet less secure.
  • Households comparing a removable solution before replacing otherwise usable sheets.
  • People who can safely lift a mattress corner or reach the attachment points without overstraining.

Who should skip it

  • Skip straps if the sheet cannot cover the mattress corners without being stretched close to its limit.
  • Choose another approach if lifting or reaching under the mattress is unsafe or impractical.
  • Avoid clips on delicate, loosely woven, or damaged fabric unless the manufacturer specifically indicates compatibility.
  • Do not route long straps where they can interfere with adjustable-bed hardware, power cables, hinges, or moving components.
  • Replace worn bedding when failing elastic, tears, or severely distorted pockets are the main problem.

What to verify before buying

  • Determine whether the design uses individual corner straps, three-point corner triangles, side-to-side bands, or a full crisscross layout.
  • Check the listed adjustment range against the distance the straps must span on your mattress and sheet.
  • Review how the clips open, close, and grip; confirm whether any protective inserts or fabric-contact surfaces are described.
  • Verify the number of straps, clips, or sets included rather than relying on staged listing images.
  • Consider mattress weight and bed-frame access, especially with platform beds, wall-side corners, bunk beds, and heavy toppers.
  • Confirm laundering instructions and whether straps should be removed before the sheet goes into the washer or dryer.
  • For an adjustable base, review both the bed guidance and the fastener routing before attaching anything underneath.

Match the fastener layout to the bed

Short corner straps usually connect two edges around one mattress corner. They can be easier to install because only a small section of the mattress needs to be lifted, and they let you address the corner that causes trouble. Their reach is limited, however, and clip placement can become awkward if the sheet hem is thick or hidden beneath a protector.

Three-point or triangle-style fasteners add another attachment point around each corner. That layout may spread the pull across more of the sheet edge, but it also adds clips and setup steps. Check product diagrams carefully because similar-looking sets can differ in how far the elastic extends and where the center connection sits.

Cross-mattress suspenders span a larger distance beneath the bed. They may distribute tension beyond individual corners, yet installation can be inconvenient on a heavy mattress or a platform frame with little hand clearance. A full-length strap should never be guessed into place around mechanical parts. Plan the route before clipping it to the sheet.

Clips, tension, and sheet fabric

A secure clip is only useful if it holds without damaging the material. Metal and plastic clip designs vary, as do their teeth, locking mechanisms, and protective surfaces. Product photos can suggest how a clip works, but current instructions and compatibility wording are more reliable than appearance alone.

Use the least tension that keeps the sheet settled. Overtightening can pull the corners into an unnatural shape, concentrate force near the clip, or make the sheet difficult to remove. After installation, smooth the sleeping surface and check that the fitted-sheet seam still sits near the mattress corner rather than being dragged far underneath.

Fabric condition deserves attention. A sturdy sheet in good condition may handle removable fasteners differently from a thin, aged, or loosely woven one. If you see stretching, small holes, pulled threads, or clip marks after initial use, stop and reassess the placement or the entire solution.

Setup and everyday care

Installing straps is easier before the bed is fully dressed. Fit the sheet first, attach one area at a time, and avoid kneeling or reaching under an unsupported mattress. If the mattress is heavy, ask for help rather than trying to hold it up with one hand while operating a clip with the other.

Recheck the straps after the first few nights. Elastic can settle, clips can shift, and bedding layers may move differently once the bed has been used. Make modest adjustments instead of immediately pulling every strap tighter.

For laundry day, follow the product instructions. Removable hardware can catch other textiles or strike the washer or dryer if left attached. Keeping a small pouch near the linen closet gives loose straps and clips a predictable storage place between changes.

Limitations

  • Straps do not turn an incorrectly sized fitted sheet into a properly fitted one.
  • Clips may leave impressions or damage some fabrics, particularly when placed under excessive tension.
  • Installation can be difficult on heavy mattresses, low-clearance frames, wall-side beds, and top bunks.
  • Long under-mattress straps may be unsuitable around adjustable-base mechanisms or other moving hardware.
  • Elastic, clip construction, adjustment range, and package quantity vary across current listings and need individual verification.

Alternatives to compare

  • A fitted sheet with a pocket depth that more closely matches the mattress and topper.
  • Sheets with reinforced corner elastic or built-in corner bands.
  • A different mattress protector if a slick surface is contributing to movement.
  • Sheet grippers designed for individual corners rather than a full under-bed system.
  • Flat-sheet folding methods when the bed setup makes fitted sheets or under-mattress clips impractical.

FAQ

Do bed sheet straps work with a mattress topper?

They can when the fitted sheet already covers the combined mattress and topper without excessive stretching. Measure the total depth first and make sure the chosen strap layout can be installed without shifting or compressing the topper awkwardly.

Are corner straps easier to install than crisscross straps?

Usually, because corner straps require access to a smaller area beneath the mattress. Crisscross designs span farther and may take more lifting, routing, and adjustment, particularly on a platform bed.

Can sheet fastener clips damage fabric?

They can if the clip design is unsuitable, the fabric is delicate or worn, or the straps are overtightened. Inspect the contact points after initial use and stop if you notice holes, pulled threads, or distortion.

Should bed sheet straps stay attached during washing?

Follow the current care instructions for the fasteners and bedding. Removable clips and elastic hardware are often safer to take off so they do not catch other laundry or knock against the washer or dryer.

Can I use bed sheet straps on an adjustable bed?

Only if the routing is compatible with the base and does not cross hinges, motors, cables, or moving sections. Check the adjustable-bed guidance and the fastener instructions; when compatibility is unclear, use another sheet-holding approach.

Closet Organizers: Who They Fit and What to Check Before Buying

Product links are for reference. Verify current details on the retailer page before buying.

Illustrative image for a closet organizer buying guide

Illustrative image, not an official product photo.

Short answer

Closet organizers are useful when your closet has wasted vertical space or mixed storage needs. Measure carefully, compare installation requirements, and verify load guidance before choosing a system.

Search reference

Closet organizer options

Compare current options and verify details on the retailer page before buying.

View matching options

What this product type is

A closet organizer adds shelves, hanging space, drawers, cubes, or modular sections to a closet. The right choice depends on closet width, wall type, installation method, load guidance, and the mix of folded clothes, shoes, bags, and hanging garments you need to store.

This guide treats the seed listing as a category signal only. Compare current matching options and verify details on the retailer page before buying.

Who this is for

  • Homeowners or renters who need more structured clothing storage.
  • People organizing shared bedrooms, kids rooms, entry closets, or guest rooms.
  • Buyers comparing shelves, rods, drawers, cubes, and shoe storage in one setup.
  • Anyone planning a closet refresh without custom built-ins.

Who should skip it

  • Skip fixed systems if you cannot drill, anchor, or alter the closet area.
  • Skip large kits if you have not measured width, depth, height, and door clearance.
  • Compare freestanding racks if you move often or need temporary storage.

What to verify before buying

  • Measure closet width, depth, height, baseboards, and door swing before buying.
  • Confirm installation method, required tools, wall support, and mounting hardware details.
  • Verify load guidance for shelves, rods, drawers, and any modular sections.
  • Check whether parts can be trimmed, expanded, or rearranged for your closet layout.
  • Review finish, material notes, cleaning instructions, and current package contents.
  • Review seller information and return policy before buying.

Main buying notes

The biggest mistake is buying before measuring. Closet kits can look flexible, but real spaces have trim, doors, vents, outlets, and uneven walls.

Think by storage job. Hanging rods help shirts and jackets, shelves help folded clothes, drawers hide small items, and open cubes keep daily items visible.

Installation requirements matter. Some systems need wall anchoring, cutting, or extra tools. Verify the current retailer page and manufacturer instructions before buying.

A modular system can be easier to adjust over time, but modular parts still need the right dimensions and support.

Limitations

  • A closet organizer cannot fix poor measurements or weak wall support.
  • Some kits may require cutting, drilling, anchoring, or additional tools.
  • Load guidance depends on installation quality and wall conditions.
  • Large components can be difficult to return or move after assembly.

Alternatives to compare

  • Freestanding garment racks for temporary hanging storage.
  • Fabric hanging shelves for lightweight folded items.
  • Under-bed storage bins for seasonal clothing.
  • Drawer units or baskets if closed storage matters more than rods.

FAQ

What should I measure before buying a closet organizer?

Measure width, depth, height, baseboards, door clearance, wall obstacles, and the space needed for hanging clothes.

Do closet organizers always require drilling?

No, but many fixed systems do. Verify the current installation method, hardware, and wall support requirements before buying.

How do I choose the right layout?

Start with what you store: hanging clothes, folded clothes, shoes, bags, accessories, and seasonal items all need different sections.

Are modular closet organizers better?

They can be easier to adjust, but only if the dimensions, hardware, and load guidance match your closet and storage needs.

What should I verify on the retailer page?

Verify dimensions, package contents, materials, installation method, load guidance, finish, seller information, and return policy.