Before You Buy a Foil and Plastic Wrap Organizer, Measure the Whole Drawer

Product links are for reference. Verify current details on the retailer page before buying.
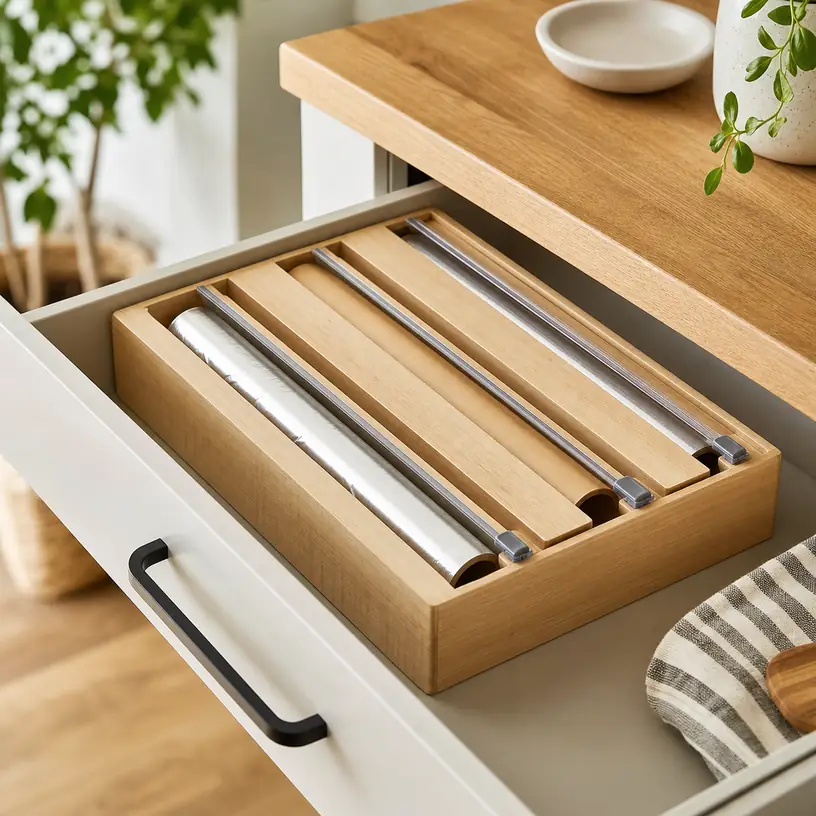
Illustrative image of a generic wooden foil and plastic wrap organizer in an open kitchen drawer

Illustrative image, not an official product photo.

Short answer

Do not size a wrap organizer from its outside length alone. First measure the drawer’s clear internal width, depth, and height, then repeat the height measurement under any rails, handle screws, or countertop overhang that the organizer must pass. Measure the rolls now in the kitchen too: package width, roll diameter, and the space required to load a replacement all matter. Decide whether you want to keep original boxes, move rolls into a dispenser, or simply divide a drawer. An integrated cutter can reduce loose boxes, but only if the roll turns freely, the cutting carriage is easy to reach, and the complete unit can be cleaned and refilled without an awkward struggle.

Search reference

Foil and plastic wrap organizers with cutters

Compare usable roll compartments, drawer clearance, refill access, cutter guards, mounting details, and cleaning instructions for the exact materials you store.

View matching options

Start with the route into the drawer

A product can match the drawer’s rectangular measurements and still refuse to go in. Many drawers have a narrower opening than the cavity behind the face. Side rails, a lowered countertop edge, a center support, or screws from the handle can also reduce usable clearance. Measure the opening through which the organizer will travel as well as the space where it will rest. If the unit is wider than the opening, tilting it may help only when there is enough height and depth to rotate it safely.

Empty the drawer before measuring. Record width at the front and back, depth on both sides, and height at several points. Older cabinets and drawer liners may not be perfectly square. Subtract room for finger access, normal drawer movement, and any liner that bunches at the edges. A tight friction fit may look efficient, but it can make removal for cleaning difficult and can transmit every pull on a cutter to the drawer sides.

Next, close the empty drawer slowly while watching the space above it. Tall rolls, raised knobs, protruding cutter carriages, and tabs can catch even when the organizer body sits below the rim. If the product will stand on a counter or mount to a wall instead, measure the working area in front of it. A dispenser needs more than storage depth; someone must be able to pull material forward and complete a cut without striking a backsplash, cabinet door, or nearby appliance.

Who this is for

  • Households that keep two or more rolls of foil, parchment, plastic wrap, or similar kitchen material in one frequently used drawer.
  • Cooks who want each roll to remain in a fixed position rather than stacking original boxes that shift when the drawer closes.
  • People prepared to measure current rolls and check new refills instead of assuming every package uses the same core, width, or diameter.
  • Small kitchens where consolidating compatible wraps can release useful drawer or shelf space.
  • Buyers who prefer an enclosed sliding cutter or another clearly documented cutting method over torn boxes and exposed serrated edges.
  • Renters who choose a drawer insert or another nonpermanent arrangement that does not require altering cabinets.

Who should skip it

  • Anyone whose drawer opening, interior height, or rail layout leaves no comfortable clearance around a rigid organizer.
  • Households that regularly buy unusually wide, thick, or high-capacity rolls without confirmed compartment dimensions.
  • People who want to preserve package instructions, material identification, or date information but have no plan to transfer those details when a roll leaves its box.
  • Shared kitchens where users may not recognize which unlabelled roll is foil, parchment, waxed paper, or plastic wrap.
  • Buyers who cannot mount a wall or cabinet unit using the specified method and suitable substrate.
  • Kitchens where a simple adjustable divider already keeps original boxes orderly without adding refill steps or another item to maintain.

What to verify before buying

  • Drawer opening and cavity: Compare the narrowest opening, internal width, depth, height, rail position, and handle hardware with the organizer’s complete external dimensions.
  • Usable roll space: Check each compartment’s internal width and diameter allowance, not just the unit’s overall length or the number of rolls shown.
  • Loading direction: Determine whether refills enter from an end, the top, a hinged panel, or a removable rod, and reserve room for that movement.
  • Roll control: Look at how the core is supported and whether a partly used roll can unwind without drifting, binding, or collapsing into the compartment.
  • Material separation: Confirm that each stored wrap remains identifiable after original packaging is removed and that labels can be updated without blocking operation.
  • Cutter design: Verify which materials the cutter is intended to handle, where its working edge rests, how fingers stay clear, and whether the carriage can be replaced.
  • Pulling direction: Check whether the dispenser is designed for in-drawer, countertop, vertical, or under-cabinet use; the same mechanism may not work securely in every orientation.
  • Mounting system: For mounted units, inspect fastener type, hole spacing, required tools, supported surfaces, installation template, and removal consequences.
  • Base stability: A counter unit should resist sliding or tipping while material is pulled. An in-drawer model should not slam into the drawer walls.
  • Cleaning access: Read the care instructions for the body, cutter channel, rod, finish, labels, adhesives, feet, and mounting parts.
  • Replacement parts: Find out whether cutter carriages, labels, rods, or other wear items are available and specific to the model.
  • Package contents: Confirm that product photos do not imply rolls, labels, mounting hardware, or extra cutters that are not actually included.

A three-slot organizer does not fit every set of three rolls

Slot count is only a rough description. Foil, parchment, and plastic wrap can arrive in packages with different widths and roll diameters, and larger refills may grow in diameter even when the material width stays familiar. Measure the physical rolls you expect the dispenser to hold, including a newly purchased full roll rather than only the nearly empty one in the drawer.

The core matters as well. Some dispensers use a rod through the center; others cradle the roll or depend on end caps. Compare the supported core range and loading mechanism with the refills you buy. A roll that technically enters the compartment may still bind if its sides rub the walls or if the core sits off center. Plastic wrap also behaves differently from stiff foil when it clings to itself, so a smooth material path and accessible leading edge are important.

Think about substitutions. If one slot normally holds parchment but occasionally stores waxed paper or a roll of bags, will everyone know what is loaded? Original boxes carry instructions and identity information that a bare roll does not. Retain relevant package information and use clear, changeable labels. Do not treat look-alike materials as interchangeable in cooking; follow the material maker’s current directions and the recipe or appliance instructions.

A little unused compartment width is useful for loading and rotation. Too much can allow the roll to shift sideways, creating an angled feed into the cutter. Look for documented internal dimensions or adjustment features rather than inferring fit from styled photos. When dimensions are incomplete, outline the proposed unit and roll positions with paper in the drawer before deciding whether the arrangement will improve access.

The refill motion needs its own space

The best time to discover a loading problem is before the organizer is wedged between other drawer inserts. A top-loading unit needs enough vertical clearance to lift a full roll over the compartment wall. A removable rod may need several inches of free space at one end. A hinged lid can collide with the cabinet frame, and an end cap can become inaccessible when the organizer is installed flush against a divider.

Imagine replacing the roll with the drawer in its normal position. Can the unit stay in place, or must the entire organizer be lifted out? If it must be removed, is there a safe place to set it while handling the roll? A long rigid body filled with several rolls can be awkward to turn in a narrow kitchen. Finger recesses or a clear gripping area may matter more than a perfectly filled drawer.

Before discarding any original packaging, load one roll and make a short trial feed according to the product instructions. Confirm that the material exits in the intended direction and that the leading edge remains available for the next use. Store the package information until you know the refill is compatible and clearly labelled.

Treat the cutter as a tool, not a decoration

Integrated cutters may use a sliding carriage, a recessed edge, or another mechanism. The product documentation should state which materials each cutter is intended to cut. A mechanism that handles foil acceptably may behave differently with thin cling film or heavy paper. Do not force a jammed carriage or substitute a material the instructions do not cover.

Look at the rest position. A working edge should not be where a hand naturally grips the organizer or searches for a loose end. A slider should move along a stable track without requiring fingers to cross the material path. If separate carriages serve adjacent rolls, clear labels or distinct positions can reduce confusion. Keep the area inaccessible to children if the design or household setup requires it, and follow the maker’s storage and use guidance.

A clean cut also depends on the dispenser staying still. On a counter, pulling a long sheet can drag a lightweight unit forward. Inside a drawer, the same force can make the organizer strike the sides or lift at one edge. Feet, a broad base, drawer fit, or the specified mounting hardware may help, but verify how the product is meant to resist the pull. Do not improvise screws or adhesive strips on a design that was not intended for them.

Food residue, dust, and scraps can collect in cutter tracks. Check whether the carriage, lid, or rod can be removed for cleaning and how to protect the working edge during that process. Follow the documented care method rather than soaking a wood body, putting an unknown assembly in a dishwasher, or probing the track with bare fingers.

Drawer insert, counter dispenser, or mounted rack?

An in-drawer insert keeps the counter clear and the cutters out of the main work area. It depends on drawer clearance and may occupy most of a shallow drawer. Pulling material while the drawer is open also changes the leverage on the slides, so use the mechanism as directed and avoid leaning on the drawer.

A countertop dispenser is quick to reach and easier to refill when there is open space around it. It remains visible, collects normal kitchen dust, and needs a stable location away from heat, water, and the edge of the counter. Measure the footprint with material extended into the working zone, not only the storage position.

A wall or cabinet-mounted organizer can release a drawer, but mounting is a separate project. Confirm the substrate, hidden utilities, fasteners, weight and pulling forces, door swing, and clearance around the loaded rolls. Renters should obtain permission where needed. Adhesive attachment is not automatically suitable for a repeated pulling load merely because a surface is smooth.

Some units advertise more than one orientation. Verify that the loading doors, roll supports, labels, and cutters are designed to operate in every claimed position. A body that can be physically turned sideways is not necessarily a functional wall dispenser.

Build a simple restocking routine

Consolidated storage removes the visual cue of a branded box becoming empty. Keep one replacement location and decide when a roll is low enough to add it to the shopping list. Avoid overfilling a compartment with a new roll before the old one is used; two layers can interfere with rotation and conceal scraps.

When changing materials, remove fragments from the track, inspect the cutter and supports as the instructions recommend, and update the label before the organizer returns to service. Keep relevant instructions from the refill packaging in a nearby file or photograph them clearly if the household relies on them. The organizer should reduce drawer clutter without erasing information needed to use each material appropriately.

Periodically lift the unit out and check the drawer beneath it. Loose foil edges, crumbs, and moisture can go unnoticed under a large insert. Clean and dry the organizer and cabinet according to their separate care requirements before reassembly. If the cutter becomes damaged, stop using that channel until the specified part can be repaired or replaced.

Limitations

  • Compartment dimensions are not always reported as clearly as the organizer’s exterior dimensions.
  • A refill that fits today does not guarantee that a differently sized package will fit later.
  • Removing rolls from their boxes can separate materials from useful identity and usage information.
  • Integrated cutters add tracks and moving parts that can jam, dull, collect debris, or require model-specific replacements.
  • A large in-drawer unit may consume space that adjustable dividers could use more flexibly.
  • Countertop models remain visible and require open pulling space, while mounted models introduce installation constraints.
  • Wood, plastic, metal, finishes, adhesives, labels, and cutter assemblies may require different cleaning methods.
  • No organizer makes foil, parchment, waxed paper, and plastic wrap interchangeable for cooking or storage tasks.

Alternatives to compare

An adjustable drawer divider keeps retail boxes upright while preserving their labels and built-in cutters. A long basket or open tray groups boxes without committing to fixed roll compartments and can be lifted out for cleaning. A vertical file-style rack uses cabinet height and leaves each package intact, though box widths and shelf clearance still matter. A door-mounted basket can free a drawer if the door, hinges, clearances, and mounting method support the arrangement. For households that use one roll much more than the others, a single-roll dispenser plus boxed storage may be easier to refill and replace than a large all-in-one unit.

FAQ

How do I measure a drawer for a foil and plastic wrap organizer?

Remove the contents and measure the narrowest drawer opening plus the internal width, depth, and height at several points. Note rails, handle screws, liners, and any reduced clearance under the cabinet frame. Compare those measurements with the organizer’s complete external dimensions and leave room to lift, tilt, refill, and clean it.

Will any standard roll fit a wrap organizer?

No universal fit should be assumed. Measure the full refill’s material width, outside diameter, and core, then compare them with each compartment and support mechanism. Check the loading path too; a roll may fit inside yet be impossible to insert when the organizer is in its final position.

Is it better to keep foil and plastic wrap in their original boxes?

Original boxes preserve identification, instructions, and a cutter chosen for that packaged material. A dispenser can consolidate storage and replace damaged boxes, but it adds compatibility, labelling, cleaning, and cutter questions. Choose the arrangement that keeps each material identifiable and easy to use correctly in your kitchen.

Can a drawer organizer also be mounted on a wall?

Only when the current product instructions explicitly support that orientation and provide an appropriate installation method. Mounting changes the pull direction and the load on the body and fasteners. Verify the wall or cabinet substrate, hardware, clearances, refill access, and cutter operation rather than improvising a mount.

How should I clean a wrap organizer with cutters?

Follow the maker’s instructions for every component. Remove rolls and secure or avoid the cutting edge before working near the track. Use only the recommended cleaning method, let all appropriate parts dry fully, and do not submerge, machine-wash, or dismantle the unit unless its documentation permits it.
A Recipe Card Box for a Kitchen That Is Still Collecting Recipes

Product links are for reference. Verify current details on the retailer page before buying.

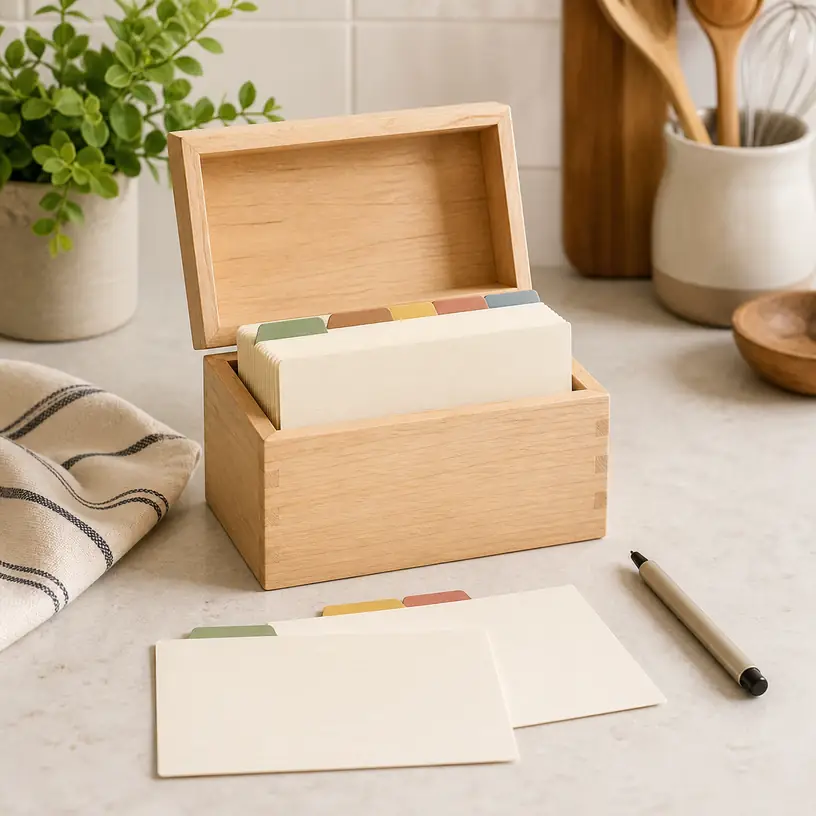
Illustrative image of a generic wooden recipe card box with blank cards and divider tabs on a kitchen counter

Illustrative image, not an official product photo.

Short answer

A useful recipe card box should fit the cards you already own, leave room for the collection to grow, and let you pull one recipe without unloading half the file. Measure the largest card, including any protective sleeve and raised tab, then compare that envelope with the box’s internal dimensions and lid clearance. Look beyond the number of cards a listing claims to hold: divider thickness, bent corners, handwritten inserts, and breathing room all reduce practical capacity. Stable footing, labels you can read while standing, and a lid that stays out of the way can make the box easier to use at the counter. If most recipes live on a phone or arrive as full sheets, a card box may add a transcription project rather than solve an organization problem.

Search reference

Recipe card boxes with dividers

Compare internal card clearance, divider positions, working space inside the file, lid behavior, and the material care instructions for a real kitchen.

View matching options

Begin with the recipes, not the box

Pull together a representative sample before shopping: an old family card, a newer card, a clipped recipe you intend to rewrite, any laminated favorites, and the thickest sleeve you use. Measure width and height at the widest points. A nominal card format such as 3 by 5 inches or 4 by 6 inches is only a starting description; handwriting tabs, curled edges, dividers, and sleeves can make the working file taller, wider, and thicker.

Decide whether everything truly needs to share one box. A mixed archive may include cards in two orientations, folded notes, printouts, photographs, and booklets. Choosing an oversized container for the largest odd item can leave ordinary cards leaning and sliding. It may be simpler to keep standardized working cards in the box and store source clippings or full-page originals in a separate folder.

Count the cards loosely rather than compressing them into a tight stack. Add the dividers you expect to use and leave enough free space to flip through sections with two fingers. A box filled edge to edge on the first day will be frustrating as soon as another recipe arrives. On the other hand, a mostly empty deep box lets cards fall forward unless it includes a follower block, adjustable support, or another suitable way to keep a small collection upright.

Who this is for

  • Home cooks who use handwritten or printed index cards more often than a screen at the counter.
  • Families consolidating a manageable set of inherited recipes while preserving the wording and notes on the original cards.
  • People who want a small, portable file that can move from a shelf to a prep area and return after the meal.
  • Recipe collectors willing to use consistent card sizes, category labels, and a simple filing routine.
  • Gift makers assembling a starter collection with blank cards and enough open capacity for the recipient’s additions.

Who should skip it

  • Cooks whose collection is mainly letter-size printouts, cookbook pages, saved web links, or notes in several unrelated formats.
  • Anyone who wants automatic search, scaling, sharing, meal planning, or backup; a paper box does not provide digital tools.
  • Very large archives that need multiple indexing levels, duplicate detection, or storage conditions beyond a kitchen shelf.
  • Households without a reasonably dry, clean place away from splashes, cooking vapor, direct heat, and strong sunlight.
  • Buyers who enjoy collecting recipes but are unlikely to rewrite, print, label, or return cards after use.

What to verify before buying

  • Internal dimensions: Compare usable width, depth, and height with the largest card, sleeve, and divider tab—not just the box’s exterior measurements.
  • Card orientation: Check whether cards stand in landscape or portrait orientation and whether your recipes are readable that way.
  • Divider fit: Confirm the number, material, writing area, tab position, and compatibility of included dividers with replacement cards.
  • Lid clearance: Make sure raised tabs and sleeves will not bend when the lid closes, and check how far the lid opens at the counter.
  • Working capacity: Treat stated card count as an estimate until card thickness, dividers, sleeves, and browsing space are considered.
  • Interior finish: Look for smooth card-contact surfaces, covered hardware, and corners that will not catch paper during filing.
  • Counter stability: Compare the base footprint, empty weight, feet, and how the box is meant to stay steady while cards are flipped.
  • Material care: Read the cleaning and moisture guidance for the complete box, including finishes, hinges, labels, windows, and adhesives.
  • Included cards: Verify their actual dimensions, quantity, printing layout, paper specification, and whether matching refills can be sourced.
  • Closure and hardware: Check how the lid or latch operates, whether fingers can stay clear of hinges, and whether spare hardware is available if relevant.

Dividers should follow the way dinner is planned

A preprinted divider set can look complete while using categories that do not match the household. One cook may search by meal—breakfast, lunch, dinner, dessert—while another thinks in techniques, main ingredients, family branches, seasons, or frequency. Before accepting the included labels, write ten recipes on slips of paper and decide where each would go. If several could reasonably belong in three places, the system needs a cross-reference or simpler categories.

Broad sections are easier to maintain than a forest of narrow tabs. Five to ten starting categories leave room to browse and can be subdivided later. Blank or erasable labels allow the file to evolve, but verify which pens or label materials are suitable and whether rewriting damages the divider. Alternating tab positions may make labels visible, provided the lid has clearance above the tallest row.

An alphabetical system works when recipe names are stable and memorable. It is less helpful when the same dish is known by a relative’s name, an ingredient, and a holiday nickname. A small index card at the front can map alternate names to the filing location. Numbering cards and maintaining a separate index adds control for a larger collection, but it also adds work every time a card is removed or added.

Avoid creating categories for imagined future recipes. Empty sections take space and make the file feel unfinished. Begin with the cards in hand, use temporary labels for a few weeks, and formalize the dividers after real cooking has shown where people look first.

The lid has a job during cooking

A box protects cards in storage, but its behavior while open deserves equal attention. A fully removable lid creates an extra object on a crowded counter. A hinged lid remains attached, though it needs overhead and rear clearance and should not pull a light box backward. Some designs describe a groove or clip for displaying a card; verify the card sizes, viewing angle, and whether the box remains stable when that feature is used.

Do not place the box where a propped card can fall toward a burner, sink, moving appliance, or wet prep area. A separate washable recipe stand may be safer and easier to position than using the storage box as a display. If a sleeve is used during cooking, confirm that it fits the stand and clean it according to its own instructions before returning it to the file.

Closures range from simple lift-off lids to hinges, magnets, clasps, or sliding panels. A tight closure may help keep shelf dust out, but it should not crush tabs or require two hands to fight with a loaded box. A carry handle can be useful for moving the archive, yet it does not establish how much weight the lid, handle, or fasteners can support. Carry the base unless the maker gives clear guidance for another method.

Paper needs protection without becoming inaccessible

Kitchens combine moisture, oils, crumbs, temperature changes, and frequent handling. No ordinary recipe box should be assumed to be waterproof or food-safe simply because it is sold for kitchen use. Keep it away from sink spray, kettles, ovens, dishwashers, and the path of raw ingredients. Wipe hands before browsing and return the box to a dry shelf after cooking.

Wood can bring warmth to an open shelf, but species, construction, finish, and cleaning limits vary. Metal may offer a different feel and thinner walls, yet edges, coatings, seams, and corrosion guidance still need checking. Plastic can be light and easy to see through, while hinges, latches, scratching, and heat sensitivity remain model-specific. Choose from documented dimensions and care instructions rather than assuming one material label guarantees durability.

Sleeves add a replaceable barrier for frequently used cards, but they also increase thickness and may create glare. Verify sleeve dimensions and opening direction so the card cannot slide out when placed on a stand. If an old handwritten card is fragile, repeated removal may be unwise even with a sleeve. A high-quality scan and a working copy can preserve the original while allowing the recipe to remain in regular rotation.

A box protects against ordinary handling; it is not an archival conservation system. Irreplaceable family cards may deserve scanning, backup copies in more than one location, and advice suited to the paper and ink. Do not apply tape, laminate, cleaners, or coatings to an original until their long-term effects are understood.

Capacity is about thumb room

Card-count claims are difficult to compare because paper weight, printing, coatings, sleeves, and dividers differ. Internal depth is a more useful starting point, but not every inch should become a solid block of paper. The user needs room to separate a section, read a title, pinch a card, and return it without scraping adjacent edges.

One practical check is to place the current collection, dividers, and sleeves into a temporary box or tray with similar internal dimensions. Add a small group of blank cards representing expected growth. If the file can be browsed without lifting out a chunk, the spacing is workable. Measure the occupied depth rather than relying on a visual guess.

A long box can hold more but may be awkward on a shallow shelf and heavy when full. Two smaller boxes can separate everyday recipes from an archive, different households, or sweet and savory cooking. The tradeoff is a second filing decision and a greater chance that a card returns to the wrong box. Labeling the exterior clearly matters when containers look alike.

Make the collection easy to hand forward

A recipe file is most valuable when another person can understand it. Put a dated note inside the lid or at the front explaining the categories, abbreviations, and ownership of fragile originals. Include source information where known, especially when a card has been adapted over time. Marking the date of a change helps preserve the history instead of silently replacing it.

Use one intake routine for new recipes. A loose clipping can go into a temporary inbox envelope rather than being wedged between finished cards. On a regular schedule, decide whether to discard it, digitize it, or copy it to the standard format. This keeps untested scraps from overwhelming the recipes people actually cook.

Photograph or scan both sides of handwritten cards, including stains and margin notes that carry context. Confirm that files are readable, named consistently, and backed up before treating the digitization as complete. The digital copy does not make the paper disposable; it simply reduces the risk that one kitchen accident erases the only version.

Limitations

  • Internal dimensions and practical card capacity are not always stated clearly or measured the same way.
  • Included cards and dividers may use a layout, paper thickness, tab sequence, or category scheme that is hard to match later.
  • A decorative box does not provide waterproof, fireproof, pest-proof, or archival storage unless the current specifications explicitly establish a relevant level of protection.
  • Hinges, clasps, magnets, display grooves, and handles add functions but also create points that may wear or interfere with cards.
  • Small boxes fill quickly once sleeves, thick dividers, folded notes, and browsing space are included.
  • Large boxes can be heavy, take up counter or shelf space, and allow a small collection to slump.
  • Paper filing cannot search ingredients, recalculate portions, synchronize edits, or create an off-site backup by itself.
  • No organizer can compensate for inconsistent labels or cards that are not returned after cooking.

Alternatives to compare

A three-ring recipe binder accommodates full sheets, sleeves, and printed pages, although it occupies more open counter space. An index-card file drawer provides growth and easier subdivision for a larger standardized collection. A photo storage case may separate cards into small removable groups, but internal fit, materials, and latch behavior need the same scrutiny. A document folder suits clippings and letter-size printouts better than small cards. A recipe app or ordinary note system adds search, sharing, backup, and scaling tools, while requiring a screen and a consistent import process. Many households will do well with a hybrid: preserve original cards in protected storage, keep working copies in the kitchen box, and maintain readable scans as a backup.

FAQ

What size recipe card box should I buy?

Measure the largest card you plan to file, including its sleeve and the tallest divider tab. Compare those measurements with the box’s internal width, depth, height, and closed-lid clearance. Leave enough depth for fingers to browse rather than sizing the box to a tightly compressed stack.

How much extra space should a recipe card box have?

There is no universal percentage because card and divider thickness varies. Add the dividers, sleeves, and a realistic batch of future cards, then preserve enough open space to separate sections and lift one card cleanly. If the collection is already near the box’s working limit, choose a larger file or divide the archive now.

Are 3-by-5 and 4-by-6 recipe cards interchangeable in one box?

Not automatically. A box sized for 4-by-6 cards may physically hold smaller cards, but they can lean, hide below tabs, or slide out of order. A box designed only for 3-by-5 cards will usually lack clearance for larger cards. Check orientation and internal measurements, and use an appropriate insert or separate section only if it supports the smaller cards without damaging them.

Should original family recipe cards stay in the kitchen box?

Frequently handled originals face spills, light, abrasion, and loss. Consider making clear scans and working copies, then storing fragile or irreplaceable originals under conditions appropriate to their paper and ink. If an original remains in the active box, use a suitable sleeve and keep the box away from food preparation hazards without applying unverified treatments to the card.

Is a wooden or metal recipe card box easier to maintain?

Material alone does not decide maintenance. Finish, seams, hinges, edge treatment, coatings, and the maker’s cleaning instructions all matter. Compare the complete product’s care guidance and keep any box in a dry location away from heat and splashes.

Over-the-Cabinet Towel Bars: Fit the Hook Before You Hang the Towel

Product links are for reference. Verify current details on the retailer page before buying.

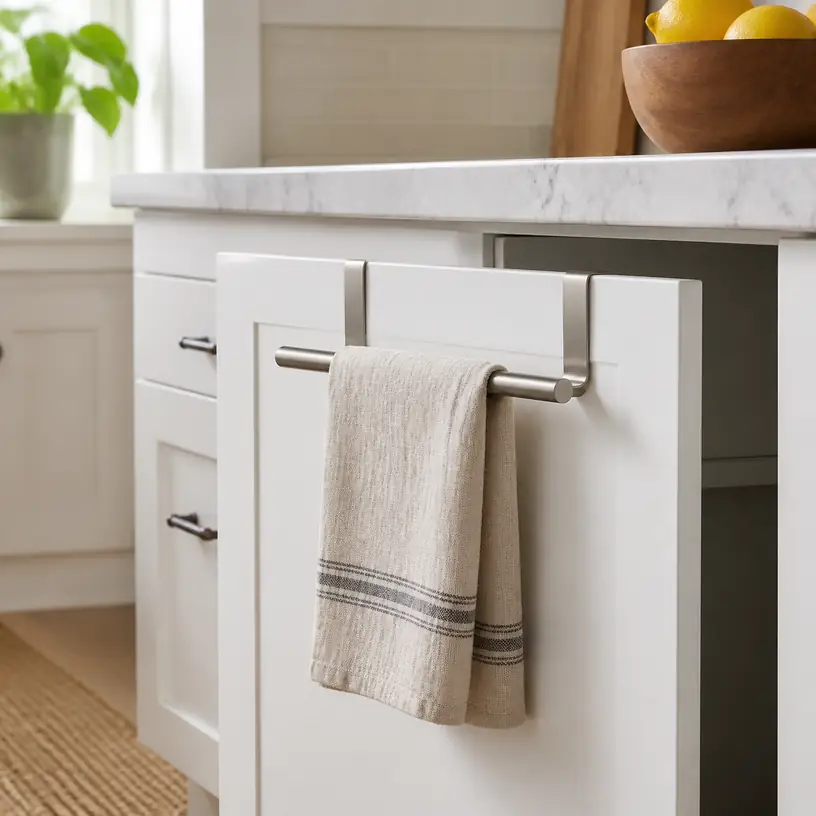
Illustrative image of a generic metal towel bar hanging over a white kitchen cabinet door

Illustrative image, not an official product photo.

Short answer

An over-the-cabinet towel bar can put a dish towel within reach without drilling, but the hook must fit the actual door before the bar style matters. Measure the door thickness and the gap above it, then inspect the space behind the door for shelves, drawer boxes, plumbing, and stored items. Compare the hook’s usable depth, protective lining, bar length, and distance below the door top. A good match should let the door close normally, keep the towel clear of the floor and nearby heat or food-preparation areas, and avoid concentrating pressure on a delicate cabinet finish.

Search reference

Over-the-cabinet towel bar options

Compare hook dimensions, door-clearance requirements, bar length, padding, inside-cabinet projection, and towel drop against the cabinet you plan to use.

View matching options

Start with one specific cabinet door

The useful installation spot is not simply “under the sink” or “near the stove.” Choose the exact door, open it, and look at all four edges. Some doors sit below a countertop with a visible gap; others close into a narrow reveal or overlap a face frame. An accessory that slips easily over one door may scrape the countertop, prevent an adjacent drawer from opening, or leave another door slightly ajar.

Measure the door itself rather than relying on a general cabinet description. Record its thickness at the top edge, the vertical clearance between that edge and the counter or frame, and the distance from the top edge to the lowest point of the towel bar. If the door has a routed panel or curved upper rail, check whether the hook would rest on a flat, structurally suitable section instead of a bevel or decorative edge.

Next, close the empty door slowly while watching the hook from the side. The part that wraps inside needs room between the door and cabinet structure. A shelf placed close to the top, a drawer box behind a false-looking front, or the rim of a pull-out bin can occupy that space. Under a sink, supply lines and cleaning bottles may not touch the hook when the door is still, yet could catch it as the door swings.

Who this is for

  • Renters and homeowners who want a removable place for a hand towel or dish towel without making holes.
  • Small kitchens where counter space is limited but a compatible base-cabinet door is available.
  • Households that can dedicate one door to towel storage without blocking a walkway, drawer, appliance, or second cabinet door.
  • Buyers willing to measure both the outside and inside of the door instead of choosing by bar length alone.
  • People who prefer a towel to hang from a bar rather than bunching it through a cabinet pull.

Who should skip it

  • Skip this format when the cabinet maker advises against hanging accessories over the door or applying pressure to its top edge.
  • A door with almost no closing gap, a thick decorative top, an angled edge, or an unusually fragile finish may not accept a generic hook.
  • Look elsewhere if the only available door puts the towel beside a burner, oven vent, open flame, trash opening, pet bowl, or heavily splashed work zone.
  • Do not use a bar that interferes with child locks, soft-close hardware, a pull-out shelf, plumbing, or the normal operation of an appliance.
  • A towel that would drag on the floor, become trapped between doors, or brush against stored chemicals needs a different location.
  • If the household routinely pulls hard on towels or hangs heavy wet items, a properly installed fixed solution may be more appropriate.

What to verify before buying

  • Door thickness: Compare the measured top edge with the hook’s stated usable opening, not just its overall outside width.
  • Top clearance: Confirm the metal and any protective liner can pass beneath the counter, rail, or drawer above without scraping.
  • Inside projection: Check how far the hook extends behind the door and whether it conflicts with shelves, bins, hinges, or plumbing throughout the swing.
  • Bar length: Make sure the bar fits on a flat section without crossing a neighboring door, handle, corner, or appliance front.
  • Towel drop: Calculate where the bottom of your usual folded towel will land after it is placed on the bar.
  • Surface protection: Read what contacts the front, top, and back of the door, and whether pads or liners are included and replaceable.
  • Finish and care: Verify cleaning instructions for the bar and compatibility guidance for painted, laminated, veneered, or wood cabinet surfaces.
  • Load wording: Check the current stated use and limit; a dish towel is a different load from a bath towel, damp apron, or filled bag.
  • Installation orientation: Some designs may be intended for a particular door direction or bar position, so follow the exact instructions.

Hook fit has three dimensions

Product photos tend to show the visible bar, while the hidden hook determines whether the accessory works. Its first critical dimension is the opening that receives the door. Too narrow and it will not seat fully; much wider and the bar may tilt, rattle, or shift unless the design includes a suitable spacer. Do not bend a rigid hook to force a new fit unless the maker explicitly describes that adjustment.

The second dimension is the material stacked above the door. Even when the hook opening matches the thickness, the top bridge must fit through the closing gap. Include attached pads in this calculation. Compressing a liner to make the door close can transfer pressure to the finish and may keep the door from sitting in its intended position.

The third dimension is the leg hidden inside the cabinet. A longer inner leg may help locate the hook on a compatible door, but it also reaches farther toward shelf contents. Observe the entire door swing, not only the closed position. The hook should not sweep across a tall bottle, catch the edge of a pull-out container, or press a bag against a hinge.

Cabinet pairs deserve extra attention. A bar mounted near the meeting edge can collide with the second door or cover its finger pull. Corner cabinets and doors beside dishwashers may create similar conflicts. A short piece of removable painter’s tape can mark the proposed bar width during measurement, but do not leave adhesive on a finish longer than its instructions allow.

Put the towel where kitchen work actually happens

Placement determines whether the bar is convenient or perpetually in the way. Near the sink, a hand towel is easy to reach, but repeated splashes may keep it damp. Near a prep area, it may be convenient for drying clean hands, yet it should not brush food, knife handles, cabinet contents, or the floor. Near an oven or cooktop, heat, steam, grease, and open flames make proximity a poor default; follow appliance clearances and choose a safer location.

Open the selected cabinet while someone stands in the normal work position. A long towel can swing into knees or catch on a projecting handle. In a narrow galley kitchen, a bar that adds only a small amount of depth can still snag clothing as people pass. The towel should remain reachable without requiring the user to lean across a hot, wet, or busy surface.

Consider which towel will live there. A small hand towel folded once over the bar has a different drop from a full-size kitchen towel hanging from one end. Measure the towel in its intended fold and add the distance from the cabinet top to the bar. If the calculated bottom is too low, choose a shorter towel, a higher bar geometry, or another door rather than relying on the product image.

Bar shape, stops, and usable width

Overall width and usable hanging width are not always the same. End caps, bends, hook brackets, or raised stops can take up part of the bar. A narrow bar may hold one folded towel neatly, while a longer one can allow more airflow or accommodate two small towels if its stated use permits. Extra length is not automatically useful when it crosses a door seam or invites the towel to slide into a walkway.

An open-ended arm can make it quick to slide a towel on and off, but the towel may also work its way off if the cabinet door moves briskly. A capped or closed bar can retain it more predictably, though threading a thick folded towel may take more room. Look at how the bar meets the hook: a connection that projects outward may change the effective depth more than a straight profile.

A smooth bar is easier to wipe than one with deep decorative joints. If the location is close to the sink, examine current care guidance and whether water can collect around seams, pads, or end caps. Finish names alone do not establish resistance to scratches, moisture, or cleaners, so use the recommended cleaning method and dry the accessory as directed.

Protect the door and check it over time

Pads are helpful only when they remain clean, aligned, and compatible with the surface. Dust, grit, or dried kitchen residue trapped beneath a pad can mark a finish as the bar shifts. Inspect every contact point before installation, wipe the door according to the cabinet care instructions, and make sure no sharp edge or exposed fastener touches it.

Install the accessory without forcing the door. Close it gently the first time and check the reveal around neighboring fronts. The latch or soft-close action should work as it did before. If the door springs open, sits proud, rubs the counter, or needs pressure to latch, remove the bar rather than treating that behavior as normal.

During routine cleaning, lift the bar off and inspect the top edge, front, and back of the door. Check for trapped moisture, pad movement, discoloration, abrasion, rust-like spots, loose joints, or bending. A damp towel adds moisture directly beside the cabinet, so allow both towel and contact area to dry. Follow the maker’s instructions about cleaning the accessory and replacing any protective parts.

Limitations

  • “No drilling” does not mean every cabinet finish or door profile is compatible.
  • A hook can match door thickness while still being too tall for the closing gap or too deep for the cabinet interior.
  • The bar uses part of the door edge and may interfere with paired doors, drawers, pull-outs, or countertop overhangs.
  • Wet towels can transfer moisture to the accessory and nearby cabinet surfaces.
  • A removable bar may shift or rattle when the towel is pulled or the door is opened quickly.
  • Long towels can hang into walkways, touch the floor, or swing into adjacent storage.
  • Generic search photos cannot confirm the fit of a specific cabinet; measurements and current product instructions remain necessary.

Alternatives to compare

  • A self-standing countertop towel holder when counter space is available and a movable location is useful.
  • A wall-mounted or cabinet-mounted bar installed with hardware appropriate for the surface and expected load.
  • A towel ring placed away from heat and splashes when only one small hand towel is needed.
  • A compatible appliance-handle towel clip that helps keep a towel from sliding, provided it does not affect appliance operation.
  • A removable hanging hook approved for the chosen surface, with enough surrounding airflow for the towel.
  • Keeping clean towels in a nearby drawer and placing the in-use towel at a dedicated sink-side drying point.

FAQ

How do I measure a cabinet door for an over-the-door towel bar?

Measure the thickness at the exact top section where the hook will sit, then measure the gap above the closed door and the unobstructed space behind it. Also mark the proposed bar width and calculate the bottom of the folded towel. Compare every measurement with the current product diagram and installation instructions.

Will an over-the-cabinet towel bar stop the door from closing?

It can if the top bridge and padding are thicker than the available gap or if the inner hook contacts cabinet structure. A compatible bar should not require force or change the door’s alignment. Remove it if the door rubs, sits open, or no longer closes normally.

Can I use this type of bar on a painted cabinet?

Only when the product guidance and cabinet care instructions indicate that the contact materials and mounting method are suitable. Inspect pads and edges, keep contact areas clean and dry, and check periodically for marks or finish changes.

Where should a cabinet towel bar go in a kitchen?

Choose a compatible door near the task but away from burners, open flames, oven vents, food-contact areas, trash openings, and crowded walkways. Test the door swing and make sure the towel cannot touch the floor, stored chemicals, or adjacent appliances.

Is a longer towel bar always better?

No. A longer bar offers more hanging width only if it stays within a clear, flat section of the door. It may otherwise cross a cabinet seam, block a neighboring front, or project into traffic. Match usable width to the towel and the available door area.

Can I hang more than a dish towel on the bar?

Use it only for the item types and load described by the current instructions. Do not assume that a design intended for a light hand towel can support a wet bath towel, apron, cleaning tools, or a filled bag.

Stove Gap Covers: Measure the Seam Before You Choose a Strip

Product links are for reference. Verify current details on the retailer page before buying.

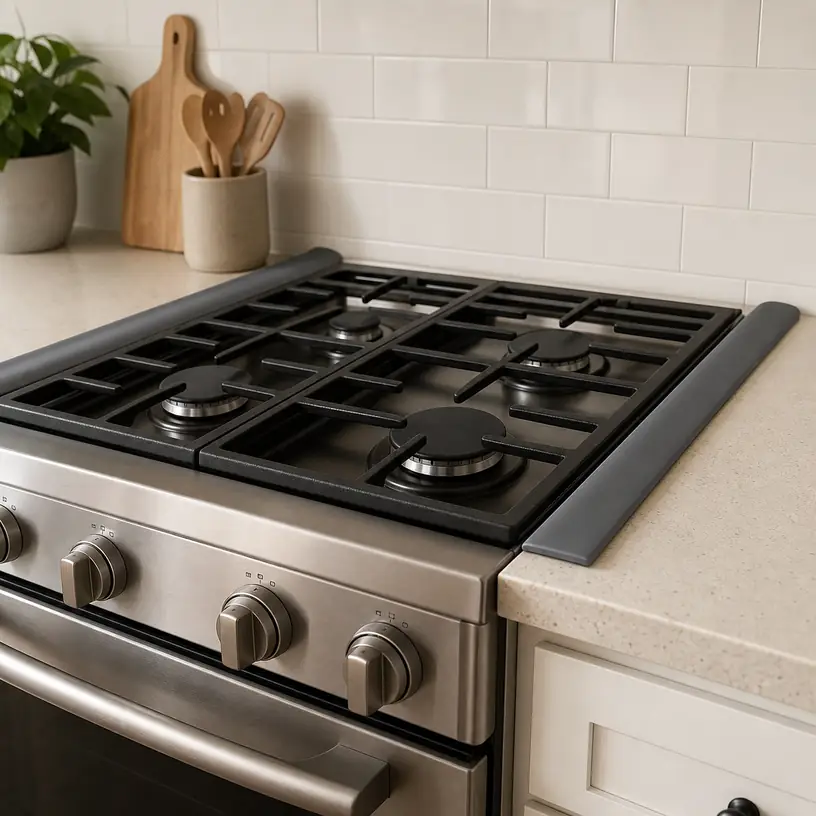
Illustrative image of generic gap covers fitted between a kitchen range and adjacent counters

Illustrative image, not an official product photo.

Short answer

A stove gap cover should bridge the seam beside a range without interfering with controls, ventilation, appliance movement, or safe clearances. Measure the gap at the front, middle, and back on both sides; also note whether the counter and range top are level. Flexible T-shaped strips can adapt to modest variations when their center fin fits the seam, while flat strips need enough supported surface on each side. Before choosing either style, compare its full width, length, trim instructions, temperature limits, cleaning directions, and compatibility language with the range manual. A cover can catch crumbs at an awkward seam, but it cannot correct a poorly installed appliance or make an unsafe clearance acceptable.

Search reference

Stove gap cover options

Compare strip profiles, stated dimensions, trimming methods, material guidance, and cleaning instructions against the two seams in your kitchen.

View matching options

Map the seam from front to back

The space beside a range rarely behaves like one tidy measurement. Cabinets may be slightly out of square, the appliance can sit closer to one counter than the other, and a raised edge or control panel may interrupt the back of the seam. Measuring only at the front can lead to a strip that pinches halfway along or leaves an opening where spills are most likely to disappear.

With the appliance cool and in its normal position, measure each seam at several points without moving the range merely to make the numbers look uniform. Record the narrowest and widest sections. Then measure the usable run from the front edge to the first obstruction at the rear. Left and right sides deserve separate notes; there is no guarantee they match.

Height is just as important as width. If the range top sits below the countertop, a very soft flat strip may sag toward the appliance. If it sits higher, a rigid cover may tilt or rock. Look at the cross-section shown in the listing and ask where it will actually rest. Product length alone says little about whether the profile can handle that height difference.

Who this is for

  • Households that regularly find crumbs or light splashes in the narrow seams beside a freestanding or slide-in range.
  • Renters who want a removable solution and are permitted to place one without adhesive or appliance modification.
  • Cooks whose counters and range provide continuous, unobstructed support for the profile specified by the cover maker.
  • People willing to remove the strips for cleaning rather than treating them as a permanent seal.
  • Buyers who can check the range manual and current product instructions before placing an accessory close to a cooking appliance.

Who should skip it

  • Skip a cover if the range manual prohibits accessories in that location or requires the seam to remain open for airflow, movement, or service access.
  • Do not use a decorative strip to conceal an installation problem, unstable appliance, damaged counter edge, gas odor, electrical concern, or inadequate clearance.
  • A poorly fitting cover is not useful when controls, burners, vents, doors, or cookware can contact it.
  • Built-in cooktops and unusual commercial-style ranges may require a different solution specified by the appliance or counter manufacturer.
  • Anyone unable to confirm the material’s permitted temperature and placement should leave the area clear until compatibility is established.

What to verify before buying

  • Measure the gap width at multiple points on both sides and compare the complete range with the cover’s stated fit range.
  • Check the counter-to-range height difference and identify which surfaces will support the strip.
  • Compare usable seam length with the product’s actual length, then read whether and how it may be trimmed.
  • Inspect the profile dimensions: top width, center-fin width and depth, edge thickness, and any end caps or raised lips.
  • Confirm compatibility with the appliance type and follow the range maker’s clearance, ventilation, and accessory instructions.
  • Review the material description, stated temperature limits, and restrictions around burners, hot cookware, flames, and oven vents.
  • Check whether the strip relies on friction, adhesive, magnets, clips, or simple surface contact; verify that the attachment method suits both adjoining surfaces.
  • Read cleaning directions, including whether the cover must cool before removal and whether hand washing or dishwasher cleaning is permitted.
  • Confirm package quantity. A photo showing both sides of a range does not necessarily mean two strips are included.
  • Look for color and finish descriptions under ordinary kitchen lighting rather than assuming a styled photo will match the appliance or counter.

Flat strips and T-shaped profiles solve different fit problems

A flat cover spans the seam from above. Its broad top can create a simple visual line, but it needs adequate contact on the range and counter to remain level. If the surfaces have a large height mismatch, the strip may lean, curl, or leave an edge that catches during wiping. Measure the available landing area as well as the open gap, especially near raised trim and rounded counter edges.

A T-shaped cover adds a center fin that drops into the seam. That fin can help locate the strip and reduce sideways movement, provided it is narrow enough to enter the tightest section and deep enough for the intended design. A fin that is too wide will bunch up; one that is too narrow may not stabilize the cover. Check whether the maker allows the fin to be trimmed, because cutting the wrong part can change how the strip sits.

Rigid metal-style bridges offer another look but tend to demand more consistent geometry. Curves, rolled edges, end pieces, and attachment hardware all affect fit. Magnets only help where the relevant appliance surface and cover design are magnetically compatible; a nearby stainless-looking panel should not be assumed to hold them. Adhesive may reduce movement, but it adds questions about heat exposure, residue, surface finish, removal, and rental rules.

Heat guidance matters more than a color match

A gap cover lives near an appliance, yet exact conditions vary by range design and burner use. Oven vents may direct warm air through the rear or side area, oversized cookware may extend beyond a burner, and a gas flame can behave differently from an electric cooking element. A generic material label does not prove suitability for every location on every range.

Start with the appliance manual. Identify vents, required openings, hot-surface warnings, cleaning-cycle instructions, and accessory restrictions. Then compare those requirements with the current cover instructions and stated temperature limits. Keep the strip away from any area the instructions exclude, and never let it overlap a burner, flame, heating element, control, or moving door.

Fit should be checked again during ordinary use without touching a hot strip. Curling, discoloration, odor, softening, or movement can indicate that the product is unsuitable for the conditions or placement. Turn off the appliance and follow the relevant safety directions if something appears wrong. Do not improvise with tape, caulk, or another material merely to hold a heat-exposed cover in place.

Trimming should preserve the intended profile

Many covers are sold in a standard length because appliance depths differ. A neat cut can keep a strip clear of a rear obstruction or align it with the counter front, but only when trimming is explicitly permitted. Read which end or section may be cut and what tool is recommended. A hollow profile, metal insert, magnet, cap, or adhesive channel can make a seemingly simple cut unsuitable.

Mark each side separately. Place the uncut, cool strip in position as the instructions allow, note the actual endpoint, and account for any required clearance. Removing a small amount at a time is safer than trying to restore material after an aggressive cut. Rounded front corners or manufacturer-supplied end pieces may affect which end should remain visible.

A cut edge should not expose sharp reinforcement, scrape the counter, or interfere with removal. If trimming creates an uneven profile that no longer lies as designed, choose a more suitable size rather than forcing it into the seam.

Cleaning works best when the cover stays removable

Gap covers intercept residue instead of eliminating it. Crumbs can collect along the edges and fine liquid can travel beneath a strip that is not a sealed barrier. Plan to lift and clean both the accessory and adjoining cool surfaces at an interval appropriate for the way the kitchen is used.

Follow the product directions for removal and washing. Flexible-looking material is not automatically dishwasher safe, and decorative coatings or attached magnets may require gentler care. Let the appliance and surrounding surfaces cool before handling the cover. Dry the seam and strip as directed before replacing it so trapped moisture does not remain hidden.

During cleaning, inspect the profile for cuts, hardening, warping, loose pieces, or residue that prevents it from sitting flat. Also confirm that the range has not shifted. If a cover suddenly fits differently, remeasure rather than stretching, wedging, or gluing it into position.

Limitations

  • A cover reduces direct access to a seam but does not create a watertight or food-safe seal unless the exact product documentation explicitly says so.
  • Irregular gaps, uneven counters, raised range edges, and rear obstructions can defeat an otherwise suitable profile.
  • Flexible strips can curl, discolor, collect residue, or move when the fit and support are poor.
  • Rigid strips are less forgiving of changing gap width and differences in surface height.
  • Adhesive or magnetic features depend on compatible surfaces and may complicate cleaning or removal.
  • Heat exposure varies with appliance design, cookware, ventilation, and cooking habits; a broad material claim cannot replace the stated limits.
  • The strips must be removed periodically to clean underneath them.
  • A gap cover cannot repair cabinetry, level a range, correct appliance clearances, or replace qualified service.

Alternatives to compare

  • Leaving the seam uncovered and cleaning it with a narrow crevice tool after the appliance is cool.
  • An appliance-manufacturer accessory specifically listed for the exact range model.
  • A counter-mounted filler installed by a qualified professional when the cabinetry and appliance design permit it.
  • Repositioning or leveling the range according to its installation instructions if the seam is uneven because the appliance has shifted.
  • A removable crumb-catching tray beneath the side area when the appliance design allows access and the maker’s directions permit it.
  • Cabinet or countertop correction during a planned kitchen renovation when the gap comes from a persistent installation mismatch.

FAQ

How wide a gap can a stove gap cover bridge?

There is no universal width because flat and T-shaped profiles use different dimensions. Measure the seam at the front, middle, and back on each side, then compare both its narrowest and widest points with the stated fit range. For a T-profile, also verify the center fin rather than looking only at the width visible on top.

Should a stove gap cover be level with the countertop?

It should sit in the position described by its maker without rocking, sagging, obstructing the range, or creating an awkward raised edge. A counter-to-range height difference changes how the cover is supported, so compare that difference with profile drawings and compatibility guidance before ordering.

Can stove gap covers be cut shorter?

Only trim a cover when the current instructions permit it. Confirm which end or section can be cut, the recommended tool, and whether the design contains magnets, reinforcement, adhesive, or end caps. Measure the left and right sides independently before cutting.

Are silicone stove gap covers safe near heat?

A silicone description by itself is not enough to establish safe placement. Check the exact product’s stated temperature limits and restrictions, then follow the range manual regarding vents, burners, flames, clearances, and accessories. Stop using a strip that changes shape or condition in a way the instructions identify as a problem.

Do gap covers stop every spill from reaching the floor?

No. They can intercept crumbs and some light splashes, but edges and an unsealed underside may still allow liquid or fine debris through. Remove the covers after the area cools and clean beneath them according to the product and appliance directions.

Reusable Silicone Stretch Lids: Matching Sizes to Bowls and Produce

Product links are for reference. Verify current details on the retailer page before buying.

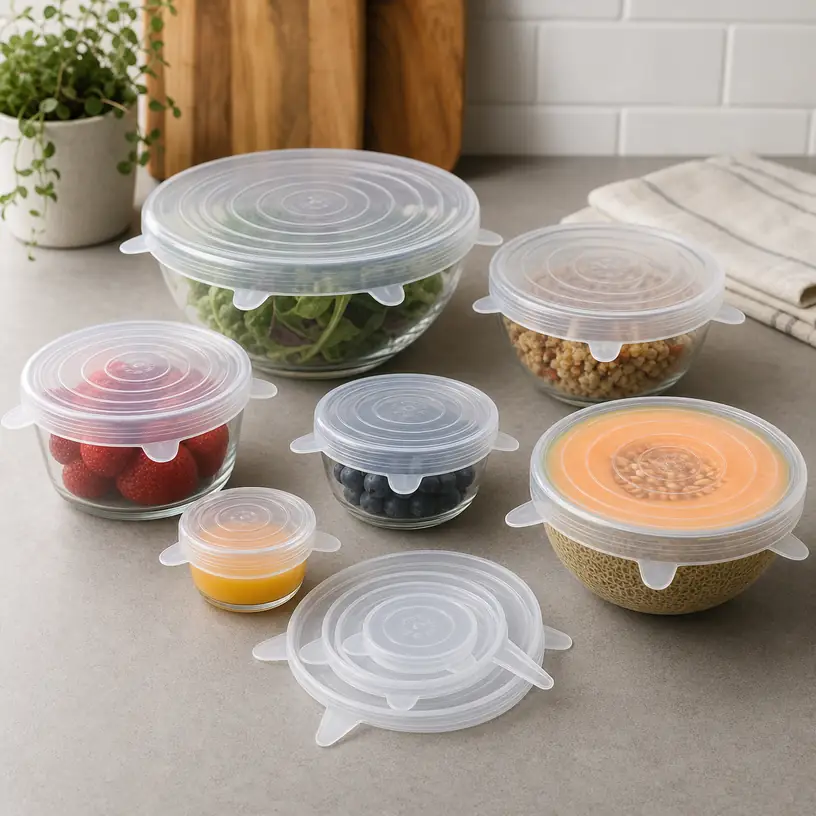
Illustrative image for a reusable silicone stretch lid buying guide

Illustrative image, not an official product photo.

Short answer

Reusable silicone stretch lids make the most sense when several lid sizes match containers you already reach for: a mixing bowl, an open can, half a melon, or a small leftover dish. Measure the outside diameter of those items instead of choosing by the number of pieces alone. Then compare the stated size range, compatible rim shapes, tab design, temperature guidance, and cleaning instructions. A lid still needs a clean, dry edge and an appropriate fit to stay in place.

Search reference

Reusable silicone stretch lid sets

Compare current size ranges, lid shapes, pull tabs, care directions, and stated container compatibility with the bowls and produce you plan to cover.

View matching options

Start with six measurements, not a set count

A six-piece set sounds complete, but adjacent lid sizes may cover nearly the same group of containers while missing the large bowl that prompted the purchase. Make a short list of the items that regularly lose their original lids, and measure the widest part of each rim. For cut produce, measure the diameter near the cut face rather than the whole fruit.

Compare those measurements with the maker’s stated unstretched and supported ranges. Stretch is useful for creating tension, but it should not be treated as unlimited extra size. A lid pulled to its maximum may be difficult to position, more likely to slip during handling, and less convenient for everyday reuse. If two frequently used bowls fall between sizes, a mixed set with closer increments may be more practical than a bundle centered on very small containers.

Who this is for

  • Households that often store leftovers in bowls without matching rigid lids.
  • Small kitchens where a nested set of flexible covers takes less drawer space than many container lids.
  • People who want temporary covers for cut onions, citrus, melons, or open cans when the size and shape are suitable.
  • Shared kitchens where quick visual size selection matters more than a perfectly matched container system.
  • Buyers willing to wash and dry flexible lids between uses and keep container rims clean before applying them.

Who should skip it

  • Choose locking food-storage containers when spill resistance during commuting or bag transport is the priority.
  • Keep purpose-made lids for containers that already have reliable fitted covers.
  • Skip stretch lids if most cookware has pronounced handles, pouring spouts, or irregular rims that interrupt contact.
  • Use another storage method when the food, temperature, or cleaning routine falls outside the current product’s stated guidance.

What to verify before buying

  • Measure the outside diameter and note whether each target rim is round, square, rectangular, lipped, or irregular.
  • Confirm the dimensions for every lid rather than relying on labels such as small, medium, or large.
  • Check the stated material, food-contact information, temperature limits, and refrigerator, freezer, microwave, and dishwasher guidance.
  • Look at the number and position of pull tabs, especially if wet or slippery lids are difficult for you to grip.
  • Confirm whether the lids are intended for cans and cut produce as well as bowls and containers.
  • Review care directions for oily foods, staining ingredients, odor removal, and full drying before nesting.
  • Check whether the set includes a storage holder or whether the lids can be stacked without sticking together.

Rim shape decides whether stretch becomes grip

Flexible material cannot compensate for every container shape. A smooth, even rim gives the lid a continuous surface to wrap around, while a spout, side handle, thick rolled lip, or sharp corner can create a gap. Square and rectangular dishes also ask the material to travel farther around corners than around a circle with a similar width.

Container condition matters too. Moisture, oil, crumbs, or condensation on the contact area can reduce grip. Wipe the rim and your hands dry before stretching the lid evenly from opposite sides. If the lid repeatedly rides upward or distorts the container, move to the next size rather than forcing more tension. Very lightweight cups and bowls may flex or tip while a tight lid is being applied.

Tabs, texture, and a repeatable routine

Small tabs can help center a lid, pull it over a rim, and lift an edge later. Their usefulness depends on placement and thickness: a tiny tab may be hard to hold with wet hands, while several prominent tabs take slightly more room when lids are nested. A textured outer surface can also improve handling, but grooves may need extra attention during washing.

For an easier routine, assign the sizes to familiar objects before storing the set. For example, keep the lid that fits the everyday mixing bowl on top of the stack, and avoid tightly nesting damp pieces. Some sets use colors or molded size markings; verify whether those cues are visible enough to be useful once the lids are in a drawer.

Storage expectations and food safety habits

A stretch lid is a cover, not a promise that a bowl can be turned upside down or carried loose in a backpack. Keep covered containers upright unless the maker explicitly describes and demonstrates a different use. For soups, dressings, and other spill-prone foods, a rigid container with a locking lid is generally the more predictable transport option.

Follow ordinary food-storage practices regardless of the cover style. Refrigerate perishable leftovers promptly, use containers appropriate for the food, and discard food according to relevant safety guidance. Check the current instructions before exposing a lid to heat, freezing temperatures, sharp edges, or direct contact with a heating element. Replace a lid if it tears, remains tacky after cleaning, or can no longer hold its intended shape.

Limitations

  • Real-world fit depends on rim geometry and surface condition, not diameter alone.
  • A size range may describe possible stretch rather than the easiest everyday fit.
  • Flexible covers can slip on wet, oily, dusty, or uneven edges.
  • Strong-smelling or deeply colored foods may require more careful cleaning according to the maker’s directions.
  • Stretch lids do not automatically make a container leakproof, stackable, or safe for travel.
  • Pulling a small lid over a large rim can make application and removal unnecessarily difficult.

Alternatives to compare

  • Rigid snap-on or locking containers for lunches and liquid leftovers.
  • Elastic fabric bowl covers for low-tension countertop or refrigerator covering where appropriate.
  • Flat silicone covers that rest on smooth bowl rims without wrapping around the sides.
  • Reusable storage bags for portions that do not need to retain a bowl’s shape.
  • Replacement lids from the container maker when only one frequently used piece is missing.

FAQ

How do I choose the right stretch-lid size?

Measure the outside diameter of the container rim and compare it with the individual lid dimensions and supported fit range. Select a lid that needs modest, even tension rather than the smallest one that can be forced over the edge.

Do silicone stretch lids fit square containers?

Some are described for multiple shapes, but corners, rolled rims, and side features can interrupt the seal. Check the current compatibility guidance and dimensions; a round-lid set should not be assumed to fit every square or rectangular dish.

Why does a stretch lid keep slipping off?

The lid may be too small or too large, or the rim may be damp, oily, uneven, or interrupted by a handle or spout. Clean and dry the contact area, center the lid, and try the next appropriate size without overstretching it.

Can a covered bowl be stored upside down?

Do not assume so. Stretch lids vary in fit and are not automatically leakproof. Keep the container upright unless the maker explicitly states that the specific lid and container combination supports another orientation.

How should reusable stretch lids be stored?

Wash and dry them according to the current care instructions, then stack or hang them without trapping moisture. A loose nested stack or simple holder can make sizes easier to separate than a tightly compressed bundle.

Countertop Compost Bins for Daily Kitchen Scraps and Odor Control

Product links are for reference. Verify current details on the retailer page before buying.

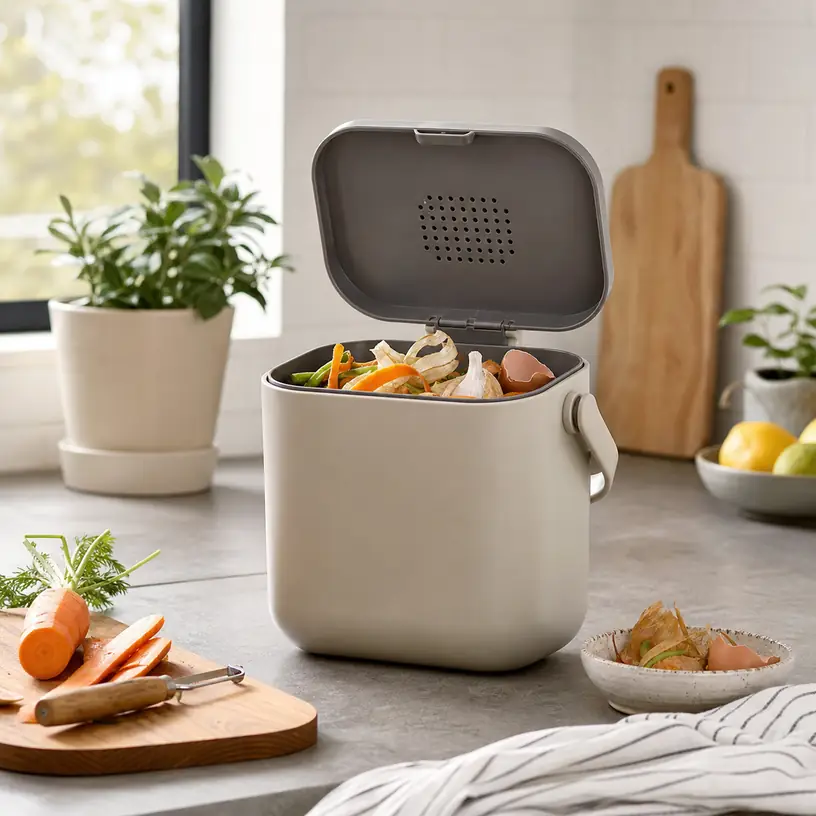
Illustrative image for a countertop compost bin buying guide

Illustrative image, not an official product photo.

Short answer

A countertop compost bin is useful when you want food scraps to leave the cutting board quickly without walking to an outdoor pile, shared collection bucket, or under-sink container after every meal. Start with the amount of prep waste your kitchen actually creates, then compare lid design, whether the bin uses replaceable filters, how easy the inner surfaces are to wash, and whether the shape fits the counter space where you chop vegetables most often.

Search reference

Countertop compost bin options

Compare compact kitchen scrap bins by capacity, lid style, filter approach, liner compatibility, and cleaning instructions before choosing one for your prep routine.

View matching options

Place the bin where scraps happen

The best countertop bin is not always the largest one. It is the one you can keep near the cutting board without crowding the coffee maker, dish rack, or stove. A small kitchen may need a narrow shape that tucks against a backsplash, while a household that cooks from fresh produce every night may prefer a wider opening that accepts peelings without constant aiming.

Before comparing finishes, picture the route from prep area to final disposal. Some people empty a countertop bin into a municipal food-scrap cart every evening. Others use it as a temporary holder before moving scraps to a backyard compost setup or freezer bag. That routine affects capacity, liner needs, handle comfort, and how much odor control matters between emptying cycles.

Who this is for

  • Home cooks who want a nearby place for vegetable peels, coffee grounds, eggshells, or other accepted food scraps during daily prep.
  • Apartment or townhouse kitchens where the main collection container is outside, in a shared area, or under the sink.
  • Households trying to separate food scraps without adding a full-size trash can to the counter.
  • People who cook in short sessions and want a bin that can be emptied and rinsed without a complicated cleaning routine.
  • Small-space kitchens that need a tidy container instead of an open bowl near the cutting board.

Who should skip it

  • Skip a countertop bin if your local compost or food-scrap program does not accept the scraps you plan to collect.
  • Choose an under-sink or freezer-based setup if visible counter storage bothers you more than an extra trip during prep.
  • Avoid filter-dependent designs if you do not want to buy replacement filters or track their fit over time.
  • Do not assume any bin will control odor indefinitely if it is overfilled, left warm, or cleaned infrequently.

What to verify before buying

  • Check the listed capacity and compare it with how often you realistically plan to empty the bin.
  • Review the lid type, opening width, and whether one-handed use is comfortable for your cooking routine.
  • Confirm whether the bin requires charcoal filters, replacement discs, bags, or brand-specific liners.
  • Look at cleaning instructions, especially whether the parts separate and whether dishwasher use is allowed.
  • Verify the footprint, height, and handle clearance against the counter space where the bin will sit.
  • Check which food scraps are accepted by your local composting option before relying on the bin for everything.

Main buying notes

Capacity is a balancing act. A very compact bin is easier to park beside a cutting board and empty nightly, but it can fill quickly during meal prep. A larger bin reduces trips, yet it also occupies more counter space and may encourage scraps to sit longer. If your kitchen is warm or you cook with strong-smelling ingredients, a smaller bin that gets emptied often may be more practical than a big one with a tight lid.

Lid design matters more than it first appears. A flip lid can be convenient when your hands are messy, while a lift-off lid may be simpler to clean. Some bins rely on airflow and replaceable filters; others focus on a close-fitting lid and frequent emptying. Neither approach removes the need for regular washing, so read how the lid, rim, and filter area are meant to be maintained.

Material and shape should match your habits. Smooth interiors are easier to rinse than seams and sharp corners. A removable inner bucket can make emptying less awkward, but it adds another part to clean. If you plan to use compostable liners, confirm the intended bag size and remember that liner rules vary by local collection program.

Limitations

  • A countertop bin is a temporary scrap holder, not a complete composting system by itself.
  • Odor control depends on what you put inside, how long scraps sit, room temperature, and cleaning habits.
  • Filters, liners, and replacement parts may add ongoing cost or become harder to match later.
  • Some bins are too tall for low cabinets or too wide for crowded prep zones.
  • Local rules for meat, dairy, bones, compostable bags, and paper products can differ widely.

Alternatives to compare

  • Under-sink food scrap bins if you want the counter fully clear.
  • Freezer scrap containers for households that empty less often or want to slow odors between pickups.
  • A small lidded bowl or reused container for occasional vegetable prep.
  • Outdoor compost pails for kitchens with direct access to a garden or backyard bin.
  • Pull-out trash and recycling systems when you want waste sorting hidden inside a cabinet.

FAQ

What size countertop compost bin works for a small kitchen?

For a small kitchen, look for a footprint that fits beside your main prep area first, then choose capacity based on how often you will empty it. A compact bin emptied daily can be more convenient than a larger bin that blocks counter space.

Do countertop compost bins stop odors completely?

No countertop bin should be expected to stop odors completely. Lid fit, filters, airflow, food type, room temperature, and emptying frequency all matter. Plan on regular rinsing and do not overfill the container.

Are charcoal filters necessary for a kitchen scrap bin?

They are not always necessary, but some designs are built around them. If a bin uses filters, verify the filter size, replacement schedule, and replacement source before buying so the ongoing maintenance is clear.

Can I use compostable bags in a countertop compost bin?

Only if the bin size fits the bags and your local composting program accepts that liner type. Some programs restrict compostable bags, so check local guidance before making liners part of your routine.

Should a compost bin go on the counter or under the sink?

Choose the counter if quick access during chopping is the priority. Choose under-sink storage if you dislike visible containers or have very limited counter space. The better choice is the one you will actually empty and clean consistently.

Choosing an Under-Sink Organizer for Awkward Cabinet Storage

Product links are for reference. Verify current details on the retailer page before buying.

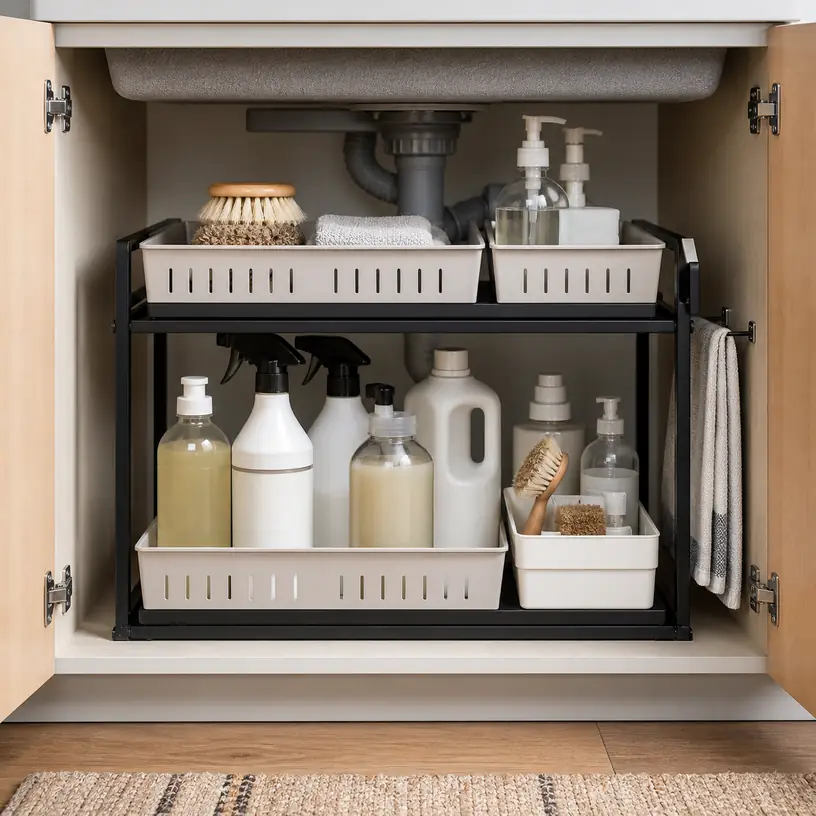
Illustrative image for an under-sink organizer buying guide

Illustrative image, not an official product photo.

Short answer

An under-sink organizer is worth comparing when the cabinet has become a dark pile of cleaners, spare sponges, hair tools, trash bags, or bathroom supplies. The right choice depends less on how tidy it looks in a photo and more on whether it clears the drain pipe, garbage disposal, water lines, cabinet lip, and door hinges while still leaving space to reach shutoff valves and wipe up leaks.

Search reference

Compare under-sink organizer options

Use the search page to compare current shelf layouts, pull-out designs, height clearances, and mounting details before choosing one for your cabinet.

View matching options

Start with the cabinet, not the organizer

Under-sink storage is awkward because the most valuable space is interrupted by plumbing. A rectangular shelf may be perfect for a pantry cabinet but frustrating under a sink if the top tier collides with the drain trap or the sliding basket cannot pass the cabinet face frame.

Before shopping, empty the cabinet and note the usable footprint on each side of the plumbing. Check the width between the side wall and the pipe, the depth from the cabinet front to the back wall, and the height below the drain. Also look at the door opening, because some organizers fit inside the cabinet but cannot slide in through the front.

Kitchen sinks, bathroom vanities, laundry sinks, and utility cabinets can all need different layouts. A kitchen cabinet may need room for a disposal unit and cleaning bottles. A bathroom vanity may need smaller bins for toiletries, hair tools, and backup supplies. Treat the product photo as a layout idea, then match the actual dimensions to your cabinet.

Who this is for

  • Renters and homeowners trying to make daily cleaning supplies easier to reach.
  • Small bathrooms where the vanity cabinet needs to hold toiletries, paper goods, and extra grooming items.
  • Kitchens where bottles, dishwasher pods, trash bags, and scrub tools keep falling into one pile.
  • Shared households that need a clear place for frequently used supplies without remodeling the cabinet.
  • Buyers who want a removable storage upgrade rather than a built-in pull-out system.

Who should skip it

  • Anyone who cannot confirm the cabinet measurements or plumbing clearance before ordering.
  • Cabinets with active leaks, water damage, loose pipes, or electrical work that should be addressed first.
  • Households that need a custom built-in drawer system, child-safety locking plan, or exact match to existing cabinetry.
  • Very shallow vanities where a small open bin may work better than a sliding frame.

What to verify before buying

  • Measure usable width, depth, and height inside the cabinet, including the door opening.
  • Check the location of the drain trap, water lines, disposal unit, shutoff valves, and any filter hardware.
  • Confirm whether the organizer is freestanding, adhesive mounted, screw mounted, or designed to hook over a door.
  • Look at drawer travel and handle placement so the basket can open without hitting hinges or cabinet trim.
  • Review the material wording and care instructions, especially if damp bottles or cleaning sprays will sit on it.
  • Check whether baskets, dividers, hooks, liners, or assembly tools are included in the current option.
  • Make sure the layout still lets you inspect the cabinet floor and reach valves quickly.

Buying notes that matter under a sink

Two broad layouts show up often: open shelves that create vertical levels, and pull-out organizers that bring stored items toward the front. Open shelves can be simple and flexible, but items at the back may still be hard to reach. Pull-out baskets are easier to access, but they need enough clearance to move smoothly.

A narrow organizer can be useful beside a pipe, while a wider frame may work only when the plumbing is centered high enough or shifted to one side. If the product has adjustable shelves, verify the adjustment range rather than assuming it will clear every drain setup.

Material choice is also practical. Plastic baskets can be easy to wipe and may be less likely to scratch bottles. Metal frames can feel sturdy but may need protective coatings and good drying habits in damp cabinets. Wood-look or decorative pieces can be attractive in open vanity spaces, but hidden sink cabinets usually reward easy cleaning over appearance.

Think about what will live in the organizer. Tall spray bottles need vertical room. Shorter baskets work better for sponges, dishwasher tabs, grooming items, and spare soap. If children or pets are in the home, storage location and cabinet safety matter more than squeezing in the maximum number of items.

Limitations

  • Search results may include different cabinet sizes, mounting styles, and bundled accessories over time.
  • A product photo cannot confirm whether the organizer clears your exact drain, disposal, or valve placement.
  • Sliding baskets may feel less useful if the cabinet has a raised front lip or narrow door opening.
  • Adhesive or screw-mounted parts may not be suitable for every rental, cabinet finish, or damp surface.
  • Even a good organizer does not fix leaks, poor ventilation, or unsafe storage of household chemicals.

Alternatives to compare

  • Stackable open bins for shallow vanities or cabinets with low plumbing.
  • Lazy Susan turntables for round bottles in wider cabinets.
  • Door-mounted caddies when the cabinet floor must stay open for pipes or a trash bin.
  • Tension rods for hanging spray bottles if the drain layout leaves enough room.
  • Custom pull-out cabinet hardware when a built-in solution is worth the installation effort.

FAQ

How do I measure for an under-sink organizer?

Empty the cabinet, then measure the usable width, depth, and height around the plumbing rather than the full cabinet box. Include the door opening, front lip, hinges, and any hardware that could block a sliding basket.

Are sliding drawers always better under a sink?

Not always. Sliding drawers make items easier to reach, but they need clearance to open and can be blocked by pipes, trim, or a raised cabinet face. A simple open shelf or bin may work better in tight vanities.

What should I store on the lower level?

Put heavier or leak-prone items lower when the layout allows it, and keep frequently used bottles near the front. Avoid burying shutoff valves or anything you would need to reach quickly during a leak.

Can one organizer work for both kitchen and bathroom cabinets?

Sometimes, but the best layout may differ. Kitchens often need room for taller cleaning bottles and disposal hardware, while bathroom vanities may need smaller compartments for toiletries and grooming supplies.

Is adhesive mounting a good idea in a sink cabinet?

It can be convenient, but check the surface, moisture level, weight expectations, and removal concerns before relying on it. Freestanding organizers are easier to move, while screw-mounted systems may feel more secure when installation is appropriate.