A Desktop Calculator for Household Numbers: Display, Keys, and Power

Product links are for reference. Verify current details on the retailer page before buying.
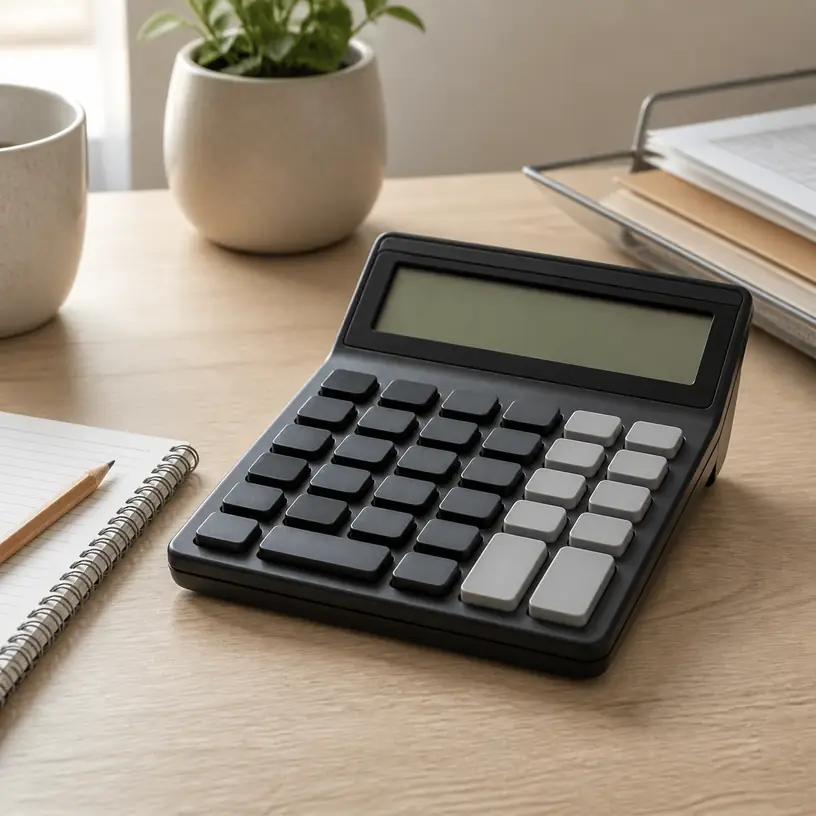
Illustrative image of a generic desktop calculator beside a notebook on a home office desk

Illustrative image, not an official product photo.

Short answer

A desktop calculator earns its space when you can read it at your normal sitting angle, enter figures without watching every keystroke, and recognize each function without decoding a crowded keypad. For household bills, expense logs, order totals, and tax-preparation notes, compare display size and tilt, key spacing, digit capacity, decimal controls, memory behavior, power source, and the calculator’s complete footprint. More functions are not necessarily helpful: a clear arithmetic layout with the few operations you actually use can be faster than a busy model. Check whether an angled display will remain legible under your desk lighting and whether dual-power wording includes a replaceable battery or only supplemental light-powered operation.

Search reference

Desktop calculators for home-office paperwork

Compare display angles, keypad layouts, digit limits, power arrangements, dimensions, and instructions for the calculations you repeat.

View matching options

Let the paperwork define the keypad

Start with the calculations that currently send you to a phone or computer. A monthly household budget may need addition, subtraction, percentages, tax-style adjustments, and a running memory. Reconciling receipts can benefit from a double-zero key, while schoolwork may require functions that an ordinary business calculator does not provide. Write down the operations instead of assuming that a large key count is better.

Layout matters because the same label can appear in different positions across calculators. People who enter long columns by touch often develop habits around zero, decimal, plus, and total keys. Moving between a computer number pad and a calculator can also expose differences in key order. Study a straight-on keypad image and check the manual for unfamiliar symbols before buying. A dedicated backspace or correction key can save a whole entry, but its behavior should be confirmed rather than guessed from an arrow icon.

Key shape changes the experience as much as key size. Wide gaps can help isolate each press, while tall, sculpted caps may guide a fingertip toward the center. Completely flat keys make the surface compact but can be harder to distinguish without looking. If several people will share the calculator, favor labels with strong contrast and conventional terms over niche shortcuts that only one person understands.

Who this is for

  • Households totaling receipts, comparing monthly expenses, checking invoice arithmetic, or planning a simple budget on paper.
  • Home-office users who want a number-entry tool that remains available without opening an app or switching computer windows.
  • Small workspaces where a basic calculator can sit beside a notebook, printer, or filing tray without occupying the main keyboard area.
  • People who prefer physical keys and an always-visible result for short arithmetic sequences.
  • Shared desks that benefit from a straightforward layout and no individual account, setup, or saved document.

Who should skip it

  • Use a spreadsheet when calculations need named categories, formulas across many rows, revisions, charts, or a permanent audit trail.
  • Choose a scientific, graphing, financial, construction, or printing calculator when a course or profession names specific functions and conventions.
  • A handheld model may suit a mobile kit better when every inch of desk depth matters.
  • A phone or computer may be sufficient if arithmetic is rare and adding another battery-powered object would create clutter.
  • Do not rely on a basic desk calculator to preserve important records; copy and verify results in the document where they belong.

What to verify before buying

  • Display: Check the digit count, character height, contrast, viewing angle, and whether tilt is fixed or adjustable.
  • Desk lighting: Confirm how the display behaves in dim rooms, bright window light, and reflections from overhead fixtures.
  • Key map: Locate zero, decimal, arithmetic, percent, memory, clear, correction, and any double-zero or tax keys you expect to use.
  • Decimal behavior: Read how floating and fixed decimal positions, rounding, and add-mode switches operate, if supplied.
  • Entry feedback: Look for stated key style and rollover behavior; do not assume rapid presses will always register in sequence.
  • Digit capacity: Choose enough positions for your realistic totals while remembering that separators and decimals affect readability.
  • Power arrangement: Identify the battery type, battery access, automatic shutoff, and the exact role of any solar cell.
  • Dimensions: Compare width, depth, display height, and storage clearance rather than judging scale from a close product image.
  • Instructions and support: Check whether a readable manual explains memory, percentage, tax, rounding, and error messages.
  • Package contents: Verify whether a battery is installed or included and whether any protective tab must be removed before use.

Read the display from your chair, not from above

A product image photographed directly over the keys says little about real viewing. At a desk, your eyes may be above and behind the keypad, and the display may sit below a lamp or face a bright window. Fixed-angle displays are simple and sturdy, but their usefulness depends on chair height and placement. An adjustable panel offers another way to manage reflections, although it adds a hinge whose permitted range and long-term support are product-specific.

Digit capacity deserves a practical check. A display with many positions can hold larger totals, yet squeezing more characters into a similarly sized window may reduce character width. Comma separators, decimal points, minus signs, memory indicators, and error symbols should remain distinguishable at a glance. If a household member uses reading glasses or has difficulty with low contrast, character height and background contrast are more informative than a vague “large display” claim.

Think about the desk surface too. A dark calculator on a dark desk can make the body edges less visible, and glossy plastic can reflect a lamp. Rubber feet may reduce sliding when they are clean and in full contact, but a very light calculator can still move under energetic key presses. Measure the available area with room for your wrist; the listed dimensions should include the raised display, not just the flat keypad section.

Understand memory, percent, and decimal controls before using the result

Basic arithmetic keys are familiar, but percentage operations are not implemented identically across every sequence or calculator category. A percent key may calculate a percentage of a number, add a markup, or behave according to the preceding operation. Tax keys can store a rate and then apply it through dedicated buttons. Read the model’s examples and test simple figures whose answer you already know before relying on these shortcuts for paperwork.

Memory controls are useful for keeping a subtotal while another figure is calculated. Common labels include memory plus, memory minus, recall, and clear, sometimes combined on one key. The display may show an indicator while a value is stored, but memory retention after automatic shutoff, a manual clear, or battery removal varies. Important figures still need to be written down in the relevant worksheet or file.

A side or rear switch may select floating decimals, a fixed number of decimal places, rounding direction, or an adding-machine style mode. Those settings can silently change how results appear. Check the switch position if a familiar calculation suddenly looks rounded or scaled unexpectedly. For money-related records, decide on the rounding method required by the document or organization rather than assuming the calculator’s default is appropriate.

Error handling is another useful manual check. An overflow result, division by zero, or excessively long entry may trigger an error symbol and require a specific clear sequence. Practice clearing an entry and clearing the complete calculation. A key labeled C, CE, AC, or a combined variant may not erase the same amount of work.

Power claims need a closer reading

A solar panel on the front does not necessarily mean the calculator operates indefinitely without a battery. Many desktop models combine a light-powered cell with a battery, using one or both depending on conditions. The listing or manual should identify the battery chemistry and size, whether it can be replaced, and any lighting requirements. “Dual power” alone does not answer those questions.

Automatic shutoff helps conserve battery life, but the delay and the treatment of memory or settings should be confirmed. If the calculator sleeps midway through transcribing a long statement, check what remains when it wakes. Never open a sealed compartment or attempt a battery replacement that the instructions do not support.

Store the calculator away from spills, heat, and prolonged direct sun unless the maker specifies otherwise. Light-powered operation does not require baking the device on a windowsill. Clean the display and key gaps according to the instructions, without spraying liquid into the keypad. Remove and dispose of a depleted or leaking battery using applicable guidance, and keep loose button cells away from children and pets.

Limitations

  • A desktop calculator shows an answer but does not automatically preserve the reasoning, categories, or source figures behind it.
  • “Large display” and “large keys” are relative descriptions; listed measurements and layout images provide better comparisons.
  • Fast entry can expose missed or doubled keystrokes, especially when key feel and rollover behavior are not documented.
  • Percent, tax, rounding, and memory functions may behave differently from another calculator you already know.
  • Fixed display angles can be difficult to read under glare or from an unusually high or low chair position.
  • Light-powered performance depends on the design and environment; the battery arrangement still requires verification.
  • A basic calculator is not a substitute for specialist functions, recordkeeping software, or a second check on consequential figures.

Alternatives to compare

  • A pocket calculator when drawer space, portability, or a small travel kit matters more than key size.
  • A computer spreadsheet for repeatable formulas, categorized budgets, what-if changes, and a saved calculation history.
  • A phone calculator app for occasional arithmetic when carrying another device would add unnecessary clutter.
  • A printing calculator when a paper tape is useful and its noise, supplies, and larger footprint fit the workspace.
  • A scientific or financial calculator when a class, exam, trade, or financial method requires named functions beyond household arithmetic.
  • An external numeric keypad for entering many figures directly into accounting software or a spreadsheet.

FAQ

How many digits should a desktop calculator display?

Choose enough positions for the largest totals you realistically enter, then compare the actual character size and separators. More digits are useful only if the complete number remains legible and you understand how the calculator signals overflow or rounding.

Is a solar desktop calculator battery-free?

Not necessarily. Many light-powered calculators also contain a battery, and “dual power” can describe different arrangements. Check the current specifications or manual for the battery type, replacement instructions, lighting needs, and automatic-shutoff behavior.

What is the difference between C, CE, and AC keys?

Their exact behavior is model-specific. One may clear only the latest entry, while another clears the current operation or a broader calculation state. Use the manual’s examples and practice with simple numbers before entering a long column.

Do I need tax and percent keys for household budgeting?

They can reduce keystrokes for repeated calculations, but only after you understand the sequence and any stored rate. Ordinary arithmetic is sufficient for many budgets, while a spreadsheet is safer when formulas and assumptions need to remain visible.

Will an angled display always reduce glare?

No. Readability depends on the panel angle, chair height, desk position, window direction, and lighting. An adjustable display offers more positioning options, but the useful range and stability should still be checked.
Desktop Staplers for a Home Office: Capacity, Reach, and Refill Fit

Product links are for reference. Verify current details on the retailer page before buying.

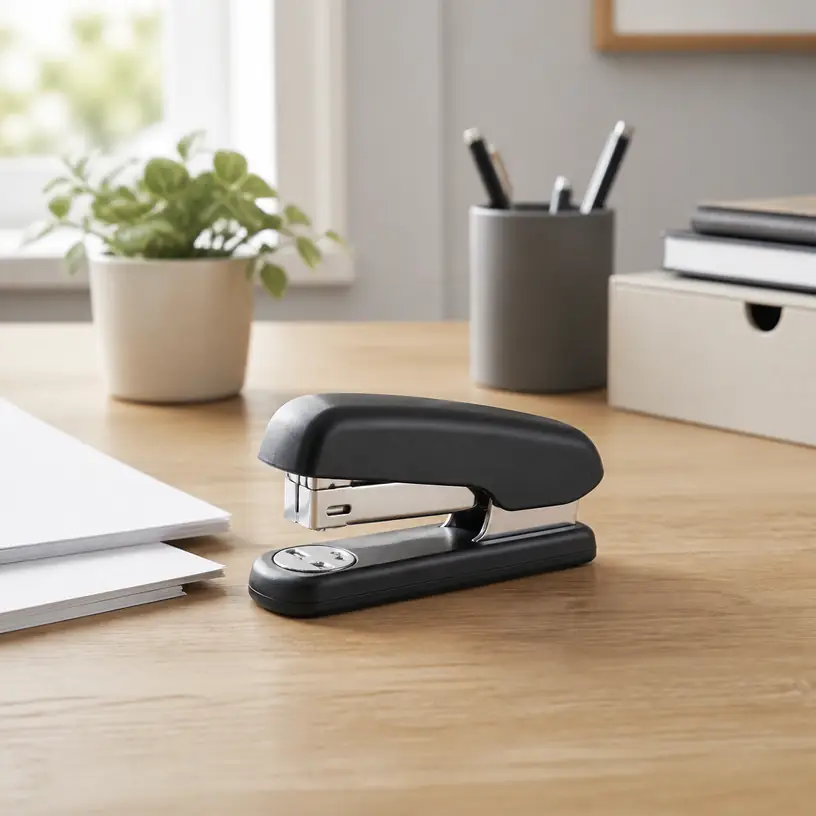
Illustrative image of a generic desktop stapler on a tidy home office desk

Illustrative image, not an official product photo.

Short answer

For occasional forms, school papers, and household records, a compact desktop stapler should be easy to refill, steady under one hand, and compatible with staples you can identify and replace. Do not judge it by appearance alone. Compare the stated sheet capacity with the size of your usual packets, check the exact staple series and leg length, and look at throat depth if the staple must sit farther from an edge. A grippy base, visible refill window, accessible jam path, and comfortable press area can matter more in daily use than a sleek shell. If you regularly bind thick reports, fasten cartons, or tack material to a surface, a standard desk model is probably the wrong mechanism.

Search reference

Desktop stapler options for a home office

Compare refill specifications, practical capacity, reach, loading access, footprint, and jam-clearing instructions for the paperwork you handle.

View matching options

Start with the packets on your desk

A stapler that is comfortable for two receipts and a cover note may not be the right tool for a monthly report. Before comparing products, collect a few representative packets and count the sheets. Note whether they are ordinary printer paper, heavier cover stock, folded documents, or mixed materials. Thickness and stiffness vary, so a sheet-capacity figure is a useful comparison point rather than a guarantee for every stack.

Choose some margin above your normal packet instead of planning to operate at the stated maximum every time. More capacity is not automatically better: a larger mechanism can occupy extra desk space, require a different refill, or feel unnecessarily bulky for light paperwork. The goal is a comfortable match for repeat jobs, with an alternative method available for rare oversized bundles.

Placement matters as well. Most home-office tasks use a staple near a top corner, where a shallow-reach stapler works well. Booklets, folded handouts, and center-line fastening demand a longer reach or a dedicated long-arm design. Measure the distance from the paper edge to the desired staple position. Overall product length does not reveal the usable throat depth, so look for that measurement explicitly.

Staple compatibility is the key specification

Staples that look similar are not necessarily interchangeable. The product information or manual should name the supported staple type, crown format, and leg length. Match that wording when buying refills rather than relying on a picture or a broad phrase such as “standard staples.” Regional naming, wire gauge, strip length, and cartridge systems can differ.

Leg length helps determine how much material a staple can pass through and still fold underneath, but using a longer refill in an incompatible stapler can lead to jams or poor clinching. The stapler mechanism, driver, magazine, and anvil all have to be designed for the refill. If a listing gives several capacities, check which approved staple size corresponds to each one.

A home office also benefits from refills that are easy to source locally or reorder by an unambiguous specification. Proprietary cartridges may offer convenient loading in a compatible tool, while conventional strips can be simpler to find. Either approach can work; the important question is whether you can identify the refill later without guessing.

Who this is for

  • People assembling short reports, forms, receipts, school papers, and household records at a desk.
  • Remote workers who want a dedicated paper fastener that remains ready beside a printer or filing area.
  • Shared study spaces where straightforward loading and clearly labeled refill storage reduce confusion.
  • Buyers replacing a lightweight stapler that slides, tips, or feels uncomfortable during routine jobs.
  • Anyone whose usual staple position is near the paper edge and whose packets stay within standard desktop capacity.

Who should skip it

  • Use a heavy-duty stapler or another binding method for consistently thick packets beyond desktop capacity.
  • Choose a long-arm or booklet stapler when the fastener must reach the center of folded pages.
  • A standard office stapler is not a substitute for a carton stapler, staple gun, upholstery tool, or construction fastener.
  • Consider a staple-free fastener for very small packets if avoiding metal fasteners matters more than holding strength or capacity.
  • A compact model may be unnecessary if almost all documents are stored and shared digitally.

What to verify before buying

  • Supported refills: Record the exact staple series, compatible leg lengths, and any cartridge requirements.
  • Sheet capacity: Compare the stated capacity with your typical paper weight and packet size, leaving useful margin.
  • Throat depth: Check the usable reach from the paper edge to the staple position, not just the stapler’s total length.
  • Loading method: Confirm whether the magazine opens from the top, front, rear, or bottom and how its latch works.
  • Remaining-staple view: Look for a refill window or another way to check the strip before a larger task.
  • Jam access: Find the manufacturer’s clearing instructions and determine whether the magazine can be opened without improvised prying.
  • Base and footprint: Compare desk dimensions, rubber contact points, and whether the base remains stable during a one-handed press.
  • Clinching options: Verify the intended anvil positions and whether temporary pinning or flat opening is actually supported.
  • Package contents: Check whether staples are supplied and, if so, whether they match the refills you intend to keep.

Loading should be obvious before the first jam

Top-loading designs often expose the magazine when the upper arm is lifted. Other models use a spring-loaded channel, rear pusher, or cartridge. None is inherently best for every user, but the sequence should be clear and should not require forcing plastic parts. Look at the manual before purchase if the listing photos do not show how the magazine opens.

A refill window is a small feature with practical value. It lets you see whether enough staples remain before assembling several packets and can reveal whether a strip has shifted. Window visibility depends on where the stapler sits, though; a narrow side opening may be less convenient when the tool is stored tightly between desk accessories.

Jams can happen when a packet is too thick, sheets move during the press, an unsuitable refill is loaded, or a staple becomes distorted in the track. Good access and documented clearing steps make recovery less frustrating. Disconnect nothing and keep fingers away from the driver path; follow the instructions rather than pushing a sharp object into the mechanism. If jams repeat, confirm the refill specification and reduce the packet instead of simply pressing harder.

Press feel, leverage, and desk stability

A broad top pad spreads pressure across the hand. A longer upper arm may provide leverage, but dimensions, hinge position, spring resistance, and mechanism design all influence the actual feel. Marketing phrases about reduced effort are difficult to compare without a consistent test, so focus first on intended capacity and ergonomics that are visible or measurable.

For one-handed use, the base should stay flat instead of skating across a smooth desk. Rubber pads can help, provided they make full contact and remain clean. A weighted metal base may feel planted but adds mass when the stapler lives in a drawer or mobile work kit. Lightweight construction is easier to move, yet the user may need to steady it with the other hand.

Think about hand position too. The press area should be easy to reach without pinching near the hinge, and the tool should return predictably after a stroke. People with limited hand strength may want to compare lever-assisted models, but capacity and refill rules still apply. Product wording alone cannot establish what will feel comfortable for a particular person, so a return policy can be relevant when trying an unfamiliar mechanism.

The anvil changes how the staple closes

The small metal plate beneath the driver is the anvil. Its grooves guide the staple legs after they pass through the paper. Many desktop staplers use a permanent-clinch position that bends the legs inward for ordinary document fastening. Some anvils rotate to a second position that bends the legs differently for temporary pinning. Treat this as a model-specific function and check the instructions before rotating or repositioning anything.

A few staplers open flat for tacking paper to a suitable bulletin surface. A hinge that appears to open does not automatically mean the tool is designed for that use, and a desk stapler should never be treated like a staple gun. Verify the supported mode, keep hands away from the exit point, and consider pushpins or a purpose-built tacker when that is the recurring task.

Flat-clinch mechanisms fold staple legs more closely against the back of a packet, which can reduce the bulge created by stacks of filed documents. That can be useful in dense folders, but it is a specific mechanism rather than a promise that follows from a flat-looking anvil. Check the exact product description and compatible refills if filing thickness is a priority.

Size the stapler to its storage place

A desktop model left beside a printer needs enough clearance to open for refilling without colliding with a shelf. One stored in a drawer needs room for its height and length, and loose items should not press the top accidentally. Measure the intended location and leave space to grip the tool rather than choosing solely from close-cropped product photos.

Refills need a dry, labeled storage spot too. Keeping different staple types in unmarked containers invites mix-ups. Retain the box or label a divided organizer with the exact specification and the stapler it serves. Loose staples can bend or separate, making them harder to load cleanly.

Color and finish may help a shared office return the tool to the right station, but surface treatment does not reveal internal construction. If durability is important, compare the stated mechanism and warranty terms instead of assuming that a metallic exterior means every load-bearing component is metal.

Limitations

  • Stated sheet capacity can vary in practice with paper thickness, coatings, folds, alignment, and staple choice.
  • A standard desktop throat cannot reach the center of most booklets or large sheets.
  • Refill names and sizes are not universal, even when staples appear similar.
  • Small windows may show the remaining strip without making the loading process easier.
  • Rubber feet can collect dust and may grip differently across desk surfaces.
  • A desktop stapler cannot safely replace purpose-built tools for cartons, fabric, wood, or construction work.
  • Stapled packets create metal waste and may need preparation before shredding or other paper processing, depending on the equipment used.

Alternatives to compare

  • A long-arm stapler reaches farther into sheets for booklet folds and custom placement.
  • A heavy-duty stapler handles larger packets when paired with its specified refills and capacity range.
  • A staple-free fastener cuts and folds a small tab in a limited number of sheets, avoiding refill storage.
  • Binder clips hold papers without puncturing them and can be removed repeatedly, though they add edge bulk.
  • Report covers or binding systems may suit documents that need frequent page turning or a more formal presentation.
  • A purpose-built tacker or staple gun is the appropriate category for supported fastening to surfaces; it requires its own safety and material checks.

FAQ

What size staples does a desktop stapler use?

There is no single refill that fits every desktop stapler. Check the supported staple series and leg length in the product information or manual, then match that exact specification when ordering refills.

How much extra sheet capacity should I allow?

Choose capacity above the packets you handle regularly rather than treating the stated maximum as your routine target. The useful margin depends on paper thickness, folds, and the approved staple, so count representative packets and compare them with the manufacturer’s guidance.

Why does my stapler keep jamming?

Common causes include an overloaded packet, sheets shifting during the press, damaged or incompatible staples, and a strip that is not seated correctly. Follow the model’s clearing instructions, confirm the refill specification, and reduce the packet if jams recur.

Do I need a long-arm stapler for booklets?

Usually, if the staple must reach a center fold that lies beyond a standard desktop throat. Measure from the sheet edge to the intended fastening line and compare that distance with the listed throat depth of a long-arm or booklet model.

Can a desktop stapler be opened for tacking?

Some models are designed to open flat, but others are not. Verify that function in the current instructions and use the tool only on an appropriate surface. For recurring surface fastening, compare a purpose-built tacker rather than assuming a desk stapler is suitable.

Foldable Laptop Stands for Hybrid Work and Travel

Product links are for reference. Verify current details on the retailer page before buying.

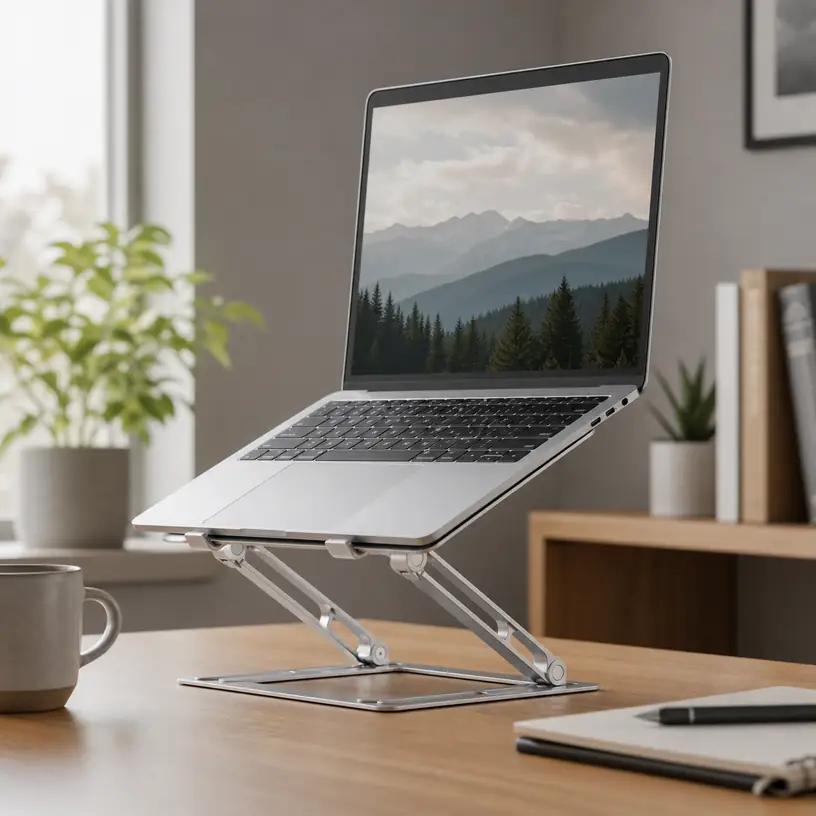
Illustrative image of a generic laptop on an adjustable folding desk stand

Illustrative image, not an official product photo.

Short answer

A foldable laptop stand is most useful when it raises a notebook for viewing, then packs down without becoming another bulky travel item. Start with the laptop itself: note its width, weight, underside vents, hinge position, and the depth of its front edge. Then consider how you work. A raised screen generally makes more sense with a separate keyboard and pointing device, while a low-angle stand may still allow occasional use of the built-in keyboard. For hybrid work, the strongest match is not necessarily the stand with the most joints; it is one that holds your device steadily at a repeatable position and fits the desk surfaces you actually encounter.

Search reference

Foldable laptop stand options

Compare device support, adjustment method, folded dimensions, ventilation layout, and the accessories needed for your working position.

View matching options

Decide whether you need lift, tilt, or both

Laptop stands that look similar in a folded product image can create very different workstations. A compact wedge mainly tilts the keyboard and opens space beneath the computer. A taller articulated stand can bring the display closer to the height of an external monitor. Some designs offer several fixed notches; others rely on hinges that stay at almost any angle within their range.

Think in terms of the screen position you need rather than the maximum advertised height. If the notebook will be your primary display, place it on a stack of sturdy books and adjust the stack until the screen feels practical for your chair and desk. Measure that lift and observe how far the laptop moves toward you as it rises. A stand can fit the desktop at its lowest setting yet place the screen or support feet too close to the desk edge when fully raised.

Tilt deserves a separate check. A steep platform may improve screen placement but make the built-in keyboard uncomfortable to reach. It can also put more pressure on the front retaining tabs. If you expect to type directly on the notebook for more than a quick message, test a low mock-up angle before choosing a tall stand.

Who this is for

  • Hybrid workers who carry a notebook between home, an office, and occasional shared workspaces.
  • Travelers who want a screen riser that occupies less bag space than a fixed desktop platform.
  • People using a laptop beside an external monitor and trying to align the two displays more closely.
  • Small-desk users who want to reclaim some surface area beneath an elevated notebook.
  • Presenters, musicians, or hobbyists who need a portable support at a repeatable viewing angle, provided the stand is intended for that device and setting.

Who should skip it

  • Skip a tall stand if there is no room for an external keyboard and pointing device when the laptop is raised.
  • A fixed riser may be simpler when the setup never leaves one desk and does not need regular adjustment.
  • Avoid narrow travel stands for unusually heavy or large devices unless current fit and load guidance clearly support them.
  • A folding stand may not suit a soft sofa, bed, or lap; most open-frame designs need a firm, level surface.
  • If heat or fan behavior is the only concern, compare maintenance guidance and dedicated cooling accessories rather than assuming elevation will resolve the cause.

What to verify before buying

  • Check the supported device sizes and current load guidance against your laptop, including any attached case.
  • Compare platform width, support-arm spacing, and front-tab dimensions with the laptop’s feet, curved edges, and palm-rest thickness.
  • Locate the notebook’s intake and exhaust vents so the stand will not block them.
  • Review the available height and tilt positions, plus the space the base occupies at the setting you intend to use.
  • Confirm whether adjustment is tool-free and whether the hinges or locking points are designed for frequent repositioning.
  • Look at contact pads, front stops, exposed edges, and base grip; these affect both stability and surface protection.
  • Check the folded length, width, thickness, and listed weight rather than relying on the word “portable.”
  • Verify what comes in the package, including any sleeve, tools, cable accessories, or separate support pieces shown in photos.
  • Read current assembly, care, and use instructions before placing equipment on the stand.

Match the support points to your laptop

The stand needs to support the computer without interfering with its controls or structure. Wide platforms spread contact across more of the underside, while two-arm stands leave a large open area between their rails. The open style can suit laptops with vents across the bottom, but rail spacing matters: the laptop’s rubber feet may land awkwardly, or a narrow device may have too little surface resting on each arm.

Front retaining tabs keep a tilted computer from sliding. Their height should be enough to catch the laptop without rising into the palm rest or making typing unpleasant. Thick protective cases change that fit and can move the computer’s vents relative to the support arms. If you use a snap-on shell, verify dimensions with the case attached.

Hinge placement also matters. A laptop whose display opens far back may contact a tall rear bar, while another may become rear-heavy when the screen is fully open. Check the maker’s current compatibility details, and open and close the display gently after placing the computer on a new support.

Stability is a whole-setup question

A stable stand begins with a broad, secure footprint, but the desk and working habits complete the picture. Tall elevation increases leverage: pressing the laptop’s trackpad, connecting a firm cable, or bumping the desk can create more movement than it would at a low angle. A stand that feels steady with a compact notebook may behave differently with a larger device.

Hinges usually follow one of two approaches. Indexed designs use slots or set positions that make a setting easy to repeat. Friction hinges offer finer placement but must hold the chosen angle under the laptop’s weight. Some require significant force or a tool to adjust. Neither approach is automatically preferable; the useful question is whether it remains secure and manageable during your normal transitions.

Contact surfaces should be considered together. Pads on the support arms can help protect the laptop, and feet beneath the base can reduce sliding. Their performance depends on the materials, cleanliness, and desk finish. Dust or debris caught under a pad can mark a surface, so wipe both the stand and desk before setting up in a temporary workspace.

Plan the keyboard, mouse, and cables

Raising the screen changes where your hands go. For a high display position, budget desk area and bag space for a separate keyboard and pointing device. A compact keyboard can preserve room on a shallow table, but its layout is a separate purchase decision. Make sure the stand’s base does not occupy the spot where the keyboard needs to sit.

Cable direction can limit adjustment. A stiff power connector on one side may pull when the laptop is raised, and a short display cable can prevent the stand from reaching the intended location. Side-mounted hubs add weight and can interfere with support arms. Map the power, display, storage, and audio connections you use, then check that every port remains reachable without sharply bending a cable.

If the stand creates usable space beneath the laptop, decide what belongs there. A keyboard may slide partly underneath during calls, or a small hub may sit below the device. Avoid crowding vents or placing loose items where they can obstruct a fan, snag a cable, or keep the stand from sitting flat.

Packing a stand for hybrid work

“Foldable” does not always mean convenient to carry. A stand may collapse into a thin shape but still be long, heavy, or awkward beside a laptop sleeve. Compare all folded dimensions with the compartment you plan to use. If a storage pouch is important, confirm that it is included rather than merely pictured.

Loose two-piece stands can pack very small, though they introduce pieces that must be positioned evenly and kept together. One-piece articulated stands are faster to set up but may weigh more. Fixed-angle folding frames offer fewer choices, which can be an advantage when you want the same position each time.

Practice the transition from bag to desk. A useful travel setup should unfold without pinched fingers, wobbling joints, or several tools on a shared table. It should also cool and fold safely after use according to its instructions. Keep it separated from the laptop if hard edges or hinge hardware could press against the computer in transit.

Limitations

  • Raising a laptop does not by itself create a complete workstation; a keyboard, mouse, suitable chair, and adequate desk depth may still be needed.
  • Lightweight travel designs can trade some footprint and rigidity for portability.
  • Maximum height is not always a comfortable or stable working position for every laptop.
  • Open-frame stands can leave room around vents, but they do not provide powered cooling or diagnose overheating.
  • Rubberized pads and feet can wear, collect debris, or grip differently across desk surfaces.
  • A stand that fits one notebook may not fit a replacement device with different vents, edges, weight, or hinge geometry.

Alternatives to compare

  • A fixed laptop riser for a permanent desk where packing size and frequent adjustment do not matter.
  • A monitor stand or shelf when several desktop items need elevation and storage together.
  • A portable external monitor if the priority is gaining display area rather than lifting the laptop.
  • A lap desk for supported use away from a conventional table, where an open folding stand may be unstable.
  • A laptop cooling pad when powered airflow is specifically wanted and the device fits its support surface.
  • A separate monitor with the laptop closed only when the computer maker’s operating and ventilation guidance allows that arrangement.

FAQ

Can I type directly on a foldable laptop stand?

Direct typing may be practical at a low angle if the stand is stable and the front tabs do not interfere with your wrists. A tall position usually makes a separate keyboard and pointing device the more workable arrangement. Test the intended height and desk depth before deciding.

How do I know whether a laptop stand will block the vents?

Inspect the underside and edges of your laptop, then compare every intake and exhaust opening with the stand’s arms, pads, and rear supports. Device manuals and current stand diagrams can help; do not assume that an open center clears vents located near an edge.

Are foldable laptop stands stable at their maximum height?

Stability depends on the base, hinge design, laptop weight, screen position, desk surface, and how the computer is used. Maximum height can increase movement, so evaluate the intended setting rather than treating the highest possible position as the default.

What should I measure before packing a laptop stand?

Measure its fully folded length, width, and thickness, then compare those dimensions with the actual bag compartment alongside your charger and input devices. Also check its weight and whether protruding tabs or hinges need a protective pouch.

Can one folding stand work with both a tablet and a laptop?

Only if the current compatibility guidance and support geometry suit both devices. A tablet may be too thin for tall front stops or may place buttons against a support, while a laptop adds different weight and hinge forces. Verify each device separately.

Choosing an Under-Desk Footrest for a Small Workspace

Product links are for reference. Verify current details on the retailer page before buying.

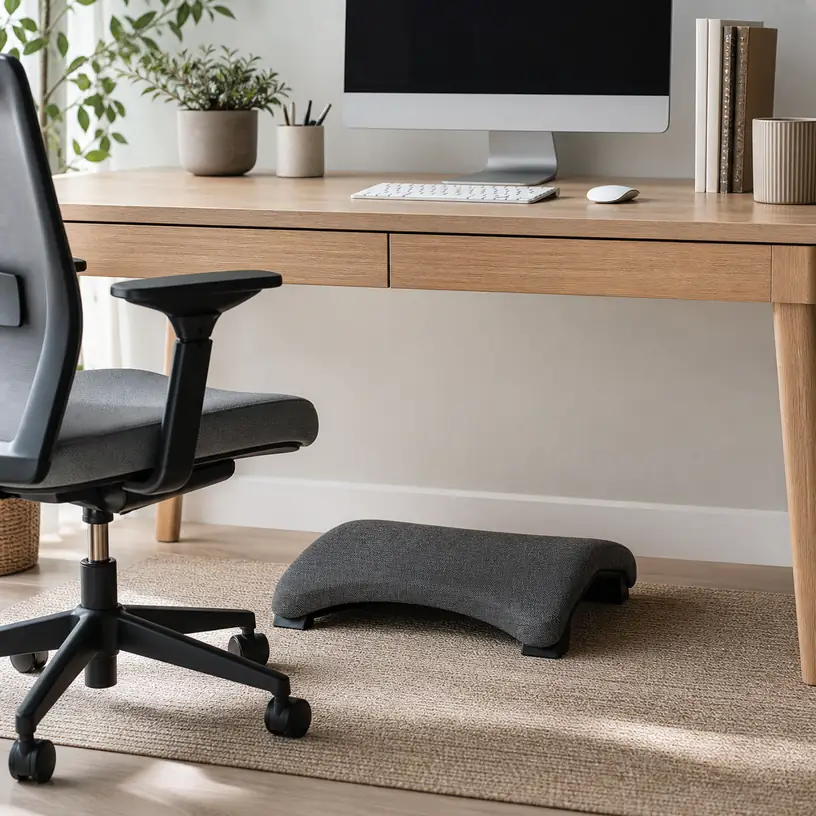
Illustrative image of a generic footrest beneath a home-office desk

Illustrative image, not an official product photo.

Short answer

An under-desk footrest can be useful when your feet do not rest comfortably on the floor or when you prefer to change lower-leg position while seated. In a small workspace, begin with the space below the desk: measure floor-to-desk clearance, chair movement, and the distance between any drawers or support legs. Then compare fixed versus rocking designs, usable surface area, height or tilt adjustment, floor grip, cover care, and how easily the footrest can be moved aside.

Search reference

Under-desk footrest options

Compare compact fixed platforms, adjustable supports, and gently rocking designs against your desk clearance and preferred sitting position.

View matching options

Fit the footrest to the space under your desk

The area beneath a desk is rarely an empty rectangle. A filing pedestal, crossbar, power strip, cable tray, chair base, or storage box may occupy the same zone where a footrest needs to sit. Measure that zone while seated, not only when the chair is pushed away. A platform that technically fits can still feel awkward if it blocks the chair wheels or forces both feet into one narrow position.

Think about movement as well as footprint. Some footrests stay at a fixed angle, some offer several height positions, and others rock when pressure shifts between heel and toe. A fixed support may suit someone who wants a predictable landing place. A moving platform can provide more position changes, but it may also require extra floor space and feel distracting to a person who wants the support to remain still.

Who this is for

  • People whose feet do not settle comfortably on the floor at their usual chair and desk height.
  • Remote workers who want another lower-leg position during long stretches of desk work.
  • Buyers furnishing a compact study nook where a large chair or desk change is impractical.
  • Shared-desk users who need an accessory that can be repositioned or stored after work.
  • Anyone comparing a dedicated platform with a simple foot stool or a broader workstation adjustment.

Who should skip it

  • Skip a footrest if it would crowd chair wheels, pedals, a computer tower, or storage already beneath the desk.
  • Do not use one to compensate for a chair or desk setup that remains uncomfortable in several other ways.
  • A rocking model may not suit someone who wants a completely stable surface.
  • A soft cushion-style support may be a poor match for shoes, spills, or a workspace that needs frequent wipe-down cleaning.

What to verify before buying

  • Measure width, depth, and maximum usable height beneath the desk with the chair in its normal working position.
  • Check the listed height range and tilt positions, including whether adjustments require tools or turning the product over.
  • Compare the usable top surface with your normal foot placement rather than relying on the product’s outside dimensions alone.
  • Review floor-contact details for carpet, hard flooring, or a chair mat, and look for clear anti-slip or stability information.
  • Confirm whether a textile cover is removable and how the surface or cover should be cleaned.
  • Check whether a rocking platform can be locked, whether a fixed platform folds, and how much clearance each motion requires.
  • Verify assembly steps, stated load guidance, and return terms on the current retailer page.

Choose between platform, rocking, and cushion styles

A rigid platform usually gives the clearest sense of support. Adjustable versions can be helpful when several people share a workstation, although adjustment controls should be easy to reach and secure once set. Pay attention to the angle as well as the height: a steep surface changes ankle position and may not feel natural for every sitter.

Rocking footrests trade a fixed angle for movement. They can suit people who like to shift position, but their curved base or pivot mechanism may need more room than a static platform. Check whether the movement is free, tensioned, or lockable rather than assuming all rocking designs behave alike.

Cushion-style footrests feel different from hard platforms and may be easier to tuck away. Their shape can compress during use, however, so listed outside height may not describe the supported height you experience. Cover material and cleaning instructions matter more if the footrest will be used with shoes.

Surface texture is another practical choice. Raised patterns or fabric may help feet stay in place, while a smoother top may be easier to wipe. If you often work barefoot or in socks, seams and firm ridges may matter more than they would with shoes. Current product details should make the intended orientation and care method clear.

Limitations

  • A footrest cannot correct every problem caused by chair height, desk height, screen placement, or limited legroom.
  • Added height can feel excessive if the platform and chair are not adjusted together.
  • Rocking parts may move on some flooring or make unwanted contact with nearby furniture.
  • Fabric and foam surfaces can require more care than rigid wipe-clean platforms.
  • Compact models may save floor space but offer less room for changing foot position.

Alternatives to compare

  • A chair with a usable foot ring for a counter-height or drafting-style workstation.
  • A simple low foot stool when adjustment and rocking motion are unnecessary.
  • A chair-height or desk-height change if the whole seated setup is mismatched.
  • An anti-fatigue mat for periods spent standing rather than sitting.
  • A wider workstation reconfiguration if cables, drawers, or a computer tower are causing the real clearance problem.

FAQ

How do I measure for an under-desk footrest?

Sit in your usual working position and measure the open floor area between your chair and the desk structure. Include width, depth, and vertical clearance, then account for chair-wheel movement, cables, drawers, and anything else stored below the desk.

Is a rocking footrest better than a fixed platform?

Neither style is universally better. A rocking model allows position changes, while a fixed platform provides a consistent angle. Compare the movement you prefer with the available floor space and check whether the rocking action can be limited or locked.

Should an under-desk footrest be height adjustable?

Adjustment is useful when the initial fit is uncertain or several people use the same desk. A fixed-height model can still work if its dimensions already match the chair, desk, and sitter, so measure before treating adjustability as essential.

Will a footrest stay in place on a chair mat?

That depends on the base and the chair-mat surface. Review current grip details and dimensions, and remember that a rocking model may shift differently from a static platform. Avoid assuming that feet designed for carpet will grip a smooth mat equally well.

Are cushion footrests practical when wearing shoes?

They can be, but cover durability and cleaning become important. Look for explicit care instructions and a removable cover if needed, and consider a rigid wipe-clean surface when the workspace sees outdoor shoes or frequent spills.

Choosing Bookends for Shelves, Desks, and Growing Book Collections

Product links are for reference. Verify current details on the retailer page before buying.

Illustrative image for a bookends for shelves buying guide

Illustrative image, not an official product photo.

Short answer

Bookends are worth comparing when a shelf, desk, windowsill, or media console has more books than a loose stack can handle, but not enough books to fill the whole span. Start with the books you need to support: tall hardcovers, slim paperbacks, notebooks, binders, children’s books, and cookbooks all lean differently. A useful pair should have enough weight or under-book grip for your shelf surface, a base that does not steal too much room, and a height that supports the tallest items without becoming the most noticeable object in the room.

Search reference

Bookends for shelves

Compare current styles by weight, base shape, height, finish, shelf surface compatibility, and whether the pair is meant for light paperbacks, mixed home office books, or taller display shelves.

View matching options

Why bookends are more about leverage than decoration

A bookend has one simple job: keep a partial row from sliding, tilting, or collapsing into the empty part of a shelf. The decorative shape matters less than how the support meets the books and the shelf. A lightweight bookend can look tidy in photos but may struggle if the books are tall, glossy, or placed on a slick painted surface. A heavier pair may feel more stable, but it can be bulky on a narrow shelf or too visually dominant on a small desk.

Think about how the shelf changes during the week. A row of reference books that stays untouched can use a different setup than a work desk where notebooks move in and out every day. Children’s books, cookbooks, art books, magazines, and binders also create different pressure points. If the row is constantly changing, a simple shape with an easy-to-slide base may be more practical than a sculptural piece that needs careful placement.

Shelf finish is part of the decision. Painted wood, laminate, metal, glass, veneer, and open wire shelving do not grip the same way. Some bookends depend on a flat base that sits under the first few books. Others rely more on weight, rubber feet, or a broad vertical panel. Before choosing by color, check whether the design makes sense for the surface and the books you actually own.

Who this is for

  • Readers who have partial rows of books on open shelves, small bookcases, nightstands, or media consoles.
  • Home office users who keep notebooks, manuals, journals, binders, or reference books within reach.
  • Parents organizing picture books or school books that are pulled out and returned often.
  • Renters or dorm residents who need shelf order without drilling, wall mounting, or permanent furniture changes.
  • Anyone styling a visible shelf but still wanting a support that works during daily use.

Who should skip it

  • Skip small decorative bookends if you need to support a heavy run of oversized art books, textbooks, or binders.
  • Choose a full bookcase, shelf divider, or bin if the main problem is overall storage capacity rather than a leaning row.
  • Avoid hard metal bases on delicate shelf finishes unless you can confirm foot material, padding, or surface protection.
  • Do not rely on bookends to make an overloaded shelf safer; shelf weight limits and anchoring concerns are separate issues.

What to verify before buying

  • Measure the shelf depth, usable width, and vertical clearance, especially if the shelf has a lip, back panel, or low upper shelf.
  • Compare bookend height with your tallest books; a very low support may not help much with tall hardcovers or binders.
  • Check the base style: some bases slide under books, while others depend mostly on weight or grippy feet.
  • Review material and finish wording if the bookends will touch wood, painted shelves, glass, veneer, or metal.
  • Confirm whether the listing is for a pair or a single piece, because product photos can make sets look larger than they are.
  • Look for notes about non-slip pads, rounded edges, sharp corners, and care instructions if children or delicate shelves are involved.
  • Check current dimensions and weight rather than assuming a decorative shape is suitable for heavy books.

Buying notes for real shelves

Base footprint is easy to overlook. A long under-book base can add stability because the books themselves help hold it down, but it also takes up shelf space and may be visible beneath short paperbacks. A freestanding weighted piece can be easier to move, though it needs enough mass and friction to resist the row’s sideways pressure. If you rearrange shelves often, choose a shape that can be repositioned without scratching or catching on book covers.

Height should match the row rather than the room decor. Low bookends can work for paperbacks, notebooks, or children’s board books, but tall books can lean above the support and create a fan-shaped row. Very tall bookends can support larger books, yet they may block cover art or look crowded on a shallow shelf. If your shelf mixes sizes, decide whether the tallest books can sit near the end or whether a separate section would be cleaner.

Material choice affects both function and mood. Metal bookends can be thin and space-saving, wood can feel warmer on visible shelves, acrylic can keep a light visual profile, and stone or ceramic styles may add weight. None of those materials is automatically better. The key is whether the finish, edge shape, feet, and base design suit the books and surface you plan to use.

For children’s rooms and busy desks, simple may be better than impressive. A smooth shape with rounded edges and an easy-clean finish is often more useful than a fragile decorative object. If books are pulled out several times a day, check whether the bookend can be nudged back into place without tipping or scraping the shelf.

Limitations

  • Search results change over time, so current dimensions, materials, included quantity, and color options should be verified on the retailer page.
  • Bookends help organize partial rows, but they do not increase shelf strength or replace proper furniture anchoring.
  • Very light designs may be better for display than for heavy books, even if they look sturdy in product photos.
  • A base that works on a flat wood shelf may not behave the same way on glass, wire shelving, or a slick painted surface.
  • Tall or oversized books may need a higher support, a deeper shelf, or a different storage method.

Alternatives to compare

  • Shelf dividers if you are organizing stacks of sweaters, bags, files, or books on a larger open shelf.
  • Magazine holders for thin booklets, workbooks, folders, or loose paper that will not stand cleanly between bookends.
  • A desktop file sorter if the items are mainly notebooks, mail, folders, or active paperwork.
  • Storage bins or baskets for children’s books that are handled more like toys than display items.
  • A larger bookcase or wall-mounted shelf if the collection has outgrown partial-row support.

FAQ

What height should bookends be for shelves?

Choose a height that supports the books near their middle, not just at the bottom edge. Low bookends can work for paperbacks and small notebooks, while tall hardcovers, binders, and cookbooks usually need a higher vertical panel.

Are heavy bookends always better?

Not always. Weight can help, but the base shape, shelf surface, book height, and whether books sit on top of the base also matter. A thin under-book base can be very practical when the first few books help hold it in place.

Do bookends scratch shelves?

They can if the edges are sharp, the base is rough, or the bookend is dragged across a delicate finish. Check material details, foot pads, and edge design before placing them on wood, veneer, painted shelves, or glass.

Should I buy bookends as a pair?

A pair is useful when a row has open space on both sides or when you want symmetry on a desk or shelf. If one side is already against a wall or bookcase panel, a single support may be enough, but confirm how the current option is sold.

What is better for children’s books, bookends or bins?

Bookends look tidier for books that stay upright, but bins can be easier for young children who pull books out quickly and return them without careful alignment. For a shared family shelf, a mix of bins and simple bookends may work better than one method everywhere.

Paper Shredders for Home Offices: Capacity, Cut Style, and Bin Fit

Product links are for reference. Verify current details on the retailer page before buying.

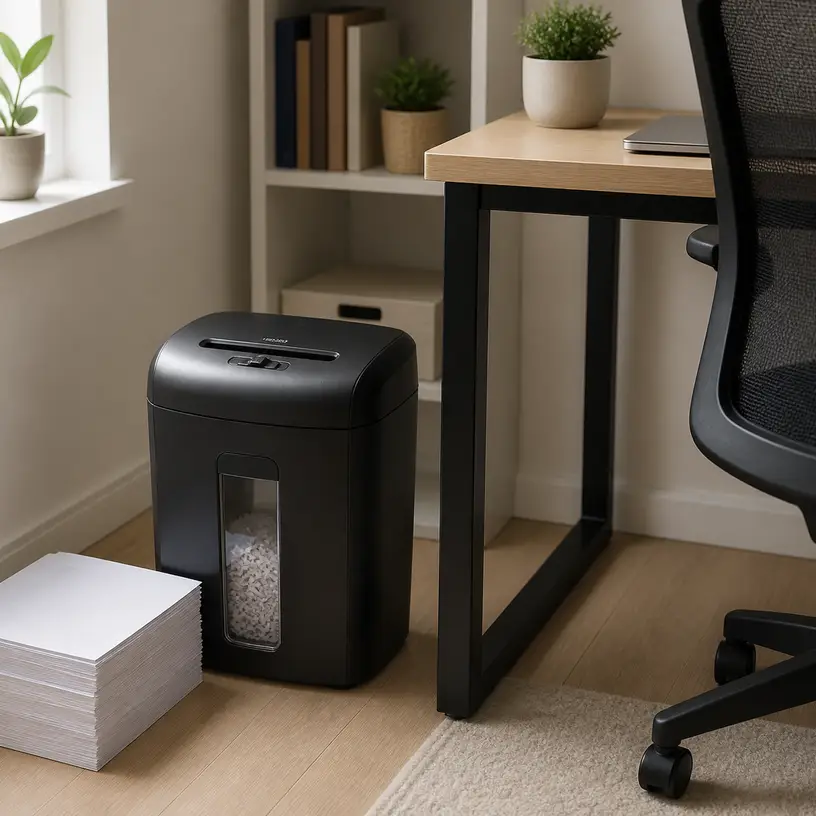
Illustrative image for a paper shredder buying guide for home offices

Illustrative image, not an official product photo.

Short answer

Choose a home-office paper shredder by matching the machine to your real paperwork rhythm: a few envelopes each week, a monthly file cleanout, or regular desk-side document disposal. The most useful comparisons are cut style, stated sheet capacity, run-time and cool-down wording, bin size, jam controls, noise expectations, safety details, and whether the listing clearly says what materials should not be shredded.

Search reference

Paper shredder options for home offices

Compare cut styles, bin designs, capacity wording, duty-cycle notes, jam controls, and item restrictions before choosing a machine for daily desk-side use.

View matching options

Fit the shredder to the pile you actually create

A paper shredder is easy to overbuy or underbuy because the important details are tied to habits. Someone who clears a small stack of mail at the end of the week needs a different machine from someone who empties old folders, tax copies, school paperwork, or small-business records in batches. Start by estimating how many pages you usually handle at once and where the shredder will live when it is not in use.

Cut style is one of the first differences to understand. Strip-cut shredders usually create long strips, while cross-cut and micro-cut wording generally points to smaller pieces. Smaller pieces can mean a fuller bin sooner and a slower shredding pace, so do not compare cut style without also reading bin capacity, run-time notes, and recommended use limits.

Sheet capacity should be treated as a controlled-condition number rather than a promise for every stack on your desk. Paper thickness, folded pages, envelopes, old staples, humidity, and feeding angle can all affect how smoothly a shredder runs. For less frustration, choose a machine with some margin instead of planning to use the maximum sheet count every time.

Who this is for

  • Home-office users who want a dedicated place to dispose of routine paperwork.
  • Remote workers, students, or household organizers who clear mail, forms, and older files in small batches.
  • Buyers comparing compact shredders that can fit beside a desk, under a work table, or in a closet.
  • People who want a cleaner alternative to tearing documents by hand.
  • Small-space users who need to balance paper handling with noise, bin size, and storage footprint.

Who should skip it

  • Skip a desk-side shredder if you need high-volume document destruction that may require a larger office machine or a shredding service.
  • Avoid very small bins if you dislike emptying paper waste often.
  • Do not choose by sheet capacity alone if you expect to shred envelopes, thick paper, cards, or mixed stacks.
  • Compare lockable storage or off-site disposal if documents must be held for a while before disposal.
  • If noise is a major concern, do not assume a compact shredder will be quiet without checking current product wording and buyer-facing specifications.

What to verify before buying

  • Confirm the cut style wording and whether it matches how small you want the shredded pieces to be.
  • Check sheet capacity, recommended run time, cool-down language, and any daily-use guidance.
  • Compare bin size, pull-out or lift-off design, window visibility, and how easy the bin looks to empty without spilling paper.
  • Review the accepted and restricted materials, especially envelopes, staples, paper clips, plastic cards, discs, adhesive labels, or laminated items.
  • Look for jam-reverse controls, auto shutoff wording, overheat protection, and safety notes around the feed slot.
  • Measure the footprint, height, cord reach, and storage location before assuming it will fit beside or under a desk.

Buying notes that matter after the first week

The bin design affects daily satisfaction more than many buyers expect. A larger bin can reduce emptying trips, but it may also make the unit taller or harder to tuck under a desk. Pull-out bins are convenient in a home office, while lift-off tops can be simple and compact. Check whether the listing shows the bin removal method clearly and whether the machine must be lifted to empty it.

Run time is another practical detail. A shredder meant for short sessions may work well for weekly mail but feel slow during a file cleanout. If you tend to save paperwork until a weekend, compare run-time and cool-down wording carefully instead of focusing only on the maximum number of sheets per pass.

Noise and placement are linked. A shredder beside a desk may be used more often, but it can also interrupt calls or shared living spaces. If the machine will sit in a bedroom office, apartment, or family room, check available noise wording and think about whether you would rather store it in a closet and shred in planned batches.

Maintenance language should be plain and easy to follow. Some shredders call for lubrication sheets or oiling routines, while others may describe different care instructions. Verify the current guidance before buying, especially if you expect the machine to sit unused for long periods and then handle a larger stack.

Limitations

  • A home-office shredder is not a substitute for a professional high-volume shredding service.
  • Maximum sheet capacity may not reflect thick paper, folded pages, envelopes, or mixed materials.
  • Smaller cut pieces can fill the bin quickly, even when the shredder itself is compact.
  • Run-time limits and cool-down periods can make large cleanup sessions slower than expected.
  • Some machines may require ongoing care, careful feeding, or specific handling to reduce jams.

Alternatives to compare

  • A shredding service for large boxes of old records or one-time file purges.
  • Lockable document storage if papers must be kept before disposal.
  • A compact desktop shredder for very occasional receipts or mail, if full-size floor placement is unnecessary.
  • Manual tearing or scissors for a few low-volume items, where practical and appropriate.
  • A recycling bin plus a separate disposal plan for documents that should not go directly into household recycling.

FAQ

What cut style should I consider for home paperwork?

Start with how small you want the pieces to be and how often you will empty the bin. Strip-cut wording usually means longer pieces, while cross-cut or micro-cut wording usually points to smaller pieces. Smaller pieces may suit more private paperwork, but they can also affect speed and bin-filling behavior.

Is sheet capacity the main feature to compare?

No. Sheet capacity is useful, but it should be read together with run time, cool-down wording, jam controls, bin size, and material restrictions. A machine with a modest capacity can still be a better fit if it handles your actual weekly pile more comfortably.

How important is bin size for a small office?

Bin size matters because it changes how often you stop to empty shredded paper. A compact bin can save floor space, while a larger bin may be easier for batch cleanup. Compare bin design and removal method, not just the stated volume.

Can a paper shredder handle envelopes, staples, or cards?

Some listings mention envelopes, staples, paper clips, or cards, while others restrict them. Verify the current material guidance before buying and before feeding anything other than plain sheets of paper.

What should I check if the shredder will sit near a desk?

Measure the footprint, height, cord reach, and clearance for emptying the bin. Also consider noise, heat vents, wheel placement, and whether the feed slot is convenient without putting the machine where knees, pets, or children may bump it.

Desk Mats for a More Comfortable Home Office Surface

Product links are for reference. Verify current details on the retailer page before buying.

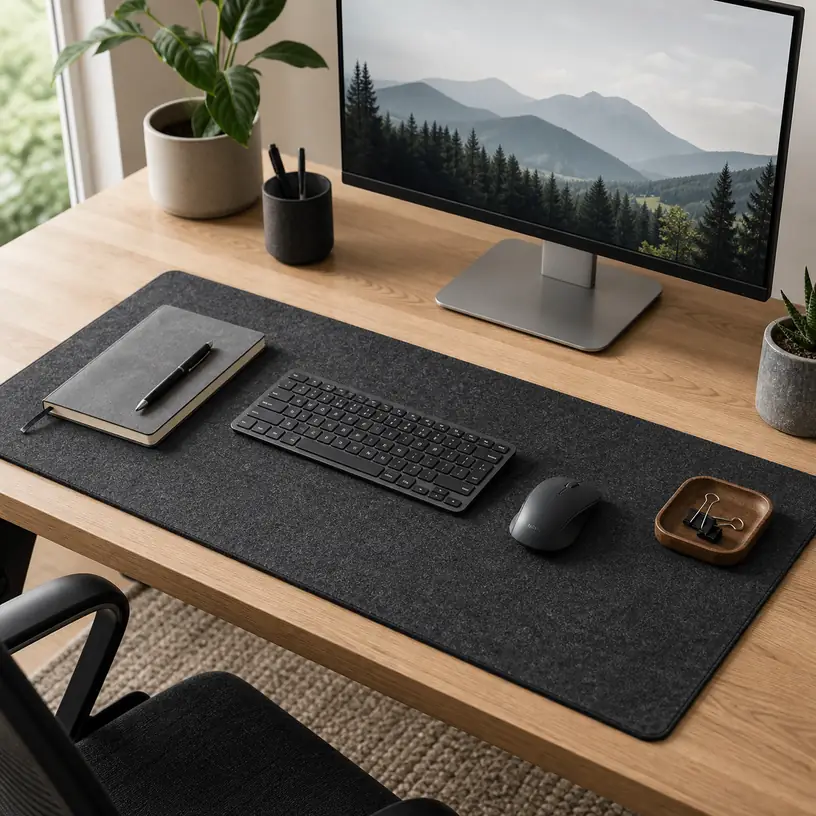
Illustrative image for a desk mat buying guide

Illustrative image, not an official product photo.

Short answer

A desk mat is most useful when you want one cleaner surface for keyboard work, mouse movement, note-taking, and the small objects that collect around a home office setup. Choose by measuring the usable part of your desktop first, then compare mat width, depth, surface texture, edge stitching, backing grip, cleaning instructions, and whether the mat leaves enough uncovered space for a monitor stand, desk lamp, drink coaster, or laptop dock.

Search reference

Desk mat options

Compare sizes, surface textures, edge styles, backing materials, and care notes against the way your keyboard, mouse, notebook, and desk accessories actually share space.

View matching options

Start with the part of the desk you really use

Desk mats look simple, but the right size depends on the working zone rather than the total desk width. A full-width mat can make a compact desk feel more intentional, while an oversized mat may fight with monitor feet, cable grommets, clamp-on lamps, speaker stands, or a docking station. Before shopping, clear the desk and mark the area where your keyboard, mouse, notebook, and forearms naturally land.

Surface feel matters because the mat becomes the layer you touch all day. A smoother finish can suit broad mouse movement and quick cleaning. A more textured surface may feel warmer for writing or resting hands, but it can make a pen tip, optical mouse, or sliding keyboard feel different. If you switch between typing, handwriting, sketching, and gaming, avoid choosing by color alone.

Also think about what the mat is supposed to solve. Some buyers want a large mouse surface. Others want to protect a wood or laminate desktop from keyboard feet, laptop movement, and daily scuffs. A few want the desk to look calmer on video calls. Those goals lead to different choices in size, thickness, color, and material wording.

Who this is for

  • Home office users who want one continuous surface under a keyboard and mouse.
  • Students or remote workers who alternate between laptop work, handwriting, and a desktop keyboard.
  • People with small desks who need a defined work zone without adding more trays or organizers.
  • Buyers protecting a desktop from everyday scuffs, keyboard movement, or light accessory marks.
  • Anyone comparing a desk mat with a standard mouse pad before changing the whole workstation layout.

Who should skip it

  • Skip a large desk mat if your monitor base, lamp clamp, speakers, or cable openings already use most of the desktop.
  • Choose a smaller mouse pad if the only problem is pointer tracking, not desk comfort or surface protection.
  • Avoid light colors if your desk area regularly meets pens, coffee, snacks, makeup, or craft supplies.
  • Do not rely on a mat to fix wrist, shoulder, or posture discomfort that may need broader ergonomic changes.

What to verify before buying

  • Measure the usable desktop area, including the space taken by monitor stands, laptop stands, chargers, lamps, and cable pass-throughs.
  • Compare mat width and depth with your keyboard, mouse movement, notebook size, and whether you use left- or right-handed mouse placement.
  • Check thickness and edge design; raised stitching can bother some forearm positions or catch a mouse at the edge.
  • Review backing material and grip wording if the mat will sit on glass, laminate, wood, veneer, or a standing desk surface.
  • Confirm cleaning instructions, stain-resistance wording, and whether the material should avoid heat, soaking, or harsh cleaners.
  • Verify whether product photos include accessories only for styling, and check current color and size options on the retailer page.

Buying notes for everyday desk setups

A desk mat should make the desk easier to use, not turn it into a display surface that you are afraid to touch. If you eat at the desk or use ink pens often, prioritize wipeability and darker colors over delicate-looking finishes. If the mat will sit under a laptop, check whether heat, rubber feet, or frequent sliding are mentioned in care guidance.

For keyboard-and-mouse layouts, width is usually more important than thickness. You need enough room for normal mouse travel without hitting the keyboard, a notebook, or the mat edge. Depth matters when your forearms rest on the surface; a shallow mat may look tidy but leave your wrists moving between the mat and the bare desk.

Edge treatment is a practical detail. Stitched edges can help the perimeter feel finished, but they may create a small raised border. Cut or beveled edges can feel flatter but may depend more on the material and construction. Product photos often hide this difference, so read the size and edge notes carefully.

For standing desks, check the mat with the desk in motion. A mat that barely fits around a monitor riser or cable hub may slide, curl, or rub when the desk moves. A simpler rectangular shape is often easier to position than a decorative shape if your setup changes between sitting and standing.

Limitations

  • A desk mat does not replace proper desk depth, chair fit, keyboard height, or broader ergonomic adjustments.
  • Large mats can interfere with clamp-on monitor arms, lamps, microphone arms, cable holes, or desk-mounted accessories.
  • Light colors and soft finishes may show stains, pressure marks, or pen impressions more easily.
  • Thick or textured surfaces may change how a mouse tracks or how handwriting feels.
  • Some mats need more careful cleaning than a bare laminate or glass desktop.

Alternatives to compare

  • A standard mouse pad if you only need better pointer movement in one small area.
  • An extended gaming-style mouse pad if mouse travel is the main priority.
  • A writing pad or blotter if handwriting comfort matters more than keyboard coverage.
  • A monitor stand riser or desk shelf if the goal is vertical organization rather than surface protection.
  • Cable clips, trays, or a cable management box if visual clutter is coming mostly from cords.

FAQ

What size desk mat should I choose?

Measure the usable work zone, not just the full desktop. The mat should fit your keyboard, mouse movement, and writing area while leaving room for monitor feet, lamps, cable openings, and accessories that should stay directly on the desk.

Is a desk mat better than a regular mouse pad?

A desk mat is better when you want one continuous surface for keyboard, mouse, and forearm contact. A regular mouse pad is simpler if you only need a small tracking area and want the rest of the desktop uncovered.

Will a desk mat work on a standing desk?

It can, but check the footprint with the desk at both sitting and standing heights. Make sure the mat does not catch on cables, risers, monitor arms, or accessories when the desktop moves.

What material is easiest to keep clean?

The easiest option depends on the exact material and finish, so rely on current care instructions rather than assumptions. For messy desks, look for clear wipe-clean guidance and avoid finishes that warn against moisture or harsh cleaners.

Can a desk mat protect a wood desk?

A desk mat can reduce everyday contact from keyboards, mice, notebooks, and small accessories, but it is not a guarantee against heat, spills, dents, or dye transfer. Check backing material and care notes before placing it on delicate wood or veneer.

Monitor Stand Risers for a Cleaner Home Office Setup

Product links are for reference. Verify current details on the retailer page before buying.

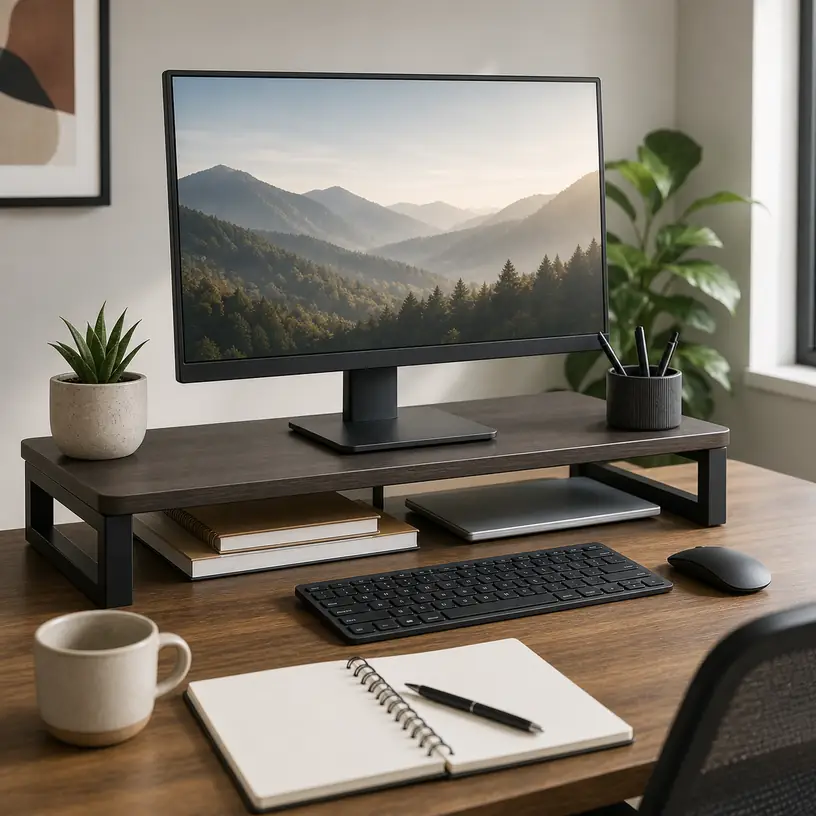
Illustrative image for a monitor stand riser buying guide

Illustrative image, not an official product photo.

Short answer

A monitor stand riser is worth comparing if your desk needs a tidier screen area, a small amount of under-monitor storage, or a more deliberate place for a keyboard, notebook, or hub when the workday ends. The main checks are platform width, height, stated load support, desk depth, cable clearance, surface finish, and whether drawers or side compartments would help or simply take up more room.

Search reference

Monitor stand riser options

Compare simple platforms, drawer-style risers, and wider desk shelves, then confirm dimensions and load details on the retailer page.

View matching options

What this product type is

Monitor stand risers are small desk platforms designed to lift a monitor, laptop, small printer, or other workstation item above the main desktop surface. Some are plain shelves, while others add drawers, metal mesh trays, side pockets, or space underneath for a keyboard. For a home office, the best fit often depends less on appearance and more on whether the riser improves the layout of the desk you already use.

Who this is for

  • People setting up a compact work-from-home desk with limited surface area.
  • Buyers who want a landing spot under the monitor for a keyboard, notebook, dock, or small accessories.
  • Shared-space workers who need the desk to look cleaner after work hours.
  • Anyone comparing a low-cost desk organization upgrade before buying a larger desk or monitor arm.

Who should skip it

  • Skip a riser if your monitor already sits at the right height and extra storage would create clutter.
  • Consider a monitor arm instead if you need fine height, depth, or rotation adjustment.
  • Avoid drawer-heavy designs if your desk is shallow or your keyboard needs to slide fully underneath.
  • Do not assume a riser is suitable for heavy displays, printers, or dual-monitor setups without checking the current load details.

What to verify before buying

  • Measure the monitor base and compare it with the platform width and depth.
  • Check the riser height against your chair, desk, and usual viewing position.
  • Verify stated load support and whether it applies to the whole platform or a centered load.
  • Review the space underneath if you plan to store a keyboard, notebook, dock, or cable hub.
  • Check feet, pads, or surface finish if the riser will sit on wood, glass, laminate, or a standing desk.
  • Confirm assembly requirements, drawer dimensions, cable pass-throughs, and return terms before buying.

Main buying notes

Start with desk measurements rather than product photos. A riser that looks compact online can feel oversized on a shallow writing desk, while a narrow riser may not support a wide monitor base cleanly. If you use a full-size keyboard, measure both keyboard width and the open space beneath the riser before assuming it will slide away.

Height is the next important choice. A small lift can make the desk feel more organized, but too much height may push the screen above a comfortable viewing line. If the riser has fixed legs, compare the listed height with your current monitor position; if it is adjustable, check how the adjustment works and whether the feet remain stable.

Storage features are helpful only when they match your habits. A single open shelf can suit people who clear the keyboard at night. Drawers may work better for pens, sticky notes, and adapters, but they can also reduce open clearance. Mesh or metal designs may feel lighter visually, while wood-look or solid platforms may blend better with a home office desk.

Limitations

  • A riser does not provide the same range of adjustment as a monitor arm.
  • Extra height can be uncomfortable if your chair and desk are already aligned well.
  • Drawers and compartments may reduce usable under-shelf space.
  • Some materials can scratch, wobble, bow, or slide depending on desk surface and load.
  • Product photos may not show how much depth remains for writing, a mouse, or a laptop.

Alternatives to compare

  • Monitor arms for more flexible height and screen positioning.
  • Full-width desk shelves if you want a continuous raised storage layer.
  • Laptop stands if the main device is a notebook rather than an external monitor.
  • Desk trays or drawer organizers if clutter, not screen height, is the main problem.
  • Larger desks or standing desk converters for broader workspace changes.

FAQ

How wide should a monitor stand riser be?

It should be wider and deeper than the monitor base or device you plan to place on it. Measure the base first, then leave enough margin so the item does not sit close to the edge.

Is a drawer monitor riser better than an open shelf?

A drawer can hide small supplies, but an open shelf is usually easier for storing a keyboard, notebook, or dock. Choose based on what you actually want to move off the desktop.

Can a monitor stand riser hold two monitors?

Only use one for two monitors if the current listing clearly supports the combined size and load. Many compact risers are intended for one monitor or light desk accessories.

What height should I choose for a home office riser?

Compare the riser height with your current screen position, chair height, and desk height. A modest lift may help organization, while a tall platform can make the screen sit too high.

What should I check for a standing desk?

Check the riser footprint, stability, feet or pads, and whether it leaves enough room for keyboard and mouse movement when the desktop moves up or down.

Ergonomic Keyboard Wrist Rests: Who They Fit and What to Check Before Buying

Product links are for reference. Verify current details on the retailer page before buying.

Illustrative image for a ergonomic keyboard wrist rests buying guide

Illustrative image, not an official product photo.

Short answer

Ergonomic keyboard wrist rests fit desk users who want a softer surface near the keyboard and a cleaner workstation setup. Compare length, height, surface material, base grip, cleaning instructions, mouse-rest bundle options, and whether the rest aligns with your keyboard before choosing one.

Search reference

Ergonomic Keyboard Wrist Rests options

Compare current options and verify details on the retailer page before buying.

View matching options

What this product type is

Ergonomic keyboard wrist rests are desk accessories placed near a keyboard to support the wrist area during pauses or light typing. Common options use foam, gel, fabric, silicone-like surfaces, or bundled keyboard and mouse-rest designs. Buyers usually compare length, height, surface feel, base grip, cleaning instructions, and fit with their keyboard layout.
This guide treats the seed listing as a category signal only. Compare current matching options and verify details on the retailer page before buying.

Who this is for

  • Desk users replacing a worn or flattened wrist rest.
  • People setting up a keyboard and mouse area for daily work.
  • Buyers who want a softer surface at the front edge of the keyboard.
  • Small-office buyers looking for simple workstation accessories.

Who should skip it

  • Skip it if your desk posture issue needs professional ergonomic advice.
  • Avoid thick rests if they raise your wrists too high for your keyboard.
  • Compare full desk mats if you want one large surface instead of separate pads.

What to verify before buying

  • Check length, width, height, and keyboard compatibility.
  • Verify surface material, firmness wording, and cleaning instructions.
  • Review non-slip base details and whether the pad moves on smooth desks.
  • Check whether a mouse wrist rest is included or sold separately.
  • Confirm edge shape, stitching, and desk clearance before buying.
  • Review current seller information, warranty terms, and return policy.

Main buying notes

Height matters. A wrist rest that is too tall can feel awkward even if the surface is soft.
Surface feel is personal, so verify material wording and cleaning instructions instead of assuming comfort from photos.
Base grip is important on glass, laminate, or polished desktops. Check the current listing for anti-slip details.
Bundled keyboard and mouse rests can be convenient, but only if both pieces fit your desk layout.

Limitations

  • A wrist rest is not a medical fix for pain or injury.
  • Foam and fabric surfaces can wear or stain over time.
  • Some rests may slide on certain desk finishes.
  • Height mismatch can make typing less comfortable.

Alternatives to compare

  • Full desk mats for one continuous work surface.
  • Low-profile keyboards if keyboard height is the main issue.
  • Adjustable keyboard trays for broader desk-position changes.
  • Mouse pads with built-in support for pointer-focused setups.

FAQ

What should I verify before buying an ergonomic keyboard wrist rest?

Verify dimensions, height, surface material, base grip, cleaning instructions, and compatibility with your keyboard layout.

Can a keyboard wrist rest fix wrist pain?

A wrist rest is a desk accessory, not medical treatment. Seek professional advice for persistent pain or injury.

Should the wrist rest match my keyboard length?

It should fit the keyboard area you use most. Check dimensions and compare them with your keyboard before buying.

Are foam wrist rests easy to clean?

Cleaning depends on the cover and material. Verify care instructions on the retailer page before buying.

What alternatives should I compare with a keyboard wrist rest?

Compare full desk mats, low-profile keyboards, adjustable keyboard trays, and mouse pads with support.