Ironing Board Covers: Fit, Padding, and Fastening Without the Guesswork
Product links are for reference. Verify current details on the retailer page before buying.
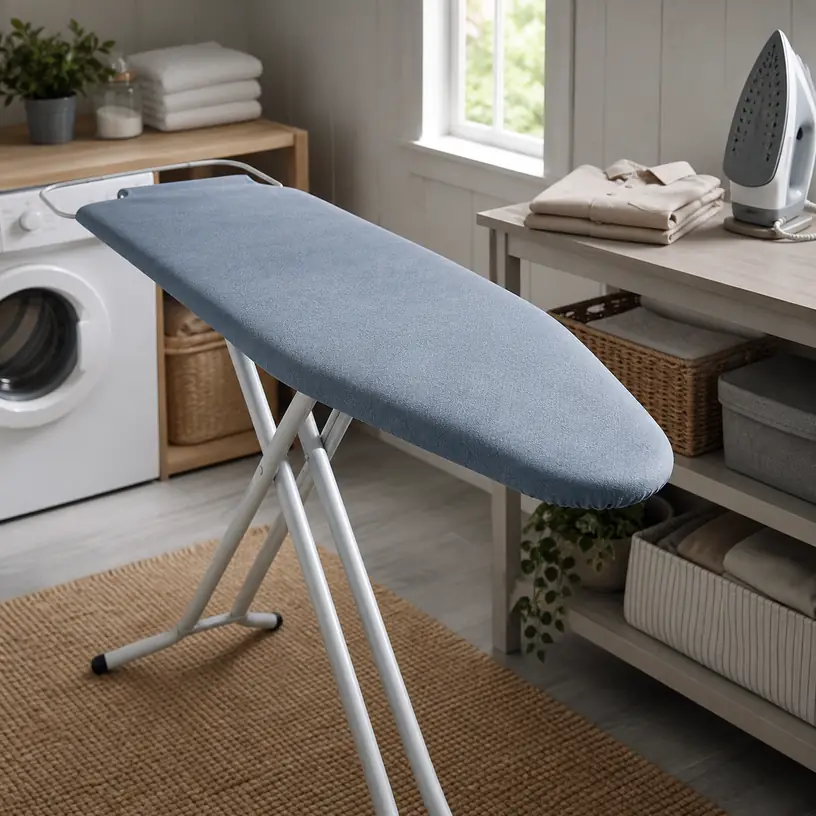
Illustrative image, not an official product photo.
Short answer
An ironing board cover works well only when its shape, padding, and fastening system suit the board underneath it. Measure the deck itself from nose to rear edge, record the width at its broadest point, and note the nose profile, attached iron rest, hinges, and clearance below the frame. Then compare those observations with the current fit diagram rather than relying on labels such as standard or large. A smooth cotton-style surface with a separate or integrated pad is a familiar general-purpose arrangement, while metallic or coated surfaces come with different care and temperature guidance. Whatever the material, the cover should tighten evenly without wrinkles, exposed hardware, hanging cords, or a soft pad that shifts under the garment.
Search reference
Ironing board cover options
Compare deck dimensions, nose shape, pad construction, edge depth, tightening hardware, surface care, and compatibility with the frame already in your laundry space.
View matching optionsMeasure the board after the old cover comes off
A worn cover can hide the very dimensions needed for its replacement. Its elastic may have relaxed beyond the deck, its pad may overhang the edges, and years of stretching can make the nose look rounder than the metal or composite board beneath it. If the board maker’s instructions allow removal, take measurements from the bare, cool deck rather than tracing the old textile.
Measure length along the center from the tip of the nose to the rear edge. Find the widest part of the board and measure straight across it. It also helps to record the width at one or two points nearer the nose because two boards with the same maximum dimensions may taper differently. Finally, measure deck thickness or edge depth where the cover must wrap underneath.
Look below the board before shopping. Crossbars, leg pivots, wall-mount hardware, cable guides, and an attached iron rest can limit where elastic, clips, buckles, or a drawstring can run. Photographing the underside for personal reference makes it easier to compare product diagrams without repeatedly unfolding the board. Keep hands clear of hinges and lock the frame as directed while measuring.
What this product type is
An ironing board cover is the replaceable top textile fitted over an ironing board deck. Many versions include a sewn-in pad, a separate underlay, or both; others are sold as a cover only. The edge may be held by elastic, a drawstring, a bungee-style cord, straps, clips, or a combination of those systems.
Surface descriptions vary. Plain woven covers are common, while some listings describe metallic, silicone-treated, reflective, stain-resistant, or heat-resistant finishes. Those terms are not interchangeable, and none should be treated as permission to leave a hot iron standing on the board. The iron’s heel rest or a separate rest should be used exactly as the appliance and board instructions specify.
Who this is for
- Households replacing a stained, scorched, loose, or compressed cover while keeping an otherwise serviceable ironing board.
- People whose current cover shifts at the nose, forms ridges, or exposes the deck edge during ordinary garment care.
- Buyers willing to measure an extra-wide, compact, tabletop, wall-mounted, or built-in board instead of assuming a universal fit.
- Sewers and crafters who want a consistently smooth work surface and can match pad firmness to the pressing tasks they perform.
- Anyone assembling a first laundry setup who wants the cover, pad, frame, and iron-rest arrangement to work as one system.
Who should skip it
- Do not cover a bent, unstable, rust-damaged, heat-damaged, or poorly locking board merely to hide the problem; assess repair or replacement first.
- Skip universal-fit claims when the listed dimension range, taper, and underside layout do not match the board.
- A conventional full-size cover will rarely suit a sleeve board, tabletop board, over-the-door design, or built-in foldaway deck without explicit compatibility.
- Avoid coated or metallic surfaces when their instructions conflict with a garment label, iron manual, pressing tool, or the way you use steam.
- Anyone unable to secure cords, clips, and excess fabric away from hinges, feet, children, and pets should choose a safer fastening arrangement.
What to verify before buying
- Match the stated minimum and maximum deck length and width to measurements of the bare board, not to the relaxed old cover.
- Compare the nose outline, rear corners, edge depth, and any cutout needed around an attached iron rest.
- Confirm whether the package contains a cover only, an integrated pad, a loose underlay, fastening clips, or some combination of these parts.
- Check the surface material wording, pad material, layer count, and total thickness without assuming a thick-looking photo represents the delivered construction.
- Identify how tension is adjusted: continuous elastic, drawstring, bungee cord, toggle, underside straps, clips, hook-and-loop tabs, or fixed elastic edging.
- Review the underside diagram to ensure fasteners will clear the board’s braces, hinges, wall hardware, and leg mechanism.
- Read care instructions before washing, drying, or spot cleaning; integrated foam, felt, coatings, and printed finishes may require different treatment.
- Check the maker’s temperature, steam, and iron-rest guidance. Heat-resistant wording does not mean fireproof or suitable as a parking surface for a hot soleplate.
- Verify return terms before opening or installing the cover if exact fit is uncertain.
Padding changes the feel as much as the surface does
The pad separates fabric from the hard or perforated deck. Too little cushioning can allow the board pattern or hardware to telegraph through thin garments. Too much soft padding can make it difficult to press crisp seams, allow the iron to rock, or hold moisture after heavy steam use. The useful balance depends on the board construction and the work being done.
A sewn-in pad simplifies installation because its alignment is fixed, but the whole cover generally has to be replaced when one layer wears out. A separate pad can be trimmed or replaced independently when the instructions permit, yet it needs to stay flat while the cover is tensioned over it. Confirm whether a loose underlay should reach the deck edge or stop short of the wraparound skirt; bunching material under the edge can prevent an even fit.
Foam and felt are often described by thickness, weight, density, or simply a layer count. Those measurements do not translate neatly into the same firmness. Compare the actual specifications supplied for each option, and be cautious about treating more layers as automatically better. If the existing setup already has a reusable pad, check whether the new cover is intended to go over it. Stacking unapproved layers can alter fit, trap moisture, or reduce stability.
Fastening should distribute tension around the deck
Elastic edging is quick to install when its sewn shape closely follows the board. It becomes less forgiving when the deck sits at the limit of the advertised size range. A drawstring or bungee cord adds adjustment, but the cord path and locking toggle need a safe location underneath. Underside straps can pull opposing edges together and reduce sideways movement, provided they clear braces and do not distort the cover.
Fit the cover only with the iron unplugged, cool, and set aside. Follow the cover and board instructions, lock the board in its working position, and center the nose before tightening the rear. Work around the edge in small increments rather than pulling one point to maximum tension. The surface should become smooth without forcing seams over the deck, curling its edges upward, or loading the frame unevenly.
After installation, fold and unfold the board cautiously while watching the underside. No cord, strap, clip, or loose skirt should enter a hinge, scrape a wall, catch a leg, or touch the floor. Recheck tension after the first few uses because new fabric and elastic can settle. A cover that repeatedly slips despite correct installation may have the wrong dimensions or contour.
Surface choice should follow the fabric-care routine
A conventional cotton or cotton-blend surface offers a familiar feel and makes it easy to see whether the board is smooth. Pattern and color are aesthetic choices, but very bold dyes or prints should still come with clear care guidance. Stop using a cover if its finish transfers, discolors garments, develops an odor, or changes in a way the instructions identify as unsafe.
Metallic-looking and reflective surfaces are often marketed around heat management. The exact coating, permitted settings, steam guidance, and care restrictions matter more than the visual appearance. They may feel different when pressing fusible materials, delicate textiles, transfers, or items that require a pressing cloth. Always start with the garment-care label and the iron manual; a cover cannot make an unsuitable temperature safe for the fabric.
Steam must have somewhere to go. A perforated deck, pad, cover, room ventilation, and ironing technique all affect moisture. If the underside remains damp, let the board cool and dry fully as directed before folding it away. Persistent condensation or odor calls for checking the layers and use instructions rather than adding another cover on top.
When to clean or replace the cover
Loose fibers, embedded residue, wrinkles that no longer tension out, compressed padding, torn edge channels, weakened elastic, and exposed deck areas all signal declining performance. Scorch marks deserve particular attention. Do not assume a darkened area is merely cosmetic; let everything cool, identify the cause, and replace any damaged component as appropriate.
Cleaning is product-specific. Some removable textile covers may permit washing, while coated surfaces, integrated pads, cords, toggles, and elastic can change the allowed method. Follow the current label for water temperature, detergent, drying, and whether the item may be ironed itself. Reinstall only when every layer is completely dry and the board is clean.
If starch, fusible residue, or another pressing product reaches the cover, follow the product and cover directions rather than scraping a warm surface. A removable pressing cloth or project-specific mat may be easier to replace for messy craft work, but it still needs to be compatible with the temperature and technique involved.
Limitations
- Size ranges do not guarantee a neat fit when the board has an unusual taper, thick edge, square nose, or integrated rest.
- A replacement cover cannot stabilize a damaged frame, repair a warped deck, or correct a faulty height lock.
- Very soft or layered padding may reduce precision for seams and small details even when it feels comfortable for larger garments.
- Coatings and metallic finishes can have care or temperature restrictions that differ from ordinary woven surfaces.
- Elastic, cords, and straps can loosen with use and require periodic inspection and adjustment.
- No cover eliminates the need to follow garment labels, appliance instructions, ventilation guidance, and safe hot-iron handling.
- Colors and patterns shown online can look different under laundry-room lighting and may show lint or scorch marks differently.
Alternatives to compare
- A board-specific replacement part from the original manufacturer when the model number is still available.
- A cover-only replacement used with an existing pad that remains flat, clean, dry, and compatible.
- A separate felt underlay beneath a properly sized cover when both products explicitly allow that arrangement.
- A tabletop ironing board for occasional small garments in a home with limited floor space.
- A sleeve board or tailor’s board for narrow garment sections and shaped sewing work.
- A heat-compatible pressing mat for a limited task on a suitable protected surface, following all mat and surface instructions.
- A complete replacement ironing board when the frame, deck, lock, feet, or attached rest is no longer sound.
FAQ
How do I measure an ironing board for a replacement cover?
Remove the old cover if the board instructions allow it, then measure the bare deck along its center from the nose to the rear edge. Record the greatest width, one or two widths along the taper, and the edge depth. Note the nose shape, rear corners, iron rest, and underside hardware before comparing a fit diagram.
Should an ironing board cover include a pad?
It depends on the board and the condition of any existing underlay. An integrated pad is convenient, while a separate pad can be replaced independently when permitted. Confirm exactly what is included and whether the new cover is designed for bare-deck installation or use over a compatible pad.
Why does a new ironing board cover keep slipping?
The cover may be too large, shaped for a different taper, unevenly tensioned, or blocked from tightening by braces underneath. Recheck the measured fit range and installation directions. Make sure straps or cords clear moving hardware, and do not add improvised fasteners that could enter the folding mechanism.
Is a metallic ironing board cover safe for every fabric?
No surface is automatically suitable for every textile or technique. Follow the garment label and iron manual, then check the cover’s stated temperature, steam, coating, and care guidance. Use a compatible pressing cloth when required and never treat the board surface as a hot-iron rest.
Can an ironing board cover go in the washing machine?
Only if its care label specifically permits machine washing. Integrated foam, felt, metallic coatings, elastic, cords, and printed finishes may require spot cleaning, hand washing, or another method. Let all layers dry completely before reinstalling the cover.