Packing Tape Dispensers for Moving Day: Roll Fit, Tension, and Safer Cuts

Product links are for reference. Verify current details on the retailer page before buying.
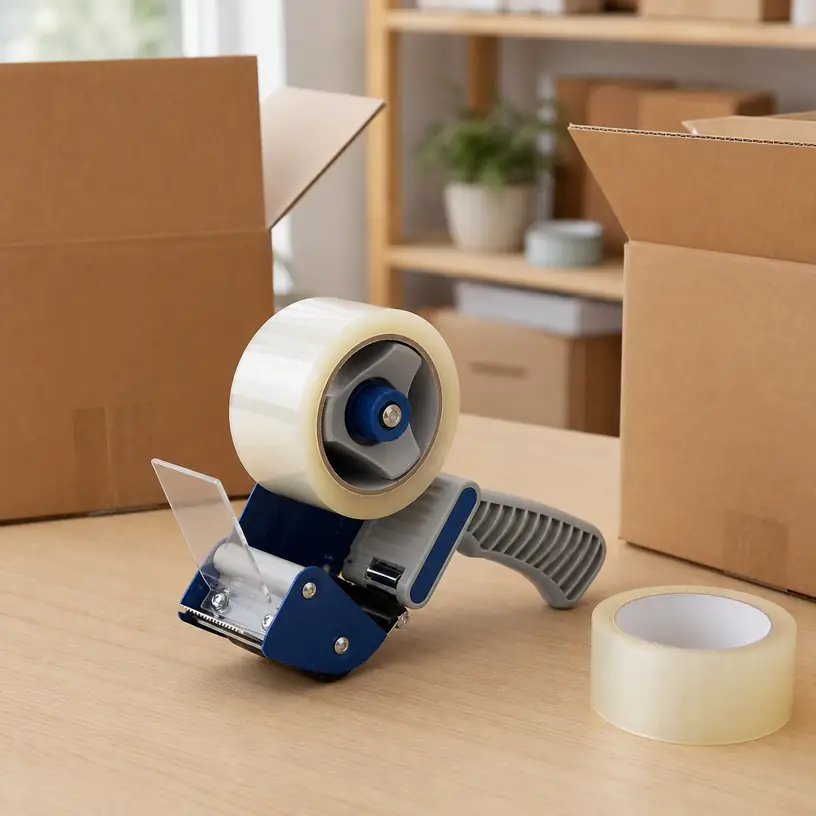
Illustrative image of a generic handheld packing tape dispenser beside cardboard moving boxes

Illustrative image, not an official product photo.

Short answer

A packing tape dispenser should match the exact rolls you plan to use and let you control tape with one hand without making every box a wrestling match. Start with tape width, maximum roll diameter, and core size; a familiar-looking roll is not enough to establish compatibility. Then compare the brake or tension adjustment, roller layout, handle angle, cutting-edge guard, and loading instructions. For a household move, a straightforward handheld dispenser is usually the practical middle ground between a bare roll and a bench-mounted machine. Buy two only when separate packing stations or multiple helpers will genuinely use them.

Search reference

Packing tape dispensers for moving

Compare roll and core compatibility, tension adjustment, handle layout, blade protection, loading directions, and included tape before choosing a dispenser.

View matching options

Why the dispenser matters after the first few boxes

Pulling tape directly from a roll can work for one return carton. During a move, the repeated sequence is different: hold box flaps together, find the tape end, keep the strip from folding onto itself, span a seam, and make a clean cut without losing the roll. A dispenser combines those steps, but only when its roll mount, pressure roller, tension system, and cutting edge cooperate with the chosen tape.

That makes workflow more important than a long accessory list. A bulky frame may feel unnecessary in a nearly empty apartment, while a light handle with poor tension can be frustrating across dozens of cartons. Think about where boxes will be assembled, who will seal them, and whether the tool must move between rooms. A dispenser parked with the tape end ready is useful; one buried under packing paper or left with an exposed edge is not.

Who this is for

  • Households sealing a substantial number of corrugated boxes for a move, storage project, or donation run.
  • Renters who want a reusable tool rather than cutting every strip with separate scissors.
  • Small online sellers who pack occasional parcels but do not need a fixed tabletop dispenser.
  • Families setting up two packing zones and deciding whether identical dispensers would simplify roll changes.
  • Anyone replacing a dispenser that drags unpredictably, drops its roll, or feels awkward during repeated use.

Who should skip it

  • A bare roll and scissors may be adequate for one or two boxes, provided the cutting tool is handled and stored safely.
  • Very narrow stationery tape, reinforced specialty tape, water-activated tape, and unusually large rolls may require different equipment.
  • A handheld tape gun is not the same as a carton-sealing machine for continuous high-volume work.
  • People with limited grip or wrist movement should not assume a pistol-style handle will be comfortable; a tabletop format or help from another packer may suit the task better.
  • Skip bundles that do not state the dimensions or type of the included tape, especially if compatibility with replacement rolls is unclear.

What to verify before buying

  • Tape width: Match the dispenser’s supported range to the width printed on the roll or packaging.
  • Core and roll fit: Check the required core diameter, maximum outside diameter, and how the hub grips the roll.
  • Tape type: Confirm that the maker supports the film thickness and adhesive-tape style you intend to use.
  • Tension control: Look for an understandable brake or adjustment and directions for preventing both free-spinning and excessive drag.
  • Roller layout: Check how the tape passes around the application roller and whether the path is clearly shown in the manual or listing.
  • Cutting assembly: Verify the cutter material, guard design, and safe storage guidance; do not assume every visible cover retracts automatically.
  • Handle fit: Compare grip length, width, texture, trigger-free clearance, and the angle between handle and frame.
  • Hand orientation: Confirm whether loading, tension adjustment, and cutting work comfortably for the intended user’s dominant hand.
  • Construction: Inspect how the hub, roller, frame, and handle connect, and whether replacement parts are identified.
  • Package contents: Distinguish a dispenser-only listing from a bundle and verify the quantity and dimensions of any included rolls.

Roll compatibility is more than a width number

Many moving-box tapes share a common visual profile, which makes it tempting to shop by width alone. The roll still has to sit securely on the hub, rotate without slipping off, and clear the frame as its outside edge turns. Check all listed measurements rather than treating “standard” as a specification.

The core holder may use flexible tabs, a split hub, a fixed spindle, or another retention system. A tight fit can make roll changes difficult; a loose fit can allow the roll to wobble. Product photos should show the loading side and the direction the adhesive faces after threading. If the instructions are unavailable, choose a better-documented option rather than guessing near a cutting edge.

Tape itself also changes the experience. A thin film may stretch or tear differently from a heavier carton-sealing tape, while a very aggressive adhesive can make misaligned strips harder to recover. Use tape approved for the box, contents, storage conditions, and carrier requirements involved. The dispenser helps apply and cut it; the tool does not make an unsuitable tape suitable.

Tension determines whether the strip behaves

The brake is meant to add enough resistance that the roll does not unwind uncontrollably. Too little tension can leave a long loop after a cut or let the tape fold against itself. Too much can require a hard pull, stretch the film, lift a box flap, or tire the user’s wrist.

Some dispensers use a knob or hub control, while simpler designs rely on friction from the roll mount. Look for a control that can be adjusted without contacting the blade. When starting a new roll, follow the loading diagram and make small tension changes over a practice carton. The useful setting may change when switching tape construction or roll weight.

Do not interpret stronger drag as better sealing pressure. Pressure comes from guiding the application roller over a properly closed seam; tape tension only manages how the strip leaves the roll. If the tool repeatedly jerks, binds, or sheds the roll, stop and check loading, compatibility, and condition rather than pulling harder.

Blade protection and handling deserve close attention

A tape dispenser’s cutter must be sharp enough to sever the intended film, which means the cutting assembly deserves the same respect as another exposed shop blade. Compare guards carefully. Some cover the teeth during storage, some move during use, and some only reduce incidental contact from one direction. Verify the exact mechanism instead of relying on a small listing photo.

Keep fingers, loose clothing, and packing material away from the cutting path. Cut with the motion described by the manufacturer, directed away from people and the box contents. Never leave the dispenser loose inside an open carton, on a floor where someone may reach or step, or under paper that hides the cutter. Store it in a consistent visible place between packing sessions and keep it away from children.

A dull, bent, loose, rusty, or damaged cutting assembly should not be forced through tape. Consult the maker’s maintenance or replacement instructions. A replaceable blade can extend the tool’s service life only if the correct part is available and replacement can be performed as directed.

Plan a moving-day tape station

A simple station reduces the time spent searching for supplies. Keep flat boxes, tape, marker, labels, cushioning, and the dispenser within reach without piling loose material over the cutter. Assemble boxes on a stable surface with enough room to turn them, and keep walkways clear of flattened cartons and rolls.

Before loading a box, seal the lower seam using the box maker’s guidance. The dispenser can help lay a continuous strip, but it does not determine how many strips a particular carton or load needs. Box construction, contents, weight, storage time, and transport method all matter. Follow applicable carton and carrier instructions rather than using the same taping pattern automatically for every package.

For multiple helpers, consistency is more valuable than handing everyone a different unfamiliar tool. Demonstrate where each dispenser is parked and how its guard works. If two packing stations use different tape, mark the supplies outside the dispenser rather than writing on the tape path or covering instructions. At the end of a session, return the tape end to the ready position recommended by the maker and put the tool in its storage location.

Handle shape affects long sessions

Pistol-grip dispensers concentrate the tool’s mass in front of the hand. Handle angle, grip thickness, roll weight, and drag all contribute to how that feels after many boxes. A cushioned surface may improve grip, but padding does not correct a handle that is too wide or a brake that requires excessive force.

Check for seams, fasteners, and frame edges near the fingers. Product dimensions can help, although they do not replace trying the grip. If several people will pack, an adjustable brake and a neutral handle size may be more useful than a highly contoured grip designed around one hand.

Left-handed buyers should look beyond labels such as ergonomic. The loading side, tape path, adjustment position, and direction of the final cutting motion may favor one orientation. Seek clear images or instructions and verify return conditions if hand fit cannot be determined before purchase.

Maintenance and storage between projects

Adhesive residue, cardboard dust, and fragments of film can collect around the roller and cutter. Follow the specified cleaning method, keeping liquids and bare fingers away from the blade. Do not apply solvents or lubricants unless the manufacturer permits them; a product that dissolves adhesive may also affect plastic, finish, roller material, or future tape adhesion.

Periodically check that the hub retains the roll, the roller turns as intended, the tension control stays in place, and frame fasteners are secure. Remove a damaged roll instead of trying to compensate with more brake pressure. If tape constantly tracks to one side, verify that the roll is seated squarely and threaded correctly.

After moving day, remove or secure the roll as directed and store the dispenser where the cutter cannot be contacted accidentally. Avoid crushing the frame under tools or boxes. Keeping the instructions with the moving supplies makes the next loading session easier, especially when the tool is used only once every few years.

Limitations

  • Listing terms such as standard, heavy duty, and professional do not establish roll compatibility or expected service life.
  • A handheld dispenser still requires controlled wrist and arm movement; it does not automate box sealing.
  • Blade guards vary and may not isolate every sharp surface in every position.
  • The included tape in a bundle may differ from separately purchased replacement rolls.
  • Tape performance depends on the carton, surface condition, environment, application, and storage—not only on the dispenser.
  • Photos and dimensions cannot fully predict grip comfort, balance, brake smoothness, or suitability for a left-handed user.

Alternatives to compare

  • A bare packing-tape roll with safely handled scissors for a very small number of cartons.
  • A compact clip-on cutter when storage space matters and the supported roll size is clearly stated.
  • A weighted tabletop dispenser for light parcels or a stationary packing desk, using tape that matches its specifications.
  • A bench-mounted carton-tape dispenser for a dedicated work surface and repeated packing workflow.
  • A water-activated tape dispenser when that tape system is specifically required; it is a different setup from a conventional handheld tape gun.

FAQ

What size tape dispenser works for moving boxes?

Match the dispenser to the tape, not to the box alone. Verify supported tape width, core diameter, maximum roll diameter, and tape type against the rolls you plan to use. “Standard size” is too vague when measurements are available.

Do I need an adjustable brake on a packing tape dispenser?

An adjustable brake is useful when you change tape types or want to tune how freely the roll turns. A fixed-friction model may be adequate for occasional use with one compatible tape, but it offers less control if the roll unwinds too easily or drags heavily.

Is a guarded cutter completely safe to touch?

No. A guard may reduce incidental contact, but its coverage and movement vary by design. Treat the cutting assembly as sharp, follow the maker’s operating directions, keep hands out of the cutting path, and store the dispenser where the edge cannot be contacted accidentally.

Should I buy one or two tape guns for a household move?

One is usually enough for a single packing station. Two can make sense when people are working in separate rooms or one tool is reserved for a different compatible tape. Extra dispensers add little value if everyone still shares the same box-building area.

Why does tape keep folding onto itself in the dispenser?

The roll may be threaded in the wrong direction, seated unevenly, incompatible with the hub, or running with too little tension. Check the loading diagram, roll measurements, tape path, and brake setting. If the roller or frame is damaged, stop using the tool and consult the maker’s guidance.
Before the Next Cut: Choosing Bypass Pruning Shears for Small Garden Jobs

Product links are for reference. Verify current details on the retailer page before buying.

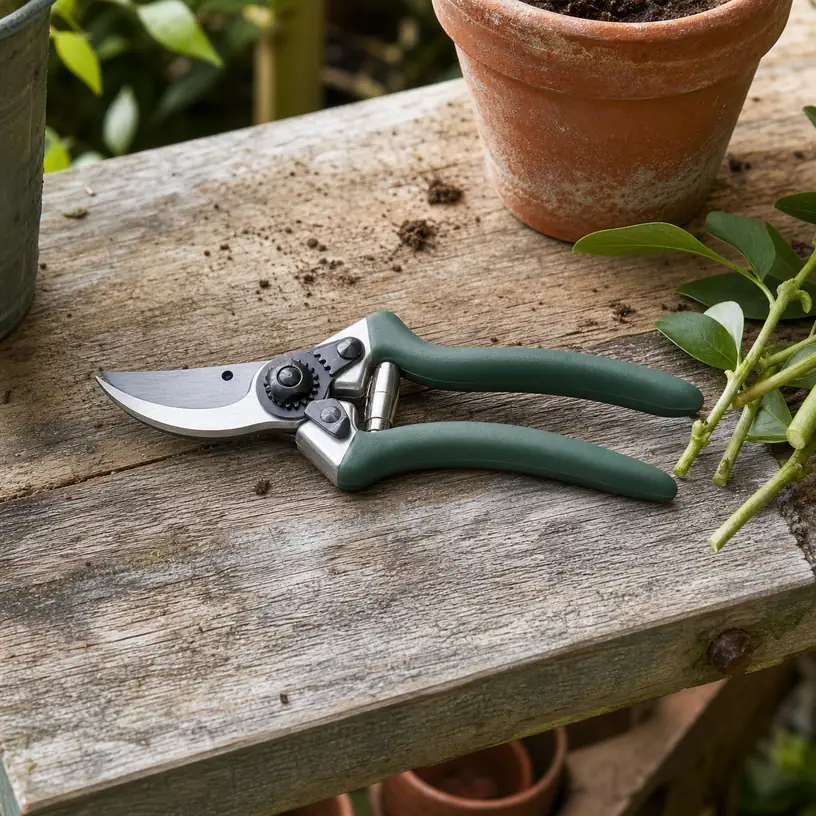
Illustrative image of generic bypass pruning shears on a garden potting bench

Illustrative image, not an official product photo.

Short answer

Bypass pruning shears are intended for controlled hand cuts in plant material that fits safely between their two passing blades. They can suit routine jobs such as shortening slender live stems, removing spent growth, or taking small trimmings, provided the plant and cut are appropriate for pruning. Start by listing those real jobs and estimating the thickest routine stem rather than buying around the largest number on a listing. Then compare the maker’s stated cutting capacity, blade overlap, handle span, spring and lock behavior, replaceable parts, and care instructions. Keep loppers, hedge shears, a pruning saw, or another suitable tool in the plan for cuts that exceed a one-handed pruner’s geometry or capacity.

Search reference

Bypass pruning shears for garden upkeep

Compare stated cutting capacity, blade geometry, hand fit, lock position, replacement parts, and care guidance against the stems you actually need to manage.

View matching options

Name the cuts before choosing the tool

Walk through the garden with the pruners still in the store. Note the plants you expect to maintain, the location of the cuts, and whether the stems are fresh and pliable, dry and woody, crowded among thorns, or positioned above a comfortable working height. Also check reliable guidance for the plant and season. The ability to cut a stem does not establish that it should be cut now, or that it should be cut in that place.

Bypass pruners use one sharpened blade that passes a supporting blade. That scissor-like motion distinguishes them from anvil pruners, which bring a cutting blade down against a broader surface. The category name is only a starting point: products vary in blade curve, overlap, maximum opening, handle leverage, spring force, and the access available near a branch junction.

Make a short job map. One column can cover light selective work on reachable stems; another can list thicker branches, long hedge faces, dense thorny growth, and overhead cuts. The first column may support buying bypass shears. The second is a warning not to force one compact hand tool into every garden task.

Who this is for

  • Gardeners making occasional, selective cuts on suitably sized live stems within comfortable reach.
  • Patio and container gardeners who need a compact tool for varied plants rather than a long tool for broad areas.
  • Households replacing worn general-purpose pruners and willing to compare hand fit as carefully as blade specifications.
  • Gardeners who clean, inspect, dry, and store cutting tools instead of leaving them outdoors between jobs.
  • Shared tool users who can agree on safe storage and choose a model whose lock and handle range work for everyone.
  • Buyers building a small tool kit in which hand pruners handle only the jobs appropriate to their stated limits.

Who should skip it

  • Choose loppers or a pruning saw, as appropriate, when branches exceed the pruner’s stated capacity or require two-handed leverage.
  • Use hedge shears or another suitable tool when the task is shaping a long surface rather than making selective individual cuts.
  • Do not choose an ordinary hand pruner for overhead work, powered cutting, roots in gritty soil, wire, plastic, or other material the maker does not specify.
  • A gardener with persistent hand pain, limited grip, or difficulty controlling a spring-loaded tool may need another design or professional advice rather than simply a larger handle.
  • Skip decorative or unidentified tools that do not state intended use, cutting limits, care, and a way to secure the blades closed.
  • For high, storm-damaged, heavy, tensioned, or otherwise hazardous branches, use an appropriately qualified service rather than improvising from a ladder.

What to verify before buying

  • Intended material: Confirm whether the maker specifies live stems, dry wood, or another use; do not infer this from a lifestyle photo.
  • Stated cutting capacity: Treat it as an upper limit under the specified conditions, not as the ideal size for every repeated cut.
  • Blade opening and access: Check whether the blades can reach the planned cut without crushing nearby shoots or forcing the handles against thorns, a pot rim, or another branch.
  • Blade contact: Look for clear information about adjustment, overlap, and service. Visible gaps, side play, chips, or bent blades require attention before use.
  • Handle span: Compare both the open and closed grip with the user’s hand, gloves, wrist position, and the need to release the tool between cuts.
  • Lock location: Determine whether the lock can be operated deliberately without putting fingers near the cutting edges and whether it stays secured in storage.
  • Spring arrangement: Verify whether the return spring is enclosed or exposed, removable or fixed, and whether replacements are available.
  • Adjustment hardware: Check the instructions before assuming a pivot nut or screw is intended for user adjustment.
  • Replaceable parts: Confirm whether blades, springs, locks, grips, and fasteners can be obtained for the exact model.
  • Cleaning and lubrication: Read the approved method and any restrictions rather than applying a household cleaner or oil at random.
  • Storage guidance: Look for a secure closed position and instructions for a dry location away from children and unintended users.
  • Complete dimensions and weight: Product length alone does not reveal handle width, balance, or how the pruner sits in a pocket or tool carrier.

Capacity is a boundary, not a target

A cutting-capacity figure can be useful, but it cannot describe every stem. Species, moisture, age, condition, branching angle, and where the stem sits between the blades all affect the effort and control required. A listed maximum should never be read as a promise that every branch of that diameter will be an easy one-handed cut.

Use the smallest appropriate tool that can make the planned cut with control, but stop when the handles require straining, twisting, repeated chewing, or two hands on a one-hand design. Rocking the tool sideways can damage both the blades and the plant. Moving to a lopper or saw is not a failure of the pruner; it is part of matching leverage and blade geometry to the job.

Access can impose a lower practical limit than raw capacity. A stem close to a trunk, wall, stake, or neighboring shoot may not allow the cutting blade to sit where the plant’s pruning guidance calls for it. Avoid grabbing an easy-to-reach point merely because the correct location is awkward. Change tools, improve access safely, or leave the cut for a more suitable method.

Hand fit appears between cuts

A pruner that feels acceptable for one squeeze may become awkward over a garden session. The open handle span determines how far the fingers must reach after the spring returns the tool. The closed span affects whether the hand is compressed at the end of the cut. Handle curves, stops, coatings, and finger contours can support one hand shape while creating pressure points for another.

If possible, evaluate fit with the type of gloves normally used, while keeping the tool secured and following store rules. Hold the wrist in a neutral position and imagine opening the hand repeatedly rather than judging only the softest grip surface. A rotating handle or adjustable opening can change the motion, but extra mechanisms also add fit questions and service points; verify how they work on the exact model.

Left- and right-handed operation deserves a direct check. A centered tool is not automatically equally convenient for both hands if the lock, grip contour, safety catch, or blade visibility favors one side. Shared households should consider the smallest and largest hands that will use it. One universally sized pruner may be less practical than clearly assigned tools that each user can control.

Look at the whole cutting path

Good access means seeing the intended cut, opening the blades around the stem, and closing them without catching a neighboring shoot. A narrow tip can reach tighter growth, while a broader blade may feel more substantial but occupy more room. Neither trait is universally superior. Compare the actual plants in the job map with blade length, curve, and maximum opening.

Blade orientation can matter near a retained branch or bud because the cutting and supporting sides do not interact with the stem in the same way. Follow the plant’s pruning guidance and the tool maker’s instructions rather than relying on one generic orientation rule for every plant. Make controlled cuts without placing the free hand in front of or beneath the blades.

Thorns and dense foliage create another access problem. Short pruners bring the hand close to the cut, and a thick glove does not turn that position into long reach. Do not extend from an unstable stance or push an arm blindly into growth. Long-handled tools, protective clothing appropriate to the plant, or professional help may be the better choice.

The pivot, spring, and lock determine daily usability

Blades receive most of the attention, but the joint controls how they meet. Excessive side play can allow poor alignment; a joint that is dirty, damaged, corroded, or improperly tightened can make movement rough. Inspect a new tool before the first garden session. Follow its instructions for any adjustment, and do not assume every visible fastener should be tightened by the user.

The spring should open the handles predictably without dislodging or trapping debris. An exposed coil is easy to see but may collect clippings; an enclosed spring hides more of the mechanism but can be harder to inspect. Replacement availability matters because a small lost or fatigued component can otherwise end the useful life of the complete tool.

A lock should keep the blades closed during transport and storage. It should not drift into the cutting path or release unintentionally. Practice locking and unlocking with the blades pointed away from people and the free hand clear of the edges. If the catch demands an unsafe grip change or regularly jams under residue, that is a usability issue, not a habit to ignore.

Plan cleaning before sap dries

Plant residue can collect on blades, around the pivot, and inside a spring or lock. Follow the maker’s instructions for removing debris, cleaning, drying, lubrication, and disinfection when moving between plants or when plant-health guidance calls for it. Different blade coatings, handle materials, and mechanisms can have different chemical restrictions, so one improvised cleaning solution should not be assumed safe for every pruner.

Inspect the tool while it is clean. Look for chips, cracks, bends, loose components, damaged grips, corrosion, and blades that no longer pass as intended. Stop using a damaged tool until it is repaired according to its instructions or replaced. Sharpening also requires the correct bevel, abrasive, technique, and hand protection; use the specified service method or a competent sharpening service if those details are uncertain.

Dry and secure the pruner before storage. Closing and locking the blades reduces accidental contact but does not make the tool harmless. Keep it away from children, damp potting supplies, and loose contact with other metal tools. A sheath or holster should be made for the tool and should not press the lock open.

Limitations

  • Bypass pruning shears do not replace plant-specific knowledge about timing, cut location, disease management, or recovery.
  • A capacity specification cannot account for every species, stem condition, access angle, or user’s hand strength.
  • Compact handles keep the tool portable but place the hand close to thorns and the cutting area.
  • Sap, moisture, soil, and plant debris can interfere with blade movement and increase maintenance needs.
  • Springs, locks, grips, pivot hardware, and coatings can wear even when the blade still looks sharp.
  • One hand size and lock position may not work equally well for every household member.
  • A fresh-looking branch may still be too large, tensioned, damaged, or awkwardly placed for a hand pruner.
  • Replaceable parts and sharpening services may not remain available for every model.

Alternatives to compare

Garden snips may provide a smaller tip for flowers, herbs, and very fine work when their stated use matches the plant material. Anvil pruners use a different cutting action and may be considered for certain dry material, subject to the tool and plant guidance. Loppers add two-handed leverage and reach for larger suitable branches. A pruning saw addresses branches that call for a sawing cut rather than squeezing harder on short handles. Hedge shears cover repeated surface shaping, while a pole pruner is a separate long-reach tool with its own control, clearance, and safety requirements. When branches are high, heavy, damaged, near utilities, or beyond a stable ground-level position, an appropriately qualified tree-care service is the relevant alternative.

FAQ

Are bypass pruning shears only for green stems?

They are commonly considered for live plant material because of their passing-blade action, but the exact intended use varies by model. Check the maker’s material guidance and the plant’s pruning needs. Do not assume the tool is suitable for dry, dead, fibrous, gritty, or non-plant material unless that use is stated.

How much cutting capacity should I leave in reserve?

There is no universal reserve percentage because stem condition and geometry vary. Choose a tool whose stated capacity covers the thickest routine appropriate cut without making the published maximum your everyday target. If a cut demands straining, twisting, repeated bites, or two hands, stop and move to a more suitable tool.

Can one pair of bypass pruners fit both small and large hands?

Sometimes, particularly if a model has a genuinely useful opening adjustment, but shared fit should be verified rather than assumed. Compare open span, closed span, handle contours, lock access, spring force, and control while wearing normal garden gloves. Separate tools may be safer and more comfortable for widely different hand sizes.

What should I do if the blades start sticking after cutting sappy growth?

Stop using the tool and follow its instructions for safe debris removal, cleaning, drying, and lubrication. Keep hands away from the edges and secure the tool as directed. If sticking remains, inspect for damage, poor alignment, or pivot problems and use the specified repair or service route.

When should I move from pruning shears to loppers or a saw?

Change tools when the branch exceeds the pruner’s stated limit, cannot be reached with a stable posture, prevents correct blade placement, or requires excessive force. Loppers and pruning saws have different capacities and techniques, so their own instructions and the plant’s pruning guidance still apply.

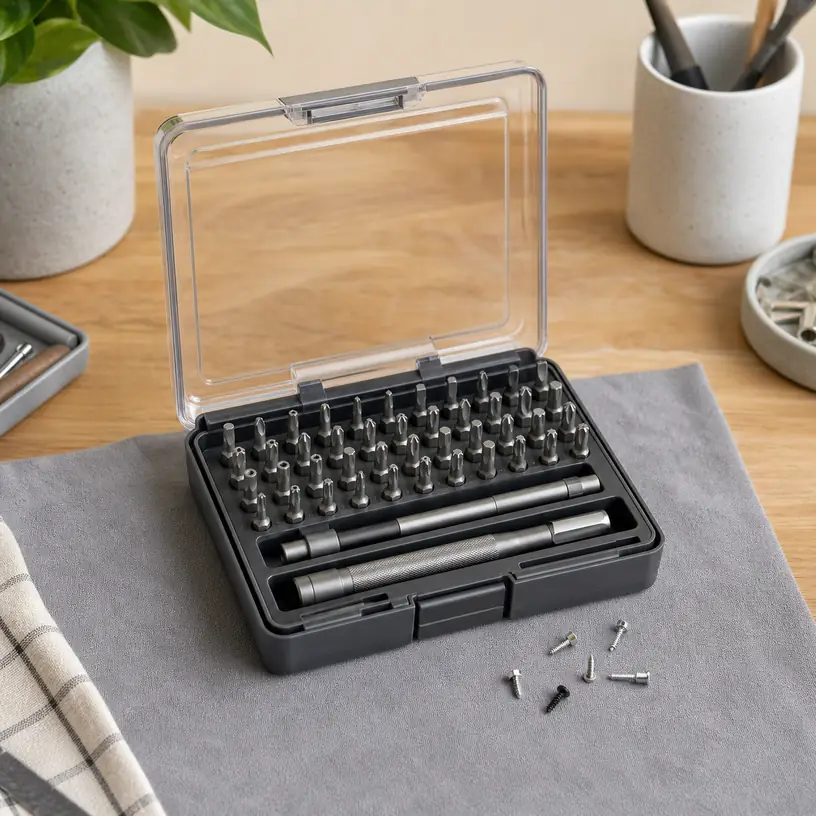
Choosing a Precision Screwdriver Set Without Guessing at the Bits

Product links are for reference. Verify current details on the retailer page before buying.

Illustrative image of a generic precision screwdriver set with organized bits on a clean workbench

Illustrative image, not an official product photo.

Short answer

Choose a precision screwdriver set from the screws outward, not from the advertised bit count inward. Inspect the items you are realistically allowed and prepared to repair, identify their fastener profiles and sizes from reliable documentation, and note whether those screws sit at the surface or down narrow recesses. Then compare bit accuracy, shaft reach, handle control, case labeling, and the availability of replacement bits. A compact set with the right ten well-fitting bits can be more useful than a large kit padded with duplicates and accessories. It should also be treated as a turning tool, not as permission to open batteries, powered equipment, safety-critical assemblies, or products whose service instructions call for specialist procedures.

Search reference

Precision screwdriver set options

Compare kits by the fastener families you encounter, access depth, handle feel, and how clearly each small bit is identified and replaceable.

View matching options

Start with one real repair

The biggest number on a screwdriver case is usually its piece count, but piece count says little about whether the kit fits the fastener in front of you. A set may include many uncommon profiles, repeated sizes, opening picks, sockets, and extensions while omitting the long, narrow bit needed to reach a recessed screw. Begin with a concrete job such as tightening eyeglass hardware, opening an approved battery compartment, adjusting a small household item, or servicing equipment under its published instructions.

Look at the fastener under bright light or modest magnification. Do not identify it from a blurred product photo or force the closest-looking bit into place. Cross-shaped, slotted, hexagonal, star-shaped, five-point, three-wing, and security fasteners each exist in multiple sizes and variations. The device maker’s service material, parts diagram, or tool list is a better reference than visual guesswork. If a screw is damaged, corroded, coated over, or unusually resistant, stop before a small mismatch becomes a stripped recess.

Access matters alongside profile. Measure or estimate the diameter of the opening around a recessed screw, the depth below the surface, and any obstruction near the fastener. A correctly shaped bit may still fail to reach if its working end is short and the holder is too wide. Conversely, a very long bit can flex or feel less controlled during a delicate surface-level job. The right geometry lets the bit sit fully in the recess while the handle remains clear of surrounding parts.

Who this is for

  • Households that regularly encounter small screws in eyewear, toys, battery doors, hobby items, computer accessories, and other permitted user-serviceable products.
  • Makers who need a compact manual driver for light assembly, adjustment, prototyping, or careful bench work.
  • People replacing a random collection of loose micro drivers with a labeled case that makes sizes easier to identify and return.
  • Repair beginners willing to consult service guidance, organize removed screws, and stop when a task exceeds their skill or equipment.
  • Tool-bag users who want low-speed hand control for small fasteners rather than the bulk and force of a powered driver.

Who should skip it

  • Anyone expecting one generic kit to authorize or safely cover every phone, computer, appliance, watch, vehicle, or electrical repair.
  • Work on energized equipment, damaged rechargeable cells, pressurized devices, mains-powered products, or other hazards that require qualified service procedures.
  • Safety-critical, calibrated, warrantied, sealed, medical, or regulated equipment when its maker or workplace procedure restricts user servicing.
  • Jobs that call for a documented torque value; an ordinary precision handle does not provide verified torque control.
  • Heavy, seized, structural, impact-rated, or high-torque fasteners better matched to full-size tools and an appropriate removal plan.
  • Buyers who only need one known driver size and would gain more from a good dedicated screwdriver than a broad kit.

What to verify before buying

  • Exact profiles and sizes: Match the listing’s individual bit table to the service instructions or known fasteners, not merely to a device category printed on the case.
  • Bit standard and replacements: Check whether the bits use a common shank format, whether individual replacements are sold, and whether the maker states compatibility clearly.
  • Working length: Verify the length and diameter of the exposed bit or shaft for recessed screws, narrow openings, and fasteners beside raised edges.
  • Bit labeling: Look for readable size markings on the bit, holder, tray, or case so similar tips are not chosen by trial and error.
  • Tip fit and finish: Product information should distinguish the profile and size precisely; decorative color bands and material buzzwords do not prove accurate engagement.
  • Handle dimensions: Compare diameter, grip surface, rotating end cap, shaft retention, and overall length with the control and hand position your tasks require.
  • Retention method: Determine whether bits are held mechanically, magnetically, or by both, and whether that arrangement is suitable around the item being serviced.
  • Extensions and sockets: Confirm their actual dimensions, connection method, load limits, and whether extra joints will still fit into the repair area.
  • Case layout: Check whether every bit has a labeled location, the tray holds pieces during transport, and the lid can close without loose parts moving between slots.
  • Included accessories: Identify which picks, tweezers, cups, brushes, or prying tools are actually included and whether their intended use is explained.
  • Care instructions: Verify guidance for cleaning, corrosion prevention, storage, damaged-bit inspection, and any limits on magnetized components.

Bit count can hide the useful details

A large assortment has value when it expands genuine coverage, but it can also make selection slower. Read the inventory line by line. Separate the entries into three groups: profiles required for known tasks, sizes likely to support adjacent household jobs, and pieces with no current purpose. This turns a headline such as “many pieces” into a practical map of what the case can do.

Look for unexplained duplicates. A repeated bit may be a welcome spare for a frequently used small size, yet it should not be mistaken for wider compatibility. Adapters, extension shafts, a handle, and a storage tool may also count as pieces. None of that is inherently misleading if the contents are listed clearly; it simply means two kits with the same total can contain very different working selections.

The profile name alone is incomplete without size. A too-small tip concentrates load at a few points and may cam out, while an oversized tip will not seat fully. Place the tool squarely into the recess and check for full engagement before turning. If it rocks, sits high, or requires downward force just to remain aligned, reassess the size and condition of both parts. The correct response to resistance is diagnosis, not more wrist force.

Security-style bits deserve the same restraint. Their presence in a set does not mean every protected product is intended for consumer access. Some fasteners discourage casual opening because important hazards, calibration, sealing, or service obligations lie beyond the cover. The product’s instructions and applicable rules take priority over the fact that a matching bit happens to be available.

Reach, handle shape, and control work together

Precision fasteners reward alignment. A rotating end cap lets the palm apply gentle axial pressure while the fingers turn the body, which can help keep the shaft centered. Handle diameter changes leverage: a wider grip may be comfortable and easy to rotate, but it can also make it easier to apply more torque than a tiny fastener or plastic boss can tolerate. A very slim handle offers feedback but may fatigue the fingers during repeated work. Choose for control, not maximum force.

The bit holder should retain a bit reliably while still allowing deliberate removal. Magnetic retention is convenient for bit changes and may help with compatible steel screws, but it does not hold every alloy and should not replace a parts tray. Follow equipment guidance where magnetic tools are limited. If the set includes a magnetizer or demagnetizer, verify its instructions rather than assuming a bit’s magnetic state has no consequence.

Rigid extensions add reach but also add another connection where play can develop. Flexible shafts can approach a fastener around a mild obstruction, yet their bend may reduce alignment and feedback. They are not universal solutions for tight screws. Test an extension first on an accessible, low-risk fastener of the same type and use only within the tool maker’s stated limits.

Deep recesses often expose the difference between interchangeable bits and dedicated precision drivers. An interchangeable bit may have a broad shoulder near the tip or meet a holder that cannot enter the opening. A dedicated long-shaft driver can be the simpler answer for a frequently serviced recessed fastener. Check the complete working geometry instead of assuming an extension creates the same access.

A case is part of the tool

Tiny bits are easy to swap, drop, and misidentify. A useful case makes the correct size visible before work begins and makes a missing piece obvious before the lid closes. Printed labels beside each slot are easier to scan than a legend placed elsewhere, provided the bits cannot migrate to neighboring positions during transport. Contrast and text size matter when several dark metal tips look nearly identical.

Try to picture the case during the job, not just on a shelf. Will it remain open on a shallow desk? Can a bit be lifted without spilling the row beside it? Is there a stable place for removed screws that does not mix them with unused bits? A separate divided tray, magnetic parts bowl where appropriate, labeled paper diagram, or small bags may still be needed to preserve the order and position of hardware.

Good organization also prevents improvisation. When a bit is returned to its labeled location after use, wear or damage is easier to notice. Rounded edges, chips, twisting, rust, and a loose shank are reasons to replace the bit rather than conceal it in the set. Keeping the tool clean and dry protects both fit and identification markings.

Small repairs still need a safe boundary

A precise tool does not make every object a beginner project. Before opening anything, disconnect power using the manufacturer’s procedure, remove accessible energy sources only when instructed, and allow specified waiting time. Rechargeable batteries can remain hazardous even when a device appears off. Do not pry, puncture, bend, heat, compress, or short a cell, and stop if a battery is swollen, leaking, unusually hot, damaged, or has an unfamiliar removal method.

Opening clips and adhesives create risks that a screwdriver list does not describe. A kit may include picks, suction cups, spudgers, or tweezers, but bundled accessories should not be treated as evidence that a particular disassembly is safe. Check the repair documentation for hidden cables, glass, spring-loaded parts, seals, replacement adhesives, static-control requirements, and reassembly tests.

For electronics work, a label such as “ESD” or an included wrist strap is not enough to establish a complete static-control setup. Sensitive work may require a defined bench, grounding method, verified equipment, handling procedure, and training. Follow the component or workplace instructions. If those requirements are unclear, use an appropriate repair service rather than experimenting on valuable or safety-related equipment.

Screw organization protects the item as much as the screws. Similar-looking fasteners can differ in length, thread, shoulder, or coating. Returning a longer screw to a shallow hole may damage material below it. Photograph approved disassembly stages, map each screw to its location, and never rely on memory after mixing a pile. Thread each screw gently by hand with the item supported; resistance can indicate misalignment, the wrong fastener, or damaged threads.

A practical first-use check

  1. Compare the case inventory with the seller’s list and confirm that labels match the physical positions.
  2. Inspect the handle, holder, bits, extensions, and accessories for looseness, chips, corrosion, or shipping damage.
  3. Choose a clean, unpowered, permitted practice item with an accessible fastener and clear instructions.
  4. Identify the exact profile and size before lifting a bit from the tray.
  5. Seat the bit fully, hold the shaft in line with the screw, and turn slowly without using an extension at first.
  6. Place removed hardware into a mapped or labeled location rather than the open bit tray.
  7. Reinstall according to the product instructions, stopping when seated or at the specified torque rather than adding an extra hard twist.
  8. Wipe and inspect the bit, return it to its marked slot, account for every screw and tool piece, and close the case carefully.

This short routine reveals practical problems early: unreadable labels, excessive holder play, a handle that is hard to control, or bits that do not reach the intended fastener. Discovering those issues during a simple approved task is better than finding them halfway through a delicate disassembly.

Limitations

  • No assortment covers every proprietary, regional, historical, or newly introduced fastener.
  • A matching profile can still be the wrong size, length, shoulder shape, or access geometry.
  • Small bits wear and can twist, chip, corrode, or round when fit or torque is poor.
  • Ordinary precision handles do not verify tightening torque and should not substitute for specified torque tools.
  • Magnetic retention works only with compatible materials and may be restricted by some equipment procedures.
  • Extensions and flexible shafts can add reach while reducing rigidity, alignment, and tactile feedback.
  • Bundled prying and handling accessories vary in suitability and do not establish a safe repair method.
  • Opening a product can affect seals, calibration, service coverage, safety checks, or reassembly requirements.
  • The set cannot replace technical instructions, hazard controls, replacement parts, skill, or qualified service.

Alternatives to compare

A dedicated long-shaft precision screwdriver can provide better reach and fewer connections for one recurring fastener size. An individual high-quality micro driver avoids paying for unused profiles when the requirement is already known. A manual bit driver with a larger common bit format may suit medium-size household screws that are too large for a precision kit. A torque-limiting driver is the relevant comparison when instructions specify a controlled tightening value. For routine equipment care, a manufacturer-recommended service tool or approved repair kit may supply the exact geometry and process support that a general assortment lacks. If the task involves hazards, sealed assemblies, or uncertain damage, compare the cost and turnaround of a qualified repair service instead of expanding the tool case.

FAQ

How many bits should a precision screwdriver set have?

There is no ideal total. List the exact profiles and sizes for two or three realistic repairs, add useful neighboring sizes, and compare that list with the kit inventory. Ten relevant, accurately labeled bits may serve better than a much larger assortment dominated by duplicates, unknown profiles, or accessories you will not use.

Can a precision screwdriver set be used for phone or laptop repair?

Only when the specific model’s service guidance permits the work and identifies the required tools, parts, hazard controls, and reassembly checks. Fasteners, adhesives, clips, batteries, displays, and static-control needs vary by model. A matching bit is just one requirement and does not make internal repair safe or appropriate.

Are magnetic precision screwdriver bits safe around electronics?

Do not apply a universal rule. Magnetic retention can help hold compatible screws, but equipment and component instructions may restrict magnetic tools or define handling controls. Verify the guidance for the exact item and use a non-magnetic tool when required. Magnetism also does not replace proper screw organization.

Why does the correct-looking bit keep slipping?

It may be the wrong size or variation, may not be seated fully, or may be blocked by debris, coating, wear, or poor access. The screw recess or bit could already be damaged, and the fastener may be thread-locked or tightened beyond what the small tool should handle. Stop before applying more force, reassess the documented profile and size, and choose an appropriate removal method or service provider.

Is a flexible extension useful for recessed screws?

It can help reach around a modest obstruction when the set is designed for that use, but bending reduces rigidity and can make it harder to keep the bit square. It will not solve a narrow opening that the bit holder cannot enter, nor is it appropriate for high resistance. A rigid extension or dedicated long-shaft driver may provide better control.

Magnetic Parts Trays: A Small Upgrade for Less Chaotic Repairs

Product links are for reference. Verify current details on the retailer page before buying.

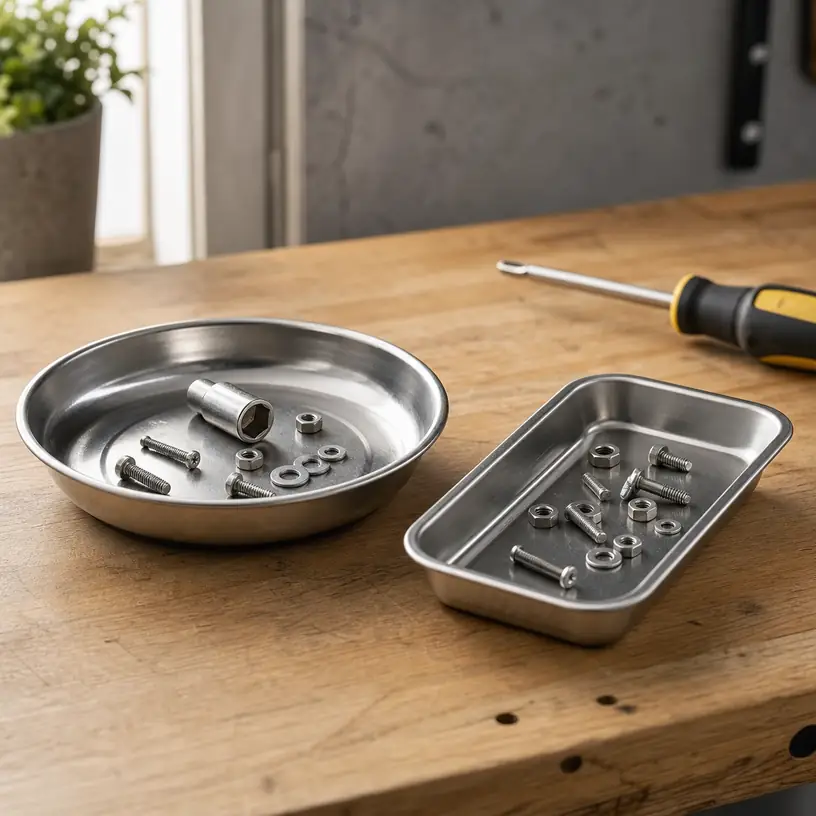
Illustrative image of generic magnetic parts trays holding screws, nuts, washers, and a socket on a workbench

Illustrative image, not an official product photo.

Short answer

A magnetic parts tray earns its bench space when it keeps ferrous screws, nuts, washers, clips, and sockets together through the messy middle of a repair. The useful choice is not automatically the strongest or largest tray. Start with the jobs you actually do, estimate how many separate fastener groups must stay identifiable, and decide whether the tray will sit on a bench, attach to a steel surface, or travel beside a tool bag. Then compare usable interior area, rim height, base protection, carrying grip, and access for gloved fingers. Remember that magnets do not hold every metal and can affect nearby items, so the tray complements—not replaces—labeled containers and a deliberate parts-counting routine.

Search reference

Magnetic parts tray options

Compare round bowls, shallow rectangular trays, and divided layouts by the fasteners you handle, where the base will rest, and whether separate assemblies must remain sorted.

View matching options

Think in repair stages, not just tray diameter

Disassembly creates a sequence. A cover comes off, then a bracket, then perhaps a component with different screw lengths. Dropping everything into one wide bowl prevents parts from rolling away, but it can also erase that sequence. Before shopping, picture a typical repair from first fastener to final reassembly. If each stage uses interchangeable hardware, one open tray may be enough. If positions or lengths matter, multiple small trays, a divided layout, or a separate labeled organizer is the safer workflow.

Capacity descriptions can be abstract, so make a quick paper outline using the listed exterior dimensions. Put the actual driver handle, socket, and a representative handful of loose hardware inside that outline. This exposes two common mismatches: a compact tray that becomes crowded as soon as a socket enters it, and an oversized tray whose center is awkward to reach from the working position. The goal is a visible, accessible landing area rather than maximum volume.

A high rim helps contain loose pieces when the tray is carried or bumped, but it can make tiny washers harder to pinch—especially with gloves. A shallow lip improves access yet offers less mechanical containment for items that the magnet does not attract. Check the interior transition between floor and wall as well. Smooth curves are easier to sweep clean and retrieve parts from than tight corners or decorative grooves.

Who this is for

  • Home mechanics who want a temporary landing place for ferrous fasteners during bicycle, lawn-equipment, appliance, or vehicle work.
  • Furniture assemblers and DIY repairers who regularly move between a tool bag and a metal work surface.
  • People who dismantle small assemblies and need loose hardware visible rather than buried in a pocket or mixed into a toolbox drawer.
  • Workshop users who already label complex parts but want a convenient catch tray at the active work area.
  • Anyone replacing an improvised cup that tips easily or hides small hardware at the bottom.

Who should skip it

  • Anyone expecting the tray to hold aluminum, brass, many stainless formulations, plastic clips, rubber pieces, or other non-ferrous parts without another containment method.
  • Electronics work where magnets are discouraged by the equipment or component manufacturer, or where small sensitive media and instruments share the bench.
  • Repairs that require strict position tracking; a parts map, compartment box, labeled bags, or documented organizer is better than one mixed tray.
  • Jobs around exposed moving machinery, live electrical equipment, delicate finishes, or contamination-controlled areas where a loose magnetic accessory is inappropriate.
  • Users who need sealed transport. An open tray is not a substitute for a lidded small-parts case.

What to verify before buying

  • Usable interior dimensions: Compare the flat or gently curved holding area, not only the widest outside measurement.
  • Tray depth and rim shape: Check whether small washers remain reachable and whether loose non-magnetic pieces have enough physical containment.
  • Magnet arrangement: Determine where the magnetic zones are, whether they act through the base, and how the seller describes holding orientation and limits.
  • Base covering: Verify whether the contact surface is exposed, coated, or protected by a removable boot, and whether it suits the surfaces you plan to use.
  • Work-surface compatibility: Confirm that the intended mounting point is actually ferromagnetic, sufficiently flat, clean, and permitted to contact a magnetic accessory.
  • Hardware compatibility: Test or confirm the material of critical fasteners; appearance alone does not prove that a magnet will attract them.
  • Carrying method: Look for an accessible rim, handle, or stable grip that does not require lifting the tray by loose hardware.
  • Set layout: Check whether a multipack contains different sizes, repeated sizes, dividers, lids, or only open trays.
  • Cleaning guidance: Verify how the tray, coating, and protective base should be cleaned after exposure to oil, dust, chips, or moisture.
  • Nearby equipment: Follow manufacturer guidance for tools, electronics, storage media, instruments, and implanted medical devices that may require distance from magnets.

Where will the tray actually stay?

On a horizontal bench

A tray resting flat on a workbench relies on its footprint and rim as well as magnetic attraction. This is the least demanding placement and may suit users who simply want fasteners to stop rolling. Measure the available patch beside the repair, including room for your forearm and the tool currently in use. A broad tray that forces you to reach across the work can be less convenient than two small trays placed at separate stages.

If the bench has a finished, painted, laminated, or otherwise delicate surface, do not assume a rubber-like base eliminates every mark. Fine metal debris caught underneath can scratch when the tray slides. Lift rather than drag it, keep the underside clean, and follow the surface owner’s care guidance.

On a vertical steel surface

Side placement can free bench area and keep parts close to a lift, cabinet, cart, or machine enclosure. It also asks more of the magnetic interface. The tray’s own weight, the load, vibration, surface curvature, paint, dirt, and any base covering can all change how securely it stays. Marketing language or a nominal force figure does not reproduce the exact installation.

Use only a location where a dropped part or tray cannot enter moving equipment, damage a vehicle, strike someone, or become an electrical hazard. Start with an empty tray, place it as directed, add a small representative load, and observe it before trusting the setup. Never use attachment as a reason to work beneath an unstable tray or to ignore the equipment manufacturer’s rules.

Traveling with a tool kit

Open trays are convenient at the job but poor containers between jobs. Even if hardware is attracted to the base, a jolt can rearrange it, non-ferrous pieces can escape, and metal parts can contact other tools. Carry the tray empty unless the product is specifically designed and verified for loaded transport. Put removed fasteners into labeled bags or a closed organizer before leaving the work area.

Nested trays can save storage room, but confirm whether their protective bases and rims are intended to nest. Strong magnetic attraction between stacked pieces can make separation awkward. A finger gap or accessible edge is more useful than a compact stack that demands prying with a screwdriver.

Treat the magnet as backup, not inventory control

A magnetic tray reduces rolling and casual displacement; it does not know which bolt came from which hole. Photograph the assembly before removal, place unique hardware in a distinct compartment or labeled container, and count parts when the repair instructions call for it. Keeping left-side and right-side components apart can be as simple as using two trays of different shapes, but the distinction must remain obvious throughout the job.

Magnetic response varies by material and geometry. A ferrous screw may hold readily while a thick socket takes more contact area and a small clip sits near the edge. Oil, filings, paint, a protective boot, and an uneven mounting surface can alter practical grip. Verify with the actual parts in a safe position instead of inferring performance from color or weight.

The tray can also collect steel dust and sharp swarf. Those particles migrate to the strongest magnetic areas and may be difficult to see against a dark liner. Avoid wiping the loaded surface with a bare hand. Remove debris using an appropriate method, wear protection suitable for the work, and inspect both sides before setting the tray on a finished surface.

A simple first-use routine

  1. Unpack the tray away from magnet-sensitive items and inspect it for loose coverings, sharp edges, dents, or shipping debris.
  2. Clean and dry the intended contact area according to the surface guidance.
  3. Try several representative fasteners in the tray and include any non-ferrous pieces that will depend on the rim alone.
  4. Test the intended placement while the machinery or equipment is safely out of operation.
  5. Move and lift the tray using its designed grip rather than pulling on a fastener or sliding the base.
  6. During the first repair, keep unique hardware separately labeled until the workflow proves clear.
  7. Empty and inspect the tray after use, removing metal chips before storage.

This short rehearsal reveals whether the tray is too deep for small washers, too crowded for gloved access, or too difficult to detach from the chosen surface. It also establishes a storage place so a strong magnet is not left loose in a drawer beside items that require separation.

Limitations

  • Magnetic attraction is limited to compatible materials and varies with contact, coating, load shape, orientation, and surface conditions.
  • An open tray cannot preserve assembly order unless the user creates a separate labeling or compartment system.
  • Stronger attachment can mean more effort to reposition or remove the tray without sliding it.
  • Metal chips can gather around magnetic zones and may scratch surfaces, contaminate parts, or injure unprotected fingers.
  • A tray mounted vertically can still slip, rotate, detach, or spill non-magnetic contents.
  • Shallow trays favor access but offer less physical containment; deep bowls contain better but can hide or crowd tiny parts.
  • Magnets may be unsuitable near some equipment, instruments, storage media, or medical devices; applicable manufacturer guidance takes priority.
  • The tray does not make an unsafe work location, unstable vehicle, live circuit, or moving machine suitable for repairs.

Alternatives to compare

A divided plastic parts box keeps several hardware groups separate and usually adds a lid for transport, though it may be slower to access during active work. Labeled resealable bags are inexpensive and useful when sequence or location matters more than instant retrieval. A silicone work mat with molded compartments can organize both magnetic and non-magnetic pieces on a horizontal surface. A foam or cardboard parts map lets you place each fastener near a marked location, which is valuable when lengths differ. For recurring assemblies, a dedicated organizer with permanent labels provides more reliable inventory control than any catch tray.

FAQ

Will a magnetic parts tray hold stainless steel screws?

Some stainless steels respond to magnets and others respond weakly or not at all, so the material name alone is not enough. Check the fastener specification when available and test a representative screw safely. The tray’s rim or a separate compartment must contain anything that is not securely attracted.

Can I attach a magnetic tray to a vehicle body panel?

Only after confirming that the specific location is a suitable ferromagnetic surface and that contact is permitted. Paint, curvature, protective layers, trapped grit, load, and vibration can affect grip or finish. Prefer a stable, low-risk location, keep the base clean, lift rather than slide, and never place it where a fall could cause injury or mechanical damage.

Is one large tray better than several small trays?

A large tray offers room for bulky sockets and a broad collection, but several small trays can preserve repair stages and fit closer to the work. Choose according to the number of distinct hardware groups, available surface area, glove access, and how the trays will be carried and stored.

How should metal shavings be removed from the tray?

Follow the product’s cleaning directions and use protection appropriate to the work. Do not sweep sharp swarf away with bare fingers. Empty ordinary parts first, remove collected particles with a suitable shop method, then inspect and clean the underside so debris is not transferred to a finished surface.

Can a magnetic parts tray be used around electronics?

Do not assume it is harmless around every device. Equipment, components, storage media, instruments, and medical devices can have specific separation guidance. Check the relevant manufacturer instructions and choose a non-magnetic divided container whenever compatibility is uncertain.

Socket Organizers for Toolbox Drawers: Rails, Trays, and Fit Checks

Product links are for reference. Verify current details on the retailer page before buying.

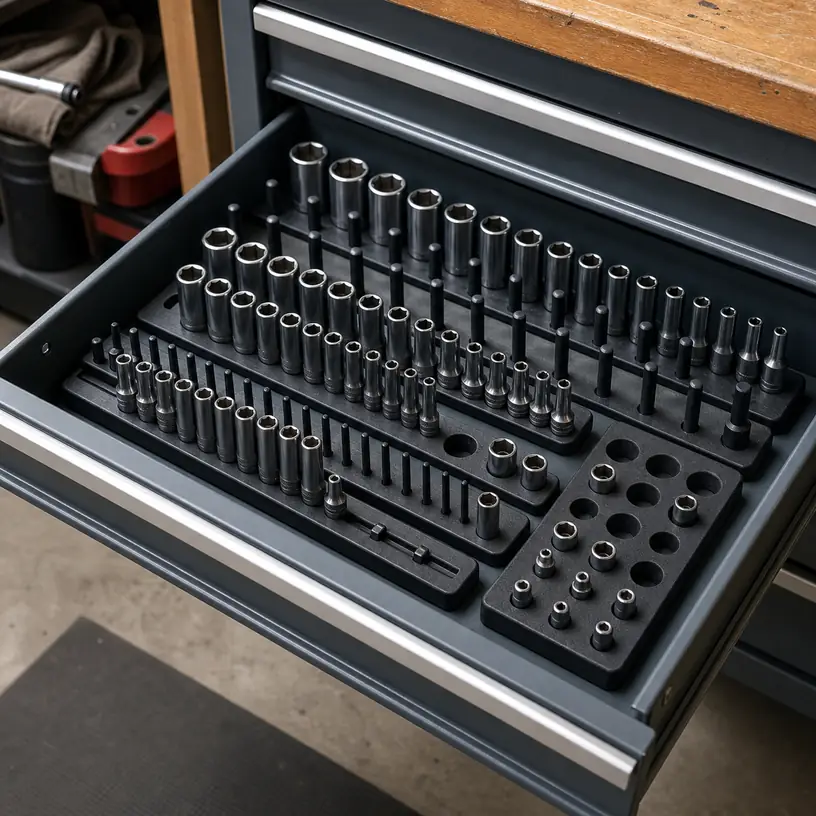
Illustrative image of generic socket organizers arranged in a toolbox drawer

Illustrative image, not an official product photo.

Short answer

Choose a socket organizer by mapping the sockets and the drawer, not by buying the tray with the largest stated capacity. Count shallow and deep sockets separately, note each drive size, and decide whether metric and SAE sets should have distinct rows. Then compare the organizer’s loaded height with the drawer’s usable clearance. Rails save space and can be rearranged, while molded or post-style trays make missing sockets easier to spot. Retention matters if the drawer is opened abruptly or the set travels; quick one-handed removal matters more in a toolbox that stays level on a bench.

Search reference

Socket organizer options for toolbox drawers

Compare rail, post, tray, and magnetic layouts after counting your drive sizes and measuring drawer height, width, depth, and liner thickness.

View matching options

Begin with a socket map

Empty capacity figures hide the details that determine whether an organizer will work. A collection may combine 1/4-inch, 3/8-inch, and 1/2-inch drive sockets; shallow and deep bodies; metric and SAE sizes; impact sockets; spark-plug sockets; and a few extensions or adapters. A tray with many posts for one drive size can still leave half the collection loose.

Lay the sockets out on a towel or drawer liner and make four basic groups: drive size, measurement system, depth, and special purpose. Count each group, then note sockets whose outside diameter or length differs noticeably from the rest. This inventory shows whether a premade graduated tray matches the collection or whether adjustable rails would use space more efficiently.

The same map can establish a retrieval order. Frequently used sockets can sit near the front of the drawer, with deep or less common sizes behind them. Metric and SAE rows can run in separate directions or use visibly different holders. A layout should reduce searching without making it difficult to return a socket to the correct place.

Who this is for

  • Home mechanics who want to see missing sockets before closing the toolbox.
  • DIY users combining several incomplete sets in one drawer.
  • Workshop owners separating metric, SAE, shallow, deep, and impact sockets.
  • People replacing loose factory cases that waste drawer space or no longer match the collection.
  • Anyone arranging a rolling cabinet where sockets shift when drawers open and close.

Who should skip it

  • Keep a fitted case if the complete socket set regularly travels and the case already retains every piece securely.
  • A very small set may need only a compact clip rail or the holder included with the sockets.
  • Foam cut to a specific collection may be a better choice when visual inventory and a fixed position for every tool matter more than future rearrangement.
  • Do not assume a standard organizer will fit oversized, pass-through, insulated, specialty, or unusually shaped sockets.
  • If several people carry subsets to different work areas, one large drawer tray may be less practical than separate portable rails.

What to verify before buying

  • Socket inventory: Count each drive size and count shallow and deep sockets separately. Include special sockets only after checking their dimensions.
  • Usable drawer area: Measure between the drawer sides and from the liner to the lowest obstruction above the drawer, not just the cabinet’s nominal dimensions.
  • Loaded height: Add the organizer base or post height to the length of the tallest socket in its intended orientation.
  • Retention method: Check whether sockets use spring clips, twist-lock studs, friction posts, magnets, or gravity alone, and whether the mechanism suits stationary or mobile storage.
  • Post and clip compatibility: Confirm the drive sizes provided and whether clips or posts can be added, removed, or replaced.
  • Socket spacing: Compare outside diameters so adjacent large sockets do not collide even if the drive fittings line up.
  • Labeling: Determine whether size markings are fixed, supplied as labels, writable, or absent, and whether they match the way you sort the collection.
  • Base stability: Look at feet, magnets, mounting holes, tray shape, and compatibility with the drawer liner.
  • Material and care: Review the current product description for construction, cleaning guidance, magnet precautions, and restrictions involving impact sockets or other heavy tools.
  • Room to grow: Reserve a few useful positions, but do not sacrifice most of a drawer to drive sizes you are unlikely to add.

Rails, trays, posts, and magnets solve different problems

A clip rail uses individual holders along a narrow bar. It is often the easiest format to rearrange as the collection changes, and several short rails can fit around ratchets or extensions. The tradeoff is that clips may slide when a socket is pulled, and size identification depends on the layout or added labels. Check whether the clips are replaceable and whether the rail can be lifted without the sockets detaching.

A twist-lock rail is intended to grip sockets until they are rotated for removal. That extra retention can help in a portable box or rolling cabinet, but it adds a deliberate step at the start and end of a job. Confirm the direction and amount of movement required and consider whether tightly spaced large sockets leave enough room for a hand to turn them.

A post-style tray places sockets upright over drive-size posts, often in graduated rows. It provides an obvious empty position and can make size order easy to scan. Upright deep sockets consume considerable vertical clearance, however. Fixed rows also become inefficient when the collection has duplicates, skipped sizes, or a distribution unlike the tray’s preset pattern.

A molded tray with recessed pockets can hold sockets lower and may reduce top-heavy movement. Pocket diameter is critical: an opening shaped for one outside diameter may not accept another socket with the same drive size. Because sockets from different series do not share one universal body shape, compare actual measurements rather than relying only on the printed size sequence.

A magnetic organizer can stabilize metal sockets and sometimes keep the tray from shifting on a suitable steel drawer. Magnet strength, surface contact, socket weight, and drawer material all affect the result. A magnetic label does not establish secure transport, and magnetic accessories should be kept away from items whose makers warn against magnetic exposure. Verify whether the base may mark a painted surface and whether debris can collect underneath it.

Drawer clearance is a three-dimensional measurement

Width and depth decide whether the organizer footprint fits, but height is the common surprise. Toolbox listings may describe drawer depth without accounting for the liner, internal rails, rolled edges, a lock bar, or the underside of the drawer above. Measure the real space at several points with the drawer installed.

For upright storage, place the tallest intended socket on a temporary block approximating the organizer’s base or post. Slowly close the empty drawer while observing from the side where possible. Do not force it. Leave clearance for normal movement and for sockets that may not sit fully down on a post. Deep sockets that are too tall can often lie on horizontal rails, while shallow sockets remain upright.

Also check access above each row. A layout may clear the closed drawer yet place a tall socket under the cabinet frame where it cannot be lifted straight off its post. Pull the drawer to its normal stop and identify any area that remains covered. Low-profile storage or infrequently used tools belong in that rear zone.

Retention should match how the toolbox moves

A stationary chest on a level bench has different needs from a service cart crossing thresholds. Light friction may be sufficient when the organizer never tilts and the priority is quick removal. A rolling cabinet benefits from enough grip to prevent sockets from hopping posts when a drawer shuts, but excessive retention can lift a loose tray or make small sockets awkward to remove.

For a portable box, judge the complete system rather than the holder alone. Ask whether the rail has a handle or end stops, whether every socket remains attached when the rail is turned, and whether the rail itself is secured inside the case. A tray that grips sockets firmly can still slide around and strike other tools.

Drawer liners add friction but also reduce clearance and can compress unevenly under narrow feet. Magnetic bases require a compatible surface; a thick liner between the magnet and steel may reduce holding force. Adhesive or screw mounting creates a more permanent layout but makes future changes harder. Follow the organizer and toolbox instructions before drilling, attaching hardware, or placing magnets on finished surfaces.

Plan labels around the way you work

Printed size markings are most useful when they remain visible with sockets installed. Check whether the tray’s sequence includes the sizes you own and whether separate metric and SAE markings are easy to distinguish in the drawer’s lighting. Fixed labels can become misleading when a missing size, duplicate, or specialty socket changes the row.

Adjustable rails can be organized from small to large, but a socket’s stamped marking may face away after it clips into place. Position the rail and rotate sockets so common sizes can be identified from the normal standing angle. Writable end labels, color accents, or labeled drawer zones can separate drive sizes without attaching something to every socket.

Leave a deliberate empty position only when its purpose is clear. A labeled gap can indicate a socket currently in use or missing; several unexplained gaps recreate the search problem the organizer was meant to solve. Photographing the finished layout can help other household members return tools without turning the drawer into a rigid display.

Make room for ratchets without wasting the drawer

Sockets are only part of a working set. Ratchets, extensions, universal joints, adapters, breaker bars, and torque tools also need accessible storage. A wide tray that fills the drawer may organize sockets beautifully while forcing their companion tools into another cabinet.

Sketch the drawer on paper and reserve a strip for the longest ratchet or extension before selecting a tray. Several independent rails can form a border around larger tools, and low-profile socket rows can leave a central section open. If a torque wrench has specific storage instructions or a protective case, follow those rather than squeezing it into the remaining gap.

Future expansion deserves a realistic allowance. Extra clips on an adjustable rail are useful when a commonly used drive size grows. Large banks of fixed empty posts are less helpful if they displace tools used every day. Modular sections make it easier to add one row or move specialty sockets into a separate drawer later.

Limitations

  • Drive size describes the square connection, not the socket’s outside diameter, body length, or fit in a molded pocket.
  • Fixed trays may include positions that do not match an incomplete, mixed, or specialized collection.
  • Upright deep sockets can exceed drawer clearance even when the organizer itself has a low base.
  • Magnets, clips, and twist locks vary in holding behavior; no format should be assumed secure for transport without checking the current instructions.
  • Printed labels can be difficult to read in a crowded or dim drawer and may not follow a preferred size sequence.
  • Plastic clips and posts can wear or break, while exposed metal rails may need care in a damp workspace.
  • An organizer improves visibility but does not replace inspection, cleaning, or the tool maker’s storage and use guidance.

Alternatives to compare

A fitted blow-molded case protects a matching set and makes transport straightforward, although it may use drawer space inefficiently. Custom-cut foam gives every tool a visible outline and can include ratchets and extensions, but changing the collection requires recutting or replacing the insert. Magnetic socket strips can mount on a compatible vertical surface and free a drawer, provided the location and retention are appropriate. Portable socket rails suit users who take selected drive sizes to a vehicle or workbench. For a small mixed collection, labeled divided bins may be flexible, though they offer less immediate size identification.

FAQ

Should deep sockets stand upright in a toolbox drawer?

Only when the socket plus organizer fits below the drawer above with comfortable clearance and can be lifted from the open drawer. Horizontal rails or low-profile pockets are often easier to fit when deep sockets approach the available height.

Are magnetic socket organizers secure enough for a rolling tool cabinet?

That depends on the magnet, contact surface, liner, socket weight, and how the cabinet moves. Confirm the organizer’s current use guidance and test the loaded layout carefully before relying on it; a magnetic base and socket retention are separate issues.

Can metric and SAE sockets share one organizer?

They can, but distinct rows or clearly marked zones reduce selection mistakes. Make sure the organizer’s labels match your socket sequence, or choose an adjustable format that lets you create your own order.

How many empty positions should a socket tray have?

Reserve enough positions for likely additions in the drive sizes you actually use. A few planned spaces can help, but a much larger fixed tray may waste room needed for ratchets, extensions, or other tools.

Why will a socket fit the post but not the tray?

The square drive connection may match while the socket body is too wide for adjacent positions or a molded recess. Measure outside diameter and length, especially for impact, deep, spark-plug, and other specialty sockets.

Cordless Electric Screwdrivers for Furniture Assembly and Small Repairs

Product links are for reference. Verify current details on the retailer page before buying.

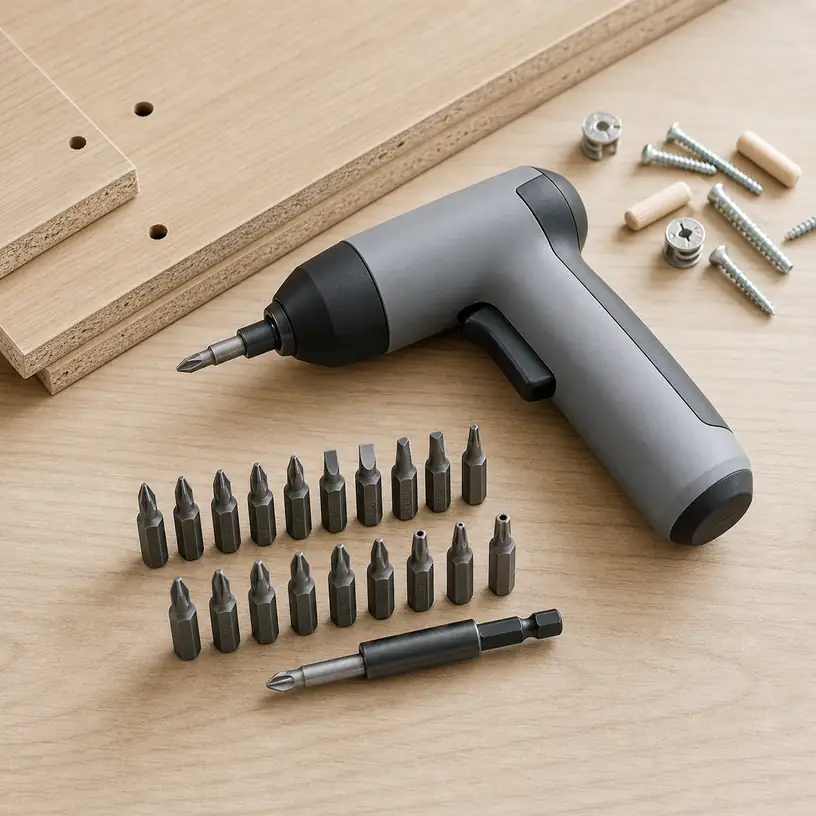
Illustrative image of a generic cordless electric screwdriver and interchangeable bits on a workbench

Illustrative image, not an official product photo.

Short answer

A cordless electric screwdriver is most useful for repeated, low-to-moderate fastening jobs: assembling flat-pack furniture, opening appliance panels, tightening cabinet hardware, and handling small household repairs. Choose one by the fasteners and spaces you actually encounter. Grip shape, bit access, low-speed control, adjustable torque, charging method, and the direction switch often matter more than a large accessory count. It is not a substitute for a drill when you regularly make holes or drive long screws into dense material.

Search reference

Cordless electric screwdriver options

Compare compact drivers by control layout, torque settings, bit standard, charging arrangement, and stated job limits.

View matching options

Where a power screwdriver earns its drawer space

Turning one or two accessible screws by hand is rarely difficult. The advantage appears when a project involves dozens of similar fasteners or awkward repetition. An electric screwdriver can reduce wrist motion while staying smaller and easier to position than a conventional drill/driver. That makes the category appealing for desks, shelving units, switch plates, battery compartments, cabinet pulls, and routine disassembly.

Compact size comes with limits. These tools usually prioritize control and portability over drilling ability and high fastening force. A screw that is corroded, cross-threaded, over-tightened, or buried in hard material may need a hand tool or a more capable driver. Matching the tool to the work prevents an underpowered purchase from becoming a frustrating substitute for the wrong category.

Who this is for

  • Households that regularly assemble ready-to-build furniture or adjust cabinet hardware.
  • Renters and homeowners who want a compact tool for light maintenance without storing a full-size drill.
  • Hobbyists who remove many small screws from cases, fixtures, or simple projects.
  • Buyers who want powered rotation but still value deliberate, low-speed fastening control.
  • Shared tool kits where straightforward charging and clearly labeled controls are priorities.

Who should skip it

  • A drill/driver is the more versatile choice if most jobs include drilling pilot holes or driving long construction screws.
  • A manual ratcheting screwdriver may be better for occasional use, long storage intervals, or maximum tactile feedback.
  • Precision electronics work can require a smaller driver, lower torque range, and specialized bits designed for tiny fasteners.
  • Automotive, masonry, deck, and structural work generally call for task-appropriate tools rather than a compact household screwdriver.

What to verify before buying

Start with the bit holder. Confirm the shank size and retention method, then check whether the included bits match the screw heads in your furniture, fixtures, or devices. A high bit count is not useful if the common sizes are duplicated, poorly labeled, or difficult to replace. For recessed screws, compare bit length and holder diameter so the nose of the tool does not block access.

Next, examine control rather than relying on a single maximum-torque number. Check whether the driver has adjustable torque or a clutch, how slowly it can start, and whether it can stop before damaging a soft fastener or finished surface. Verify the direction switch position for both right- and left-handed use. If manual finishing is important, determine whether the tool permits safe hand-tightening when powered off and follow its instructions.

Read the current listing and manual for battery type, expected charging connection, included cable or charger, charge indicator behavior, and storage guidance. A familiar port is convenient only if the required power source and cable are clearly supported. Battery runtime claims depend on workload, torque, temperature, and usage pattern, so treat them as comparison context rather than a guaranteed number of projects.

Grip formats and access

Straight and pen-style bodies

A slim in-line body can reach narrow spaces and packs easily in a small tool pouch. It may also be easier to rotate by hand for final alignment. The tradeoff is less leverage when a fastener initially resists, and some users may find a narrow cylinder harder to stabilize. Compare body diameter, switch placement, and the distance from the nose to the grip area.

Pistol-grip bodies

A pistol shape provides a familiar trigger position and can make forward pressure easier on a vertical surface. It usually occupies more storage space and may not fit between a shelf and side panel. Check whether the handle angle feels suitable for both horizontal and vertical jobs rather than assuming the drill-like shape is universally better.

Pivoting handles

Some models change between straight and angled configurations. This can be useful when one furniture project presents several access directions, but the hinge introduces another moving part. Verify how the handle locks, whether controls remain reachable in both positions, and whether there is noticeable movement at the joint.

Torque, speed, and finishing control

More force is not automatically better. Flat-pack furniture often uses particleboard, plastic fittings, inserts, and small hardware that can be damaged by overdriving. Adjustable torque settings can help, but their markings are not standardized across every tool. Begin at a conservative setting, keep the bit aligned with the screw, and finish carefully according to the furniture or fixture instructions.

Speed also affects control. A lower or variable starting speed can help the bit seat in the screw head before full rotation. A fixed-speed model may still suit repetitive, accessible fasteners if its switch responds predictably. In either case, stop when resistance changes unexpectedly. Powered rotation should not be used to force a mismatched, tilted, or cross-threaded screw.

Bits, extensions, and small conveniences

A basic selection of Phillips, slotted, hex, and star-shaped bits can cover many household jobs, but the exact sizes matter. Inventory the fasteners you own before comparing sets. Standard replaceable bits offer more flexibility than a proprietary system, while a magnetic holder can assist placement without correcting poor alignment.

An extension may reach recessed hardware, though extra length can increase wobble. An offset or right-angle attachment can help near panels and corners, but it also changes the way force reaches the fastener. Verify that any attachment is intended for the selected tool and task.

A work light is useful only when it illuminates the screw instead of casting a shadow from the tool nose. Likewise, a battery gauge is more informative when it has several levels rather than a single warning light. These details are secondary to control, access, and bit fit, but they can distinguish otherwise similar options.

Charging and storage planning

Decide where the screwdriver will live and charge. A tool stored loose in a kitchen drawer can lose bits and activate accidentally if its switch is exposed. A compact case or organized pouch keeps the driver, charging cable, and most-used bits together. Check whether the tool has a trigger lock or another transport safeguard.

For longer storage, follow the manufacturer’s battery instructions and keep the tool away from heat, moisture, and conductive debris. Inspect the cable and charging port before use. If the battery is built in, consider the long-term tradeoff: the tool may be compact, but battery replacement might not be practical. A removable battery can extend service options, although it usually increases size and cost.

A sensible first-project check

Before starting a full assembly, test the selected bit and conservative torque setting on one accessible fastener. The bit should sit fully in the head without rocking. Keep the driver in line with the screw and apply only enough forward pressure to maintain engagement. If the fastener stalls, remove the tool and identify the cause instead of repeatedly activating it.

For furniture assembly, loosely start mating fasteners as directed before fully tightening the structure. This preserves alignment and reduces the temptation to use motor force to pull misaligned panels together. Use a manual screwdriver or specified hand tool for delicate final tightening when the instructions call for it.

Limitations

  • A compact electric screwdriver may not have the chuck, speed range, or power needed for drilling holes.
  • Maximum torque figures do not describe low-speed control, clutch behavior, or performance in every material.
  • Battery runtime and charging time vary with workload, battery condition, temperature, and charging equipment.
  • Built-in lights can miss deeply recessed screws or create shadows around bulky noses.
  • Included bit kits may emphasize quantity rather than the exact profiles and sizes a household uses.
  • Powered fastening can strip screw heads or damage material when the bit, alignment, or torque setting is wrong.

Alternatives to compare

  • A ratcheting manual screwdriver for infrequent jobs and direct tightening feedback.
  • A precision screwdriver set for electronics, eyewear, and very small fasteners.
  • A 12-volt drill/driver when drilling and longer screws are routine parts of the same projects.
  • A right-angle manual driver for occasional work in a very shallow clearance.
  • A bit set with a comfortable hand driver if worn or mismatched bits are the main problem.

FAQ

Is a cordless electric screwdriver the same as a drill?

No. Both can rotate a bit, but a compact electric screwdriver is generally designed around light fastening, control, and portability. A drill/driver usually offers a chuck, broader speed range, and greater capability for drilling and demanding screws. Verify the stated functions and limits of the specific tool.

How much torque does a furniture-assembly screwdriver need?

There is no single useful number for every project because fastener size, material, inserts, and tool controls differ. For furniture, controllable low torque and a usable clutch can be more valuable than a high maximum figure. Follow the assembly instructions and avoid using motor force to correct misalignment.

Are more included screwdriver bits always better?

No. Check whether the kit contains the correct profiles, sizes, lengths, and shank standard for your jobs. A smaller, clearly labeled selection of replaceable bits may be more useful than a large assortment with duplicates or uncommon sizes.

Can an electric screwdriver remove a stuck screw?

It may remove a normally tightened screw, but a corroded, damaged, over-tightened, or thread-locked fastener can exceed the tool’s intended use. Stop if the bit slips or the tool stalls. A properly fitting hand tool or another task-appropriate method may provide better control.

Should I choose USB charging or a removable battery?

Choose around storage and frequency of use. A clearly specified USB charging arrangement can reduce cable clutter for occasional household work, while a removable battery may support longer sessions and future replacement. Confirm the exact port, power requirements, included charging equipment, and battery availability before buying.

Garden Kneeler and Seat Buying Guide for Ground-Level Yard Work

Product links are for reference. Verify current details on the retailer page before buying.

Illustrative image of a generic folding garden kneeler and seat beside a raised planting bed

Illustrative image, not an official product photo.

Short answer

A reversible garden kneeler and seat can make sense when the same yard session involves both low weeding and seated jobs such as potting or pruning. Look beyond cushion thickness: measure the usable platform, compare the two working heights, check the stated load limit and frame footprint, and consider whether the side rails will help you rise without crowding plants. Folding hardware and stored size matter if the tool will travel between a shed, patio, and community garden.

Search reference

Garden kneeler and seat options

Compare reversible platforms, frame geometry, folded size, and current load-limit wording for the way you work around beds and containers.

View matching options

From kneeling pad to temporary seat

This product type usually combines a padded rectangular platform with legs or side rails. Used close to the ground, it cushions the knees while the rails provide handholds. Turned over, the platform becomes a short seat for container work, harvesting, or a pause between chores. Some frames fold inward; some listings also show detachable tool pouches.

That two-way arrangement saves storage space, but it creates tradeoffs. A platform that feels broad as a seat may take up too much room in a narrow planting row. Tall rails may make standing easier yet interfere with reaching sideways. Treat included pouches as secondary to the frame, because stability and dimensions affect every use.

Who this is for

  • Gardeners who alternate between kneeling and seated tasks during one work session.
  • People tending raised beds, borders, patio pots, or low shelves in a greenhouse.
  • Households that want one folding item instead of a separate pad and stool.
  • Buyers who value side handholds when changing position, provided the design suits their own mobility needs.

Who should skip it

  • Choose a flat kneeling pad when storage is extremely limited or you work in very tight rows.
  • A full-height garden stool may suit people who do not plan to kneel at all.
  • Uneven, soft, or sharply sloped ground may call for a wider, task-specific seat rather than a narrow folding frame.
  • Anyone with significant mobility, balance, joint, or recovery concerns should seek appropriate professional guidance instead of relying on a garden accessory as support equipment.

What to verify before buying

Measure the space first, not just the product. Compare the platform’s usable length and width with your kneeling stance, then check overall frame width against paths between plants. Confirm both kneeling height and seat height; small differences can change how easily you reach a bed or rise afterward.

Read the current listing for the stated load limit and any instructions on which surfaces are suitable. Check whether the feet sit flat in both orientations, whether caps or ground-contact pieces are replaceable, and whether hinges have a positive locking method. If padding is described, verify its thickness, covering, and cleaning directions rather than assuming it is waterproof.

For transport and storage, confirm folded dimensions and weight. Look at where fingers go while folding, whether the legs can open unexpectedly in transit, and whether an attached pouch must be removed before reversing or storing the frame.

Match the frame to the garden layout

Narrow rows and densely planted borders

Overall footprint is the limiting measurement here. A compact frame can preserve room around stems, irrigation lines, and edging, though a smaller base may feel less forgiving on rough ground. Map out where all four contact points will land before using side rails to change position.

Raised beds and container gardens

Seat height and sideways reach matter more than deep cushioning. Consider whether you can sit close enough to the pot or bed without twisting, and whether the rail profile blocks your arms. For repeated potting, compare a standard work stool or bench as well.

Moving between several work areas

A folding model may be worthwhile when it fits a shed shelf or vehicle without snagging other tools. Weight, carrying grip, hinge behavior, and removable accessories are more useful comparison points than a long list of bundled extras.

Stability and setup habits

A garden kneeler is not automatically stable on every outdoor surface. Clear stones, tools, and loose mulch from the footprint; open the frame fully according to its instructions; and check that every foot has firm contact before adding weight. Reposition the unit rather than leaning far beyond its base. Inspect hinge hardware, padding, frame joints, and feet periodically, especially after outdoor storage.

Ground moisture also affects the buying decision. Verify the care instructions for the cushion cover and frame finish, then plan a dry storage location. A removable or wipe-clean surface can simplify muddy-season maintenance, but construction details vary by listing.

Limitations

  • A compact platform may not suit every body size or kneeling posture.
  • Padding can reduce pressure, but it does not remove the strain of prolonged ground-level work.
  • Side rails are handholds, not a substitute for certified mobility or medical equipment.
  • Folding joints add storage convenience but also require inspection and careful operation.
  • Stability depends on correct setup, the user’s movement, and the actual ground surface.
  • Tool pouches may become awkward when the platform is flipped between orientations.

Alternatives to compare

  • A thick flat kneeling pad for the smallest footprint and simplest storage.
  • A rolling garden seat for longer rows on smooth, level terrain.
  • A full-height outdoor stool for tasks that do not require kneeling.
  • Long-handled weeders or cultivators when reducing ground-level work is the priority.
  • A potting bench for repetitive container planting and tool organization.

FAQ

How wide should a garden kneeler be?

It should provide enough usable platform width for your normal knee position while leaving room in the path or planting row. Compare the platform measurement and the wider overall frame footprint; they are not the same dimension.

Is a reversible garden kneeler suitable for uneven ground?

It works most predictably on firm, level ground where every foot contacts the surface. Loose soil, rocks, slopes, and deep mulch can reduce stability, so verify the maker’s surface guidance and consider a wider alternative for difficult terrain.

Do thicker cushions always make a better kneeling platform?

No. Cushion thickness is only one factor. Platform size, foam firmness, edge shape, cover durability, cleaning directions, and the working height above the soil can matter just as much.

What should I inspect on a folding garden seat?

Check the hinges, locking or retention mechanism, frame joints, feet, padding, and any damaged or loose hardware. Open it completely according to its instructions and confirm stable ground contact before each use.

Is a garden kneeler the same as mobility support equipment?

No. Its rails may provide handholds during ordinary gardening, but it should not be treated as certified mobility or medical equipment. Buyers with balance, joint, or recovery concerns should get guidance appropriate to their needs.

Picture Hanging Kits: Who They Fit and What to Check Before Buying

Product links are for reference. Verify current details on the retailer page before buying.

Illustrative image for a picture hanging kits buying guide

Illustrative image, not an official product photo.

Short answer

Picture hanging kits fit buyers who want assorted hardware for frames, canvas pieces, light decor, or basic wall layout work. Compare wall type, frame weight needs, hardware mix, included level, nail or hook style, storage case, and installation instructions before buying.

Search reference

Picture hanging kit options

Compare current options and verify details on the retailer page before buying.

View matching options

What this product type is

Picture hanging kits bundle hooks, nails, wire, sawtooth pieces, D-rings, anchors, or small layout tools depending on the set. Current listings vary by piece count, hardware sizes, claimed weight ranges, wall type guidance, included level, storage case, and whether instructions are clear. Start with your wall material and frame weight, not the number of pieces.
This guide treats the seed listing as a category signal only. Compare current matching options and verify details on the retailer page before buying.

Who this is for

  • Buyers hanging several frames or canvas pieces at once.
  • Renters or homeowners setting up a gallery wall.
  • People replacing scattered wall hardware with one organized kit.
  • Basic DIY users who want multiple hook and nail options available.

Who should skip it

  • Skip assorted kits if you only need one exact anchor type.
  • Choose specialty anchors for masonry, tile, heavy mirrors, or unusually heavy decor.
  • Avoid unclear listings when wall compatibility or weight guidance is not visible.

What to verify before buying

  • Check wall type guidance for drywall, wood, masonry, or other surfaces.
  • Verify frame or decor weight needs before choosing hardware.
  • Review the hardware mix, sizes, wire, D-rings, hooks, and nails included.
  • Check whether a level, storage case, or instructions are included.
  • Confirm tool requirements such as hammer, drill, measuring tape, or stud finder.
  • Review current seller information, warranty terms, and return policy.

Main buying notes

Piece count can be misleading. A kit with many tiny parts may not include the hardware you need for your wall or frame.
Wall type decides the hardware. Drywall, studs, plaster, brick, and tile can require different approaches, so verify compatibility first.
Layout tools matter for gallery walls. A small level or measuring guide can help, but careful measuring is still part of the job.
Heavy items need extra caution. Mirrors, shelves, and large frames may require specialty anchors or professional advice.

Limitations

  • Assorted kits may include extra pieces you never use.
  • Weight guidance can depend on wall condition and installation quality.
  • Some wall materials require tools or anchors not included in basic kits.
  • Poor measuring can still lead to crooked placement even with a kit.

Alternatives to compare

  • Dedicated drywall anchors for specific weight needs.
  • Adhesive strips for very light decor where suitable.
  • Stud-mounted screws for heavier items.
  • Professional installation for heavy mirrors or complex wall materials.

FAQ

What should I verify before buying a picture hanging kit?

Verify wall type guidance, frame weight needs, hardware mix, included tools, instructions, warranty terms, and return policy.

Is piece count the most important part of a picture hanging kit?

No. The hardware types and wall compatibility matter more than simply having many pieces.

Can picture hanging kits handle heavy mirrors?

Do not assume that. Heavy mirrors may need specialty anchors, studs, or professional installation.

How should I compare picture hanging kit hardware?

Check hooks, nails, wire, D-rings, anchors, level tools, and whether the kit matches your wall and frame setup.

What alternatives should I compare with picture hanging kits?

Compare dedicated drywall anchors, adhesive strips, stud-mounted screws, and professional installation for heavier projects.

Garden Hose Nozzles: Who They Fit and What to Check Before Buying

Product links are for reference. Verify current details on the retailer page before buying.

Illustrative image for a garden hose nozzles buying guide

Illustrative image, not an official product photo.

Short answer

Garden hose nozzles fit buyers who want more control than an open hose for watering, rinsing, or light outdoor cleaning. Compare spray patterns, connector fit, grip comfort, trigger style, material wording, leak-resistance wording, and cleaning tasks before buying.

Search reference

Garden hose nozzle options

Compare current options and verify details on the retailer page before buying.

View matching options

What this product type is

Garden hose nozzles attach to a standard garden hose and control the spray used for watering plants, rinsing patios, washing outdoor gear, or light cleanup. Current listings vary by spray pattern count, grip design, trigger lock, connector wording, body material, leak-resistance claims, and intended tasks. The right comparison starts with the chores you actually do outdoors.
This guide treats the seed listing as a category signal only. Compare current matching options and verify details on the retailer page before buying.

Who this is for

  • Homeowners or renters who water plants, lawns, or patio containers.
  • Buyers replacing a worn nozzle that leaks or has a sticky trigger.
  • People who rinse outdoor furniture, garden tools, bikes, or cars.
  • Pet owners who need a gentle outdoor rinse setting where appropriate.

Who should skip it

  • Skip this type if you need a pressure washer for heavy cleaning.
  • Choose a watering wand if reach and gentle plant watering matter most.
  • Avoid unclear listings when connector fit, grip style, or material wording is not visible.

What to verify before buying

  • Check connector compatibility with your hose and any adapter needs.
  • Verify spray patterns and whether they match watering or rinsing tasks.
  • Review grip shape, trigger style, and lock-on control wording.
  • Check material wording, gasket details, and leak-resistance claims.
  • Confirm whether the nozzle suits gentle watering, car rinsing, or general cleanup.
  • Review current seller information, warranty terms, and return policy.

Main buying notes

Spray patterns should match real chores. A gentle shower pattern is useful for plants, while a stronger stream may suit rinsing tools or patio items.
Grip comfort matters during longer watering sessions. Trigger shape, handle texture, and lock-on controls can change how tiring the nozzle feels.
Connector fit is boring until it leaks. Verify thread compatibility, gasket wording, and whether extra washers or adapters are needed.
Material wording should be checked on the current page. Plastic, metal, and mixed-body designs can feel different in weight and durability expectations.

Limitations

  • A hose nozzle is not a substitute for a pressure washer.
  • Leak resistance depends on hose condition, washer fit, and connector setup.
  • Some spray settings may be too strong for delicate plants.
  • Grip comfort is personal and can be hard to judge from images alone.

Alternatives to compare

  • Watering wands for reach and gentle plant care.
  • Soaker hoses for slow garden watering.
  • Pressure washers for heavier outdoor cleaning.
  • Hose timers when watering schedule control matters most.

FAQ

What should I verify before buying a garden hose nozzle?

Verify connector fit, spray patterns, trigger style, grip comfort, material wording, gasket details, warranty terms, and return policy.

How many spray patterns do I need in a garden hose nozzle?

Choose based on tasks. Plant watering, patio rinsing, and gear cleanup may need different patterns, but unused settings add little value.

Can a garden hose nozzle replace a pressure washer?

No. A garden hose nozzle can improve spray control, but it is not meant for heavy pressure-washing jobs.

How should I compare garden hose nozzle grip styles?

Check handle shape, trigger design, lock-on controls, and whether the current listing shows a grip style that fits longer use.

What alternatives should I compare with garden hose nozzles?

Compare watering wands, soaker hoses, pressure washers, and hose timers depending on the outdoor job.

Cabinet Pulls: Who They Fit and What to Check Before Buying

Product links are for reference. Verify current details on the retailer page before buying.

Illustrative image for a cabinet pulls buying guide

Illustrative image, not an official product photo.

Short answer

Cabinet pulls are useful for kitchen, bathroom, dresser, and storage updates when you want a small hardware change with visible impact. Compare hole spacing, overall length, finish, screw length, material wording, edge clearance, and installation needs before choosing a set.

Search reference

Cabinet pull options

Compare current options and verify details on the retailer page before buying.

View matching options

What this product type is

Cabinet pulls are handle-style hardware pieces mounted on drawers, doors, vanities, dressers, and storage cabinets. They are usually compared by center-to-center hole spacing, overall length, projection, finish, included screws, material wording, and set quantity. They can refresh a room, but the measurements must match the existing cabinet holes or the planned installation.
This guide treats the seed listing as a category signal only. Compare current matching options and verify details on the retailer page before buying.

Who this is for

  • Homeowners updating kitchen or bathroom cabinet hardware.
  • Renters or DIY buyers replacing worn pulls with matching measurements.
  • Furniture upcyclers working on dressers, cupboards, or storage units.
  • Buyers who want a visible home update without replacing cabinets.

Who should skip it

  • Skip new pulls if you cannot confirm hole spacing or cabinet thickness.
  • Compare knobs if you want a simpler single-hole installation.
  • Avoid drilling new holes unless you are comfortable measuring and patching.

What to verify before buying

  • Measure center-to-center hole spacing and compare it with the current listing.
  • Check overall length, projection, grip clearance, and cabinet edge clearance.
  • Verify finish name, material wording, screw length, and included hardware.
  • Confirm set quantity and whether all pieces in the order use the same finish.
  • Review installation requirements, tools needed, and template guidance.
  • Check return policy and seller information before buying.

Main buying notes

Hole spacing is the first filter. If the pull does not match existing holes, installation becomes a drilling or patching project.
Finish names can vary. Brushed nickel, matte black, brass, bronze, and champagne finishes may differ across sellers, so verify current photos and wording.
Screw length matters because cabinet doors and drawer fronts vary in thickness.
Projection affects daily use. A pull that sits too close to the surface may be harder to grip.

Limitations

  • Finish color can look different under kitchen, bathroom, or daylight conditions.
  • Existing holes may not match newer hardware sizes.
  • Included screws may not fit every cabinet thickness.
  • Installing new hole spacing can leave old holes visible unless patched.

Alternatives to compare

  • Cabinet knobs for single-hole installation.
  • Cup pulls for drawers with a traditional look.
  • Edge pulls for a cleaner modern cabinet face.
  • Soft-close hinges if cabinet function matters more than appearance.

FAQ

What should I verify before buying cabinet pulls?

Verify center-to-center hole spacing, overall length, projection, finish, screw length, set quantity, and return policy.

What does center-to-center spacing mean for cabinet pulls?

It means the distance between the two mounting screw holes. Measure your existing holes before buying.

Can I install cabinet pulls without drilling new holes?

Yes, if the new pulls match the existing hole spacing and screw requirements.

Do cabinet pulls include screws?

Many sets include screws, but you should verify screw length and included hardware on the current retailer page.

Should I choose pulls or knobs?

Choose pulls for a handle grip and knobs for simpler single-hole installation or smaller cabinet fronts.