Choosing a Rechargeable Headlamp for Repairs, Campsites, and Power Outages
Product links are for reference. Verify current details on the retailer page before buying.
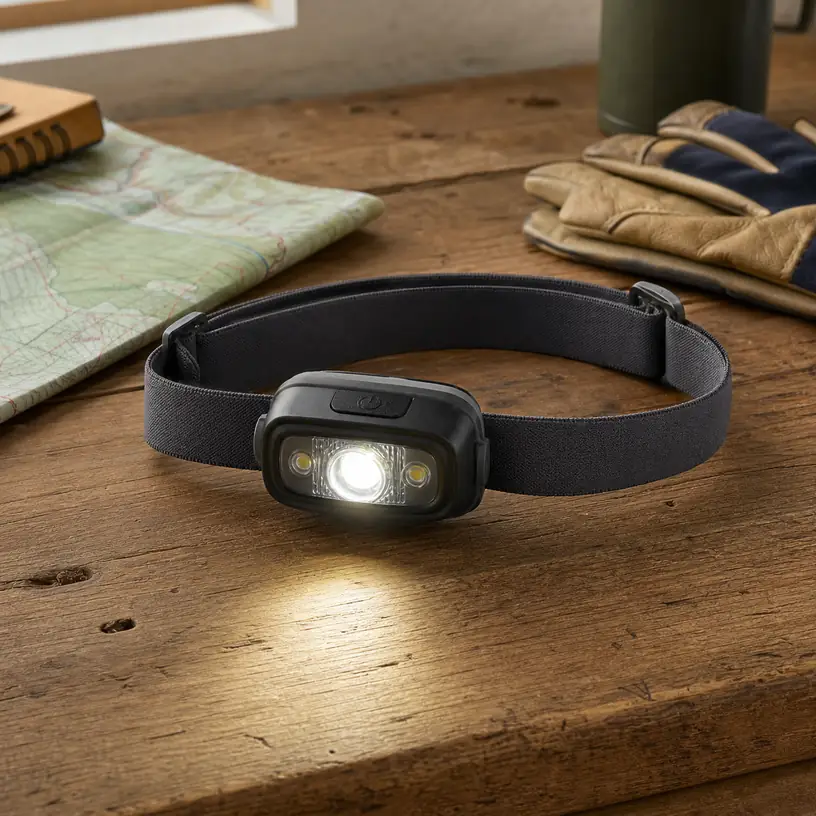
Illustrative image, not an official product photo.
Short answer
A useful rechargeable headlamp puts steady light where your eyes are looking without becoming a distraction on your forehead. For close repairs, beam width and low-mode control often matter more than a dramatic maximum-output claim. For walking after dark, look for an even beam that reveals the ground ahead without forcing you to tilt your head constantly. Before choosing, compare runtime at the mode you would actually use, how output changes as the battery drains, charging-port protection, total weight, strap adjustment, button logic, and verified resistance to rain or dust. A well-matched moderate mode, predictable controls, and a comfortable fit usually serve longer tasks better than specifications you will rarely use.
Search reference
Rechargeable headlamp options
Compare models by the working beam, practical runtime, fit, and charging routine required for your actual task—not by the largest number on the listing.
View matching optionsBegin with the task and viewing distance
“More light” is not a complete requirement. Replacing a sink fitting, sorting a dark storage closet, pitching a tent, and following a trail place the subject at different distances and call for different beam patterns. Write down the two jobs the lamp will handle most often, then estimate how far away your hands, tools, path, or campsite will be. This simple exercise makes product descriptions easier to interpret.
Close work benefits from a broad, even pool of light with a genuinely usable low setting. A narrow central hotspot can reflect from metal, glossy paint, white walls, or instruction sheets and make surrounding details harder to see. A lamp that tilts downward helps put the beam on a workbench without requiring a bowed neck. Check how many tilt positions are available and whether the hinge appears intended to hold its angle through normal movement.
Walking calls for enough forward reach to see changes in the route while retaining useful illumination near the feet. A very narrow beam may reveal a distant point but leave the edges of a path obscure. A flood-only pattern can feel comfortable nearby yet offer little warning farther ahead. If a listing describes separate spot and flood emitters, verify whether they can operate independently, together, or only through a fixed sequence.
Emergency use has a different priority: the lamp must be easy to find, sufficiently charged, and understandable by someone who has not practiced with it recently. Complicated mode trees and touchy gesture sensors can undermine that goal. A basic lamp stored in a known location and checked on a schedule may be more dependable for a household than a feature-rich model left discharged in a drawer.
Who this is for
- DIY users who need both hands available for repairs, assembly, inspection, or cleanup in dim spaces.
- Campers who want personal area lighting without pointing a handheld flashlight at every task.
- Walkers and dog owners seeking a head-directed light for dark routes where local rules permit its use.
- Households adding a portable, hands-free light to a power-outage kit.
- People who can maintain a charging routine and want to reduce dependence on loose disposable cells for frequent use.
Who should skip it
- Anyone who needs lighting approved for hazardous, explosive, industrial, firefighting, diving, or other regulated environments; a general consumer headlamp is not a substitute for task-specific certified equipment.
- Users who cannot recharge reliably during extended travel and would be better served by a light with an appropriate replaceable-cell plan.
- Work where color accuracy, inspection intensity, electrical isolation, mounting, or beam placement is governed by a professional procedure.
- People sensitive to pressure around the forehead who cannot comfortably test strap tension and lamp weight.
- Road users expecting a headlamp alone to satisfy bicycle, vehicle, workplace, or pedestrian visibility requirements.
What to verify before buying
- Beam description: Look for useful information about spot, flood, mixed, or adjustable patterns rather than relying only on a maximum-output figure.
- Mode-specific runtime: Confirm which brightness setting each runtime claim represents and whether the seller explains declining or regulated output.
- Controls: Check the button count, press sequence, mode memory, lockout function, and whether a separate red-light or sensor control can be activated accidentally.
- Charging connection: Verify the port type, cable requirements, charging indicator, port cover, and whether the lamp can operate while connected to an external power source if that matters to you.
- Battery arrangement: Determine whether the cell is built in, user-replaceable, or housed in a rear pack, and follow the maker’s charging and replacement instructions.
- Weight and balance: Compare the complete ready-to-use weight and note whether the battery sits at the front or is balanced at the back.
- Strap system: Check adjustment range, removable top strap, helmet compatibility claims, buckle position, and cleaning guidance.
- Weather and dust rating: Look for a stated test rating and its exact scope; “weather resistant” alone does not explain acceptable exposure.
- Impact claims: Verify the stated test method and limits rather than treating a rugged appearance as proof of drop resistance.
- Low-battery behavior: Check for an indicator, warning, step-down pattern, or reserve mode so loss of light is less surprising.
- Included items: Confirm whether the charging cable, clips, storage pouch, replacement strap, or helmet mounts shown are actually included.
Runtime is a curve, not just a number
A runtime headline may refer to the lowest mode, while a prominent brightness figure may describe a short high mode. Those two numbers do not necessarily occur together. Read the mode table and supporting notes closely. If the listing provides a runtime graph, look at how long output remains useful rather than only the point when the lamp finally turns off. Some lights reduce output as heat rises or battery charge falls; that behavior can protect the electronics but also changes the illumination available for the task.
Estimate a realistic session. A forty-minute household repair, a three-hour evening at camp, and repeated short dog walks create different charging needs. Add time for setup and delays, then choose a normal mode with margin instead of planning every outing around the highest setting. Cold conditions can also affect battery performance, so follow the manufacturer’s operating and storage guidance for the temperatures you expect.
Recharge before an important use and inspect the cable and port. Do not assume every USB-shaped source, fast charger, cable, or power bank is suitable. Match the lamp’s specified input, keep the connection dry, and stop using a battery-powered device that is swollen, damaged, unusually hot, leaking, or behaving abnormally. Disposal and transport rules for rechargeable batteries vary, so use the applicable local and carrier guidance.
Fit can decide whether the lamp stays on your head
The listed weight does not tell the whole comfort story. A compact front-heavy lamp can bounce when walking, pull downward during overhead work, or require excessive strap tension. A rear battery pack distributes mass differently and may feel steadier, but it introduces another housing and sometimes a cable around the head. Neither arrangement is universally better.
Consider what will sit beneath the strap. Bare skin, a thin cap, a winter hat, a hard hat, and a bicycle helmet all change circumference and grip. A headlamp described as helmet compatible may still require specific clips or a particular strap path; verify both the helmet maker’s and lamp maker’s guidance. Do not improvise an attachment that interferes with protective equipment, vents, suspension, adjustment controls, or required visibility.
Buckle placement matters when leaning against a headrest or working beneath a cabinet. Exposed edges and cable routing can catch hair or press through a thin cap. If you expect long sessions, prioritize broad adjustment and stable weight distribution. The strap should be snug enough to limit bounce without causing headache, skin irritation, or a pressure mark that lingers.
Straps absorb sweat, dust, sunscreen, and workshop residue. Check whether the band can be removed and how it should be washed. Let all components dry as directed before storage, paying attention to the charging port and battery housing. A sealed-looking enclosure is not permission to submerge or machine-wash the lamp.
Controls should work before your eyes adjust
Mode selection is easiest when the light has a predictable starting state. Some models return to the previous setting; others always start in a default mode or require cycling past several brighter levels. Either design can work, but it should match the situation. For bedside emergency storage, an obvious main button and a moderate first mode reduce fumbling. For work, mode memory may save repeated clicks. For shared household use, simpler controls can be more valuable than extra effects.
A lockout prevents accidental activation in a bag, which can drain the battery and create heat against other items. Verify how lockout is entered and exited, then practice it. Mechanical button guards and electronic locks behave differently. Store the lamp according to its instructions rather than assuming a long press makes every model safe for transport.
Motion or gesture sensors can help when gloves are dirty, but they can also react when a hand, branch, cabinet, or other object passes near the lamp. Check whether sensor control is optional and has a visible status. Test it in a safe setting before relying on it near tools, stairs, traffic, or technical tasks.
Red modes are often chosen to reduce disruptive white light in a shared tent or preserve a gentler low-light environment, but implementation varies. Confirm whether red starts without flashing through white modes and how low it actually appears in the intended space. A red emitter is not a guarantee of preserved night vision, wildlife suitability, signaling compliance, or any specialized safety function.
Match the lamp to three common situations
Close household repairs
Favor a wide beam, a low mode that does not glare from pale surfaces, and a tilt mechanism that places light on the hands. Check the lamp’s front depth if you will work inside cabinets or close to a wall. Keep the light away from live electrical parts, liquids, rotating machinery, flammable materials, and any space where the equipment instructions prohibit an ordinary battery light. A headlamp improves visibility; it does not isolate energy or make a hazardous repair safe.
Campsite routines
A controllable low or red mode can be less intrusive around other people, while a broader white beam helps with cooking-area setup and gear sorting. Use the lamp only where open battery-powered lighting is permitted, and do not confuse water resistance with submersion capability. Pack a backup lighting method appropriate to the trip, especially when route finding or essential camp work continues after dark.
Power-outage storage
Choose a fixed storage location, include the compatible cable, and set a recurring charge-and-function check. Avoid leaving the lamp permanently connected unless its instructions specifically allow that practice. Household members should know the main control and lockout. A headlamp is useful for moving hands-free, but place separate area lights where broad room illumination is needed and keep flames out of the lighting plan.
A five-minute fit and function check
- Charge the lamp using the specified method and confirm the indicator behaves as described.
- Inspect the housing, lens, strap, hinge, cable, port, and cover before first use.
- Adjust it over the same hat or protective equipment you expect to wear, without altering safety gear improperly.
- Try the lowest useful mode on a white wall and a reflective object to check glare and beam uniformity.
- Walk a familiar, obstacle-free route and notice bounce, forehead pressure, button access, and the angle needed to see the ground.
- Practice lockout, mode changes, and low-battery checks without reading the instructions mid-task.
- After use, clean and dry the unit as directed, recharge if appropriate, and return it to its planned location.
This brief rehearsal often reveals more than comparing one additional headline specification. It can expose an awkward mode sequence, a harsh hotspot, a loose hinge, a slipping strap, or a charging cover that is difficult to seat correctly.
Limitations
- Maximum output does not describe beam quality, sustained brightness, or runtime at that level.
- Built-in batteries simplify the package but may limit field replacement and eventual serviceability.
- High modes can create glare, heat, shorter runtime, and abrupt step-downs.
- A head-directed beam can shine into another person’s eyes whenever the wearer turns to speak.
- Water and dust resistance apply only within the stated test conditions and may depend on correctly closed covers.
- Cold, age, storage state, charging habits, and mode choice can change practical battery performance.
- Elastic straps stretch, absorb residue, and may need cleaning or replacement over time.
- Consumer headlamps do not automatically meet requirements for roads, workplaces, hazardous locations, rescue, or protective equipment.
- Hands-free lighting still leaves shadows and cannot replace fixed task lighting where a procedure requires it.
Alternatives to compare
A handheld flashlight offers deliberate aiming and can be passed between users, though it occupies one hand. A clip light attaches to clothing, a pocket, or a nearby edge and avoids forehead pressure, but its aim changes with the mounting point. A magnetic work light can spread light across a repair area when a suitable mounting surface is available. A lantern is better for broad campsite or room illumination shared by several people. For long trips away from charging, compare a headlamp designed for approved replaceable cells and carry batteries according to the device, transport, and storage instructions.
FAQ
How many lumens does a rechargeable headlamp need for household repairs?
There is no single useful number because working distance, beam width, surface reflectivity, and sustained output all matter. For close repairs, prioritize an even flood pattern and a controllable low or medium mode that illuminates the hands without harsh glare. Compare mode-specific runtime and beam information rather than choosing by the maximum figure alone.
Is a front battery or rear battery pack more comfortable?
A rear pack can balance a heavier lamp, while an all-front design has fewer housings and may be easier to pack. Comfort depends on total weight, head shape, strap tension, movement, headwear, and how long the lamp is worn. Check complete weight and adjustment range, then test the intended setup if returns are possible.
Can a rechargeable headlamp be used in rain?
Only within the maker’s stated water-resistance conditions. Verify a specific rating, read what it covers, close the charging-port cover correctly, and inspect the lamp for damage. Water resistance is not the same as waterproofing for every depth, duration, spray, or charging situation, and wet charging should be avoided unless the instructions explicitly provide a safe procedure.
Should I choose a headlamp with a red light?
A red mode can be convenient for low-level tasks around other people, but brightness, control sequence, and beam spread vary. Confirm that red can start without cycling through bright white modes if that matters to you. Do not treat it as proof of a specialized signaling, wildlife, safety, or night-vision capability.
How often should an emergency headlamp be recharged?
Follow the manufacturer’s storage and charging schedule because battery chemistry, standby drain, and indicators differ. Create a recurring household check that includes charge state, a brief function test, cable condition, port-cover condition, and signs of battery damage. Recharge after use when directed rather than discovering an empty lamp during an outage.