Choosing a Wall-Mounted Broom and Mop Holder for a Utility Area
Product links are for reference. Verify current details on the retailer page before buying.
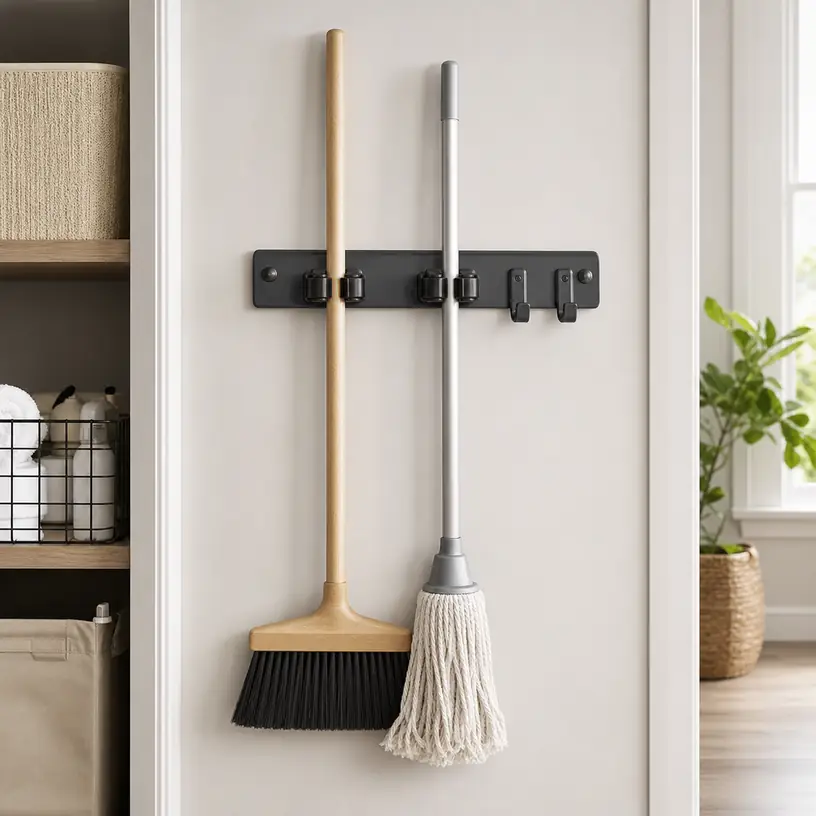
Illustrative image, not an official product photo.
Short answer
A wall-mounted broom and mop holder can reclaim floor space, but the right rail is determined by more than the number of grip positions. Inventory the tools that will actually hang there, measure each handle where the grip will close, and allow room below for mop heads, broom bristles, dustpans, and hanging loops. Then match the mounting method to the wall—not just to the organizer. A rail that fits five handles on paper may feel crowded once wide broom heads and angled tools overlap. For damp mops, choose a location with ventilation and a floor surface that can tolerate drips rather than treating the holder as a drying system.
Search reference
Wall-mounted broom and mop holder options
Compare rail length, grip range, hook layout, mounting hardware, stated load guidance, and installation requirements against your own tools and wall surface.
View matching optionsStart with a tool inventory, not a slot count
A storage rail is easiest to plan with the broom, mop, duster, floor squeegee, and dustpan in front of you. Product names often describe several gripping slots plus hooks, but those numbers do not explain whether your particular handles and tool heads can sit together comfortably.
Write down which items need a pressure grip and which can hang from a loop or hole. Measure handle diameter at the intended holding point; tapered handles may be substantially different near the top and middle. Notice where switches, foam grips, adjustment collars, or battery housings interrupt an otherwise smooth handle. A holder may close around a plain round shaft yet be unsuitable at a bulky joint.
Tool heads create a second spacing problem. Two narrow handles can fit adjacent grips while a broad push broom and string mop collide below them. Staggering the hanging heights can help, but only when the wall has enough vertical clearance. If the collection changes seasonally, leave an open position rather than designing a rail with every slot occupied from day one.
Who this is for
- Households trying to move long-handled cleaning tools off a laundry-room, mudroom, garage, or utility-closet floor.
- Renters who have permission to make suitable wall penetrations, or who can use a properly supported removable mounting approach within its stated limits.
- Buyers who want frequently used tools visible and individually accessible instead of leaning in a crowded corner.
- Small utility spaces where a carefully sized rail can use a narrow strip of wall between shelving, doors, and appliances.
- Homes that can separate damp tools from dry storage and provide an appropriate place for each.
Who should skip it
- Anyone who cannot confirm what is behind the proposed mounting area or whether the surface can support the installation.
- Renters whose lease or building rules prohibit the required fasteners.
- Households that need children to access cleaning tools containing chemicals, sharp edges, batteries, or other items that require controlled storage.
- Spaces where a projecting tool would block a walkway, door swing, appliance vent, electrical panel, valve, or emergency access.
- Buyers expecting one compact rail to safely store very heavy garden or workshop tools without product-specific load guidance and suitable anchoring.
The wall is part of the storage system
Mounting instructions are not interchangeable between drywall, wood studs, masonry, tile, paneled walls, and cabinet sides. Included screws or anchors may be intended for only certain surfaces. Before drilling, identify the wall construction and check for plumbing, wiring, ductwork, or other concealed services. If that cannot be done confidently, ask a qualified installer rather than guessing.
A stud-mounted installation may offer a different level of support from hollow-wall anchors, but rail hole spacing does not always align with the stud locations available. Masonry can require specialized bits and fasteners. Tile introduces crack risk and calls for an installation method appropriate to both the tile and the material behind it. Adhesive-mounted versions avoid holes, yet their performance depends on surface type, preparation, curing time, environment, and the maker’s load limits. Adhesive should not be treated as automatically renter-safe: removal can still damage paint or finishes.
Look at stated capacity carefully. Determine whether a number applies to the entire rail, each grip, each hook, or an installation under particular conditions. The combined weight of the tools is only one factor; tugging a handle out of a spring grip adds force, and long tools can act as levers when pulled sideways.
Allow room to take each tool down
A holder can fit the wall and still be frustrating in daily use. Some grips release when the handle is lifted; others need a controlled outward pull. Either action requires hand room and a clear path for the tool head. Mounting directly under a low shelf may prevent lifting, while placing a rail behind a door can cause repeated impacts.
Use painter’s tape to mark the proposed rail length and grip positions. Lean the actual tools against those marks, spreading wide heads into realistic positions. Open nearby doors and cabinets. Walk past the arrangement while carrying a laundry basket or taking out trash. This simple mock-up reveals conflicts that a dimension drawing may not show.
Height should suit the people who use the tools without placing broom heads so low that they remain on the floor. A grip point that is too high can make release awkward; one that is too low wastes vertical space and allows long handles to tip. In a shared household, test the reach of the shortest regular user before deciding.
Grip mechanisms and utility hooks
Rolling or spring-loaded grips are useful only within their stated handle range. A grip that is too loose can let a tool slide; one that is too tight may demand excessive pulling or mark a softer handle. Confirm the supported diameter range and check whether the mechanism is described for round, oval, or irregular profiles.
Hooks can hold a dustpan, hand brush, cleaning cloth, or lightweight accessory with a proper hanging loop. Fixed hooks make capacity easy to understand, while folding hooks can reduce projections when unused. Sliding modules offer layout flexibility but may move unless their locking method is secure. Whatever the style, check hook dimensions and individual load guidance instead of assuming every pictured accessory is supported or included.
Materials affect upkeep but should not be judged from appearance alone. Metal rails can use different alloys, coatings, fasteners, and plastic grip components. Polymer bodies vary in stiffness and temperature limitations. If the holder will be in a humid laundry area or garage, review the current product’s environmental and care notes and inspect fasteners periodically.
Wet tools need a separate plan
Hanging a damp mop above the floor does not guarantee that it will dry hygienically. Thick mop heads may retain water, touch the wall, or drip onto baseboards and flooring. Follow the mop maker’s washing and drying instructions, remove washable heads when directed, and use a ventilated location that can handle residual moisture.
Do not place wet tools above outlets, power strips, appliances, untreated wood, stored paper goods, or surfaces vulnerable to water. A washable tray may protect the floor from incidental drips, but it also needs cleaning and cannot substitute for wringing and drying the mop correctly. If the utility closet stays closed and humid, a separate drying location may be more practical than putting every tool on the same rail.
What to verify before buying
- Overall rail length, depth, and mounting-hole spacing, including any modules that slide beyond the main body.
- The handle-diameter range for each grip and whether tapered, padded, telescoping, or irregular handles are supported.
- Total and per-position load guidance, along with the mounting conditions under which those figures apply.
- Whether grips and hooks are fixed, folding, removable, or repositionable, and how movable parts lock in place.
- The installation surfaces named by the manufacturer and which screws, anchors, templates, or covers are actually included.
- Required clearance for inserting and releasing a handle, not only the organizer’s packaged dimensions.
- Material, coating, humidity, temperature, and cleaning guidance for the whole assembly and its fasteners.
- Whether replacement grip parts or additional modules are available if a mechanism wears or the tool collection changes.
- Any installation exclusions near utilities, heat, weather exposure, or moisture.
- The return terms in case the actual grip force or spacing does not suit your tools.
A safer installation and checkup routine
Lay out every component before installation and read the current instructions from start to finish. Use a level and mark holes only after confirming the finished rail will leave retrieval clearance. Choose fasteners for the actual substrate and expected load; do not substitute anchors merely because they fit the hole. Avoid overtightening, which can deform the rail, damage the wall, or crack a mounting surface.
Once mounted, test one light tool at a time. Pull in the direction the release mechanism expects rather than yanking sideways. Check whether the rail moves, fasteners loosen, or grips allow slow sliding. Add other tools gradually and stay within the applicable guidance. Reinspect the installation after the first several uses and periodically thereafter, especially if the wall experiences vibration or large temperature and humidity changes.
Keep the area beneath and around the holder uncluttered. A falling broom is inconvenient; a falling heavy tool can injure someone or damage a nearby appliance. Storage height should also reflect who can reach the tools and whether children or pets need to be kept away.
Limitations
- Grip compatibility cannot be established from slot count alone; handle shape, diameter, surface texture, and release force all matter.
- A wall rail does not make damp mops dry faster in an enclosed or poorly ventilated room.
- Included mounting hardware may not suit your wall, even when it appears in product photos.
- Capacity statements depend on installation conditions and do not justify storing unlisted heavy tools.
- Closely packed tools can tangle, hide smaller accessories, and make one-at-a-time retrieval difficult.
- Wall-mounted storage is less flexible than a freestanding rack when tools or room layouts change often.
Alternatives to compare
Freestanding cleaning-tool rack: Avoids wall penetration and can move with the room layout, though it occupies floor space and needs a stable base.
Utility cabinet with vertical dividers: Conceals supplies and can separate tools, but the cabinet must have enough height and ventilation for the intended contents.
Individual wall hooks: Allow custom spacing around wide tool heads. They may be simpler than a multi-grip rail when every item already has a strong hanging loop.
Pegboard storage: Offers a reconfigurable system for lightweight tools and accessories when the board, hooks, mounting, and loads are all compatible.
Over-door organizer: Uses otherwise idle door space, but added thickness and swinging tools can interfere with closure, trim, hinges, or nearby walls.
FAQ
How many broom and mop grips do I need?
Count the tools that require a pressure grip, then separate items that can use hooks. Leave room for wide heads and consider one spare position for a future or seasonal tool. A rail with more grips is not automatically useful if the tools cannot hang side by side.
Can a broom holder be mounted with adhesive instead of screws?
Only when the specific holder and adhesive system are approved for the surface, environment, tool weight, and pulling forces involved. Surface preparation and curing instructions matter. Adhesive can damage paint during removal and should not be assumed to work on textured, dusty, damp, or incompatible finishes.
How high should a broom and mop holder be installed?
There is no single height for every household. Place it so regular users can operate the release comfortably, tool heads clear the floor when appropriate, and handles avoid shelves and doors. Mock up the arrangement with tape and the actual tools before drilling.
Will a wall holder help a wet mop dry?
It may keep the mop off the floor, but drying still depends on how well the head is wrung out, airflow, humidity, and the mop maker’s care instructions. Do not let a damp head rest against the wall, and protect moisture-sensitive surfaces from drips.
Can the same rail hold garden tools?
Do not assume so. Garden tools can be heavier, longer, or more awkwardly balanced than household brooms. Verify the rail’s stated tool compatibility, handle range, per-position capacity, total capacity, and required mounting method before storing them.