Bedside Caddies for Small Bedrooms, Dorms, and Bunk Beds

Product links are for reference. Verify current details on the retailer page before buying.
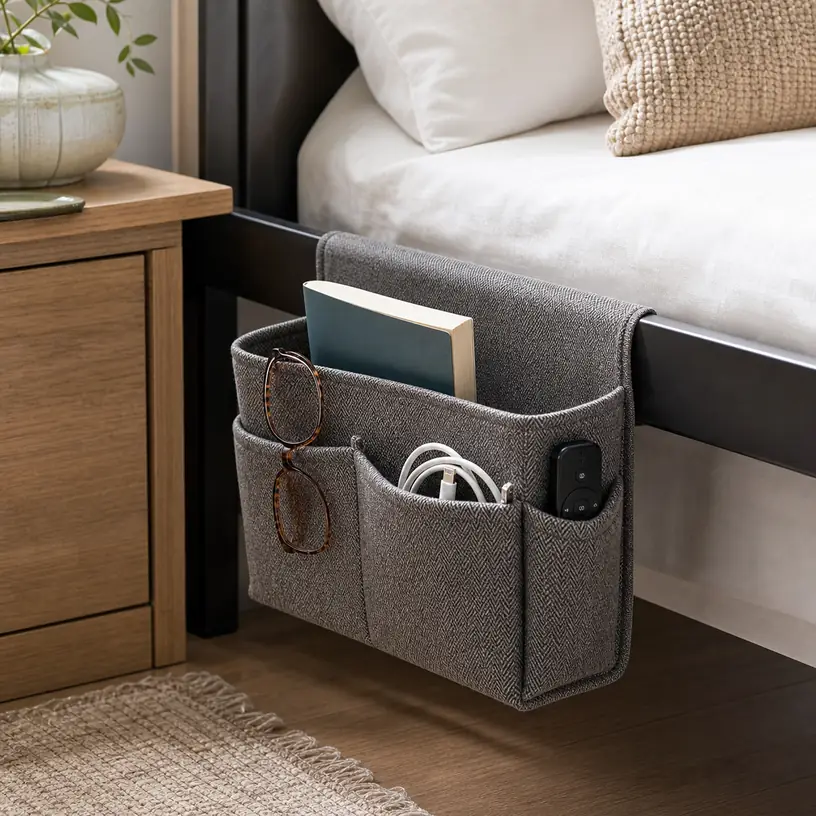
Illustrative image for a bedside caddy buying guide

Illustrative image, not an official product photo.

Short answer

A bedside caddy is worth considering when the area beside the bed is too narrow for a nightstand, shared with another sleeper, or already crowded with a lamp, water bottle, and charger. The most useful models keep small items within reach without sagging into the mattress gap, scratching the bed frame, or turning into a soft junk drawer. Compare attachment style, pocket depth, panel stiffness, fabric care, and whether the caddy fits the exact bed frame, rail, mattress, or sofa arm where it will be used.

Search reference

Bedside caddy options

Compare hanging method, pocket layout, panel stiffness, dimensions, fabric care, and compatibility with your bed frame or mattress setup.

View matching options

What this product type is

A bedside caddy is a hanging or tuck-in organizer that stores small items close to a bed, bunk, sofa, or sleeper chair. Instead of using floor space, it usually hangs from a rail, slips under a mattress, attaches to a headboard, or drapes over an armrest. Common storage targets include a phone, remote, paperback book, glasses, lip balm, tissues, charging cable, earplugs, or a small notebook.

The category looks simple, but the right choice depends heavily on the bed. A dorm loft, metal bunk, upholstered platform bed, adjustable bed base, and guest-room frame can all require different attachment decisions. A caddy that works neatly on a square rail may not stay put under a thick mattress or on a rounded headboard.

Who this is for

  • Students using dorm beds, loft beds, or bunks where a normal nightstand is awkward.
  • Small-bedroom setups where the bed is pushed against a wall or squeezed beside a closet door.
  • Guest rooms that need a place for visitors to keep glasses, a phone, and reading material.
  • Kids’ rooms where lightweight bedtime items need a repeatable landing spot.
  • Sofa sleepers, daybeds, or reading corners where a side table would block movement.

Who should skip it

  • Skip a bedside caddy if you need to store heavy books, large tablets, full water bottles, or electronics that need rigid support.
  • Choose a nightstand or wall shelf if you want a stable surface for a lamp, drink, alarm clock, or decor.
  • Avoid tuck-in designs if your mattress shifts easily or the bed base does not leave enough friction to hold the panel.
  • Do not use a soft caddy as cable management for hot power bricks, overloaded chargers, or tangled extension cords.

What to verify before buying

  • Measure the bed rail, mattress thickness, headboard, sofa arm, or bunk side where the caddy will attach.
  • Check whether the model hangs with hooks, straps, a tuck-in flap, hook-and-loop bands, or a rigid support panel.
  • Compare pocket depth and width with the specific items you want to store, especially glasses, remotes, e-readers, and small books.
  • Review material wording, panel stiffness, stitching, and whether the pocket openings are likely to sag when filled.
  • Verify cleaning instructions, color, and fabric texture if the caddy will sit against bedding or an upholstered frame.
  • Confirm whether any bedside accessories shown in photos are included or are only display props.
  • Check that the attachment style will not scratch, pinch, or interfere with the bed frame, guardrail, adjustable base, or mattress movement.

Main buying notes

Start with the attachment method, not the number of pockets. Hook-style caddies can be convenient on metal rails, wire bunks, and some headboards, but they may rattle or sit unevenly on rounded surfaces. Strap designs can be more flexible, though loose straps may slide if the rail is smooth. Tuck-in panels are discreet on standard beds, but they depend on mattress weight and friction to stay in place.

Pocket layout matters when you reach for items in the dark. One deep pocket may swallow a remote, cable, and glasses together. Several narrow pockets can keep items separated, but they may not fit a paperback or e-reader. If the caddy is for a child or guest room, simple open pockets may be easier to understand than many specialized slots.

Think about weight before the caddy is full. Soft fabric organizers often look tidy when staged, but heavy items can pull the panel outward or make the top edge fold. A stiffer back panel, reinforced seams, or a balanced pocket layout can help, but no soft bedside organizer should be treated like a shelf.

Cable use deserves a separate check. A small charging cable is one thing; a warm charger, power strip, or tightly coiled cord is another. Keep charging setups simple, follow device guidance, and make sure cords are not pinched between the mattress, frame, and organizer.

Limitations

  • A bedside caddy adds reach-in storage, not a level surface for drinks, lamps, or fragile items.
  • Sagging can happen if pockets are overloaded or the attachment method does not match the bed frame.
  • Tuck-in models may shift when the mattress is lifted, rotated, or used on a low-friction platform.
  • Deep pockets can hide small items unless the interior color and pocket openings make them easy to see.
  • Fabric, stitching, hooks, and cleaning guidance vary by listing, so verify current details before relying on a caddy for daily use.

Alternatives to compare

  • A narrow nightstand for rooms that still have a few inches of floor space.
  • A wall-mounted shelf if drilling or adhesive mounting is allowed and safe for the wall.
  • A headboard with built-in cubbies for a more permanent bedroom setup.
  • A rolling cart for shared bedrooms or guest rooms where storage needs change.
  • A simple tray on the floor or dresser if the goal is temporary bedtime storage rather than attached organization.

FAQ

Will a bedside caddy work on a bunk bed?

It can, but the attachment style must match the bunk rail. Measure the rail shape and thickness, check whether hooks or straps are included, and make sure the caddy does not interfere with climbing, guardrails, or bedding.

Is a tuck-in bedside caddy better than a hanging one?

A tuck-in caddy can look cleaner on a standard bed, while a hanging caddy may be easier on bunks, loft beds, and rails. The better choice depends on mattress friction, frame shape, and how much movement the bed gets.

What can I safely store in a bedside caddy?

Use it for lightweight bedtime items such as a phone, glasses, remote, paperback, tissues, earplugs, or charging cable. Avoid overloading soft pockets with heavy books, large bottles, or items that need a hard, stable surface.

How do I keep a bedside caddy from sagging?

Choose a model with an attachment method that fits your bed, keep heavier items in lower or balanced pockets, and avoid filling every compartment. Stiffer panels and reinforced seams may help, but weight limits and construction should be verified on the retailer page.

Is a bedside caddy useful in a guest room?

Yes, especially when the room has little space for furniture. A simple caddy can give guests a visible place for glasses, a phone, a book, and a small remote without adding another table to the room.
Vacuum Storage Bags for Bedding, Coats, and Seasonal Clothes

Product links are for reference. Verify current details on the retailer page before buying.

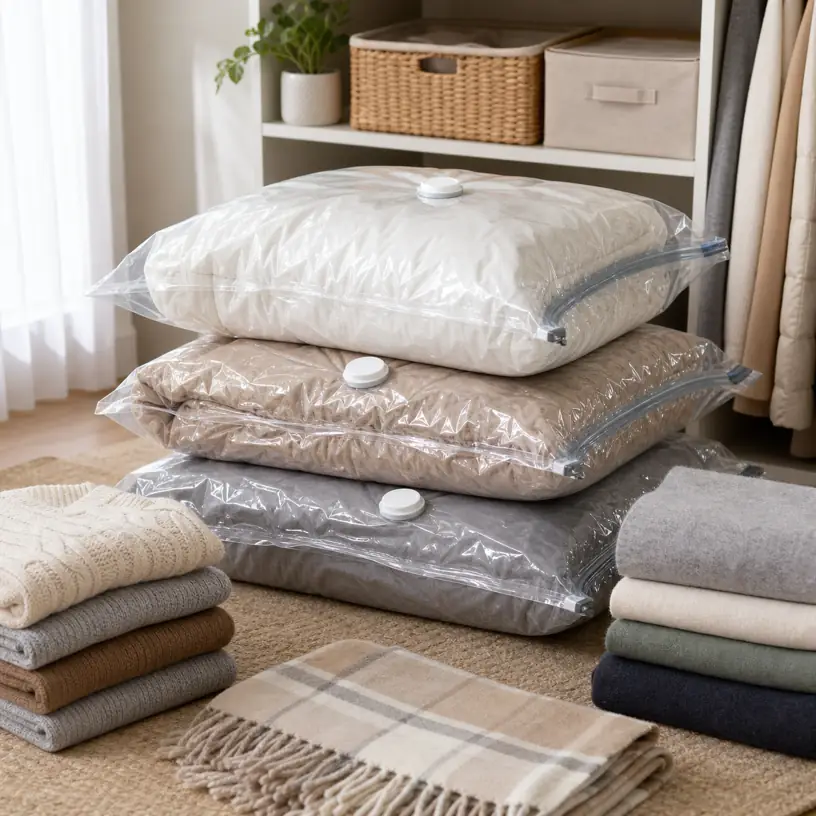
Illustrative image for a vacuum storage bags buying guide

Illustrative image, not an official product photo.

Short answer

Vacuum storage bags make the most sense for soft, bulky items you do not need every week: spare comforters, guest bedding, winter coats, sweaters, and off-season clothes. Choose them by matching bag size to the items and the storage spot, then check the seal design, valve style, included pump or vacuum compatibility, material thickness wording, and whether the compressed bag will sit flat in a closet, under a bed, or inside a storage bin.

Search reference

Vacuum storage bag options

Compare mixed-size sets, jumbo bedding bags, travel-size compression bags, valve designs, closure tools, and storage shape before deciding which style fits your closet or under-bed space.

View matching options

Start with the storage problem, not the biggest bag

A large vacuum bag looks efficient until it becomes too wide for the shelf, too heavy to move, or too stiff to slide under a bed. Before choosing a set, separate items into real storage groups: one guest bedding kit, one winter coat group, one sweater stack, or one extra blanket per bag. Smaller groups are easier to label, lift, and reopen without unpacking everything at once.

The storage location matters as much as the item volume. Under-bed bags need a flatter final shape. Closet shelf bags can be taller but still need to stack without sliding. Bags stored in bins should match the bin footprint after compression, not just before compression. If you plan to store items in a basement, garage, or attic, read the retailer page carefully for material, closure, and temperature-related wording instead of assuming every bag is suited to those conditions.

Also think about how often you will reopen the bags. For once-a-year seasonal clothing, maximum compression may be worth the extra effort. For guest bedding that is used every few months, a moderate-size bag with a simple valve and reliable closure tool may be more practical than a very large bag that must be wrestled flat each time.

Who this is for

  • Households storing bulky comforters, blankets, pillows, or guest bedding between uses.
  • Apartment renters trying to free up closet or under-bed space without adding more furniture.
  • Families rotating winter coats, sweaters, scarves, and seasonal clothing.
  • Dorm rooms, small bedrooms, and shared closets where soft goods take up too much shelf space.
  • Movers or organizers who want grouped textile storage that can be labeled and stacked.

Who should skip it

  • Skip vacuum storage bags for items you need to access daily or weekly.
  • Avoid them for delicate garments that should hang, breathe, or keep a natural shape.
  • Use rigid bins instead if the main problem is crushing, stacking strength, or pest-resistant structure.
  • Do not rely on compression bags as a substitute for cleaning and fully drying textiles before storage.
  • Choose travel packing cubes if you mainly need suitcase organization rather than long-term home storage.

What to verify before buying

  • Check the dimensions of each bag size and compare them with your closet shelf, bin, drawer, or under-bed clearance.
  • Confirm whether the set includes mixed sizes, only jumbo bags, or travel-size bags.
  • Look at the valve style and whether it works with a household vacuum, a hand pump, or both.
  • Review closure details, including the slider clip, double-zip wording, and instructions for sealing the opening.
  • Check material thickness wording, reuse guidance, and whether sharp zippers, buttons, or hangers should be avoided.
  • Verify whether any pump, labels, clips, or storage accessories shown in photos are included.
  • Read care and storage guidance on the retailer page before using bags in hot, damp, or rough storage areas.

Buying notes for bedding and clothing

For bedding, bag shape is often more important than maximum advertised capacity. A comforter or duvet can compress into a wide slab that is still awkward to move. If you store several beds’ worth of linens, separate each bed size or room into its own bag so you do not have to open a giant mixed bundle for one pillowcase set.

For clothing, avoid packing one bag with every winter item you own. Sweaters, base layers, scarves, and coats may be needed at different times. Grouping by season or person makes the bags easier to reopen. If garments have buttons, snaps, or stiff trim, fold them so hard edges do not press directly against the plastic during compression.

The valve should be easy to access after the bag is filled. A valve buried under a bulky blanket can make air removal frustrating, especially on large bags. If you do not want to pull out a full-size vacuum cleaner, check whether the listing includes a hand pump and whether that pump is intended for large bags or mainly for travel sizes.

Labels are worth planning even if the set does not include them. Once bedding and clothes are compressed, it can be surprisingly hard to identify what is inside through wrinkled plastic. A simple label with room, season, and contents can prevent unnecessary reopening.

Limitations

  • Compression reduces volume, but it does not reduce weight; large bags can become heavy and awkward.
  • Some bags may slowly let air back in if the seal, valve, or plastic is damaged or not fully closed.
  • Long-term compression may not suit delicate fabrics, structured coats, leather, down items, or garments that need to keep loft.
  • Very large bags can be hard to store if the compressed shape does not match your shelf, bin, or under-bed space.
  • Vacuum bags are not a cure for damp textiles; items should be clean and completely dry before storage.

Alternatives to compare

  • Clear lidded bins for stackable storage and easier protection from crushing.
  • Fabric under-bed bags if breathability and quick access matter more than compression.
  • Hanging garment bags for coats, dresses, suits, or items that should keep their shape.
  • Packing cubes for suitcase organization during travel.
  • Closet shelf dividers or blanket bags if you need order without removing air.

FAQ

What size vacuum storage bags should I buy for bedding?

Start by measuring the shelf, bin, or under-bed area where the compressed bag will sit. Jumbo bags can hold bulky comforters, but several medium or large bags may be easier to lift, label, and reopen for guest bedding.

Can vacuum storage bags be reused?

Many are sold as reusable, but reuse depends on the plastic, seal, valve, and how carefully the bag is handled. Avoid overfilling, keep sharp garment details away from the plastic, and verify the retailer’s reuse guidance before assuming long-term durability.

Do I need a vacuum cleaner for these bags?

Some bags are designed for a household vacuum, some include a hand pump, and some may support both. Check the valve description and included accessories, especially if you want to use the bags in a dorm, apartment, or travel setting without a full-size vacuum.

Are vacuum storage bags good for winter coats?

They can help with bulky soft coats, but structured, delicate, leather, or loft-sensitive garments may not be a good fit. Check garment care labels and avoid compressing anything that should hang, breathe, or keep its shape.

Why do some vacuum bags reinflate?

Reinflation can happen when the zipper seal is not fully closed, the valve cap is loose, the bag is overfilled, or the plastic has a small puncture. Filling the bag less tightly and running the closure tool along the seal slowly can help, but damaged bags may need replacing.

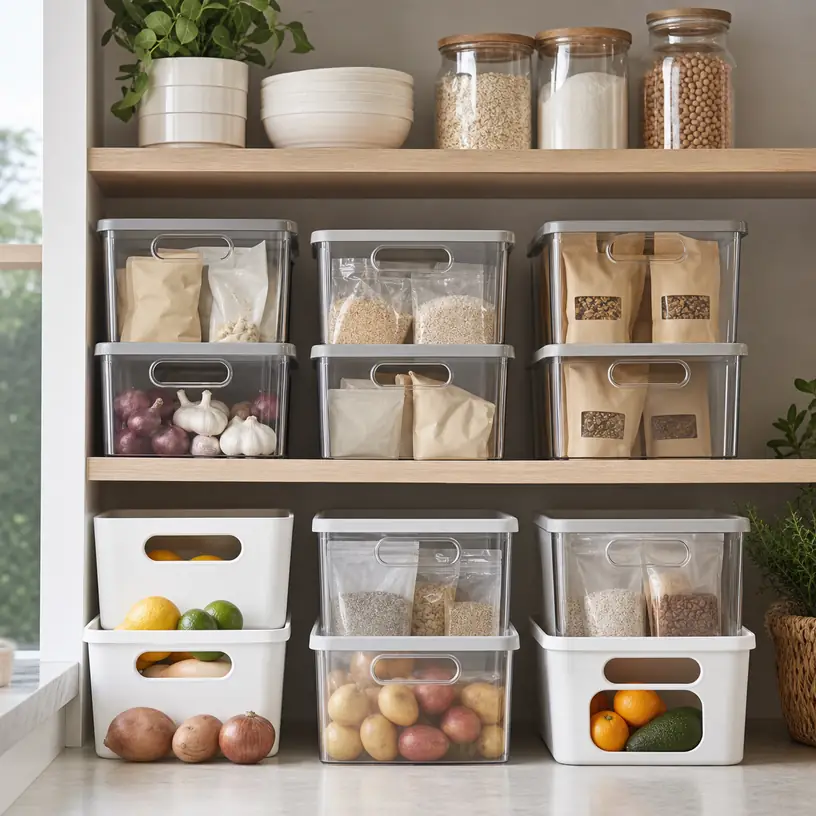
Stackable Pantry Bins for Cabinets, Shelves, and Small Kitchen Stockups

Product links are for reference. Verify current details on the retailer page before buying.

Illustrative image for a stackable pantry bins buying guide

Illustrative image, not an official product photo.

Short answer

Stackable pantry bins are most useful when shelves are deep, snacks slide around, or small packets disappear behind cans and jars. Choose them by the shelf you are trying to fix, not by how neat a product photo looks. The right set should fit the cabinet depth, stay stable when lightly stacked, let you see what is inside, and be easy to pull out without dumping the contents across the pantry.

Search reference

Compare stackable pantry bin options

Use the search page to compare current bin sizes, set counts, handle shapes, clear or opaque materials, and stacking details before matching a set to your shelves.

View matching options

Start with the shelf problem you actually have

A pantry bin is not automatically helpful just because it creates a category. It helps when it solves a specific daily annoyance: granola bars falling over, sauce packets spreading across a shelf, kids’ snacks being hard to reach, or backup cans hiding behind the first row. If the bin adds another layer to move before you can cook dinner, it may make the shelf look organized while slowing you down.

Before comparing sets, empty one shelf and group the items that cause the most clutter. Packets and pouches usually need a different shape than cans. Baking supplies may need taller sidewalls. Breakfast bars may work better in a shallow open bin that can be pulled forward quickly. The goal is to create zones that match how the household restocks and cooks, not to force every item into identical containers.

Stacking deserves extra attention. Some bins are designed to nest when empty, stack when filled, or accept a lid-like top edge. Others only appear stackable because the sides are straight. Look closely at whether stacked bins leave enough front access, whether handles remain usable, and whether the bottom bin can support the kind of weight you plan to store.

Who this is for

  • Kitchens with deep pantry shelves where smaller items get lost behind jars, boxes, or cans.
  • Families that keep grab-and-go snacks, packets, tea bags, drink mixes, or lunchbox items in repeated categories.
  • Renters who want a removable organization system without installing pull-out shelves or hardware.
  • Shared households where clear zones make it easier for everyone to put groceries back in the same place.
  • Small kitchens that need vertical shelf use but cannot add permanent cabinet organizers.

Who should skip it

  • Pantries that already work well with original boxes, shelf risers, or simple rows of cans.
  • Anyone storing heavy bulk goods without confirming the current bin size, material, and stacking guidance.
  • Very shallow cabinets where handles or front lips would waste more space than they save.
  • Households that prefer fully sealed food containers for freshness, pests, or spill protection.

What to verify before buying

  • Measure shelf width, depth, and height, then compare those numbers with the outside dimensions of each bin.
  • Check whether the bins are truly designed to stack when filled, and whether stacking requires lids or raised rims.
  • Confirm the set count and size mix; some sets include identical bins, while others combine narrow, wide, shallow, and tall pieces.
  • Look at handle placement, front cutouts, and sidewall height so the bin can be pulled out without trapping nearby items.
  • Review material wording, cleaning instructions, and any temperature or dishwasher guidance on the current listing.
  • Decide whether clear bins, tinted bins, labels, or open fronts will make the contents easier to manage in your pantry.
  • Check whether the shape fits your intended items, such as cans, spice packets, snack bars, tea boxes, produce, or baking add-ins.

Fit, visibility, and everyday reach

The most important measurement is often depth. A deep bin can turn a shelf into a drawer-like zone, but it can also become heavy and awkward if it holds too many cans or jars. A shorter bin may be easier for children or guests to use, while a longer one may work for backup snacks that are not opened every day. If the pantry has fixed shelves, remember that stacking two bins can reduce the usable height between shelves.

Visibility changes how often the system gets used. Clear bins make it easier to spot the last oatmeal packet or an opened bag of chips, but they also show clutter. Opaque or frosted bins can create a calmer shelf, though they may need labels if several bins look alike. Open fronts can help with quick access, while straight-sided bins may be better for items that need to stay contained.

Handles should match the shelf height. A front cutout is helpful when a bin sits at eye level or below. Side handles may be useful on open shelves but less helpful inside a narrow cabinet. If the bin will sit above shoulder height, avoid layouts that require lifting a loaded bin down at an awkward angle.

Stacking and weight tradeoffs

Stackable pantry bins are tempting because they promise more vertical storage without installation. That only works when the stacked items are light enough and the shelf remains easy to use. Snack pouches, tea bags, napkins, lightweight packets, and small boxed goods are better candidates than dense cans, glass jars, or large bottles.

If the bins rely on lids or raised edges to stack, confirm what is included in the current option. A lid may create a flatter top, but it can also add a step every time someone needs a snack. Open stacking can be faster, but the upper bin may block access to the lower one. In many pantries, using one stackable set for lightweight overflow and a separate shelf riser for cans is more practical than forcing every item into bins.

Cleaning matters too. Pantry bins collect crumbs, seasoning dust, and sticky residue from opened packages. Smooth corners are easier to wipe than decorative ridges or narrow seams. If dishwasher-safe cleaning is important, check the current care instructions rather than assuming all plastic storage bins can handle heat.

Limitations

  • Search results can change, so dimensions, set counts, and stacking claims should be checked on the current retailer page.
  • Bins organize loose items, but they do not seal food the way lidded food storage containers do.
  • Stacked bins can become inconvenient if the lower bin is used more often than the upper one.
  • Clear bins show contents quickly, but they can also make mixed packaging look visually busy.
  • Heavy cans, jars, bottles, or bulk bags may exceed what a lightweight pantry bin can handle comfortably.

Alternatives to compare

  • Shelf risers for cans, jars, and spices that need a stepped view instead of a pull-out bin.
  • Airtight food storage containers for flour, cereal, rice, or dry goods that need sealed storage.
  • Lazy Susan turntables for condiments, oils, or small jars in corner cabinets.
  • Drawer dividers or snack organizers if the clutter problem is inside a drawer rather than on a shelf.
  • Installed pull-out baskets when a deep pantry needs hardware-based access instead of removable bins.

FAQ

Are stackable pantry bins worth it for a small kitchen?

They can be, especially when one shelf needs clearer zones for snacks, packets, or lightweight backup items. In a very small kitchen, measure carefully so the bins add usable access rather than taking up shelf height you cannot spare.

What should I put in stackable pantry bins?

They work best for lightweight, frequently used categories such as snack bars, tea bags, seasoning packets, drink mixes, pouches, small baking add-ins, and lunchbox items. Heavy cans and glass jars may be better on a shelf riser or a sturdier pull-out system.

Do pantry bins need lids?

Not always. Open bins are faster for daily snacks and packets, while lids can help with stacking or dust control. If you need freshness or pest protection, compare sealed food storage containers instead of relying on open pantry bins.

How do I choose the right pantry bin size?

Measure the shelf first, then subtract room for your hand to pull the bin forward. Also check the tallest item you plan to store and whether two stacked bins would still leave enough clearance under the shelf above.

Are clear or opaque pantry bins better?

Clear bins make it easier to see when a category is running low. Opaque bins can look calmer on open shelves but may need labels. The better choice depends on whether fast visibility or a cleaner visual appearance matters more in your kitchen.

Entryway Boot Trays for Wet Shoes, Mudrooms, and Small Hallways

Product links are for reference. Verify current details on the retailer page before buying.

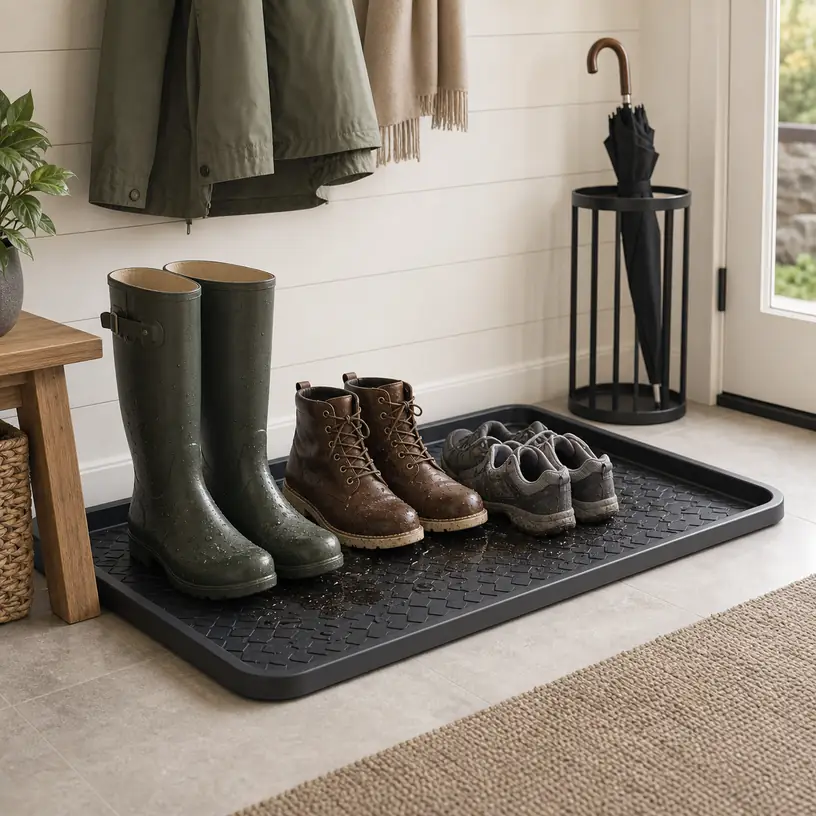
Illustrative image for an entryway boot tray buying guide

Illustrative image, not an official product photo.

Short answer

An entryway boot tray is a simple way to keep wet shoes, muddy boots, pet leashes, umbrellas, and winter gear from spreading mess across the floor. The useful details are not complicated, but they matter: measure the space beside the door, choose a rim high enough for slush or drips, make sure the surface is easy to rinse or wipe, and decide whether you need a narrow hallway tray, a wider family mudroom tray, or a decorative mat-style option that stays visible all year.

Search reference

Compare entryway boot tray options

Use the search page to compare current tray sizes, rim heights, surface textures, materials, and color options before matching one to the door area you use most.

View matching options

Think about the mess route through the door

A boot tray works best when it sits exactly where shoes are removed, not where the entryway happens to look neat in a photo. Watch the normal path through the door for a day: where do people step first, where do they drop bags, and where do wet soles usually touch the floor? A tray placed too far from the threshold can become another object to step around instead of a habit everyone uses.

The shape should match the doorway. A narrow apartment hallway may need a long, shallow tray that fits two or three pairs without blocking the door swing. A mudroom may be better served by a wider tray that can handle boots, kids’ shoes, and a dripping umbrella at the same time. If the tray will sit under a bench, check both the footprint and the clearance above the tray so taller boots still fit.

Rim height is the main difference between a shoe mat and a true boot tray. A low rim may be easier to step over and look cleaner in a front hall, while a taller rim is more helpful for melting snow, muddy gardening shoes, and rainy-day gear. The right choice depends on whether the tray is mostly for everyday shoe parking or for catching actual water and debris.

Who this is for

  • Homes where rain, snow, garden soil, beach sand, or muddy sidewalks regularly come in on shoes.
  • Small apartments that need a defined landing zone near the door without installing shelves or racks.
  • Families that want boots, kids’ shoes, umbrellas, and pet-walking items contained in one easy-to-clean spot.
  • Renters who need floor protection but cannot change the entryway flooring or add permanent storage.
  • Mudrooms, garages, laundry rooms, and side entrances that need a practical place for wet footwear.

Who should skip it

  • Entryways that already stay dry with a washable doormat and a separate shoe rack.
  • Homes that need vertical shoe capacity more than floor-level water containment.
  • Doorways so tight that a raised rim would create a tripping point or stop the door from opening fully.
  • Anyone storing tall boots under a bench without confirming the tray height and available clearance.

What to verify before buying

  • Measure the available floor area, including door swing, baseboards, bench legs, and nearby closet doors.
  • Check outside dimensions and usable inside dimensions; raised rims can reduce the space available for shoes.
  • Compare rim height with the kind of mess you expect, such as light drips, melting snow, or muddy boots.
  • Review material wording and care instructions, especially if the tray will sit in direct sun, a cold garage, or a damp mudroom.
  • Look at surface texture, drainage channels, or raised grids if wet soles need to sit above pooled water.
  • Confirm whether the underside is likely to stay put on your floor type or whether you may need a separate non-slip pad.
  • Decide whether appearance matters because the tray will be visible in a front entry rather than hidden in a utility area.

Size, rim height, and daily use

Start with the number of pairs that need to land on the tray at the same time. A two-person household may only need space for everyday shoes and one wet pair. A family entry can fill quickly with boots, sneakers, sandals, and the footwear guests remove near the door. If the tray is too small, shoes spill over the edge and the tray stops protecting the floor.

Depth is easy to underestimate. Adult boots and larger shoes may need more front-to-back room than a slim hallway tray provides. If shoes are placed sideways to fit, water can drip outside the rim. A longer but shallower tray may work for narrow halls, while a deeper tray is usually more comfortable in a mudroom or garage entry.

Rim height should be practical, not just high. A very low lip may only catch dust and light moisture. A taller lip can hold melting snow, pebbles, and mud, but it can also make the tray more noticeable underfoot. For older adults, children, or busy doorways, think carefully about whether the edge could become something people catch with a toe.

Materials and floor protection

Common boot trays are made from flexible plastic, rubber-like materials, metal, or decorative composites. Plastic and rubber-style trays are often easy to rinse and move, but you should still check the current care guidance. Metal trays can look tidy in a visible entry, though they may show scratches, dents, or water marks depending on finish and use.

The underside matters as much as the top. A tray that slides every time someone steps near it can be annoying and may scratch or scuff certain floors. If the entry has tile, hardwood, laminate, vinyl, or painted concrete, think about moisture trapped beneath the tray. Lifting and drying the area occasionally is safer than assuming a tray can sit in one place all season without attention.

Surface texture changes how the tray handles water. Raised channels or a grid-like pattern can keep shoe soles slightly above pooled water, while a smooth tray is easier to wipe quickly. Deep grooves may catch grit and require more rinsing. If the tray will collect leaf bits, road salt, potting soil, or pet mess, choose a shape that can be cleaned without a brush getting stuck in tiny corners.

Where a tray fits better than a rack

A shoe rack organizes pairs vertically, but it does not always catch drips. A boot tray is better when the problem is wetness or dirt rather than capacity. Many homes use both: a tray for the pairs currently drying and a rack or closet shelf for shoes that are already clean.

Boot trays can also be useful beyond footwear. They can sit under a dog bowl in a utility room, hold potted plants temporarily, catch water from an umbrella stand, or protect a garage floor under small outdoor items. If you plan to use one this way, verify the material and size for that purpose instead of assuming every entry tray can handle the same load or moisture level.

For a front entry, appearance may matter more than maximum capacity. A dark rubber tray can disappear near a side door, while a decorative tray may look better beside a console table. In a working mudroom, easy cleaning and enough space usually matter more than color.

Limitations

  • Search results can change, so dimensions, material wording, color availability, and included pieces should be checked on the current retailer page.
  • A boot tray contains water and debris only when shoes actually fit inside the raised edge.
  • Raised rims can be awkward in tight hallways, especially where people step through quickly.
  • A tray does not dry shoes by itself; wet footwear may still need ventilation and time.
  • Moisture trapped under any floor-level tray can be a problem if the area is not cleaned and dried periodically.

Alternatives to compare

  • Washable entry mats for low-profile dirt control when standing water is not the main issue.
  • Freestanding shoe racks when the entry needs more pairs stored vertically.
  • Over-the-door shoe organizers for closets where floor space is already crowded.
  • Mudroom benches with cubbies when seating and storage need to be combined.
  • Umbrella stands, wall hooks, or small caddies if the main clutter comes from rain gear rather than shoes.

FAQ

What size boot tray do I need for an entryway?

Measure the floor area first, then count how many pairs need to sit on the tray at one time. Leave room for the door to open and for people to step around the tray without catching the raised edge.

Is a rubber or plastic boot tray easier to clean?

Both can be practical, but the surface design matters. Smooth trays are usually faster to wipe, while deep grooves or raised patterns may need rinsing to remove grit, salt, or mud.

Should a boot tray have a high rim?

A higher rim is useful for melting snow, heavy rain, muddy boots, and gardening shoes. A lower rim may be enough for light drips and can feel less intrusive in a narrow hallway.

Can I put a boot tray on hardwood or laminate flooring?

You can use one as a protective landing area, but do not let moisture sit underneath for long periods. Lift the tray occasionally, dry the floor, and check whether the underside is appropriate for your floor finish.

Is a boot tray better than a shoe rack?

It solves a different problem. A boot tray catches water, mud, and debris from shoes that are currently in use, while a shoe rack stores more pairs vertically. Many entryways benefit from using a tray for wet shoes and a rack for dry storage.

Drawer Organizer Trays for Kitchens, Desks, and Everyday Small Items

Product links are for reference. Verify current details on the retailer page before buying.

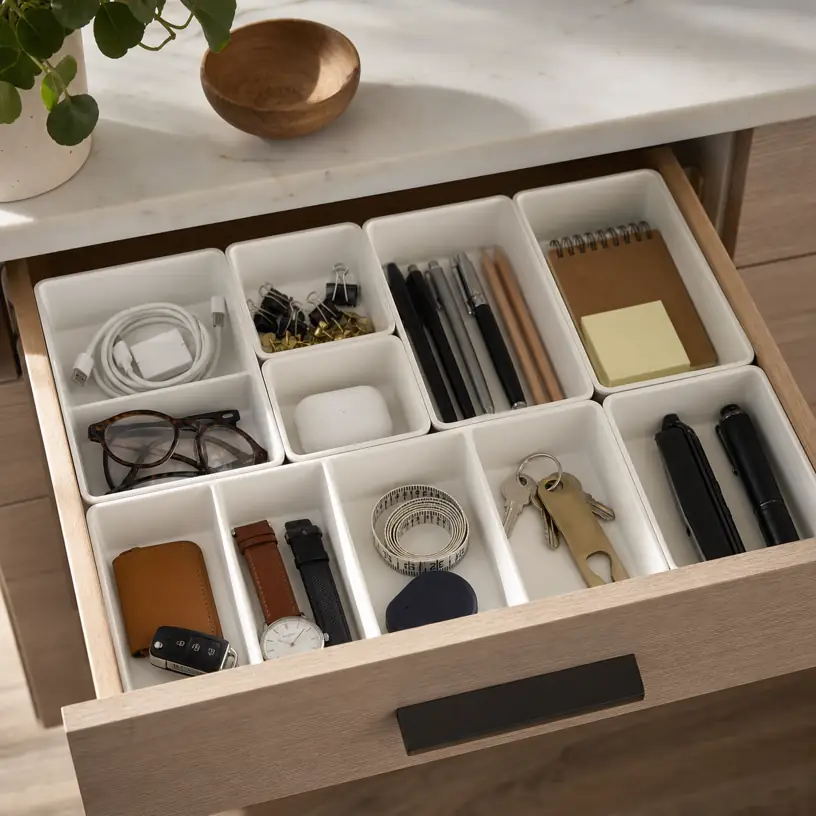
Illustrative image for a drawer organizer trays buying guide

Illustrative image, not an official product photo.

Short answer

Drawer organizer trays work best when a drawer already has a clear job: cutlery beside the sink, pens near a work surface, hair ties in a vanity drawer, or small tools in an entryway console. Start by emptying the drawer and grouping the items you actually keep there. Then compare tray dimensions, compartment shapes, material, cleanability, and whether the layout leaves enough open space for the few oversized items that never fit a perfect grid.

Search reference

Drawer organizer tray options

Compare compartment layouts, outside dimensions, material, drawer depth, and cleaning instructions before choosing trays for a specific drawer.

View matching options

Organize the drawer before choosing the organizer

A tray can make a drawer easier to use, but it cannot decide what belongs in that drawer. The most useful first step is to sort the contents into groups: everyday utensils, backup utensils, office supplies, cosmetics, batteries, keys, craft tools, or small hardware. If the drawer is holding several unrelated categories, a single molded tray may create more frustration than order.

Measure the drawer after removing bulky items and loose packaging. Note the inside width, depth, and height, then subtract a little room so the tray can slide in without scraping. For kitchen drawers, also check whether handles, serving spoons, peelers, or chopsticks are longer than standard compartments. For desk and vanity drawers, short compartments can be helpful for clips and bands, while longer channels are better for markers, brushes, and cords.

Think about maintenance. A kitchen tray may collect crumbs, spice dust, or utensil marks. A bathroom tray may need to handle damp items. A desk tray may only need a quick dusting. Material choice matters less as a status feature and more as a cleaning and fit decision.

Who this is for

  • Households trying to make a kitchen utensil drawer easier to scan during cooking.
  • Home office users who want pens, sticky notes, clips, chargers, and small tools separated.
  • Renters or first-apartment shoppers who need flexible organization without built-in cabinetry changes.
  • Parents setting up a craft, homework, or lunch-packing drawer with repeatable places for small items.
  • Anyone turning a catch-all drawer into a focused storage spot instead of a daily search zone.

Who should skip it

  • Skip fixed trays if the drawer contents change weekly or include many oddly shaped items.
  • Use a deeper bin or caddy if items need to be carried from room to room instead of stored in one drawer.
  • Avoid tall trays in shallow drawers; even a good layout is annoying if the drawer rubs or jams.
  • Do not rely on a tray alone for sharp tools, medications, batteries, or child-safety concerns that need more deliberate storage.

What to verify before buying

  • Measure the inside drawer width, depth, and usable height, not just the cabinet face.
  • Compare compartment length with your longest utensil, brush, marker, tool, or charger cable.
  • Check whether the tray is one fixed piece, a set of separate bins, expandable, or made with movable dividers.
  • Review material wording, edge shape, non-slip features, and whether the bottom may slide on smooth drawer liners.
  • Verify cleaning instructions, especially for kitchen, bathroom, craft, or makeup storage.
  • Check listing photos carefully to see whether accessories shown inside the trays are included or only display props.
  • Confirm the quantity and outside dimensions of every tray in the set before assuming it fills a drawer.

Choosing a layout that will stay useful

Fixed utensil trays are simple when the drawer has one predictable purpose. They are usually easiest for forks, spoons, knives, and a few cooking tools, but they can waste space if the drawer holds a mixed group. Separate modular trays give more freedom because you can leave open pockets for bulky items or rearrange the drawer after a few weeks of use.

Expandable trays can be helpful in wider kitchen drawers, but the expanded side sections are not always the same size as the main compartments. Before choosing one, decide what will live in the extra width. A side channel can work for tongs, straws, food clips, or measuring spoons, but it may not suit wide spatulas or stacked gadgets.

Clear trays make it easy to see crumbs and small items, which can be good or bad depending on the drawer. Bamboo or wood-look trays can feel warmer in a kitchen or desk, but buyers should still verify care instructions and actual material wording. Plastic trays can be light and easy to wipe, yet very thin walls may flex when a drawer is packed tightly. Metal mesh can work for office supplies, though small pieces may catch in openings.

If you are organizing a catch-all drawer, consider using several smaller trays rather than one large insert. The goal is not to fill every inch. A little empty space helps when a new tape roll, charger, notepad, or measuring spoon temporarily joins the drawer.

Limitations

  • A tray cannot fix a drawer that is storing too many unrelated categories.
  • Very specific compartment shapes may become inconvenient when your tools or utensils change.
  • Separate bins can shift unless the drawer liner, tray bottom, or layout keeps them stable.
  • Shallow trays may not contain tall items when the drawer opens quickly.
  • Materials and cleaning guidance vary, so verify the current retailer details before using trays in damp or messy areas.

Alternatives to compare

  • Adjustable drawer dividers for large open drawers or changing storage needs.
  • Small open bins for bathroom, craft, or utility drawers with mixed item sizes.
  • A countertop caddy when items need to move between rooms or work areas.
  • Drawer liners for reducing sliding when you already like the existing layout.
  • Wall hooks, rails, or countertop crocks for long utensils that do not fit comfortably in a drawer.

FAQ

How do I measure a drawer for organizer trays?

Measure the inside width from side to side, the inside depth from front to back, and the usable height below any drawer frame or countertop lip. Leave a little clearance so the tray can be placed and removed without scraping.

Are separate trays better than one large insert?

Separate trays are better when the drawer holds mixed items or may change over time. One large insert is simpler when the drawer has a stable purpose, such as everyday flatware or a focused desk-supply drawer.

What material works best for kitchen drawer organizers?

There is no single best material for every kitchen. Compare cleanability, moisture guidance, wall thickness, edge finish, and whether the tray fits your utensils without forcing long tools into short compartments.

Can drawer organizer trays help with junk drawers?

They can help if you first narrow the drawer to a few useful categories, such as batteries, tape, pens, and keys. If everything stays in the drawer, trays may only create smaller piles instead of a more usable system.

Should organizer trays fill the whole drawer?

Not always. Leaving some open space can make room for oversized tools, temporary items, or a future category. A drawer that is completely packed with compartments can be harder to adapt.

Choosing a Shower Caddy That Actually Fits Your Bathroom

Product links are for reference. Verify current details on the retailer page before buying.

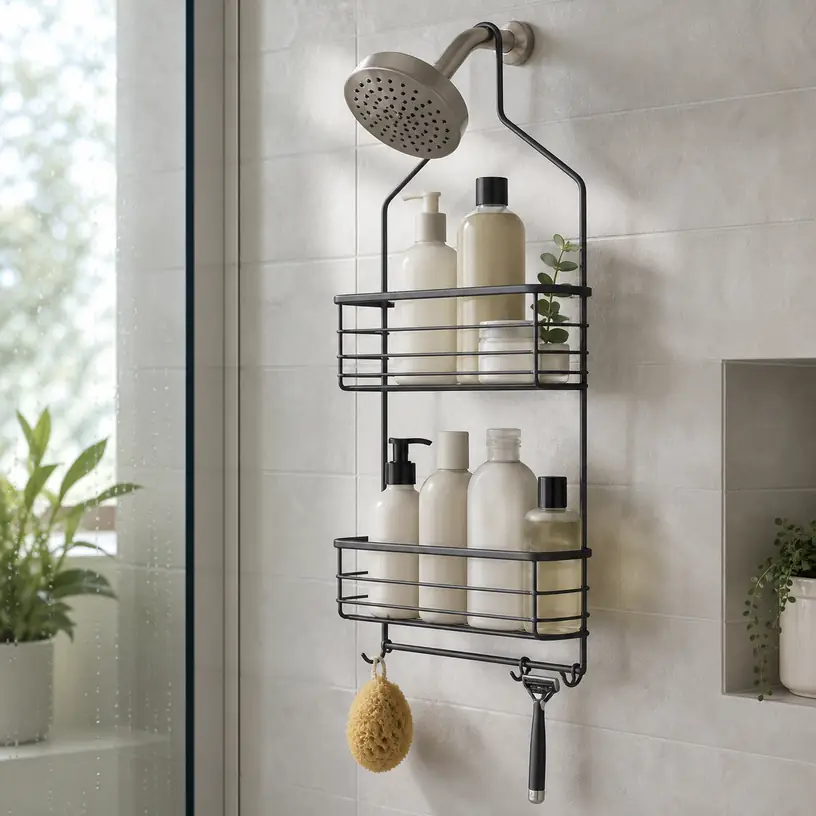
Illustrative image for a shower caddy buying guide

Illustrative image, not an official product photo.

Short answer

A shower caddy is a good upgrade when bottles, razors, soaps, and washcloths keep crowding the tub ledge or shower floor. The right option depends on where it will attach, how much water reaches it, whether your bottles fit upright, and how easily you can clean behind it. Before choosing one, compare the mounting method, surface compatibility, drainage, shelf spacing, stated load guidance, material wording, and whether the layout works for a shared bathroom or a single-user shower.

Search reference

Compare shower caddy options

Use the search page to compare current hanging, corner, adhesive, suction, and tension-pole layouts before matching one to your shower space.

View matching options

Start with the shower, not the shelf

A shower caddy looks simple until it meets a real bathroom. A hanging model may need a shower arm with the right shape and enough wall clearance. Adhesive shelves need a surface that accepts the pad or strip. Suction cups can be convenient, but their usefulness depends on tile texture, grout lines, moisture, and weight. A tension-pole caddy can create vertical storage, but it needs a stable floor-to-ceiling or tub-to-ceiling span.

Look at the wettest area of the shower and the places you actually reach during a routine. If shampoo sits high but razors need to stay dry, one large basket may be less useful than several smaller levels. If multiple people share the bathroom, separate compartments can prevent the caddy from becoming another pile.

Who this is for

  • Renters who want more shower storage without a built-in renovation.
  • Small bathrooms where bottles and soaps have taken over the tub edge.
  • Shared households that need visible, separated storage for everyday products.
  • Guest bathrooms that need a neat place for basic toiletries and washcloths.
  • Buyers replacing a caddy that slips, traps water, stains surfaces, or is too cramped for current bottles.

When another storage plan may work better

A standard shower caddy may not solve the problem if the shower has textured stone, fragile tile, very narrow corners, unusual fixtures, or no good mounting surface. It also may be the wrong fix when you need child-safe storage, a sealed medicine area, a permanent built-in niche, or a place for heavy refill containers that exceed the listed load guidance.

What to verify before buying

  • Identify the mounting style: over-showerhead, over-door, adhesive, suction, corner shelf, freestanding, or tension pole.
  • Measure the available width, depth, vertical clearance, and distance from the shower spray.
  • Check whether the selected option works with your tile, glass, fiberglass, metal, painted surface, or shower door.
  • Compare shelf height and basket depth against the bottles and pump dispensers you use most often.
  • Look for drainage openings, removable trays, or open-wire layouts that reduce standing water.
  • Review the material and finish wording, including any care notes for damp environments.
  • Confirm stated load guidance, included hooks, soap dish placement, razor slots, and assembly or mounting parts.
  • Make sure the caddy leaves room to clean the wall, reach controls, and avoid blocking the shower stream.

Buying notes for wet bathroom storage

Mounting style changes the buying decision more than color or shape. Hanging caddies are easy to understand, but they can swing or slide if the top hook does not match the shower arm. Door-hanging designs can free the wall but may need enough clearance for the door to close properly. Adhesive shelves can look tidy, yet they depend on careful surface prep and the product’s stated installation limits.

Drainage is not just a neatness detail. Shelves that hold puddles can leave soap residue, encourage buildup, and make cleaning more annoying. Open baskets, slotted trays, and removable inserts are easier to evaluate than a smooth solid shelf with no obvious water path.

Bottle size matters because many modern pumps and refill bottles are taller or wider than older bath products. Check the shelf spacing and rail height before assuming a large bottle will stand upright. If several people use the same shower, consider whether the caddy separates tall bottles, smaller tubes, razors, and washcloths instead of mixing everything together.

Material claims should be read carefully. Metal, plastic, bamboo-look, and coated finishes can all work in the right setting, but damp bathrooms are hard on hardware. Rather than relying on a broad durability promise, check the care instructions, finish description, and any notes about ventilation, drying, or surface maintenance.

Limitations

  • Search results can change, so the linked page may show different mounting styles, bundles, or materials over time.
  • Product photos cannot confirm whether adhesive, suction, hooks, or poles will work with your exact bathroom surface.
  • Load guidance, finish performance, and long-term appearance can depend on installation, water exposure, ventilation, and cleaning habits.
  • A caddy can organize products, but it cannot fix poor drainage, loose tile, mildew problems, or unsafe storage habits.
  • Very heavy bottles, family-size refills, and crowded shared showers may require more than one storage solution.

Alternatives to compare

  • Built-in shower niches for a remodel or permanent upgrade.
  • Corner tension-pole organizers when vertical space is available.
  • Over-door shower organizers for stalls with a suitable door or enclosure.
  • Small waterproof bins outside the shower for backup bottles and less-used products.
  • Wall-mounted dispensers if the main goal is reducing bottle clutter rather than adding shelf space.

FAQ

Is a hanging shower caddy better than adhesive shelves?

Neither is automatically better. A hanging caddy can be easier to move, while adhesive shelves can look cleaner when the wall surface and installation instructions are a good match. Choose based on your fixture shape, wall material, bottle weight, and willingness to prep or remove adhesive.

What measurements matter for a shower caddy?

Measure the usable wall or corner area, shelf depth, height between tiers, door clearance if relevant, and the size of your tallest bottles. Also check whether the caddy will block controls, the shower stream, or normal cleaning access.

How can I reduce slipping or rust concerns?

Match the mounting method to the surface, follow the installation directions, avoid overloading the shelves, and choose a layout that drains well. For finish concerns, read the material wording and care instructions instead of assuming every metal or coated caddy performs the same way.

Should I choose a metal or plastic shower caddy?

Metal caddies can feel slim and sturdy, while plastic designs may be easier to rinse and less likely to scratch some surfaces. The better choice depends on drainage, weight, finish care, bottle size, and how damp the shower stays between uses.

Can one caddy work for a shared bathroom?

It can, but check the number of shelves, hooks, and compartments before relying on one organizer for several people. Shared bathrooms often work better with clear zones for tall bottles, small tubes, razors, soaps, and washcloths.

Choosing an Under-Sink Organizer for Awkward Cabinet Storage

Product links are for reference. Verify current details on the retailer page before buying.

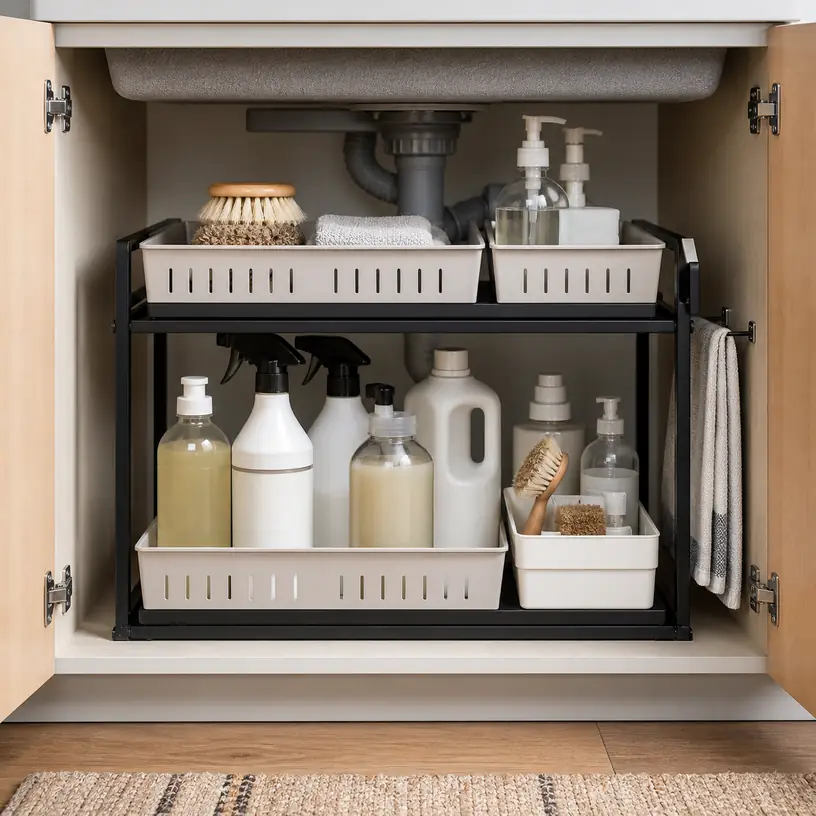
Illustrative image for an under-sink organizer buying guide

Illustrative image, not an official product photo.

Short answer

An under-sink organizer is worth comparing when the cabinet has become a dark pile of cleaners, spare sponges, hair tools, trash bags, or bathroom supplies. The right choice depends less on how tidy it looks in a photo and more on whether it clears the drain pipe, garbage disposal, water lines, cabinet lip, and door hinges while still leaving space to reach shutoff valves and wipe up leaks.

Search reference

Compare under-sink organizer options

Use the search page to compare current shelf layouts, pull-out designs, height clearances, and mounting details before choosing one for your cabinet.

View matching options

Start with the cabinet, not the organizer

Under-sink storage is awkward because the most valuable space is interrupted by plumbing. A rectangular shelf may be perfect for a pantry cabinet but frustrating under a sink if the top tier collides with the drain trap or the sliding basket cannot pass the cabinet face frame.

Before shopping, empty the cabinet and note the usable footprint on each side of the plumbing. Check the width between the side wall and the pipe, the depth from the cabinet front to the back wall, and the height below the drain. Also look at the door opening, because some organizers fit inside the cabinet but cannot slide in through the front.

Kitchen sinks, bathroom vanities, laundry sinks, and utility cabinets can all need different layouts. A kitchen cabinet may need room for a disposal unit and cleaning bottles. A bathroom vanity may need smaller bins for toiletries, hair tools, and backup supplies. Treat the product photo as a layout idea, then match the actual dimensions to your cabinet.

Who this is for

  • Renters and homeowners trying to make daily cleaning supplies easier to reach.
  • Small bathrooms where the vanity cabinet needs to hold toiletries, paper goods, and extra grooming items.
  • Kitchens where bottles, dishwasher pods, trash bags, and scrub tools keep falling into one pile.
  • Shared households that need a clear place for frequently used supplies without remodeling the cabinet.
  • Buyers who want a removable storage upgrade rather than a built-in pull-out system.

Who should skip it

  • Anyone who cannot confirm the cabinet measurements or plumbing clearance before ordering.
  • Cabinets with active leaks, water damage, loose pipes, or electrical work that should be addressed first.
  • Households that need a custom built-in drawer system, child-safety locking plan, or exact match to existing cabinetry.
  • Very shallow vanities where a small open bin may work better than a sliding frame.

What to verify before buying

  • Measure usable width, depth, and height inside the cabinet, including the door opening.
  • Check the location of the drain trap, water lines, disposal unit, shutoff valves, and any filter hardware.
  • Confirm whether the organizer is freestanding, adhesive mounted, screw mounted, or designed to hook over a door.
  • Look at drawer travel and handle placement so the basket can open without hitting hinges or cabinet trim.
  • Review the material wording and care instructions, especially if damp bottles or cleaning sprays will sit on it.
  • Check whether baskets, dividers, hooks, liners, or assembly tools are included in the current option.
  • Make sure the layout still lets you inspect the cabinet floor and reach valves quickly.

Buying notes that matter under a sink

Two broad layouts show up often: open shelves that create vertical levels, and pull-out organizers that bring stored items toward the front. Open shelves can be simple and flexible, but items at the back may still be hard to reach. Pull-out baskets are easier to access, but they need enough clearance to move smoothly.

A narrow organizer can be useful beside a pipe, while a wider frame may work only when the plumbing is centered high enough or shifted to one side. If the product has adjustable shelves, verify the adjustment range rather than assuming it will clear every drain setup.

Material choice is also practical. Plastic baskets can be easy to wipe and may be less likely to scratch bottles. Metal frames can feel sturdy but may need protective coatings and good drying habits in damp cabinets. Wood-look or decorative pieces can be attractive in open vanity spaces, but hidden sink cabinets usually reward easy cleaning over appearance.

Think about what will live in the organizer. Tall spray bottles need vertical room. Shorter baskets work better for sponges, dishwasher tabs, grooming items, and spare soap. If children or pets are in the home, storage location and cabinet safety matter more than squeezing in the maximum number of items.

Limitations

  • Search results may include different cabinet sizes, mounting styles, and bundled accessories over time.
  • A product photo cannot confirm whether the organizer clears your exact drain, disposal, or valve placement.
  • Sliding baskets may feel less useful if the cabinet has a raised front lip or narrow door opening.
  • Adhesive or screw-mounted parts may not be suitable for every rental, cabinet finish, or damp surface.
  • Even a good organizer does not fix leaks, poor ventilation, or unsafe storage of household chemicals.

Alternatives to compare

  • Stackable open bins for shallow vanities or cabinets with low plumbing.
  • Lazy Susan turntables for round bottles in wider cabinets.
  • Door-mounted caddies when the cabinet floor must stay open for pipes or a trash bin.
  • Tension rods for hanging spray bottles if the drain layout leaves enough room.
  • Custom pull-out cabinet hardware when a built-in solution is worth the installation effort.

FAQ

How do I measure for an under-sink organizer?

Empty the cabinet, then measure the usable width, depth, and height around the plumbing rather than the full cabinet box. Include the door opening, front lip, hinges, and any hardware that could block a sliding basket.

Are sliding drawers always better under a sink?

Not always. Sliding drawers make items easier to reach, but they need clearance to open and can be blocked by pipes, trim, or a raised cabinet face. A simple open shelf or bin may work better in tight vanities.

What should I store on the lower level?

Put heavier or leak-prone items lower when the layout allows it, and keep frequently used bottles near the front. Avoid burying shutoff valves or anything you would need to reach quickly during a leak.

Can one organizer work for both kitchen and bathroom cabinets?

Sometimes, but the best layout may differ. Kitchens often need room for taller cleaning bottles and disposal hardware, while bathroom vanities may need smaller compartments for toiletries and grooming supplies.

Is adhesive mounting a good idea in a sink cabinet?

It can be convenient, but check the surface, moisture level, weight expectations, and removal concerns before relying on it. Freestanding organizers are easier to move, while screw-mounted systems may feel more secure when installation is appropriate.

Over-the-Door Shoe Organizers: Who They Fit and What to Check Before Buying

Product links are for reference. Verify current details on the retailer page before buying.

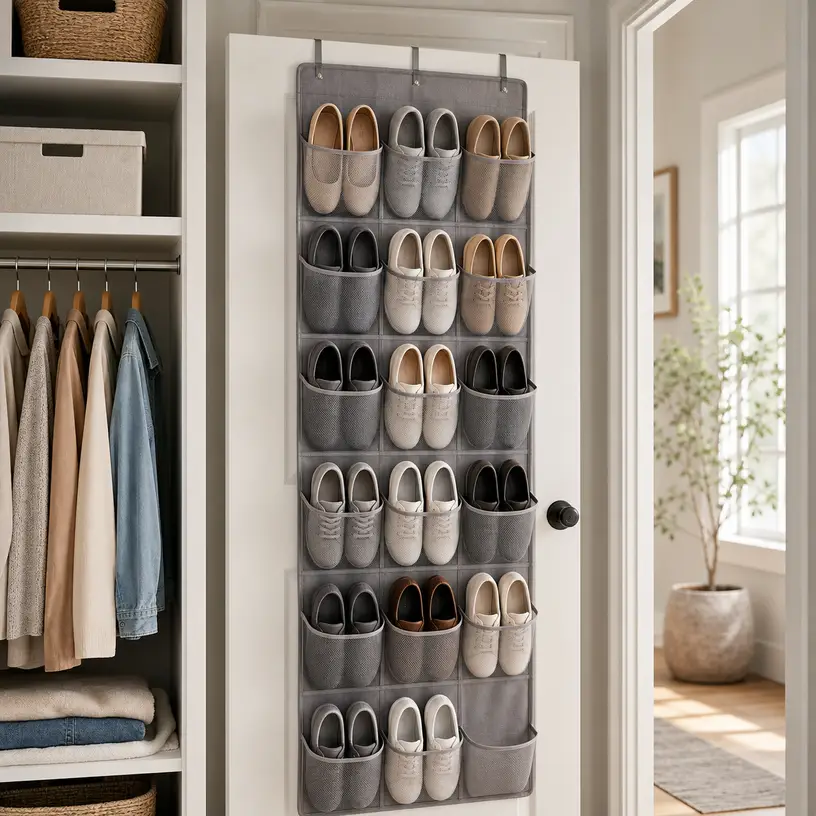
Illustrative image for an over-the-door shoe organizers buying guide

Illustrative image, not an official product photo.

Short answer

Over-the-door shoe organizers fit buyers who need shoe storage without adding a floor rack. Compare door fit, hook thickness, pocket or shelf layout, item capacity wording, material care, door swing clearance, and whether the organizer suits your shoe types before buying.

Search reference

Over-the-door shoe organizer options

Compare current options and verify details on the retailer page before buying.

View matching options

What this product type is

Over-the-door shoe organizers hang from a door to add vertical storage for shoes, sandals, accessories, or small closet items. Current listings vary by pocket count, tier layout, hook thickness, door clearance needs, fabric or mesh wording, weight guidance, and whether the organizer is better for shoes or mixed household storage. The main question is whether the door, closet, and items match the design.
This guide treats the seed listing as a category signal only. Compare current matching options and verify details on the retailer page before buying.

Who this is for

  • Small apartments, dorm rooms, closets, and entry areas with limited floor space.
  • Buyers who want shoes visible and easy to grab.
  • Households organizing sandals, flats, sneakers, or small accessories.
  • Renters who prefer non-permanent storage when door fit allows it.

Who should skip it

  • Choose a floor shoe rack if door clearance is tight or the door must close silently.
  • Skip pocket-style organizers if you mainly store tall boots or bulky shoes.
  • Avoid unclear listings when hook size, door fit, or material care is missing.

What to verify before buying

  • Check door thickness, top clearance, and whether included hooks fit your door.
  • Verify pocket count, shelf layout, and item size guidance.
  • Review material wording, stitching, mesh panels, and cleaning instructions.
  • Check whether the organizer may affect door closing or wall clearance.
  • Confirm whether it suits shoes, accessories, or mixed storage as intended.
  • Review current seller information, warranty terms, and return policy.

Main buying notes

Door fit comes first. Even a useful organizer can become annoying if the hooks scrape the frame or stop the door from closing properly.
Pocket layout should match shoe shape. Slim pockets may suit flats or sandals, while shelves may handle sneakers more comfortably.
Capacity wording should be treated as a rough guide. Bulky shoes can reduce the number of usable slots.
Material and cleaning details matter in entry areas. Verify whether dust, moisture, or scuffs can be managed with the care instructions shown.

Limitations

  • Door hooks may not fit every door or frame clearance.
  • Bulky shoes can reduce usable storage space.
  • A loaded organizer may swing or shift when the door moves.
  • Some designs may be visible from the room side of the door.

Alternatives to compare

  • Freestanding shoe racks for entryways or closets.
  • Under-bed shoe storage for seasonal pairs.
  • Stackable shoe boxes for dust protection.
  • Closet cubbies when permanent shelf storage is preferred.

FAQ

What should I verify before buying an over-the-door shoe organizer?

Verify door thickness, hook fit, pocket or shelf layout, item size guidance, material care, seller information, and return policy.

Can over-the-door shoe organizers hold boots?

Some may hold small or foldable boots, but many are better for flats, sandals, and sneakers. Verify current size guidance before buying.

Will an over-the-door shoe organizer stop my door from closing?

It can if the hooks are too thick or clearance is tight. Check door and frame clearance before buying.

How should I compare pocket and shelf shoe organizers?

Pocket organizers can save space for slim shoes, while shelf-style designs may work better for bulkier pairs. Compare layout with your shoe types.

What alternatives should I compare with over-the-door shoe organizers?

Compare freestanding racks, under-bed storage, stackable boxes, and closet cubbies depending on your space.

Laundry Hampers: Who They Fit and What to Check Before Buying

Product links are for reference. Verify current details on the retailer page before buying.

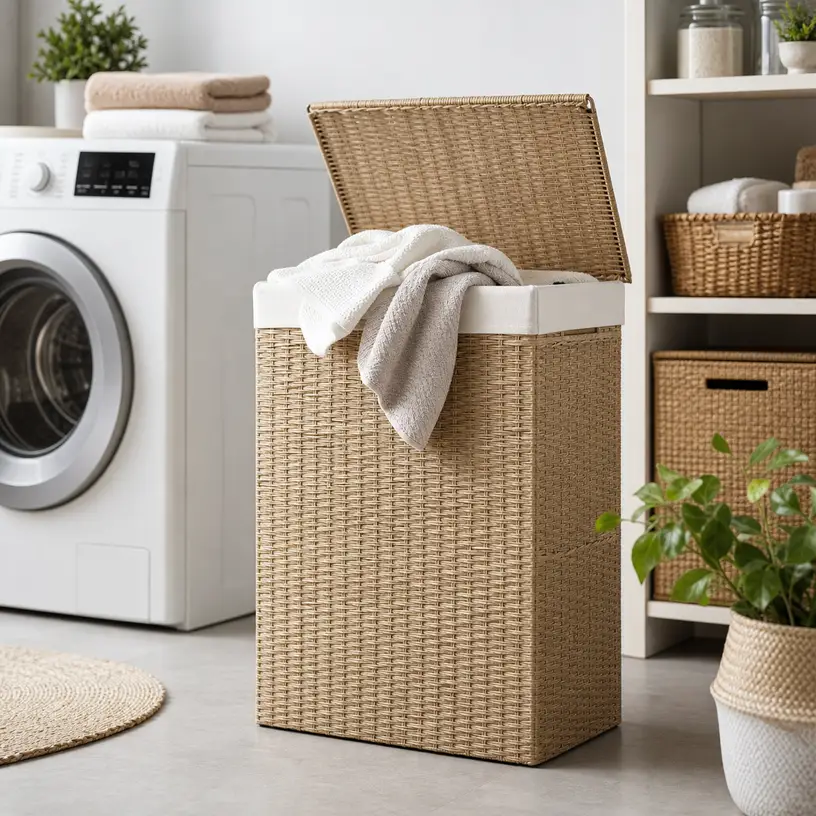
Illustrative image for a laundry hamper buying guide

Illustrative image, not an official product photo.

Short answer

Laundry hampers are useful when you want dirty clothes contained, sorted, and easier to carry. Compare capacity, footprint, handles, liner design, lid style, ventilation, and whether the hamper fits your bedroom, bathroom, dorm, or laundry area.

Search reference

Laundry hamper options

Compare current options and verify details on the retailer page before buying.

View matching options

What this product type is

A laundry hamper is a home storage container for clothing before washing. Options range from soft foldable baskets to structured hampers with lids, removable liners, dividers, wheels, or handles.

This guide treats the seed listing as a category signal only. Compare current matching options and verify details on the retailer page before buying.

Who this is for

  • Bedrooms, bathrooms, dorm rooms, and laundry closets that need cleaner clothing storage.
  • Households that want one container for daily laundry buildup.
  • Buyers who carry laundry between rooms or floors.
  • People comparing lids, liners, and divided sorting options.

Who should skip it

  • Skip large hampers if floor space is tight and a slim basket would fit better.
  • Skip lidded designs if you prefer maximum airflow.
  • Compare rolling carts if you move heavy laundry over longer distances.

What to verify before buying

  • Check capacity, height, width, and whether it fits your target location.
  • Verify handle style, liner attachment, and whether the liner is removable.
  • Compare lid design, opening size, and ventilation.
  • Check whether the hamper folds, stands rigidly, or needs assembly.
  • Review material notes, cleaning guidance, and moisture limitations.
  • Review seller information and return policy before buying.

Main buying notes

Capacity matters, but footprint matters too. A tall hamper may hold a lot while still fitting into a narrow corner.

Handles and liners change daily convenience. If you carry laundry to another room, verify how the load is supported.

Lids can hide clutter, but airflow may be better in open designs. Choose based on where the hamper will sit.

Material choice affects care. Fabric, bamboo, plastic, metal frames, and collapsible panels can behave differently in damp rooms.

Limitations

  • A hamper does not remove moisture or odor by itself.
  • Large soft hampers may lose shape when empty or overloaded.
  • Removable liners and handles can wear differently from the outer frame.
  • Size photos can be misleading, so verify dimensions before buying.

Alternatives to compare

  • Rolling laundry carts for heavier loads.
  • Slim laundry baskets for narrow spaces.
  • Divided sorters for separating clothing types.
  • Mesh laundry bags for dorms, gyms, or shared laundry rooms.

FAQ

What size laundry hamper should I compare?

Compare the capacity and footprint against your laundry volume, room size, and how often you wash clothes.

Is a lid useful on a laundry hamper?

A lid can hide clutter, but open designs may provide more airflow. Choose based on room placement and preference.

Should I choose a removable liner?

A removable liner can make carrying laundry easier, but you should verify how it attaches and how much weight it can handle.

Can a laundry hamper be used in a bathroom?

It can, but verify material notes and moisture guidance if the room gets humid.

What should I verify before buying?

Verify dimensions, capacity, handles, liner design, lid style, ventilation, material notes, and return policy.