Bed Risers for Extra Storage: Measure the Bed Before You Raise It

Product links are for reference. Verify current details on the retailer page before buying.
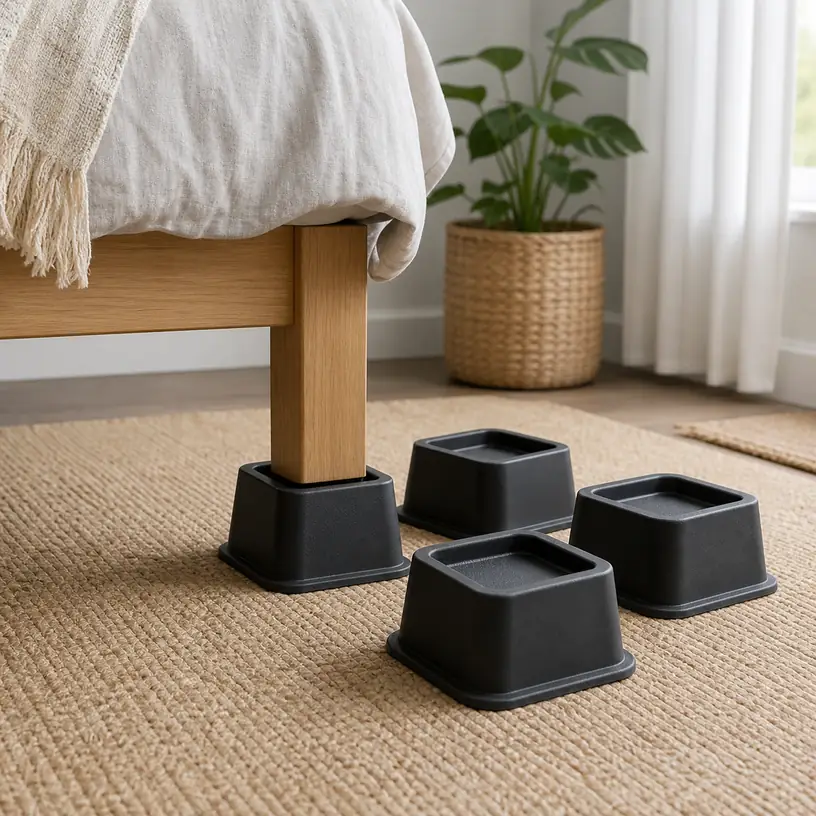
Illustrative image of generic bed riser blocks beside a simple wooden bed leg

Illustrative image, not an official product photo.

Short answer

Start with the bed, not the storage bins. Count every point that actually touches the floor, measure the width and shape of each leg or foot, and note the present floor-to-frame clearance. Choose only enough lift to clear the containers you plan to use, then check the riser’s top recess, base footprint, stated load rating, floor guidance, and compatibility with the complete bed frame. Raising a bed also raises the mattress edge and changes how the frame handles movement, so the lowest suitable height is usually the more practical comparison point.

Search reference

Bed riser options

Compare lift height, recessed top dimensions, number of pieces, base width, load wording, and floor-contact design against your actual bed and storage plan.

View matching options

Map the bed’s support points first

Four risers are enough only for a bed with four load-bearing feet. Many frames have a center rail with one or more legs, extra supports near the headboard, paired feet under a platform, or glides that are easy to miss beneath fabric. Putting risers under the visible corners while leaving a center support on the floor changes the frame geometry instead of raising it evenly.

Inspect the assembled bed from all sides and count every floor contact. If the frame instructions specify center legs, brackets, or required support locations, preserve that arrangement. A set advertised for a four-legged piece of furniture may not contain enough matching pieces for a six- or nine-point bed frame. Mixing heights or improvising a support from unrelated blocks is not a substitute for a complete compatible set.

Measure each contact point rather than assuming they are identical. A wooden bed may have square corner posts and a narrower center leg; a metal frame may end in wheels, broad glides, angled feet, or a combination of shapes. Record the widest dimension at the point that would sit inside the riser. Also note whether a caster can be removed only when the frame maker allows it, because a wheel sitting loosely in a shallow recess can behave differently from a flat leg.

Who this is for

  • Renters and small-bedroom households trying to fit measured storage containers beneath an otherwise compatible freestanding bed.
  • Buyers whose bed has clearly identifiable, accessible support feet that match a riser’s stated top shape and dimensions.
  • People who need a modest increase in clearance and can still get into and out of the raised bed comfortably.
  • Households willing to raise every required support point evenly and inspect the setup after installation.
  • Organizers choosing bins after calculating usable clearance, rather than buying risers and hoping existing containers will fit.

Who should skip it

  • Skip generic risers if the bed or frame instructions prohibit raising, require proprietary supports, or do not confirm compatibility.
  • Do not assume they suit adjustable bases, bunk or loft beds, wall beds, waterbeds, trundle systems, hospital-style beds, or frames attached to another structure.
  • Avoid a riser whose recessed top cannot fully and predictably receive the bed’s legs, feet, or permitted casters.
  • A raised bed may be inconvenient when mattress height already makes sitting, transferring, or changing sheets difficult.
  • If the floor is uneven, damaged, heavily cushioned, or unsuitable under the riser’s instructions, solve the surface issue rather than using the risers as levelers.
  • A bed that is loose, bent, cracked, missing hardware, or unstable should be repaired or replaced before any change in height is considered.

What to verify before buying

  • Support count: Count corner, center, and intermediate legs and make sure the set provides one identical-height riser for every required floor contact.
  • Top fit: Compare the recess length, width or diameter, depth, edge shape, and any anti-slip insert with each bed foot.
  • Lift versus total height: Distinguish added lift from the product’s full outside height, then calculate the new mattress-edge height.
  • Load statement: Read how the current rating is defined and whether it applies per piece or per complete set; account for the bed, foundation, mattress, occupants, bedding, and anything else supported.
  • Base footprint: Check that each riser can sit fully on the floor without touching a baseboard, wall, rug edge, cable, or neighboring furniture.
  • Floor guidance: Confirm approved surfaces and whether a separate floor protector is allowed without changing stability.
  • Frame compatibility: Review the bed maker’s instructions, especially for center supports, removable casters, adjustable components, and headboards.
  • Stacking rules: Never assume risers can be stacked, nested, or combined to create another height unless the exact product instructions permit that configuration.
  • Installation method: Determine how the bed will be lifted and positioned without placing hands or feet beneath it, and arrange enough capable help for the complete setup.

Choose clearance from a real container

The useful number is not simply “six-inch riser” or another headline dimension. Measure the current vertical gap at the lowest point a bin must pass under, which may be the side rail, center rail, slat hardware, or a hanging fabric edge. Add the advertised lift, not the riser’s total height, to estimate the new opening. Then leave handling clearance above the container so it can pass beneath the rail without scraping or requiring the bed to flex.

Container lids, wheels, handles, and bowed contents all affect the height needed in practice. A soft zippered bag may catch on hardware even when its nominal dimensions fit. A rigid bin needs enough room for fingers at the front and enough open floor area to turn as it slides out. Map where center legs divide the under-bed area as well; the total footprint under a queen or king bed is not one uninterrupted rectangle.

The raised mattress height deserves its own calculation. Measure from the floor to the top edge now, add the planned lift, and compare that result with the people who use the bed. More storage is a poor trade if feet no longer reach the floor while sitting at the edge or if regular access requires an improvised step. Thick mattresses, toppers, and foundations can make even a modest riser feel like a large change.

The top recess matters more than the color

Most rigid risers use a recessed cup, channel, or textured platform to locate a furniture foot. That area must be wide enough for the foot to sit as directed but not so mismatched that a narrow leg can slide across a broad, shallow surface. Compare the usable inside dimensions, not just the outside block size shown in a photograph.

Depth also changes fit. A deep cup may help surround a compatible straight leg, yet it can conflict with an angled leg, decorative flare, horizontal frame member, or caster bracket. A shallow top can be easier to place under a broad flat foot but may provide less surrounding edge. There is no universally better shape; the relevant choice is the one documented for the support geometry beneath your bed.

Some sets use separate inserts or removable pads. Confirm whether these pieces are required, how they are oriented, and whether replacements are available. Adhesive grip material and floor pads should not be added casually: extra layers can compress, shift, or change how the riser sits unless the product instructions specifically allow them.

Load wording needs context

Large capacity numbers can be difficult to compare because listings may describe one riser, an entire set, static load, or a test condition that does not match a moving bed. Read the complete current statement and supporting instructions. The relevant load is not just the sleeper’s body weight; it includes the frame, mattress system, occupants, bedding, and any supported accessories.

A load rating does not prove compatibility or stability. A riser can have a substantial stated capacity while its top is the wrong size for a particular leg or its base is poorly placed on the room’s floor. Likewise, a frame still has to follow its own load and support requirements. Treat capacity, fit, support count, and surface conditions as separate checks that all need acceptable answers.

Beds experience movement as people sit down, turn, or get up. Added height can increase leverage at joints and make existing looseness more noticeable. Check frame fasteners according to the bed instructions before installation, and stop if the raised arrangement rocks, shifts, creaks in a new way, or leaves any support unloaded.

Plan installation and future access

Installing risers is not a one-person balancing task for many beds. Remove loose items and under-bed storage, clear a working path, and follow both the bed and riser directions. The goal is to lift and place the frame without anyone reaching beneath an unsupported load. Large frames, heavy mattresses, attached headboards, and tight rooms may require disassembly or professional assistance rather than a quick corner-by-corner lift.

After every support is positioned, inspect from several angles. Each foot should sit in the intended area, every riser base should be flat on the floor, and center supports should carry load as designed. Check clearance around outlets, cords, nightstands, wall trim, and anything attached to the headboard. Raising the bed can change the alignment of bedside furniture and expose gaps that were not present before.

Recheck the setup after initial use and during routine room cleaning, following the maker’s inspection guidance. Look for movement, cracks, deformation, worn pads, loosened frame hardware, or damage to the flooring. Do not drag the bed while it is on risers unless the instructions explicitly describe a safe way to move it; unload and reposition the system as directed instead.

Limitations

  • Risers create vertical clearance but do not remove center legs, low crossbars, or other obstructions beneath the frame.
  • Outside block dimensions do not reveal whether the top recess fits a particular bed foot.
  • A stated load rating cannot compensate for missing supports, an incompatible frame, or an unsuitable floor.
  • More lift raises the mattress, increases the visual height of the bed, and may change access to nightstands or wall-mounted fixtures.
  • Carpet, rugs, floor seams, and uneven boards can keep a wide base from contacting the floor as intended.
  • Under-bed containers still need room to enter, turn, open, and clear dust or floor transitions.
  • Generic risers are not automatically suitable for specialized, attached, stacked, folding, or powered bed systems.

Alternatives to compare

  • Low-profile under-bed bags or shallow rolling bins that fit the bed’s current clearance.
  • A bed frame designed with built-in drawers or documented storage clearance.
  • Vacuum storage bags for appropriate soft goods when reduced volume matters more than quick access.
  • Closet shelf, wardrobe, or over-door storage for items that should not be kept near the floor.
  • A compatible replacement frame with a taller fixed clearance if the current feet cannot safely accept risers.
  • Reducing the amount stored beneath the bed so frequently used items remain easy to reach and inspect.

FAQ

How many bed risers do I need?

You need one compatible riser for every support point the bed requires, not automatically four. Count corner feet, center legs, and any intermediate supports, then confirm that all can be raised evenly without changing the frame’s intended geometry.

How do I know whether a bed leg fits the riser?

Measure the leg or foot at the contact area and compare its shape with the riser’s usable recess length, width or diameter, and depth. Check for flared legs, caster brackets, angled members, or nearby hardware that could prevent the foot from seating as directed.

What height should I choose for under-bed bins?

Measure the present opening at its lowest obstruction, measure the bin including its lid, wheels, and handles, and add working clearance for sliding it in and out. Select the smallest compatible lift that creates that real opening, then calculate whether the new mattress height remains comfortable.

Can bed risers be stacked for more height?

Only when the instructions for that exact product explicitly allow a stated stacked configuration. Do not combine unrelated sets, invert blocks, or improvise extra layers to reach another height.

Do bed risers work on carpet?

Some may be intended for particular carpet types, while others may require a hard, level surface. Check the current floor guidance and base dimensions. The riser must remain flat and stable rather than rocking on padding, a rug edge, or a floor transition.

Can I use bed risers under a frame with wheels?

Do not assume so. Confirm both the frame maker’s guidance and the riser’s permitted foot or caster shapes. A wheel needs a specifically compatible recess or an approved conversion; removing casters or placing them in a generic cup without instructions can change fit and support height.
Choosing a Rolling Utility Cart for Flexible Room-to-Room Storage

Product links are for reference. Verify current details on the retailer page before buying.

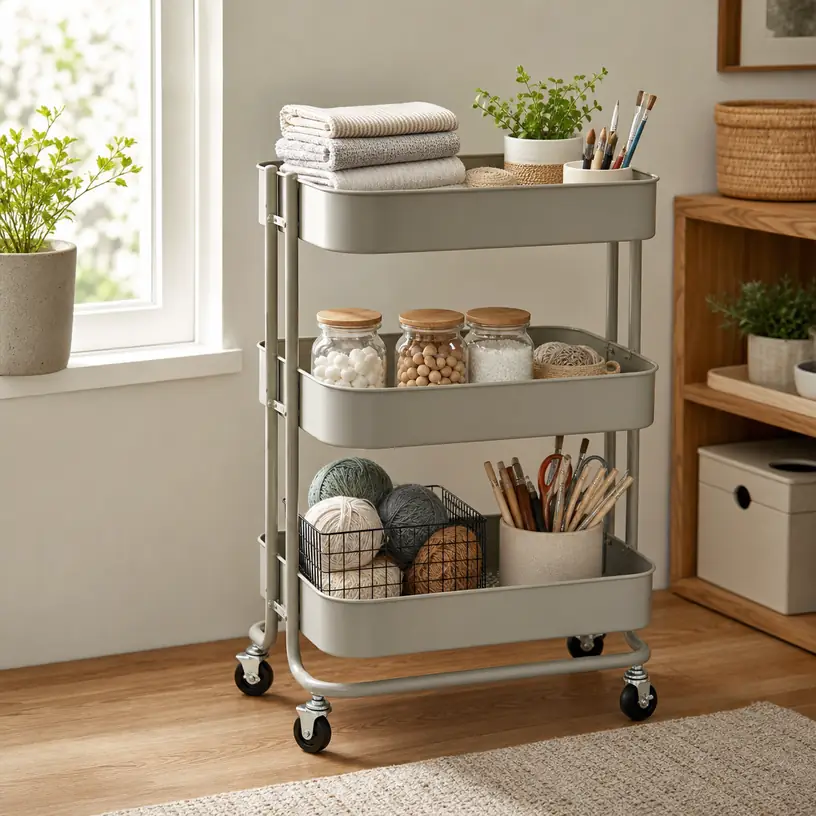
Illustrative image of a generic three-tier rolling utility cart in a home storage area

Illustrative image, not an official product photo.

Short answer

A rolling utility cart is most useful when supplies need a home but not a permanent address. It can follow a craft project to the table, move toiletries out of a shared bathroom, or bring pantry items beside a prep area and roll away afterward. Choose by measuring the cart’s complete footprint—including handles and protruding wheels—then compare usable shelf clearance, caster behavior, load guidance, and whether the frame can pass through the tightest route in your home. A tall cart with tiny wheels is not automatically more useful than a shorter, steadier model with accessible shelves.

Search reference

Rolling utility cart options

Compare the full assembled dimensions, shelf spacing, caster layout, brakes, handles, and stated load guidance for the supplies you plan to move.

View matching options

Plan the route before choosing the cart

A mobile cart should be sized for movement, not just for the empty corner where it will be parked. Measure narrow doorways, gaps beside furniture, counter overhangs, and the turning space near the intended storage spot. Baseboards can make a wall gap narrower near the floor, while an outward-facing handle may add more depth than the shelf dimensions suggest.

Floor transitions matter too. Small hard casters may roll easily across a smooth kitchen floor yet catch at a thick rug edge or raised threshold. If the cart will stay in one room, compact wheels may be sufficient. If it will travel between a pantry, dining area, and home office, wheel size and route clearance deserve as much attention as shelf count.

Who this is for

  • Renters who want extra storage without drilling shelves into a wall.
  • Crafters who need to move current project supplies to and from a worktable.
  • Shared households where bathroom, laundry, or cleaning supplies must be rolled out of the way.
  • Small kitchens that need a movable station for lightweight pantry goods or prep tools.
  • Home offices that need flexible storage for paper, notebooks, cables, and frequently used supplies.

Who should skip it

  • Choose a fixed shelving unit when storage will never move and maximum stability is the priority.
  • Avoid a light utility cart for heavy appliances, large water containers, or other loads outside its stated guidance.
  • Consider a purpose-built tool cart if sharp, oily, or very heavy equipment needs secure transport.
  • A carry basket may be simpler when only a few lightweight items move between rooms.
  • Do not rely on an open cart where children or pets can easily reach unsafe household products.

What to verify before buying

  • Check assembled width, depth, and height rather than relying on shelf dimensions alone.
  • Compare usable clearance between tiers with the tallest bottle, bin, or tool you intend to store.
  • Review the stated total load and per-shelf guidance, including whether weight should be distributed evenly.
  • Confirm the number and type of casters, which wheels lock, and whether replacement casters are discussed.
  • Look for a handle position that works from the side you can reach in the intended parking spot.
  • Verify frame, tray, and fastener material wording along with cleaning and moisture-care instructions.
  • Check whether shelves have solid or ventilated bottoms, raised lips, drainage holes, or removable components.
  • Confirm what assembly is required and which pictured hooks, cups, liners, or bins are actually included.

Shelf layout changes how the cart works

Deep tray lips help contain small bottles and loose supplies while the cart is moving, but they can make a low shelf harder to see and reach. Open wire shelves offer visibility and may let crumbs or water pass through, though narrow items can tip unless a liner or bin is added. Solid shelves are easier to use with small objects, but any spills need to be noticed and cleaned rather than draining away.

Do not count tiers without checking vertical clearance. Three evenly spaced shelves may suit folded cloths and short jars, while a tall spray bottle or roll of paper can require an adjustable shelf or an open top tier. If the cart will change jobs over time, adjustable components can be useful—but only if the adjustment range matches realistic storage setups.

Wheels, brakes, and load placement

A cart feels different once it is filled. Place denser items low and spread weight rather than loading one upper corner. This lowers the center of gravity and can reduce tipping during turns, but it does not override the manufacturer’s load guidance. Side hooks and hanging cups also shift weight beyond the wheelbase, so treat them as storage for light accessories rather than a way to expand capacity indefinitely.

Wheel locks are helpful when the cart becomes a temporary station, but confirm what the lock controls. Some designs stop wheel rotation, some limit swiveling, and product wording may not make the distinction obvious. A brake also cannot compensate for a sloped floor, overloaded frame, or an uneven route.

Match the cart to one primary job

A cart can be repurposed, but choosing one main use prevents a collection of poorly fitting supplies. For a craft cart, check paper dimensions, upright tool storage, and whether small pieces need lidded bins. For bathroom use, think about airflow, splash exposure, and keeping personal items separated. A pantry cart needs clear bottle height and an easy-to-clean shelf surface. An office cart may benefit more from quiet rolling and file-friendly dimensions than deep tray walls.

If the contents should stay hidden, an open utility cart may create more visual clutter than it solves. Matching bins can organize small items, yet bins reduce usable shelf dimensions and add another measurement step. Account for both the outer bin size and the hand space required to lift it out.

Limitations

  • A narrow, tall cart can feel less stable when heavy items are placed on upper tiers.
  • Small casters may struggle on rugs, thresholds, grout lines, or uneven flooring.
  • Open shelves expose contents to dust and do not secure items during abrupt movement.
  • Locks reduce unwanted rolling but do not make a mobile cart equivalent to anchored furniture.
  • Added bins, hooks, and liners can improve organization while reducing clearance or changing weight balance.
  • Moisture resistance, load guidance, replacement parts, and included accessories vary by listing and should be checked before purchase.

Alternatives to compare

  • A fixed bookcase or modular shelf for higher-capacity storage that stays in one place.
  • A lidded storage tote for seasonal items that need dust protection rather than frequent access.
  • A carry caddy for a small group of cleaning, grooming, or craft supplies.
  • A drawer unit when contents should be concealed and separated into shallow categories.
  • A purpose-built kitchen island, tool cart, or laundry sorter when the main job requires a work surface or specialized features.

FAQ

Are three tiers enough for a rolling utility cart?

Three tiers suit many everyday setups, but shelf clearance matters more than the tier count. List the items for each level, measure the tallest one, and make sure your hand can reach it without unloading the shelf above.

Will a rolling utility cart work on carpet?

It may work on low-pile carpet, but small casters generally face more resistance on soft or uneven surfaces. Check the wheel design and intended floor guidance, then consider whether the loaded cart must cross rug edges or thresholds.

Should all the wheels have brakes?

Not necessarily, but you should know how many wheels lock, where they are positioned, and whether you can reach them after parking the cart. The right arrangement depends on how often the cart moves and whether it becomes a stationary work or supply station.

What should go on the bottom shelf?

Place compact, denser supplies low when practical, while staying within the stated shelf and total load guidance. Keep frequently used lightweight items higher, and avoid storing hazardous products where children or pets can reach them.

Can a utility cart be used in a bathroom?

It can hold towels and toiletries, provided its materials and care instructions are suitable for the room’s moisture and splash exposure. Allow wet items to dry, clean spills promptly, and do not assume every metal or composite cart is intended for humid conditions.

Over-the-Door Shoe Organizers: Who They Fit and What to Check Before Buying

Product links are for reference. Verify current details on the retailer page before buying.

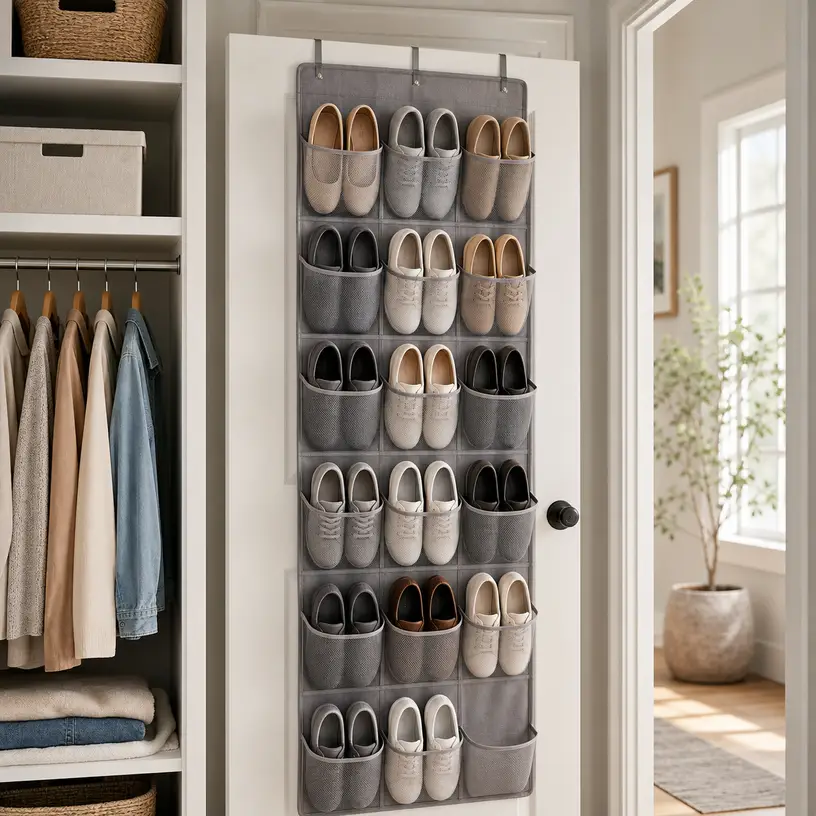
Illustrative image for an over-the-door shoe organizers buying guide

Illustrative image, not an official product photo.

Short answer

Over-the-door shoe organizers fit buyers who need shoe storage without adding a floor rack. Compare door fit, hook thickness, pocket or shelf layout, item capacity wording, material care, door swing clearance, and whether the organizer suits your shoe types before buying.

Search reference

Over-the-door shoe organizer options

Compare current options and verify details on the retailer page before buying.

View matching options

What this product type is

Over-the-door shoe organizers hang from a door to add vertical storage for shoes, sandals, accessories, or small closet items. Current listings vary by pocket count, tier layout, hook thickness, door clearance needs, fabric or mesh wording, weight guidance, and whether the organizer is better for shoes or mixed household storage. The main question is whether the door, closet, and items match the design.
This guide treats the seed listing as a category signal only. Compare current matching options and verify details on the retailer page before buying.

Who this is for

  • Small apartments, dorm rooms, closets, and entry areas with limited floor space.
  • Buyers who want shoes visible and easy to grab.
  • Households organizing sandals, flats, sneakers, or small accessories.
  • Renters who prefer non-permanent storage when door fit allows it.

Who should skip it

  • Choose a floor shoe rack if door clearance is tight or the door must close silently.
  • Skip pocket-style organizers if you mainly store tall boots or bulky shoes.
  • Avoid unclear listings when hook size, door fit, or material care is missing.

What to verify before buying

  • Check door thickness, top clearance, and whether included hooks fit your door.
  • Verify pocket count, shelf layout, and item size guidance.
  • Review material wording, stitching, mesh panels, and cleaning instructions.
  • Check whether the organizer may affect door closing or wall clearance.
  • Confirm whether it suits shoes, accessories, or mixed storage as intended.
  • Review current seller information, warranty terms, and return policy.

Main buying notes

Door fit comes first. Even a useful organizer can become annoying if the hooks scrape the frame or stop the door from closing properly.
Pocket layout should match shoe shape. Slim pockets may suit flats or sandals, while shelves may handle sneakers more comfortably.
Capacity wording should be treated as a rough guide. Bulky shoes can reduce the number of usable slots.
Material and cleaning details matter in entry areas. Verify whether dust, moisture, or scuffs can be managed with the care instructions shown.

Limitations

  • Door hooks may not fit every door or frame clearance.
  • Bulky shoes can reduce usable storage space.
  • A loaded organizer may swing or shift when the door moves.
  • Some designs may be visible from the room side of the door.

Alternatives to compare

  • Freestanding shoe racks for entryways or closets.
  • Under-bed shoe storage for seasonal pairs.
  • Stackable shoe boxes for dust protection.
  • Closet cubbies when permanent shelf storage is preferred.

FAQ

What should I verify before buying an over-the-door shoe organizer?

Verify door thickness, hook fit, pocket or shelf layout, item size guidance, material care, seller information, and return policy.

Can over-the-door shoe organizers hold boots?

Some may hold small or foldable boots, but many are better for flats, sandals, and sneakers. Verify current size guidance before buying.

Will an over-the-door shoe organizer stop my door from closing?

It can if the hooks are too thick or clearance is tight. Check door and frame clearance before buying.

How should I compare pocket and shelf shoe organizers?

Pocket organizers can save space for slim shoes, while shelf-style designs may work better for bulkier pairs. Compare layout with your shoe types.

What alternatives should I compare with over-the-door shoe organizers?

Compare freestanding racks, under-bed storage, stackable boxes, and closet cubbies depending on your space.