A Desktop Calculator for Household Numbers: Display, Keys, and Power

Product links are for reference. Verify current details on the retailer page before buying.
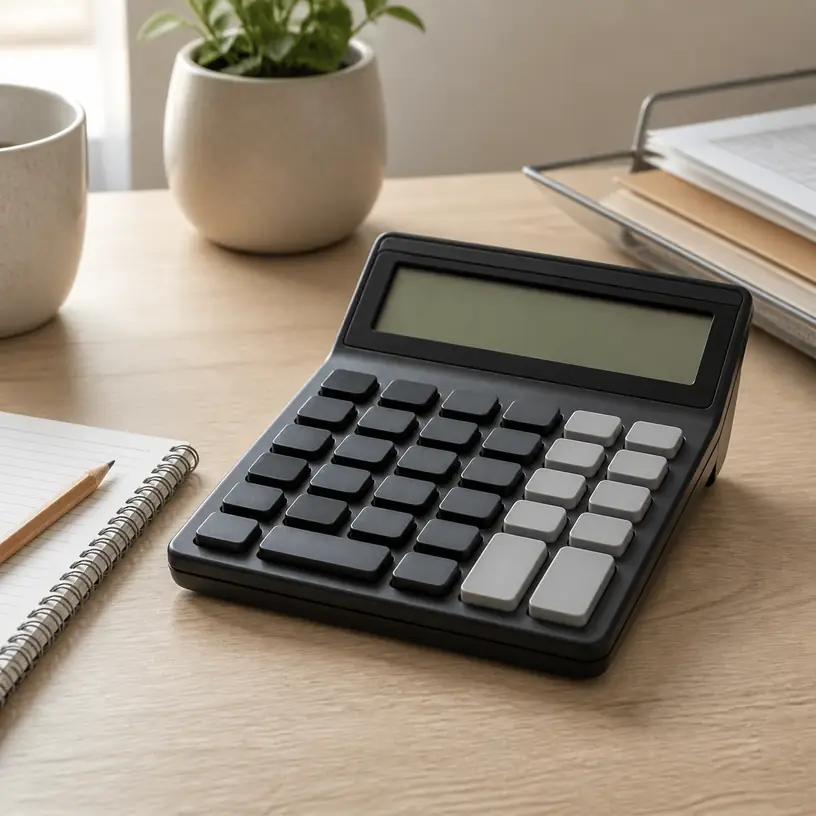
Illustrative image of a generic desktop calculator beside a notebook on a home office desk

Illustrative image, not an official product photo.

Short answer

A desktop calculator earns its space when you can read it at your normal sitting angle, enter figures without watching every keystroke, and recognize each function without decoding a crowded keypad. For household bills, expense logs, order totals, and tax-preparation notes, compare display size and tilt, key spacing, digit capacity, decimal controls, memory behavior, power source, and the calculator’s complete footprint. More functions are not necessarily helpful: a clear arithmetic layout with the few operations you actually use can be faster than a busy model. Check whether an angled display will remain legible under your desk lighting and whether dual-power wording includes a replaceable battery or only supplemental light-powered operation.

Search reference

Desktop calculators for home-office paperwork

Compare display angles, keypad layouts, digit limits, power arrangements, dimensions, and instructions for the calculations you repeat.

View matching options

Let the paperwork define the keypad

Start with the calculations that currently send you to a phone or computer. A monthly household budget may need addition, subtraction, percentages, tax-style adjustments, and a running memory. Reconciling receipts can benefit from a double-zero key, while schoolwork may require functions that an ordinary business calculator does not provide. Write down the operations instead of assuming that a large key count is better.

Layout matters because the same label can appear in different positions across calculators. People who enter long columns by touch often develop habits around zero, decimal, plus, and total keys. Moving between a computer number pad and a calculator can also expose differences in key order. Study a straight-on keypad image and check the manual for unfamiliar symbols before buying. A dedicated backspace or correction key can save a whole entry, but its behavior should be confirmed rather than guessed from an arrow icon.

Key shape changes the experience as much as key size. Wide gaps can help isolate each press, while tall, sculpted caps may guide a fingertip toward the center. Completely flat keys make the surface compact but can be harder to distinguish without looking. If several people will share the calculator, favor labels with strong contrast and conventional terms over niche shortcuts that only one person understands.

Who this is for

  • Households totaling receipts, comparing monthly expenses, checking invoice arithmetic, or planning a simple budget on paper.
  • Home-office users who want a number-entry tool that remains available without opening an app or switching computer windows.
  • Small workspaces where a basic calculator can sit beside a notebook, printer, or filing tray without occupying the main keyboard area.
  • People who prefer physical keys and an always-visible result for short arithmetic sequences.
  • Shared desks that benefit from a straightforward layout and no individual account, setup, or saved document.

Who should skip it

  • Use a spreadsheet when calculations need named categories, formulas across many rows, revisions, charts, or a permanent audit trail.
  • Choose a scientific, graphing, financial, construction, or printing calculator when a course or profession names specific functions and conventions.
  • A handheld model may suit a mobile kit better when every inch of desk depth matters.
  • A phone or computer may be sufficient if arithmetic is rare and adding another battery-powered object would create clutter.
  • Do not rely on a basic desk calculator to preserve important records; copy and verify results in the document where they belong.

What to verify before buying

  • Display: Check the digit count, character height, contrast, viewing angle, and whether tilt is fixed or adjustable.
  • Desk lighting: Confirm how the display behaves in dim rooms, bright window light, and reflections from overhead fixtures.
  • Key map: Locate zero, decimal, arithmetic, percent, memory, clear, correction, and any double-zero or tax keys you expect to use.
  • Decimal behavior: Read how floating and fixed decimal positions, rounding, and add-mode switches operate, if supplied.
  • Entry feedback: Look for stated key style and rollover behavior; do not assume rapid presses will always register in sequence.
  • Digit capacity: Choose enough positions for your realistic totals while remembering that separators and decimals affect readability.
  • Power arrangement: Identify the battery type, battery access, automatic shutoff, and the exact role of any solar cell.
  • Dimensions: Compare width, depth, display height, and storage clearance rather than judging scale from a close product image.
  • Instructions and support: Check whether a readable manual explains memory, percentage, tax, rounding, and error messages.
  • Package contents: Verify whether a battery is installed or included and whether any protective tab must be removed before use.

Read the display from your chair, not from above

A product image photographed directly over the keys says little about real viewing. At a desk, your eyes may be above and behind the keypad, and the display may sit below a lamp or face a bright window. Fixed-angle displays are simple and sturdy, but their usefulness depends on chair height and placement. An adjustable panel offers another way to manage reflections, although it adds a hinge whose permitted range and long-term support are product-specific.

Digit capacity deserves a practical check. A display with many positions can hold larger totals, yet squeezing more characters into a similarly sized window may reduce character width. Comma separators, decimal points, minus signs, memory indicators, and error symbols should remain distinguishable at a glance. If a household member uses reading glasses or has difficulty with low contrast, character height and background contrast are more informative than a vague “large display” claim.

Think about the desk surface too. A dark calculator on a dark desk can make the body edges less visible, and glossy plastic can reflect a lamp. Rubber feet may reduce sliding when they are clean and in full contact, but a very light calculator can still move under energetic key presses. Measure the available area with room for your wrist; the listed dimensions should include the raised display, not just the flat keypad section.

Understand memory, percent, and decimal controls before using the result

Basic arithmetic keys are familiar, but percentage operations are not implemented identically across every sequence or calculator category. A percent key may calculate a percentage of a number, add a markup, or behave according to the preceding operation. Tax keys can store a rate and then apply it through dedicated buttons. Read the model’s examples and test simple figures whose answer you already know before relying on these shortcuts for paperwork.

Memory controls are useful for keeping a subtotal while another figure is calculated. Common labels include memory plus, memory minus, recall, and clear, sometimes combined on one key. The display may show an indicator while a value is stored, but memory retention after automatic shutoff, a manual clear, or battery removal varies. Important figures still need to be written down in the relevant worksheet or file.

A side or rear switch may select floating decimals, a fixed number of decimal places, rounding direction, or an adding-machine style mode. Those settings can silently change how results appear. Check the switch position if a familiar calculation suddenly looks rounded or scaled unexpectedly. For money-related records, decide on the rounding method required by the document or organization rather than assuming the calculator’s default is appropriate.

Error handling is another useful manual check. An overflow result, division by zero, or excessively long entry may trigger an error symbol and require a specific clear sequence. Practice clearing an entry and clearing the complete calculation. A key labeled C, CE, AC, or a combined variant may not erase the same amount of work.

Power claims need a closer reading

A solar panel on the front does not necessarily mean the calculator operates indefinitely without a battery. Many desktop models combine a light-powered cell with a battery, using one or both depending on conditions. The listing or manual should identify the battery chemistry and size, whether it can be replaced, and any lighting requirements. “Dual power” alone does not answer those questions.

Automatic shutoff helps conserve battery life, but the delay and the treatment of memory or settings should be confirmed. If the calculator sleeps midway through transcribing a long statement, check what remains when it wakes. Never open a sealed compartment or attempt a battery replacement that the instructions do not support.

Store the calculator away from spills, heat, and prolonged direct sun unless the maker specifies otherwise. Light-powered operation does not require baking the device on a windowsill. Clean the display and key gaps according to the instructions, without spraying liquid into the keypad. Remove and dispose of a depleted or leaking battery using applicable guidance, and keep loose button cells away from children and pets.

Limitations

  • A desktop calculator shows an answer but does not automatically preserve the reasoning, categories, or source figures behind it.
  • “Large display” and “large keys” are relative descriptions; listed measurements and layout images provide better comparisons.
  • Fast entry can expose missed or doubled keystrokes, especially when key feel and rollover behavior are not documented.
  • Percent, tax, rounding, and memory functions may behave differently from another calculator you already know.
  • Fixed display angles can be difficult to read under glare or from an unusually high or low chair position.
  • Light-powered performance depends on the design and environment; the battery arrangement still requires verification.
  • A basic calculator is not a substitute for specialist functions, recordkeeping software, or a second check on consequential figures.

Alternatives to compare

  • A pocket calculator when drawer space, portability, or a small travel kit matters more than key size.
  • A computer spreadsheet for repeatable formulas, categorized budgets, what-if changes, and a saved calculation history.
  • A phone calculator app for occasional arithmetic when carrying another device would add unnecessary clutter.
  • A printing calculator when a paper tape is useful and its noise, supplies, and larger footprint fit the workspace.
  • A scientific or financial calculator when a class, exam, trade, or financial method requires named functions beyond household arithmetic.
  • An external numeric keypad for entering many figures directly into accounting software or a spreadsheet.

FAQ

How many digits should a desktop calculator display?

Choose enough positions for the largest totals you realistically enter, then compare the actual character size and separators. More digits are useful only if the complete number remains legible and you understand how the calculator signals overflow or rounding.

Is a solar desktop calculator battery-free?

Not necessarily. Many light-powered calculators also contain a battery, and “dual power” can describe different arrangements. Check the current specifications or manual for the battery type, replacement instructions, lighting needs, and automatic-shutoff behavior.

What is the difference between C, CE, and AC keys?

Their exact behavior is model-specific. One may clear only the latest entry, while another clears the current operation or a broader calculation state. Use the manual’s examples and practice with simple numbers before entering a long column.

Do I need tax and percent keys for household budgeting?

They can reduce keystrokes for repeated calculations, but only after you understand the sequence and any stored rate. Ordinary arithmetic is sufficient for many budgets, while a spreadsheet is safer when formulas and assumptions need to remain visible.

Will an angled display always reduce glare?

No. Readability depends on the panel angle, chair height, desk position, window direction, and lighting. An adjustable display offers more positioning options, but the useful range and stability should still be checked.
A Three-Hole Punch for Home Filing: Align the Paper Before You Press

Product links are for reference. Verify current details on the retailer page before buying.

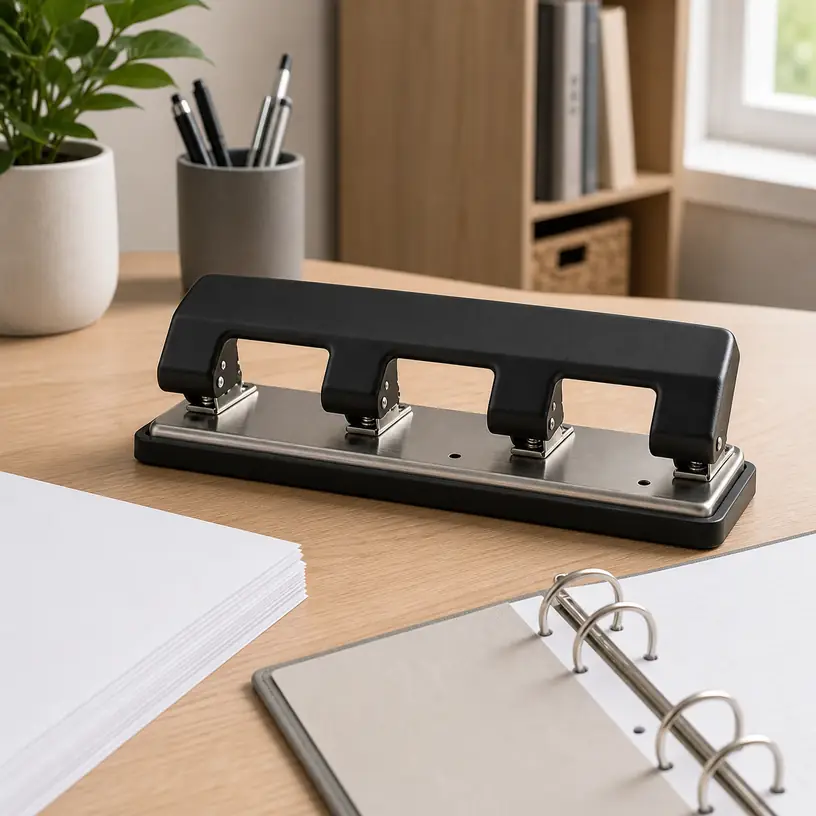
Illustrative image of a generic three-hole paper punch on a home-office desk

Illustrative image, not an official product photo.

Short answer

A useful three-hole punch does more than make three openings. It places those openings consistently so letter-size pages turn without catching in the binder, and it lets you repeat that result without realigning every sheet by eye. Before buying, check the stated hole spacing and intended paper format, then look for an adjustable or clearly defined paper guide, a capacity suited to your usual batches, and a chip tray you can empty without scattering paper dots across the desk. A long handle can improve leverage, but it also changes the storage footprint. If you only file a few pages at a time, reliable alignment and easy cleanup are usually more valuable than a very high capacity.

Search reference

Three-hole punches for binders

Compare hole layout, sheet capacity, guide adjustment, handle clearance, chip-tray access, base grip, and supported replacement parts.

View matching options

Begin with the binder, not the punch

Take one binder and one representative page to the desk before comparing tools. Confirm the paper size, count the rings, and measure the center-to-center spacing between them if the binder format is not clearly identified. A product described simply as a “three-hole punch” may be intended for a familiar office layout, but the name alone does not prove compatibility with every planner, photo album, imported binder, half-size system, or specialty notebook.

For ordinary home filing, also inspect how far the binder rings sit from the page edge and how much margin your documents provide. Punching through printed content is a layout problem rather than a punch-capacity problem. Tax forms, school handouts, recipes, warranties, and downloaded manuals can place text close to the margin. Print a test page with a wider margin or use protective sleeves when the document layout leaves no safe punching area.

Think about the finished stack. Holes that are too close to the edge can tear under repeated page turning; holes placed too far inward can make pages resist the binder cover or obscure more content. The punch’s guide and throat determine this setback. Look for a documented measurement or a guide you can set repeatably, rather than estimating from a product photo.

The paper guide prevents slow drift

A sliding edge guide, fixed fence, or well-marked centering system should put each batch in the same position. Without one, a stack can move sideways as the handle comes down, leaving holes that technically fit the rings but make page edges look uneven. This becomes especially noticeable when pages of identical size are filed together.

Check how the guide locks. A loose slider may creep after several batches, while a stiff guide can be inconvenient when the household alternates between formats. Markings should be readable from the user’s normal position and should refer to paper formats you actually use. If a punch supports several arrangements through adjustable heads, determine whether both the heads and the paper stop can be secured without tools or guesswork.

Run a low-stakes test before punching original records. Fold a scrap sheet in half to identify its center, align it according to the instructions, and compare the punched result with the open binder. Then test a small batch of the same paper used for the real job. Keep that successful sheet as a setup reference if several people share the tool.

Who this is for

  • Households that file statements, warranties, school papers, printed recipes, or reference sheets in standard ring binders.
  • Home-office users who punch small or medium batches often enough that a repeatable paper stop saves time.
  • Students and teachers assembling course notes, provided the punch layout matches the required binder system.
  • Shared workspaces that need a stable punch with a visible chip tray and an easy-to-explain alignment method.
  • Buyers replacing a compact handheld punch that cannot keep multiple holes aligned across full-size pages.

Who should skip it

  • People using disc-bound notebooks, spiral binding, two-ring formats, six-hole planners, or another system that needs a different punch pattern.
  • Anyone who files nearly everything in sheet protectors and rarely needs to punch the original page.
  • Buyers expecting a basic office punch to handle cardboard, plastic sheets, fabric, laminated stacks, or other materials not listed by the maker.
  • Workflows that regularly exceed desktop batch capacity; a heavier-duty or powered system may be more appropriate.
  • Very small desks where a long handle cannot open fully and there is no nearby shelf or drawer large enough for storage.

What to verify before buying

  • Hole pattern: Confirm the number of holes, their center-to-center spacing, diameter, and compatibility with the exact binder and paper format.
  • Edge setback: Check the distance from the paper edge to the holes and whether that distance is fixed or adjustable.
  • Sheet capacity: Match the stated capacity to the paper type and batch size you use, without assuming the maximum is comfortable for every stack.
  • Paper guide: Look for a stop or fence that locks securely and has markings relevant to your documents.
  • Punch-head adjustment: If the heads move, verify the available positions, locking method, setup instructions, and whether unused heads can be removed safely.
  • Handle clearance: Measure the tool with its handle open as well as closed, especially for use under a shelf or storage in a shallow drawer.
  • Base stability: Compare the contact area, non-slip pads, mounting options if any, and the surface where the punch will operate.
  • Chip tray: Determine how its cover opens, whether fullness is visible, and whether the tray can be emptied without turning the entire tool upside down.
  • Jam access: Read the specified procedure for a stuck batch; do not plan to pry near the punch heads with an improvised sharp object.
  • Replaceable parts: For a tool expected to see frequent use, check whether punch heads, cutting discs, pads, guides, or trays are replaceable for that model.
  • Package contents: Confirm that any spare discs, guides, mounting hardware, or replacement heads shown are actually included.

Capacity is a working limit, not a target

Sheet-capacity numbers are useful for comparing products, but paper is not uniform. Heavy presentation stock, folded sheets, coated pages, labels, and mixed stacks behave differently from ordinary printer paper. Even when a batch falls within a stated count, it should enter the throat flat, reach the guide, and remain square as pressure is applied.

For repeat filing, make batches smaller than the stated maximum if that produces cleaner alignment and a more controlled press. Dividing a thick packet into equal groups takes a little longer but reduces the chance that pages fan outward or shift. Reassemble the punched groups against a flat surface before putting them on the rings.

Do not add force by striking the handle, standing on it, or extending it with a pipe. If the handle stops or the paper does not release, follow the maker’s jam procedure. Too much material, an unsuitable material, dull cutting components, or a full chip compartment can all change the feel. Repeated resistance is a reason to inspect the setup, not to press harder.

Handle length changes both effort and placement

A longer handle can provide leverage, which is helpful when punching regular batches. It also sweeps through a larger arc. Under a wall shelf, monitor riser, or low cabinet, the handle may not open far enough to insert paper or clear a jam. Measure vertical and rear clearance at the intended work area rather than using only the closed dimensions.

Some handles lock down for storage. Check how that lock is engaged and released, and keep fingers away from hinges and punch-head areas while operating it. A carrying lock is not necessarily a safety guard, and a closed handle can still move if the product is lifted incorrectly. Store the tool according to its instructions, especially where children use the same room.

The base matters as much as the lever. A narrow or lightweight punch may tilt during an off-center press. Non-slip pads can help on a clean, dry desktop, while a wide metal base may feel steadier but take more drawer space. Products designed for bolting to a work surface introduce mounting requirements; verify the supported method before drilling furniture.

Paper dots need a planned exit

A three-hole punch produces a surprising amount of confetti during a filing session. As the chip compartment fills, waste can crowd the cutting area or spill when the tool moves. A translucent window or tray can make the fill level easier to notice, but only if it remains visible from the normal position.

Look at the tray’s release direction. A bottom panel that depends on gravity can empty quickly into a wastebasket, yet it can also open over the desk if the latch is weak or misunderstood. A removable drawer may offer more control but needs enough side or rear clearance to slide out. Whichever style you choose, empty it before it is packed full and follow the instructions for clearing material around the cutting parts.

Paper chips are small and can spread easily. Empty the tray away from food preparation areas, pets, and young children, then check that the cover is fully seated before the next use. Do not reach into a punch head to retrieve a trapped dot. If the maker allows access to cutting discs or pads, use the documented procedure with the handle secured as directed.

Fixed heads or adjustable heads?

A fixed three-head layout is straightforward when every document goes into the same standard binder. There is less setup to remember, and a fixed paper stop may make repeated letter-size work quick. Its limitation is equally clear: the layout cannot follow you to a planner or nonstandard filing system.

An adjustable-head punch can serve several formats if its frame provides the required positions. Flexibility brings more setup. Each head must be in the correct location and secured before use, and the paper guide must center the selected pattern. Some systems use indexed slots; others require measurements. Verify the supported combinations instead of assuming that movable heads can reproduce any spacing.

If one head is removed for a two-hole pattern, find out where it should be stored and whether the tool is designed to operate that way. Loose cutting parts should not roll around in a desk drawer. For an occasional specialty format, a separate compact punch made for that binder may be less error-prone than reconfiguring the main office tool.

Build a filing setup that protects originals

Keep the punch near a flat sorting area rather than balancing it on top of a binder. Arrange documents in final order, remove staples or clips, square the edges, and check page orientation before making holes. A page punched upside down can still enter the rings but may disrupt double-sided reading or tab placement.

Documents that must remain intact may belong in archival or ordinary sheet protectors appropriate to the filing purpose. Thick sleeves generally require a punch designed for that material, so do not put them through an office punch unless the documentation permits it. Originals such as certificates, receipts on fragile paper, or documents with legal significance may warrant a different storage method.

Keep a small label on the punch or nearby drawer with the successful guide position and supported refill-part identifiers, if applicable. In a shared household, that note is more useful than relying on everyone to remember a number. Periodically inspect the base pads, guide, tray latch, handle lock, and cutting components according to the maker’s maintenance guidance.

Limitations

  • A standard three-hole layout does not match every binder, planner, notebook, or international paper system.
  • Sheet capacity varies in practice with paper thickness, coatings, folds, stack alignment, and cutting-component condition.
  • Long handles improve leverage at the cost of open clearance and storage space.
  • A fixed guide can be quick for one format but unsuitable for another; adjustable guides can move or be set incorrectly.
  • Chip trays reduce mess only when they are checked, emptied, and reattached correctly.
  • Punch heads and cutting pads eventually wear, and replacement parts may be model-specific or unavailable.
  • Holes permanently remove part of the page and may cut into text when the source document has a narrow margin.
  • A paper punch should not be assumed suitable for plastic, cardboard, laminated material, fabric, or metal foil.

Alternatives to compare

A single-hole punch is useful for tags and custom positions but requires manual spacing for binder pages. A two-hole punch matches filing systems designed around two fasteners rather than three rings. A planner-specific punch provides the smaller, more numerous holes used by a named paper format, subject to exact compatibility. Sheet protectors preserve documents without punching the original and can hold pages with narrow margins. Report covers and binding spines keep a project together without a ring-binder pattern. For frequent large jobs, a heavy-duty or powered punch may reduce repetitive effort, but it requires a separate review of capacity, setup, power, guarding, and workspace.

FAQ

Will any three-hole punch fit a standard binder?

Do not rely on the name alone. Confirm the punch’s hole spacing, hole diameter, and edge setback against the exact binder and paper format. Specialty planners, imported binders, photo albums, and compact systems may use different patterns.

How many sheets should I punch at once?

Stay within the current manufacturer’s capacity for the paper type, and use smaller batches when a stack feels difficult to align or press. Heavy, coated, folded, or mixed paper can require fewer sheets than ordinary printer paper. Never add improvised leverage to force a batch through.

Why are my punched pages uneven in the binder?

The paper guide may be loose or incorrectly set, the stack may not be square against the fence, or pages may be shifting as pressure begins. Test the setup on scrap paper, secure the guide, and divide thick packets into smaller, consistently aligned batches.

Can a three-hole punch be used for laminated sheets or plastic sleeves?

Only if the product instructions explicitly list that material and thickness. A basic paper punch can jam or wear prematurely on unsupported material. Using pre-punched sheet protectors is often a simpler way to file an unpunched page.

When should I empty the chip tray?

Empty it before paper dots become tightly packed or begin to spill into the mechanism. The practical interval depends on tray size and use. Follow the tool’s instructions, keep fingers away from cutting parts, and make sure the cover or drawer is fully secured afterward.

Desktop Staplers for a Home Office: Capacity, Reach, and Refill Fit

Product links are for reference. Verify current details on the retailer page before buying.

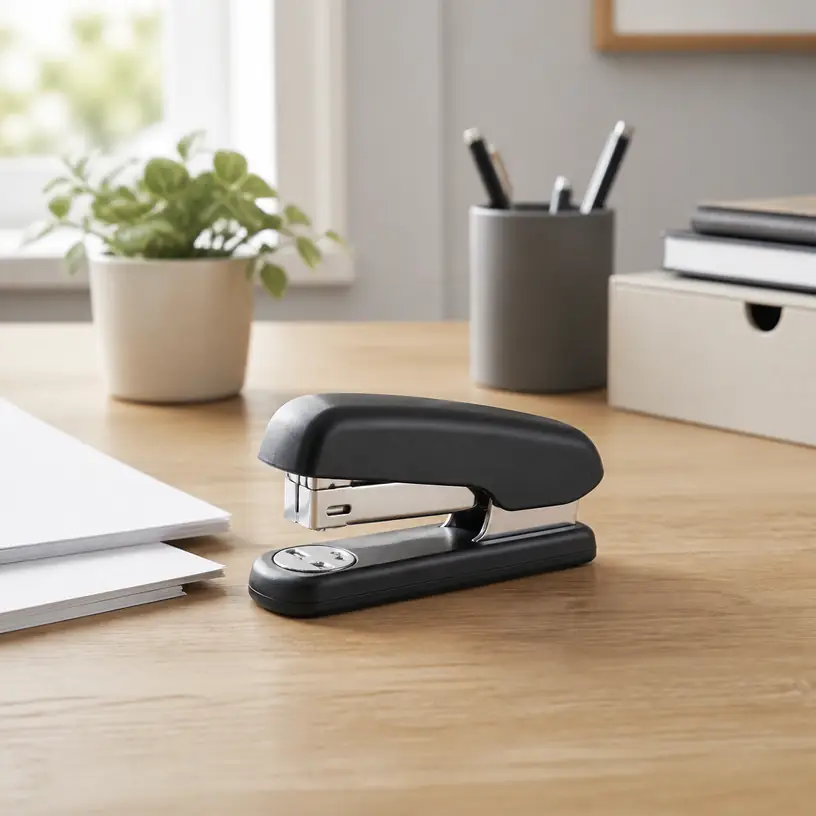
Illustrative image of a generic desktop stapler on a tidy home office desk

Illustrative image, not an official product photo.

Short answer

For occasional forms, school papers, and household records, a compact desktop stapler should be easy to refill, steady under one hand, and compatible with staples you can identify and replace. Do not judge it by appearance alone. Compare the stated sheet capacity with the size of your usual packets, check the exact staple series and leg length, and look at throat depth if the staple must sit farther from an edge. A grippy base, visible refill window, accessible jam path, and comfortable press area can matter more in daily use than a sleek shell. If you regularly bind thick reports, fasten cartons, or tack material to a surface, a standard desk model is probably the wrong mechanism.

Search reference

Desktop stapler options for a home office

Compare refill specifications, practical capacity, reach, loading access, footprint, and jam-clearing instructions for the paperwork you handle.

View matching options

Start with the packets on your desk

A stapler that is comfortable for two receipts and a cover note may not be the right tool for a monthly report. Before comparing products, collect a few representative packets and count the sheets. Note whether they are ordinary printer paper, heavier cover stock, folded documents, or mixed materials. Thickness and stiffness vary, so a sheet-capacity figure is a useful comparison point rather than a guarantee for every stack.

Choose some margin above your normal packet instead of planning to operate at the stated maximum every time. More capacity is not automatically better: a larger mechanism can occupy extra desk space, require a different refill, or feel unnecessarily bulky for light paperwork. The goal is a comfortable match for repeat jobs, with an alternative method available for rare oversized bundles.

Placement matters as well. Most home-office tasks use a staple near a top corner, where a shallow-reach stapler works well. Booklets, folded handouts, and center-line fastening demand a longer reach or a dedicated long-arm design. Measure the distance from the paper edge to the desired staple position. Overall product length does not reveal the usable throat depth, so look for that measurement explicitly.

Staple compatibility is the key specification

Staples that look similar are not necessarily interchangeable. The product information or manual should name the supported staple type, crown format, and leg length. Match that wording when buying refills rather than relying on a picture or a broad phrase such as “standard staples.” Regional naming, wire gauge, strip length, and cartridge systems can differ.

Leg length helps determine how much material a staple can pass through and still fold underneath, but using a longer refill in an incompatible stapler can lead to jams or poor clinching. The stapler mechanism, driver, magazine, and anvil all have to be designed for the refill. If a listing gives several capacities, check which approved staple size corresponds to each one.

A home office also benefits from refills that are easy to source locally or reorder by an unambiguous specification. Proprietary cartridges may offer convenient loading in a compatible tool, while conventional strips can be simpler to find. Either approach can work; the important question is whether you can identify the refill later without guessing.

Who this is for

  • People assembling short reports, forms, receipts, school papers, and household records at a desk.
  • Remote workers who want a dedicated paper fastener that remains ready beside a printer or filing area.
  • Shared study spaces where straightforward loading and clearly labeled refill storage reduce confusion.
  • Buyers replacing a lightweight stapler that slides, tips, or feels uncomfortable during routine jobs.
  • Anyone whose usual staple position is near the paper edge and whose packets stay within standard desktop capacity.

Who should skip it

  • Use a heavy-duty stapler or another binding method for consistently thick packets beyond desktop capacity.
  • Choose a long-arm or booklet stapler when the fastener must reach the center of folded pages.
  • A standard office stapler is not a substitute for a carton stapler, staple gun, upholstery tool, or construction fastener.
  • Consider a staple-free fastener for very small packets if avoiding metal fasteners matters more than holding strength or capacity.
  • A compact model may be unnecessary if almost all documents are stored and shared digitally.

What to verify before buying

  • Supported refills: Record the exact staple series, compatible leg lengths, and any cartridge requirements.
  • Sheet capacity: Compare the stated capacity with your typical paper weight and packet size, leaving useful margin.
  • Throat depth: Check the usable reach from the paper edge to the staple position, not just the stapler’s total length.
  • Loading method: Confirm whether the magazine opens from the top, front, rear, or bottom and how its latch works.
  • Remaining-staple view: Look for a refill window or another way to check the strip before a larger task.
  • Jam access: Find the manufacturer’s clearing instructions and determine whether the magazine can be opened without improvised prying.
  • Base and footprint: Compare desk dimensions, rubber contact points, and whether the base remains stable during a one-handed press.
  • Clinching options: Verify the intended anvil positions and whether temporary pinning or flat opening is actually supported.
  • Package contents: Check whether staples are supplied and, if so, whether they match the refills you intend to keep.

Loading should be obvious before the first jam

Top-loading designs often expose the magazine when the upper arm is lifted. Other models use a spring-loaded channel, rear pusher, or cartridge. None is inherently best for every user, but the sequence should be clear and should not require forcing plastic parts. Look at the manual before purchase if the listing photos do not show how the magazine opens.

A refill window is a small feature with practical value. It lets you see whether enough staples remain before assembling several packets and can reveal whether a strip has shifted. Window visibility depends on where the stapler sits, though; a narrow side opening may be less convenient when the tool is stored tightly between desk accessories.

Jams can happen when a packet is too thick, sheets move during the press, an unsuitable refill is loaded, or a staple becomes distorted in the track. Good access and documented clearing steps make recovery less frustrating. Disconnect nothing and keep fingers away from the driver path; follow the instructions rather than pushing a sharp object into the mechanism. If jams repeat, confirm the refill specification and reduce the packet instead of simply pressing harder.

Press feel, leverage, and desk stability

A broad top pad spreads pressure across the hand. A longer upper arm may provide leverage, but dimensions, hinge position, spring resistance, and mechanism design all influence the actual feel. Marketing phrases about reduced effort are difficult to compare without a consistent test, so focus first on intended capacity and ergonomics that are visible or measurable.

For one-handed use, the base should stay flat instead of skating across a smooth desk. Rubber pads can help, provided they make full contact and remain clean. A weighted metal base may feel planted but adds mass when the stapler lives in a drawer or mobile work kit. Lightweight construction is easier to move, yet the user may need to steady it with the other hand.

Think about hand position too. The press area should be easy to reach without pinching near the hinge, and the tool should return predictably after a stroke. People with limited hand strength may want to compare lever-assisted models, but capacity and refill rules still apply. Product wording alone cannot establish what will feel comfortable for a particular person, so a return policy can be relevant when trying an unfamiliar mechanism.

The anvil changes how the staple closes

The small metal plate beneath the driver is the anvil. Its grooves guide the staple legs after they pass through the paper. Many desktop staplers use a permanent-clinch position that bends the legs inward for ordinary document fastening. Some anvils rotate to a second position that bends the legs differently for temporary pinning. Treat this as a model-specific function and check the instructions before rotating or repositioning anything.

A few staplers open flat for tacking paper to a suitable bulletin surface. A hinge that appears to open does not automatically mean the tool is designed for that use, and a desk stapler should never be treated like a staple gun. Verify the supported mode, keep hands away from the exit point, and consider pushpins or a purpose-built tacker when that is the recurring task.

Flat-clinch mechanisms fold staple legs more closely against the back of a packet, which can reduce the bulge created by stacks of filed documents. That can be useful in dense folders, but it is a specific mechanism rather than a promise that follows from a flat-looking anvil. Check the exact product description and compatible refills if filing thickness is a priority.

Size the stapler to its storage place

A desktop model left beside a printer needs enough clearance to open for refilling without colliding with a shelf. One stored in a drawer needs room for its height and length, and loose items should not press the top accidentally. Measure the intended location and leave space to grip the tool rather than choosing solely from close-cropped product photos.

Refills need a dry, labeled storage spot too. Keeping different staple types in unmarked containers invites mix-ups. Retain the box or label a divided organizer with the exact specification and the stapler it serves. Loose staples can bend or separate, making them harder to load cleanly.

Color and finish may help a shared office return the tool to the right station, but surface treatment does not reveal internal construction. If durability is important, compare the stated mechanism and warranty terms instead of assuming that a metallic exterior means every load-bearing component is metal.

Limitations

  • Stated sheet capacity can vary in practice with paper thickness, coatings, folds, alignment, and staple choice.
  • A standard desktop throat cannot reach the center of most booklets or large sheets.
  • Refill names and sizes are not universal, even when staples appear similar.
  • Small windows may show the remaining strip without making the loading process easier.
  • Rubber feet can collect dust and may grip differently across desk surfaces.
  • A desktop stapler cannot safely replace purpose-built tools for cartons, fabric, wood, or construction work.
  • Stapled packets create metal waste and may need preparation before shredding or other paper processing, depending on the equipment used.

Alternatives to compare

  • A long-arm stapler reaches farther into sheets for booklet folds and custom placement.
  • A heavy-duty stapler handles larger packets when paired with its specified refills and capacity range.
  • A staple-free fastener cuts and folds a small tab in a limited number of sheets, avoiding refill storage.
  • Binder clips hold papers without puncturing them and can be removed repeatedly, though they add edge bulk.
  • Report covers or binding systems may suit documents that need frequent page turning or a more formal presentation.
  • A purpose-built tacker or staple gun is the appropriate category for supported fastening to surfaces; it requires its own safety and material checks.

FAQ

What size staples does a desktop stapler use?

There is no single refill that fits every desktop stapler. Check the supported staple series and leg length in the product information or manual, then match that exact specification when ordering refills.

How much extra sheet capacity should I allow?

Choose capacity above the packets you handle regularly rather than treating the stated maximum as your routine target. The useful margin depends on paper thickness, folds, and the approved staple, so count representative packets and compare them with the manufacturer’s guidance.

Why does my stapler keep jamming?

Common causes include an overloaded packet, sheets shifting during the press, damaged or incompatible staples, and a strip that is not seated correctly. Follow the model’s clearing instructions, confirm the refill specification, and reduce the packet if jams recur.

Do I need a long-arm stapler for booklets?

Usually, if the staple must reach a center fold that lies beyond a standard desktop throat. Measure from the sheet edge to the intended fastening line and compare that distance with the listed throat depth of a long-arm or booklet model.

Can a desktop stapler be opened for tacking?

Some models are designed to open flat, but others are not. Verify that function in the current instructions and use the tool only on an appropriate surface. For recurring surface fastening, compare a purpose-built tacker rather than assuming a desk stapler is suitable.