Magnetic Parts Trays: A Small Upgrade for Less Chaotic Repairs
Product links are for reference. Verify current details on the retailer page before buying.
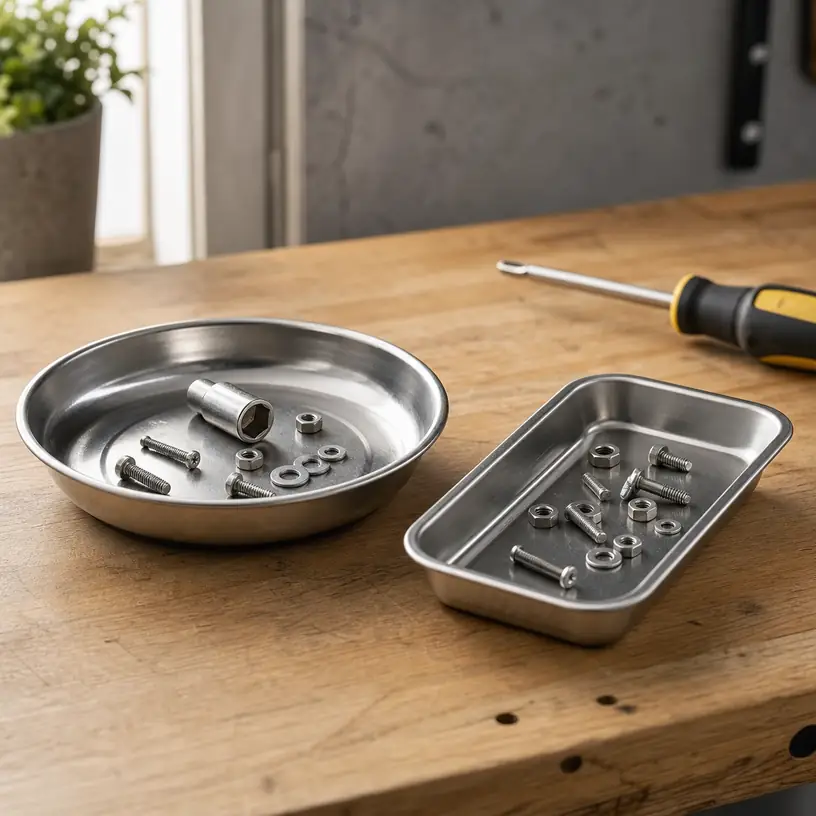
Illustrative image, not an official product photo.
Short answer
A magnetic parts tray earns its bench space when it keeps ferrous screws, nuts, washers, clips, and sockets together through the messy middle of a repair. The useful choice is not automatically the strongest or largest tray. Start with the jobs you actually do, estimate how many separate fastener groups must stay identifiable, and decide whether the tray will sit on a bench, attach to a steel surface, or travel beside a tool bag. Then compare usable interior area, rim height, base protection, carrying grip, and access for gloved fingers. Remember that magnets do not hold every metal and can affect nearby items, so the tray complements—not replaces—labeled containers and a deliberate parts-counting routine.
Search reference
Magnetic parts tray options
Compare round bowls, shallow rectangular trays, and divided layouts by the fasteners you handle, where the base will rest, and whether separate assemblies must remain sorted.
View matching optionsThink in repair stages, not just tray diameter
Disassembly creates a sequence. A cover comes off, then a bracket, then perhaps a component with different screw lengths. Dropping everything into one wide bowl prevents parts from rolling away, but it can also erase that sequence. Before shopping, picture a typical repair from first fastener to final reassembly. If each stage uses interchangeable hardware, one open tray may be enough. If positions or lengths matter, multiple small trays, a divided layout, or a separate labeled organizer is the safer workflow.
Capacity descriptions can be abstract, so make a quick paper outline using the listed exterior dimensions. Put the actual driver handle, socket, and a representative handful of loose hardware inside that outline. This exposes two common mismatches: a compact tray that becomes crowded as soon as a socket enters it, and an oversized tray whose center is awkward to reach from the working position. The goal is a visible, accessible landing area rather than maximum volume.
A high rim helps contain loose pieces when the tray is carried or bumped, but it can make tiny washers harder to pinch—especially with gloves. A shallow lip improves access yet offers less mechanical containment for items that the magnet does not attract. Check the interior transition between floor and wall as well. Smooth curves are easier to sweep clean and retrieve parts from than tight corners or decorative grooves.
Who this is for
- Home mechanics who want a temporary landing place for ferrous fasteners during bicycle, lawn-equipment, appliance, or vehicle work.
- Furniture assemblers and DIY repairers who regularly move between a tool bag and a metal work surface.
- People who dismantle small assemblies and need loose hardware visible rather than buried in a pocket or mixed into a toolbox drawer.
- Workshop users who already label complex parts but want a convenient catch tray at the active work area.
- Anyone replacing an improvised cup that tips easily or hides small hardware at the bottom.
Who should skip it
- Anyone expecting the tray to hold aluminum, brass, many stainless formulations, plastic clips, rubber pieces, or other non-ferrous parts without another containment method.
- Electronics work where magnets are discouraged by the equipment or component manufacturer, or where small sensitive media and instruments share the bench.
- Repairs that require strict position tracking; a parts map, compartment box, labeled bags, or documented organizer is better than one mixed tray.
- Jobs around exposed moving machinery, live electrical equipment, delicate finishes, or contamination-controlled areas where a loose magnetic accessory is inappropriate.
- Users who need sealed transport. An open tray is not a substitute for a lidded small-parts case.
What to verify before buying
- Usable interior dimensions: Compare the flat or gently curved holding area, not only the widest outside measurement.
- Tray depth and rim shape: Check whether small washers remain reachable and whether loose non-magnetic pieces have enough physical containment.
- Magnet arrangement: Determine where the magnetic zones are, whether they act through the base, and how the seller describes holding orientation and limits.
- Base covering: Verify whether the contact surface is exposed, coated, or protected by a removable boot, and whether it suits the surfaces you plan to use.
- Work-surface compatibility: Confirm that the intended mounting point is actually ferromagnetic, sufficiently flat, clean, and permitted to contact a magnetic accessory.
- Hardware compatibility: Test or confirm the material of critical fasteners; appearance alone does not prove that a magnet will attract them.
- Carrying method: Look for an accessible rim, handle, or stable grip that does not require lifting the tray by loose hardware.
- Set layout: Check whether a multipack contains different sizes, repeated sizes, dividers, lids, or only open trays.
- Cleaning guidance: Verify how the tray, coating, and protective base should be cleaned after exposure to oil, dust, chips, or moisture.
- Nearby equipment: Follow manufacturer guidance for tools, electronics, storage media, instruments, and implanted medical devices that may require distance from magnets.
Where will the tray actually stay?
On a horizontal bench
A tray resting flat on a workbench relies on its footprint and rim as well as magnetic attraction. This is the least demanding placement and may suit users who simply want fasteners to stop rolling. Measure the available patch beside the repair, including room for your forearm and the tool currently in use. A broad tray that forces you to reach across the work can be less convenient than two small trays placed at separate stages.
If the bench has a finished, painted, laminated, or otherwise delicate surface, do not assume a rubber-like base eliminates every mark. Fine metal debris caught underneath can scratch when the tray slides. Lift rather than drag it, keep the underside clean, and follow the surface owner’s care guidance.
On a vertical steel surface
Side placement can free bench area and keep parts close to a lift, cabinet, cart, or machine enclosure. It also asks more of the magnetic interface. The tray’s own weight, the load, vibration, surface curvature, paint, dirt, and any base covering can all change how securely it stays. Marketing language or a nominal force figure does not reproduce the exact installation.
Use only a location where a dropped part or tray cannot enter moving equipment, damage a vehicle, strike someone, or become an electrical hazard. Start with an empty tray, place it as directed, add a small representative load, and observe it before trusting the setup. Never use attachment as a reason to work beneath an unstable tray or to ignore the equipment manufacturer’s rules.
Traveling with a tool kit
Open trays are convenient at the job but poor containers between jobs. Even if hardware is attracted to the base, a jolt can rearrange it, non-ferrous pieces can escape, and metal parts can contact other tools. Carry the tray empty unless the product is specifically designed and verified for loaded transport. Put removed fasteners into labeled bags or a closed organizer before leaving the work area.
Nested trays can save storage room, but confirm whether their protective bases and rims are intended to nest. Strong magnetic attraction between stacked pieces can make separation awkward. A finger gap or accessible edge is more useful than a compact stack that demands prying with a screwdriver.
Treat the magnet as backup, not inventory control
A magnetic tray reduces rolling and casual displacement; it does not know which bolt came from which hole. Photograph the assembly before removal, place unique hardware in a distinct compartment or labeled container, and count parts when the repair instructions call for it. Keeping left-side and right-side components apart can be as simple as using two trays of different shapes, but the distinction must remain obvious throughout the job.
Magnetic response varies by material and geometry. A ferrous screw may hold readily while a thick socket takes more contact area and a small clip sits near the edge. Oil, filings, paint, a protective boot, and an uneven mounting surface can alter practical grip. Verify with the actual parts in a safe position instead of inferring performance from color or weight.
The tray can also collect steel dust and sharp swarf. Those particles migrate to the strongest magnetic areas and may be difficult to see against a dark liner. Avoid wiping the loaded surface with a bare hand. Remove debris using an appropriate method, wear protection suitable for the work, and inspect both sides before setting the tray on a finished surface.
A simple first-use routine
- Unpack the tray away from magnet-sensitive items and inspect it for loose coverings, sharp edges, dents, or shipping debris.
- Clean and dry the intended contact area according to the surface guidance.
- Try several representative fasteners in the tray and include any non-ferrous pieces that will depend on the rim alone.
- Test the intended placement while the machinery or equipment is safely out of operation.
- Move and lift the tray using its designed grip rather than pulling on a fastener or sliding the base.
- During the first repair, keep unique hardware separately labeled until the workflow proves clear.
- Empty and inspect the tray after use, removing metal chips before storage.
This short rehearsal reveals whether the tray is too deep for small washers, too crowded for gloved access, or too difficult to detach from the chosen surface. It also establishes a storage place so a strong magnet is not left loose in a drawer beside items that require separation.
Limitations
- Magnetic attraction is limited to compatible materials and varies with contact, coating, load shape, orientation, and surface conditions.
- An open tray cannot preserve assembly order unless the user creates a separate labeling or compartment system.
- Stronger attachment can mean more effort to reposition or remove the tray without sliding it.
- Metal chips can gather around magnetic zones and may scratch surfaces, contaminate parts, or injure unprotected fingers.
- A tray mounted vertically can still slip, rotate, detach, or spill non-magnetic contents.
- Shallow trays favor access but offer less physical containment; deep bowls contain better but can hide or crowd tiny parts.
- Magnets may be unsuitable near some equipment, instruments, storage media, or medical devices; applicable manufacturer guidance takes priority.
- The tray does not make an unsafe work location, unstable vehicle, live circuit, or moving machine suitable for repairs.
Alternatives to compare
A divided plastic parts box keeps several hardware groups separate and usually adds a lid for transport, though it may be slower to access during active work. Labeled resealable bags are inexpensive and useful when sequence or location matters more than instant retrieval. A silicone work mat with molded compartments can organize both magnetic and non-magnetic pieces on a horizontal surface. A foam or cardboard parts map lets you place each fastener near a marked location, which is valuable when lengths differ. For recurring assemblies, a dedicated organizer with permanent labels provides more reliable inventory control than any catch tray.
FAQ
Will a magnetic parts tray hold stainless steel screws?
Some stainless steels respond to magnets and others respond weakly or not at all, so the material name alone is not enough. Check the fastener specification when available and test a representative screw safely. The tray’s rim or a separate compartment must contain anything that is not securely attracted.
Can I attach a magnetic tray to a vehicle body panel?
Only after confirming that the specific location is a suitable ferromagnetic surface and that contact is permitted. Paint, curvature, protective layers, trapped grit, load, and vibration can affect grip or finish. Prefer a stable, low-risk location, keep the base clean, lift rather than slide, and never place it where a fall could cause injury or mechanical damage.
Is one large tray better than several small trays?
A large tray offers room for bulky sockets and a broad collection, but several small trays can preserve repair stages and fit closer to the work. Choose according to the number of distinct hardware groups, available surface area, glove access, and how the trays will be carried and stored.
How should metal shavings be removed from the tray?
Follow the product’s cleaning directions and use protection appropriate to the work. Do not sweep sharp swarf away with bare fingers. Empty ordinary parts first, remove collected particles with a suitable shop method, then inspect and clean the underside so debris is not transferred to a finished surface.
Can a magnetic parts tray be used around electronics?
Do not assume it is harmless around every device. Equipment, components, storage media, instruments, and medical devices can have specific separation guidance. Check the relevant manufacturer instructions and choose a non-magnetic divided container whenever compatibility is uncertain.