Repot Houseplants Without Spreading Soil: How to Size an Indoor Potting Mat
Product links are for reference. Verify current details on the retailer page before buying.
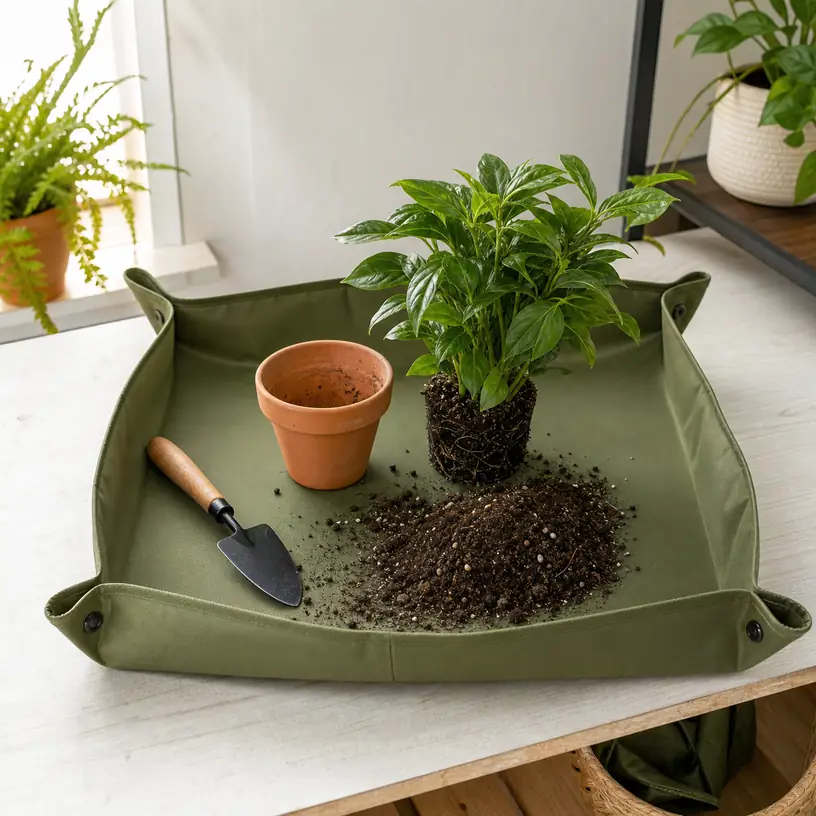
Illustrative image, not an official product photo.
Short answer
An indoor plant repotting mat creates a temporary work zone for loose potting mix, fallen leaves, and empty nursery pots, but the useful size is determined by movement rather than pot diameter alone. The mat should hold the plant, the new container, a scoop, and a small supply of mix while leaving room to lift the root ball and turn the pot without working over an edge. Raised corners can keep dry material from scattering during a modest houseplant job; they do not automatically make the mat leakproof or suitable for heavy planters. Before choosing, compare the assembled working area, wall height, closure placement, surface texture, cleaning directions, drying needs, and folded storage size. Measure the available table or floor first, then plan where a filled pot will move when the job is finished.
Search reference
Indoor plant repotting mat options
Compare usable work area, corner construction, cleanup method, and folded storage size against the plants and workspace you already have.
View matching optionsMap the whole repotting motion
Product dimensions often describe a mat laid completely flat. Once the corners are fastened, part of that width becomes the upright wall, and the usable floor area shrinks. A plant that appears to fit by pot diameter can still feel cramped when its leaves extend beyond the container or when the root ball must be set down beside the replacement pot.
Rehearse the job with newspaper or a folded sheet cut to the listed size. Place the current pot, proposed new pot, scoop, pruners if needed, and a bowl or bag of potting mix inside the outline. Then mimic the motions of tipping the old pot, supporting the plant, adding mix, rotating the container, and brushing the rim clean. Keep fragile foliage and trailing stems in mind; they need clearance even though they add little to the pot’s footprint.
The exit path matters too. A full planter may be awkward to lift over a raised wall without tipping it. Decide whether you will unfasten one corner, lower a side, or simply lift the finished pot straight up. Check that this motion does not pull the mat, knock over tools, or require carrying a wet, heavy container across an unstable table.
For a single small houseplant, a compact mat can keep the task contained and fold into a drawer. Repotting several plants in one session calls for more than a larger rectangle: you need a clean zone for supplies, a soil zone, and a place for emptied nursery pots. One large mat may provide that separation, but two smaller work surfaces can be easier to clear and reset between plants.
Who this is for
- Apartment and condo residents who repot small or medium houseplants without a permanent potting bench.
- Houseplant owners who want a defined cleanup zone on a table, utility counter, balcony, or suitable floor area.
- People handling modest amounts of dry or lightly damp potting mix and looking to funnel reusable material back into a container.
- Renters who prefer a removable work surface rather than a fixed gardening station.
- Anyone who will clean and dry the mat after use instead of folding it away with soil and moisture trapped inside.
Who should skip it
- Skip a lightweight mat for very large, top-heavy, or difficult-to-lift planters that need a stable floor, another person, a trolley, or a dedicated work area.
- Do not rely on a generic mat as the only protection for delicate wood, carpet, porous stone, or any surface that can be damaged by grit, moisture, fertilizer, or staining.
- Large batches of outdoor plants, vigorous root work, and bulk soil mixing are usually better handled on a potting bench, in a tray, or in an appropriate outdoor area.
- A flat mat is not a substitute for a rigid basin when you expect runoff, standing water, or a container to drain during the job.
- Anyone with plant, soil, pest, or disease concerns that require isolation and sanitation should follow the applicable plant-care guidance rather than treating one reusable mat as a universal clean surface.
What to verify before buying
- Assembled work area: Distinguish the fully flat dimensions from the interior floor space remaining after the corners or sides are raised.
- Wall height: Check whether the edge is high enough to interrupt loose soil yet low enough to reach over and remove the finished pot safely.
- Corner closures: Verify the number and placement of snaps, tabs, hooks, or other fasteners, and whether one side can be opened without collapsing the entire setup.
- Surface behavior: Look for a texture that permits controlled scooping and wiping without making the pot or tools slide too easily.
- Construction details: Confirm current material, coating, seams, edge finish, and any limitations involving water, sunlight, heat, cleaning products, or sharp tools.
- Cleanup method: Check whether the mat should be shaken, wiped, hand-washed, rinsed, or treated another way, and where that cleanup can be done without sending soil into a drain.
- Drying instructions: Determine whether the mat must be hung or laid flat and how much space it needs before it can be folded.
- Storage size: Compare folded dimensions and closure bulk with the drawer, bin, hook, or shelf where it will actually live.
- Pot and tool load: Verify any weight or use limits and do not assume a flexible sheet is designed to carry a planted pot like a sling.
- Included pieces: Check whether the listing includes only the mat or also shows a scoop, gloves, ties, kneeling pad, or storage pouch that may be sold separately.
Raised corners help with soil, not every spill
The main advantage of a repotting mat over an ordinary flat sheet is its temporary perimeter. When the edges are assembled correctly, they can redirect rolling particles and give you a place to sweep scattered mix inward. This is especially useful with dry bark, perlite-like particles, and crumbs that would otherwise reach the floor whenever the pot is turned.
Containment depends on the details. Soil can lodge beneath overlapping corner flaps, escape through gaps near fasteners, or bounce over a low wall when poured from too high. A tall wall contains more but may press against foliage or complicate lifting. Closures positioned at the very corner can create a cleaner interior, while closures farther inward may leave tails or folds that collect material. Listing photos should show the mat both flat and assembled; verify the actual layout for the selected size.
Water is a different problem. A surface described as water resistant may slow a small splash without safely holding standing liquid, and seams or fastener points may still allow moisture through. Water can also carry fine soil under the mat, where it is easy to miss. Keep the plant’s drainage saucer nearby, avoid watering heavily over the mat, and inspect the supporting surface as soon as the job ends. Follow the mat maker’s stated limits rather than inferring leak protection from a glossy finish.
If you work on a table, leave a margin around the mat instead of aligning it with the edge. A trowel handle, trailing stem, or corner flap can extend beyond the printed dimensions. On the floor, choose a stable area outside the normal walking path and avoid creating curled edges that someone can catch with a foot. A mat defines the messy zone; it does not remove the need for a stable, comfortable working position.
Think about the surface underneath
Loose potting mix is abrasive enough to matter on some finishes. Particles trapped beneath the mat can scratch when a loaded pot is rotated or when the whole setup shifts. Clean the table or floor before unfolding the mat, inspect its underside, and lift rather than drag planted containers. If the underlying surface requires special protection, use an appropriate rigid or absorbent layer recommended for that surface instead of assuming the repotting mat covers every risk.
Carpet presents a different challenge. A flexible mat can follow the pile, leaving the pot less stable and the edges harder to assemble. Soil that escapes at a corner can work below the fibers before it is noticed. A smooth, level, cleanable work surface is easier to manage. If no such indoor surface is available, compare a rigid tray or wait for a suitable outdoor workspace rather than balancing a heavy pot on a soft floor.
Also consider height. Floor-level work provides room for foliage but can strain knees and backs, while a counter brings the pot closer but may not offer safe clearance for lifting. A table should support the complete load and remain stable while you loosen the root ball. Do not place gardening materials on a food-preparation surface unless that use and the subsequent cleaning method are appropriate for the surface and household.
A less chaotic setup for one plant
- Measure the open mat and fasten its corners according to the instructions before bringing soil into the area.
- Put the supporting surface on stable footing, then place the replacement pot, tools, and a modest quantity of mix within easy reach.
- Keep a separate container ready for damaged leaves, old soil that will not be reused, labels, and empty nursery-pot pieces.
- Move the plant onto the center of the mat and keep both the old and new containers away from corner fasteners.
- Add mix with short, low scoops rather than pouring from a large bag above the wall.
- Once the plant is settled, move it to its saucer or intended location before gathering loose material.
- Use one clean corner as a funnel only if the product is designed to flex that way; support the soil container so the mat is not carrying its weight.
- Remove remaining particles, clean the mat as directed, inspect the surface underneath, and let everything dry fully before storage.
This sequence reduces repeated reaching across the boundary. It also keeps the bulk soil bag outside the mat, where it cannot occupy half the working area or collapse into the plant. Decanting only what the job is likely to need makes leftover material easier to handle.
A corner that opens independently can help return clean excess mix to its container, but avoid pouring questionable old soil back into fresh supplies. Plant health, pest, and soil-reuse decisions depend on the condition of the plant and growing medium. When in doubt, keep material separated and follow reliable horticultural guidance.
Cleanup and storage deserve equal weight
A mat may save time during repotting and give that time back during cleanup if its folds are difficult to empty. Fine particles settle along stitched edges, beneath closure hardware, and inside creases. Light-colored interiors reveal soil clearly, while dark surfaces can hide residue. Smoothness helps wiping, but an extremely slick surface can let a pot move while you work. Choose the compromise that suits your cleanup routine and container weights.
Plan where the mat will be emptied before buying. Shaking soil from a balcony may scatter material onto neighbors or shared property, while rinsing potting mix into a household drain can create plumbing and waste problems. Collect solids for suitable reuse or disposal first. Then clean the mat only by the recommended method and according to local rules.
Drying is easy to overlook in a small home. A broad mat can take over a shower rod or utility area, and folded corners can trap moisture even when the center feels dry. Check whether it has a hanging loop and whether the material can be draped without deforming. Store it away from sharp tools and extreme temperatures as directed. Folding along the same hard crease after every use may eventually affect some constructions, so follow any provided folding or rolling guidance.
Limitations
- A raised perimeter reduces scatter but cannot capture every particle that falls from leaves, tools, clothing, or a pot lifted beyond the mat.
- Listed dimensions may refer to the fully open sheet rather than the smaller assembled interior.
- Flexible mats provide little structural support for a heavy planter and should not be used as carrying slings unless explicitly designed for it.
- Seams, closures, folds, and edge gaps can allow fine soil or moisture to reach the surface underneath.
- Grit trapped below the mat may scratch delicate finishes if the setup slides.
- Lightweight edges can shift when bumped, vacuumed nearby, used outdoors in wind, or loaded unevenly.
- Reusable mats need cleaning, thorough drying, and appropriate storage between jobs.
- One mat may transfer residue between plants; it does not replace plant-specific sanitation or pest-control practices.
- The mat cannot make an unstable table, awkward lifting task, or oversized planter safe to handle.
Alternatives to compare
A rigid boot tray or utility tray provides a defined shape and may handle small spills more predictably, though bulky sides make storage harder. A shallow mixing tub offers more capacity for soil blending and root work but can be cumbersome in an apartment. A washable table covering plus a rimmed tray separates surface protection from the active potting area. A dedicated potting bench is better for frequent or multi-plant work and keeps tools at a practical height. For occasional tiny pots, a wide basin or repurposed container approved for the task may already provide enough containment without adding another foldable item.
FAQ
What size repotting mat do I need for indoor plants?
Allow room for the current pot, replacement pot, plant canopy, tools, and a small soil supply—not just the largest pot’s diameter. Check the interior dimensions after the sides are raised, then mock up that area with paper or a sheet and rehearse lifting and turning the plant. Choose more working margin if you repot several plants at once.
Are indoor plant repotting mats waterproof?
Do not assume so. Material descriptions such as coated, wipeable, or water resistant do not establish that seams, folds, and fastener points can hold standing water. Verify the selected mat’s current specifications and use limits, keep drainage under control, and inspect the surface below immediately after the job.
Can I use a repotting mat on carpet?
A firm, smooth, cleanable surface is generally easier to keep stable and inspect. Carpet can let a flexible mat dip or shift, and escaped soil can enter the pile unnoticed. If carpet is the only option, compare a rigid tray and an appropriate underlying protection method rather than relying on a thin mat alone.
How do I empty soil from a repotting mat without spilling it?
Move the finished plant and tools first, gather soil toward one clean corner, and unfasten only the edge needed for controlled transfer if the design permits it. Support the receiving container instead of asking the mat to carry a heavy load. Collect solids before cleaning and do not send loose potting mix into a household drain.
Should a repotting mat be cleaned between plants?
Cleaning needs depend on what was on the plant, pot, and growing medium. At minimum, remove residue and follow the mat’s care directions before storage. When pests, disease, questionable soil, or plant-specific sanitation is a concern, isolate materials and follow appropriate horticultural guidance rather than moving directly from one plant to another on the same uncleaned surface.