Choosing a Spoon Rest That Actually Catches the Drips
Product links are for reference. Verify current details on the retailer page before buying.
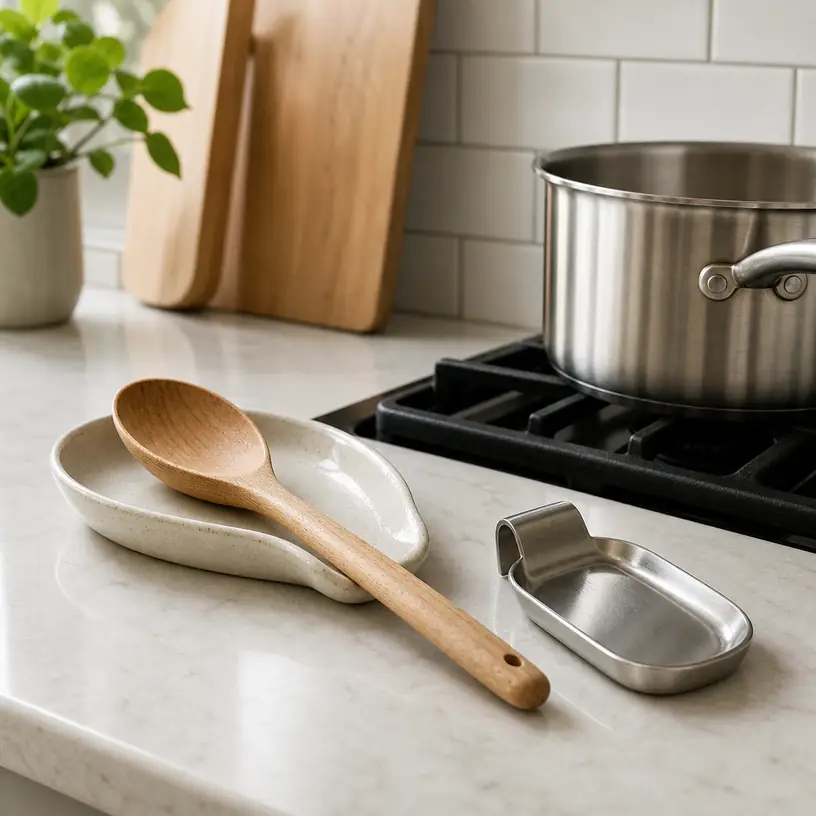
Illustrative image, not an official product photo.
Short answer
A useful spoon rest needs to catch what falls from the working end of a utensil while supporting enough of the handle to keep the setup steady. Measure the widest ladle, turner, or serving spoon you pause with during cooking, then compare that head with the rest’s usable bowl or tray. A shallow dish is easy to wipe but may let thin liquid run onto the counter; a deeper cradle contains more drips but can be awkward for broad utensils. Also check the overall footprint, rim height, cleaning access, and the material’s stated care and temperature guidance. If several tools are usually active at once, a divided utensil rest or small washable tray may work better than one decorative spoon-shaped dish.
Search reference
Kitchen spoon rest options
Compare the usable cradle with your widest cooking utensil, then check handle support, drip capacity, cleaning instructions, and the space available beside the stove.
View matching optionsThe utensil determines the useful shape
The phrase “spoon rest” suggests a single shape, yet cooking utensils vary widely. A teaspoon, wooden spoon, silicone turner, pasta server, and deep ladle do not meet a surface in the same way. Lay the utensils used in a typical meal on the counter and note the width and curve of each food-contact end. The widest head is a more useful reference than the longest handle.
A small oval dish can suit a narrow spoon while leaving the edge of a turner hanging over the counter. A deep ladle may roll sideways if only its rounded bowl touches the rest. A spatula with a broad, flat head needs enough horizontal area to settle without teetering. Product photos often show one carefully positioned utensil, so compare listed dimensions with your own tools rather than judging scale from the scene.
Handle support changes the balance. Some rests have a notch or raised tail that lifts the handle while the head sits in a basin. Others are nearly flat. A raised support can keep more of the utensil off the counter, but it also creates a lever: a heavy handle may tip a lightweight rest or lift the spoon head out of a shallow bowl. The combination should remain stable when the utensil is placed down casually, not only when it is centered with care.
Who this is for
- Cooks who pause with a sauced spoon, ladle, turner, or serving utensil and want a defined washable landing spot.
- Small kitchens where a compact rest is easier to clean than repeatedly wiping a larger counter area.
- Households that want to keep an active cooking utensil separate from clean tools in a countertop holder.
- People who use one or two predictable utensil shapes and can match the rest to those dimensions.
- Shared kitchens where an obvious utensil landing place helps keep drips away from handles, appliance controls, and prep space.
Who should skip it
- A single spoon rest may be too restrictive when several utensils, tongs, or pot lids are active at the same time.
- Cooks with very limited space beside the range may prefer a washable plate already in the kitchen or a rest integrated into another suitable tool.
- A lightweight decorative dish is a poor choice for a long, heavy ladle if the handle can pull it sideways.
- Skip intricate grooves or fixed dividers if quick, complete washing is more important than separating tools.
- Do not place any rest on a hot cooking surface or expose it to direct flame unless the exact product instructions explicitly permit that use.
What to verify before buying
- Usable cradle dimensions: Compare the interior width and length with the working ends of your ladle, turner, spoon, and other frequent tools.
- Handle position: Check notch width, support height, and the likely angle of the utensil so the handle does not roll or point into a walkway.
- Drip containment: Look at bowl depth, raised edges, and where liquid will collect when the utensil rests at an angle.
- Loaded stability: Consider base width, feet, weight distribution, and whether a long handle could tip or rotate the rest.
- Counter footprint: Measure the actual landing zone beside the stove, including clearance from burners, appliance controls, prep boards, and the counter edge.
- Material wording: Verify the stated construction and finish rather than inferring ceramic, metal, silicone, or stone from appearance alone.
- Care instructions: Confirm whether the complete item can go in the dishwasher and whether corners, slots, or removable parts need extra cleaning.
- Temperature guidance: Check stated limits and placement instructions; a utensil fresh from a pan can transfer heat even when the rest is not on the cooktop.
- Surface contact: Review the underside, non-slip features, and any care guidance relevant to a finished counter or stovetop surround.
- Set contents: Search results may show utensils or multiple rests for context, so confirm the quantity and components in the selected option.
A basin should contain drips without trapping the tool
Containment is a question of both volume and direction. A deep center does little if the utensil head hangs past the rim and sauce runs down the outside. Look at the path from the lowest part of the tool to the collecting area. Ideally, drips fall inside the perimeter even when the handle is not positioned perfectly straight.
Raised edges are useful for thin broth, oil, or condensation, but a high front rim can catch a wide turner as it is lifted. A very narrow handle notch may not accept a thick wooden spoon, while an oversized notch can let slim metal handles slide sideways. If the design has several slots, compare each opening with the handles it is meant to separate.
Capacity claims are rarely necessary for this small accessory. The practical question is whether the rest can hold residue from one cooking session without liquid reaching the edge. A cook who stirs a thick sauce may need a broad wipeable surface; someone serving soup may benefit from more depth. Empty the rest if liquid accumulates rather than allowing a utensil handle to dip into it or relying on an unstated capacity.
One tool, several tools, or a pot lid?
A classic single cradle keeps one active utensil easy to identify. It also discourages stacking a clean spoon on a used one. This arrangement works for a simple stovetop task but can become crowded when a second pan requires a turner and a ladle at the same time.
Multi-slot rests spread several handles apart and may offer a larger drip tray below. Check the spacing between positions, because wide heads can overlap even when handles occupy separate notches. More slots also mean more corners and ridges to wash. A flat tray offers flexible placement, although utensils can touch or roll unless its surface and edge are shaped to control them.
Some listings suggest using a large utensil rest for a pot lid. Treat that as a separate fit check. A lid introduces much more width, weight, hot condensation, and leverage than a spoon. Confirm that the exact rest is intended for the lid’s diameter and weight, and think about where the wet lid will drain. A purpose-designed lid holder or heat-safe plate may be the clearer choice. Do not assume a small spoon rest can safely support cookware because one staged image appears to show it.
Place it where a dripping utensil can reach safely
The shortest route from pan to rest usually creates the fewest drips, but proximity to cooking heat has limits. Choose a stable counter section where the rest does not crowd a burner, block controls, sit on a warm vent, or require reaching across a hot pan. Handles should point away from the counter edge and busy walkways. They should not extend over another burner or snag a towel.
Left- and right-handed cooks may prefer different positions. In a shared kitchen, test both sides of the range before committing to a large or fixed arrangement. If one side holds oil bottles or prep ingredients, a compact rest on the other may reduce congestion. A paper outline cut to the product dimensions can reveal whether a listed footprint leaves enough working room.
The rest should be easy to remove for cleaning without brushing against a hot pot. Grease and food can collect underneath even if the top catches every visible drip, so include the surrounding counter in the cleanup routine. Follow the counter maker’s guidance as well as the rest’s instructions, especially if the base is rough, unglazed, or fitted with removable feet.
Material affects weight, handling, and care
Ceramic-style rests can provide useful weight and a smooth basin, but they may chip or break if dropped. Confirm the actual material, care method, and whether the underside is appropriate for the intended surface. A glossy appearance alone does not establish construction or durability.
Metal options can be thin and easy to rinse, or heavier depending on their build. Look for finished edges, stable feet, and clear cleaning guidance. Do not infer corrosion resistance, alloy type, or compatibility with a dishwasher unless those details are stated for the current item.
Flexible polymer or silicone-style designs may grip the counter and resist breakage, but stiffness, stain behavior, temperature limits, and washing instructions vary. A soft rest that bends during lifting may spill collected liquid unless it is supported underneath. Stone, wood, and composite products bring their own sealing and care requirements. No material category is automatically the easiest; the best fit is the one whose weight, surface, and washing routine suit the way it will be used.
Limitations
- A spoon rest catches residue from the utensil head, but drips can still travel along a handle or fall while the utensil moves from the pan.
- One small cradle rarely fits a narrow spoon, broad turner, deep ladle, and tongs equally well.
- A long or heavy handle can rotate, slide, or tip a rest that appears stable when empty.
- Grooves, dividers, and handle notches add control while creating more surfaces to inspect and wash.
- Placing a rest near a stove does not make it suitable for a hot burner, open flame, oven, or other exposure outside its instructions.
- Light colors may show sauce residue quickly, while dark colors can make some residue harder to notice; either still requires routine cleaning.
- A utensil rest is not automatically engineered to support a pot lid or other cookware.
Alternatives to compare
A small washable plate or saucer offers a broad landing area and may already fit the kitchen routine, though a round utensil can roll without a notch. A divided utensil tray can serve several tools during a larger cooking session but occupies more counter space. A clip-on utensil holder keeps the spoon near a pot; it must be explicitly compatible with the vessel, utensil, heat, and handling method. A lid-and-utensil stand may suit meals involving both items, provided its loaded stability and cleanup needs work in the available area. Finally, a heat-safe washable mat creates a flexible landing zone for irregular tools, but it may not contain liquid as well as a raised basin.
FAQ
How large should a kitchen spoon rest be?
It should be wide enough for the largest working end you routinely set down and long enough to support a useful portion of the utensil without letting drips fall beyond the edge. Compare interior dimensions with your actual ladle, turner, or spoon rather than using a universal size.
Is a deep or shallow spoon rest easier to use?
A shallow rest is easy to wipe and gives a broad utensil more clearance, while a deeper basin can contain more thin liquid. The right depth depends on the utensil curve and the type of residue. Check that the head sits inside the rim without becoming wedged or unstable.
Can one spoon rest hold several cooking utensils?
Only if its usable area or divided slots fit the handles and heads without unstable stacking. A purpose-made multi-slot rest or washable tray is usually easier to assess for several tools than a small single-spoon cradle.
Can a spoon rest also hold a pot lid?
Do not assume so. A lid is wider, heavier, and may release hot condensation. Use the rest for a lid only when the current product instructions and dimensions support that use; otherwise compare a dedicated lid holder or another suitable heat-safe surface.
Where should a spoon rest sit beside the stove?
Place it on a stable surface within easy reach but away from direct flame, hot burners, vents, controls, and the counter edge. Orient the utensil handle so it does not cross a cooking zone or project into a walkway, and follow all material and placement instructions.